

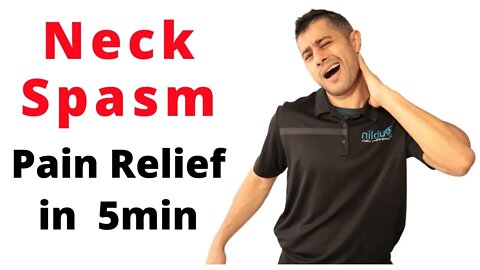
Neck Spasm pain relief in 5min
In this video I have share with you the best home base exercises for neck spasm pain relief. With following this routine you can improve you neck spams pain and mobility in 5min.
I have share with you one of the best way to treat your neck spasm and relief your neck pain in 5min.
The list of exercises that I share with you in this video:
Hot pack:
Before you start your rehab exercises, its highly recommended to use hot pack for your neck spasm. Hot pack can simply helps to improve your neck blood circulation and also due to the heat reduce your pain. I would recommend you to use it regularly through the day couple of times. If you don't have a hot pack, you can use a wet kitchen towel or small towel, by putting them in microwave for 2min and they do the job.
Isometric neck strengthening: best exercise for acute or chronic neck pain
This exercise simply help you with reduce your neck pain and at the same time improve your neck strength. You should follow do this exercise daily at least once for optimum results.
Self mobilisation technique:
This exercise helps you to improve your neck mobility and your neck pain. With this technique you can improve your neck stiffness and also mobilise each section of your neck.
Chin tuck:
Chin tuck helps you to improve your neck pain and your neck mobility. Chin tuck is simply helps you to strengthen the deep cervical flexor and extensor of your neck.
I have added another link to check in my website if you experience neck and upper back pain:
- Cervical herniated disc exercises
https://www.dublinsportsinjuryclinic.com/cervical-herniated/
How to relieve pain on your neck and your upper back
https://dublinsportsinjuryclinic.com/3-exercise-for-thoracic-mobility/
- 4 top exercises for sciatica pain:
https://dublinsportsinjuryclinic.com/4-top-exercises-for-sciatica-pain-relief
- Your back is not out of alignment:
https://dublinsportsinjuryclinic.com/how-to-improve-your-posture-at-home/
-Herniated disc management and treatments:
https://dublinsportsinjuryclinic.com/herniated-discs-treatment-and-management/
- Degenerative disc diseases:
https://dublinsportsinjuryclinic.com/degenerative-disc-disease-back-pain/
References:
1- https://journals.sagepub.com/doi/abs/10.1177/0269215515575747
2- https://www.ncbi.nlm.nih.gov/pmc/articles/PMC5684019/
3-https://www.ncbi.nlm.nih.gov/pmc/articles/PMC5857448/
4- https://www.ncbi.nlm.nih.gov/books/NBK441822/
Tags:
Neck spams pain relief in 5min
Cervical herniated disc exercises
Cervical herniated disc treatment
best Cervical herniated disc exercises
cervical herniated disc pain relief
Sore neck pain relief exercises
best exercise for neck pain
**MEDICAL DISCLAIMER**
All information, content, and material of this video or website are for informational and demonstration purposes only. It is not intended to serve as a substitute for the consultation, diagnosis, and/or medical treatment of a qualified physician or healthcare provider.
Don’t use this content as a replacement for treatment and advice given by your doctor or health care provider. Consult with your physical therapist or healthcare professional before doing anything contained in this content.
By watching this video, you agree to indemnify and hold harmless Dublin Sports Injury Clinic(and its representatives) for any and all losses, injuries, or damages resulting from any and all claims that arise from your use or misuse of this content. Dublin Sports Injury Clinic makes no representations about the accuracy or suitability of this content.
USE OF THIS VIDEO'S CONTENT IS AT YOUR OWN RISK.
#cervicalherniateddisc #neckpain #neckspasm #howtorelieveneckpain #neckinjury #stiffneck #neckstretch #neckstrengthening #tightneck #thoracipain #upperbackpain #soreback #backpain #lowerbackpain #thoracicoutlet #Thoracicrotation #neckartritis neck pain, neck pain relief, neck injury, stiff neck, stiff neck rehabilitation, stiff neck stretch, tretch for stiff neck, strengthen your neck, #neckpain #soreneck #neckspasm #neckinjury #stiffneck #neckstretch #neckstrengthening #tightneck #thoracipain #upperbackpain #soreback #backpain #lowerbackpain #thoracicoutlet #Thoracicrotation #neckartritis
#dublinsportsinjuryclinic #dublinsportsphysio #bobfiro #dulin2phyiso #bobyourphysio #bobonlinecare #Sportsinjurydublinclinic
#dublinsportsinjuryclinic #dublinsportsphysio #bobfiro #dulin2phyiso #bobyourphysio #bobonlinecare #Sportsinjurydublinclinic #Sore neck relief exercises #dublinsportsinjuryclinic #bobthephysio
72
views
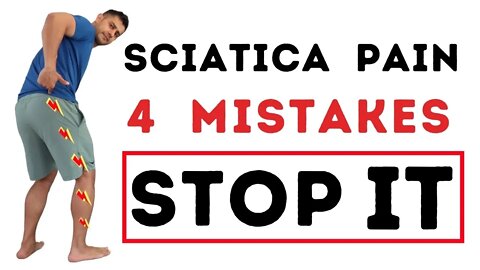
4 Mistake that doesn't help your Sciatica to get better
In this video I have shared with you 4 Mistake that doesn't help your Sciatica to get better.
Understanding these mistakes will helps you to avoid these mistakes and improve your back pain and your sciatica.
As I mentioned, I see many of my patients in the clinic suffering from sciatica pain, and they are trying to follow the rehab exercises daily but unfortunately aware of these factors that can affect their back pain recovery.
1- Identify activities that aggravates yoru sciatica pain and modify them
The first mistakes that many of my patients who suffer from sciatica pain are doing is repeating activities that aggravates their sciatica pain and not modifying those activities. Unfortunately if you don't modify your daily activities that bother your sciatica pain your back pain recovery will be way longer even though if you follow your daily exercise for your lower back pain relief.
2- Self Diagnosis for sciatica through google search
The second common mistakes that my patients are doing while experience sciatica pain is that, they are trying to self diagnosed their back pain and sciatica pain through google search. Unfortunately you can make diagnosis for your lower back pain or on the other word the liability and accuracy of your diagnosis would be very low and I would always suggest my patients to sick help from professional like physical therapy or physiotherapist for correct diagnosis. More specifically if you suffering from sciatica pain or disc bulges or non specific lower back pain your physical therapist would be the best person to help you with the right diagnosis and treatment plan.
3- Not following the rehab exercises consistent
The 3rd common mistake that many of my patients doing after episode of sciatica pain is to follow the rehab exercises until their lower back pain decrease and by then they stop their rehab routine or try them on and off. I would always suggest my patients to follow the rehab exercises for sciatica or disc bulges consistent and even after recovery from lower back pain keep the rehab exercises as part of their daily routine. With continue doing your rehab exercises you will minimise the reoccurrence of your lower back pain and your sciatica pain will recover quicker. Also, with following the routine that I share with you in this video you can reduce your sciatica pain and improve your mobility.
Sciatica pain relief in 5min
https://youtu.be/nEMxW8Z_CI4
4- Focus on what they can't do
The 4th common mistake that many of my patients doing after episode of sciatica pain is to only focus on what they can't do and bother their lower back pain and keep checking those activities. I would highly suggest my patients specially in the acute phase of their back pain to avoid checking those activities that bother their lower back pain. Make a list of activities that that does not bother your lower back pain and stick to those activities in the acute phase of your injury and gradually build up and progress your rehab routine.
**MEDICAL DISCLAIMER**
All information, content, and material of this video or website are for informational and demonstration purposes only. It is not intended to serve as a substitute for the consultation, diagnosis, and/or medical treatment of a qualified physician or healthcare provider.
Don’t use this content as a replacement for treatment and advice given by your doctor or health care provider. Consult with your physical therapist or healthcare professional before doing anything contained in this content.
By watching this video, you agree to indemnify and hold harmless Dublin Sports Injury Clinic(and its representatives) for any and all losses, injuries, or damages resulting from any and all claims that arise from your use or misuse of this content. Dublin Sports Injury Clinic makes no representations about the accuracy or suitability of this content.
USE OF THIS VIDEO'S CONTENT IS AT YOUR OWN RISK.
#sciaticatretament #sciaticapainrelief #sciatica #backpain #Soreback #Lowerbackpain #Sciatica #backpainrehabilitation #sciaticapainrelief #sciaticapain #dublinsportsinjuryclinic #bobthephysio
16
views
10 Min Daily Routine for Lumbar Disc Bulges and Sciatica Pain Relief
In this routine I share with you a 10 minutes Daily routine for L4 L5 / L5 S1 Disc bulges and Sciatica Pain. This routine has been designed to be done daily as part of your daily activities.
If you suffer from L4 L5 / L5 S1 Disc bulges and Sciatica Pain this daily routine can help you to stay active without aggravating your pain and discomfort. You can follow this routine daily at least once for optimum results.
5 Min Daily Routine for Lumbar Disc Bulges and Sciatica Pain Relief
https://youtu.be/cdfjRX54VsY
Cat Camel:
Get onto your hands and knees, with your knees spaced hip-width apart and your hands directly beneath your shoulders. Tighten your abdominal muscles and arch your spine upward toward the ceiling. Hold the position for at least 10 seconds, then slowly relax your back. Allow your stomach to fall toward the floor, bring your shoulders together and stretch your back downwards into a swayback position. If you suffer from L4 L5 / L5 S1 Disc bulges and Sciatica Pain this workout routine can help you to stay active without aggravating your pain and discomfort.
Baby Pose:
Begin on your hands and knees. Spread your knees wide apart while keeping your big toes touching. Rest your buttocks on your heels. Those with very tight hips can keep their knees and thighs together. Sit up straight and lengthen your spine up through the crown of your head. Your heart and chest should rest between or on top of your thighs. Allow your forehead to come to the floor. Keep your arms long and extended, palms facing down. Press back slightly with your hands to keep your buttocks in contact with your heels. Lengthen from your hips to your armpits, and then extend even further through your fingertips.
Kneeling Thoracic Rotation:
This drill is to help improve thoracic mobility, specifically thoracic rotation. Begin in a half kneeling position near the wall. This will help keep your pelvis and lumbar spine fixed and reduce your ability to compensate. While keeping the knee close to the wall, rotate your head and shoulders. The goal here is to eventually allow both arms to lay against the wall . Exhale as you rotate further into this stretch.
McKenzie Exercise:
McKenzie exercises for low back pain are beneficial treatments for increasing flexibility of spine and improving the pain with better results in pain relief. McKenzie exercises are a successful method for decreasing and centralising the pain and increasing spinal movements in patients with low back pain.
Figure 4 stretch:
The figure four stretch is one of the best stretches you can do for your body, regardless of the type of training you do. It targets the hips, lower back, and glutes, your body's largest and most powerful muscle group, specifically your Piriformis muscle. Try this stretch daily for 3 to 4 sets of 15 to 20 sec hold.
Nerve Glide Seated:
Application for the nerve mobilization techniques is not only improved the functions and health of the participants, It may also promote healing of the soft tissues by stimulating the functions of the nervous system to improve nervous system adaptability and decrease sensitivity, helping to alleviate symptoms.
Hamstring stretches:
Hamstring stretches and nerve mobilization are effective interventions for patients with lower back pain, and nerve mobilization is superior to hamstring stretching in alleviating lower back pain of patients. Therefore, both hamstring stretching and nerve mobilization can be usefully applied for the therapy of patients with lower back pain.
Figure 4 stretch Seated:
The figure four stretch is one of the best stretches you can do for your body, regardless of the type of training you do. It targets the hips, lower back, and glutes, your body's largest and most powerful muscle group specifically your Performs muscle. Try this stretch daily for 3 to 4 sets of 15 to 20 sec hold.
Glute Bridges:
Lie down on the floor, with you back straight against the ground and your knees at right angles. Keep your arms at your side, pess your knees out , and raise your hips towards the ceiling. Squeeze your glutes tight, hold for 1-2 sec, and release. Repeat the exercise for at last 10 repetitions.
Follow me Visit my Website: https://www.dublinsportsinjuryclinic.com
Like us on Facebook: https://www.facebook.com/dublinphysic...
Follow on Instagram: https://www.instagram.com/dublin_spor...
Follow on Twitter: https://twitter.com/physio_bob?s=03
**MEDICAL DISCLAIMER**
All information, content, and material of this video or website are for informational and demonstration purposes only. It is not intended to serve as a substitute for the consultation, diagnosis, and/or medical treatment of a qualified physician or healthcare provider.
10 Min Daily Routine for Lumbar Disc Bulges and Sciatica Pain Relief
#sciaticatretament #sciaticapainrelief #sciatica #backpain #Soreback #Lowerbackpain #Sciatica #backpainrehabilitation #dublinsportsinjuryclinic #bobthephysio
127
views
5 Min Daily Routine for Lumbar Disc Bulges and Sciatica Pain Relief
In this routine I share with you a 5 minutes Daily routine for L4 L5 / L5 S1 Disc bulges and Sciatica Pain. This routine has been designed to be done daily as part of your daily activities.
If you suffer from L4 L5 / L5 S1 Disc bulges and Sciatica Pain this daily routine can help you to stay active without aggravating your pain and discomfort. You can follow this routine daily at least once for optimum results.
Cat Camel:
Get onto your hands and knees, with your knees spaced hip-width apart and your hands directly beneath your shoulders. Tighten your abdominal muscles and arch your spine upward toward the ceiling. Hold the position for at least 10 seconds, then slowly relax your back. Allow your stomach to fall toward the floor, bring your shoulders together and stretch your back downwards into a swayback position. If you suffer from L4 L5 / L5 S1 Disc bulges and Sciatica Pain this workout routine can help you to stay active without aggravating your pain and discomfort.
Baby Pose:
Begin on your hands and knees. Spread your knees wide apart while keeping your big toes touching. Rest your buttocks on your heels. Those with very tight hips can keep their knees and thighs together. Sit up straight and lengthen your spine up through the crown of your head. Your heart and chest should rest between or on top of your thighs. Allow your forehead to come to the floor. Keep your arms long and extended, palms facing down. Press back slightly with your hands to keep your buttocks in contact with your heels. Lengthen from your hips to your armpits, and then extend even further through your fingertips.
Kneeling Thoracic Rotation:
This drill is to help improve thoracic mobility, specifically thoracic rotation. Begin in a half kneeling position near the wall. This will help keep your pelvis and lumbar spine fixed and reduce your ability to compensate. While keeping the knee close to the wall, rotate your head and shoulders. The goal here is to eventually allow both arms to lay against the wall . Exhale as you rotate further into this stretch.
McKenzie Exercise:
McKenzie exercises for low back pain are beneficial treatments for increasing flexibility of spine and improving the pain with better results in pain relief. McKenzie exercises are a successful method for decreasing and centralising the pain and increasing spinal movements in patients with low back pain.
Figure 4 stretch:
The figure four stretch is one of the best stretches you can do for your body, regardless of the type of training you do. It targets the hips, lower back, and glutes, your body's largest and most powerful muscle group, specifically your Piriformis muscle. Try this stretch daily for 3 to 4 sets of 15 to 20 sec hold.
Follow me Visit my Website: https://www.dublinsportsinjuryclinic.com
Like us on Facebook: https://www.facebook.com/dublinphysic...
Follow on Instagram: https://www.instagram.com/dublin_spor...
Follow on Twitter: https://twitter.com/physio_bob?s=03
Here is a couple of helpful videos that could help you with your lower back pain.
- Improve your lower back pain (sciatica pain) and relief your sciatica pain
https://dublinsportsinjuryclinic.com/...
- How to improve your posture at home:
https://dublinsportsinjuryclinic.com/...
-Herniated disc management and treatments:
https://dublinsportsinjuryclinic.com/...
- Degenerative disc diseases:
https://dublinsportsinjuryclinic.com/...
**MEDICAL DISCLAIMER**
All information, content, and material of this video or website are for informational and demonstration purposes only. It is not intended to serve as a substitute for the consultation, diagnosis, and/or medical treatment of a qualified physician or healthcare provider.
Don’t use this content as a replacement for treatment and advice given by your doctor or health care provider. Consult with your physical therapist or healthcare professional before doing anything contained in this content.
By watching this video, you agree to indemnify and hold harmless Dublin Sports Injury Clinic(and its representatives) for any and all losses, injuries, or damages resulting from any and all claims that arise from your use or misuse of this content. Dublin Sports Injury Clinic makes no representations about the accuracy or suitability of this content.
USE OF THIS VIDEO'S CONTENT IS AT YOUR OWN RISK.
5 Min Daily Routine for Lumbar Disc Bulges and Sciatica Pain Relief
#sciaticatretament #sciaticapainrelief #sciatica #backpain #Soreback #Lowerbackpain #Sciatica #backpainrehabilitation #sciaticapainrelief #sciaticapain #dublinsportsinjuryclinic #bobthephysio
62
views
Sciatica Pain Relief During the Pregnancy
Sciatica is a general name given to any pain that is caused by irritation or compression of the sciatic nerve. The sciatic nerve is the longest nerve in the body. It runs from the back of the pelvis, through the buttocks, and travels along the back of both legs, ending at your feet.
During pregnancy it is common to experience back pain or sciatica symptoms and baby’s weight could increase the pressure on Sciatica nerve (Piriformis syndrome) because it puts extra pressure on your pelvis and hip joints. Usually you may experience pain in the buttock and radiation down to the leg, or back pain radiate up to your mid back or your thighs.
If you suffer with back pain or sciatica during pregnancy, in most cases you can manage these symptoms with modifying your daily activity and staying active with a daily exercise routine that focus on your lower back and hip mobility.
In this video I have shared with you a series of exercises that you can follow during pregnancy and these exercises can reduce your back pain and improve your hip mobility. Sciatica during pregnancy can be cure by following these exercises. These exercises will reduce your back pain while you are pregnant and improve your lower back mobility.
Posterior Hip Tilt:
Due to the extra weight from the baby your pelvic shift to an anterior tilt and that create an extra load on your lower back. In this exercise we are going to mobilise your lower back and your hip and posteriorly tilt your pelvic.
Lying with knees bent up and feet flat on floor/bed about 12inches (30cms) apart. Place your hand underneath of your lower back and tighten your tummy and posteriorly tilt your pelvis to flatten your back down onto the bed/floor, you will feel the pressure on your hand. Hold the pressure for 3 sec and release, then repeat 3-5 times. This exercise can reduce your lower back pain and if you suffer from sciatica during pregnancy it can reduce your hip and lower back pain.
Glute Bridges:
Lie down on the floor, with you back straight against the ground and your knees at right angles. Keep your arms at your side, pess your knees out , and raise your hips towards the ceiling. Squeeze your glutes tight, hold for 1-2 sec, and release. Repeat the exercise for at last 10 repetitions. Glute bridge is a great exercise if you suffer from sciatica or experience lower back pain during your pregnancy.
Figure 4 stretch:
The figure four stretch is one of the best stretches you can do for your body, regardless of the type of training you do. It targets the hips, lower back, and glutes, your body's largest and most powerful muscle group specifically your Performs muscle. Try this stretch daily for 3 to 4 sets of 15 to 20 sec hold. If you suffer from performs syndrome or sciatica pain during pregnancy, figure 4 stretch can reduce your hip pain with improve your overall hip mobility.
Partial Squat:
Stand just in front of your chair, facing away from it. Keep your spine neutral and head and chest raised. Gently Seat on the chair and squeeze your glutes and hamstrings to drive your hips forward and up, returning to the starting position. Try doing 3 sets of 10 reps. Partial Squat is a great exercise if you suffering from lower back pain and during pregnancy this exercise can be a great help for your overall lower back pain and your hip mobility.
Seated Back Extension:
Place your tumbs at the back of your hip (PSIS) apply slight pressure and start with small extension and gradually progress. Move within pain free range of movement, don't push it. Breathing is essential while doing it. For optimum results you may try this routine at least 2 to 3 times a day.This exercise promote extension to your lower back and your hip and can help you to improve your lower back mobility.
Hip Mobility :
Sit on a mat/floor/ or Gymball with your knees bent, feet together, and heels on the floor, Keeping the spine erect, exhale and slowly rotate your torso to clock wise gradually for couple of rounds and then anti clockwise, Imagine that the ball is buttoned to your torso. Focus on your movement and your breathing. With improving your hip mobility you can reduce your back pain during pregnancy.
**MEDICAL DISCLAIMER**
All information, content, and material of this video or website are for informational and demonstration purposes only. It is not intended to serve as a substitute for the consultation, diagnosis, and/or medical treatment of a qualified physician or healthcare provider. Dublin Sports Injury Clinic makes no representations about the accuracy or suitability of this content.
USE OF THIS VIDEO'S CONTENT IS AT YOUR OWN RISK.
#sciaticatretament #sciaticapainrelief #sciatica #backpain #Soreback #Lowerbackpain #Sciatica #backpainrehabilitation #sciaticapainrelief #sciaticapain
80
views
Cervical Disc Bulge and Cervical Facet Lock pain Relief
In this video I have shared with you the best home base exercises for cervical herniated discs and Cervical facetlock. By following this routine you can improve your cervical herniated disc pain or facet lock with improving your range ofmotion in your neck.
The main sign and symptoms of the cervical herniated disc is neck pain, neck stiffness, neck and shoulder pain, pain might radiate down to your shoulder and your elbow or your arm and fingers. In severe cases, you may experience lack of strength and numbness in the fingers. Cervical herniated disc interchangeably called cervical radiculopathy when you experience radicular pain.
As I promised you can check my other video regardingCervical herniated Disc for C4 - C5 and C5 - C6.https://youtu.be/2UOafHzyNDo
Cervical Disc Nerve Glide:
Application for the cervical nerve mobilization techniques not only improved the functions and health of the participants, It may also promote healing of the soft tissues by stimulating the functions of the nervous system to improve nervous system adaptability and decrease sensitivity, helping to alleviate symptoms. If you experience pins and needles or tingling sensation in your arm this exercise can help you to improve the pins and needles and reduce the pain.
Cervical Disc Isometric Strengthening:
Press your palm against your forehead. Resist with your neck muscles. Hold for 5 seconds. Relax. Repeat for 3 sets of 5 repetitions.Try the exercise again, pressing on the side of your head. for 3 sets of 5 repetitions. Switch sides. Trythe exercise again, pressing on the back of your head. for 3 sets of 5 repetitions.
Standing Row with Resistance Band:
Try to secure the band to the door with the door anchor at chest height. Body Positioning: Stand 3 to 4 feet away from the door while facing the door. Keep your feet hips width apart, chest up and head straight. Position your arms straight out in front of you (parallel with the floor), and your palms facing each other. Try the pull and hold for 3 sec, repeat for 3 sets of 5 repetitions.
Cervical DIsc Self Mobilisation:
Sit upright in a chair or stand tall with a towel around your neck, holding each end with your hands. Adjust the towel aroundC7 and pull the towel with applying 30 to 40% of your max strength.While holding the towel flex and extend the neck to the range you feel comfortable. Repeat the movement 5 times and readjust the towel to C6 - C5 & C4. Work within your own range.
Rhomboid Y StrengtheningExercise:
To start this exercise, lay face down on the floor with your arms raised to create a “Y” shape with your torso. Stick your thumbs up. Glide your shoulder blades together and down, then raise your arms off the ground and pull your elbow next to your body and hold for 3 sec. Go back to the starting position and repeat the same movement again for 3 sets of 5 repetitions.
Modified Kneeling Rotation:
Get into a child-pose position and place one hand on the upper back or back of the neck. Do not pull down or put pressure into the neck with your hand. Begin to rotate leading with the eyes, head and shoulder as far as possible. Then reverse the motion leading with the eyes, head and shoulder rotating upwards as far as possible.
Kneeling Thoracic Rotation:
Get into a quadruped position with the knees under the hips and the hands under the shoulders. Place one hand on the upper back or back of the neck. Do not pull down or put pressure into the neck with your hand. Begin to rotate leading with the eyes, head and shoulder as far as possible. Then reverse the motion leading with the eyes, head and shoulder rotating upwards as far as possible.
Tags:
Cervical herniated disc exercises
Cervical herniated disc treatment
best Cervical herniated disc exercises
cervical herniated disc pain relief
Sore neck pain relief exercises
best exreicse for neck pain
neck pain, neck pain relief, neck injury, stiff neck, stiff neck rehabilitation, stiff neck stretch,
stretch for stiff neck, strengthen your neck,
#cervicalherniateddisc #neckpain #soreneck #howtorelieveneckpain #neckinjury #stiffneck #neckstretch #neckstrengthening #tightneck #thoracipain #upperbackpain #soreback #backpain #lowerbackpain #thoracicoutlet #Thoracicrotation #neckartritis neck pain, neck pain relief, neck injury, stiff neck, stiff neck rehabilitation, stiff neck stretch, tretch for stiff neck, strengthen your neck, #neckpain #soreneck #howtorelieveneckpain #neckinjury #stiffneck #neckstretch #neckstrengthening #tightneck #thoracipain #upperbackpain #soreback #backpain #lowerbackpain #thoracicoutlet #Thoracicrotation #neckartritis
#dublinsportsinjuryclinic #dublinsportsphysio #bobfiro #dulin2phyiso #bobyourphysio #bobonlinecare #Sportsinjurydublinclinic
#dublinsportsinjuryclinic #dublinsportsphysio #bobfiro #dulin2phyiso #bobyourphysio #bobonlinecare #Sportsinjurydublinclinic #Sore neck relief exercises #dublinsportsinjuryclinic #bobthephysio
132
views
Workout routine for L4 L5 / L5 S1 Disc bulges and Sciatica Pain (Advanced)
In this routine I share with you a 20 minutes of advanced workout routine for L4 L5 / L5 S1 Disc bulges and Sciatica Pain. In this routine I share with you a warm up to start and a cool down to finish your workout.
If you suffering from L4 L5 / L5 S1 Disc bulges and Sciatica Pain this workout routine can help you to stay active without aggravating your pain and discomfort. You can follow this routine 2 to 3 times a week and this workout can help you to progress your rehabilitation routine.
Workout routine for L4 L5 / L5 S1 Disc bulges and Sciatica Pain (Begginer)
https://youtu.be/lwTunDiPTHc
Workout routine for L4 L5 / L5 S1 Disc bulges and Sciatica Pain (Intremediate)
https://youtu.be/YrytUkceFSI
Forward Lunges:
Stand tall with feet hip-width apart. Engage your core.Take a big step forward with right leg. Lower your body until right thigh is parallel to the floor and right shin is vertical. Press into right heel to drive back up to starting position. Feel free to lean forward and arch your back. Repeat on the other side.
McKenzie exercises, back extension :
McKenzie exercises for low back pain are beneficial treatment for increasing flexibility of spine and improving the pain with better results in pain relief. McKenzie exercises are successful method for decreasing and centralising the pain and increasing spinal movements in patients with low back pain. If you suffering from L4 L5 / L5 S1 Disc bulges and Sciatica Pain this workout routine can help you to stay active without aggravating your pain and discomfort.
Kneeling Thoracic Mobility
Get into a quadruped position with the knees under the hips and the hands under the shoulders. Place one hand on the upper back or back of the neck. Do not pull down or put pressure into neck with hand. Begin to rotate leading with the eyes, head and shoulder as far as possible. Then reverse the motion leading with the eyes, head and shoulder rotating upwards as far as possible. If you suffering from L4 L5 / L5 S1 Disc bulges and Sciatica Pain this workout routine can help you to stay active without aggravating your pain and discomfort.
Bird Dugs progression:
The bird dog is a simple core exercise that improves stability, encourages a neutral spine, and relieves low back pain. It strengthens your core, hips, and back muscles. It also promotes proper posture and increases range of motion. This exercise is suitable for people of all levels, including seniors, and it can be used to prevent injury, align your spine, and recover from low back pain.
Bend Over Row with resistance band:
Stand on your resistance band with your feet at shoulder width and adjust the band resistance. Bend over (hip hing) with a flat back and chest up. Keep your elbows next to your body and pull the bands to the point that you feel your elbows parallel with your back. Try to pinch your shoulder blades together & slowly back to starting position . Repeat the movement.
Bridge Toe Toch:
Sit on the floor with your feet in front of you and hands behind you. Your fingers can be pointed towards the side or behind you. With your feet on the floor, lift your hips skyward. Pause when your body is parallel with the floor. Focusing on contracting the core first, bring your right hand up while simultaneously lifting your left leg up. Touch your right hand to your left toes. Slowly return to the elevated position and switch sides. Bring your left hand to your right toes. Keep alternating back and forth.
Pigeon Stretch:
Pigeon pose is the perfect pose to release tension and maintain hip flexibility because it stretches both the hip rotators (buttocks area) and the hip flexors (the muscles that run along the front thighs and pelvis).
Pigeon pose helps to elongate the back, open the hips, groin and hamstrings, can alleviate pressure on the low back and decrease symptoms of sciatica.
Side Plank:
The side plank is one of the easiest ways to work the two layers of muscle along the sidesof your core, known as your obliques. These muscles help you rotate and bend your trunk, and they also play a role in helping to protect your spine.
Side kick with resistance band:
Standing with the knee shoulder with a part. Use the resistance band and bring it up above your knees. Use a wall as your balance and slightly bend both knees, and try a sidekick without moving your stationary leg. Focus on your glutes muscles, and minimise any jerky movement. Abduct the hip and slowly get back to the starting position. Repeat it for 10 repetitions, for both sides.
Follow me
Visit my Website: https://www.dublinsportsinjuryclinic.com
Like us on Facebook: https://www.facebook.com/dublinphysic...
Follow on Instagram: https://www.instagram.com/dublin_spor...
Follow on Twitter: https://twitter.com/physio_bob?s=03
**MEDICAL DISCLAIMER**
USE OF THIS VIDEO'S CONTENT IS AT YOUR OWN RISK.
#sciaticatretament #L5S1 #l4l5 #sciaticatretament #sciaticapainrelief #backpain #Soreback #dublinsportsinjuryclinic #bobthephysio
131
views
Sciatica Pain relieve 5 top tips to follow
In this video I share with you Sciatica Pain relieve 5 top tips to follow. This 5 tips will help you to understand what activities can be a risk factors for sciatica pain and how you can avoid them.
I also share with you the cause of sciatica, he sign and symptoms of sciatica and the best exercise routine to follow to relief your back pain.
As I promised here is the list of video that you should follow for quicker recovery.
Sciatica pain relief in 5min. The best exercise routine to follow if you suffer from sciatica pain. https://youtu.be/nEMxW8Z_CI4
Back spasms pain relief
https://youtu.be/XjNl16a-UeA
The cause of sciatica:
The vast majority of cases of sciatica have a spinal cause, such as disc herniation or rupture causing impingement of L5 or S1 nerve roots.
Other common causes of sciatica can include spinal stenosis, degenerative disc disease, and spondylolisthesis. There are also many non-spinal causes or sciatica, which are less common: These include piriformis syndrome, trauma, postoperative complications.
Sciatica is mainly diagnosed by history taking and physical examination of the patient by a physical therapist.
Sciatica sign and symptoms:
- Moderate to severe pain in the lower back, buttock, and down their leg.
- Numbness or weakness in their lower back, buttock, leg, or feet.
- Pain that worsens with movement; and may cause loss of movement control.
- Pins and needles” feeling in their legs, toes, or feet.
This is the list of tips that I share with you in this video.
1- Avoid activities that bothers your back in the first 24 to 72 hours after your sciatica pain and your back injury.
If you suffering from sciatica pain, you should avoid any activities that bothers your back pain. These activities can be different for each individual and in some cases can be squatting or jumping, or going for a run. However some individual might have no problem with those activities and find driving aggravates their back pain.
2- Avoid deep tissue massage in the first 24 to 72 hours after your sciatica pain and your back injury. Deep tissue massage can aggravates your sciatica pain and in the acute phase I recommend to avoid massage but you can try mobility exercises and stretches and that will help you to reduce your sciatica pain.
3- Activity modifications for sciatica pain
To improve your sciatica pain, while you following the rehab exercises you should identify the activities that aggravates your pain and minimise those activities. For example, some of my patients find running or prolonged sitting aggravates their sciatica pain. In that case I would suggest to avoid prolonged sitting and instead take some break every 20 to 30 minutes.
4- Avoid testing your pain - don't chase the pain
One of the common mistake that my patients are doing is that they keep chasing the pain and keep checking their back. Avoid testing you back and trust the rehab process, your sciatica pain will improve as long as you follow these tips.
5- Visit your physical therapist if you didn't see any improvement after 2 weeks of following this routine. If you have been following these exercises and these tips that I share with you in this video and you didn't find any pain relief. I would highly suggest you to visit your physical therapist for the right diagnosis.
**MEDICAL DISCLAIMER**
All information, content, and material of this video or website are for informational and demonstration purposes only. It is not intended to serve as a substitute for the consultation, diagnosis, and/or medical treatment of a qualified physician or healthcare provider.
Don’t use this content as a replacement for treatment and advice given by your doctor or health care provider. Consult with your physical therapist or healthcare professional before doing anything contained in this content.
By watching this video, you agree to indemnify and hold harmless Dublin Sports Injury Clinic(and its representatives) for any and all losses, injuries, or damages resulting from any and all claims that arise from your use or misuse of this content. Dublin Sports Injury Clinic makes no representations about the accuracy or suitability of this content.
USE OF THIS VIDEO'S CONTENT IS AT YOUR OWN RISK.
#sciaticatretament #sciaticapainrelief #sciatica #backpain #Soreback #Lowerbackpain #Sciatica #backpainrehabilitation #sciaticapainrelief #sciaticapain
54
views

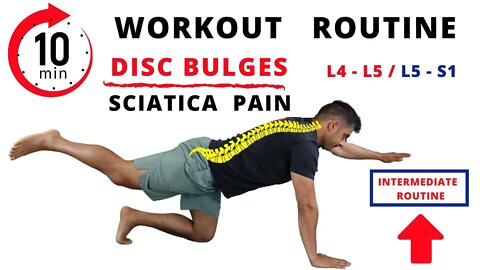
Workout routine for L4 L5 / L5 S1 Disc bulges and Sciatica Pain (Intermediate)
In this routine I share with you a 20 minutes of workout routine for L4 L5 / L5 S1 Disc bulges and Sciatica Pain. This routine is an intermediate workout routine, and in this routine I share with you a warm up to start and a cool down to finish your workout.
If you haven't follow my 1st Workout routine for L4 L5 / L5 S1 Disc bulges and Sciatica Pain (Begginer). You can start your routine from here. https://youtu.be/lwTunDiPTHc
Sciatica pain relief in 5min
https://youtu.be/nEMxW8Z_CI4
Annular Tear L4L5 L5S1 Disc Bulges
https://youtu.be/qbnFdG_ZULY
If you suffering from L4 L5 / L5 S1 Disc bulges and Sciatica Pain this workout routine can help you to stay active without aggravating your pain and discomfort. You can follow this routine 2 to 3 times a week and this workout can help you to progress your routine.
Cat Camel:
Get onto your hands and knees, with your knees spaced hip-width apart and your hands directly beneath your shoulders. Tighten your abdominal muscles and arch your spine upward toward the ceiling. Hold the position for at least 10 seconds, then slowly relax your back. Allow your stomach to fall toward the floor, bring your shoulders together and stretch your back downwards into a swayback position. If you suffering from L4 L5 / L5 S1 Disc bulges and Sciatica Pain this workout routine can help you to stay active without aggravating your pain and discomfort.
Kneeling Thoracic Rotation:
This drill is to help improve thoracic mobility, specifically thoracic rotation. Begin in a half kneeling position with near the wall. This will help keep your pelvis and lumbar spine fixed and reduce your ability to compensate. While keeping the knee close to the wall rotate your head and shoulders. The goal here is to eventually allow both arms to lay against the wall . Exhale as you rotate further into this stretch.
Kneeling Push up:
Get on your knees and place your hands on the floor in line with your shoulders, your hands slightly wider than shoulder-width apart. Contracting your core, keeping your elbows close to the sides of your torso, bend your elbows to lower your body until your chest nearly touches the floor. Pause, then push yourself to the starting position.
Romanian Deadlift (RDLs):
Standing with feet shoulder width apart, facing forward, head up, shoulders back, and back straight, the legs should have a slight bend in the knee. Start with a hip hinge, pivot forward at the waist keeping the shoulders pulled back and low and the back straight without bending your lower back and upper back. At the bottom of the motion you should have a good stretch in the hamstrings. contracting through the glutes, hamstrings, and calves, standing back up to starting position.
Clamshell:
Lie on your side, with legs stacked and knees bent at a 45-degree angle. Rest your head on your lower arm, and use your top arm to steady your frame. Be sure that your hipbones are stacked on top of one another, as there is a tendency for the top hip to rock backward. Engage your abdominals by pulling your belly button in, as this will help to stabilize your spine and pelvis. Keeping your feet touching, raise your upper knee as high as you can without shifting your hips or pelvis. Don’t move your lower leg off the floor.Pause, and then return your upper leg to the starting position on the ground. Do 20 reps on each side.
Side kick (RB):
Standing with the knee shoulder with a part. Use the resistance band and bring it up above your knees. Use a wall as your balance and slightly bend both knees, and try a sidekick without moving your stationary leg. Focus on your glutes muscles, and minimise any jerky movement. Abduct the hip and slowly get back to the starting position. Repeat it for 10 repetitions, for both sides.
Superman Exercise:
Start by lying in a prone position with your face down, arms straight overhead and legs fully extended. You are going to lift your right arm and opposite hip/leg off the ground, and then alternate the movement to the other arms and hip/leg. By lifting your arms engage your core and activate muscles throughout your upper back and with lifting your opposite hip you will engage your glute and lower back muscles. Repeat the movement for 3 sets of 10 repetitions.
Follow me
Visit my Website: https://www.dublinsportsinjuryclinic.com
Like us on Facebook: https://www.facebook.com/dublinphysic...
Follow on Instagram: https://www.instagram.com/dublin_spor...
Follow on Twitter: https://twitter.com/physio_bob?s=03
**MEDICAL DISCLAIMER**
USE OF THIS VIDEO'S CONTENT IS AT YOUR OWN RISK.
#sciaticatretament #L5S1 #l4l5 #sciaticatretament #sciaticapainrelief #sciatica #backpain #Soreback
78
views

How to do a push up beginner to advance training
In this video I show you how to do a push up for beginner and how to start and how to progress them.
Push ups can be difficult for many of us and in this video you can start with a simple version of push up on the wall and gradually progress it to correct eversion of push up.
If you are not sure how to start your push up and avoiding it from your workout routine, in this video you can learn how to do a correct push up and gradually build up your upper body strength.
I have listed the push up routine in this routine here and you can follow them one by one.
Wall push up
The wall push up is the easiest version of push up that you can start with. You will be standing close to the wall and your feet shoulder with a part. Maintain your back tall and engage your core while doing the push up. This will help you to build up your upper body strength and help you shortly to progress to the next exercise.
Table push up
The Table push up is the next progress of push up that you can try. You will be using a table or your kitchen cabinet and your feet shoulder with a part. Maintain your back straight and engage your core while doing the push up. Try to avoid dropping your lower back while doing the push up.
Box push up
The box push up is the next progress of push up which is similar to table pushup. You will be using a gym box and your feet shoulder with a part. Maintain your back straight and engage your core while doing the push up. Try to avoid dropping your lower back while doing the push up. Breath in and out through out the movement.
Kneeling push up
The Kneeling push up is the next progress of push up which you can try on the ground. Knee down and keep your hand shoulder with a part. Maintain your back straight and engage your core while doing the push up. Try to avoid dropping your lower back while doing the push up. Breath in and out through out the movement.
Controlled Push up
The Controlled push up is the next progress of push up which you can try on the ground. You are going to perform a push up going down phase in this exercise and control the movement. Maintain your back straight and engage your core while doing the push up. Try to avoid dropping your lower back while doing the push up. Breath in and out through out the movement.
Body weight Push up
You are ready to progress to body weight push up by this stage. Maintain your back straight and engage your core while doing the push up. Try to avoid dropping your lower back while doing the push up. Breath in and out through out the movement.
Declined Push up
The Declined push up is the next progress of push up which you can try with putting your feet on the box. Maintain your back straight and engage your core while doing the push up. Try to avoid dropping your lower back while doing the push up. Breath in and out through out the movement.
**MEDICAL DISCLAIMER**
All information, content, and material of this video or website are for informational and demonstration purposes only. It is not intended to serve as a substitute for the consultation, diagnosis, and/or medical treatment of a qualified physician or healthcare provider.
Don’t use this content as a replacement for treatment and advice given by your doctor or health care provider. Consult with your physical therapist or healthcare professional before doing anything contained in this content.
By watching this video, you agree to indemnify and hold harmless Dublin Sports Injury Clinic(and its representatives) for any and all losses, injuries, or damages resulting from any and all claims that arise from your use or misuse of this content. Dublin Sports Injury Clinic makes no representations about the accuracy or suitability of this content.
𝐂𝐨𝐧𝐧𝐞𝐜𝐭 𝐰𝐢𝐭𝐡 𝐁𝐨𝐛 𝐚𝐭 𝐃𝐮𝐛𝐥𝐢𝐧 𝐒𝐩𝐨𝐫𝐭𝐬 𝐈𝐧𝐣𝐮𝐫𝐲 𝐂𝐥𝐢𝐧𝐢𝐜
-----------------------------------------------------------------------------
𝐖𝐄𝐁𝐒𝐈𝐓𝐄→ https://www.dublinsportsinjuryclinic.com
𝐄𝐌𝐀𝐈𝐋 → Rehab@dublinsportsinjuryclinic.com
𝐓𝐄𝐋 → 0879276712
𝐅𝐀𝐂𝐄𝐁𝐎𝐎𝐊 → https://www.facebook.com/dublinphysic...
𝐈𝐍𝐒𝐓𝐀𝐆𝐑𝐀𝐌 → https://www.instagram.com/dublin_spor...
#pushup #bodyweightpushup #homebasedexercises
7
views
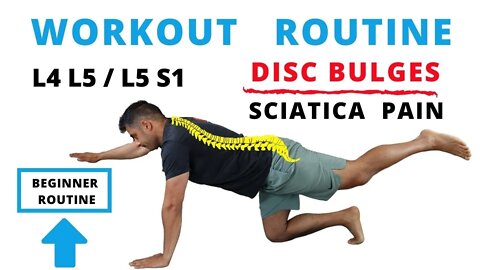
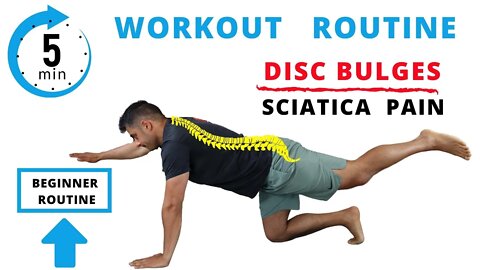
Workout routine for L4 L5 / L5 S1 Disc bulges and Sciatica Pain (Beginner)
In this routine I share with you a 20 minutes of workout routine for L4 L5 / L5 S1 Disc bulges and Sciatica Pain. In this routine I share with you a warm up to start and a cool down to finish your workout.
If you suffering from L4 L5 / L5 S1 Disc bulges and Sciatica Pain this workout routine can help you to stay active without aggravating your pain and discomfort. You can follow this routine 2 to 3 times a week and this workout can help you to progress your routine.
Cat Camel:
Get onto your hands and knees, with your knees spaced hip-width apart and your hands directly beneath your shoulders. Tighten your abdominal muscles and arch your spine upward toward the ceiling. Hold the position for at least 10 seconds, then slowly relax your back. Allow your stomach to fall toward the floor, bring your shoulders together and stretch your back downwards into a swayback position. If you suffering from L4 L5 / L5 S1 Disc bulges and Sciatica Pain this workout routine can help you to stay active without aggravating your pain and discomfort.
Hip Hing
Get into Kneeling position, knee shoulder with apart. Engage your core and use one hand in your lower back and one hand in-front of your abdominal. Without curving your back, lean forward and push your hip back like you're going to sit on your hip. Maintain your core engaged and back to the starting position.Progress it to standing when you feel comfortable. If you suffering from L4 L5 / L5 S1 Disc bulges and Sciatica Pain this workout routine can help you to stay active without aggravating your pain and discomfort.
Mini situps
It's a gentle sit up and helps you to activate your core muscles.
Avoid uplifting your shoulders and focus on the abdominal muscles. Try this exercise for 3 sets of 8 to 10 repetitions each side. For optimum results you may try this routine at least 1 to 2 times a day. If you suffering from L4 L5 / L5 S1 Disc bulges and Sciatica Pain this workout routine can help you to stay active without aggravating your pain and discomfort.
McKenzie exercises, back extension
McKenzie exercises for low back pain are beneficial treatment for increasing flexibility of spine and improving the pain with better results in pain relief. McKenzie exercises are successful method for decreasing and centralising the pain and increasing spinal movements in patients with low back pain. If you suffering from L4 L5 / L5 S1 Disc bulges and Sciatica Pain this workout routine can help you to stay active without aggravating your pain and discomfort.
Stand double shoulder apart. Hip hing and try to get to a partial squat position.
Stay close to the wall just for safety and use the wall as balance if you need it. Breath normally through out your movement, and sit on your hip and repeat the movement. If you suffering from L4 L5 / L5 S1 Disc bulges and Sciatica Pain this workout routine can help you to stay active without aggravating your pain and discomfort.
Hamstring stretches and nerve mobilization
Hamstring stretches and nerve mobilization are effective interventions for patients with lower back pain, and nerve mobilization is superior to hamstring stretching in alleviating lower back pain of patients. Therefore, both hamstring stretching and nerve mobilization can be usefully applied for the therapy of patients with lower back pain. If you suffering from L4 L5 / L5 S1 Disc bulges and Sciatica Pain this workout routine can help you to stay active without aggravating your pain and discomfort.
Kneeling Thoracic Mobility
Get into a quadruped position with the knees under the hips and the hands under the shoulders. Place one hand on the upper back or back of the neck. Do not pull down or put pressure into neck with hand. Begin to rotate leading with the eyes, head and shoulder as far as possible. Then reverse the motion leading with the eyes, head and shoulder rotating upwards as far as possible. If you suffering from L4 L5 / L5 S1 Disc bulges and Sciatica Pain this workout routine can help you to stay active without aggravating your pain and discomfort.
Kneeling Kick Back
Get into all fours, with a straight spine, and contract your core muscles.Extend your right leg back and up until your thigh is parallel with the ground. Contract your glute at the top of the move and hold for a beat.Return to your starting position without touching your knee to the ground and repeat. If you suffering from L4 L5 / L5 S1 Disc bulges and Sciatica Pain this workout routine can help you to stay active without aggravating your pain and discomfort.
Follow me
Visit my Website: https://www.dublinsportsinjuryclinic.com
Like us on Facebook: https://www.facebook.com/dublinphysic...
Follow on Instagram: https://www.instagram.com/dublin_spor...
Follow on Twitter: https://twitter.com/physio_bob?s=03
**MEDICAL DISCLAIMER**
USE OF THIS VIDEO'S CONTENT IS AT YOUR OWN RISK.
#sciaticatretament #L5S1 #l4l5 #sciaticatretament #sciaticapainrelief #sciatica #backpain #Soreback
89
views
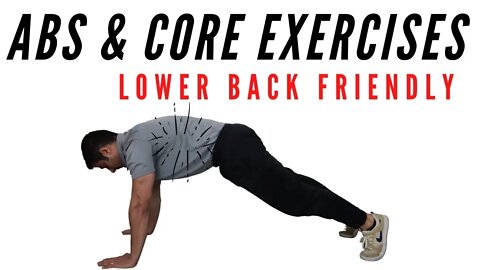
10 Minutes Abs and Core exercises, lower back freindly
In this routine I share with you a 10 minutes of abs and core exercises. This routine is simple and effective to improve your core strength and if you suffering from lower back pain, you can try these core exercises.
Reverse crunches:
For reverse crunches, start by lying down with your arms by your sides. Raise your legs so your thighs are perpendicular to the floor and your knees are bent at a 90° angle. Breathe out and contract your abs to bring your knees up towards your chest and raise your hips off the floor. then slowly lower your legs back to the starting position and avoid to bring your legs all the way back to the ground.
Reverse Crunches should be done slowly with complete control. This keeps the abs under tension for a longer period and prevents you from putting strain on your lower back, which can happen if you rush the movement. If you’re arching your lower back when lowering your legs, that’s a sign you’re not moving in a controlled.
Oblique Crunches:
Lie on the floor facing up with your knees bent and feet shoulder-width apart. Place your hands on the back of your head. Do not interlace your fingers. Engage your abs. On an exhale, using your core, lift your head, neck, and chest bringing your left elbow towards your left knee. You create a combined rotation and crunch up at the same time. Your lower back stays on the floor throughout the entire movement. Release and untwist on an inhale.
Dynamic Side Plank:
Lie on your right side with your knees bended and feet stacked on top of each other. With your neck neutral, breathe out and brace your core and lift your hips off the mat so that you're supporting your weight on your elbow and the side of your knee, hold this position for a second and come back to the starting position. Repeat this moment for 30sec and then switch side. Try to engage your flute muscles and your abs / core at the same time. Slower you do this routine the more challenging it become.
Knee Touch:
Start on back with the knees bended at 90 degrees and hold them in that position through the exercise. Bring head, neck, and shoulders off the mat and reach arms up towards the knee. Return to the tips of the shoulders and repeat. If you would like to progress this exercise bring back your arms back over the head and repeat the same movement.
Reverse Crunches seated:
For seated reverse crunches, start in seated position with your arms by your sides. Knees are bended in the 90 degrees and maintaining your balance with your hands. Start with extending your knees as far as you feel comfortable and flex back the knees to the body and repeat. Engage the core through the movement and focus on the lower abdominal muscles. If you would like to progress this exercise try the same movement slowly and maintain your form.
Crossed body mountain climbers:
Assume a push-up position. Core is tight. Back is flat. Hands are underneath the shoulders. Head is in neutral position.
Bring one knee up towards your chest and twist towards the opposing elbow. (Ex: Right knee to left elbow.)
Contract the core and return the leg to the starting position.
Alternate between legs.
Dead. Bug modified:
Keep your hand underneath of your lower back and apply slight pressure with your lower back (posterior tilt) and maintain that pressure through the exercises.
Your knees bended in 90 degrees in the starting position, relax your shoulder and your neck,
on an exhale, slowly lower your left leg until they’re just above the floor. On the inhale bring back the knee to the starting position and change leg. Repeat the movement for 45 sec.
Toe Touch:
Start with lying on your back with the knees almost straight and hold them in that position through the exercise. Bring head, neck, and shoulders off the mat and reach arms up towards your toes. Return to the tips of the shoulders and repeat. If you would like to progress this exercise bring back your arms back over the head and repeat the same movement.
Kick back Modified:
Get into all fours, with a straight spine, and contract your core muscles.
Extend your right leg back and up until your thigh is parallel with the ground, Contract your glute at the top of the move and hold for a beat.Return to your starting position without touching your knee to the ground and repeat. To progress the movement, get into the high plank position and and contract your core muscles.Extend your right leg back and up until your thigh is parallel with the ground, Contract your glute at the top of the move and hold for a beat.
Dynamic Crunches:
In this movement we are going to activate and engage the core muscles and mixed the normal crunches and oblique rotation. Start with bringing the shoulder and neck off the ground and
**MEDICAL DISCLAIMER**
USE OF THIS VIDEO'S CONTENT IS AT YOUR OWN RISK.
#abs #crunches #lowerbackpain
85
views
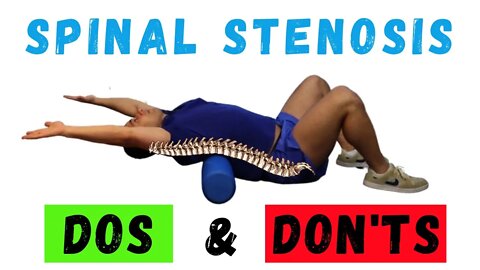
Spinal stenosis cause, symptoms and rehabilitation routine
In this video I show you a series of exercises for Spinal Stenosis and how to get pain free. I have shared with you the cause of spinal Stenosis and sign and symptoms and treatment option. In addition I have shared with you 3 important tips to follow if you suffering from Spinal Stenosis.
Spinal stenosis is a narrowing of the spaces within your spine, which can put pressure on the nerves that travel through the spine. Spinal stenosis occurs most often in the lower back and the neck.
Some people with spinal stenosis may not have symptoms. Others may experience pain, tingling, numbness and muscle weakness. Symptoms can worsen over time.
Spinal stenosis is most commonly caused by wear-and-tear changes in the spine related to osteoarthritis. In severe cases of spinal stenosis, doctors may recommend surgery to create additional space for the spinal cord or nerves.
Exercise routine for Spinal stenosis:
- Single leg / double leg hip stretches: 07:00
- Figure 4 stretch: 07:45
- Clam shell exercise: 08:21
- High plank static / dynamic 09:06
- Glute bridges: 09:44
- Single leg hip stretch 10:24
📚 References:
Exercise therapy versus surgery for lumbar spinal stenosis: A systematic review and meta-analysis. https://www.ncbi.nlm.nih.gov/pmc/articles/PMC6115590/
Surgery versus Nonsurgical Treatment for Lumbar Spinal Stenosis: A Comparative Effectiveness Randomized Trial with 2-Year Follow-up
https://www.ncbi.nlm.nih.gov/pmc/articles/PMC6252248/
Follow me
Visit my Website: https://www.dublinsportsinjuryclinic.com
Like us on Facebook: https://www.facebook.com/dublinphysicaltherapy
Follow on Instagram: https://www.instagram.com/dublin_sports_injury_clinic/
Follow on Twitter: https://twitter.com/physio_bob?s=03
**MEDICAL DISCLAIMER**
All information, content, and material of this video or website are for informational and demonstration purposes only. It is not intended to serve as a substitute for the consultation, diagnosis, and/or medical treatment of a qualified physician or healthcare provider.
Don’t use this content as a replacement for treatment and advice given by your doctor or health care provider. Consult with your physical therapist or healthcare professional before doing anything contained in this content.
By watching this video, you agree to indemnify and hold harmless Dublin Sports Injury Clinic(and its representatives) for any and all losses, injuries, or damages resulting from any and all claims that arise from your use or misuse of this content. Dublin Sports Injury Clinic makes no representations about the accuracy or suitability of this content.
USE OF THIS VIDEO'S CONTENT IS AT YOUR OWN RISK.
Tags:
Spinal Stenosis Rehabilitation
Spinal stenosis cause, symptoms and rehabilitation routine
Spinal lumbar stenosis rehabilitation
lumbar spine stenosis treatment
Spinal lumbar stenosi surgery
sign and symptoms of spinal stenosis
#spinalstenosi #spinalstenositreatment #spinallumbarstenosis
32
views
1
comment
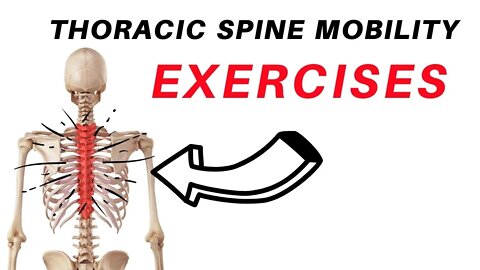
Thoracic Spine Mobility Exercises
Thoracic Spine mobility Exercises
In this video I share with you a series of exercises for improving your thoracic spine mobility. Research has been shown reduced thoracic mobility in individuals who spend more than 7 hours/day sitting and active less than150 min/week of physical activity.
Kneeling Thoracic Rotation
This drill is to help improve thoracic mobility, specifically thoracic rotation. Begin in a half kneeling position with near the wall.
This will help keep your pelvis and lumbar spine fixed and reduce your ability to compensate. While keeping the knee close to the wall rotate your head and shoulders.
The goal here is to eventually allow both arms to lay against the wall . Exhale as you rotate further into this stretch.
Kneeling Thoracic Rotation
Get into a quadruped position with the knees under the hips and the hands under the shoulders. Place one hand on the upper back or back of the neck. Do not pull down or put pressure into neck with hand.
Begin to rotate leading with the eyes, head and shoulder as far as possible. Then reverse the motion leading with the eyes, head and shoulder rotating upwards as far as possible.
Modified Thoracic Rotation
Get into a child-pose position and place one hand on the upper back or back of the neck. Do not pull down or put pressure into neck with hand.
Begin to rotate leading with the eyes, head and shoulder as far as possible. Then reverse the motion leading with the eyes, head and shoulder rotating upwards as far as possible.
Cat Camel
Get onto your hands and knees, with your knees spaced hip-width apart and your hands directly beneath your shoulders. Tighten your abdominal muscles and arch your spine upward toward the ceiling. Hold the position for at least 10 seconds, then slowly relax your back. Allow your stomach to fall toward the floor, bring your shoulders together and stretch your back downwards into a swayback position.
Foam Roller Extension
Put the foam roller under your upper back / thoracic spine. Cross one leg and keep the other feet flat on the ground. Place one hands behind your head and pull your elbows back and rotate as far as you feel comfortable. Let your head fall to the floor and try to wrap yourself around the foam roller, extending the thoracic spine over the roller. Roll, slowly up and down the vertebrae (do not roll the neck or lower back, focussing solely on the thoracic spine).
Side Lying Thoracic Rotation
Lie on the right side of your body , bring your palms together and extend your arms in front of your chest. Bend your left knee and hip to about 90 degrees and extend your right leg away from you. Put a foam roller beneath your left knee and press your knee against it. Rotate your torso to your left, bringing your left shoulder and hand to the floor, and reach upward in front of your chest with your right hand As you reach up, keep your right shoulder blade on the floor.
📚 References:
Wilkes et al. (2017): https://pubmed.ncbi.nlm.nih.gov/27494342/
Barrett et al. /2016): https://pubmed.ncbi.nlm.nih.gov/27475532/
Heneghan et al. (2018): https://pubmed.ncbi.nlm.nih.gov/29730619/
Cho et al. (2017): https://pubmed.ncbi.nlm.nih.gov/29233164/
Joshi et al. (2019):https://pubmed.ncbi.nlm.nih.gov/31154701/
Follow me
Visit my Website: https://www.dublinsportsinjuryclinic.com
Like us on Facebook: https://www.facebook.com/dublinphysicaltherapy
Follow on Instagram: https://www.instagram.com/dublin_sports_injury_clinic/
Follow on Twitter: https://twitter.com/physio_bob?s=03
Tags:
Thoracic Mobility Exercises
Best Thoracic exercises
thoracic spine pain
thoracic spine mobility
TSpine
Thoracic spine injury
how to improve your thoracic mobility-relief neck pain and upper back pain
#thocaricmobility #thoracicpain #neckpain #stiffneck #stiffupperback
#backpain #Soreback #Lowerbackpain #Sciatica #backpainrehabilitation
#Stiffback #Degenerativediscdiseases #goodposture #strongposture #kyphoticposture #imporveposture #upperbackpain #neckpain #upperbackpain #thoracicspine #thoracicrotation
59
views
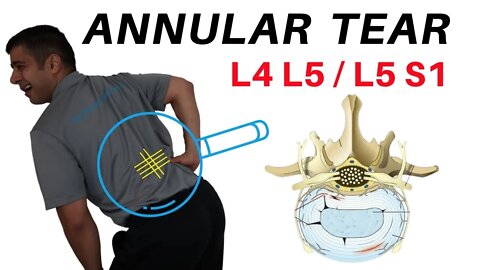
Annular Tear L4L5 L5S1 Disc Bulges
In this video I shared with you what is Annular Tear is and what is the sign and symptoms and what are the options for management of Annular Tear or annular fissure. I share what you a series of exercises that can help you with pain and mobility.
Your Spinal column has 33 vertebrae and the top three-quarters of which are separated by discs. These discs, 23 in all, serve to cushion and protect the vertebrae; they absorb shock and help to keep weight in the back evenly distributed.
The inside of the disc, the nucleus, is made of a soft, gelatinous fluid, and the outer half is made of tough connective fibers called the annulus fibrosus.
What is An Annular Tear / fissure ?
As we get older, the vertebral discs can start to exhibit wear & tear (normal ageing process) . One of the common changes in the discs could be a tear in the annulus fibrosus. The annular fibers commonly referred to as an annular tear or fissure.
Read the full article in my website:
Annular Tear L4L5 L5S1 Disc Bulges treatment
https://www.dublinsportsinjuryclinic.com/annular-tear-l4l5-l5s1-disc-bulges-treatmet/
How Common is An Annular Tear ?
Annular tears / fissure are commonly identified in asymptomatic individuals during imaging for other reasons. Estimates for annular tears in adults range from a few percents to upward of 50% depending on the criteria and imaging used to identify an annular tear / fissure. That mean out of 2 people 1 would highly have a chance to have an annular tear without any symptoms.
Treatment / Management
An annular fissure or tear can be symptomatic or asymptomatic. Symptomatic annular fissures can occur with or without intravertebral disc protrusion or herniation.
Asymptomatic Annular Tear
If the annular tear or fissure is identified incidentally, most commonly on MRI imaging, then no treatment is warranted. Such annular fissures may resolve spontaneously over time and are frequently due to the stresses applied to the spine.
Asymptomatic Annular Tear managemnet
It is posited that some asymptomatic annular tears may become symptomatic with time, but there is currently no definitive evidence that the treatment of asymptomatic annular tears provides any benefit or prevents any future issues.
Symptomatic Annular Tear without Disc Protrusion or Herniation
An annular fissure or tear can be symptomatic without disc protrusion or herniation. It is suspected that local inflammatory reactions from the annulus fibrosus tear or fissure lead to irritation of adjacent nerve fibers or traversing nerve roots.
Treatment Options / Non invasive
The treatment for such situations is - non-steroidal anti-inflammatory (NSAIDs). & low-impact physical therapy.
Symptomatic Annular Tear with Disc Protrusion or Herniation
If there is disc protrusion or herniation, it is usually the protruding or herniated disc material itself which causes the clinical symptoms. In such cases, the patient is treated for the disc protrusion or herniation and not the annular fissure or tear.
Diagnostic test for High Intensity Zone
They have cuncluded, when injected during discography, the same percentage of asymptomatic and symptomatic discs with a high-intensity zone were shown to be painful.”
Treatment Options / Non invasive
Treatment options for disc protrusion or herniation including conservative measures of (NSAIDs), physical therapy.
Treatment Options for Annular Tear / Annular Tear Surgury
Recent studies suggest the act of discography on a normal disk in the control group will cause that disk to degenerate at a faster rate.
**MEDICAL DISCLAIMER**
All information, content, and material of this video or website are for informational and demonstration purposes only. It is not intended to serve as a substitute for the consultation, diagnosis, and/or medical treatment of a qualified physician or healthcare provider.
Don’t use this content as a replacement for treatment and advice given by your doctor or health care provider. Consult with your physical therapist or healthcare professional before doing anything contained in this content.
By watching this video, you agree to indemnify and hold harmless Dublin Sports Injury Clinic(and its representatives) for any and all losses, injuries, or damages resulting from any and all claims that arise from your use or misuse of this content. Dublin Sports Injury Clinic makes no representations about the accuracy or suitability of this content.
USE OF THIS VIDEO'S CONTENT IS AT YOUR OWN RISK.
#annulartear #Annularteartreatment #annulartearsurgury #annularTearMRI
Annular tear treatment,
Annular tear rehabilitation
Annular tear exercises
Annular tear mri report
Annular report surgery
47
views
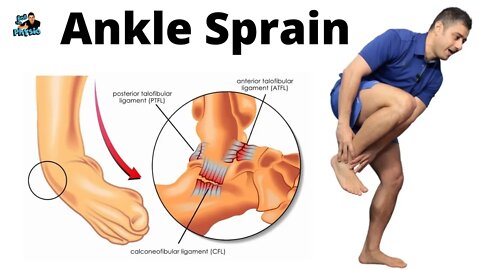
Ankle Sprain Exercises Early Stage
Ankle sprains are one of the most common injuries in sports such as (Basketball. Soccer, and Volleyball). It is one of the most prevalent injuries of the musculoskeletal system.
In This video I show you how to start your ankle rehabilitation in acute phase and fasten your ankle recovery.
About 50% of these injuries are sports-related. The research highlighted, if it is not treated properly, the chances of injury recurrent would be up to 30% to 40% of the patients.
I am going to show you with a couple of steps on how to protect your ankle from an acute injury.
The first aid method of treating musculoskeletal injuries is POLICE protocol. The POLICE Principle is a modern/modified first aid method of treating musculoskeletal injuries.
These steps are known as POLICE protocol as we could divide them to Protection, Optimal Loading, Rest, Ice, Compression, and Elevation. This procedure should be applied within the first 24 to 72 hours immediately after an ankle injury.
POLICE Protocol
https://www.dublinsportsinjuryclinic.com/acute-injury-management-police-protocol/
The main goal of this time frame is to control the amount of swelling to the injured area, prevent further injury, and reduce pain. This principle will help you to reduce the amount of swelling, thereby it will fasten the recovery and rehabilitation program. Read more about the healing stages of soft tissue.
Protection
Protection is meant to prevent further injury. For example, an injured leg or foot may be protected by limiting or avoiding weight-bearing through the use of crutches, a cane, or hiking poles. Partially immobilizing the injured area by using a sling, splint, or brace may also be a means of protection.
Optimal Loading
Optimal loading will stimulate the healing process as bone, tendon, ligament, and muscle all require some loading to stimulate healing. Optimal loading is done by utilizing mechano-therapy intervention and includes a wide range of manual techniques currently available “Paradoxically, crutches, braces, and supports, traditionally associated with rest, may have a greater role in adjusting and regulating optimal loading in the early stages of rehabilitation.
The right amount of activity can help manage the swelling. For example in the ankle, contraction of the calf muscles helps to move swelling up the body against gravity. Complete rest would prevent this. In some instances, loading may not be necessary i.e. in severe fractures that need surgery.
Rest
Rest is important to allow for healing. However, many sports medicine specialists use the term “relative rest” meaning rest that allows for healing but is not so restrictive that recovery is compromised or slowed. A person should avoid activities that stress the injured area to the point of pain or that may slow or prevent healing. Some movement, however, is beneficial. Gentle, pain-free, range-of-motion and basic isometric contractions of the joints and muscles surrounding an injury have been shown to speed recovery.
Ice
Ice refers to the use of cold treatments, also known as cryotherapy, to treat acute injuries. Ice is recommended with the intent to minimize and reduce swelling as well as to decrease pain. There are many ways to employ cryotherapy at home. The most common and most convenient is a simple plastic bag of crushed ice placed over a paper towel on the affected area. It is important to protect the skin and limit the cold exposure to 10 to 15 minutes. Cycles of 10 to 15 minutes on and 1 to 2 hours off are generally agreed upon as effective and safer than longer periods of continuous ice application.
Compression
Compression is the use of a compression wrap, such as an elastic bandage, to apply an external force to the injured tissue. This compression minimizes swelling and provides mild support. How to move to the 2nd phase of ankle rehabilitation.
Avoid Harm protocol:
https://www.dublinsportsinjuryclinic.com/acute-injury-management-avoid-harm/
𝐂𝐨𝐧𝐧𝐞𝐜𝐭 𝐰𝐢𝐭𝐡 𝐁𝐨𝐛 𝐚𝐭 𝐃𝐮𝐛𝐥𝐢𝐧 𝐒𝐩𝐨𝐫𝐭𝐬 𝐈𝐧𝐣𝐮𝐫𝐲 𝐂𝐥𝐢𝐧𝐢𝐜
𝐖𝐄𝐁𝐒𝐈𝐓𝐄→ https://www.dublinsportsinjuryclinic.com
𝐄𝐌𝐀𝐈𝐋 → Rehab@dublinsportsinjuryclinic.com
𝐓𝐄𝐋 → 0879276712
𝐅𝐀𝐂𝐄𝐁𝐎𝐎𝐊 → https://www.facebook.com/dublinphysicaltherapy/
𝐈𝐍𝐒𝐓𝐀𝐆𝐑𝐀𝐌 → https://www.instagram.com/dublin_sports_injury_clinic/
Tags:
Ankle Sprain treatment
Ankle Sprain injury
Ankle Sprain rehabilitation
Ankle Sprain exercises
Ankle Sprain Ice method
Ankle Sprain early stage
Ankle Injury treatmnet
#anklesprain #ankleinjurytreatment #anklespraininjury#stressfracture
34
views
Blood Flow Restriction Training Cuffs ACHEDAWAY
In this video I review the Achedaway blood flow restriction training cuff. BFR is a game changer in the world of rehab. Achedaway cuff helps you increases muscle strength, muscle size, and muscle endurance with even low loads. This makes it ideal for rehabilitation, performance, and everyday training.
You can use my discount code: Bobfiro
Get extra 10% discount on any rehab equipment on their website : https://achedaway.com
I would highly recommend the Achedaway blood flow restriction training cuff to who ever who would like to increase their intensity and have a better workout and get a better pump. On the other hand if you suffer from an injury you can use the Achedaway blood flow restriction training cuff while you are recovering and minimise the muscle loss and get a great rehab session with minimum load.
BFR training was initially developed in the 1960’s in Japan and known as KAATSU training. It involves the application of a pneumatic cuff (tourniquet) proximally to the muscle that is being trained. It can be applied to either the upper or lower limb. The cuff is then inflated to a specific pressure with the aim of obtaining partial arterial and complete venous occlusion. The patient is then asked to perform resistance exercises at a low intensity of 20-30% of 1 repetition max (1RM), with high repetitions per set (15-30) and short rest intervals between sets (30 seconds).
The aim of BFR training is to mimic the effects of high intensity exercise by recreating a hypoxic environment using a cuff. The cuff is placed proximally to the muscle being exercise and low intensity exercises can then be performed. Because the outflow of blood is limited using the cuff capillary blood that has a low oxygen content collects and there is an increase in protons and lactic acid. The same physiological adaptations to the muscle eg release of hormones, hypoxia and cell swelling, will take place during the BFR training and low intensity exercise as would occur with high intensity exercise.
In this video I have share with you a series of exercises that you can try with body weight or 20 to 30% of your maximum resistance for optimum results.
𝐂𝐨𝐧𝐧𝐞𝐜𝐭 𝐰𝐢𝐭𝐡 𝐁𝐨𝐛 𝐚𝐭 𝐃𝐮𝐛𝐥𝐢𝐧 𝐒𝐩𝐨𝐫𝐭𝐬 𝐈𝐧𝐣𝐮𝐫𝐲 𝐂𝐥𝐢𝐧𝐢𝐜
𝐖𝐄𝐁𝐒𝐈𝐓𝐄→ https://www.dublinsportsinjuryclinic.com
𝐄𝐌𝐀𝐈𝐋 → Rehab@dublinsportsinjuryclinic.com
𝐓𝐄𝐋 → 0879276712
𝐅𝐀𝐂𝐄𝐁𝐎𝐎𝐊 → https://www.facebook.com/dublinphysicaltherapy/
𝐈𝐍𝐒𝐓𝐀𝐆𝐑𝐀𝐌 → https://www.instagram.com/dublin_sports_injury_clinic/
40
views
hip bursitis, Trochanteric Bursitis exercise rehabilitation
Lateral hip pain goes by many names: hip bursitis, trochanteric bursitis, greater trochanteric pain syndrome, gluteal tendinopathy. However, several studies suggest that bursitis and inflammation are not exactly the primary drivers of symptoms in this region. Instead, gluteal tendinopathy should be the main consideration.
Many of my patients who assume their symptoms are due to inflammation has been taking a passive approach to rehabilitation: mostly rest and applying ice and taking anti inflammatory which doesn't help them to recover and it become a chronic pain.
In this video I have share with you 3 important tips that you should follow for your recovery. Minimising the activities that aggravates your pain and yoru symptoms, being consistence with your exercises, and make sure to get help from your physical therapist for the right diagnosis.
References:
Gluteal Tendinopathy: Integrating Pathomechanics and Clinical Features in Its Management https://www.jospt.org/doi/pdf/10.2519/jospt.2015.5829
𝐂𝐨𝐧𝐧𝐞𝐜𝐭 𝐰𝐢𝐭𝐡 𝐁𝐨𝐛 𝐚𝐭 𝐃𝐮𝐛𝐥𝐢𝐧 𝐒𝐩𝐨𝐫𝐭𝐬 𝐈𝐧𝐣𝐮𝐫𝐲 𝐂𝐥𝐢𝐧𝐢𝐜
𝐖𝐄𝐁𝐒𝐈𝐓𝐄→ https://www.dublinsportsinjuryclinic.com
𝐄𝐌𝐀𝐈𝐋 → Rehab@dublinsportsinjuryclinic.com
𝐓𝐄𝐋 → 0879276712
𝐅𝐀𝐂𝐄𝐁𝐎𝐎𝐊 → https://www.facebook.com/dublinphysicaltherapy/
𝐈𝐍𝐒𝐓𝐀𝐆𝐑𝐀𝐌 → https://www.instagram.com/dublin_sports_injury_clinic/
Tags:
#hipbursitis #glutealtendinopathy #trochantericbursitis
hip bursitis, Trochanteric Bursitis exercise rehabilitation
Hip bursitis exercises
throchantric bursitis treatment
hip bursitis treatment
Hip pan,
hip bursitis,
anterior hip pain,
gluteal tendinopathy
trochanteric bursitis,
Hip pain
23
views
Groin Injury Rehabilitation Adductor strain mid stage
In this video I shared with you a series of exercises that you can follow after a groin injury, adductor strain. This routine is the mid stage of your rehabilitation after 4 to 6 weeks.
A groin strain is a muscular tear or rupture to any one of your groin muscles; usually one of the hip adductor muscle group. Your body has five adductor muscles: adductor brevis, longus, magnus, pectineus, and gracilis. Any of these groin muscles can be strained but the most common is adductor longus. A groin strain usually occurs with high-speed activities such as kicking, change of direction or sprinting. Groin injuries account for 2% to 5% of all sports-related injuries with a high recurrence rate between 15% and 31%.
Most adductor strains are managed conservatively. Initial management will include relative active rest from sports, Police Protocol and physical therapy. In the treatment of muscle-tendon injuries, immobilization should be limited to as short a period as possible to avoid the harmful effects of immobilization including muscle atrophy and loss of function. In some cases you may use “Analgesia" typically includes acetaminophen and non-steroidal anti-inflammatory medications.
I have added a couple of links here for you to get a better idea about the recovery plan for a groin injury. you can add police protocol and avoid harm while you following this routine.
1- Groin injury treatment and management: https://dublinsportsinjuryclinic.com/groin-strain/
2- Police protocol: https://dublinsportsinjuryclinic.com/acute-injury-management-police-protocol/
3- Avoid Harm: https://dublinsportsinjuryclinic.com/acute-injury-management-avoid-harm/
References:
1- https://www.jospt.org/doi/pdfplus/10.2519/jospt.2018.7850
2- https://www.ncbi.nlm.nih.gov/pmc/articles/PMC6990618/
3- https://www.ncbi.nlm.nih.gov/pmc/articles/PMC6045696/
**MEDICAL DISCLAIMER**
All information, content, and material of this video or website are for informational and demonstration purposes only. It is not intended to serve as a substitute for the consultation, diagnosis, and/or medical treatment of a qualified physician or healthcare provider.
Don’t use this content as a replacement for treatment and advice given by your doctor or health care provider. Consult with your physical therapist or healthcare professional before doing anything contained in this content.
By watching this video, you agree to indemnify and hold harmless Dublin Sports Injury Clinic(and its representatives) for any and all losses, injuries, or damages resulting from any and all claims that arise from your use or misuse of this content. Dublin Sports Injury Clinic makes no representations about the accuracy or suitability of this content.
USE OF THIS VIDEO'S CONTENT IS AT YOUR OWN RISK.
𝐂𝐨𝐧𝐧𝐞𝐜𝐭 𝐰𝐢𝐭𝐡 𝐁𝐨𝐛 𝐚𝐭 𝐃𝐮𝐛𝐥𝐢𝐧 𝐒𝐩𝐨𝐫𝐭𝐬 𝐈𝐧𝐣𝐮𝐫𝐲 𝐂𝐥𝐢𝐧𝐢𝐜
𝐖𝐄𝐁𝐒𝐈𝐓𝐄→ https://www.dublinsportsinjuryclinic.com
𝐄𝐌𝐀𝐈𝐋 → Rehab@dublinsportsinjuryclinic.com
𝐓𝐄𝐋 → 0879276712
𝐅𝐀𝐂𝐄𝐁𝐎𝐎𝐊 → https://www.facebook.com/dublinphysicaltherapy/
𝐈𝐍𝐒𝐓𝐀𝐆𝐑𝐀𝐌 → https://www.instagram.com/dublin_sports_injury_clinic/
Tags:
groin injury-adductors rehabilitation early stage-the first two weeks after groin injury
#adductorstrain #groininjury #hippain
#GroinInjuryrehabilitation, #GroinStrengtheningroutine, #Adductorrehabilitation
#GroinInjury #SoreGroin #Soreadductor #GroinRehabilitation #sorethigh #runninginjury #adductortear #adductorstrain #soreadductor #soreinnerthigh #sprint #adductor #groinphyiso #groinrehabilitation#dublinsportsinjuryclinic #dublinsportsphysio #bobfiro #dulin2phyiso #bobyourphysio #bobonlinecare #Sportsinjurydublinclinic #dublinsportsinjuryclinic #dublinsportsphysio #bobfiro #dulin2phyiso #bobyourphysio #bobonlinecare #Sportsinjurydublinclinic
40
views
Best exercises for osteoporosis
In this video I share with you what osteoporosis is and what type of exercises can be helpful to minimise the chances of developingosteoporosis. Research highlighted, you should add weight bearingexercises to your daily routine if you are suffering fromosteoporosis.
Osteoporosis can be defined as “a disease characterized by low bone mass and microarchitectural deterioration of bone tissue, leading to enhanced bone fragility and a consequent increase in fracture risk.Physical exercise is an obvious and natural way to modulate the bone’s mechanical environment, and one would expect that increased loading via physical activity should lead to bigger, stronger bones.
In addition, adding dietary supplementssuch as Calcium and vitamin D has been shown to be beneficial forosteoporosis. I will cover the dietary recommendationin another video.
Prolonged aerobic training (e.g., swimming, cycling, and walking) is widely beneficial to all body systems, but there are clinical evidences suggesting that none of these activities provide an adequate stimulus to bones !!
Non-weight-bearing aerobic exercise applies no or very low impact on bones, and shows lesser osteogenic responses than weight-bearing aerobic exercise in older adults.
Regular walking, which is frequently prescribed to prevent osteoporosis, also has little or no effect on prevention of bone loss.
This could be attributed that low-impact loading force applied during walking does not elicit loads of a sufficient magnitude, rate, or distribution to stimulate bone cells to lead to an adaptive skeletal response.
I have shared with you a series of exercises that you can add to your daily routine. Theseexercises are low impact but they will challenge you to get stronger and build your bone density.
1- Body weight / weighted squat:
2- DumbbellShoulder press:
3- Plank / high plank:
4- Dips exercise
5- Side step up
6- Glute bridges
7- Standing Calf raises
osteoporosis
osteopenia
bone density
bone loss
osteoblast
osteoclast
lack of bone density
weight bearing exercises
strengthen your bone
best exercise for osteoporosis
exercise for osteoporosis
prevent osteoporosis
References:
https://www.ncbi.nlm.nih.gov/pmc/articles/PMC6279907/pdf/enm-33-435.pdf
https://www.ncbi.nlm.nih.gov/pmc/articles/PMC2621390/
**MEDICAL DISCLAIMER**
All information, content, and material of this video or website are for informational and demonstration purposes only. It is not intended to serve as a substitute for the consultation, diagnosis, and/or medical treatment of a qualified physician or healthcare provider.
Don’t use this content as a replacement for treatment and advice given by your doctor or health care provider. Consult with your physical therapist or healthcare professional before doing anything contained in this content.
By watching this video, you agree to indemnify and hold harmless Dublin Sports Injury Clinic(and its representatives) for any and all losses, injuries, or damages resulting from any and all claims that arise from your use or misuse of this content. Dublin Sports Injury Clinic makes no representations about the accuracy or suitability of this content.
#osteoporosis #osteopenia #osteoblast
62
views
l4 l5 - l5 S1 core exercises with Gymball
In this routine I share with you an advance core exercise routine for l4 l5 disc bulges.
This routine can help you to improve your pain and strengthen your core. If you suffering form l4 l5 disc bulges this routine can help you to strengthen your core along side of reducing your lower back pain.
If you never done any core strengthening exercises, start with this routine:
https://youtu.be/7dEu7bAfkTw
This is the best core exercises for lower back pain. If you experience lower back pain specifically chronic lower back pain or you would like to prevent lower back pain these core exercises can help you to relieve your back pain, strengthen your core with quicker recovery and reduce the chances of back pain recurrence. Try this routine daily at least once for minimum 4 weeks consistent to see quicker results.
Exercises that you will be doing in this routine:
1- Passive crunches on gym ball: passive crunches can help you to improve your core strength without creating any movement. It is a great starter to your program.
2- Elbow plank on the gym ball: this is considered as advanced core exercise and if you suffering from lower back pain, this can be your last progress that you add in to your routine. You can keep it as short as 5 t 10 sec hold.
3- High plank on the gym ball : This is the easier version of the plank, with gives you a chance to strengthen your core without movement, and If you find it easy you can add slight shuffle to your toes and that makes it a bit challenging.
4- Back extension on the gym ball: Back extension or Mackenzie can simply help you to strengthen your core and specifically your lower back muscles. Back extension can help you with relief pain from your lower back and help you to gain more movement. You can try back extension for 3 repetitions of 5 sec hols for 3 sets.
Here is a couple of helpful videos that could help you with your lower back pain.
- Improve your lower back pain (sciatica pain) and relief your sciatica pain
https://dublinsportsinjuryclinic.com/...
- How to improve your posture at home:
https://dublinsportsinjuryclinic.com/...
-Herniated disc management and treatments:
https://dublinsportsinjuryclinic.com/...
- Degenerative disc diseases:
https://dublinsportsinjuryclinic.com/...
**MEDICAL DISCLAIMER**
All information, content, and material of this video or website are for informational and demonstration purposes only. It is not intended to serve as a substitute for the consultation, diagnosis, and/or medical treatment of a qualified physician or healthcare provider.
Don’t use this content as a replacement for treatment and advice given by your doctor or health care provider. Consult with your physical therapist or healthcare professional before doing anything contained in this content.
By watching this video, you agree to indemnify and hold harmless Dublin Sports Injury Clinic(and its representatives) for any and all losses, injuries, or damages resulting from any and all claims that arise from your use or misuse of this content. Dublin Sports Injury Clinic makes no representations about the accuracy or suitability of this content.
#coreexercises #lowerbackpain #l4l5 #l5S1
11
views
Top 5 stretches for Sciatica pain relief
In this routine I share with you my top 5 stretches for sciatica pain relief. If you suffering from sciatica pain tases stretches will help you with sciatica pain relief and you will gain more mobility.
Resistance band: https://amzn.to/3rGBl5B
Yoga Mat: https://amzn.to/3nWAmfn
Yoga stretch band: https://amzn.to/38P7Wh6
Resistance band lope: https://amzn.to/3hrkgrK
Hers is the list of exercises that I have share with you in this routine.
Mackenzie Stretch
McKenzie exercises for low back pain are beneficial treatment for increasing flexibility of spine and improving the pain with better results in pain relief. McKenzie exercises are successful method for decreasing and centralising the pain and increasing spinal movements in patients with low back pain.
Pigeon Stretch
Pigeon pose is the perfect pose to release tension and maintain hip flexibility because it stretches both the hip rotators (buttocks area) and the hip flexors (the muscles that run along the front thighs and pelvis). Pigeon pose helps to elongate the back, open the hips, groin and hamstrings, can alleviate pressure on the low back and decrease symptoms of sciatica.
Kneeling Hip Flexor
The Kneeling Hip Flexor Stretch is one of the best stretches to help with mobility at the front of the pelvis. Benefits of stretching the Hip Flexors include alleviating lower back pain (Sciatica), improving your posture and aligning your legs in a manner that makes them work more powerfully.
Fiqure 4 stretch
The figure four stretch is one of the best stretches you can do for your body, regardless of the type of training you do. It targets the hips, lower back, and glutes, your body's largest and most powerful muscle group specifically your Piriformis muscle.
Try this stretch daily for 3 to 4 sets of 15 to 20 sec hold.
Hamstring stretches
Hamstring stretches and nerve mobilization are effective interventions for patients with lower back pain, and nerve mobilization is superior to hamstring stretching in alleviating lower back pain of patients. Therefore, both hamstring stretching and nerve mobilisation can be usefully applied for the therapy of patients with lower back pain.
**MEDICAL DISCLAIMER**
All information, content, and material of this video or website are for informational and demonstration purposes only. It is not intended to serve as a substitute for the consultation, diagnosis, and/or medical treatment of a qualified physician or healthcare provider.
Don’t use this content as a replacement for treatment and advice given by your doctor or health care provider. Consult with your physical therapist or healthcare professional before doing anything contained in this content.
By watching this video, you agree to indemnify and hold harmless Dublin Sports Injury Clinic(and its representatives) for any and all losses, injuries, or damages resulting from any and all claims that arise from your use or misuse of this content. Dublin Sports Injury Clinic makes no representations about the accuracy or suitability of this content.
USE OF THIS VIDEO'S CONTENT IS AT YOUR OWN RISK.
Top 5 stretches for Sciatica pain relief
Sciatica stretches
best sciatica stretches
sciatica pain relief
sciatica treatment
#sciaticatretament #sciaticapainrelief #sciatica #backpain #Soreback #Lowerbackpain #Sciatica #backpainrehabilitation #sciaticapainrelief #sciaticapain
110
views

Best cupping therapy ever, Achedaway Cupper review
In this video I review the Achedaway Cupper, a multifunctional dynamic cupping massager, combines dynamic suction, smart massage and red light therapy in one device. It’s an incredible recovery tool for pain management and myofascial release, a perfect choice for both professional and home use.
You can use my discount code: Bobfiro
Get extra 10% discount on any rehab equipment on their website : https://achedaway.com
I would highly recommend the Achedaway Cupper to anyone who is active or a therapist who work with active people specially for back pain, neck pain, trigger points. Its really easy to use and pretty effective to use.
Red light is thought to work by producing a biochemical effect in cells that strengthens the mitochondria. The mitochondria are the powerhouse of the cell — it’s where the cell’s energy is created. The energy-carrying molecule found in the cells of all living things is called ATP (adenosine triphosphate).
I show you in this video how you can use this tool after an injury. Th Achedaway cupping therapy reduced the pain and inflammation and accommodate blue circulation and muscle recovery in the injury area. I have demonstrate how to use 5 different massage styles.
Dynamic Cupping Technology - Cupper outstands ordinary cupping sets with rhythmic alternation of suction and release, which boosts blood circulation faster to the cupping area and speeds up the recovery process.
Smart Massage - Offering suction of 5 different modes and 5 intensity levels, Cupper serves as your personal massage therapist and tailors a massage to your own needs.
Red Light Therapy - The red light is a good aid in pain, inflammation, bringing faster results in healing skin and muscle tissue as well as creating more relaxation.
Effective Myofascial Release - The innovative combination of different treatments enables effective trigger point or myofascial release while enhancing circulation, mobility and flexibility in just a few minutes.
So Easy to Use - A simple touch on the control panel frees you from exhausting hand manipulation. Now you can enjoy a massage effortlessly. Compact and Portable - The compact size makes Cupper a perfect recovery tool for various areas such as the back, shoulder, hips, hamstring and calves. You can carry it around and enjoy a massage anywhere and anytime.One-Year Warranty - You can rest assured that we warrant this device to be free from defects in workmanship and materials for a period of one year.
References:
Improving acne
https://www.ncbi.nlm.nih.gov/pmc/articles/PMC4126803/
Wound healing
https://www.ncbi.nlm.nih.gov/pmc/articles/PMC4148276/
Reducing pain
https://www.minervamedica.it/en/journals/europa-medicophysica/article.php?cod=R33Y2017N04A0603
Enhancing bone recovery
https://pubmed.ncbi.nlm.nih.gov/28292696/
Anti-inflammatory benefits
https://www.ncbi.nlm.nih.gov/pmc/articles/PMC5523874/
#cuppingtherapy #achedaway #bestcuppingtherapy
41
views
How to lose weight effectively
How to lose weight without losing muscle. In this video I share with you my 5 top tips on how to lose weight efficiently.
I share with you the biggest problem with low calories diet and high volume of aerobic exercises. Why you should avoid low calories diet and what are the side effects of doing too much aerobic exercises to lose weight.
I have also talk about why you should be considering on cutting sugar and reducing your sugar intake. Specially if you are obese or over weight, with reducing your sugar intake you are reducing the chances of type 2 diabetes.
Beside reducing your sugar, you should be considering to increase your protein intake in a daily bases. Protein is your building block of your body and we use protein to build muscle and repair tissue in your body. The other advantages of protein is that protein can help you stay full and can increase your body metabolism through thermogenesis.
Adding strength training in to your routine can be huge help for you to 1st of all maintain your muscle mass, but also strength training helps you to build firm tissue. With building muscle you simply increasing your body metabolism which can be a huge help in regards to weight loss.
My last but not the least tips is to hire a coach and get help for your nutrition and training. Beside that, your coach can help you with your accountability and show your progress in a weekly bases.
We do offer an 8 weeks online training that can help you to lose weight and get shape, If you would like to get some help don't hesitate to email me on : rehab@dublinsportsinjuryclinic.com
Tags:
Lose weight and gain muscle
how to lose weight in 30 days
best losing weight tips
lose weight
how to lose weight
best diet plan to lose weight
diet plan to lose weight
low calories diet
low fat diet
high fat diet
high protein diet
strength training for weight loss
How to lose weight effectively
#loseweight #gainmuslce #losefat
10
views
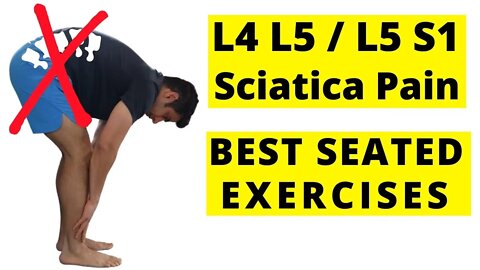
L4 L5 - L5 S1 best seated exercises
In this video I show you an effective exercise rehabilitation routine for L4 - L5 / L5 - S1 Disc Bulge and sciatica pain relief. In this routine, I share with you the L4 L5 - L5 S1 best-seated exercises.
Seated extension exercise:
Start with a small extension and gradually progress. Move within a pain-free range of movement, don't push it. Breathing is essential while doing it. For optimum results, you may try this routine at least 2 to 3 times a day.
McKenzie Exercise:
McKenzie exercises for low back pain are a beneficial treatment for increasing flexibility of the spine and improving the pain with better results in pain relief. McKenzie exercises are a successful method for decreasing and centralizing the pain and increasing spinal movements in patients with low back pain.
Seated Nerve Glide:
Application for the mobilization techniques of the sciatic nerves not only improved the functions and health of the participants, but It may also promote healing of the soft tissues by stimulating the functions of the nervous system to improve nervous system adaptability and decrease sensitivity, helping to alleviate symptoms.
Standing Hamstring stretches:
Hamstring stretches and nerve mobilization are effective interventions for patients with lower back pain, and nerve mobilization is superior to hamstring stretching in alleviating lower back pain in patients. Therefore, both hamstring stretching and nerve mobilization can be usefully applied for the therapy of patients with lower back pain.
Seated Figure 4 stretch:
The figure four stretch is one of the best stretches you can do for your body, regardless of the type of training you do. It targets the hips, lower back, and glutes, your body's largest and most powerful muscle group specifically your Piriformis muscle.
Try this stretch daily for 3 to 4 sets of 15 to 20-sec hold.
These exercises will help you to relieve pain, and improve your lower back mobility. If you have sciatica symptoms this routine is suitable for you.
As I promised, here is a couple of sources that you may want to read in regard to your back pain and your MRI scan.
L4 L5 - L5 S1 disc bulge best exercise rehabilitation for pain relief
https://youtu.be/SNDEBO6nQ6A
Spondylolisthesis treatment
https://youtu.be/jzcKlm0jo8w
Sciatica pain relief in 5min
https://youtu.be/nEMxW8Z_CI4
- MRI vs MRI: https://www.dublinsportsinjuryclinic.com/mris-vs-mris/
- Herniated Discs Treatment and Management
https://www.dublinsportsinjuryclinic.com/herniated-discs-treatment-and-management/
- 4 TOP EXERCISES FOR SCIATICA PAIN RELIEF
https://www.dublinsportsinjuryclinic.com/4-top-exercises-for-sciatica-pain-relief
References:
The effects of self-mobilization techniques for the sciatic nerves
https://www.ncbi.nlm.nih.gov/pmc/articles/PMC4755972/
Systematic Literature Review of Imaging Features of Spinal Degeneration in Asymptomatic Populations
https://www.ncbi.nlm.nih.gov/pmc/articles/PMC4464797/
Variability in Diagnostic Error Rates of 10 MRI Centers Performing Lumbar Spine MRI Examinations
https://pubmed.ncbi.nlm.nih.gov/27867079/
Tags:
L4 L5 - L5 S1 disc bulge best exercise rehabilitation for pain relief
L4 L5 - L5 S1 best-seated exercises
Tight hamstring
Sciatica pain relief
Sciatica exercises
L4 L5 L5 S1 seated exercises
Mckenzie Technique
Sciatica treatment
Sciatica pain stretches
sciatica stretches
Sciatica seated exercises
Piriformis syndrome
Piriformis pain
Piriformis treatment
L4 L5 - L5 S1 disc bulge best exercise rehabilitation for pain relief, L4 L5, L5 S1, disc bulges, disc protrusion, slipped disc, L5 S1, Disc bulges, disc protrusion, lower back disc, Lower back pain relief, lower back disc bulges, lower back exercise, slip disc, slipped disc exercises.
#L4L5L5S1discbulge #Sciaticapainrelief #L4L5L5S1seatedexercises
80
views