
Enjoyed this channel? Join my Locals community for exclusive content at
noreenskitchen.locals.com!

BLT FLATBREAD!! QUICK AND EASY !!
Today I am sharing another quick and easy idea that you can use with those par baked pizza crusts we made up a couple weeks ago. These are great for pizza, but today I am going to make a delicious BLT flat bread! Yes I said BLT! Bacon, Lettuce and tomato along with some cheddar and mozzarella cheese come together for a delicous combination that you can make for lunch or a light dinner. This would also be a delicous option as a go along with soup, stew or chili! I know once you give this a try, you and your family are going to love it!
This is super simple. I tossed together two different kinds of cheese with some chopped bacon and a bit of minced chives and placed this mixture on top of my flat bread or par baked pizza crust. Many asked last week if the crust had been thawed. It was not. I used it directly from the freezer. No need to thaw.
The flat bread was placed in a 375 degree oven and baked for about 18 minutes until the crust was golden and the cheese was melted. Then once removed from the oven we scattered over some shredded lettuce and diced tomato, along with a little drizzle of Ranch dressing. That's it! Super easy and this we really delicious!
I made enough of the cheese topping to make two flat breads with of the size I made which was 9X13. So you can simply eyeball this and make it up as you go. No rocket science here. No measurments really needed, just top your flatbread and enjoy!
I hope you give this BLT flatbread a try sometime soon and I hope you love it!
Happy Eating!
Get my cookbooks here: http://bit.ly/1czqM5R
Business Inquiries can be sent to:
info@noreenskitchen.com
Check me out on social media!
Facebook: http://on.fb.me/12bdibt
Twitter: @noreenskitchen
Instagram: http://bit.ly/12bdqrp
Google + http://bit.ly/1o5GMYy
***MAILING ADDRESS****
Noreen's Kitchen
PO Box 14173
New Bern, NC 28561
Have a question for me? Send me an email:
info@noreenskitchen.com
Noreen's Kitchen Community Guidelines (The Rules)
http://bit.ly/2i7VocU
Any links to Amazon are, in many cases, affiliate links.
Produced by Noreen's Kitchen ©2008-2016 all rights reserved All embeds must live link to Noreen's Kitchen channel. No Editorial Excerpts without permission, Violators agree to pay royalties, all court costs, all collections & all lawyers fees.
14
views
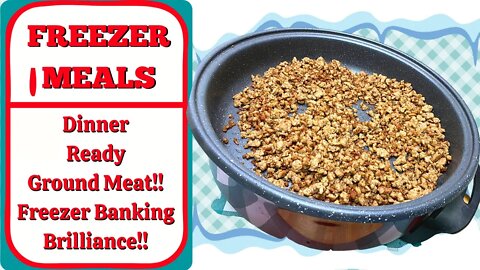
DINNER READY GROUND MEAT!! FREEZER BANKING BRILLIANCE!!
Today we are wrapping up our two month theme of freezer meals, freezer banking and freezer prep. This final topic will focus on dinner ready ground meat. I say this in the broad sense because you can use whatever ground meat your family loves best. Beef, pork, turkey, chicken, bison, elk or venison. Whatever you use the most. Browning it up in a skillet and seasoning it neutrally so it can be frozen and used in quick meals on evenings when you are just too busy to deal. Having pre cooked ground meat in the freezer is a great option for quick nights to get dinner on the table in a hurry. I think that you will enjoy using this trick as I have for many years!
We all know how to brown up some ground meat. I will not insult you and think you don't. However just like my mom always reminded me, we are never too old to learn something new and maybe this will help you in the long run. So toss that ground meat in a skillet and get it cooking. I like to use my electric skillet and turn it on the hottest temperature. This will take a lot of the time out of the equation because the electric skillet keeps a constant temp. I like to break the meat up using a plastic masher or "spurtle" that is intended for this job. I used to think they were silly, but honestly, since I got one, I love it! So while you are grabbing yourself an electric skillet, grab yourself one of these meat mashers too. You'll be glad you did!
I am going to cook my ground beef and pork mixture just until most of the water has cooked away and the meat is just beginning to brown in the remaining fat. This is the time I will season the meat using about a teaspoon of beef bullion powder, fine ground black pepper and garlic powder. Equal parts of each make for a flavorful base for whatever you will use this meat for after you freeze it. Tonight I am going to make tacos with mine. I will not be freezing this but wanted to share what I feel is a really great and time and money saving tip with you.
My mom always said why bother browning the meat if you are not going to brown the meat? Something that she often drove home when teaching me to cook. If the meat is still swimming in a good bit of liquid, chances are you have not given it enough time to cook. If you see a lot of liquid and your ground meat sounds like boiling water it is simmering. Only when the water has cooked away and the fat begins to sizzle like you are cooking bacon is it perfection. So remember: we want it to sizzle, not simmer! A quick and easy mantra to remember to have it come out great every time.
Once the ground meat is completely cooked you can spoon it out onto a baking sheet lined with parchment to cool. Spreading it out in a single layer will help this to happen quickly. Then you can pop it into a freezer bag, label it and pop it into the freezer. The next time you have a night when you have to much to deal with and dinner was the last thing on your mind, pull that ground meat out, season it up and make some tacos, spaghetti, chili, sloppy joes, chili mac or cheeseburger macaroni. Lots of options here!
I hope that this easy tip gives you some helpful ideas of how you can use and apply this in your own meal planning and freezer banking! I hope you give it a try and I hope you love it!
Happy eating!
Get my cookbooks here: http://bit.ly/1czqM5R
Business Inquiries can be sent to:
info@noreenskitchen.com
Check me out on social media!
Facebook: http://on.fb.me/12bdibt
Twitter: @noreenskitchen
Instagram: http://bit.ly/12bdqrp
Google + http://bit.ly/1o5GMYy
***MAILING ADDRESS****
Noreen's Kitchen
PO Box 14173
New Bern, NC 28561
Have a question for me? Send me an email:
info@noreenskitchen.com
Noreen's Kitchen Community Guidelines (The Rules)
http://bit.ly/2i7VocU
Any links to Amazon are, in many cases, affiliate links.
Produced by Noreen's Kitchen ©2008-2016 all rights reserved All embeds must live link to Noreen's Kitchen channel. No Editorial Excerpts without permission, Violators agree to pay royalties, all court costs, all collections & all lawyers fees.
33
views

CHICKEN ALFREDO PIZZA!! QUICK DINNER OR LUNCH IDEA!!
Let's use one of those par baked pizza crusts we made last week and cook us up some lunch or quick dinner! Today I am sharing one of my family's favorite pizzas! This chicken alfredo pizza is really delicous and you can fix it up how you like with whatever toppings you prefer. I am using jarred Alfredo sauce because it is one of my regular pantry staples and it makes for super easy quick meal fixes. You can feel free to make your own, but it's pizza and why make it harder than it has to be? With these frozen crusts, all you need to do is top and bake! This one is a great way to use up some leftover chicken and then toppings that you love the most! I promise this one will not disappoint!
I am using my pizza crust, straight from the freezer. No need to thaw out in advance. I spread a generous amount of our favorite Alfredo sauce over the top. I would say I used a bit better than 1/2 cup. Sprinkled with a bit of grated Parmesan and then with a light sprinkle of Italian blend cheese. Then the magic happens.
I needed to sautee up some chicken breast for my dinner later in the day and since I knew I wanted to make this video for you, I took it as an opportunity to do everything early. Three chicken breasts were butterflied, seasoned with my favorite chicken seasoning and some garlic pepper and cooked in a skillet with a bit of oil. After they were done, I popped some sliced mushrooms in the pan with a couple tablespoons of butter and a bit of minced garlic and seasoned that up with some Italian seasoning. I cooked them until they were tender and the water had cooked away. Now we are ready to build our pizza!
I used about 3/4 of a cup of the cubed chicken breast as well as about the same amount of the sauteed mushrooms over the top of the pizza. Then I sprinkled more of both the Italian blend grated cheese as well as the Parmesan. You can feel free to season this with some pizza seasoning, more Italian seasoning or a healthy pinch of red pepper flakes. Since my chicken and mushrooms were both highly seasoned, I did not add anything more. This was popped into a hot oven. About 375 degrees. You will want your oven to be well preheated so that your crust gets nice and crisp. Baked for about 20 minutes or until the crust was golden brown and the cheese was well melted.
Like I say with just about anything I take out of the oven. Let this rest for a few before serving to avoid any roof of the mouth burns. This makes everyone happier. When I make these crusts in the quarter sheet pans, I like to cut them into 6 nice size slices. I do this by cuting into thirds across the short side and then once down the middle. Easy. You can always cut this into wedges by slicing in triangles if you wanted to get super fancy.
This is just one way to enjoy pizza out of the thousands that exist. Everyone loves theirs. Some people are cheese only and some people love theirs with pineapple, olives and double jalapenos, like Javi on Castle. (we are currently watching that show) But whatever you choose it will be delicious.
I hope you give this chicken Alfredo and mushroom pizza a try sometime soon and I hope you love it!
Happy Eating!
Get my cookbooks here: http://bit.ly/1czqM5R
Business Inquiries can be sent to:
info@noreenskitchen.com
Check me out on social media!
Facebook: http://on.fb.me/12bdibt
Twitter: @noreenskitchen
Instagram: http://bit.ly/12bdqrp
Google + http://bit.ly/1o5GMYy
***MAILING ADDRESS****
Noreen's Kitchen
PO Box 14173
New Bern, NC 28561
Have a question for me? Send me an email:
info@noreenskitchen.com
Noreen's Kitchen Community Guidelines (The Rules)
http://bit.ly/2i7VocU
Any links to Amazon are, in many cases, affiliate links.
Produced by Noreen's Kitchen ©2008-2016 all rights reserved All embeds must live link to Noreen's Kitchen channel. No Editorial Excerpts without permission, Violators agree to pay royalties, all court costs, all collections & all lawyers fees.
56
views
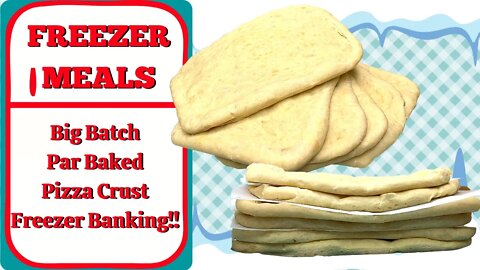
PAR BAKED PIZZA CRUST!! EASY FREEZER BANKING IDEA!!
Today I am sharing something I have been working on for a while and have been wanting to share. Now is the time! Everyone loves pizza. We love to make homemade pizza but sometimes it's just no fun to have to mix up the dough for the crust and wait and roll and then build. So I have figured out a way to have homemade, par baked pizza crust for the freezer. This is perfect for a quick and easy dinner or lunch on the fly. These crusts are baked just enough to set the dough then cooled, and frozen. When you are ready to have pizza, pull one out of the freezer and build your pizza. No waiting necessary before baking. I know you are going to love this version of homemade convenience food right from your own freezer!
I am using my tried and true, big batch pizza crust recipe that I have been making for years and years. People who have tried this recipe say it is their go to as well. It is fluffy and chewy and perfect for our family. You can also use this pizza dough to make cinnamon sticks, bread sticks, pizza rolls, garlic knots and more. It is super versatile and uses only a few basic pantry ingredients and it goes together quick. You don't even have to wait an hour for it to rise before making your pies.
Flour, sugar, salt, yeast and water with a bit of olive oil is all that goes in there. Mixed up in your dough bowl by hand or with your mixer. I do recommend a larger professional model mixer for this amount of dough as a smaller stand mixer will not be able to handle this recipe without straining and possibly breaking your gear box. So be careful. This recipe is easily halved as well if you need to.
Once the dough is mixed up, allow it to rise in a warm place, covered for at least 30 minutes. If it goes longer there is no need to worry. Pizza dough is better the longer it ferments the first time around. Once the first rise is complete, knock down the dough gently to deflate than give it a few kneads to remove a good amount of the air. Then you can divide this up into portions. I divided mine into 6 somewhat equal portions that I eyeballed. You can, of course use a kitchen scale for more precise sizing.
I am using my quarter sheet pans, which are approximately 9x13 in size. Making these pizza crusts rectangular is easier to store and much less awkward to find a place for in the freezer once finished. I sprayed each clean pan with a bit of vegetable oil then pressed the dough into it. If your dough is pulling back when pressing in the pan, set it aside for five minutes to allow the gluten to relax then it should spread more easily for you. Remember, these don't need to look factory perfect. They are homemade and handmade and it's alright for them to look that way. If some of your pizza crusts look more like a ameoba, then so be it. It will still taste great.
Once the dough is pressed into the pans, you can bake at 350 degrees for 10 to 12 minutes or just until the crusts have risen and are dry to the touch and they bounce back with pressed with your finger. Then you can simply remove from the oven and transfer the crusts to a cooling rack. You will want these to cool completely before you layer between parchment and pack either in a 2 gallon zip lock bag or wrap individually with plastic wrap before freezing.
When you are ready to make pizza, simply pull the crust from the freezer, lay on a baking sheet and top with sauce and your favorite toppings and bake in a 400 degree oven for 15 to 20 minutes or until the crust is golden and the cheese has melted and browned a bit. If you like a flavored crust, you can brush with either olive oil or melted buttter and spirnkle with garlic salt, everything bagel seasoning or your favorite herbs and spices.
These crusts are great for making quick bread sticks, or cinnamon sticks. Pull from the freezer, brush with melted butter and season with cinnamon sugar or garlic powder and parsley and boom! You have all those delicious take out treats for a fraction of the cost and since you did all the work at once, you can have as many crusts in your freezer as you like for as long as you need. These will keep well in the freezer for up to three months.
I hope you give these par baked pizza crusts a try sometime soon and I hope you love them!
Happy Eating!
You can find a printable version of this recipe here: http://bit.ly/37y5vQe
Get my cookbooks here: http://bit.ly/1czqM5R
Business Inquiries can be sent to:
info@noreenskitchen.com
Check me out on social media!
Facebook: http://on.fb.me/12bdibt
Twitter: @noreenskitchen
Instagram: http://bit.ly/12bdqrp
Have a question for me? Send me an email:
info@noreenskitchen.com
Any links to Amazon are, in many cases, affiliate links.
Produced by Noreen's Kitchen ©2008-2016 all rights reserved All embeds must live link to Noreen's Kitchen channel. No Editorial Excerpts without permission, Violators agree to pay royalties, all court costs, all collections & all lawyers fees.
58
views
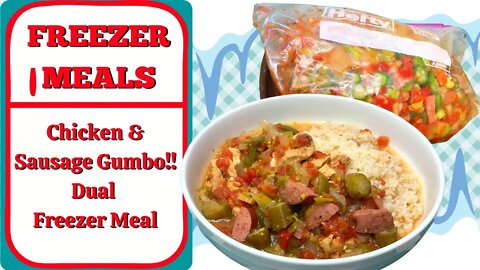
CHICKEN & SAUSAGE GUMBO!! DUAL FREEZER MEAL!!
Today we continue our freezer meal journey with one of my families very favorite slow cooker dinners. Chicken and sausage gumbo may not be a gumbo in the traditional sense, but it is very tasty and easy to make on the fly with ingredients on hand or turn into a freezer meal when doing your monthly prep and one that gives you another pre cooked meal for later that you can freeze and reheat for a night when there is just too much to do. Thus why I am calling this a "dual" freezer meal. I know that your family is going to love this flavorful simple stew filled with chicken, sausage and veggies and I know that you will love knowing that you are cooking once for dinner at least twice!
I have made this dinner into a video before. A couple of years ago. It was a bit of a different ingredient list. But this one that I am sharing today, with a pared down ingredient list but still as much flavor is just as delicious. I have swapped out the boxed stock for chicken and tomato bullion powder which is nice, especially when making a freezer meal because you don't have to deal with the bulk. My family loves this meal from fresh and reheated. I never get any complaints. In fact the night I made this my daughter Micah was having one of her nursing school clinical days and on her way home asked what was for dinner and when I told her and texted her a picture she replied with an enthusiastic "Hell Yeah!". That is just how good this is!
Basically this freezer meal goes together in a freezer bag just as easily as it would if you were tossing everything into your slow cooker. The benefit of having the freezer meal on hand is for when you are on your way out the door for work or a day of tasks and you want to return to a prepared meal. Making these in advance is a great way to keep on top of both your schedule and your sanity not to mention your budget! It encourages you to use what you have as well as discouraging you from running for take out on a night when you are simply too tired to think about cooking. With this all you have to do is steam some rice, or grab some precooked rice from your freezer and boom! Dinner with no fuss, no muss and literally no thinking!
I am using boneless skinless chicken breast, but you could also use precooked chicken, which would make this even easier but I prefer the fresh. I am also using our favorite smoked sausage cut into half moons. Tons of veggies go in here. Frozen okra, green bell peppers, celery, onion, garlic and a handful of seasonings of your choice. I used my favorite chicken seasoning as well as a bit of Italian seasoning and some marjoram which is like oregano's low key cousin. Some canned tomatoes and green chilies along with petite diced tomatoes go in as well and the bullion powder. I added a couple cups of water to the mix and we are good to go.
I have included all the cooking instructions for you from fresh frozen as well as from cooked frozen for both the slow cooker and the pressure cooker. I hope that you will take time to refer to that using the link below.
I hope you give this chicken and sausage gumbo a try whether it is for a freezer meal or just an easy slow cooker meal any night of the week and I hope you love it!
Happy Eating!!
Get a printable version of this recipe here: http://bit.ly/2NyeQAf
Get my cookbooks here: http://bit.ly/1czqM5R
Business Inquiries can be sent to:
info@noreenskitchen.com
Check me out on social media!
Facebook: http://on.fb.me/12bdibt
Twitter: @noreenskitchen
Instagram: http://bit.ly/12bdqrp
Google + http://bit.ly/1o5GMYy
***MAILING ADDRESS****
Noreen's Kitchen
PO Box 14173
New Bern, NC 28561
Have a question for me? Send me an email:
info@noreenskitchen.com
Noreen's Kitchen Community Guidelines (The Rules)
http://bit.ly/2i7VocU
Any links to Amazon are, in many cases, affiliate links.
Produced by Noreen's Kitchen ©2008-2016 all rights reserved All embeds must live link to Noreen's Kitchen channel. No Editorial Excerpts without permission, Violators agree to pay royalties, all court costs, all collections & all lawyers fees.
40
views

TIRAMISU POKE CAKE!! VALENTINE'S DAY DESSERT IDEA!!
Since Valentine's day is coming up this weekend, I thought it would be fun to share a decadent and delicious dessert option that you can make for your sweetheart or your family. This Tiramisu poke cake is super simple. It uses pantry staples and is so deliciously inspired by one of my favorite special ocassion desserts, I just know you are going to love this! The coffee, cream and tangy taste of a traditional tiramisu, flipped into this inspired poke cake is near perfection! I mean, who doesn't love a poke cake? I know you are going to love this one!
First of all, if you are not familiar with a poke cake, let me enlighten you. To the best of my memory, I believe poke cakes came on the scene some time in the 70's. J-ello was a huge nostalgia brand and still is today. Instant pudding and flavored gelatin were all good things, along with frozen whipped topping you could make a dessert fit for a king that your family would love and nobody would refuse at a church potluck. Bake a cake, poke some holes in it and pour some not quite set mixed up instant pudding over that bad boy. Then refrigerate and top with a container of cool whip. what could be bad about that? Back then your choices for flavors of cake mix, pudding or gelatin were limited. Now they are vast with everything from your every day yellow and devil's food cake to more exotic strawberry or coconut options. No matter what you choose it's going to be good!
This particular poke cake is inspired by one of my top three desserts of all time, Tiramisu. It means "pick me up" in Italian and the traditional version requires the making of a cooked custard, lady fingers, espresso, simple syrup and a whipped marscapone cream on top. Very decadent and very delicious. But what if you could make this same flavor profile in an old fashioned poke cake? Well, I'm telling you this is amazing!
Start by baking your favorite boxed yellow cake mix in a 9x13 pan. I used Duncan Hines butter recipe yellow and made it with 1 cup of milk, 1 stick of softened butter and 4 eggs. This goes against the box instructions, but over time I have perfected this quick and easy pound cake version of a box mix. You should use what you have, what you love and follow the box instructions. The cake will serve as the base for the creamy filling and topping.
Once your cake is completely cooled, you will want to take the handle of a wooden spoon and poke several holes in your cake. I might add that I recommend that you give those holes a good swirl, to be sure that they are large enough. You can also use a boba straw instead of the spoon handle. this will push the cake out and leave a lovely sponge for the filling.
Mixing up the filling could not be easier. I started with 2 small boxes, 4 serving size each, of vanilla instant pudding. I added 1/4 cup of instant coffee granules. I like the Anthony's organic brand that I get from Amazon. Then I add 2 cups of milk and 2 cups of heavy cream. You can use all milk, or all half and half if you like. I enjoy the body and texture of the pudding using the cream or half and half and my mom always used this method to mimic homemade pastry cream without the fuss or work. Trust me here, it really is good! I used my electric mixer to whip this up just until blended and slightly thickened.
Get my favorite instant coffee here: https://amzn.to/3jK2QHS
Now you can slowly pour this mixture over your pokey cake. Use a spatula to get all that goodness down in those holes and pour as much as your pan will receive. You may end up with extra and you can just pour that into a container and allow it to set in the fridge. It is an amazing coffee creme'! Put your cake in the fridge while you make your topping.
The topping is made with cream cheese which replaces the more traditional and expensive marscarpone in Tiramisu. The cream cheese and heavy cream with just a touch of sugar are whipped up well until stiff peaks form then spread gently over the top of the slightly chilled cake. Don't worry if things bleed into each other, just get it nice and smooth then hit the top with a couple tablespoons of cocoa powder. TaDa! Tiramisu poke cake! Refrigerate for at least two hours and serve with abandon!
I hope you give this poke cake a try sometime soon and I hope you love it!
Happy eating!
Get a printable version of this recipe here: http://bit.ly/37cn0p4
Get my cookbooks here: http://bit.ly/1czqM5R
Business Inquiries can be sent to:
info@noreenskitchen.com
Check me out on social media!
Facebook: http://on.fb.me/12bdibt
Instagram: http://bit.ly/12bdqrp
Have a question for me? Send me an email
info@noreenskitchen.com
Any links to Amazon are, in many cases, affiliate links.
Produced by Noreen's Kitchen ©2008-2016 all rights reserved All embeds must live link to Noreen's Kitchen channel. No Editorial Excerpts without permission, Violators agree to pay royalties, all court costs, all collections & all lawyers fees.
63
views
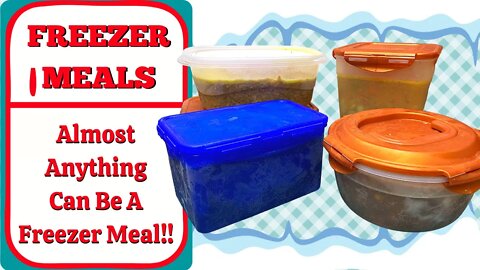
ALMOST ANYTHING CAN BE A FREEZER MEAL!! PLUS SURGERY UPDATE!!
Today I thought we could have a bit of a chat and discuss how just about anything can become a freezer meal. Whether you bulk prep in advance the raw packages for later slow cooking, baking or pressure cooking or maybe you like to bulk cook a hot meal and have enough left for one or two more meals later. These are all ways to stock your freezer with easy and delicious options for nights when life gets in the way or when you just don't have the time or inclination to cook a full blown meal but still need to get dinner on the table. I hope you will take these tips and tricks to heart and I hope they help you get the most out of your freezer banking!
I am also sharing a bit of a surgery update now that I am two weeks post procedure. I think you will be so happy with the news and I wish to take a moment to thank everyone from the doctors and nurses to my family, my church family and all of you for covering me in prayer, encouragement and good thoughts during this very scary time between my diagnosis and my outcome. I have never felt more loved and cared for and I thank you!
Get my cookbooks here: http://bit.ly/1czqM5R
Business Inquiries can be sent to:
info@noreenskitchen.com
Check me out on social media!
Facebook: http://on.fb.me/12bdibt
Twitter: @noreenskitchen
Instagram: http://bit.ly/12bdqrp
Google + http://bit.ly/1o5GMYy
***MAILING ADDRESS****
Noreen's Kitchen
PO Box 14173
New Bern, NC 28561
Have a question for me? Send me an email:
info@noreenskitchen.com
Noreen's Kitchen Community Guidelines (The Rules)
http://bit.ly/2i7VocU
Any links to Amazon are, in many cases, affiliate links.
Produced by Noreen's Kitchen ©2008-2016 all rights reserved All embeds must live link to Noreen's Kitchen channel. No Editorial Excerpts without permission, Violators agree to pay royalties, all court costs, all collections & all lawyers fees.
10
views
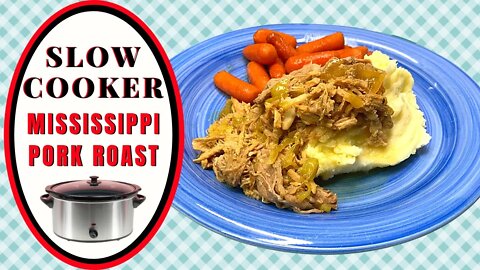
MISSISSIPPI PORK ROAST SLOW COOKER MEAL IDEA! FREEZER MEAL COMPATIBLE!!
Today we are going to make a delicious slow cooker recipe that can easily be converted, in advance, to a freezer meal. This Mississippi pork roast is a spin on the wildly popular Mississippi roast that took the internet by storm a couple of years ago. I have made this using a pork loin and the basic ingredients with a few added flavorizers to take this over the top delicious. Slow cook this all day to fall apart perfection and serve however you like. This has a lot of possibilities aside from just popping this in a bun. I know your family is going to love this spin on a favorite! Plus it's super budget friendly!
I think this is another opportunity to show that almost any meal can be considered for freezer banking. This one is good for either the before prep or the leftover freezer banking opportunity! If you want to prep the slow cooker meal in advance in bulk, simply toss all the ingredients into several zip lock bags. Use our bread pan trick shared in other videos and freeze for up to four months. Then when ready just pop in the slow cooker for 6 to 8 hours and boom! Your main dish is done. Just add sides or fixins for a quick and easy dinner!
My Mississippi roast starts with a pork loin roast. To be more specific it starts with half of a whole pork loin. I find that purchasing the whole loin on sale is the most economical way. I get that home, cut it in half or into some butterfly chops and roast and I have great options for later down the road. Buying in bulk when you hit a sale is always a great idea if you have the freezer space!
I am popping the roast into my slow cooker frozen. You should check with your owners manual to see if that is ok for yours. I added one dry packet of Au Jus gravy mix. The equivalent of one dry packet of Ranch dressing. In my case I used my homemade, big batch ranch dressing mix and used 3 tablespoons. Just sprinkle all that goodness right on top. This is the seasoning for the dish and nothing more is required. Next a large onion, sliced thin, a couple cloves of minced garlic and one jar of sliced pepperoncini pickled banana peppers with their liquid. You can choose to drain yours if you like. I think that this briny juice adds a great flavor here and cuts through the richness of the pork. To top things off I place half a stick of butter cut into pats on top of the roast then drizzle a cup of water in around the roast. Now all you have to do is set it and forget it. I cooked my on high for about 7 hours until it was tender enough to submit to my tongs and just fell apart.
I served this over some homemade mashed potatoes with some glazed carrots on the side. You can do so many things here! It was delicious the way we ate this for supper. This is great on a sandwich, tucked into a hoagie roll with melted provolone and marinara sauce. Used as the base for a burrito bowl, over rice with cheese and all the toppings you love. Add this to some brothy ramen for a delicious spin on your average noodle bowl. Use this for taco filling, serve inside of a baked potato or even as an open faced "hot" sandwich sprinkled with some cheddar cheese. Your imagination is your only limit here. This is a super versatile dish that can go a lot of places.
If you want to, you can even freeze these leftovers after they are cooked and have them at the ready for a super quick reheatable meal for a night when you really run out of time and patience. It's always great to have those on hand. We all have nights like that and meals ready in the freezer can make or break us!
I hope you give this Mississippi pork roast a try some time soon and I hope you love it!
Happy Eating!
You can get a printable version of this recipe here: http://bit.ly/3aylPRw
Get my cookbooks here: http://bit.ly/1czqM5R
Business Inquiries can be sent to:
info@noreenskitchen.com
Check me out on social media!
Facebook: http://on.fb.me/12bdibt
Instagram: http://bit.ly/12bdqrp
***MAILING ADDRESS****
Noreen's Kitchen
PO Box 14173
New Bern, NC 28561
Have a question for me? Send me an email:
info@noreenskitchen.com
Noreen's Kitchen Community Guidelines (The Rules)
http://bit.ly/2i7VocU
Any links to Amazon are, in many cases, affiliate links.
Produced by Noreen's Kitchen ©2008-2016 all rights reserved All embeds must live link to Noreen's Kitchen channel. No Editorial Excerpts without permission, Violators agree to pay royalties, all court costs, all collections & all lawyers fees.
117
views
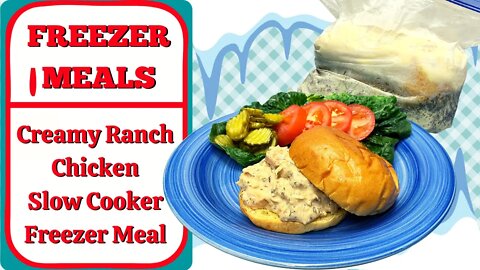
CREAMY RANCH CHICKEN FREEZER MEAL IDEA!!
Today we are taking one of my family's favorite slow cooker meals and turning it into a quick and convenient freezer meal that is ready to go whenever you are! This creamy ranch chicken (Also known on the internet as Crack Chicken) is a fabulous option for a night when everyone seemingly has to eat separately. This is also a great option for meal sharing or for pot luck taking. This chicken is slow cooked in a creamy sauce that is thick enough to be popped onto a roll and eaten as a sandwich or as a meal served over the side of your choice. If you have never had this dish, you are in for a real treat!
Since I work from home, the idea of creating freezer meals was never at the forefront of my thinking. Yes they are convenience and yes I have them in my freezer sometimes. But honestly I pop these ingredients in the slow cooker, frozen chicken and all and just wing it most days. Everyone has their favorite dishes. Thinking ahead I think is key. So even if you are not making this specifically as a freezer meal, and just making this as a slow cooker dish, perfect! If you have leftovers, pop those in freezer safe containers and freeze for the next time you are pressed for time and just pull this out and heat it up. The magic of having prepared meals, leftovers included in the freeze takes a lot of stress off of you as a provider and helps you to enjoy the family more without running to the take out line in a pinch. Anything can be turned into a freezer meal. Whether you prep it as one or you freeze as a main course that is already cooked. Start thinking like that an your possibilities are endless and you will always have delicious meals at your fingertips!
This starts with boneless skinless chicken breast. You can also sub in chicken thigh here if you prefer. Some sliced onion and minced garlic add aromatic flair. The key to this is what you may consider a copious amount of ranch dressing mix and cream cheese, but trust me on this one, it is perfection! I am using my homemade big batch ranch dressing mix but you could use the large container of commercial blend from the warehouse store. Two bricks of cream cheese are what make the magic happen here and create a delicious creamy sauce that will make your chicken sing!
Ranch dressing mix recipe here: https://youtu.be/ej2z3-Okgxs
I popped all of these ingredients into a gallon size zip lock bag and did my best to get all the air out. This is another opportunity to use the bread pan trick and freeze until solid in the pan then remove and store in your freezer for up to three months. Also note, that this is only one time that I will advocate for freezing cream cheese. It is not recommended and actually printed on the box not to freeze it. However, since this is going to be cooked a long time and will blend with the juices from the chicken and vegetables along with a bit of water this will turn out fine. No worries.
When ready to cook from frozen, simply pop in your slow cooker and add 1/4 to 1/2 cup of water and cook on low for 6 to 8 hours. Check about halfway and start to break things up and give things a stir. It may look a fright, but I promise in the end it will all come together. Once the meat starts to become tender the sauce will be easier to stir and become a creamy, cohesive blend.
We like to serve this on brioche buns as a sandwich. Rick likes to add Frank's Red Hot to his and have it buffalo style. I like to pop some bread and butter pickles on my for a little sweet with this savory ranch chicken. You can also serve this over rice, noodles or mashed potatoes as a great main course. Add a bag of frozen country style veggies for a creamy ranch spin on chicken a'la king! No matter how you serve this I know your family will enjoy it and ask for it again and again!
I hope you give this creamy ranch chicken freezer meal idea a try sometime soon and I hope you love it!
Happy Eating!
Get a printable version of this recipe here: http://bit.ly/3pIoAWE
You can find some of the items used in this video on my Amazon store page here: https://amzn.to/3hSnncs
Get my cookbooks here: http://bit.ly/1czqM5R
Business Inquiries can be sent to:
info@noreenskitchen.com
Check me out on social media!
Facebook: http://on.fb.me/12bdibt
Twitter: @noreenskitchen
Instagram: http://bit.ly/12bdqrp
Google + http://bit.ly/1o5GMYy
***MAILING ADDRESS****
Noreen's Kitchen
PO Box 14173
New Bern, NC 28561
Have a question for me? Send me an email:
info@noreenskitchen.com
Noreen's Kitchen Community Guidelines (The Rules)
http://bit.ly/2i7VocU
Any links to Amazon are, in many cases, affiliate links.
Produced by Noreen's Kitchen ©2008-2016 all rights reserved All embeds must live link to Noreen's Kitchen channel. No Editorial Excerpts without permission, Violators agree to pay royalties, all court costs, all collections & all lawyers fees.
69
views
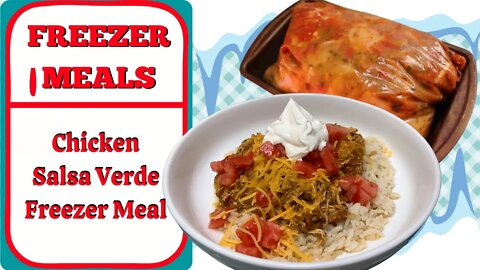
CHICKEN SALSA VERDE FREEZER MEAL IDEA!!
Another installment for our current theme! This freezer meal is one of my family's favorites. Chicken salsa verde. super easy to make, whether it is for a freezer meal or not! This goes together super fast and you can pop it in your slow cooker or pressure cooker and dinner is on the way! Tender, shredded chicken in a mildly spicy green chili salsa with tomatoes and some of my homemade taco seasoning. This is the perfect filling for a burrito, a sauce for a "wet' burrito or chimichanga, a great way to fill a tostada or taco or as a base for a simple burrito bowl, which is what I am showing you in today's video. I know that if tacos are a favorite than this chicken salsa verde is going to be a winner in your house!
This is so easy to put together! I used boneless skinless chicken breast that I cut into manageable pieces. You can also use chicken thighs for this dish as well or if you are so inclined, you could even use some cubed pork butt or pork loin to make a makeshift pork green chili. This gets put in a zip top bag with a sliced onion, some garlic, a 24 ounce jar of your favorite green chili salsa as well as an 8 ounce can of tomatoes with green chilis and rounded out with a generous portion of taco seasoning. I used 1/2 cup of my homemade version but you can use a few packets of whatever is your favorite. If you like yours a bit spicier, toss in some chopped chipotle chilies and enjoy!
This then gets sealed into the bag and massaged for a moment to get everything incorporated. I like to then pop the sealed bag into a loaf pan to freeze overnight. Then you can remove it from the pan and store it in your freezer for maximum space saving. I like to use the loaf pan method when I know I will be using my slow cooker because the loaf pan is smaller than my vessel and I know that it will easily slide in without being too large.
Now when you are ready to cook this just remove the frozen dinner from the freezer and run under some warm water. This will help loosen the bag from the contents. It should slide right out into your slow cooker or pressure cooker. If not grab your kitchen shears and clip the side and open it up. You probably weren't going save the disposable bag anyway.
You can cook this from frozen in your slow cooker on low between 6 to 8 hours. Or on high for 4 to 6 hours. If you prefer to cook your freezer meal from a thawed state, just thaw in the refrigerator overnight and pour into the slow cooker and set it on low for 4 to 6 hours. When the chicken is soft enough to break apart with a tongs you are ready to go. Just mash it up and the meat should easily fall apart into shreds that are perfect for a taco filling.
If you would like to make this in your pressure cooker then I would use the meat setting and if you are cooking from frozen set for 60 minutes on medium pressure. Be sure to add 1/2 cup of water to the vessel because your cooker won't work without it! If you like to thaw your freezer meals overnight then you can cook this for 40 minutes at medium pressure on the meat or stew setting.
This dish is a family favorite in our house. It's easy and cheap and I always have the ingredients on hand. You can easily throw this together quickly in the morning using frozen chicken and then pour over the rest of the ingredients. It will cook up just the same. A freezer meal is a great thing to have on hand, but having the ability to toss everything in the slow cooker or pressure cooker at a moment's notice is a great way to deal with things as well!
I hope you give this chicken salsa Verde freezer meal a try sometime soon and I hope you love it!
Happy Eating!
You can get a printable copy of this recipe here: http://bit.ly/3p4rdlp
You can find some of the items used in this video on my Amazon marketplace storefront. It costs you nothing but if you purchase using my link I will get a small commission that will help the channel grow. https://amzn.to/3hSnncs
Get my cookbooks here: http://bit.ly/1czqM5R
Business Inquiries can be sent to:
info@noreenskitchen.com
Check me out on social media!
Facebook: http://on.fb.me/12bdibt
Twitter: @noreenskitchen
Instagram: http://bit.ly/12bdqrp
Google + http://bit.ly/1o5GMYy
***MAILING ADDRESS****
Noreen's Kitchen
PO Box 14173
New Bern, NC 28561
Have a question for me? Send me an email:
info@noreenskitchen.com
Noreen's Kitchen Community Guidelines (The Rules)
http://bit.ly/2i7VocU
Any links to Amazon are, in many cases, affiliate links.
Produced by Noreen's Kitchen ©2008-2016 all rights reserved All embeds must live link to Noreen's Kitchen channel. No Editorial Excerpts without permission, Violators agree to pay royalties, all court costs, all collections & all lawyers fees.
69
views
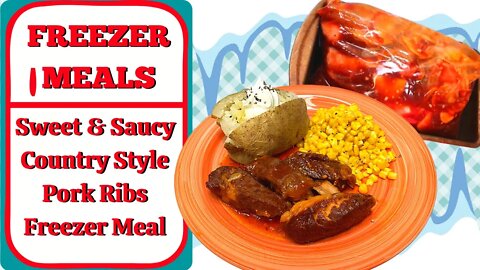
SWEET & SAUCY COUNTRY STYLE PORK RIBS FREEZER MEAL IDEA!!
Today we continue with another excellent option for freezer banking! This time we are making a sweet and saucy country pork rib freezer meal. These ribs aren't really ribs, per se. They are boneless pork loin or shoulder that has been cut into generous flanks. These are great for making in the slow cooker or the pressure cooker and can easily be done in multiples if you like to make batches at a time. This uses your favorite barbecue sauce as well as some additional ingredients to make a delicious main course that you can pair with anything! I know this will quickly become a family favorite for it's sweet savory appeal and you will love the budget friendly factor for putting a delicious protein on the table!
I have started with 3 pounds of boneless country style pork ribs. One small, 16 ounce bottle of your favorite barbecue sauce. I usually end up pouring this into a measuring cup then putting a bit of water in the bottle and shaking out the rest. You paid for it, you should use it! Get every bit of goodness out of there! I ended up with approximately 2.5 cups of sauce. I also added some sliced sweet onion a bit of minced garlic and a bit of liquid smoke. This is optional if you are not a fan but I have to tell you this really takes the flavor over the top. I also added a sprinkling of brown sugar to the mix.
Note that if you are on a sugar restricted diet than you should seek out your favorite sugar free barbecue sauce and use a brown sugar substitute in your version. This will taste just as fabulous I promise!
Everything goes in the bag. Seal it up then give it a good little massage to get all the goodness mixed together. I like to pop this into a bread pan and freeze. This will help the meal freeze in a shape that is more conducive to your slow cooker or your pressure cooker. Instead of freezing flat, I prefer to do it this way. You should do what works best for you and the space you have available.
When you wish to cook this you can pop this into your slow cooker frozen and set it on low for 6 to 8 hours until bubbly and tender. If you thaw this out for 24 hours before cooking you can set this on low for 4 to 6 hours instead.
Cooking in your pressure cooker? From frozen you can do 1 hour on medium pressure or from thawed you can do 30 minutes on medium pressure. Ours were never frozen and we cooked them for 40 minutes on medium pressure and they were perfectly delicious! Of course these times may vary depending on your make and model of pressure cooker as well as the amount you are intending to prepare so keep this in mind and always consult the manual for more guidelines.
In the end you can serve this on it's own like I did with a baked potato and a vegetable or you can shred this and serve it with cole slaw on buns for some fab bbq pork sammies. Everyone loves those!
I hope this gives you another freezer meal idea that will make your family happy. I hope you give this a try some time soon and I hope you love it!
Happy eating!
Get a printable version of this recipe here: http://bit.ly/38Xkl3G
You can find some of the items used in this video on my Amazon marketplace storefront. It costs you nothing but if you purchase using my link I will get a small commission that will help the channel grow. https://amzn.to/3hSnncs
Get my cookbooks here: http://bit.ly/1czqM5R
Business Inquiries can be sent to:
info@noreenskitchen.com
Check me out on social media!
Facebook: http://on.fb.me/12bdibt
Twitter: @noreenskitchen
Instagram: http://bit.ly/12bdqrp
Google + http://bit.ly/1o5GMYy
***MAILING ADDRESS****
Noreen's Kitchen
PO Box 14173
New Bern, NC 28561
Have a question for me? Send me an email:
info@noreenskitchen.com
Noreen's Kitchen Community Guidelines (The Rules)
http://bit.ly/2i7VocU
Any links to Amazon are, in many cases, affiliate links.
Produced by Noreen's Kitchen ©2008-2016 all rights reserved All embeds must live link to Noreen's Kitchen channel. No Editorial Excerpts without permission, Violators agree to pay royalties, all court costs, all collections & all lawyers fees.
28
views
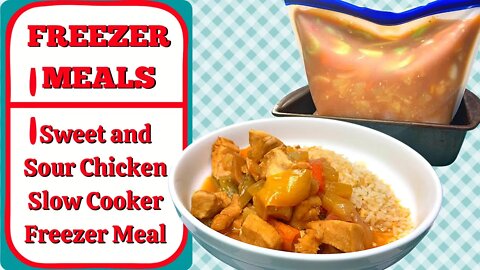
SWEET AND SOUR CHICKEN SLOW COOKER FREEZER MEAL!!
Today I am sharing a freezer meal that you can prepare and make in either your slow cooker or pressure cooker. This makes it super simple to plan your weekly menus and get good home cooked meals on the table. It also helps you budget. Not to mention make delicious food your family will love! Today we are sharing a sweet and sour chicken that can be made up and frozen in a zip lock bag then popped in your slow cooker either frozen or thawed and cooked all day. You can also thaw this during the day and pop it in your pressure cooker when you get home. Steam some rice and a fresh veggie and dinner is served!
This sweet and sour chicken is fresh, delicious and nutritious. Packed with all those delicious flavors from your favorite Chinese restaurant without the cost or the extra calories because this recipe is not fried. This is a super easy way to make a freezer meal that will satisfy! These can be made by the single recipe when menu planning or you can make three or more at one time. That way you always have them on hand for quick meal selection.
This starts with some boneless skinless chicken breast or thigh meat, then the usual suspects for sweet and sour chicken. onions, celery, bell peppers and carrots. I did not have any carrots on hand today so we skipped them. You can add to or take away what you like or don't like. Then the magic is in the sauce! Ketchup, water, vinegar, garlic, lemon grass paste, ginger paste, soy sauce, sugar, brown sugar and corn starch are mixed together and then poured over the meat and veggies in a gallon freezer bag. I am using my reusable ones. NOTE:, please be sure to seal them well or you will end up with a mess like I did.
This can be frozen flat or if you like you can pop it in a loaf pan and freeze it then it will be easier to pop into your slow cooker. You can also divide this up into two separate bags if that makes things easier. Remember Label, label, label!!
I have provided all of the cooking instructions for both slow cooker and pressure cooker as well as from frozen or thawed. This makes for a super easy meal with some steamed rice or even noodles. We love to have roasted broccoli with this as well. You can never really have too many veggies on your plate!
I hope you give this sweet and sour chicken freezer meal a try and I hope you love it!
Happy Eating!
You can find a printable version of this recipe here: http://bit.ly/3nRtkaO
You can find a shopping list of some of the items used in this video on my Amazon store here: https://amzn.to/3hSnncs
Get my cookbooks here: http://bit.ly/1czqM5R
Business Inquiries can be sent to:
info@noreenskitchen.com
Check me out on social media!
Facebook: http://on.fb.me/12bdibt
Twitter: @noreenskitchen
Instagram: http://bit.ly/12bdqrp
Google + http://bit.ly/1o5GMYy
***MAILING ADDRESS****
Noreen's Kitchen
PO Box 14173
New Bern, NC 28561
Have a question for me? Send me an email:
info@noreenskitchen.com
Noreen's Kitchen Community Guidelines (The Rules)
http://bit.ly/2i7VocU
Any links to Amazon are, in many cases, affiliate links.
Produced by Noreen's Kitchen ©2008-2016 all rights reserved All embeds must live link to Noreen's Kitchen channel. No Editorial Excerpts without permission, Violators agree to pay royalties, all court costs, all collections & all lawyers fees.
15
views
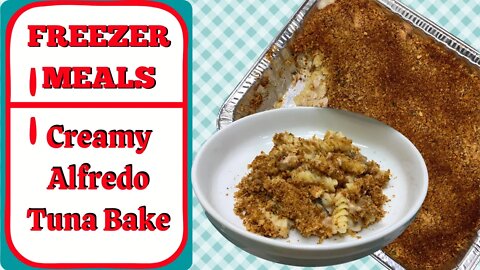
CREAMY ALFREDO TUNA BAKE FREEZER MEAL!!
Nothing says comfort like a delicious casserole. This creamy alfredo tuna bake is a great way to have a delicious comfort food meal and make an extra to store in the freezer for another night. Prepping freezer meals does not have to be a marathon cooking session! It just means making an extra meal's worth when making your evening dinner or menu plan. Today I am making two of these. One for dinner and one for the freezer. It's that easy! When you plan ahead, you can get things done!
This creamy alfredo tuna bake is something I actually created out of an evening where I had no idea what to make for dinner and had not thawed out any meat and went to the pantry to see what I could create. I started with a noodle mix but changed up the pasta, only using the sauce packet. Threw in some canned tuna, mushrooms and parmesan cheese. Then I wondered how I could make this even more delicious and that is where the toasted buttered breadcrumb topping came in. The first time I made this in a skillet on top of the stove. The second time I turned it into a baked casserole and used the alfredo sauce as a base and it is what we are sharing today.
Note that one of these casseroles fed my family of four two main meals. So this easily serves 8 people a generous amount along with a side of fresh salad or steamed veggies and a biscuit or bread if that is what you like. We usually just have the casserole and some veggies and it is perfect for us.
This starts with 12 ounces or almost an entire box of rotini pasta cooked for 8 minutes then drained. I usually use the pasta pot to build the sauce and then mix everything up. I start this with a jar of alfredo sauce. Some milk, canned mushrooms with their liquid, some parmesan cheese and a good amount of Italian cheese blend. I use canned albacore tuna in water and recommend that using the water packed variety and not the oil packed for this casserole. This all gets mixed up. I like to break up the tuna so it is not to mushy. Nice chunks are preferred here. Then the noodles are tossed in and everything is mixed well and poured into a 9 x 13 casserole or foil pan.
Next comes the magic. The buttered breadcrumb topping really elevates this to a new level. This buttered breadcrumb seems so simple, but it really does amazing things for casseroles and even just steamed veggies. My grandmother used these often. They are even amazing tossed in with buttered noodles! Thats some good German engineering in the kitchen right there! I used a mixture of both regular and panko Italian seasoned breadcrumb but you can use what you have on hand. Dry breadcrumb is the best bet here. Toss the crumbs in some melted butter and toss over medium heat until toasted and lightly brown and they have attained a toasty aroma. Then sprinkle over the top of your casserole.
Now is when you decide. Will you bake this to eat now or freeze to eat later. If baking now, just pop in a 350 degree oven for 25 to 30 minutes. If freezing for later, simply layer some parchment on top of the casserole and cover with either a foil lid that fits the pan or tightly seal with two layers of aluminum foil. Be sure to label and write the heating instructions on top of the pan. Sometimes, if I have them on hand, I enjoy putting the wrapped casserole into a 2 gallon zip lock bag for longer storage success. If using the bag, your casserole will remain fresh in the freezer for up to six months. Without it will last for three.
To prepare after freezing you would simply pop the frozen casserole into a 450 degree oven for 1 hour. Then remove the foil lid and parchment and bake for an additional 15 minutes. Be sure the center is hot and the edges are bubbly. Then you are ready to enjoy!
Of course you can make these up into smaller portions to suit your needs. I would probably make this double batch into 4 8x8 casseroles next time and have them fresh baked each time. Although this is delicious reheated in a warm oven there is nothing like eating this fresh baked.
I hope you learned a thing or two about freezer banking on the fly! I hope you give this a try and I hope you love it!
Happy eating!
Get a printable version of this recipe here: http://bit.ly/3soRb5m
Get my cookbooks here: http://bit.ly/1czqM5R
Business Inquiries can be sent to:
info@noreenskitchen.com
Check me out on social media!
Facebook: http://on.fb.me/12bdibt
Instagram: http://bit.ly/12bdqrp
***MAILING ADDRESS****
Noreen's Kitchen
PO Box 14173
New Bern, NC 28561
Have a question for me? Send me an email:
info@noreenskitchen.com
Noreen's Kitchen Community Guidelines (The Rules)
http://bit.ly/2i7VocU
Any links to Amazon are, in many cases, affiliate links.
Produced by Noreen's Kitchen ©2008-2016 all rights reserved All embeds must live link to Noreen's Kitchen channel. No Editorial Excerpts without permission, Violators agree to pay royalties, all court costs, all collections & all lawyers fees.
74
views
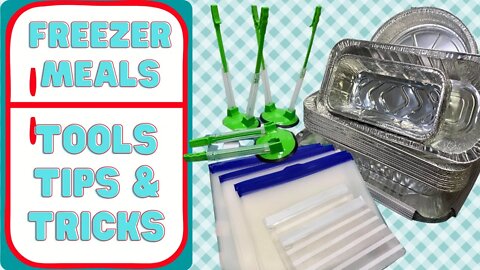
FREEZER MEAL PREP, TOOLS, TIPS TRICKS
Today, I am going to start out my series on freezer meals by sharing some quick tips, tricks and resources on what I find easy to use when prepping freezer meals. Some of these things are for convenience. Some are necessary and some are just nice to have. It is my hope that these tips and suggestions will help you along your way to making freezer meals a regular part of your meal prep strategy.
As you may know, I am preparing to have surgery at the end of this month. With that in mind I am going to be prepping a lot of freezer meals that can be used while I am recovering from said surgery. To make this easy on my family who are virtually all adults, I want to have everything available to make it easy to throw a meal into the slow cooker or pressure cooker or into the oven. Aside from making a vegetable/ salad or some noodles rice or potatoes, the main course will be ready to go with ease of preparation. This is not just something that I use when getting ready for a life event. This is a way of life for us.
Having a number of freezer meals at the ready makes life very easy. Even for me, who works from home. I often get to the end of a busy day and have neglected to thaw meat for a main course or altogether did not think about what to make for dinner. Having a tub of meatballs in sauce or a large container of homemade soup, stew or chili in the freezer can make the difference between eating something not so great to having a meal that is super satisfying and delicious.
Another benefit of having a number of freezer meals on hand is that you always have something on hand to share in the event that you need to feed a family from church or a neighbor who has had a baby or a trip to the hospital or a loss in their family. Pop that in the oven or the slow cooker and you will always have something to share that is warm and comforting. I love this part the best, because feeding people helps to feed my soul and make my heart happy.
The basics are plastic bags, gallon and quart size either disposable or reusable, which I think are a great idea if you plan to keep making freezer meals because then you are not tossing so much waste in the trash. Foil pans are a convenience for me and I always have them. You can always line your regular casserole dishes with foil, plastic and parchment and freeze till solid then pop the casserole out for storing and pop back into the same pan when cooking. I will always have foil pans in the house. I buy them from a restaurant supply and they are pennies per unit. I like to have casserole size large loaf size and small loaf size as well as round. All with lids of their own and this makes it extra easy to stack and store.
I love to have the bag holders I shared because they are literally an extra set of hands. They are about $12 for a set of 6 and worth it to me. You can purchase them individually as well if you don't think you will use six of them.
Foil and parchment are next on the list. These are a must if you did not get pans or containers with lids. The parchment is something I always put on top of the food directly before covering with foil. This helps with leaching in the event that my dish has a high acid content like tomato sauce. These all help with storage and avoiding freezer burn. Another great tip is to get some 2 gallon zip lock bags and place your 9x13 casseroles in them for longer term freshness. You can also wrap the sealed casserole in some plastic wrap as well.
My last tip is about labeling! You always want to label! Because you will forget! LIfe happens and spaghetti sauce and chili look the same. Use a sharpie or other permanent marker to write directly on the plastic bag or foil lid what the item is, the date it was made and the reheating instructions. This will make your work and your inventory much easier to deal with! I like to take things a step further and use printer labels in the 2"x4" size and print the information the stick on the bag or foil lid then cover with a couple pieces of packing tape. This helps to keep the label waterproof and helps to keep things adhered.
That sums it up! I hope you learned something and I hope it helped!
Happy Eating!
Shopping List containing the items used in this video: http://amzn.to/3hSnncs
Webstaurant Store foil pans: https://bit.ly/3otdHrk
Get my cookbooks here: http://bit.ly/1czqM5R
Business Inquiries can be sent to:
info@noreenskitchen.com
Check me out on social media!
Facebook: http://on.fb.me/12bdibt
Twitter: @noreenskitchen
Instagram: http://bit.ly/12bdqrp
Have a question for me? Send me an email:
info@noreenskitchen.com
Any links to Amazon are, in many cases, affiliate links.
Produced by Noreen's Kitchen ©2008-2016 all rights reserved All embeds must live link to Noreen's Kitchen channel. No Editorial Excerpts without permission, Violators agree to pay royalties, all court costs, all collections & all lawyers fees.
54
views

NEW YEAR, NEW PLAN MY NEW JOURNEY
Getting in gear for the new year and hoping that you had a fantastic holiday! As you can tell, I took some time off to spend with my family and friends this holiday season and had a lovely time. But now it's time to get back to work. Hoping to face 2021 with new goals and new eyes. Hoping to start doing some themes every couple of months so that we can deep dive and focus on a particular topic. I also have some news to share about myself that I am hoping you will stay tuned for.
To begin the year, I am focusing on freezer meals for January and February. Not just to help you have what you need when you need it, but to help myself prepare for my upcoming surgery at the end of January. Getting ready to have what I need on hand to make things easier for the family while I may be out of commission for a while during the recovery process.
I plan on sharing some awesome freezer meals. Casseroles, freezer crock pot and pressure cooker meals. Tips and tricks to make freezer banking super easy for you and resources to help you find the best things to make freezer prepping even easier than you thought and give you zero excuses to not do it!
The hard truth of the matter is my surgery is due to a cancer diagnosis I got in mid December. I have ben diagnosed with malignant neoplasm of the endometrium. In layman's terms, I have cancer of the uterus. It was caught very early and aside from having a full and complete hysterectomy my doctors do not foresee any further treatment, barring anything different in the pathology. Please keep me and my family in your prayers that radiation or Chemo will not be necessary. However if it is that will be the next step in the journey.
Life has thrown many curveballs. 2020 was a challenge for many and I did not emerge unscathed. I would like to take this opportunity to remind all my ladies to make an appointment to have an well woman check. It could mean the difference and save your life. If I had not gone, I would never have known about the cancer. I have had zero symptoms, nothing was out of the ordinary and had the doctor not detected bleeding during the pap smear, which came back negative and normal, I would have never known. It is truly a blessing that this happened the way it did. Take care of yourself so you can continue to take care of others!
I do not plan to let this slow me down. I plan on having good content on the channel twice weekly and hope it will help you all as much as I possibly can!
Thanks for keeping me in your prayers! Look for another video on Friday!
Happy eating!
Get my cookbooks here: http://bit.ly/1czqM5R
Business Inquiries can be sent to:
info@noreenskitchen.com
Check me out on social media!
Facebook: http://on.fb.me/12bdibt
Twitter: @noreenskitchen
Instagram: http://bit.ly/12bdqrp
Google + http://bit.ly/1o5GMYy
***MAILING ADDRESS****
Noreen's Kitchen
PO Box 14173
New Bern, NC 28561
Have a question for me? Send me an email:
info@noreenskitchen.com
Noreen's Kitchen Community Guidelines (The Rules)
http://bit.ly/2i7VocU
Any links to Amazon are, in many cases, affiliate links.
Produced by Noreen's Kitchen ©2008-2016 all rights reserved All embeds must live link to Noreen's Kitchen channel. No Editorial Excerpts without permission, Violators agree to pay royalties, all court costs, all collections & all lawyers fees.
32
views
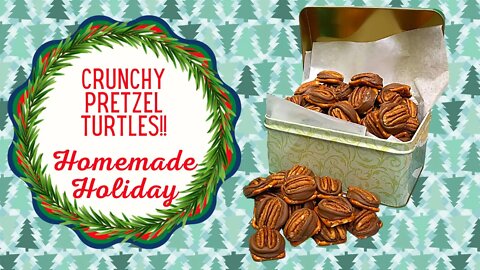
CRUNCHY PRETZEL TURTLES!!! HOMEMADE HOLIDAY!!
Today I am revisiting a recipe that we made a video of about seven years ago. It is still just as delicious, but in these times of quick and easy, budget friendly comfort treats, I thought it was a great time to remake this video. These crunchy pretzel turtles are super simple to throw together and you can even get your kids in on the action. If you like to make a bunch of treats at one time, this recipe is for you! You can literally make almost 100 of these tasty salty, chewy, chocolaty treats at one time! I know these are going to hit the spot for all the loved ones on your list!
These turtles are so easy to make and take lots of help from the grocery store. Start with some small pretzels. I am using Snyders of Hanover butter snaps because I love their taste, texture and shape. I am also using a bag of rolo candies as well as some pecan halves. Thats it! Three easy ingredients and you are going to have fabulous treats in no time!
All you have to do is lay the pretzels out on a baking sheet that you have lined with either parchment or foil. Then top each one with a Rolo. Then you put that sheet of Rolo topped pretzels in a 200 degree oven for 3 to 5 minutes or just until they are shiny but not melted and distorted. Remove these from the oven and push a toasted pecan half into the top of each one, gently squishing the caramel and chocolate down into the pretzel. Then let them cool. I like to pop mine in the fridge for about 5 or 10 minutes to help them set. Then you are ready to roll or Rolo as the case may be.
These keep well for a couple of weeks in an airtight container in the fridge. If you want to up the ante and the flavor profile you can also drizzle these with melted white or dark chocolate or a combo of the two. You can drizzle with colored candy melts for a festive touch or you can sprinkle with a bit of Mauldon or regular sea salt or Himalayan pink salt that has a coarse grind for texture and extra flavor. You can amp these up as much as you like or keep them simple like I did. You choose.
I hope you give these crunchy pretzel turtles a try this holiday season or anytime you want a sweet and salty chocolaty treat and I hope you love them!
Happy Eating!
NOTE: I did not provide a written recipe for this video because of the simplicity of the subject. I am sure you are all able to figure these three ingredients out! Enjoy!
Get my cookbooks here: http://bit.ly/1czqM5R
Business Inquiries can be sent to:
info@noreenskitchen.com
Check me out on social media!
Facebook: http://on.fb.me/12bdibt
Twitter: @noreenskitchen
Instagram: http://bit.ly/12bdqrp
Google + http://bit.ly/1o5GMYy
***MAILING ADDRESS****
Noreen's Kitchen
PO Box 14173
New Bern, NC 28561
Have a question for me? Send me an email:
info@noreenskitchen.com
Noreen's Kitchen Community Guidelines (The Rules)
http://bit.ly/2i7VocU
Any links to Amazon are, in many cases, affiliate links.
Produced by Noreen's Kitchen ©2008-2016 all rights reserved All embeds must live link to Noreen's Kitchen channel. No Editorial Excerpts without permission, Violators agree to pay royalties, all court costs, all collections & all lawyers fees.
11
views
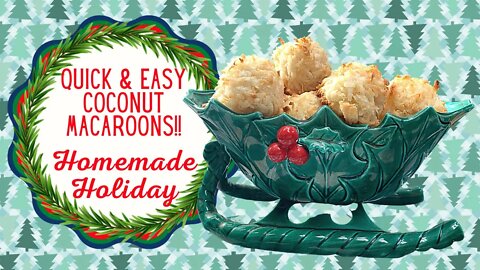
QUICK AND EASY COCONUT MACAROONS!! HOMEMADE HOLIDAY!!
So it begins. We are officially two weeks away from Christmas day as of the posting of this video. Time to get those homemade goodies ready to give to all the friends and neighbors! I don't know about you but I am not going to let the current situation stop me from sharing the holiday love with the people I care about! Today we are making some of my all time favorites! Quick and easy coconut macaroons. Straight out of my mom's recipe box and if it was good enough for her, it will definitely be something you and yours will love! I know this is definitely going to become a holiday treat for years to come if you give this one a try!
To be sure, these are old fashioned macaroons. NOT the froofy, French Macarons, which are also delicious but much more time and work intensive. These are just plain good. A few ingredients, blended together in just the right way and popped in the oven for just the right amount of time to create this crispy, on the outside, chewy on the inside, caramely from the browned edges and slightly sweet. These are a perfect bite in my book. They are also super versatile and a great filler for your gift boxes or cookie trays every year, without question.
Of course these will start with coconut. The sweetened and flaked variety. Add in flour, sugar, egg whites, a bit of salt, vanilla and almond extract and you have the beginnings of a bakery worthy cookie that everyone will fight for.
TOP TIP: If you do a lot of recipes that use egg whites, look for a carton of "Just Whites" in the refrigerator section where the eggs are sold. This saves you from having to separate eggs and if you are not a fan of saving the yolks, this also saves money and space in the freezer.
The secret here is to whisk the egg whites just until foamy. This helps to break the whites up and gives the cookie a lighter, less dense finish. I like to add the extract into the whisked whites then everything gets tossed together. The mixture will feel and look a little dry to begin with. Just keep stirring. I like to use a fork to kind of toss and smash to get everything well blended. If the mixture just won't seem to come together in a nice mass, add a couple of tablespoons of water and keep stirring until it reaches just the right sticky and moist consistency for scooping.
I like to use a standard cookie scoop to make these macaroons. This measures about 2 tablespoons in volume. You can make yours as large or as small as you like. This recipe with my scoop makes exactly 3 dozen nice sized macaroons. These get baked at 325 degrees for 20 to 25 minutes depending on your oven. You will know when they are ready, first by their delicious aroma, then by their appearance. The macaroons should have a lovely, light brown ring around the bottom and be just kissed with brown flecks on top. They should also feel firm to the touch as well as dry. Remove from the oven and allow the cookies to cool on the baking sheet for 10 minutes before moving to a rack to cool completely.
These macaroons can be stored in an airtight container, in a cool, dry place, but not in the refrigerator for up to two weeks. They are best eaten in the first week and may dry out a bit after that but they are still delicious. These are best made close to when you would like to serve or share.
I hope you give these quick and easy coconut macaroons a try for you holiday giving and sharing some time soon and I hope you love them!
Happy Eating and Happy Holidays!
Get a printable version of this recipe here: https://bit.ly/3qQPdts
Get my cookbooks here: http://bit.ly/1czqM5R
Business Inquiries can be sent to:
info@noreenskitchen.com
Check me out on social media!
Facebook: http://on.fb.me/12bdibt
Twitter: @noreenskitchen
Instagram: http://bit.ly/12bdqrp
Google + http://bit.ly/1o5GMYy
***MAILING ADDRESS****
Noreen's Kitchen
PO Box 14173
New Bern, NC 28561
Have a question for me? Send me an email:
info@noreenskitchen.com
Noreen's Kitchen Community Guidelines (The Rules)
http://bit.ly/2i7VocU
Any links to Amazon are, in many cases, affiliate links.
Produced by Noreen's Kitchen ©2008-2016 all rights reserved All embeds must live link to Noreen's Kitchen channel. No Editorial Excerpts without permission, Violators agree to pay royalties, all court costs, all collections & all lawyers fees.
14
views
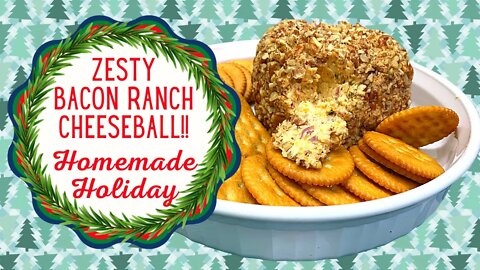
ZESTY BACON RANCH CHEESE BALL!! HOMEMADE HOLIDAY!!
As promised, today I am sharing how to make a delicious, quick and easy zesty, bacon ranch cheese ball for your holiday entertaining or to share with friends and family throughout the holiday season! This is super quick and everyone loves a cheeseball! I always try to make some new incarnation of one each year because they are festive and fun and my holiday buffet would not be complete without one! These are delicious served with crackers, baguette, veggies or even sliced apples and pears. This recipe can make one great big cheese ball or as many as 6 small ones. You decide based on your needs. I know that you are going to love this fabulous throw back from Christmas past!
Like all good cheese balls, this one starts with some softened cream cheese and shredded cheese. This is the base for any type you would like to make. Where you go from here is up to you. Since we are making a zesty bacon and ranch version today, we will be adding some crumbled bacon, a good portion of homemade ranch dressing mix and some seasonings to boost the flavor to just the right level. A couple secret ingredients here are liquid smoke and worcestershire sauce. These are integral to bringing the flavor to this delicious treat.
I am using my stand mixer to mix this up but you can easily do this with a hand mixer or even a wooden spoon if you like. The softened cream cheese is whipped till soft and fluffy and the flavorizers are added in then the cheese and bacon and everything is blended to perfection. Now the fun begins.
Lay out a couple large pieces of plastic wrap and divide the cheese mixture into two. Then place one half of the cheese mixture on one of the pieces of plastic wrap. This will help you to form them into balls. Do the same to the other portion and wrap them both tightly in another layer of plastic wrap and refrigerate for a couple hours.
Now that the cheeseballs have had time to firm up you can roll them in some chopped pecans or paprika or dried parsley. then wrap again and store in the fridge until ready to serve. These will last in the refrigerator for up to one month. Perfect to have on hand for holiday drop ins, potlucks, snacking or sharing with friends and neighbors. Everyone loves a savory snack and this fits the bill! Toss in a basket with a bottle of wine and some nice crackers and some apples and boom! A delicious and festive holiday gift.
I hope you give this zesty bacon, ranch cheese ball a try sometime soon and I hope you love it!
Happy Eating!
You can find the printable recipe here: https://bit.ly/39PNMWg
Get my cookbooks here: http://bit.ly/1czqM5R
Business Inquiries can be sent to:
info@noreenskitchen.com
Check me out on social media!
Facebook: http://on.fb.me/12bdibt
Twitter: @noreenskitchen
Instagram: http://bit.ly/12bdqrp
Google + http://bit.ly/1o5GMYy
***MAILING ADDRESS****
Noreen's Kitchen
PO Box 14173
New Bern, NC 28561
Have a question for me? Send me an email:
info@noreenskitchen.com
Noreen's Kitchen Community Guidelines (The Rules)
http://bit.ly/2i7VocU
Any links to Amazon are, in many cases, affiliate links.
Produced by Noreen's Kitchen ©2008-2016 all rights reserved All embeds must live link to Noreen's Kitchen channel. No Editorial Excerpts without permission, Violators agree to pay royalties, all court costs, all collections & all lawyers fees.
23
views
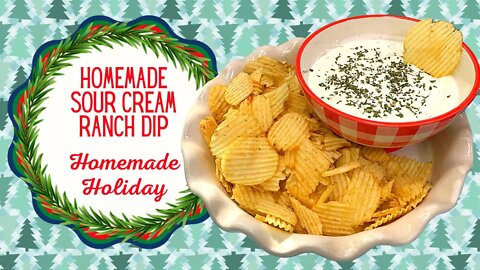
SOUR CREAM RANCH DIP!! HOMEMADE HOLIDAY!!
Let's use some of our homemade ranch dressing mix to make a simple and festive dip for the holidays or anytime you want something delicious to share or snack on all by yourself! This sour cream ranch dip is super simple, two ingredients and most of all delicious. This can be made just as is with the mix and the sour cream or you can boost it and make a variety of delicious ranch dips that will wow your friends, family and guests. I know you will love it if you give this a try!
This could not be more simple and while I know that most of you know how to mix something into some sour cream I think it is never a bad thing to reiterate a simple idea. I have used a good quality sour cream. By that I mean that the ingredients should only be two. Cream and culture. Nothing more, nothing less. If the sour cream has added thickeners such as gelatin, gums or other unpronounceable ingredients, it is best to leave that at the store and opt for another brand. Good things start with good ingredients. This simple dip is no exception.
I have used three tablespoons of the ranch dressing mix that I shared in a previous video with two cups or one 16 ounce container of sour cream. My preferred brand is Daisy. But any other good quality brand will do and many store brands are also very good quality. I use the Daisy brand because it is not much more ounce per ounce in price compared to the store brand and I get consistent quality every time. You should use what you like best.
You can think of this basic dip as a blank canvas. This Ranch dip can be the beginning of a number of different types of dips that you can enjoy just by adding in one or two other ingredients to take this to a new level. Of course simple ranch dip is perfect on your veggie tray or next to a big bowl of ripple chips. But you can take this a lot of places!
Some things you can do with ranch dip for your consideration are:
Cucumber ranch: Add 1 cup of grated and squeezed English cucumber.
Smoky Bacon Ranch: 1/2 cub crumbled bacon and a dash of liquid smoke
Ranch Tzaziki: Add 1 cup of grated and squeezed English cucumber, 1 clove of minced garlic, 1/2 of a grated onion. the zest and juice of one lemon and a tablespoon of fresh dill, minced well.
Lemon Pepper Ranch: Add a tablespoon of your favorite lemon pepper seasoning.
Blue Cheese Ranch: 1/2 cup crumbled blue cheese
Chive and onion Ranch: Add 1/2 cup of both green onion and white onion and chives chopped well and stirred in.
Chipotle Ranch: add in one chopped chipotle pepper along with a bit of the adobo sauce it is packed in.
Salsa Ranch: Stir in 1/2 cup of your favorite jarred salsa or pico de gallo.
Avocado ranch: Stir in 1/2 of a mashed ripe avocado.
Caramelized Onion Ranch: Add in one large onion that has been caramelized and cooled before stirring into the mix.
The list goes on and on. You are the master of your ranch dip! Make it your own and think outside the box!
I hope you give this simple idea a try for your holiday entertaining or just while snacking and watching holiday movies! I hope you try it and I hope you love it!
Happy Eating and Happy Holidays!
Get my cookbooks here: http://bit.ly/1czqM5R
Business Inquiries can be sent to:
info@noreenskitchen.com
Check me out on social media!
Facebook: http://on.fb.me/12bdibt
Twitter: @noreenskitchen
Instagram: http://bit.ly/12bdqrp
Google + http://bit.ly/1o5GMYy
***MAILING ADDRESS****
Noreen's Kitchen
PO Box 14173
New Bern, NC 28561
Have a question for me? Send me an email:
info@noreenskitchen.com
Noreen's Kitchen Community Guidelines (The Rules)
http://bit.ly/2i7VocU
Any links to Amazon are, in many cases, affiliate links.
Produced by Noreen's Kitchen ©2008-2016 all rights reserved All embeds must live link to Noreen's Kitchen channel. No Editorial Excerpts without permission, Violators agree to pay royalties, all court costs, all collections & all lawyers fees.
31
views
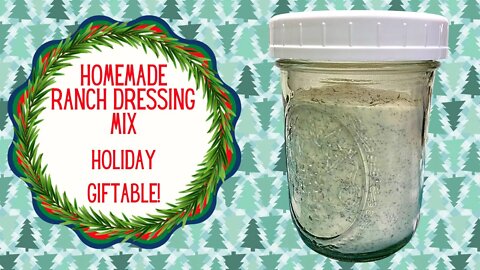
HOMEMADE RANCH DRESSING MIX!! HOLIDAY GIFTABLE!!
The time has come to really buckle down and choose how we are going to share the holiday spirit with family and friends from our hearts and from our kitchens! Today I am revisiting an old favorite and giving it a bit of a makeover! My homemade ranch dressing mix is my go to for all things ranch and other things! This is such a versatile mix to have on the pantry shelf, you really could consider it a seasoning with lots of possibilities. The bonus is that this is so easy to make and you may already have what you need to throw a batch together!
Six years ago I shared my version of a recipe for ranch dressing mix in my customary "big batch" style. But I know that not everyone needs a full quart or more of ranch dressing mix so I pared it back a bit, changed it up a bit and have come up with the perfect blend of homestyle ranch goodness that you are going to love. This makes a great dressing when adding to milk and buttermilk or sour cream or a delicious sour cream ranch dip that can be simple or complex with the addition of other flavors. You can use this to make a delicious holiday cheese ball or even everyone's favorite, slow cooker ranch chicken sandwiches! The possibilities are endless.
This starts with some non fat dry milk powder and then you add all the seasonings, herbs and spices to make this delicious blend that is fit for gifting! With the holidays upon us, may I recommend whipping up a batch or two and then making some delicious cheese balls and gifting both the cheeseball along with the ranch dressing mix as well as the recipes for both. Your neighbors and friends will be able to tuck your card into their own recipe box and share the delicious treats with their friends and family for years to come!
I know this seems super simple and it is, but in this time of really difficult times for so many people I think a trip back to simplicity is called for. Get back some of our heartfelt goodness by sharing goodness from our hearts. Ranch dressing is only one possibility. Because lots of people love it, this is definitely sure to please many on your list!
I hope you give this homemade ranch dressing mix a try for the holidays and beyond and I hope you love it!
Happy Eating!
You can find a printable version of this recipe here: https://bit.ly/2VhbDps
Get my cookbooks here: http://bit.ly/1czqM5R
Business Inquiries can be sent to:
info@noreenskitchen.com
Check me out on social media!
Facebook: http://on.fb.me/12bdibt
Twitter: @noreenskitchen
Instagram: http://bit.ly/12bdqrp
Google + http://bit.ly/1o5GMYy
***MAILING ADDRESS****
Noreen's Kitchen
PO Box 14173
New Bern, NC 28561
Have a question for me? Send me an email:
info@noreenskitchen.com
Noreen's Kitchen Community Guidelines (The Rules)
http://bit.ly/2i7VocU
Any links to Amazon are, in many cases, affiliate links.
Produced by Noreen's Kitchen ©2008-2016 all rights reserved All embeds must live link to Noreen's Kitchen channel. No Editorial Excerpts without permission, Violators agree to pay royalties, all court costs, all collections & all lawyers fees.
36
views
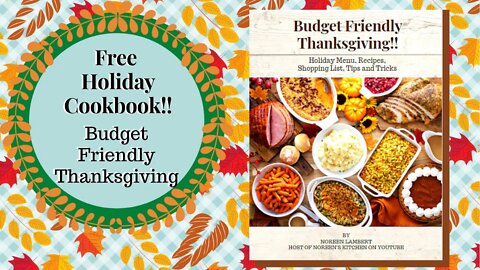
Budget Friendly Thanksgiving Cookbook release video
Download Budget Friendly Thanksgiving for free here: https://bit.ly/3pQFRxk
Get your copy of Make Ahead Thanksgiving here: http://bit.ly/2zHyjUD
Link to all my other cookbooks including the Holiday Helper: http://bit.ly/2KTBQmm
As my holiday gift to you I have created this Budget Friendly Thanksgiving Cookbooklet. Filled with a complete, easy, budget friendly holiday menu, shopping list, 9 delicious recipes and charts, tips and tricks to help you get your holiday dinner on the table quick and easy even if you have never cooked your own Thanksgiving dinner by yourself or if you are a seasoned pro. This is a great resource to have on hand! You can also check out my Make Ahead Thanksgiving cookbook that is a perennial favorite since it's release. I know that this is going to help you through what can be a tough holiday season for many. I hope that this takes some of the fear out of things. I know it will be a hit with you and yours!
This is my way of saying thank you and letting you know what a blessing you are to me and my family. It is my hope that we are, in turn blessings to you. I hope that this holiday and the coming season find you happy, healthy and well. I know that there will be a wonderful conclusion to all of this very soon. Have faith and keep going!
Get my cookbooks here: http://bit.ly/1czqM5R
Business Inquiries can be sent to:
info@noreenskitchen.com
Check me out on social media!
Facebook: http://on.fb.me/12bdibt
Twitter: @noreenskitchen
Instagram: http://bit.ly/12bdqrp
Google + http://bit.ly/1o5GMYy
***MAILING ADDRESS****
Noreen's Kitchen
PO Box 14173
New Bern, NC 28561
Have a question for me? Send me an email:
info@noreenskitchen.com
Noreen's Kitchen Community Guidelines (The Rules)
http://bit.ly/2i7VocU
Any links to Amazon are, in many cases, affiliate links.
Produced by Noreen's Kitchen ©2008-2016 all rights reserved All embeds must live link to Noreen's Kitchen channel. No Editorial Excerpts without permission, Violators agree to pay royalties, all court costs, all collections & all lawyers fees.
3
views
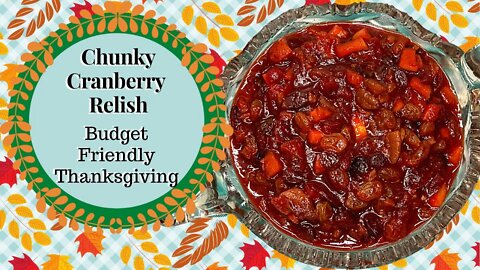
CHUNKY CRANBERRY RELISH!! BUDGET FRIENDLY THANKSGIVING!!
As of the uploading of this video we are ten days out from Thanksgiving 2020. While that may look a little different for some of us this year, it is no reason to not hold with tradition and make ourselves a big delicious meal, take stock of all we are thankful for and hold dear. Even if you are new to the whole cooking the bird thing, you can do this! I am here to help you! Lets start simple with something you can make right now! This chunky cranberry relish is easy, delicious and will put the gourmet touch on your holiday meal that you are looking for!
I have many incarnations of cranberry sauce, relish etc, on my channel from years past. I like to change things up from year to year, but the base remains the same. Today we are making a version that is sort of a hybrid of a compote and a conserve. We are boosting a traditional cranberry relish by adding chopped apples, oranges, pecans and the secret to a thick and jammy cranberry sauce the dried cranberries and golden raisins. The latter help to make the final product super thick and jammy and just the right consistency for serving next to your succulent bird or spreading on a sandwich the next day!
This starts with some fresh cranberries. You can find them in abundance this time of year in the fresh produce section of your grocer. If you have a hard time finding them you can always go with frozen. Along with the fresh fruit we are adding both cranberry and orange juice, white and brown sugar and a touch of ground allspice. Keep in mind that some of these ingredients are optional. If you don't like raisins or whole oranges in your cranberry sauce, leave them out. You can start with just fresh cranberries, dried cranberries and juice and have a lovely condiment on the side. Mine is always boosted and made a little over the top. This is how I usually make this and everyone loves it and I think you will too if you are a fan of the cranberries.
Everything gets tossed into a pot that you think is a bit bigger than you might need and heating to a simmer. You don't want to ever leave a pot of cranberries alone. They can be a little rambunctious when left on their own and this can result in a lot of gooey cranberry splatter from unattended popping or foamy overspill resulting in cranberry slime covering the top of your stove which is a very unpleasant surprise to return to in the kitchen.
You will want to simmer your cranberry relish for about 10 minutes. Halfway through that time you will want to begin stirring with a broad wooden spoon and starting to smash the whole berries on the side of the pot. This will help release all their natural pectin and help you avoid that dreaded splatter. When the sauce beings to bubble and spit and look and feel a bit thicker, you can remove it from the heat and put a lid on it and set aside to cool completely.
Once cooled, transfer to an airtight container or some mason jars with tight fitting lids. Store this in the refrigerator for up to three months. Yes, it will last that long. But you can make this well in advance of your Thanksgiving dinner and take that ask off your list. Now is the time to start thinking about what you can do to conserve energy and make time management your optimal skill. Its easy if you give it a little advanced thought.
I hope you give this chunky cranberry relish a try some time soon and I hope you love it!
Happy Eating!
Get printable version of this recipe here: https://bit.ly/3nnMvcC
Get my cookbooks here: http://bit.ly/1czqM5R
Business Inquiries can be sent to:
info@noreenskitchen.com
Check me out on social media!
Facebook: http://on.fb.me/12bdibt
Twitter: @noreenskitchen
Instagram: http://bit.ly/12bdqrp
Google + http://bit.ly/1o5GMYy
***MAILING ADDRESS****
Noreen's Kitchen
PO Box 14173
New Bern, NC 28561
Have a question for me? Send me an email:
info@noreenskitchen.com
Noreen's Kitchen Community Guidelines (The Rules)
http://bit.ly/2i7VocU
Any links to Amazon are, in many cases, affiliate links.
Produced by Noreen's Kitchen ©2008-2016 all rights reserved All embeds must live link to Noreen's Kitchen channel. No Editorial Excerpts without permission, Violators agree to pay royalties, all court costs, all collections & all lawyers fees.
59
views
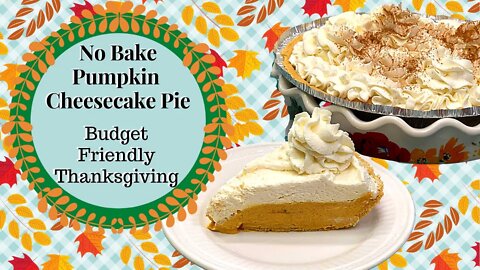
NO BAKE PUMPKIN CHEESECAKE PIE!! BUDGET FRIENDLY THANKSGIVING!!
Continuing on with our theme of a budget friendly Thanksgiving we move on to dessert! This no bake pumpkin cheesecake pie is going to knock your socks off! I played with this recipe and have gotten rave reviews from people who have tried it. It is super simple, with few ingredients and even your kids could make it! What better way to get the family together in the kitchen than to assign everyone a task? This is creamy, pumpkin and spice with just a hint of tangy goodness from the cream cheese. This is the perfect answer for someone who has never baked a pumpkin pie but this year is tasked with making the whole meal! Give this a try, I promise you won't be sorry!
Say what you want about no bake pie. But honestly this one rivals any regular baked pumpkin pie I have eaten. It hits all the right notes and everyone in our family loved it! It all starts out with a graham cracker pie crust. I have purchased my favorite brand (Keebler) and got the larger version that says "2 extra slices" on the label. This accommodates the amount of filling just right. You can, of course make your own graham cracker pie crust and use a standard deep dish pie plate. If you need to know how to make that you can refer to my recipe video here: https://bit.ly/35tzlor
Next up, let's work on the filling! It all starts with some softened cream cheese. You want to make sure it is super soft. Let it sit on the counter for a couple hours. Softening in the microwave can be inconsistent. Whip this using a hand or stand mixer. Once soft pour in the heavy whipping cream and allow this to mix until it thickens and gets smooth and fluffy. Let the whipping cream do it's job. Next up is just a little sugar. Beat that into the cream cheese and heavy cream. Then we add a box of instant vanilla pudding and some canned pumpkin puree along with some pumpkin pie spice and vanilla extract. Allow this to beat until thick and fluffy. Just a couple minutes will do.
If you cannot find pumpkin pie spice you can make your own! Here is my video: https://bit.ly/38HOx38
Pour this mixture into your graham cracker pie shell and smooth evenly. I made some whipped cream to top my pie sweetened with just a bit of sugar and flavored with vanilla extract. If you are not up to that task, no worries! Get yourself a tub of non dairy whipped topping from the freezer section. Be sure to allow that to thaw in the fridge according to the package directions or it will be a watery mess.
Need help with how to make whipped cream? No worries! Here's my video: http://bit.ly/1mW8sPA
Top your pie by either piping the whipped cream or topping through a pastry bag or just slather on with a spatula. I promise nobody cares how you do it. Just get it done! Then cover with the plastic liner that you removed from the pie shell or with some plastic wrap and refrigerate for at least two hours. Overnight is better. You can even make this pie a couple of days in advance and get that task off your list and not have to worry about dessert on the day of the big meal!
This recipe is easily converted to a sugar free version by using sugar free instant vanilla pudding and the sweetener of your choice in the pie and the whipped cream. You can even make a low carb crust using ground almonds, pecans or hazelnuts and butter. That would need to be baked and cooled prior to filling and refrigerating. But you can do that and make everyone at your table happy! Don't want to mess with a nutty crust? Just use this filling and the sweetened whipped cream and layer into some parfait dishes for a wonderful pumpkin cheesecake parfait that is easy to serve! Everyone will love it!
I hope you give this no bake pumpkin cheesecake pie a try sometime soon and I hope you love it!
Happy Eating!
You can get a printable version of this recipe here: https://bit.ly/32FXZAa
Get my cookbooks here: http://bit.ly/1czqM5R
Business Inquiries can be sent to:
info@noreenskitchen.com
Check me out on social media!
Facebook: http://on.fb.me/12bdibt
Twitter: @noreenskitchen
Instagram: http://bit.ly/12bdqrp
Google + http://bit.ly/1o5GMYy
***MAILING ADDRESS****
Noreen's Kitchen
PO Box 14173
New Bern, NC 28561
Have a question for me? Send me an email:
info@noreenskitchen.com
Noreen's Kitchen Community Guidelines (The Rules)
http://bit.ly/2i7VocU
Any links to Amazon are, in many cases, affiliate links.
Produced by Noreen's Kitchen ©2008-2016 all rights reserved All embeds must live link to Noreen's Kitchen channel. No Editorial Excerpts without permission, Violators agree to pay royalties, all court costs, all collections & all lawyers fees.
88
views
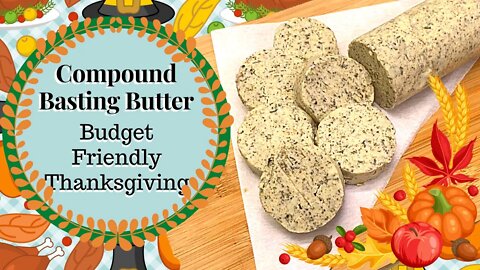
COMPOUND BASTING BUTTER!! BUDGET FRIENDLY THANKSGIVING!!
Kicking off November with a new series for a delicious and budge friendly Thanksgiving! We know that this year may be very different for a number of people. We know that there are some who may never have experienced the act of preparing Thanksgiving dinner for themselves or without other family members. We want to make this process go as smoothly as possible by sharing some quick and easy, delicious and economical ways to put a wonderful holiday meal on the table. You can do this! I have your back! No worries, start now and everything is going to be alright!
Starting off with something you can do right now and stow in the freezer! Compound basting butter can be used to slather on your bird prior to roasting to give it an amazing flavor and the crispiest of skin. Use it to sautee the veggies for your homemade or semi homemade stuffing, dressing or whatever it is you love to call it. Use it to dress steamed or roasted veggies just before serving or use as a spread for heated rolls or biscuits, homemade or not. This butter has a great potential and you can have it on hand in a flash!
This starts, as you might imagine, with some softened butter. Make sure you don't soften in the microwave. Let this sit on the counter for a good while before making, this will help the butter to not separate should you accidentally melt it a little by heating it too much. I am whipping this using the paddle attachment on my stand mixer, but you can use a hand mixer or even do this by hand with a whisk or wooden spoon and everything will turn out fine.
Once the butter is nice and creamy add in the seasonings of choice. Today I am flavoring this up to use on our Thanksgiving bird so that includes some of my homemade poultry seasoning, salt, cracked black pepper, onion powder, garlic powder, dried parsley, dried thyme, rubbed sage, and ground rosemary. You can add or take away whatever you like. A dash of nutmeg would be excellent as well.
See my poultry seasoning video here: http://bit.ly/34DaxXv
All these get whipped or stirred together and then scraped out onto a parchment paper or plastic wrap. I am using parchment and then folded over and used the flat side of a dough scraper, but you can use something else flat like a ruler to gently put pressure on the butter to form a long. Then just twist the ends and wrap up . Place in the fridge or freezer to set. You can easily make this now for Thanksgiving. Freeze until the day before and transfer to the fridge. Then use in all your savory dishes that require butter.
Super simple and super delicious. A great way to bring your menu together with cohesive flavors. Let me know if you all would enjoy having me make a suggested budget friendly Thanksgiving menu for you along with grocery lists, both main and supplementary for you to use if this is your first time attempting the holiday meal on your own! This is doable. If you are new and want to try, let me help you! I promise it's just about preparation and timing and everyone can do this!
I hope you give this compound basting butter a try for the holidays or anytime and I hope you love it!
Happy Eating!!
Find a printable version of this recipe here: https://bit.ly/3n8MYPL
Get my cookbooks here: http://bit.ly/1czqM5R
Business Inquiries can be sent to:
info@noreenskitchen.com
Check me out on social media!
Facebook: http://on.fb.me/12bdibt
Twitter: @noreenskitchen
Instagram: http://bit.ly/12bdqrp
Google + http://bit.ly/1o5GMYy
***MAILING ADDRESS****
Noreen's Kitchen
PO Box 14173
New Bern, NC 28561
Have a question for me? Send me an email:
info@noreenskitchen.com
Noreen's Kitchen Community Guidelines (The Rules)
http://bit.ly/2i7VocU
Any links to Amazon are, in many cases, affiliate links.
Produced by Noreen's Kitchen ©2008-2016 all rights reserved All embeds must live link to Noreen's Kitchen channel. No Editorial Excerpts without permission, Violators agree to pay royalties, all court costs, all collections & all lawyers fees.
24
views
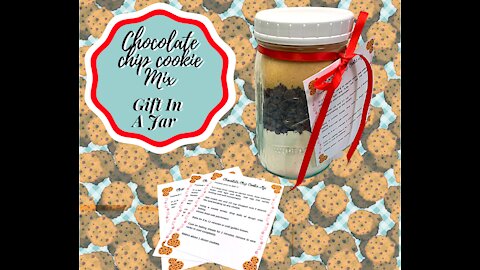
CHOCOLATE CHIP COOKIE MIX!! GIFT IN A JAR!! HOMEMADE HOLIDAY!!
Nothing beats a gift from the kitchen or something handmade during the holidays! We all like to give and receive these welcomed items! In an effort to get a good jump on holiday gift giving ideas this year we are starting a bit early with this quick and easy, chocolate chip cookie mix in a jar! These go together fast and you can assembly line these in an afternoon and have a bunch of easy gifts ready to give all season long! I have prepared a sheet with four tags that you can print and cut and use to attach to the jars to help the recipient know how to make these delicious chocolate chip cookies!
I have received so many requests for gifts in a jar that I had to start this off with this chocolate chip cookie mix. So easy and budget friendly! Yes the person receiving has to make it up for themselves but who doesn't love a warm chocolate chip cookie, fresh from the oven? They will love you for thinking of them and they already have what they need to prepare the recipe which is butter, one egg and some vanilla. Everything else is in the jar!
Constructing these jars is easy but there are a few rules and tips to consider. First, you always want a jar that is large enough to fit the ingredients but you don't want one that is too large that the contents will just mix up. You want the separation to be seen, it is what gives this gift it's charm. Secondly you want to tamp. Each layer will need to be fully settled before adding the next otherwise you run the risk of running out of room in your jar. Tapping the jar on the counter several times can help as can a tamper to help things along.
The cookie mix starts with a blend of all purpose flour, baking soda and salt that is blended then poured into a one quart jar. Tamp that layer down well then add the chocolate chips on top. Tamp again and add the brown sugar, This is where you will want to really press that down with some sort of tamper. A bent spoon or a wooden tart tamper or even a small glass with a flat bottom will work. You will want to make sure you have enough room for the granulated sugar to sit on the top layer. Now all you need to do is tamp again and put a lid on it! Note, that the jar will be very full all the way to the top.
Filling the jar to the top helps to keep air out. If you have a vacuum sealer with a jar attachment you can use that with a standard canning flat lid and ring to ensure freshness. You can safely prepare these up to 8 weeks in advance of your gift giving. You will want to be sure to seal them accordingly and make sure the brown sugar does not harden making it difficult for the recipient to get the mix out of the jar.
Now for the fun part! Decorate that jar to your heart's content! I have prepared a sheet of tags that you can use to attach to the jars prior to giving. Just cut them apart and punch a hole then attach with a pretty ribbon. Or you can pop the jar in a cute small gift bag and give to your friends, family or coworkers.
I am aware that currently there is a problem in some parts of the country obtaining canning jars. Do not think that you must use a canning jar to give this mix! You can use recycled jars from your groceries that you have soaked the labels off of and washed and thoroughly dried. You can even spray pain the tops to coordinate with your theme. Alternatively you can build this mix in a cellophane bag that can be ordered online then tie with a bow and give with the instructions. If you really want to go all out, take that cello bag of cookie mix and pop it into a cute mixing bowl with a matching spatula, and a couple of wooden spoons. Pop into a shrinkable gift basket bag from the dollar store and use your hair dryer to shrink it down. Tie with a pretty ribbon and you have an impressive gift for anyone on your list!
I hope that you enjoyed learning about how you can make this chocolate chip cookie mix gift in a jar! I hope that you consider adding these to your gift giving list this holiday season and I hope you love them!
Happy Eating and Happy Holidays!
You can find a printable version of this recipe here; https://bit.ly/2HfdE1B
Get my cookbooks here: http://bit.ly/1czqM5R
Business Inquiries can be sent to:
info@noreenskitchen.com
178
views
1
comment