
Enjoyed this channel? Join my Locals community for exclusive content at
noreenskitchen.locals.com!
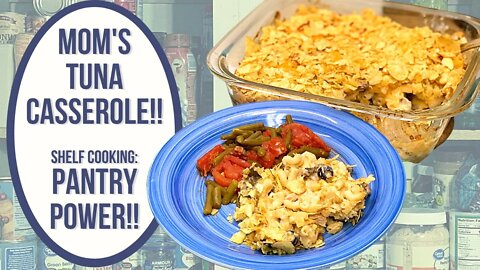
MOM'S TUNA CASSEROLE!! PANTRY POWER!! SHELF COOKING!!
Today I am sharing the original pantry meal that I grew up with! My Mom's tuna casserole. This one is a little unconventional but it is delicious. It is simple to make and it is easy enough for your kids to make on their own, with supervision. A great way to put a budget friendly meal on the table that is sure to satisfy both their hunger as well as your desire to save money and pull from what you have. This is a favorite of my father's as well as the rest of my family and I hope that you will find it to be the same for you!
I recently put a question out on my YouTube community page, instagram and Facebook and asked if you would like to see some more pantry style cooking and recipe videos. The response was overwhelmingly YES! So here we are. I will be planning to share more practical recipe and information videos including stocking a pantry on a budget as well as fill a request for information about those dates on your food and packages. What do they really mean?
I digress. Today we are making a simple, delicious and budget friendly recipe that uses 95% pantry items that you can put together in no time! Tuna casserole is propably something that every mom has made. My mom's is a little different. It starts with a box of macaroni and cheese. I prefer the thick and creamy variety and it is simply made according to the directions on the box.
To that .37 cent box of mac and cheese we are going to add one can of cream of mushroom soup, a can of sliced mushrooms, a can of sliced ripe olives as well as two cans of the tuna of your choice. I prefer albacore which is a little more expensive than chunk light which would make this casserole a little cheaper, but the flavor, taste and texture of the albacore is something we prefer over the less expensive variety. We are also going to add 1 cup of shredded cheddar cheese as well as a cup of crushed potato chips. If you don't have chips, use some buttered breadcrumb or some crushed corn flakes that have been tossed in a bit of melted butter. Any of those will give you the crunchy topping you are looking for here.
This all gets mixed together, with the exception of half the cheese and the chips. Poured into a baking dish and then topped with the remaining cheese and the crushed potato chips. Then it gets popped in the oven for about a half an hour until browned and bubbly.
We serve this with our favorite side which is one can of green beans mixed with one can of stewed tomatoes which adds a great accompaniment to the creamy, cheesy casserole. This will serve six people generously and with the addition of the vegetable side dish and maybe some biscuits or bread if you desire, no one is walking away hungry!
The cost breakdown here goes as follows: NOTE: I used all store brand ingredients and they came from Walmart.
Great Value Thick and Creamy Mac and Cheese: $0.34
Great Value Cream of Mushroom Soup: $0.57
2 cans Great Value Albacore Tuna: ($1.12 each) $2.24
Great Value Mushroom Stems & Pieces: $1.25
Great Value Sliced Ripe Olives: $0.67
1 cup shredded sharp cheddar cheese: $1.33
1 cup crushed potato chips: $0.25
1/2 stick butter for mac and cheese: $0.34
1/2 cup milk for mack and cheese: $0.18
Total cost: $7,17
NOTE: In the video I mentioned that the cost breakdown was $7.35. I miscalculated on the part of the milk and actually doubled the amount. This breaks down to approximately $1.20 per serving if serving six people. The cost of the vegetable side dish was $1.17 for the whole bowl. In my opinion this is a champion pantry meal that really hits all the notes of being budget friendly as well as being family friendly! If you are not keen on tuna, you could certainly make this casserole with chicken or ham as well!
I hope you give this recipe for my Mom's tuna casserole a try sometime soon and I hope you love it!
Happy Eating!
Get a printable version of this recipe here: https://bit.ly/3mSxlgF
Get my cookbooks here: http://bit.ly/1czqM5R
Business Inquiries can be sent to:
info@noreenskitchen.com
Check me out on social media!
Facebook: http://on.fb.me/12bdibt
Instagram: http://bit.ly/12bdqrp
Any links to Amazon are, in many cases, affiliate links.
Produced by Noreen's Kitchen ©2008-2016 all rights reserved All embeds must live link to Noreen's Kitchen channel. No Editorial Excerpts without permission, Violators agree to pay royalties, all court costs, all collections & all lawyers fees.
56
views
1
comment
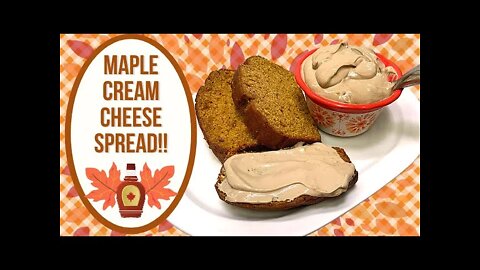
MAPLE CREAM CHEESE SPREAD!! PERFECT FOR FALL TREATS!!
Let's make some delicious maple cream cheese spread to slather on homemade pumpkin, zucchini or banana bread. This is also a delicious spread for homemade buttermilk biscuits, sweet potato rolls or even your cinnamon raisin bagel! This is definitely a fall favorite that you will want to have on hand in your fridge! Tangy cream cheese, sweet maple syrup and some added extras make this spread a keeper! I know you and yours will just love it!
So simple to throw together! A softened brick of cream cheese whipped until light and fluffy, then toss in a bit of salt, some of your favorite pure maple syrup or whatever pancake syrup you have on hand. A splash of vanilla, some maple extract, a bit of heavy cream or milk and you are on your way. Whip or whisk this up until smooth and creamy then pop into a container and refrigerate for a few hours. This will remain soft and may be a little loose, but boy does it pack a punch.
This spread is tangy with just a hint of sweetness from the maple syrup, but if you would like yours a little sweeter, just add 1/2 cup of powdered sugar and beat that in. Now you really have a modified cream cheese frosting ready to go for all those delicious pumpkin goodies you will be churning out of your kitchen this fall!
This should be stored in an airtight container and should be used within two weeks. I know it won't last that long! I hope you give this maple cream cheese spread a try and I hope you love it!
Happy Eating!
Get a printable version of this recipe here: https://bit.ly/3lqMsia
Get my cookbooks here: http://bit.ly/1czqM5R
Business Inquiries can be sent to:
info@noreenskitchen.com
Check me out on social media!
Facebook: http://on.fb.me/12bdibt
Twitter: @noreenskitchen
Instagram: http://bit.ly/12bdqrp
Google + http://bit.ly/1o5GMYy
***MAILING ADDRESS****
Noreen's Kitchen
PO Box 14173
New Bern, NC 28561
Have a question for me? Send me an email:
info@noreenskitchen.com
Noreen's Kitchen Community Guidelines (The Rules)
http://bit.ly/2i7VocU
Any links to Amazon are, in many cases, affiliate links.
Produced by Noreen's Kitchen ©2008-2016 all rights reserved All embeds must live link to Noreen's Kitchen channel. No Editorial Excerpts without permission, Violators agree to pay royalties, all court costs, all collections & all lawyers fees.
41
views

SLOW COOKER MEATBALL MINESTRONE!! CROCKTOBER EXTRAVAGANZA!!
Be sure to subscribe to all these channels so you don't miss out on any of the CROCKtober videos!
CROCKtober Extravaganza 2021 FB Group
https://www.facebook.com/groups/12100...
CROCKtober Extravaganza 2021
Jeni Gough https://bit.ly/3D2xN2B
A Country Life https://bit.ly/3ov0nWk
Noreen's Kitchen https://bit.ly/3DafJn0
The Bealles https://bit.ly/3Fe2x2t
That 1870's Homestead https://bit.ly/3orTCob
Parsnips and Parsimony https://bit.ly/3ortQjJ
Homestead Dad https://bit.ly/3F8tVyV
organizedMOM https://bit.ly/3mo1R1I
Apron strings https://bit.ly/2ZUz79t
Linda's Pantry https://bit.ly/3itxlCE
Gregs Kitchen https://bit.ly/3ixEHF7
Freedom Homestead https://bit.ly/2ZUzj8H
Diane - The Canning Nana https://bit.ly/3iwgJu2
Our HodgePodge Homestead https://bit.ly/3F6UoN8
Frugal Fit Mom https://bit.ly/3Fg4yeA
Whippoorwill Holler https://bit.ly/3mmYHvm
Souper at 60 https://bit.ly/3DcONTV
A Good Life Farm https://bit.ly/3FhhIYw
2leelou Creates https://bit.ly/3mjXvZI
Prepper Potpourri https://bit.ly/2ZUHGB6
In the Kitchen with Karen https://bit.ly/3D8q4Qx
The Purposeful Pantry https://bit.ly/3iv6hCP
Helga's Pennsylvania Cooking https://bit.ly/3itZ7yC
Arizona Homestead https://bit.ly/3DbkNrA
Fantail Valley Homestead https://bit.ly/3FcSLxu
Mennonite Farmhouse: https://bit.ly/3mpD8KJ
Little Village Homestead https://bit.ly/3mllnMn
Little Urban Homestead https://bit.ly/3D7rlHt
Country living with the Bateman's: https://bit.ly/3ovmL1S
Today I am excited to have been invited to participate in the CROCKtober Extravaganza! Every day in October you will find a new video posted, brought to you by a curated selection of folks who were hand picked by our host, Jeni! You will find all things slow cooker and instant pot! One new video, every day culminating with a give away by Jeni for a crockpot on the 31st! So be sure to leave a comment down below and then go check out all the channels so you don't miss a video or an opportunity to enter the giveaway! Also be sure to go over to Facebook and join the CROCKtober Facebook group! Lots of fun to be had by all!
We have chosen to share this delicius, meatball minestrone soup that is so simple to throw together with fresh vegetables of your choice and homemade mini meatballs from my favorite basic recipe. You can choose to use my version which is included in the written recipe the link to which is below and posted in the pinned comment below the video or you can use frozen mixed vegetables and frozen meatballs along with the other ingredients to make this super simple, budget friendly and just as delicious!
Minestrone is nothing more than a delicious vegetable soup that we traditionally serve with some sort of tiny pasta, whether it be elbows, baby shells or wagon wheels, which were a favorite when was a kid. I have added the meatballs to make this extra hearty and delicious and really a one pot dish.
This can be made in the slow cooker or the electric pressure cooker. Both techniniques are included in my written recipe. This can be made as simple or elaborate as you choose, but either way you will end with a delicious, hearty soup that is chock full of nutritious vegges and little meatballs that are sure to please!
Be sure to check the pinned post for links to the recipe as well as the Facebook group and all the wonderful participants in the CROCKtober Extravaganza!
I hope you give this a try and I hope you love it!
Happy Eating!
Get a printable version of this recipe here; https://bit.ly/3DdVepP
Business Inquiries can be sent to:
info@noreenskitchen.com
Check me out on social media!
Facebook: http://on.fb.me/12bdibt
Instagram: http://bit.ly/12bdqrp
Any links to Amazon are, in many cases, affiliate links.
Produced by Noreen's Kitchen ©2008-2016 all rights reserved All embeds must live link to Noreen's Kitchen channel. No Editorial Excerpts without permission, Violators agree to pay royalties, all court costs, all collections & all lawyers fees.
255
views
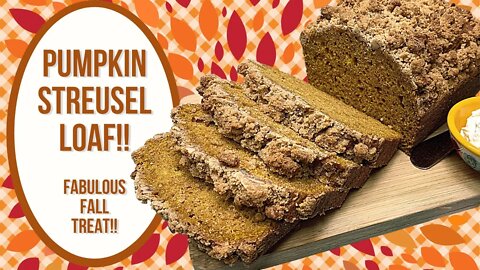
PUMPKIN STREUSEL LOAF!! FABULOUS FALL TREAT!!
Nothing says fall like something made with pumpkin! Am I right? Today I am sharing my fabulous, quick and easy and a little bit fancy, Pumpkin Streusel loaf. A step up from regular pumpkin bread that will have them coming back for more. Trust me this one will disappear quick if you're not careful! Made with all the ingredients you might assume, but with a couple twists along the way. This year I hope you will give this version a try. I promise if you make it once you will come back to it again and again!
My pumpkin bread recipe is moist, flavorful and has a super crumby topping that is just amazing! LIke your favorite crumb cake and your favorite pumpkin bread had a baby! This one is definitely a keeper! This brings together all the regular ingredients. I am using canned pumpkin but if you like to use your own home cooked version, you can use 2 cups. I am also adding buttermilk to my recipe, which gives great rising power to the baking soda and baking powder as well as giving the moist factor a boost. Not to mention the flavor it brings to the table. If you don't have buttermilk and don't want to purchase just for one recipe use some sour cream instead. I do not recommend using the old milk and vinegar trick because that is not buttermilk. It is soured milk and really isn't the same because it does not contain the necessary cultures that regular buttermilk or sour cream bring to the table.
The real champ here is the topping! I mixed up half a batch of my favorite big batch streusel and popped it on top of these loaves to make them out of this world delicious! You can use as much or as little streusel as you like and if you have leftover you can store it in the freezer for another time when you make muffins, a pie or a coffee cake. It's great to have on hand and you'll reach for it again and again!
These loaves are delicious sliced and enjoyed on their own or with a smear of cream chese or butter or honey butter or maple butter or maple cream cheese spread. The latter of which may or may not be coming to the channel some time soon!
These loaves can be stored in an airtight container, a zip top bag or wrapped tightly in two layers of plastic wrap until eaten or you can freeze them for up to three months. Bake a bunch and enjoy them all year long! This recipe will make two large loaves like I made. Four small loaves or 24 or more muffins!
I hope you give this recipe for pumpkin streusel loaf a try sometime soon and I hope you love it!
Happy Eating!
You can find a printable version of this recipe here: https://bit.ly/3zRO0Wf
Link to Big Batch Streusel video: https://bit.ly/3upnCSy
Link to Pumpkin Pie Spice video: https://bit.ly/3me1KWy
Get my cookbooks here: http://bit.ly/1czqM5R
Business Inquiries can be sent to:
info@noreenskitchen.com
Check me out on social media!
Facebook: http://on.fb.me/12bdibt
Twitter: @noreenskitchen
Instagram: http://bit.ly/12bdqrp
Google + http://bit.ly/1o5GMYy
***MAILING ADDRESS****
Noreen's Kitchen
PO Box 14173
New Bern, NC 28561
Have a question for me? Send me an email:
info@noreenskitchen.com
Noreen's Kitchen Community Guidelines (The Rules)
http://bit.ly/2i7VocU
Any links to Amazon are, in many cases, affiliate links.
Produced by Noreen's Kitchen ©2008-2016 all rights reserved All embeds must live link to Noreen's Kitchen channel. No Editorial Excerpts without permission, Violators agree to pay royalties, all court costs, all collections & all lawyers fees.
39
views

FOUR FALL FAVORITE RECIPES!! COZY AND COMFORTING!!
Check the top comment for links to the recipes!
The air is starting to get crisp in the mornings and today was the first day without a heavy,humid, heat to the air. Fall is on the way and I could not be happier. Summer is in my rear view and good bye! See you in 9 months! Time to get those warm and cozy comfort food recipes out. Time to revisit a few of my family's fall favorites! I know these will warm your heart and feed your body. They are all quick and easy and most importantly delicious!
First up is a quick dump and go slow cooker recipe for pork loin with applesauce. Two things that go together so well! If you have never thought of using a jar of applesauce to stew a pork roast in then you are in for a treat! Give this one a try and pair it with egg noodles and fried cabbage for a true fall festival of flavors!
It just wouldn't be fall without something deliciously pumkin now would it? These pumpkin scones are a riff off of my basic cream cheese scone recipe that makes them light, fluffy and moist. These are your favorite baking powder biscuits on steroids. Lightly sweet with the taste of pumpkin with just a bit of crunch from some crystal sugar on top. These are simple to make and when they come out of the oven you can watch the magic as these disappear!
Next up a delicious selection for your pressure cooker. This white bean, chicken chili is simple to throw together using pantry and freezer staples and only takes about a half an hour to cook. This is delicious on it's own or topped with shredded cheese, sour cream and a scattering of white onion along with a handful of tortilla chips for a delicious, hearty meal that will keep your family coming back for more! The beauty here is that this recipe is perfect for freezer banking and you can easily make two meals in one pot. One for tonight and one for another time. Just freeze and either thaw when ready or pop back into your pressure cooker with a bit of water and cook for five minutes. Boom, dinner in a flash!
Finally a cranberry and orange cereal snack mix that may be a welcomed respite from the norm. This is sweet and savory, crispy and chewy but most of all my very favorite delicous fall snack ever. Simple ingredients come together to make an unusual combination that everyone is sure to love! Perfect for fall and it carries all the way through the holidays, making this mix perfect for gift giving!
I hope you give these favorite fall recipes a try sometime soon and I hope you love them!
You can find printable versions of these recipes here:
Slow Cooker Pork in Applesauce: https://bit.ly/3ubTutN
Sugar Crusted Pumpkin Scones: https://bit.ly/3uhHfMf
White Bean and Chicken Chili: https://bit.ly/2XV8qAE
Cranberry Orange Snack Mix: https://bit.ly/3lYtXRa
Get my cookbooks here: http://bit.ly/1czqM5R
Business Inquiries can be sent to:
info@noreenskitchen.com
Check me out on social media!
Facebook: http://on.fb.me/12bdibt
Twitter: @noreenskitchen
Instagram: http://bit.ly/12bdqrp
Google + http://bit.ly/1o5GMYy
***MAILING ADDRESS****
Noreen's Kitchen
PO Box 14173
New Bern, NC 28561
Have a question for me? Send me an email:
info@noreenskitchen.com
Noreen's Kitchen Community Guidelines (The Rules)
http://bit.ly/2i7VocU
Any links to Amazon are, in many cases, affiliate links.
Produced by Noreen's Kitchen ©2008-2016 all rights reserved All embeds must live link to Noreen's Kitchen channel. No Editorial Excerpts without permission, Violators agree to pay royalties, all court costs, all collections & all lawyers fees.
40
views
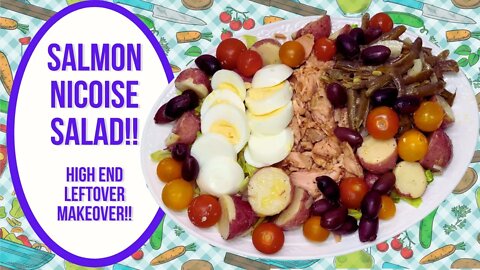
SALMON NICOISE SALAD!! HIGH END LEFTOVER MAKEOVER!!
Let's take some of that delicious leftover honey garlic glazed salmon as well as the green bean and potato salad that we made in previous videos and make a delicious, high end style lunch that will be perfect for you to serve friend, family or just yourself! You deserve something special don't you? This salad is my take on a traditional French Nicoise salad that hails from Nice in the south of France. If you can't vacation on the Riviera, you can bring the French Riviera to your dining room table! This one is so easy when you make it with items you have in the fridge! It is versatile and you can turn leftovers into haute cuisine! I know you are going to love this one!
A traditional salad nicoise would typically have poached tuna or preserved anchovies or both along with steamed harcots verts or French style green beans as well as some boiled, cold potatoes that were either small and left whole or halved or sliced. Sometimes red onion is strewn about and hard cooked egg is almost always present as well as tiny tomatoes or wedges of fresh garden tomatoes and briney black or green olives. The truth is you can really create your own version and that is exactly what I have done here.
I took one of the generous salmon filet that we made in a previous video and simply took a fork and broke it into semi large flakes then placed those in the middle of a bed of shredded romaine hearts. Then we took that potato and green bean salad that was dressed with that delicious white wine vinaigrette dressing and I separated the green beans and the potatoes so we could more easily compose this salad, but really I didn't need to do that. I added a couple of perfectly hard cooked eggs, some heirloom cherry tomatoes and some pitted Calamata olives to the platter and voila' Pierre's your uncle! Salad Nicoise my way.
If you are not keen on the green beans, use some steamed asparagus. Or if you have some leftover grilled veggies like zucchini, yellow squash and bell peppers, add those instead. If you don't prefer the steamed, fish how about some poached chicken or leftover grilled steak. Would that constitute a "nicoise" per se? Probably not, but if it makes you happy and it's delicious, then why not go there? I only aim to inspire!
Since our green bean and potato salad was dressed with the white wine vinaigrette and the salmon had that delicious honey garlic glaze I opted not to add anymore dressing to this salad because there is already a lot of flavor going on in there and I was right to do just that. The yolk of the egg, combined with the moist salmon and the olives along with the dressing on the potatoes and green beans, made for a delicious creamy texture that coated the salad when served up in bowls for lunch. It was seriously delicous and a welcomed mid week treat!
I hope this inspires you to put together a lovely, no cook Nicoise style salad for lunch or dinner sometime soon and I hope you love it!
Happy Eating!
You can find a printable version of this recipe here: https://bit.ly/3zw7SOv
Get my cookbooks here: http://bit.ly/1czqM5R
Business Inquiries can be sent to:
info@noreenskitchen.com
Check me out on social media!
Facebook: http://on.fb.me/12bdibt
Twitter: @noreenskitchen
Instagram: http://bit.ly/12bdqrp
Google + http://bit.ly/1o5GMYy
***MAILING ADDRESS****
Noreen's Kitchen
PO Box 14173
New Bern, NC 28561
Have a question for me? Send me an email:
info@noreenskitchen.com
Noreen's Kitchen Community Guidelines (The Rules)
http://bit.ly/2i7VocU
Any links to Amazon are, in many cases, affiliate links.
Produced by Noreen's Kitchen ©2008-2016 all rights reserved All embeds must live link to Noreen's Kitchen channel. No Editorial Excerpts without permission, Violators agree to pay royalties, all court costs, all collections & all lawyers fees.
32
views
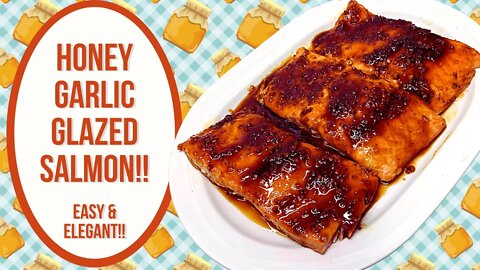
HONEY GARLIC GLAZED SALMON!! EASY AND ELEGANT!!
Time for a main dish so quick, easy and elegant you can serve it to guests on a weeknight! Yes, I said a weeknight! This honey garlic glazed salmon is a real winner. So fast and easy you won't even believe it! The glaze mixes up fast using ingredients that we all probably have on hand and all you need to do while its baking is fix a big salad or steam some veggies and make some rice on the side. I love a quick dinner, especially on a busy night. This one is good enough for company and I know you and your family are going to love it!
This starts off with some good, fresh salmon filets. I have some non frozen, wild caught, atlantic salmon, but love a good Alaskan version as well. I also prefer to purchase the whole side of salmon and remove the skin myself, but today my grocery store only had this prepackaged fresh version available. I have four nice filets that were also skinless. My preference but if you like, leave the skin on. It will not get crispy with this preparation so that I why I prefer to leave it off.
Mixing up this glaze is super simple. Some honey, soy sauce, grainy, brown or Dijon mustard, lemon juice and chopped garlic make an amazing glaze that goes on the filets. I just whisked this together and then brushed it on. Preheat your oven to 350 degrees and pop the salmon in for 20 to 25 minutes checking at the 10 minute mark to baste again with more glaze. You want to be sure not to overcook your salmon it should just flake and still be moist and if you prefer just a little less than well done in the middle. I like mine just done. Pull it from the oven and allow to rest while finishing up the rest of your meal.
I used about half the glaze on the baking fish and popped the rest in a saucepan. When the fish was done, I tipped the liquid from the roasting pan into the saucepan as well then turned that on full crack and monitored it until it reduced down to a lovely jammy consistency. I brushed this reduced glaze over the filets for a finishing touch. If desired sprinkle the salmon with some toasted sesame seeds for a great garnish.
This salmon is lovely eaten straight from the oven or it can be served cold on a salad platter later. The leftovers are lovely for this and later we will be sharing a video of a composed salad using one of these filets served cold and flaked to perfection.
I hope you give this honey garlic glazed salmon a try sometime soon and I hope you love it!
Happy Eating!
A printable version of this recipe can be found here: https://bit.ly/3CsLYxH
Get my cookbooks here: http://bit.ly/1czqM5R
Business Inquiries can be sent to:
info@noreenskitchen.com
Check me out on social media!
Facebook: http://on.fb.me/12bdibt
Twitter: @noreenskitchen
Instagram: http://bit.ly/12bdqrp
Google + http://bit.ly/1o5GMYy
***MAILING ADDRESS****
Noreen's Kitchen
PO Box 14173
New Bern, NC 28561
Have a question for me? Send me an email:
info@noreenskitchen.com
Noreen's Kitchen Community Guidelines (The Rules)
http://bit.ly/2i7VocU
Any links to Amazon are, in many cases, affiliate links.
Produced by Noreen's Kitchen ©2008-2016 all rights reserved All embeds must live link to Noreen's Kitchen channel. No Editorial Excerpts without permission, Violators agree to pay royalties, all court costs, all collections & all lawyers fees.
92
views
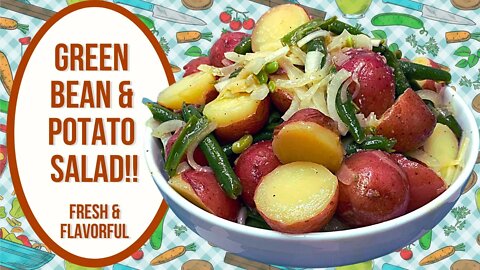
GREEN BEAN AND POTATO SALAD!! FRESH & FLAVORFUL!!
Let's use some of that delicious white wine vinaigrette dressing and make an end of summer salad that is a little bit different but sure to please! This has, as you may expect, fresh steamed green beans and cooked to perfection, tender, baby red potatoes. Served warm this salad is a lovely accompaniment to any type of grilled, steamed or baked fish, chicken or other protein. Served cold it is a wonderful go along for any type of cold salad platter. This is a great make ahead salad that can stand up in the fridge for at least a week. Make quick work of this fabulous side dish by cooking the beans and the potatoes in your pressure cooker and the this salad on the table in pretty quick order. I think you are going to love this!
This salad is not your typical potato salad. This one is just a little different. We are not using any mayonnaise here. Today we are going to be using that delicious white wine vinaigrette dressing we made in a previous video. If you missed that, you can see it here: https://bit.ly/2Xy171A
This salad has just a few ingredients, the green beans, the potatoes a bit of sliced sweet onion, which you can sub out for red or green onion or leave it out if you prefer and a healthy sprinkling of salt. Don't forget the salt because those potatoes really love it and in the end it will seriously enhance the flavors.
I cooked both the green beans and the potatoes in my electric pressure cooker. I cooked them separately to make things a bit easier. The beans are much more tender and require much less time than the potatoes which are dense and require a longer cooking time. On my pressure cooker, which may be different than yours, as I do not have an "Instant Pot", I cooked the beans on the vegetables/fish setting and manually adjusted the pressure to low for 2 minutes let them cook and immediately quick released the pressure once the timer went off. Once done the beans were plunged into an ice bath to quick cool. The potatoes were placed in the basked of the pressure cooker and cooked on the vegetable/fish button and manually selected medium pressure for 4 minutes. I did a quick release of the pressure as soon as the timer went off and did not put the potatoes into an ice bath but did cut them in half.
Once all the components were ready I tossed the beans and potatoes along with half a slivered sweet onion and half a cup of the white wine vinaigrette dressing in a large bowl. Gave everything a sprinkling of kosher salt and tasted for seasoning. At this point you have the option of adding the juice of half a fresh squeezed lemon if you like a little more acidity and brightness. My vinaigrette was just right so I did not add the lemon.
If you don't want to make the vinaigrette dressing or prefer something different, any oil and vinegar based dressing is going to work here. Your favorite Italian, sweet onion or other bottled dressing is going to be perfect. Just be sure to dress the salad when the potatoes are still on the warm side to get the most flavor infusion as possible.
Serve this salad immediately or chill for later. Keep this in a sealed container in the refrigerator for up to a week. Take it for lunch, use it as a quick side or addition to a dinner style salad during the week. I think you will find yourself reaching for this fresh and flavorful dish often and I know you are going to enjoy every bite!
I hope you give this different spin on a potato salad with green beans and no mayo a try and I hope you love it!
Happy Eating!
You can find a printable version of this recipe here: https://bit.ly/39fjhY8
Get my cookbooks here: http://bit.ly/1czqM5R
Business Inquiries can be sent to:
info@noreenskitchen.com
Check me out on social media!
Facebook: http://on.fb.me/12bdibt
Twitter: @noreenskitchen
Instagram: http://bit.ly/12bdqrp
Google + http://bit.ly/1o5GMYy
***MAILING ADDRESS****
Noreen's Kitchen
PO Box 14173
New Bern, NC 28561
Have a question for me? Send me an email:
info@noreenskitchen.com
Noreen's Kitchen Community Guidelines (The Rules)
http://bit.ly/2i7VocU
Any links to Amazon are, in many cases, affiliate links.
Produced by Noreen's Kitchen ©2008-2016 all rights reserved All embeds must live link to Noreen's Kitchen channel. No Editorial Excerpts without permission, Violators agree to pay royalties, all court costs, all collections & all lawyers fees.
103
views
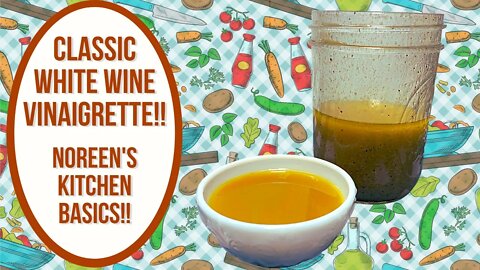
CLASSIC WHITE WINE VINAIGRETTE DRESSING!! KITCHEN BASICS!!
Today we are getting down to basics! This classic, white wine vinaigrette salad dressing is the most basic of basics! This is a great recipe that will serve you for a lifetime and beauty here is that you will use ingredients that you most likely already have on hand. Salad dressing is so easy to make. Yes I know you can pick up a bottle in any grocery store, however homemade is so much tastier and fresher and since you already have what you need, why not make it yourself? This one is quick, simple and delicious. Perfect for dressing a bowl of greens, a plate of home grown tomatoes, or as a marinade for chicken, pork, fish or seafood. You will get tons of mileage out of this basic but timeless recipe!
The ingredients list is sparse, but that does not mean you can't amp it up if you like! It starts with olive oil or whatever oil you use on an everday basis. Do you like avocado oil, peanut oil, vegetable oil or a delicious nut oil? Use that! The ratio here is 3 parts oil to 1 part white wine vinegar which you should not confuse with white vinegar. White vinegar is a petroleum byproduct and has a very high acidic taste and can be acrid. White wine vinegar comes from, as luck would have it, white wine. Fermented in barrels and strained to become this mild, delicious vinegar.
Most vinaigrette will have some sort of emulsifier. In this case we are using some Dijon mustard. Grainy mustard or Chardonnay mustard would be great here as well. Your choice, however I do not recommend using regular yellow mustard. Keep that for your hot dog. Next up a little sweetness to offset the tartness of the vinegar. I am using honey, you should feel free to use agave nectar, maple syrup, or if you want a fruity dressing pop in a bit of your favorite fruit preserves for a spunky raspberry or apricot vinaigrette. Salt and pepper to taste and you are ready to go.
I like to pop everything in a mason jar and shake this up. You can always make this in a bowl with a whisk or even in your standard or shake blender. It's all going to work here. Use what you have, make this your own and you are on your way to greatness.
I have made you the most basic of this recipe. If you prefer your dressing to be a bit more tart, use the ratio of 2 parts vinegar to 3 parts oil and if you really like the tartness to shine, use equal parts of oil to vinegar. You can change this up by using red wine vinegar instead of white or even champagne vinegar will add a different flavor still. If you want to add more flavor try adding a finely minced shallot or a bit of sweet onion, a clove of fresh garlic or some freshly snipped herbs from the garden such as chives, tarragon or dill. So many possibilities here! What direction do you want to go?
This classic dressing is one that will serve you for a lifetime. One you will make without refering to a written recipe and one that you will teach generations to come. One that you will reach for often for so many uses. I hope you give this classic white wine vinaigrette dressing a try sometime soon and I hope you love it!
Happy eating!
You can find a printable version of this recipe here: https://bit.ly/3no0iDk
Get my cookbooks here: http://bit.ly/1czqM5R
Business Inquiries can be sent to:
info@noreenskitchen.com
Check me out on social media!
Facebook: http://on.fb.me/12bdibt
Twitter: @noreenskitchen
Instagram: http://bit.ly/12bdqrp
Google + http://bit.ly/1o5GMYy
***MAILING ADDRESS****
Noreen's Kitchen
PO Box 14173
New Bern, NC 28561
Have a question for me? Send me an email:
info@noreenskitchen.com
Noreen's Kitchen Community Guidelines (The Rules)
http://bit.ly/2i7VocU
Any links to Amazon are, in many cases, affiliate links.
Produced by Noreen's Kitchen ©2008-2016 all rights reserved All embeds must live link to Noreen's Kitchen channel. No Editorial Excerpts without permission, Violators agree to pay royalties, all court costs, all collections & all lawyers fees.
34
views
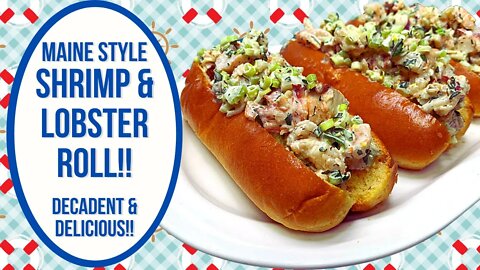
MAINE STYLE SHRIMP AND LOBSTER ROLL!! DECADENT AND DELICIOUS!!
Let's use the lobster we made in the pressure cooker along with some shrimp I made the same way as well as that delicious, creamy, lemon dill dijonnaise to create our own version of a regional North Eastern classic, the lobster roll! My version of this northeastern favorite is chock full of cooked lobster tail meat and jumbo shrimp tossed with some crispy, crunchy veggies and that creamy lemony dressing. All stuffed into the obligitory top split brioche bun. This one is truly decadent and delicious! A great way to wind up summer with friends and family when you really want to treat them right!
This one is super simple and when you have all the components in place it is lightening fast! I am using both shrimp and lobster to put my spin on a traditional Maine style lobster roll sandwich. I used four lobster tails but this did not really render enough meat for me to make even two sandwiches stuffed properly so I cooked up some additional jumbo shrimp that I had in the freezer from earlier in the summer. I cooked the shrimp in the pressure cooker as well and just rapid cooled it in some ice water after it was finished cooking. The lobster and the shrimp have both been cut up into similiarly sized chunks. Not too big and not too small. Like Goldilocks would like them, just right!
The lobster and shrimp get tossed in a bowl with some minced celery, green onion and parsley. Then pour on just enough of that delicious creamy, lemon dill Dijonnaise to coat everything lightly. You do not want to over dress this filling and you don't want to have any of the sauce pooling in the bottom of the bowl. Over dressing is going to be the enemy here. Then using a fork, gently toss the whole mixture together so as not to break up the meat further. Remember, we want nice chunks of lobster and shrimp. We aren't trying to make a tuna salad.
When your filling is ready, stuff this into some delicious split to brioche buns. If you cannot find the split top buns or even the brioche buns, a standard hot dog bun will do. You want a nice soft bread here, not a hard roll. A great alternative would be a potato hot dog bun. Then stuff the filling in those buns, again, not too much, and not too little. Don't be stingy but don't give away the farm either!
Now it's time to enjoy! Serve these up with pints of your favorite lager, pale ale or grolsch and some kettle cooked chips! Extra points if you fry up your own chips! Waffle fries would be a great option here as well! Then feast to your hearts content with friends and family because good food is even better with good company!
I hope that this gives you a great idea for your next get together! Something a little different and a lot delicious! I hope you give this Maine style shrimp and lobster roll with lemon dill Dijonnaise a try sometime soon and I hope you love it!
Happy Eating!
A printable version of this recipe can be found here: https://bit.ly/3jQBG3U
Get my cookbooks here: http://bit.ly/1czqM5R
Business Inquiries can be sent to:
info@noreenskitchen.com
Check me out on social media!
Facebook: http://on.fb.me/12bdibt
Twitter: @noreenskitchen
Instagram: http://bit.ly/12bdqrp
Google + http://bit.ly/1o5GMYy
***MAILING ADDRESS****
Noreen's Kitchen
PO Box 14173
New Bern, NC 28561
Have a question for me? Send me an email:
info@noreenskitchen.com
Noreen's Kitchen Community Guidelines (The Rules)
http://bit.ly/2i7VocU
Any links to Amazon are, in many cases, affiliate links.
Produced by Noreen's Kitchen ©2008-2016 all rights reserved All embeds must live link to Noreen's Kitchen channel. No Editorial Excerpts without permission, Violators agree to pay royalties, all court costs, all collections & all lawyers fees.
158
views
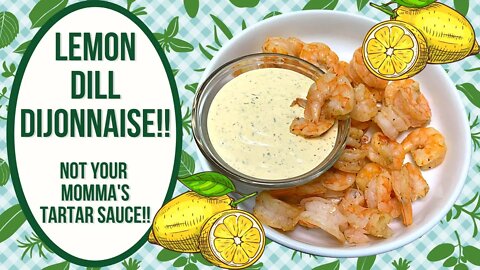
LEMON DILL DIJONNAISE!! NOT YOUR MOMMA'S TARTAR SAUCE!!
Today I am sharing a delicious recipe for lemon dill Dijonnaise which is like a creamy, mustardy, lemony sauce filled with dill and other flavors that is the perfect mix in for your favorite seafood or fresh chicken salad. This is a great alternative to tartar sauce or even as an addition next to your favorite cocktail sauce. This is perfect for dipping freshly steamed shrimp or crab or used as a tangy sauce to serve with all those delicious fried appetizers like fried pickles, mozzarella sticks, mushrooms or zucchini! I know that you are going to love this one and its so easy to make using things you already have in your fridge!
I am in the process of working up to the final video for a regional sandwich favorite but had to take the opportunity to share this sauce which will be used in the final product. This lemon, dill, Dijonnaise is a nice flavorful, creamy dressing that you can use for a salad, or mix in to your favorite seafood, shrimp, crab or lobster salad or even make a delicious lemon and dill chicken salad to boost your sandwich game. This can be used in place of or in addition to traditional tartar sauce or alongside that dish of your favorite cocktail sauce. Giving people choices is a great way to expand their food universe! This sauce is sure to make a favorable impression!
This starts off with a good quality mayonnaise. We usually use either Hellman's or Dukes in our house. Rick is a fan of the Dukes. I am a life long fan of the Hellman's so that is what I normally reach for. Fun fact, Rick did a mayo throw down on his channel several years ago which is still popular today. We tasted a lot of mayonnaise and you would be surprised at the range of taste in something that literally has the same ingredients. If you are interested in seeing that video I will share a link here: https://bit.ly/2WMkkfm
Along with mayonnaise I have added Dijon mustard and I suggest sticking to Dijon specifically as any other type is not going to give you the same end result. I am using dill paste from the produce section, only because the dill at the store was very sad looking. I love the herbaciousness of fresh dill and the paste is a great alternative to the fresh, bonus is that it lasts a while in the fridge without going bad and having to toss it. I also added in the juice and zest of one lemon as well as a teaspoon of Worcestershire sauce and a few dashes of Tabasco. This was seasoned up with onion powder, garlic powder and celery seed. I did not add any salt or pepper as this sauce did not need it. This is full of tangy, salty flavor and a little hint of heat from the hot sauce. You can, of course, omit that if it is not your favorite.
Mix all these ingredients up in a bowl until well blended the pop in the fridge to chill before serving. This is always going to taste better after being allowed to sit. Giving all the ingredients time to get to know each other and for the dried spices to bloom. It should also get a little thicker after sitting.
I will be using this to make a delicious sandwich for an upcoming video but wanted to present this with some beautifully cooked shrimp that I made in my pressure cooker. I honestly won't ever do them any other way. Very quick and easy and they come out perfect every single time! This sauce is a delicious dip for fresh steamed shrimp or crab or even lobster if you are so inclined! Use this as a dip for your favorite fried fish or seafood and you are going to be amazed at how good it tastes!
I hope you give this lemon dill Dijonnaise a try sometime soon and I hope you love it!
Happy Eating!
You can get a printable version of this recipe here: https://bit.ly/3yHXAKP
Get my cookbooks here: http://bit.ly/1czqM5R
Business Inquiries can be sent to:
info@noreenskitchen.com
Check me out on social media!
Facebook: http://on.fb.me/12bdibt
Twitter: @noreenskitchen
Instagram: http://bit.ly/12bdqrp
Google + http://bit.ly/1o5GMYy
***MAILING ADDRESS****
Noreen's Kitchen
PO Box 14173
New Bern, NC 28561
Have a question for me? Send me an email:
info@noreenskitchen.com
Noreen's Kitchen Community Guidelines (The Rules)
http://bit.ly/2i7VocU
Any links to Amazon are, in many cases, affiliate links.
Produced by Noreen's Kitchen ©2008-2016 all rights reserved All embeds must live link to Noreen's Kitchen channel. No Editorial Excerpts without permission, Violators agree to pay royalties, all court costs, all collections & all lawyers fees.
62
views
1
comment
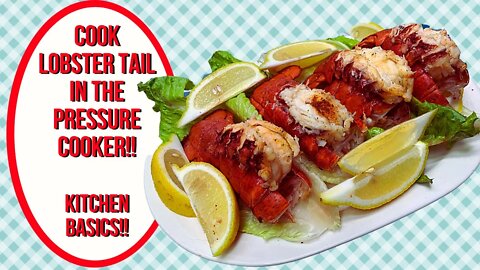
HOW TO COOK LOBSTER TAIL IN THE PRESSURE COOKER!! NOREEN'S KITCHEN BASICS!!
Going back to basics, in a way you may not have thought of. Today I am going to show you how I cook lobster tail in the pressure cooker! This is the quickest, best, most convenient way I have found for cooking these luxurious gifts from the sea. I am making these to use in another video for another regional sandwich favorite that I am excited to share so be sure to stay tuned for that one coming up later this week. Since my recipe requires lobster, we have to cook some and I wanted to take the opportunity to share how I do mine in the pressure cooker! I know you are going to love this idea and I think you are going to really want to give it a try!
We are starting off with four small lobster tails that I got from my local fish counter at Harris Teeter. These are a little on the small side, but this is what they had fresh today so we went with it. I like to process these a little before cooking and that requires nothing but a good rinse in cold water and a pair of kitchen utility scissors.
I like to cut all the way down the top side of the shell splitting in in half, but not cutting the whole tail in half. Then I run my fingers just between the meat and the shell to loosen gently This is not neccesary but I wanted to show you how to do it. The meat will loosen from the shell after cooking as well. Next you want to turn the tail upside down and being careful to avoid the barbs that run down the center of the tail, gently press at each division to crack the shell. This will help to avoid curling while cooking.
Now it's time to put everything into the pressure cooker! Add 1 cup of water, wine or beer to the vessel along with the juice of 1 lemon. I also tossed the lemon halves in the basket after I squeezed them for extra flavor during the cooking process. Then pop your prepped lobster tails in the basket and sprinkle with your favorite seafood seasoning. Today I am using some seasoning from Saltopia that my brother gave me as a gift this past Christmas. It smells and tasted amazing! But the standard Old Bay will work just fine!
I popped the lid on my cooker, made sure the vent valve was shut and set the machine on the "fish and vegetables" setting on the low option for 2 minutes which is the default. This will allow the machine to come to pressure, cook and then I like to allow the vessel to sit for two more minutes before quick releasing the remaining pressure from the vessle. Now your lobster tail is perfectly done and you can serve it or chill it for use later, which is what I am planning to do.
I hope that this was somewhat helpful in giving you a new idea in a way to cook lobster without having to boil large vats of water on the stove. This is quick, easy and makes a delicious end product. I hope you give this a try sometime soon and I hope you love it!
Happy Eating!
Get my cookbooks here: http://bit.ly/1czqM5R
Business Inquiries can be sent to:
info@noreenskitchen.com
Check me out on social media!
Facebook: http://on.fb.me/12bdibt
Twitter: @noreenskitchen
Instagram: http://bit.ly/12bdqrp
Google + http://bit.ly/1o5GMYy
***MAILING ADDRESS****
Noreen's Kitchen
PO Box 14173
New Bern, NC 28561
Have a question for me? Send me an email:
info@noreenskitchen.com
Noreen's Kitchen Community Guidelines (The Rules)
http://bit.ly/2i7VocU
Any links to Amazon are, in many cases, affiliate links.
Produced by Noreen's Kitchen ©2008-2016 all rights reserved All embeds must live link to Noreen's Kitchen channel. No Editorial Excerpts without permission, Violators agree to pay royalties, all court costs, all collections & all lawyers fees.
180
views
1
comment
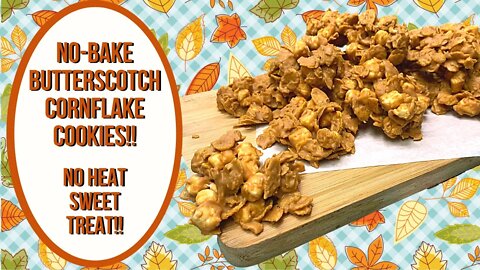
NO BAKE BUTTERSCOTCH CORNFLAKE COOKIES!! NO HEAT TREAT!!
I thought it was about time to do a little sweet treat since we have been doing so many savory options lately. It is still summer and still very hot where I live and across most of the country. Fall may be on the horizon, but I still do not want to turn on my oven. So a no bake cookie is on deck for today! This no bake, butterscotch cornflake cookie hits all those notes that you want in a sweet treat and trust me this one is sweet. You only need one of these delicious morsels that come together quick and have just a few ingredients from your pantry shelf. I know that you are going to love these!
No bake cookies are not really my favorite thing to make and I especially do not enjoy the ones that use the crispy chow mein noodles. But this cornflake version is delicious. It is chewy, crunchy, sweet and a bit salty. Perfect for eating with a tall glass of iced tea in the hot afternoon. These are great for tossing in the kids lunch boxes or sharing with friends and neighbors just because.
These, as you might expect, start off with corn flakes. Plain old fashioned corn flakes, which I tossed with some mini marshmallows to give this cookie a different, airy, chewy bite. Then I melted together some butterscotch chips, creamy peanut butter and some coconut oil. The coconut oil is important here because when we go to add the vanilla extract it will stay creamy. Without the coconut oil, it will seize the wax in the morsels. Its just science. Nothing to worry about. If you forgot to add the oil, just add it a spoon at a time until you get the righ consisency like I did. No harm, no foul.
I have also added a bit of kosher salt to the mixture to offset some of the sweetness. I think it works well here but if you prefer, you can leave it out. Once the creamy mixture is ready, pour it over the cornflakes and marshmallows and stir, stir, stir, until all that goodness is well blended and all the bits and pieces are coated. Now it's time to scoop.
I used a 1 ounce cookie scoop which is equivalent to approximately 2 tablespoons. I compacted the mixture in the scoop by scraping it on the side of the bowl as I was scooping. The placed each scoop of the mixture on a parchment lined baking sheet. Once everything was scooped, I placed them in the refrigerator for about 20 minutes until firmly set.
These should be stored in the refrigerator in an airtight container to retain freshness and especially if it is warm where you live. If you make these in the cooler months or live in a cooler climate you can allow these to set at room temperature and store them that way as well, but still in an airtight container.
The beauty of these cookies is that you can change it up and make your own creation. Change the corn flakes to oat rings, crispy rice or woven rice or corn cereal, whatever you have on hand could probably work. Change the butterscotch chips to dark, milk or white chocolate and put your own spin on these delicious morsels of goodness. Toss in some of your favorite chopped nuts for a bit more crunch! You make them your own. Use this as inspiration!
These are the perfect little sweet bite. More like a candy than a "cookie" but a delicious treat nonetheless. I think everyone is going to love these and I hope you give them a try sometime soon!
Happy Eating!
You can find a printable version of this recipe here: https://bit.ly/3joFR6G
Get my cookbooks here: http://bit.ly/1czqM5R
Business Inquiries can be sent to:
info@noreenskitchen.com
Check me out on social media!
Facebook: http://on.fb.me/12bdibt
Twitter: @noreenskitchen
Instagram: http://bit.ly/12bdqrp
Google + http://bit.ly/1o5GMYy
***MAILING ADDRESS****
Noreen's Kitchen
PO Box 14173
New Bern, NC 28561
Have a question for me? Send me an email:
info@noreenskitchen.com
Noreen's Kitchen Community Guidelines (The Rules)
http://bit.ly/2i7VocU
Any links to Amazon are, in many cases, affiliate links.
Produced by Noreen's Kitchen ©2008-2016 all rights reserved All embeds must live link to Noreen's Kitchen channel. No Editorial Excerpts without permission, Violators agree to pay royalties, all court costs, all collections & all lawyers fees.
49
views
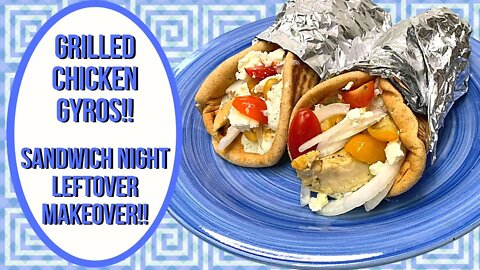
QUICK GRILLED CHICKEN GYROS!! LEFTOVER MAKEOVER!!
Today I am sharing a great way to use leftover chicken whether it's grilled, broiled or roasted and make some delicious, quick and easy, Gyros for sandwich night or for a quick lunch. This is super easy to throw together and a fablulous change from taco night! Yes, we love our tacos, but gyros are just as good and a great way to change things up! Using some warmed up pita bread, some warmed leftover or freshly grilled chicken and all the usual suspects, top that gyro the way you love it best. Wrap it in some foil just like the local Greek diner and you are ready to enjoy the fastest sandwich night ever!
These start with some delicous chicken, but you could also use leftover steak, pork loin or pork chops, whatever you like! I took some grilled chicken that was seasoned with some of that amazing Greek seasoning from Cavenders and I sliced it and tossed it in a skillet with a little water over medium high heat. Popped the lid on and let it simmer for a few minutes then removed the lid, drained the water and returned the chicken to the heat to sear for just a minute or two and it was as delicious as the day it was grilled.
While the chicken is warming, get your toppings ready. I used diced heirloom tomatoes, sliced, sweet onion, crumbled feta and some of our homemade Tzatziki sauce. You could add sliced black olives, thinly sliced cucumbers, green or red onion, shredded lettuce, or some lemon wedges for a good squeeze of acid. You decide what you like and make it happen!
You can find my video for traditional Tzatziki sauce here: https://bit.ly/3sKR193
Then all you have left to do is build your gyro! I like to lay down a piece of foil and put my warmed pita on top so that it is hanging halfway off the foil. Then spread the pita with a generous amount of that tzatziki, lay on some chicken slices, top with tomatoes, onions and crumbled feta. Then roll that pita sandwich up so it is sort of like a cone with the skinny end away from you, then fold up the part of the foil that is hanging off the pita and tightly wrap the sides up on to themselves wrapping your gyro in a safe, warm swaddle. This helps a lot when eating and really helps if you have children. You can also choose to lay down some parchment on top of the foil if you like.
These were so delicius and a quick way to fix dinner on the fly, especially during these super hot end of summer days. A great way to use bounty from the garden and use up the homemade tatziki sauce that we made for so many of our Mediterranean treats. This can be done in a variety of ways and everyone is going to love it!
I hope you give this idea for a different twist on sandwich night a try and I hope you make these grilled chicken gyros and I hope you love them!
Happy Eating!
Get my cookbooks here: http://bit.ly/1czqM5R
Business Inquiries can be sent to:
info@noreenskitchen.com
Check me out on social media!
Facebook: http://on.fb.me/12bdibt
Twitter: @noreenskitchen
Instagram: http://bit.ly/12bdqrp
Google + http://bit.ly/1o5GMYy
***MAILING ADDRESS****
Noreen's Kitchen
PO Box 14173
New Bern, NC 28561
Have a question for me? Send me an email:
info@noreenskitchen.com
Noreen's Kitchen Community Guidelines (The Rules)
http://bit.ly/2i7VocU
Any links to Amazon are, in many cases, affiliate links.
Produced by Noreen's Kitchen ©2008-2016 all rights reserved All embeds must live link to Noreen's Kitchen channel. No Editorial Excerpts without permission, Violators agree to pay royalties, all court costs, all collections & all lawyers fees.
45
views
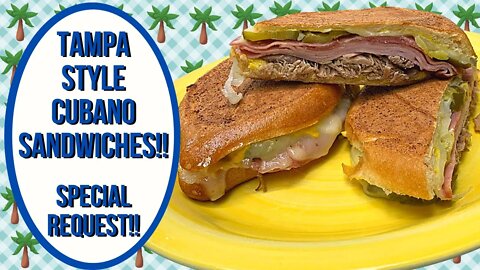
TAMPA STYLE CUBANO SANDWICHES!! VIEWER REQUEST!!
When we posted our last video for the mini muffaletta sandwiches a viewer requested that we do Tampa style Cubano sandwiches so I am here to deliver on that request! If are not familiar with the wildly popular cultural revolution that is the Cubano sandwich then let me help you. The Cubano is a sandwich made on traditional cassava bread with a soft texture and a crunchy crust. It is filled with tender roast pork, sweet ham, Swiss cheese pickles and mustard. The Tampa version include the addition of Genoa Salami. It is an homage to the immigrants that made the Tampa community what it is today. Built on these sandwiches that fueled the once grand cigar industry. A true gem in the crown of our nation that you may or may not know about. Today we learn.
I was excited at the request to share this sandwich. A number of years ago I did a burger inspired by the Tampa Cuban that was delicious but today we are going straight to the heart of things and creating this delicous yet simple sandwich that fed many a cigar factory worker but came to represent an entire city in the peninsula state.
Today I am using an accessible Bolillo roll as my bread because I do not have a source for the traditional Cassava bread that you will get in an authentic version of this sandwich. You can use a hard Italian roll or even a split baguette or french loaf to help recreate yours. The roll is smeared with a generous amount of yellow mustard and then we layer on the fillings each of which represent a group of immigrants that made Tampa great. First we layer on some pulled pork. I am using some that we smoked over fourth of July and I froze but you could easily use some leftover pork either sliced or pulled or procure some from the local deli. Next goes on some sweet ham, I am using black forest style ham. Top this with some Genoa salami and then a healthy dose of dill pickle slices. Place sliced Swiss cheese on top of everything and cap that off with the top bun. I used some quick garlic butter to brush on top.
I pressed my Tampa Cubano in my waffle iron that has flat plates included. This took a bit of work because we had to keep the top pressed down. But if you don't have a panini press or a waffle iron like I do, you can wrap your sandwiches in foil and put an iron skillet on the top and bake them in a 350 degree oven for 20 minutes. Alternatively you can place them in a hot skillet with another heavy skillet on top or a brick wrapped in foil. You can press a sandwich in many ways. Maybe you have a bacon press that would work in place of the brick. Get creative with what you have on hand in your kitchen.
The story of this Tampa style Cubano sandwich is that each of the filligs represent one of the cultures that made Tampa great. The bread and the pork represent the Cuban people. The ham the Spaniards, the Salami, the Italians and the pickles and mustard represent the German people. The Swiss cheese is what melts all these things together and makes them one cohesive and delicious represenatation of an entire culture and community that was built on the cigar industry.
If you are interested look up the history of Tampa. I find it quite charming and rich and one that everyone should know about! I hope that you will give this Tampa style Cubano sandwich a try sometime soon and I hope you love it!
Happy Eating!
You can get a printable version of this recipe here: https://bit.ly/2WglUWO
Get my cookbooks here: http://bit.ly/1czqM5R
Business Inquiries can be sent to:
info@noreenskitchen.com
Check me out on social media!
Facebook: http://on.fb.me/12bdibt
Twitter: @noreenskitchen
Instagram: http://bit.ly/12bdqrp
Google + http://bit.ly/1o5GMYy
***MAILING ADDRESS****
Noreen's Kitchen
PO Box 14173
New Bern, NC 28561
Have a question for me? Send me an email:
info@noreenskitchen.com
Noreen's Kitchen Community Guidelines (The Rules)
http://bit.ly/2i7VocU
Any links to Amazon are, in many cases, affiliate links.
Produced by Noreen's Kitchen ©2008-2016 all rights reserved All embeds must live link to Noreen's Kitchen channel. No Editorial Excerpts without permission, Violators agree to pay royalties, all court costs, all collections & all lawyers fees.
95
views
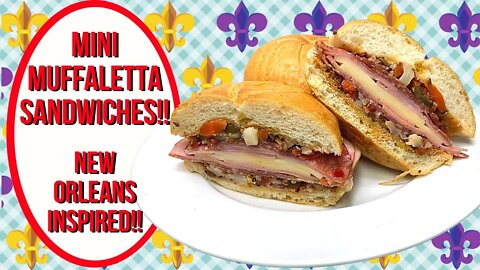
MINI MUFFALETTA SANDWICHES!! NEW ORLEANS INSPIRED!!
Let's use some of that delicious olive tapenade we made in a previous video and use it as the base for an olive salad that will go into these delicious "mini" muffaletta sandwiches! The muffaletta sandwich is a New Orleans classic. Born and bread in the heart of the Big Easy at the Central Market, this sandwich has been satisfying New Orleaneans for over a century! Filled with a generous abundance of meats and cheese and garnished with a salty, briney olive salad that takes this sandwich over the edge to a place you will want to come back to again and again!
I am calling these "mini" muffaletta sandwiches because I am not making this in the traditional manner. This is more of an "inspired" way of doing things using ingredients I could procure locally with ease. The original version of this sandwich is made on a large, round loaf of bread. Yes, the entire loaf is split and the sandwich is built inside. Intended to feed four to six people. Today I am using some fresh Kaiser rolls from a local deli. You could use any hard Italian or French style roll that will get the job done. If you like to make the original version you can seek out a large shepherd's style loaf of round bread or a French style Boule with a great crust will work as well.
The meats and cheeses traditionally include lots of thinly sliced salami. Either Genoa or Soprasetta or a combination of the two. Thin sliced ham such as Capicola, Danish or in my case Black Forest ham as well as Italian Mortadella which is, for all intents and purposes, Italian style bologna. The difference is that mortadella will often times have cheese and or roasted pistachios in the sausage itself, so that when sliced you can see the beautiful mosaic created by the addition of those ingredients. I could not procure any of this delicacy so I went with my favorite style German bologna and it works just fine. Add in some cheese. Today I am using Provolone but you could use that as well as a combination of mozzarella, ementaler, swiss or any other mild cheese you prefer.
The magic happens when you add the delicious olive salad which is what makes a muffaletta, a muffaletta. The Central Market makes and markets their own version of this "salad" which is a lovely combo of black and spanish olives fresh vegetables and olive oil. Since we made the olive tapenade, I thought this was a great starting point for the olive salad.
I took approximately a cup of my tapenade and combined it with some jarred giardiniera that I drained and chopped roughly. I added a couple tablespoons of olive oil to give the mixture the right consistency and "juiciness". This is pure gold and if you are a fan of both olives and pickled veggies, you are in for a real treat!
To build the sandwich simply spoon some olive salad on the bottom bun then layer the meats. Salami first, then bologna or mortadella, cheese, ham and more salami and topped off with more olive salad on the top bun then everything is mashed together for good measure! Some purists will tell you to wrap the sandwich tightly in plastic and set a weight on top and let it rest for at least an hour to allow the olive salad to do it's magic and soak into the bread and compress the behemoth. You can do that, but I don't think it's entirely necessary. Especially since you will want to eat it right away it will be too delicious smelling to resist!
I am telling you that delicious, does not begin to describe this delicacy! The combination of meats gives you many textures from soft bologna, chewy salami, sweet ham, and the cheese to the briney, salty goodness of that olive salad. Dare I say this really is a sandwich to try before you die!
I hope you will give my verison of the New Orleans Classic Muffaletta a try sometime soon and I hope you love it!
Happy Eating!
You can find a printable version of this recipe here: https://bit.ly/3iYQoW1
Get my cookbooks here: http://bit.ly/1czqM5R
Business Inquiries can be sent to:
info@noreenskitchen.com
Check me out on social media!
Facebook: http://on.fb.me/12bdibt
Twitter: @noreenskitchen
Instagram: http://bit.ly/12bdqrp
Google + http://bit.ly/1o5GMYy
***MAILING ADDRESS****
Noreen's Kitchen
PO Box 14173
New Bern, NC 28561
Have a question for me? Send me an email:
info@noreenskitchen.com
Noreen's Kitchen Community Guidelines (The Rules)
http://bit.ly/2i7VocU
Any links to Amazon are, in many cases, affiliate links.
Produced by Noreen's Kitchen ©2008-2016 all rights reserved All embeds must live link to Noreen's Kitchen channel. No Editorial Excerpts without permission, Violators agree to pay royalties, all court costs, all collections & all lawyers fees.
54
views
1
comment
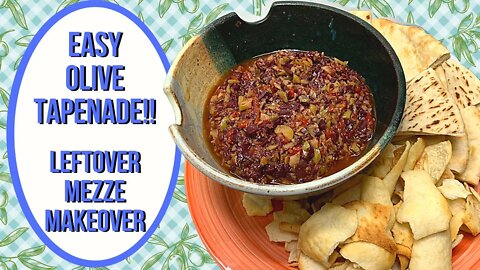
EASY OLIVE TAPENADE!! LEFTOVER MEZZA MAKEOVER!!
Let’s take some of those leftover olives and such from that beautiful Mediterranean Mezze platter and turn it into a useful condiment that we can employ as an appetizer, spread, pasta sauce and beyond! This olive tapenade is full of flavor, and it is something we love in our family, but have you ever gone to purchase this from the store? It will make your head spin when you see the price! A small jar that is about half a cup is more than $5! I can make so much more than that from leftovers that were on my Mezze platter or charcuterie board that we will be able to enjoy for the coming weeks! This is a fabulous, bougie leftover makeover that is sure to please in so many ways!
Tapenade can be made in several ways. It is basically a bunch of ingredients chopped up together and used to serve on baguette or as part of crostini or just as a briny dip. We love it and I really love how easy it is to make. I bet you have some of these ingredients on hand already. Maybe in the back of your fridge or in your pantry! This is a great option to make after a big holiday get together or even as a holiday gift for family and friends. You can mix up a big batch and jar it up and keep it in the fridge for gifting. This will make a great hostess gift as well as a quick, throw together appetizer for drop in guests with a glass of wine while visiting!
Today we are using the leftover calamata or brined black olives as well as the green olives brined with the Zataar seasoning along with some roasted red pepper strips, sun dried tomatoes in oil. Flavorizers include capers, minced garlic, and an anchovy filet, if you have anchovy paste, use about a teaspoon or you can always leave this out if you don’t have them or it is not your preference. Anchovies do not taste fishy; they add a bit of briny depth and nuttiness to the final dish. I am also adding some lemon juice and olive oil to finish.
I am using my food processor for ease, but you could easily do this on a large cutting board with a knife or a mezzaluna until the mixture reaches your preferred consistency. I like to add everything but the olive oil to the bowl of the food processor and then give this about 9 or 10 good pulses. Don’t over process the tapenade into a paste. That is not the result we are going for. We want this to have some good texture and if you can still see some larger slices of olive, all the better! Then you can transfer this to a bowl and stir in your olive oil.
Now you are ready to serve with some fresh bread, toasted baguette, soft or crunchy pita. This is a great interactive appetizer that can be served as is, but this tapenade has so many other opportunities! Use it as a sandwich spread for a New Orleans style Muffuletta sandwich, use it when steaming fish in parchment for a delicious and fancy main course. Drape of a piece of grilled chicken. Add to a salad, or to your marinara sauce for a flavor boost. Toss with warm pasta for a simple side dish or use it to enhance your favorite pizza! The possibilities are endless! Use your imagination!
I hope you give this easy olive tapenade a try sometime soon and I hope you love it!
Happy Eating!
You can find a printable version of this recipe here: https://bit.ly/3g45sj8
Get my cookbooks here: http://bit.ly/1czqM5R
Business Inquiries can be sent to:
info@noreenskitchen.com
Check me out on social media!
Facebook: http://on.fb.me/12bdibt
Twitter: @noreenskitchen
Instagram: http://bit.ly/12bdqrp
Google + http://bit.ly/1o5GMYy
***MAILING ADDRESS****
Noreen's Kitchen
PO Box 14173
New Bern, NC 28561
Have a question for me? Send me an email:
info@noreenskitchen.com
Noreen's Kitchen Community Guidelines (The Rules)
http://bit.ly/2i7VocU
Any links to Amazon are, in many cases, affiliate links.
Produced by Noreen's Kitchen ©2008-2016 all rights reserved All embeds must live link to Noreen's Kitchen channel. No Editorial Excerpts without permission, Violators agree to pay royalties, all court costs, all collections & all lawyers fees.
32
views
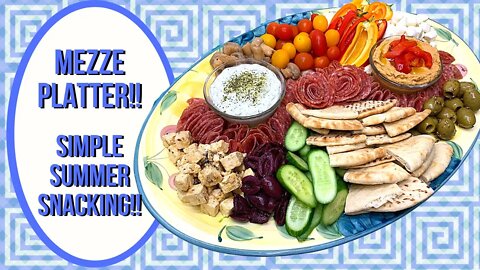
MEDITERRANEAN MEZZE PLATTER!! SIMPLE SUMMER SNACKING!!
Today is the culmination of all these delicious Greek and Mediterranean inspired dishes we have been making! This Mediterranean Mezze platter has got it all! This is the gathering of all things delicious! A combination of meats, cheeses, spreads, dips, and fresh and pickled veggies. Served up with crunchy and soft pita and perhaps some lavash bread or baguette. This platter makes for a great communal appetizer or even a light lunch or dinner. Everyone loves “picky” types of foods that can be enjoyed, and this platter is no exception. Full of delicious flavorful options there is seriously something here for everyone. I know you are going to love this summer friendly, no cook, quick to throw together platter during these hot dog days of summer! There is nothing like a cool and refreshing, no cook, option for dinner!
Mezze, as I understand it means “small plates” in the Greek. Which is the perfect explanation for how this platter is intended to be served. Everyone gets a little plate and a fork and takes what they like to enjoy with that cool glass of wine, sangria, or beer. Charcuterie is huge right now. Pictures of charcuterie boards and grazing tables, fill Instagram, Facebook and TikTok and for good reason! They are not only a feast for the eyes, but a delicious and simple way to feed a crowd. Mezze is to the Mediterranean much the same as Charcuterie is to France, Tapas is to Spain, Dim Sum is to China and Antipasto is to Italy. All delicious ways to eat and enjoy small bites of regional and cultural cuisine.
This Mezze platter I have built for you started with a large platter. You can use whatever you have to build one. A couple of dinner or pie plates will work just as well as a large platter. How about a wooden cutting board, a pizza peel, or even a large baking sheet. No matter what you choose, you can build a delicious platter that will wow your guests.
Mine started off on the platter by placing the anchor bowls for my Tzatziki and hummus then I created what is called a meat river. Which is nothing more than a bunch of sliced salami or cured meats that have been folded and arranged to look like a lovely ruffly river across the platter. You can simply shingle yours if you like, but ever since I learned about the meat river from a friend who does charcuterie boards for a living there is no going back! You can find her on Instagram @brooksboards. Here's a link: https://bit.ly/3s940Ru Have a look at her amazing work!
Now that you have your meat river anchor, you can fill your dishes with the dip and spread. Next, I added some mozzarella pearls, the marinated feta cheese, some brined options like calamata olives, brined green olives with Zaatar and some beautiful, marinated mushrooms. Next came some fresh options like halved, baby, sweet peppers perfect for dipping, Persian cucumbers sliced on the bias and a hand full of heirloom cherry tomatoes in all their brilliance. I swirled the top of the hummus and added a drizzle of olive oil and a pile of roasted red pepper strips to indicate what was in the dip and sprinkled the Tzatziki with some Greek seasoning for color. Then I piled the remaining empty space with wedges of soft sliced pita bread and put on the finishing touch of a couple salami roses for garnish. And that is how I made my beautiful Mediterranean Mezze platter.
You can build your platter using whatever you enjoy. Go to the olive bar at your favorite grocery store and get a little of everything! Add some prosciutto or grilled chicken skewers to your platter, or if you are really going full Club Med, make some delicious Mediterranean meat balls to serve along with this spread! You are the boss of your Mezze and I know you will come back to this time and time again. If not for its deliciousness, for its simplicity and ease!
I hope you give a Mezze platter try sometime soon and I hope you love it!
Happy Eating!
You can find all the recipes we made for this platter in this playlist: https://bit.ly/3xE3Fr2
Get my cookbooks here: http://bit.ly/1czqM5R
Business Inquiries can be sent to:
info@noreenskitchen.com
Check me out on social media!
Facebook: http://on.fb.me/12bdibt
Twitter: @noreenskitchen
Instagram: http://bit.ly/12bdqrp
Google + http://bit.ly/1o5GMYy
***MAILING ADDRESS****
Noreen's Kitchen
PO Box 14173
New Bern, NC 28561
Have a question for me? Send me an email:
info@noreenskitchen.com
Noreen's Kitchen Community Guidelines (The Rules)
http://bit.ly/2i7VocU
Any links to Amazon are, in many cases, affiliate links.
Produced by Noreen's Kitchen ©2008-2016 all rights reserved All embeds must live link to Noreen's Kitchen channel. No Editorial Excerpts without permission, Violators agree to pay royalties, all court costs, all collections & all lawyers fees.
79
views
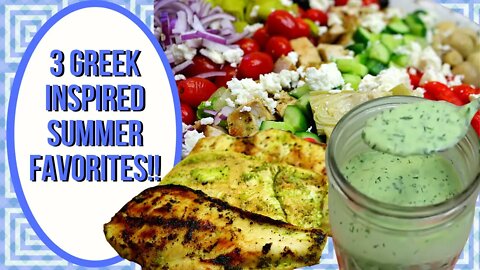
3 GREEK INSPIRED SUMMER FAVORITES!! MARVELOUS MEDITERRANEAN!!
Revisiting some delicious Greek inspired recipes that I have done in the past because they fit so well with what we are currently focusing on now. These recipes go right along with the delicius Mediterranean ideas we have been sharing on our channel recently. These three ideas are simple and accessible and super summery! Greek inspired cobb salad with a Greek marinated grilled chicken and a cool and creamy cucumber salad dressing. All these recipes come together to make a delicious, cool and refreshing meal for family or for sharing! I know that you will love having these in your recipe box!
Creamy cucumber dressing is super easy to make using plain yogurt, buttermilk, cucumbers, chives, onions, garlic and a variety of simple shelf ingredients to make a creamy and delicious dressing for salad any day of the week. I love making dressings at home and this one is a real winner. The addition of the cucumber makes this very refreshing and flavorful. I like to use Persian style or "mini" cucumbers because they are small, dense and have very few if any seeds at all. This dressing will keep in your fridge for up to a week but I promise you will want to put this on everything from your salad to grilled salmon to using it as a dip for a cool, refreshing veggie platter!
Next up is a Greek or Mediterranean style marinade for chicken, pork or fish. This also has cucumber along with dill, chives, onions, and a bunch of great spices. I marinated an entire family size tray of chicken breast using this marinade, but you could marinate anything you like. Chicken thighs would be delicious and a great start to a homemade style gyro or souvlaki. You could also use this as a freezer marinade and keep this frozen until ready to use for your menu plan.
The final culmination here is the Greek inspired Cobb salad. A riff on a traditional Cobb made famous by the Brown Derby restaurant that used to be in Hollywood, California. We are taking that traditional idea of poached chicken bacon, tomatoes, hard boiled eggs, blue cheese and lettuce and turning this into a Mediterranean feast for both the eyes and the appetite! Using our marinated grilled chicken along with some chopped romaine lettuce, red onion, grape tomatoes, cucumbers, marinated Greek olives, pepperoncini, mushrooms and artichoke hearts sprinkled all over with delicious Feta cheese and drizzled with our creamy cucumber dressing this is a meal fit for a king! Serve this with warm pita bread and make everyone at your table happy!
I hope you give some of these ideas a try in your weekly meal plan and I hope you love them!
You can find these recipes here:
Creamy Cucumber Dressing: https://bit.ly/3lz7zPI
Greek Inspired Marinade: https://bit.ly/3CnUO0a
Get my cookbooks here: http://bit.ly/1czqM5R
Business Inquiries can be sent to:
info@noreenskitchen.com
Check me out on social media!
Facebook: http://on.fb.me/12bdibt
Twitter: @noreenskitchen
Instagram: http://bit.ly/12bdqrp
Google + http://bit.ly/1o5GMYy
***MAILING ADDRESS****
Noreen's Kitchen
PO Box 14173
New Bern, NC 28561
Have a question for me? Send me an email:
info@noreenskitchen.com
Noreen's Kitchen Community Guidelines (The Rules)
http://bit.ly/2i7VocU
Any links to Amazon are, in many cases, affiliate links.
Produced by Noreen's Kitchen ©2008-2016 all rights reserved All embeds must live link to Noreen's Kitchen channel. No Editorial Excerpts without permission, Violators agree to pay royalties, all court costs, all collections & all lawyers fees.
100
views
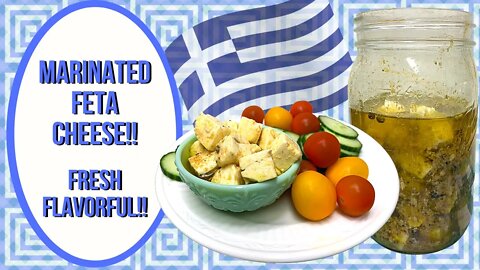
MEDITERRANEAN MARINATED FETA CHEESE!! FRESH AND FLAVORFUL!!
Keeping with our current Mediterranean theme, we are going to share this super simple recipe for marinated feta cheese, which is a lovely addition to a Mezza or Mediterranean appetizer platter that is a great option for a light lunch or supper and full of delicious bites that can be shared with a group of people. This marinated feta is delicious and versatile. You can snack on it as it or add to your salad, your wrap sandwich or as a wonderful accompaniment to your Gyro, Souvlaki or Schwarma. Full of flavor and spice, this creamy, marinated cheese is sure to please!
I have started off with some solid blocks of feta cheese and I recommend that this is where you start as well. You get a much fresher result, and you can cut the cubes into the size you like. I have use 12 ounces, mostly because I had one half of an open container and also cut up a full block. This will be easy for us to use up, so I am not worried. The goal here is to flavor and then submerge the cheese cubes in good quality olive oil. These do not take much longer than a day to marinate but the longer they sit the better and more flavorful they get. I cut my cubes about ½ inch in size.
Next, we will make a dressing of sorts. Using the juice and zest of one lemon then adding fresh chopped garlic, parsley, either dried or fresh, red pepper flakes and smoked paprika which will add a heat factor here. You can adjust the levels to suit your taste or leave them out if you prefer. I also added some Greek seasoning as well as some peppercorns and course grind black pepper. The truth is that you can add what you like. Fresh rosemary and thyme would be great here as well as a fresh chili pepper, pierced to add flavor. Some bay leaf would be nice too if you like.
Mix up the seasonings with the lemon juice, garlic and zest and add a splash of olive oil. You don’t have to be too specific here. A couple tablespoons will do the trick and its just to get everything coated and on the way to marination. Once you have the “dressing” mixed up add the cubed feta to the bowl and gently toss to coat. Being sure to coat all the cubes evenly. Once this is done transfer the cheese to a jar or container with a tight-fitting lid.
Once the cheese is in it’s final resting place, pour over some good quality olive oil of your choice. You can use extra virgin or light, whatever you prefer. Be sure to pour over enough oil to submerge the cheese so nothing dries out and everything gets even marination. Now you will want to seal this up and put it in your fridge for at least four hours before serving but overnight is best and honestly you can keep this in your fridge for ten days or longer as long as the cheese is kept under the oil. The cheese will eventually begin to break down, but that is the nature of the feta, so be sure to make what you will use in that period.
Marinated feta is great on that Mezza platter I mentioned but equally at home in a salad, on a pita or just by itself for snacking. I think you will find that the flavors are delicious together and everything compliments the creamy cheese and the oil flavors everything so well. Speaking of the oil, don’t throw that out! You have delicious, flavored oil that can be used as a base for a Greek style vinaigrette dressing, marinade or just drizzled over fresh sliced tomatoes or freshly grilled chicken, pork, lamb or beef. I think you will find a lot of versatility here.
I hope you give this marinated feta cheese a try sometime soon and I hope you love it!
Happy Eating!!
You can find a printable version of this recipe here: https://bit.ly/3Cf83QX
Get my cookbooks here: http://bit.ly/1czqM5R
Business Inquiries can be sent to:
info@noreenskitchen.com
Check me out on social media!
Facebook: http://on.fb.me/12bdibt
Twitter: @noreenskitchen
Instagram: http://bit.ly/12bdqrp
Google + http://bit.ly/1o5GMYy
***MAILING ADDRESS****
Noreen's Kitchen
PO Box 14173
New Bern, NC 28561
Have a question for me? Send me an email:
info@noreenskitchen.com
Noreen's Kitchen Community Guidelines (The Rules)
http://bit.ly/2i7VocU
Any links to Amazon are, in many cases, affiliate links.
Produced by Noreen's Kitchen ©2008-2016 all rights reserved All embeds must live link to Noreen's Kitchen channel. No Editorial Excerpts without permission, Violators agree to pay royalties, all court costs, all collections & all lawyers fees.
124
views
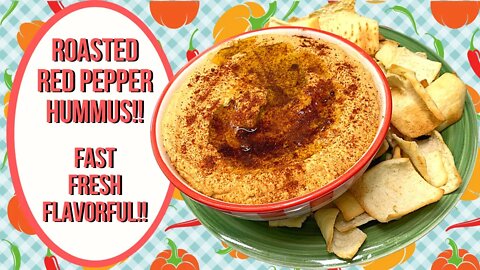
ROASTED RED PEPPER HUMMUS!! FAST FRESH AND FLAVORFUL!!
Today we are going back to the Mediterranean to enjoy some fast, fresh and flavorful roasted red pepper hummus! This is so easy to make its kind of unbelievable, but it is so delicious that you will want to put this on everything! I am using canned garbanzo beans but you can cook them from dried if you prefer. The canned version make this super fast and when you can toss everything in your food processor, even better! I know that my family loves this as a dip or spread and I know your family will love this protein packed delight as well!
Hummus can be made simply with just garbanzo beans, olive oil, lemon juice and salt. You can add in roasted garlic, or roasted red peppers or lots of fresh herbs from your garden like mint, oregano and basil. You can even make chocolate dessert hummus that is to die for but today we are focusing on the most popular version in my house, the roasted red pepper hummus! There are just a few ingredients that when combined make a delicious dip or sandwich spread that is restaurant worthy!
I used 2 cans of garbanzo beans, drained and rinsed, Wazzed them up in my food processor and then added all the rest of the ingredients. Roasted red pepper strips from a jar, copious amounts of minced garlic, lemon juice, olive oil and tahini which is sesame paste. Then we go in with some flavorizers, i.e. seasonings; salt, pepper, onion powder, cumin and smoked paprika. If you like yours on the spicy side, go ahead and toss in 1/4 to 1/2 teaspoon of Cayanne pepper or a generous shake of your favorite hot sauce will do as well.
If you don't have, can't find or don't want to buy tahini, you can easily sub it out for unsweetened, natural (the kind with the oil on top) peanut butter, almond butter or sunbutter (made from sunflower seeds). Just make sure they are unsweetened. The tahini is integral to flavor and texture of the hummus. If using the alternative ingredient it may taste a little different but not much but if you leave it out it just won't be the same.
Blend all of this up together for a good minute in the food processor until everything is nice and smooth and well combined. Then it's time to pop it in a bowl and serve it up! I like to top mine with a generous sprinkling of smoked paprika and a drizzle of olive oil. Today I am presenting mine with some crispy pita chips.
This hummus is a great option to have on hand in your fridge. We love it as is to dip fresh veggies like carrots, baby peppers, cucumbers etc. We also love to use this as a spread on sandwiches and wraps. This hummus is full of protein and flavor and I think its a great way to get kids to eat nutrition dense foods because kids love to eat anything they can dip into.
This can also become part of a lovely Mediterranean Mezze platter along with the Tzatziki we made in a previous video and a selection of fresh veggies, like grape tomatoes, baby peppers and Persian cucumbers as well as marinated artichoke hearts, mushrooms and cubes of marinated feta cheese. Serve this on a platter along with soft pita wedges and crunchy pita chips and you have a delicious appetizer that can be quickly thrown together at a moments notice when friends drop by to visit.
I love the essence of Mediterranean cuisine. Especially during the summer. It is cool and refreshing, quick to make and can be eaten communally and enjoyed by everyone. I think this is a great way to serve family and friends with a welcoming atmosphere.
I hope you give this recipe for roasted red pepper hummus a try and I hope you love it!
Happy eating!
You can find a printable version of this recipe here: https://bit.ly/3lcTIhE
Get my cookbooks here: http://bit.ly/1czqM5R
Business Inquiries can be sent to:
info@noreenskitchen.com
Check me out on social media!
Facebook: http://on.fb.me/12bdibt
Twitter: @noreenskitchen
Instagram: http://bit.ly/12bdqrp
Google + http://bit.ly/1o5GMYy
***MAILING ADDRESS****
Noreen's Kitchen
PO Box 14173
New Bern, NC 28561
Have a question for me? Send me an email:
info@noreenskitchen.com
Noreen's Kitchen Community Guidelines (The Rules)
http://bit.ly/2i7VocU
Any links to Amazon are, in many cases, affiliate links.
Produced by Noreen's Kitchen ©2008-2016 all rights reserved All embeds must live link to Noreen's Kitchen channel. No Editorial Excerpts without permission, Violators agree to pay royalties, all court costs, all collections & all lawyers fees.
65
views
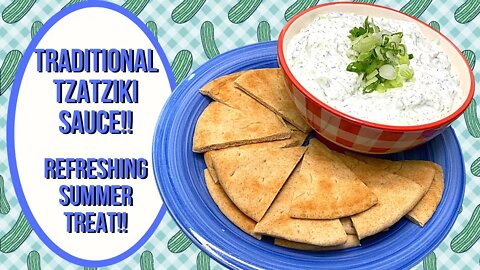
TRADITIONAL TZATZIKI SAUCE!! COOL AND REFRESHING SUMMER TREAT!!
Time to revisit Tzatziki! I did a video for a similar recipe around 8 years ago. At the time I was in a multi channel network that allowed me the opportunity to collaborate with a chef that had won an episode and eventually a season of the Food Network show Chopped. Her video is no longer a thing. My video is old so here we are. Today I am sharing my quick delicious tzatziki sauce that is the perfect accompaniment to any gyro or souvlaki platter. This Mediterranian staple is great on a sandwich or as a dip with fresh or baked pita or as an addition to a delicious Mezze platter. This is quick to make, delicious to eat and a wonderful refreshing dish to have in the fridge to pair with grilled meats or fish. This is the perfect way to use up some of that garden bounty and I know you are going to love it!
If you have a favorite Greek or Mediterranean place then you know Tzatziki is the wonderful, creamy, tangy sauce that you love to dollop on each bite of your beef and lamb gyro or chicken souvlaki. I love it, everyone loves it! It can stand on it's own or as part of a delicius appetizer platter. It's so simple to make and you probably have what you need on hand already, especially if you garden!
This starts with cucumbers. I am using an English or hothouse cuke but usually prefer to use the smaller Persian version which does not need any seeding. You can use any type of cucumber here, however if you are using a traditional garden variety cucumber or a Kirby or pickling cucumber with a tough skin, you may want to peel as well as remove the seeds from the inner part only using the thicker, fleshy part of the vegetable. I chose to grate my cucumbers after I seeded them which I did by running a tablespoon down the middle of the cucumber that had been cut in half, removing the watery seedy part. This will help to keep the tzatziki nice and creamy and not get water logged.
This is a simple dump and stir recipe. I am using half plain Greek yogurt and half sour cream but you can choose to use all yogurt or all sour cream if you like. I have added some green onion, chopped garlic, dill paste, the juice and zest of one lemon and some salt, pepper and Greek style seasoning. I have made my own in the past, but am currently out so I gave the Cavender's Greek seasoning a try and boy is this stuff delicious! I bought mine on Amazon and you can find it here: https://amzn.to/2WvhATA
If you want to make your own Greek seasoning here is my video: https://bit.ly/3l8iaRw
I am using dill paste from the produce section because I could not find any fresh dill in my area. Probably because it is canning season and people are making pickles. So this paste was a great option. If you want to use fresh dill from your garden then I would suggest 1/4 cup of fresh picked dill that has been chopped fine.
All the ingredients get stirred together in a bowl until well incorporated and then it's time to enjoy! I served mine like you might see in a restaurant for a Tzatziki tray for an appetizer. Whole wheat pita wedges and this creamy dip will quickly disappear, but don't think this is only good as a dip. This is great as a dip for pita and veggies or as an accompaniment to sandwiches or next to it's best friend the Gyro. I also think this would be lovely draped over a freshly grilled chicken breast, pork chop or piece of cedar plank salmon. Or you can do what Rick did when he ran out of pita at lunch and eat it with a spoon. No judgement here!
This will keep in your fridge for up to ten days but probably will not last that long and you will find yourself replenishing the bowl sooner than you think!
I hope you give this traditional Tzaziki a try sometime soon and I hope you love it! I have another recipe that adds a spicy twist to this one if you want to see it, let me know!
Happy eating!
You can find a printable version of this recipe here: https://bit.ly/3l8qHno
Get my cookbooks here: http://bit.ly/1czqM5R
Business Inquiries can be sent to:
info@noreenskitchen.com
Check me out on social media!
Facebook: http://on.fb.me/12bdibt
Twitter: @noreenskitchen
Instagram: http://bit.ly/12bdqrp
Google + http://bit.ly/1o5GMYy
***MAILING ADDRESS****
Noreen's Kitchen
PO Box 14173
New Bern, NC 28561
Have a question for me? Send me an email:
info@noreenskitchen.com
Noreen's Kitchen Community Guidelines (The Rules)
http://bit.ly/2i7VocU
Any links to Amazon are, in many cases, affiliate links.
Produced by Noreen's Kitchen ©2008-2016 all rights reserved All embeds must live link to Noreen's Kitchen channel. No Editorial Excerpts without permission, Violators agree to pay royalties, all court costs, all collections & all lawyers fees.
64
views
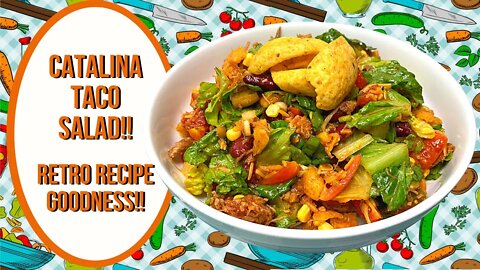
CATALINA TACO SALAD!! RETRO RECIPE GOODNESS!!
When I asked you if you wanted to see my Catalina taco salad you overwhelmingly responded with a great big YES! So today I am sharing this seriously retro recipe, straight from the 70's. When Catalina dressing was all the rage! It's sweet, savory, tomato flavor lends itself to this salad that is chock full of delicious veggies cheese and corn chips! I like this one a lot because of both it's simplicity and versatility. You can make this with what you have on hand and you can dress it up or down. This can be made for a crowd or a couple with ease. I know that you are just going to love the sweet, savory goodness of this unusual taco salad.
The beauty here is that you start off with whatever your favorite taco meat is! This is also a great way to make use of leftover taco meat as well as taco toppings from your taco Tuesday feast. I am using some taco meat I made from leftover home smoked pork shoulder. But you can use beef, chicken, turkey or whatever you like. You could even leave the meat out and probably not even miss it! I seasoned my taco filling with my homemade taco seasoning and a can of diced tomatoes and green chilies.
You can find the video for my taco seasoning here: http://bit.ly/2BSDAwW
Once you have your taco meat made you are halfway there! Now you build your salad! I used one large head of romaine lettuce chopped up but you should use what you like. Iceberg, butter lettuce, spinach or a combo thereof will be lovely. I added chopped tomatoes, green onion, a drained can of kidney beans, some fresh cut corn on the cob, cheddar cheese and the end of a bag of original frito chips. You can use taco chips, doritos, or plain tortilla chips or even a good handful of crispy wonton chips if you prefer. Something crunchy really adds to the end result.
Get all the ingredients into a large bowl and toss, toss, toss until well combined. Once you see that the salad is well incorporated, add some of that delicious Catalina dressing over the top. The amount is up to you. I used approximately 1/2 cup which was perfect for coating all of the salad ingredients just right. Toss the salad one more time to get that dressing mingled in with the rest of those ingredients and you are ready to serve.
You can find the video for the dressing here: https://bit.ly/3BCZ6Ao
This salad serves at least 4 generous servings. It is also a salad that should be eaten and served immediately upon preparation. So if you are going to be eating at different times you may wish to keep all the ingredients separate so that the salad does not get soggy for latecomers.
Like I mentioned before, this salad lends itself to versatility. You can add or take away easily here. Don't like kidney beans? Add black or pinto beans. Don't like beans? Leave them out! Only have a can of three bean salad? Toss that in after you drain it this will taste delicious! Fresh bell peppers, cucumbers, sweet onion, black olives and diced avocado all go great in this salad. If you have it in your produce drawer you can easily add it to this salad!
This really is a retro recipe that should be revisited. Something so good that falls off the radar should definitely make a comeback and visit every once and a while! I hope you give this Catalina taco salad a try sometime soon and I hope you love it!
Happy Eating!
You can find a printable version of this recipe here: https://bit.ly/3kVwwVj
Get my cookbooks here: http://bit.ly/1czqM5R
Business Inquiries can be sent to:
info@noreenskitchen.com
Check me out on social media!
Facebook: http://on.fb.me/12bdibt
Twitter: @noreenskitchen
Instagram: http://bit.ly/12bdqrp
Google + http://bit.ly/1o5GMYy
***MAILING ADDRESS****
Noreen's Kitchen
PO Box 14173
New Bern, NC 28561
Have a question for me? Send me an email:
info@noreenskitchen.com
Noreen's Kitchen Community Guidelines (The Rules)
http://bit.ly/2i7VocU
Any links to Amazon are, in many cases, affiliate links.
Produced by Noreen's Kitchen ©2008-2016 all rights reserved All embeds must live link to Noreen's Kitchen channel. No Editorial Excerpts without permission, Violators agree to pay royalties, all court costs, all collections & all lawyers fees.
48
views
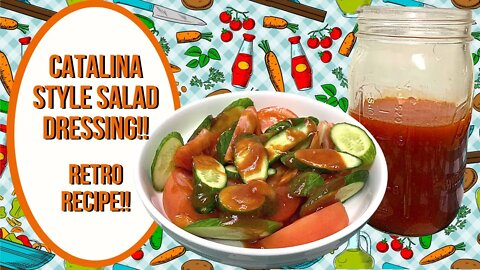
CATALINA STYLE DRESSING!! RETRO RECIPE!!
Let's go back. Way back! That's right it's retro throwback time! Today we are sharing this recipe for Catalina style dressing. You remember? That sweet, tangy, tomatoey French dressing from when you were a kid? This stuff is delicous and as easy as it may be to toss a bottle in your shopping cart, you probably already have all the ingredients you need to make this in your kitchen right now! Drizzle this over fresh garden veggies, over a chef salad, on a delicious Catalina taco salad or even blanket a hot dog in it for a real taste twist! If you are not familiar with Catalina dressing then you are in for a real treat and so is your family! Make this for your salad night and watch it disappear!
Catalina dressing was a popular favorite in our house when I was growing up. Believe it or not it was really the ranch dressing of the 70's. With it's sweet, tangy tomato flavor this is just plain good. Then we grew up and forgot about it. Rick says this reminds him of the "Western" brand dressing that he grew up with and I concur. This is just a wonderful dressing to have in your fridge and you can use it for more than just salads.
The beauty part of this dressing is that you probably already have what you need on hand because it really is just a conglomeration of shelf champion ingredients that we mostly already have. Starting off with ketchup. Use what you have then add some vinegar, apple cider or distilled is in order here. Some granulated sugar. You can adjust for your taste if you think 1/2 a cup is too much. Some vegetable oil like sunflower or your favorite clear blend. Olive oil is going to be way too heavy here. some grated onion. I ran half of a sweet Vidalia onion over my microplane so that this would be more smooth than just minced onion. I prefer this dressing to be pretty smooth. You can also waz some up in your mini chopper if you prefer or if you want to make this in your blender, just do a rough chop and let the blender do the work for you.
Next up are our flavorizers. Those include a bit of Worcestershire sauce, some mustard powder, paprika, onion and garlic powder and some salt. These all play nicely together here and accentuate the sweet, savory flavors of this delicious dressing. Now all you have to do is combine all these ingredients and whisk or stir or put them in a jar and shake them up. You can also use your standard blender or your immersion blender to mix this up. Whatever you like most.
This dressing will keep in your fridge for up to two weeks. Don't think you will use this much? Cut the recipe in half! You can also use this for more than salad! Drape over a hot dog, use it as a marinade for chicken or pork. Glaze a meat loaf with it! Use it as an alternative to barbecue sauce for a cheeky twist. Use as a base for a delicius slow cooker chicken that I will share some time in the future. Dressing is a great starting place for a lot of recipes!
You can also make this dressing sugar free by using sugar free ketchup as well as a cup for cup version of powdered sweetener such as Splenda. You make this to suit your taste and your needs. But make it because I know you will love it and so will your family. This is super versatile and has a lot of potential!
I hope you give this Catalina style dressing a try, sometime soon and I hope you love it!
Happy Eating!
You can find a printable version of this recipe here: https://bit.ly/36QJtar
Get my cookbooks here: http://bit.ly/1czqM5R
Business Inquiries can be sent to:
info@noreenskitchen.com
Check me out on social media!
Facebook: http://on.fb.me/12bdibt
Twitter: @noreenskitchen
Instagram: http://bit.ly/12bdqrp
Google + http://bit.ly/1o5GMYy
***MAILING ADDRESS****
Noreen's Kitchen
PO Box 14173
New Bern, NC 28561
Have a question for me? Send me an email:
info@noreenskitchen.com
Noreen's Kitchen Community Guidelines (The Rules)
http://bit.ly/2i7VocU
Any links to Amazon are, in many cases, affiliate links.
Produced by Noreen's Kitchen ©2008-2016 all rights reserved All embeds must live link to Noreen's Kitchen channel. No Editorial Excerpts without permission, Violators agree to pay royalties, all court costs, all collections & all lawyers fees.
43
views
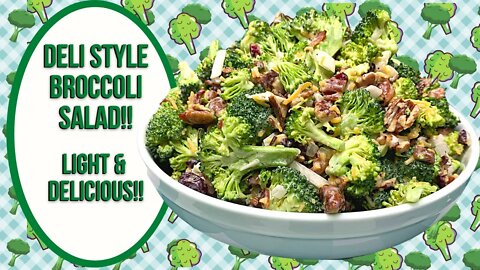
DELI STYLE BROCCOLI SALAD!! PERFECT COOL SUMMER EATING!!
The heat of summer has set in. I don't know about you but this time of year it is hard to get motivated to want to cook or prepare food. I do everything possible to avoid heating up my kitchen and do everything I can to cook early in the day and do a lot of grilling. I even put my slow cooker on the covered deck because that thing can throw some heat! This deli style broccoli salad is a great dish to have on hand for the heat of summer. It has everything! Sweet, tangy, crunchy, chewy. Filled with fiber rich broccoli and lots of delicious ingredients including bacon so how can it be bad? This is a great salad to have in the fridge for quick, light lunches, sides and snacks. This will keep up to a week, so add this one to your weekly prep!
Broccoli salad is nothing new. Everyone has seen it in just about every deli case they approach. The ingredients here are sturdy and can hold up to the dressing which is just as delicious as the salad but together they are a marriage made in salad heaven! This is very reminiscent of many an Amish or Mennonite recipe, highly influenced by their Germanic heritage with sweet and tangy being ever present. The beauty of this salad is that you can customize it to suit your own tastes by swapping out or adding different ingredients that will compliment the flavors and textures.
I have started with some fresh broccoli. I did not plant a garden this year so I purchased mine from the store, but if you still have broccoli coming out of your garden this is a great way to use it! I cut the fresh florets into small, bite sized, pieces that would be easy to eat. I added some cooked crumbled bacon, and toasted pecans. I actually toasted the pecans in the same skillet I cooked the bacon in, for extra deliciousness! I also added some shredded cheddar cheese and dried cranberries along with some diced sweet Vidalia onion. Many recipes use salted sunflower seeds but since I am not a huge fan I chose to use the pecans instead. You can use just about any crunchy element here.
The dressing is simple, but packs a flavor punch! Very much like a poppyseed dressing it is made up of mayonnaise, sour cream, apple cider vinegar, sugar and seasonings. I have used celery seed in mine but if you swap that out for poppy seeds you would have an excellent poppy seed dressing for whatever you like!
The salad and the dressing are blended together just to coat all of the ingredients. The vegetables and other goodness should not be swimming in dressing. It is merely there to coat and assist in delivery of flavor. This really is just the right amount of dressing, in my opinion for the amount of ingredients in the salad. Of course, if you like your salad to have more dressing, then please make a half batch more and go to town and enjoy!
As I mentioned before, this salad lends itself to customization. Broccoli doesn't have to be alone here. Do you like raw cauliflower? Toss it in half and half with the broccoli! Don't like pecans or sunflower seeds? Add slivered almonds or candied walnuts. Cheddar cheese can be swapped for Monterey Jack, pepper Jack or colby very easily and dried cranberries can be swapped out for golden or dark raisins or even dried cherries. You create the broccoli salad you love!
This salad can be served immeditely after preparing or you can store in an airtight container in the fridge for up to a week. This is just a great go-to salad to have on hand that will stand up to grilled meats, or as a side dish to just about any weeknight meal. I also love it for a light lunch that is filled with flavor, fiber and nutrition.
I hope you give this deli style broccoli salad a try, sometime soon and I hope you love it!
Happy Eating!
You can find a printable version of this recipe here: https://bit.ly/3inriyJ
Get my cookbooks here: http://bit.ly/1czqM5R
Business Inquiries can be sent to:
info@noreenskitchen.com
Check me out on social media!
Facebook: http://on.fb.me/12bdibt
Twitter: @noreenskitchen
Instagram: http://bit.ly/12bdqrp
Google + http://bit.ly/1o5GMYy
***MAILING ADDRESS****
Noreen's Kitchen
PO Box 14173
New Bern, NC 28561
Have a question for me? Send me an email:
info@noreenskitchen.com
Noreen's Kitchen Community Guidelines (The Rules)
http://bit.ly/2i7VocU
Any links to Amazon are, in many cases, affiliate links.
Produced by Noreen's Kitchen ©2008-2016 all rights reserved All embeds must live link to Noreen's Kitchen channel. No Editorial Excerpts without permission, Violators agree to pay royalties, all court costs, all collections & all lawyers fees.
95
views