PAR BAKED PIZZA CRUST!! EASY FREEZER BANKING IDEA!!
Today I am sharing something I have been working on for a while and have been wanting to share. Now is the time! Everyone loves pizza. We love to make homemade pizza but sometimes it's just no fun to have to mix up the dough for the crust and wait and roll and then build. So I have figured out a way to have homemade, par baked pizza crust for the freezer. This is perfect for a quick and easy dinner or lunch on the fly. These crusts are baked just enough to set the dough then cooled, and frozen. When you are ready to have pizza, pull one out of the freezer and build your pizza. No waiting necessary before baking. I know you are going to love this version of homemade convenience food right from your own freezer!
I am using my tried and true, big batch pizza crust recipe that I have been making for years and years. People who have tried this recipe say it is their go to as well. It is fluffy and chewy and perfect for our family. You can also use this pizza dough to make cinnamon sticks, bread sticks, pizza rolls, garlic knots and more. It is super versatile and uses only a few basic pantry ingredients and it goes together quick. You don't even have to wait an hour for it to rise before making your pies.
Flour, sugar, salt, yeast and water with a bit of olive oil is all that goes in there. Mixed up in your dough bowl by hand or with your mixer. I do recommend a larger professional model mixer for this amount of dough as a smaller stand mixer will not be able to handle this recipe without straining and possibly breaking your gear box. So be careful. This recipe is easily halved as well if you need to.
Once the dough is mixed up, allow it to rise in a warm place, covered for at least 30 minutes. If it goes longer there is no need to worry. Pizza dough is better the longer it ferments the first time around. Once the first rise is complete, knock down the dough gently to deflate than give it a few kneads to remove a good amount of the air. Then you can divide this up into portions. I divided mine into 6 somewhat equal portions that I eyeballed. You can, of course use a kitchen scale for more precise sizing.
I am using my quarter sheet pans, which are approximately 9x13 in size. Making these pizza crusts rectangular is easier to store and much less awkward to find a place for in the freezer once finished. I sprayed each clean pan with a bit of vegetable oil then pressed the dough into it. If your dough is pulling back when pressing in the pan, set it aside for five minutes to allow the gluten to relax then it should spread more easily for you. Remember, these don't need to look factory perfect. They are homemade and handmade and it's alright for them to look that way. If some of your pizza crusts look more like a ameoba, then so be it. It will still taste great.
Once the dough is pressed into the pans, you can bake at 350 degrees for 10 to 12 minutes or just until the crusts have risen and are dry to the touch and they bounce back with pressed with your finger. Then you can simply remove from the oven and transfer the crusts to a cooling rack. You will want these to cool completely before you layer between parchment and pack either in a 2 gallon zip lock bag or wrap individually with plastic wrap before freezing.
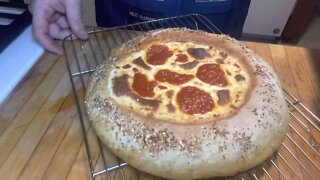
When you are ready to make pizza, simply pull the crust from the freezer, lay on a baking sheet and top with sauce and your favorite toppings and bake in a 400 degree oven for 15 to 20 minutes or until the crust is golden and the cheese has melted and browned a bit. If you like a flavored crust, you can brush with either olive oil or melted buttter and spirnkle with garlic salt, everything bagel seasoning or your favorite herbs and spices.
These crusts are great for making quick bread sticks, or cinnamon sticks. Pull from the freezer, brush with melted butter and season with cinnamon sugar or garlic powder and parsley and boom! You have all those delicious take out treats for a fraction of the cost and since you did all the work at once, you can have as many crusts in your freezer as you like for as long as you need. These will keep well in the freezer for up to three months.
I hope you give these par baked pizza crusts a try sometime soon and I hope you love them!
Happy Eating!
You can find a printable version of this recipe here: http://bit.ly/37y5vQe
Get my cookbooks here: http://bit.ly/1czqM5R
Business Inquiries can be sent to:
info@noreenskitchen.com
Check me out on social media!
Facebook: http://on.fb.me/12bdibt
Twitter: @noreenskitchen
Instagram: http://bit.ly/12bdqrp
Have a question for me? Send me an email:
info@noreenskitchen.com
Any links to Amazon are, in many cases, affiliate links.
Produced by Noreen's Kitchen ©2008-2016 all rights reserved All embeds must live link to Noreen's Kitchen channel. No Editorial Excerpts without permission, Violators agree to pay royalties, all court costs, all collections & all lawyers fees.
-
 9:16
9:16
NoreensKitchen
1 year agoTHE ULTIMATE SUMMER DIP TRIO: PERFECT FOR SHARING
7791 -
 2:24
2:24
SomethingHomely2021
3 years agoPizza Baked Chicken | Quick & Easy RECIPE Tutorial
44 -
 4:57
4:57
Paulie Detmurds
3 years agoFROZEN PIZZA REVIEW: ONE BITE 5 Cheese Stone Baked Crust
66 -
 0:50
0:50
Food recipes
3 years agoMozzarella Crust Pizza Recipe
20 -
 6:40
6:40
ChefNickNero
3 years agoPizza boiled then baked
3 -
 0:35
0:35
Aussie Ridgie Rumble
3 years agoTough Pizza Crust Challenges Gluttonous Rhodesian Ridgeback!
17 -
 7:27
7:27
Paulie Detmurds
3 years agoFROZEN PIZZA REVIEW: DIGIORNO CRISPY PAN CRUST
4 -
 6:15
6:15
NotJustGluten
3 years agoBrunch Farro Crust Pizza
15 -
 1:15:00
Sarah Westall
5 hours agoCapturing You in the Matrix – Escaping the Surveillance State, the Real & Digital ID w/ Twila Brase
28K1 -
 LIVE
LIVE
SpartakusLIVE
7 hours ago$18,000 WZ Total Frenzy Tournament || #1 Champion returns to DOMINATE yet another COMPETITION
1,277 watching