
Enjoyed this channel? Join my Locals community for exclusive content at
noreenskitchen.locals.com!

TUXEDO POPCORN GIFT FROM THE KITCHEN!! CHRISTMAS IN JULY!!
It's July and you know what that means! You will be happy to see some Christmas in July videos coming your way, this being the first one of the year. With so much happening in the world everyone loves the anticipation of the holidays. I always say, it's never too early to start planning what you are going to give your friends and neighbors this year. We are starting off with this delicious tuxedo popcorn! Very simple, very delicious and very economical! You can literally make buckets of this for very little money. If this is all you gave as homemade gifts everyone would love it!
Obviously this starts with some popcorn. I do not really love microwave popcorn, but you should use what you like and what is accessible for you. I am using Hoosier Hill Farms Mushroom Popcorn and I love it. Big beautiful puffs of corn with a very tender hull that makes this perfect for what we are going to do with it. If you like you can also purchase your popcorn pre made. I won't tell! I used 1 cup of popcorn kernels and popped them in 1/4 cup of coconut oil in a pot on the stovetop. If you would like to see how I make my popcorn like this you can refer to this video: https://bit.ly/3kwuH0T
I am melting 1, 12 ounce bag of white chocolate chips. and the same amount of dark, 60% Cacao, dark chocolate chips. I am using the Ghirardelli brand of chocolate. You should use whatever chocolate you love best. Dark, light, milk, white, ruby you name it! Maybe you want to delve a little out of the box and make some with butterscotch or peanut butter chips. That is entirely up to you! I have melted my chips in a bowl in the microwave. My microwave is 1100 watts and I started with 1 minute because these were straight from the freezer and then did 30 second bursts until the mixture was fully smooth with zero lumps. Just be careful, especially with the white chocolate, which can burn easily. I also did not add any additional oil or fat to the chocolate.
Once the chocolate is properly melted, I poured it into some plastic bags and used these as a way to drizzle. Just push it down into one corner of a gallon or quart bag and snip the corner off a little bit. You want a fine stream of chocolate so you can more evenly cover your popcorn.
I laid out the popcorn on a baking sheet that I lined with parchment paper. I only put as much popcorn as would comfortably fit in the pan without overflowing. I had about 2 or three cups left that were easily eaten by the family. Now it's time to drizzle. I started at one corner and drizzled the dark chocolate evenly over the entire pan then went over that with the white chocolate and then again with the dark chocolate. You may have some chocolate left over. Less is more here. You don't want the popcorn to be covered entirely.
Now you can let this sit for several hours uncovered on a countertop or cool place in your kitchen or you can do what I did and pop this pan in the fridge for about 20 to 30 minutes to set. This turned out perfectly and when it was ready I just broke it up into managable pieces and put it in some cellophane bags, perfect for gift giving. We did not keep this we gifted it to our friends who were moving out of town and had a long road trip ahead of them. This along with the savory pizza snack mix was a great way to keep them happy!
I hope that you give this tuxedo popcorn some consideration when making your holiday gift list! This is easy, cheap and delicious! A fabulous combination that everyone will love!
Happy eating!
Get my cookbooks here: http://bit.ly/1czqM5R
Business Inquiries can be sent to:
info@noreenskitchen.com
Check me out on social media!
Facebook: http://on.fb.me/12bdibt
Twitter: @noreenskitchen
Instagram: http://bit.ly/12bdqrp
Google + http://bit.ly/1o5GMYy
***MAILING ADDRESS****
Noreen's Kitchen
PO Box 14173
New Bern, NC 28561
Have a question for me? Send me an email:
info@noreenskitchen.com
Noreen's Kitchen Community Guidelines (The Rules)
http://bit.ly/2i7VocU
Any links to Amazon are, in many cases, affiliate links.
Produced by Noreen's Kitchen ©2008-2016 all rights reserved All embeds must live link to Noreen's Kitchen channel. No Editorial Excerpts without permission, Violators agree to pay royalties, all court costs, all collections & all lawyers fees.
93
views
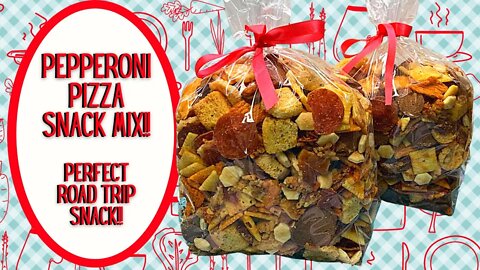
PEPPERONI PIZZA SNACK MIX!! PERFECT FOR ROAD TRIPPING!
Let's use some of those pepperoni chips to make a super delicious, savory snack mix inspired by everyone's favorite pizza! This is full of delicious, crunchy goodness that everyone will love! Pepperoni chips are the star of the show along with a variety of delicious crunchy snacks and some additions that may be a little surprising. I know that this will be a welcomed addition to our friend's road trip to live in another state. I know that they are going to love this and I know you will too!
I have chosen a variety of different crispy snacks to blend together to make this mix. I wanted to start with something cheesy and would have preferred a box of paremesan or asiago cheez-its, but my store didn't have those today so I went with the Cheez-it Duos in sharp cheddar and parmesan. Added in some Gardetto's garlic flavored rye crisps, a bag of Caesar salad croutons, a couple cups of plain oyster crackers to break up the saltiness and moved on to some more interesting treats.
I took some time devising this blend and sought the salad toppings selection at my grocery store. There are so many interesting choices and you can add or eliminate those that you love the most. Along with those delicious pepperoni chips I added some freeze dried, crispy red pepper strips, some freeze dried parmesan crisps and some crispy onions, you know, like the ones you put on top of your green bean casserole? There are a lot of choices here and they even have some crispy jalapeno strips that you could add if you wanted a bit of heat, not to mention some freeze dried pickle crisps if you like a bit of tang added in.
The last item I chose to add was some pizza seasoning. You should use whatever is your particular favorite. I love the Szeged brand but also make my own and if you want to know how I make my pizza seasoning, you can check out my video here: https://bit.ly/36FzRQ1
I sprinkled the seasoning over the items I had laid out for the recipe and then placed everything in a big bowl. You should just add everything to a big bowl along with the seasoning.
Now give everything a good stir to distribute all those delicious, crunchy treats and when you feel like everything is well blended, you can put your snack mix in the container of your choice and enjoy for however long it lasts. Due to the pepperoni I would suggest eating this within a couple of weeks otherwise it may go rancid.
I hope you give this pepperoni pizza snack mix a try sometime soon and I hope you love it!
Happy Eating!
Get my cookbooks here: http://bit.ly/1czqM5R
Business Inquiries can be sent to:
info@noreenskitchen.com
Check me out on social media!
Facebook: http://on.fb.me/12bdibt
Twitter: @noreenskitchen
Instagram: http://bit.ly/12bdqrp
Google + http://bit.ly/1o5GMYy
***MAILING ADDRESS****
Noreen's Kitchen
PO Box 14173
New Bern, NC 28561
Have a question for me? Send me an email:
info@noreenskitchen.com
Noreen's Kitchen Community Guidelines (The Rules)
http://bit.ly/2i7VocU
Any links to Amazon are, in many cases, affiliate links.
Produced by Noreen's Kitchen ©2008-2016 all rights reserved All embeds must live link to Noreen's Kitchen channel. No Editorial Excerpts without permission, Violators agree to pay royalties, all court costs, all collections & all lawyers fees.
22
views

CRISPY PEPPERONI CHIPS!! A SURPRISING SNACK!!
Today we are making some pepperoni chips or crisps. I will be using these in an upcoming video as an addtion to a pizza snack mix that I will be sharing with some friends who are moving away. These are the perfect addition to a crunchy snack mix that will be great for a road trip! These chips are super easy to make! You don't even need a recipe! When you taste these crispy, salty rounds of delight, you will want to make more. When your significant other gets a taste, you will be in trouble because you will be forever baking pepperoni chips!
These are super easy. Just line a baking sheet or two with two layers of parchment paper. Lay out your pepperoni in a single layer and bake at 400 degrees for 10 to 12 minutes. Start with 10 minutes then if you need the extra time pop them back in the oven. You will know they are done when you can hear them crackling in the oven and when you check them the centers look dry and the slices have shrunked to about half their size.
Remove the pans from the oven and then gently place a layer of paper towel on top and gently blot them to help absorb the remaining grease that the parchment did not. Allow these chips to cool on the baking sheet then place on more paper towel to absorb even more of the oil.
I stored mine in a plastic container lined with paper towel and placed more paper towel between each layer so that the oil could be caught. I think its best to catch as much of that oil as possible. Because I am going to be using my chips in a snack mix that will contain crackers and other crispy treats, Some of that oil will add to the flavor of my snack mix but I don't want too much.
These are ready to eat as soon as they are cooled, but be warned, you may not think crispy pepperoni sounds good, but it is! It's so good! I hope you give this a try sometime soon and I hope you love it!
Happy eating!
Get my cookbooks here: http://bit.ly/1czqM5R
Business Inquiries can be sent to:
info@noreenskitchen.com
Check me out on social media!
Facebook: http://on.fb.me/12bdibt
Twitter: @noreenskitchen
Instagram: http://bit.ly/12bdqrp
Google + http://bit.ly/1o5GMYy
***MAILING ADDRESS****
Noreen's Kitchen
PO Box 14173
New Bern, NC 28561
Have a question for me? Send me an email:
info@noreenskitchen.com
Noreen's Kitchen Community Guidelines (The Rules)
http://bit.ly/2i7VocU
Any links to Amazon are, in many cases, affiliate links.
Produced by Noreen's Kitchen ©2008-2016 all rights reserved All embeds must live link to Noreen's Kitchen channel. No Editorial Excerpts without permission, Violators agree to pay royalties, all court costs, all collections & all lawyers fees.
19
views
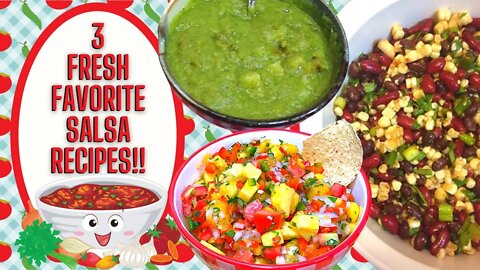
3 FRESH FAVORITE SALSA RECIPES!!
Nothing beats a fresh, homemade salsa! You can use it as a dip, as a topping for your fresh, grilled meats, as a marinade or as a salad topper. Salsa is easy to throw together using things you already have on hand and it is a great way to take advantage of the garden bounty of the season! Today I am sharing with you a compilation of three of our family favorite, fresh salsa recipes. You can watch the full version videos by clicking links below as well as get printable versions of the recipes. I hope you give these a try and I hope you love them!
Happy Eating!
Video LInks:
Roasted Green Chile and Onion Salsa: https://bit.ly/2SHuxbp
How to Roast Green Chiles: https://bit.ly/3yb9qx6
Fresh Corn and Bean Salsa: https://bit.ly/3xblxub
Fresh Peach and Pineapple Salsa: https://bit.ly/3jDsTm3
Recipe Links:
Roasted Green Chile and Onion Salsa: https://bit.ly/2SIY2tm
Fresh Corn and Bean Salsa: https://bit.ly/3wapNc2
Fresh Peach and Pineapple Salsa: https://bit.ly/3d6HD5W
Get my cookbooks here: http://bit.ly/1czqM5R
Business Inquiries can be sent to:
info@noreenskitchen.com
Check me out on social media!
Facebook: http://on.fb.me/12bdibt
Twitter: @noreenskitchen
Instagram: http://bit.ly/12bdqrp
Google + http://bit.ly/1o5GMYy
***MAILING ADDRESS****
Noreen's Kitchen
PO Box 14173
New Bern, NC 28561
Have a question for me? Send me an email:
info@noreenskitchen.com
Noreen's Kitchen Community Guidelines (The Rules)
http://bit.ly/2i7VocU
Any links to Amazon are, in many cases, affiliate links.
Produced by Noreen's Kitchen ©2008-2016 all rights reserved All embeds must live link to Noreen's Kitchen channel. No Editorial Excerpts without permission, Violators agree to pay royalties, all court costs, all collections & all lawyers fees.
51
views
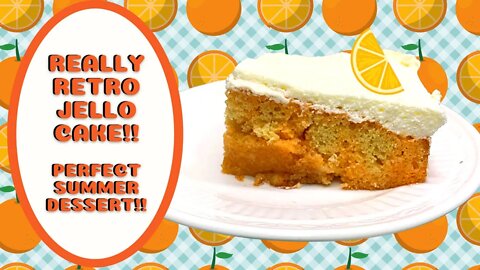
JELLO CAKE!! A REALLY RETRO SUMMER FAVORITE!!
Today I am sharing a blast from the past, really retro recipe favorite from my childhood. It may be simple, but it's surely delicious and it's Jello cake! My mom made this many a hot summer day for an after dinner treat. The cool fruity goodness of the chosen flavor of Jello combined with the tender cake and creamy topping made for the perfect refreshing combination at the end of a hot summer's day. This is so simple to make and I know that if you have never tried this tasty combination, it will soon become a favorite.
This cake is super easy to make. You start with baking a cake using your favorite boxed cake mix according to the box directions. I always use Duncan Hines cake mix. This time around I am using a yellow cake because that is what I had on the pantry shelf, but white cake is great or orange, lemon or even confetti cake is spectacular. You can come up with a myriad of combinations. I do recommend you stick with a lighter cake mix and not venture into combine Jello with chocolate cake. It won't have the same impact visually.
Completely cool the cake, once baked then take a large skewer or a meat fork and poke several holes into the cake evenly. Now we move on to making the Jello. I have used 1,3 ounce box of orange Jello today but you can use whatever flavor you like. You can combine the cake and the Jello to create great tastes that you know you enjoy. How about coconut cake with pineapple Jello? Today I am using yellow cake and orange Jello to create a sort of orange creamsicle flavor.
Dissolve the Jello powder in 1 cup of very hot water and stir until completely dissolved. Then add 1 cup of cold water and stir well. This will help to bring down the temperature of the Jello for the next step. Time to pour the Jello over the cake. You can simply pour this over evenly using the spout of a measuring cup but I find it is easier for me to use my gravy ladle and gently ladle the prepared Jello evenly over the cake. This guarantees that it will be evenly distributed.
Once the Jello has been poured in you can top your cake. My mom used to use good old fashioned Cool Whip and if you love that you can use that. You can also use the Cool Whip alternative called Tru Whip if you like. I personally made my own whipped topping using 2 cups of heavy whipping cream, 1/2 cup of powdered sugar and 2 tablespoons of instant clear gel or Ultra Jel. You can find that here: https://amzn.to/3qCMvYT
The Ultra Jel is a modified food starch instant thickener that will stabilize the whipped cream so it will not break down in the fridge. It has no flavor and it thickens the cream nicely. I whip the cream and the powdered sugar until soft peaks form then add the ultra jel and whip until thickened. You can also stabilize the whipped cream using the unflavored gelatin method. It takes a little longer but gives a similar outcome.
Spread your chosen whipped topping over the cake evenly. As an afterthought for my orange Jello cake I think that next time I will use a can of drained mandarin oranges and arrange them neatly on top before spreading the whipped cream over. It will be a nice pop of tang as well as a visual surprise when serving.
The cake will need to go into the fridge for at least 2 hours but honestly I will say, that this is best if refrigerated overnight and served the next day. This gives everything ample time to set up and mingle. Then it will be super easy to cut and serve.
I hope that you give this blast from the past, really retro recipe a try sometime soon and I hope you love it!
You can find a printable version of this recipe here: https://bit.ly/2UJscNB
Happy Eating!
Get my cookbooks here: http://bit.ly/1czqM5R
Business Inquiries can be sent to:
info@noreenskitchen.com
Check me out on social media!
Facebook: http://on.fb.me/12bdibt
Twitter: @noreenskitchen
Instagram: http://bit.ly/12bdqrp
Google + http://bit.ly/1o5GMYy
***MAILING ADDRESS****
Noreen's Kitchen
PO Box 14173
New Bern, NC 28561
Have a question for me? Send me an email:
info@noreenskitchen.com
Noreen's Kitchen Community Guidelines (The Rules)
http://bit.ly/2i7VocU
Any links to Amazon are, in many cases, affiliate links.
Produced by Noreen's Kitchen ©2008-2016 all rights reserved All embeds must live link to Noreen's Kitchen channel. No Editorial Excerpts without permission, Violators agree to pay royalties, all court costs, all collections & all lawyers fees.
69
views
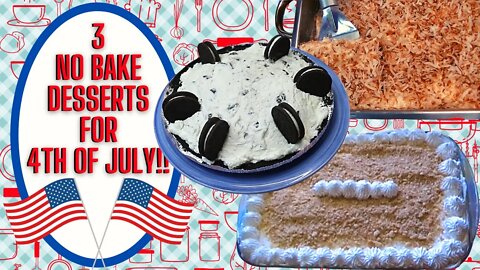
3 NO BAKE DESSERTS PERFECT FOR THE 4TH OF JULY!!
We are coming upon a fun holiday weekend full of patriotic spirit and hopefully gatherings with friends and family! Maybe some of you will be celebrating independence day with a welcomed group of people! Whenever we do this we love to have lots of options for desserts and other foods we love to share. Today we are reaching back into the catalog and sharing three fun no bake, desserts perfect for the 4th of July! These are quick, easy and delicious and will satisfy the sweet tooth of just about anyone on your invite list! Who will pass up a sweet and tangy pina colada square, a smooth and creamy banana pudding square or a decadent chocolate cookies and cream pie? I don't know anyone who would! I hope you enjoy this compilation and I hope you give these all a try sometime soon and I hope you love them!
You can see the full version videos for these recipes here:
Pina Colada Squares: https://bit.ly/3vRyxDL
Cookies and Cream pie: https://bit.ly/3wWVczD
Banana Pudding Squares: https://bit.ly/35TJslO
You can find the recipes for these no bake desserts here:
Pina Colada Squares: https://bit.ly/3vRA3Wt
Cookies and cream Pie: https://bit.ly/3dblJkY
Banana Pudding Squares: https://bit.ly/3xWQ66S
Happy Eating!!
Get my cookbooks here: http://bit.ly/1czqM5R
Business Inquiries can be sent to:
info@noreenskitchen.com
Check me out on social media!
Facebook: http://on.fb.me/12bdibt
Twitter: @noreenskitchen
Instagram: http://bit.ly/12bdqrp
Google + http://bit.ly/1o5GMYy
***MAILING ADDRESS****
Noreen's Kitchen
PO Box 14173
New Bern, NC 28561
Have a question for me? Send me an email:
info@noreenskitchen.com
Noreen's Kitchen Community Guidelines (The Rules)
http://bit.ly/2i7VocU
Any links to Amazon are, in many cases, affiliate links.
Produced by Noreen's Kitchen ©2008-2016 all rights reserved All embeds must live link to Noreen's Kitchen channel. No Editorial Excerpts without permission, Violators agree to pay royalties, all court costs, all collections & all lawyers fees.
16
views
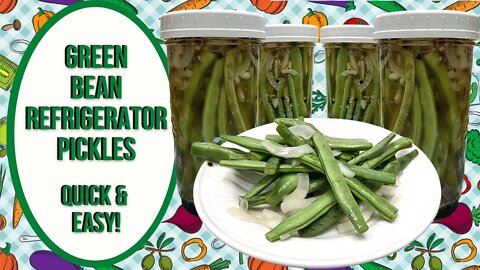
GREEN BEAN REFRIGERATOR PICKLES!! SUMMER GARDEN HARVEST RECIPE!!
Summer is here and that means bounty is going to be coming out of the garden. If you have a vegetable garden in the spring and summer then you know you are busier than a one armed paper hanger this time of year! There is pickling, jamming and canning to be done. Some don't wish to go to those lengths and would just love to pop down to the local farm stand or benefit from the benevolence of a neighbor with an over abundance of produce. Today I am sharing some delicious refrigerator pickles using the green beans my father's neighbor gave him! These are full flavored, dilly, garlickly, oniony and just plain delicious. They are easy to make and do not require any canning equipment, because as the name implies, these are kept in the refrigerator!
I love refrigerator pickles! They are easy and you can just make a couple jars if you want to. You don't have to go to lengths of sterilizing, water bathing or more. This is perfect if you love pickles without a lot of work! I have several refrigerator pickle recipes on the channel and if you want to have a look you can find the playlist here: https://bit.ly/35N23zQ
These start off with some fresh green beans that have been well washed and the ends cut off. I like to do this in pint and a half jars, but whatever containers you have will work. Just make sure they have a tight fitting lid and that the liquid will come up over the vegetables.
The pickles are enhanced by the addition of garlic, onion, pepper corns and dill seed. If you have access to fresh dill you can use it by just stuffing some of the fronds into the jar with the rest of the veggies. I do not like to use dried dill weed because it makes the liquid murky. Instead I prefer the dill seed since I had no fresh dill. You can also add some mustard seed here if you like. I was out. Bummer! If you would like to use pickling spice then you should feel free to do that as well!
The brine is mixed up using apple cider vinegar, water, salt, sugar and minced garlic. You can leave out the garlic or the onion if you do not prefer those flavors in your pickle, but you need to leave in the salt and the sugar. These are important to the pickling process as well ad the balance of flavor.
Pour all the brine ingredients into a saucepan and place over medium heat until it comes to a simmer. While you are waiting for that to happen, it's time to prep our jars. You can place the beans in first or last, up to you. I have mine in the jars already for speed. I placed the dill seed and peppercorns in the jars along with the sweet sliced onion. The beauty here is that there is no wrong way to do it. As long as you keep your brine ratios the same you are going to be fine.
When the brine comes to a simmer, it's time to ladle it into the jars to cover the vegetables. This made enough to fill both my jars and was the perfect amount for what I prepared. Now take the handle of your wooden spoon and insert it a few times into each of the jars to help get out any air bubbles and disperse the ingredients. Now put the lid on and allow to cool to room temperature before placing in the fridge.
These pickled beans are going to be at maximum deliciousness after about three days in the brine. You can eat them once they are cooled, but they will be better the longer they sit. Keep them in the fridge and eat from the jar. These will keep well for up to three months and if you finish and have brine left, there is nothing stopping you from tossing some peppers, onions, cucumbers or even more fresh green beans into that brine to pickle further.
I hope you give these green bean refrigerator pickles a try sometime soon whether it is with the bounty from your own garden, from a neigbhor's garden or from the local farm stand or even the grocery story! I hope you try them and I hope you love them!
Happy Eating!
You can find a printable version of this recipe here: https://bit.ly/35N3C0G
Get my cookbooks here: http://bit.ly/1czqM5R
Business Inquiries can be sent to:
info@noreenskitchen.com
Check me out on social media!
Facebook: http://on.fb.me/12bdibt
Twitter: @noreenskitchen
Instagram: http://bit.ly/12bdqrp
Google + http://bit.ly/1o5GMYy
***MAILING ADDRESS****
Noreen's Kitchen
PO Box 14173
New Bern, NC 28561
Have a question for me? Send me an email:
info@noreenskitchen.com
Noreen's Kitchen Community Guidelines (The Rules)
http://bit.ly/2i7VocU
Any links to Amazon are, in many cases, affiliate links.
Produced by Noreen's Kitchen ©2008-2016 all rights reserved All embeds must live link to Noreen's Kitchen channel. No Editorial Excerpts without permission, Violators agree to pay royalties, all court costs, all collections & all lawyers fees.
109
views
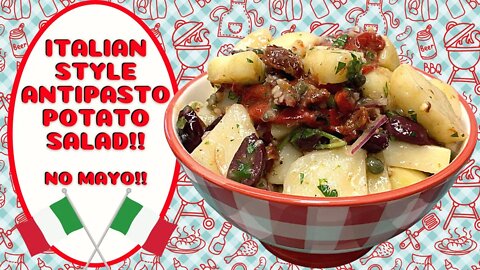
ANTIPASTO POTATO SALAD!! NO MAYO HERE!!
Today we are going really old school! All the way back to when I was a kid. This potato salad was always present at parties, barbecues and other family gatherings. It is definitely an adult taste, I don't see too many kids reaching for this as it was not one of my favorites as a child. However as I got older I could appreciate it more. I am calling this Antipasto Potato Salad because it really has the delicious flavor profiles of a well curated antipasto platter. Full flavored goodness that is topped off by your favorite bottled Italian dressing to make it even easier!
This potato salad is definitely a step away from the norm for most of us. Many are used to the traditional, mayonnaise based potato salad that we all know and love. This one is a horse of a different color, but do not discount it just yet. Open your mind and I think you'll see it is kind of amazing!
This starts off with 2 to 3 pounds of cooked, cooled and peeled red potatoes. You will want to use either red or Yukon gold potatoes for this recipe. Russets are not a great choice here due to their fluffy, starchy texture which will cause the cooked potatoes to just fall apart. You want the potatoes for this salad to be firm and have structure but still be toothsome and tender to the bite. I have cooked mine in my electric pressure cooker on the vegetable setting on medium pressure for 6 minutes and allowed it to come down from pressure naturally. Then I opened the vessel and allowed them to cool and then the skins slipped right off. I quartered the potatoes and sliced 1/4 inch thick. This makes for the perfect bite sized piece.
Now for the good stuff! What you add to yours may be different than what I add to mine. If you do not like something I used, then leave it out. If you think something would go great, then add it in. This canvas is yours to beautify! I am adding one small red onion, quartered and thinly sliced, a couple cloves of minced garlic, some minced flatleaf parsely, some salty capers that have been drained, some sweet roasted red pepper strips, a good amount of sun dried tomatoes packed in oil and the same amount of briney Kalamata olives that have been pitted and sliced or cut in half. This all gets mixed together well and then I pour over half a cup of my favorite Italian dressing. You should use whatever is your favorite or if you prefer, make your own dressing to taste.
That is how easy it is to make a beautiful Italian style potato salad that is really a showstopper if you think about it! Present this to your next potluck, picnic or get together and watch everyone light up when they find out how delicious this really is! No mayo may just appeal to lots of people who find mayonnaise to cloying.
I hope you give my Antipasto potato salad a try sometime soon and I hope you love it!
Happy Eating!
You can find a printable version of this recipe here: https://bit.ly/3iVnQNs
Get my cookbooks here: http://bit.ly/1czqM5R
Business Inquiries can be sent to:
info@noreenskitchen.com
Check me out on social media!
Facebook: http://on.fb.me/12bdibt
Twitter: @noreenskitchen
Instagram: http://bit.ly/12bdqrp
Google + http://bit.ly/1o5GMYy
***MAILING ADDRESS****
Noreen's Kitchen
PO Box 14173
New Bern, NC 28561
Have a question for me? Send me an email:
info@noreenskitchen.com
Noreen's Kitchen Community Guidelines (The Rules)
http://bit.ly/2i7VocU
Any links to Amazon are, in many cases, affiliate links.
Produced by Noreen's Kitchen ©2008-2016 all rights reserved All embeds must live link to Noreen's Kitchen channel. No Editorial Excerpts without permission, Violators agree to pay royalties, all court costs, all collections & all lawyers fees.
37
views
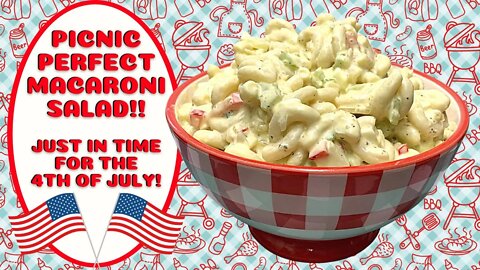
PICNIC PERFECT MACARONI SALAD!! JUST IN TIME FOR 4TH OF JULY!!
Summer is upon us and back yard BBQs, parties and potlucks are coming with it! The perfect time to get together with family and friends, after a long year of waiting. Since the 4th of July is right around the corner I wanted to take a couple of weeks and focus on delicious, picnic perfect salads and take alongs that are just right for all of these events. Everyone will love this savory macaroni salad that is chock full of veggies and a sweet and tangy dressing that is very reminiscent of a deli style macaroni salad or Amish macaroni salad. This is so easy to toss together and since it makes a lot, it's perfect for feeding a crowd! So fire up the grill and let's get going!
This macaroni salad is just super traditional. It has familiar flavors and old fashioned goodness. Sweet, but not too sweet. Tangy but not too tangy. Savory and full of crunchy veggies. This one aims to please even the pickiest macaroni salad afficianado. This can be made a few days in advance and will only get better. I would recommend keeping this under refrigeration and if carrying to an outdoor event, be sure to have a bowl of ice to set your serving bowl into so you can keep things nice and cool and safe for eating. Nothing spoils a party more than a bout of food poisoning.
This starts with one 12 ounce box of elbow macaroni, but you can use shells or whatever is your preferred small pasta. The macaroni should be cooked to "al dente" with just a bit of chew left in it and it should not be mushy. Upon draining, simply start running the cold water and then toss in a cup full of ice cubes and give everything a toss under the running water. This will help to quickly cool the macaroni and get it salad ready for the next step.
I like to mix up the dressing first and that includes mayonnaise, sour cream, which I know is not a usual ingredient but it keeps things nice and creamy. Some sugar, sweet pickle relish, prepared yellow mustard, apple cider vinegar, salt, pepper, onion powder and celery seed round things out. This gets all whisked together and set aside.
While your macaroni is cooking, set to chopping all your salad fixings. Mine includes, hard boiled eggs, onion, red bell pepper, green bell pepper and onion. All of these combined together with the macaroni and dressing make for a familiar and comforting salad that everyone is going to enjoy.
Once all your components are ready, just toss them all together, give them a stir and pour over the dressing. This salad will stay nice and moist. If you plan on making this a few days in advance be sure to save out about 1/4 of the dressing to pour over just before serving to freshen it up. The macaroni will absorb some of the moisture from the dressing and can possibly be a little on the dry side. The saved dressing can help to moisten things up a bit.
This salad hearkens back to the good old days. Maybe your grandmother or your mom made something similar. This may take you on a trip down memory lane. One thing is for certain, that this is going to make you and yours very happy because it is so delicious!
I hope you give this picnic perfect macaroni salad a try sometime soon and I hope you love it!
Happy Eating!
You can find a printable version of this recipe here: https://bit.ly/3gwDDko
Get my cookbooks here: http://bit.ly/1czqM5R
Business Inquiries can be sent to:
info@noreenskitchen.com
Check me out on social media!
Facebook: http://on.fb.me/12bdibt
Twitter: @noreenskitchen
Instagram: http://bit.ly/12bdqrp
Google + http://bit.ly/1o5GMYy
***MAILING ADDRESS****
Noreen's Kitchen
PO Box 14173
New Bern, NC 28561
Have a question for me? Send me an email:
info@noreenskitchen.com
Noreen's Kitchen Community Guidelines (The Rules)
http://bit.ly/2i7VocU
Any links to Amazon are, in many cases, affiliate links.
Produced by Noreen's Kitchen ©2008-2016 all rights reserved All embeds must live link to Noreen's Kitchen channel. No Editorial Excerpts without permission, Violators agree to pay royalties, all court costs, all collections & all lawyers fees.
47
views
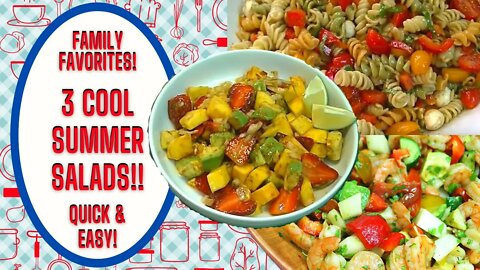
3 FAMILY FAVORITE COOL SUMMER SALADS
This week's compilation is a collection of some of my family's favorite cool and refreshing summer salads! When the weather gets hot, it's salad for dinner and even for lunch. Cool is the name of the game. Next to cool, we put easy! The easier the better! These three salads are quick, easy and delicious and they can be made in a large amount or a small amount. The choice is yours! Delicious Caprese Pasta Salad, Roasted Shrimp and Avocado salad and a quick lunchtime toss together of Mango, Avocado and strawberries with chili lime sprinkle! These all say summer to me and I hope that you will love them just as much as my family does!
You can watch the original full version videos here:
Mango Avocado and Strawberry Salad:
Caprese Pasta Salad:
Roasted Shrimp and Avocado Salad:
I hope you try them and I hope you love them!
Happy eating!
Get my cookbooks here: http://bit.ly/1czqM5R
Business Inquiries can be sent to:
info@noreenskitchen.com
Check me out on social media!
Facebook: http://on.fb.me/12bdibt
Twitter: @noreenskitchen
Instagram: http://bit.ly/12bdqrp
Google + http://bit.ly/1o5GMYy
***MAILING ADDRESS****
Noreen's Kitchen
PO Box 14173
New Bern, NC 28561
Have a question for me? Send me an email:
info@noreenskitchen.com
Noreen's Kitchen Community Guidelines (The Rules)
http://bit.ly/2i7VocU
Any links to Amazon are, in many cases, affiliate links.
Produced by Noreen's Kitchen ©2008-2016 all rights reserved All embeds must live link to Noreen's Kitchen channel. No Editorial Excerpts without permission, Violators agree to pay royalties, all court costs, all collections & all lawyers fees.
11
views
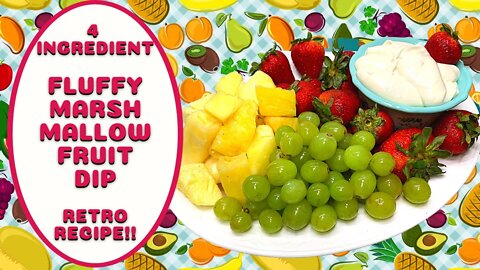
FLUFFY MARSHMALLOW FRUIT DIP!! 4 INGREDIENT SUMMER FUN!!
With summer nearly in full swing, the kids out of school and hot days ahead, I thought it would be fun to share this throwback recipe from my mom's recipe box! This fluffy marshmallow fruit dip was the "all that" in the 70's growing up and it's still "all that" today! Perfect for serving with a big platter of fresh berries and sliced pineapple or as a filling for whoopie pies or a tunneled out angel food cake. This sweet four ingredient dip is super easy and can be whipped up in no time! No waiting, just ready to enjoy! I know you and your family will love this one!
This really only has four ingredients. You can change up the flavors if you like by using different extracts for fun. One brick of softened cream cheese whipped together with some marshmallow cream, powdered sugar and vanilla extract become this creamy, sweet delicious treat that is perfect for dipping freshly picked strawberries. You can also use this as a cake filling but I don't think it's has enough body to be a frosting. You can easily drape this over a bowl of strawberries and pound cake to take your shortcake to the next level. Use lemon or orange extract for a change from the vanilla or add vanilla and one of the other for a real flavor boost! Make this one yours!
I think this is a great way to get your kids to eat more fruit this summer and who doesn't love a dip. Take this to a party on a platter with fresh fruit and vanilla wafers, mini chocolate chip cookies and cubes of either pound cake or angel food cake. Take along a bunch of skewers and make it a cold fondue experience! Speaking of skewers, how about turning the fresh fruit and cake into kabobs?! Then everyone can take a kabob and a scoop of dip and enjoy to their hearts content.
There are a lot of ways to enjoy this simple dip. I hope you give this a try sometime soon and I hope you love it!
Happy Eating!
You can find a printable version of this recipe here: https://bit.ly/3cus7n7
Get my cookbooks here: http://bit.ly/1czqM5R
Business Inquiries can be sent to:
info@noreenskitchen.com
Check me out on social media!
Facebook: http://on.fb.me/12bdibt
Twitter: @noreenskitchen
Instagram: http://bit.ly/12bdqrp
Google + http://bit.ly/1o5GMYy
***MAILING ADDRESS****
Noreen's Kitchen
PO Box 14173
New Bern, NC 28561
Have a question for me? Send me an email:
info@noreenskitchen.com
Noreen's Kitchen Community Guidelines (The Rules)
http://bit.ly/2i7VocU
Any links to Amazon are, in many cases, affiliate links.
Produced by Noreen's Kitchen ©2008-2016 all rights reserved All embeds must live link to Noreen's Kitchen channel. No Editorial Excerpts without permission, Violators agree to pay royalties, all court costs, all collections & all lawyers fees.
15
views

3 EASY INSTANT POT PRESSURE COOKER BASICS!!
The response to our last compilation video was so overwhelming we have decided to incorporate some of these into our regular schedule. This gives us a chance to refresh as well as a way for all of you to be reminded of our vast video catalog! Remember, anytime you wonder if we have a recipe video, go to our channel page, by clicking our name just under the video and have a look at the videos tab or check out our playlists! We currently have over 2200 videos uploaded to the channel! Something for everyone! This week, we concentrate on three instant pot or pressure cooker basics that you may find helpful!
In this video we revisit, in a condensed form how to cook potatoes for potato salad in the pressure cooker or Instant Pot, how to make rice as well as the most perfect and beautiful hard boiled eggs that you have ever made! They will literally jump out of their shells for you! The secret is all in the timing as well as how you release the pressure. I will guide you through. Bookmark this video for future reference, but just in case, you can view the full version videos here:
How to cook potatoes in the pressure cooker: https://bit.ly/3vPOcnP
How to cook hard boiled eggs in the pressure cooker: https://bit.ly/3fNSSF5
How to make rice in the pressure cooker: https://bit.ly/3vOYPHB
I hope if you have an electric pressure cooker and have not yet used it, that you will put your fear aside and give these basics a try! I promise that you won't ever make these by boiling them on top of the stove again and they will come out perfect every single time! In fact, this is the very best way to make potatoes for potato salad or even potato soup! You can also cook the potatoes a few minutes longer if you want to turn them into the fluffiest mashed potatoes ever. The reason is that you use lots less water and the potatoes do not get waterlogged! Amazing I tell you! Please give these a try!
Happy Eating!
Get my cookbooks here: http://bit.ly/1czqM5R
Business Inquiries can be sent to:
info@noreenskitchen.com
Check me out on social media!
Facebook: http://on.fb.me/12bdibt
Twitter: @noreenskitchen
Instagram: http://bit.ly/12bdqrp
Google + http://bit.ly/1o5GMYy
***MAILING ADDRESS****
Noreen's Kitchen
PO Box 14173
New Bern, NC 28561
Have a question for me? Send me an email:
info@noreenskitchen.com
Noreen's Kitchen Community Guidelines (The Rules)
http://bit.ly/2i7VocU
Any links to Amazon are, in many cases, affiliate links.
Produced by Noreen's Kitchen ©2008-2016 all rights reserved All embeds must live link to Noreen's Kitchen channel. No Editorial Excerpts without permission, Violators agree to pay royalties, all court costs, all collections & all lawyers fees.
53
views
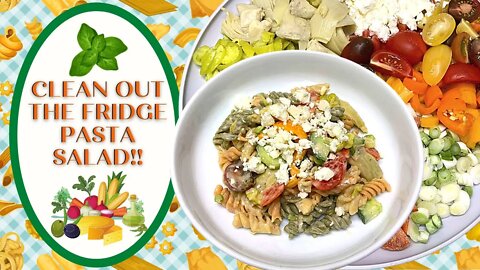
CLEAN OUT THE FRIDGE PASTA SALAD!! PERFECT FOR SUMMER!!
Warm weather is upon us and summer is here. Time to think about cool, refreshing options for meals and snacks. Today I am sharing my version of what I like to call "Clean out the fridge Pasta Salad." See what you have in the fridge, cheese drawer, meat drawer, veggie drawer and pantry and toss it all together with some cooked pasta and bottled or homemade dressing to create a delicious salad that could stand on it's own as a meal or as a side dish for delicious grilled meats. Mine may look different from yours and that is the beauty of this entire process! So go create something delicious!
I started by using a 12 ounce box of dry tri color rotini that I cooked just until it was toothsome or "al'dente". I drained it and rinsed it well with cold water and like my mom always did, tossed a cup of ice cubes in with the hot pasta to cool it off. Tossed this under running cold water and quick as a wink, that pasta was cooled and ready to use.
I had a look in my fridge for goodies to add to my salad. I had some cucumber, grape tomatoes, baby bell peppers and the white ends of one bunch of scallions or green onions waiting to be used in the veggie drawers. A look in the meat and cheese drawer revealed some pepperoni and a bonus, unused wedge of feta cheese in the back from that time Molly made that internet craze feta and tomato pasta dish, which was amazingly delicious and I may just have to share my version with you sometime soon. On to the pantry where I was hoping to find a can of black olives, bu alas, none to be seen but I did unearth a can of artichoke hearts for the win. I also grabbed a jar of pickled banana pepper slices and an open jar of Caesar dressing that were all going to be mixed into my salad.
I chopped, sliced and diced to my heart's content then dumped everything together in the pot with the cold pasta along with about a half cup of dressing and mixed well. This is best if it is allowed to sit and marinate for a while so all the flavors can meld together. If you do this, set the salad in the fridge until ready to use, then give a stir. It may have soaked up a bit of that dressing and it is perfectly acceptable to add a bit more if that is your preference. The only caveat I would give is not to let this swim in dressing.
This is great as a quick and delicious lunch, a cool and refreshing dinner or like we are going to serve it, as a side dish to some grilled chicken that we will have tonight for supper. I think that this is a super versatile way to use up leftovers, bits and bobs and pieces that may not get used as quickly because they kind of turn invisible after a while and end up in the bin.
LIke I said, my salad may not look like your salad. Maybe you want to use ranch dressing, chicken, bacon and elbow macaroni. Maybe you want to put a different spin on things and use imitation crab meat, green onions, celery and thousand island dressing with some bowtie pasta. The pasta=bilities are endless really and you can take them where ever your fridge and pantry take you!
I hope you give this clean out the fridge idea for pasta salad a try sometime soon and I hope you love it!
Happy eating!
Get my cookbooks here: http://bit.ly/1czqM5R
Business Inquiries can be sent to:
info@noreenskitchen.com
Check me out on social media!
Facebook: http://on.fb.me/12bdibt
Twitter: @noreenskitchen
Instagram: http://bit.ly/12bdqrp
Google + http://bit.ly/1o5GMYy
***MAILING ADDRESS****
Noreen's Kitchen
PO Box 14173
New Bern, NC 28561
Have a question for me? Send me an email:
info@noreenskitchen.com
Noreen's Kitchen Community Guidelines (The Rules)
http://bit.ly/2i7VocU
Any links to Amazon are, in many cases, affiliate links.
Produced by Noreen's Kitchen ©2008-2016 all rights reserved All embeds must live link to Noreen's Kitchen channel. No Editorial Excerpts without permission, Violators agree to pay royalties, all court costs, all collections & all lawyers fees.
134
views

3 FAMILY FAVORITE SLOW COOKER DINNER IDEAS!!
Links to all the full version videos as well as recipes here!
Trying something a bit different today! Going to start sharing some videos where we revisit family favorites of certain categories! It seems that some people really enjoy these type of videos! These help remind you of good ideas and for those who never saw them, it gives them a quick taste of what they can see in the full version! I hope you enjoy this video featuring three of my family's favorite slow cooker dinners that are my "go to" meals on days when cooking is just going to need to be done without thinking!
You can find the videos here:
Chicken and Sausage Gumbo: https://bit.ly/3yr1Dwa
Golden Mushroom Chicken: http://bit.ly/33J1qEe
Mississippi Pork Roast: https://bit.ly/3fAJvHn
Recipes can be found here:
Chicken and Sausage Gumbo: http://bit.ly/2MVbhBB
Golden Mushroom Chicken: https://bit.ly/3u6Vlyv
Mississippi Pork Roast: https://bit.ly/3bE72Gk
Get my cookbooks here: http://bit.ly/1czqM5R
Business Inquiries can be sent to:
info@noreenskitchen.com
Check me out on social media!
Facebook: http://on.fb.me/12bdibt
Twitter: @noreenskitchen
Instagram: http://bit.ly/12bdqrp
Google + http://bit.ly/1o5GMYy
***MAILING ADDRESS****
Noreen's Kitchen
PO Box 14173
New Bern, NC 28561
Have a question for me? Send me an email:
info@noreenskitchen.com
Noreen's Kitchen Community Guidelines (The Rules)
http://bit.ly/2i7VocU
Any links to Amazon are, in many cases, affiliate links.
Produced by Noreen's Kitchen ©2008-2016 all rights reserved All embeds must live link to Noreen's Kitchen channel. No Editorial Excerpts without permission, Violators agree to pay royalties, all court costs, all collections & all lawyers fees.
21
views

CHIPOTLE VINAIGRETTE AND MARINADE!! PERFECT FOR SALADS AND GRILLING!!
Let's dive right into summer! Today I am sharing a delicious and easy to make salad dressing/vineaigrette or marinade. It's going to work for all of the above and so much more! This is sweet, smoky, mildly spicy and tangy. It can be drizzled over garden fresh veggies, served as a dip for chips or fresh crudite or as a marinade for lots of delicious meats, fish and seafood! This is one that I know you will want to have on hand all summer long and beyond!
Nothing is better in the summer, than having the right prepped ingredients on hand to throw together quick lunches and dinners. This dressing/marinade is one of the ways that you can help keep variety on the menu! This sweet and spicy dressing is going to be perfect for your large dinner salads or just drizzled over fresh sliced tomatoes. You can use this to marinate pork, chicken, salmon, shrimp and more! The flavor on this is out of this world delicious and it is made using ingredients you may already have on hand.
Oil, vinegar, honey, water, chipotle in adobo, onion, garlic and a bunch of seasonings blend together to make this creamy dressing that you will find yourself reaching for again and again. I have used my regular blender to mix this up but you can use a food processor or your immersion blender to do the job as well. No matter how you do it, I do recommend the appliance of your choice to get a nice smooth and well emulsified dressing that you will be able to keep and use for up to a week.
I tossed everything in my blender carafe except the oil. I got that all well blended and smooth before drizzling the oil in slowly to make emulsification easy and help the dressing get just the right consistency. You will know the dressing is done when you can visibly see that the thickness has changed and the mixture clings to a spoon nicely.
Now you can simply pour into an airtight container such as a mason jar and pop it in the fridge. I dressed a bit of a lettuce and tomato salad to give this a taste and it is amazing! Rick claims that it would even be good on a flip flop. Our friend Guido might agree! Wink!
I plan on using this over the weekend to marinate a couple of different options that I will be sure to share with you in upcoming videos. I know that you will love this dressing/marinade and I hope you will give this a try and I hope you love it!
Happy Eating!
You can find a printable version of this recipe here: https://bit.ly/3ombNJJ
Get my cookbooks here: http://bit.ly/1czqM5R
Business Inquiries can be sent to:
info@noreenskitchen.com
Check me out on social media!
Facebook: http://on.fb.me/12bdibt
Twitter: @noreenskitchen
Instagram: http://bit.ly/12bdqrp
Google + http://bit.ly/1o5GMYy
***MAILING ADDRESS****
Noreen's Kitchen
PO Box 14173
New Bern, NC 28561
Have a question for me? Send me an email:
info@noreenskitchen.com
Noreen's Kitchen Community Guidelines (The Rules)
http://bit.ly/2i7VocU
Any links to Amazon are, in many cases, affiliate links.
Produced by Noreen's Kitchen ©2008-2016 all rights reserved All embeds must live link to Noreen's Kitchen channel. No Editorial Excerpts without permission, Violators agree to pay royalties, all court costs, all collections & all lawyers fees.
12
views
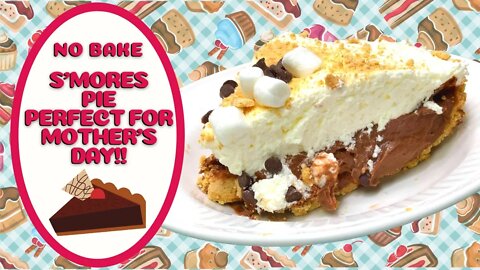
NO BAKE S'MORES PIE!! PERFECT FOR MOTHER'S DAY!!
Mother's Day is this coming Sunday so I thought it would be fun to share a quick and easy dessert that anyone can do even the kids in your family to treat mom to something delicious and honor her in a special way! This no bake S'mores pie is the perfect combination of chocolate pudding, marshmallows, whipped topping all nestled into a graham cracker shell. This is easy to make, requires no real cooking and is the perfect way for kids to get involved to make mom feel special!
I shared a delicious recipe for homemade cooked chocolate pudding a couple of weeks ago and that would be the perfect thing to start this pie with if you so choose. But if you are into super quick and easy and don't want to worry about that with the kids, the instant pudding is the way to go. If you choose to use the cooked version, be sure to make it a day in advance and chill completely before building your pie.
I love to use the instant pudding with a little less milk or liquid when I use it as a pie filling. this ensures that the filling will firm up just right and make for easy slicing. I used two, four serving boxes of instant chocolate fudge pudding and pie filling along with 2 cups of milk and 1 cup of heavy cream. You can use 3 cups of half and half or 3 cups of plain milk if that is what you have on hand. No matter what you use it will be delicious. I prefer to whip this up using my electric mixer with the whisk attachment but using a hand whisk will work just fine. Blend this up, cover and chill for at least 15 minutes.
The topping is your choice. I have use some homemade whipped cream made with 2 cups of heavy whipping cream and 1/4 cup of powdered sugar whipped together with the electric mixer until firm peaks formed. Then I used this to spread over the top of my pie filling. If you want to make things super quick and easy on yourself, just grab a big tub of frozen whipped topping such as Cool Whip or my favorite TruWhip at the grocery store. Just be sure to thaw that in the fridge overnight. If you try to thaw it on the counter it may turn very soupy and become unpleasant. ask me how I know.
Smooth the topping over the filling and then decorate as you like. I have used some crushed graham crackers, mini marshmallows and mini chocolate chips. But you can use sprinkles, teddy grahams, crushed chocolate cookies. whatever you have that will be delicious! It's going to be great no matter what you choose to top this off with.
My goal here is to give the folks who want to do something with the children some ideas on how they can achieve something simple and delicious without having to do a lot of work and without having to turn on the stove. This fits the bill. This s'mores pie is cool, sweet and the perfect ending to a sweet day with mom, honoring her for all she does!
I hope you give this a try and I hope you love it!
You can find the printable recipe here; https://bit.ly/3eqtEf9
Get my cookbooks here: http://bit.ly/1czqM5R
Business Inquiries can be sent to:
info@noreenskitchen.com
Check me out on social media!
Facebook: http://on.fb.me/12bdibt
Twitter: @noreenskitchen
Instagram: http://bit.ly/12bdqrp
Google + http://bit.ly/1o5GMYy
***MAILING ADDRESS****
Noreen's Kitchen
PO Box 14173
New Bern, NC 28561
Have a question for me? Send me an email:
info@noreenskitchen.com
Noreen's Kitchen Community Guidelines (The Rules)
http://bit.ly/2i7VocU
Any links to Amazon are, in many cases, affiliate links.
Produced by Noreen's Kitchen ©2008-2016 all rights reserved All embeds must live link to Noreen's Kitchen channel. No Editorial Excerpts without permission, Violators agree to pay royalties, all court costs, all collections & all lawyers fees.
38
views
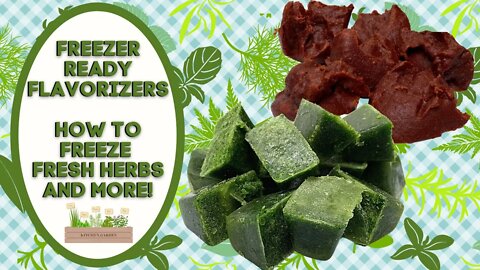
FREEZER READY FLAVORIZERS!! HOW TO FREEZE FRESH HERBS AND MORE!!
When I shared how to freeze fresh aromatics for quick use in recipes, the response was amazing! So many people started asking questions about other vegetables and even herbs that could possibly be frozen to be used the same way. Many suggested that they freeze cilantro whole and break off what they need from the frozen stems. I have never tried that, but if it works, that's great! Today I am sharing how I freeze tender herbs and as a bonus how to freeze that extra bit of tomato paste that inevitably ends up in the trash when it gets lost in the back of the fridge. These are tips I hope you find useful not only because they are easy, but because they save money and are just as important as having a great recipe!
Preserving herbs can be done in a number of ways. You can dehydrate or hang them to dry and crush them and jar them up. You can blend them with oil and keep them in your refrigerator or you can do what I am sharing today. Making fresh herb cubes that are frozen and easy to grab to add to recipes. This method preserves the natural color and flavor of the herbs and makes for a great way to have the fresh taste of your favorite flavorizers at your fingertips even when they are not fresh from your herb garden!
I know that many will be getting ready to plant their spring gardens and that will include herbs such as parsley, basil, cilantro, mint and more. Many of our favorites will be perfect for this method of preservation. I do recommend herbs that are tender such as those listed above. Oregano and even chives will be good choices as well. I do not, however recommend more woody herbs such as rosemary and thyme. Those are best left for drying or putting in flavored oils.
The process is simple. Start with a lot of fresh herbs. In this case I am demonstrating with two bunches of cilantro that I have washed and rolled in paper towel to dry. I am using about 1/2 cup of water for approximately one and a half bunches of cilantro. I want enough to fill up one standard ice cube tray. You may be tempted to add more water, but try and resist. This will dilute the flavors too much and you really want this to pack a punch flavor wise.
Place the water and the herbs in the blender. If you have a blender with a tamper even better. I have an old school Oster that works for me, and I am able to use a small silicone spatula to gently push the material down into the blades. This works very well. It takes a few minutes and you will have a wonderful puree of your favorite herbs in no time! When everything is well blended, simply pour into a clean ice cube tray and disperse evenly. Freeze for several hours or overnight then pop the cubes into a labeled freezer bag or air tight container to use whenever you need an herbacious addition to your favorite recipe!
I made up some cubes with fresh Italian parsely in advance so I could show you the finished product. These are great to add to soups, stews, any time you are browning ground beef or ground chicken or turkey, to add to a casserole or a taco filling. The cilantro can easily be used in your favorite salsa or any time you need a pop of flavor. The best part here is you can make custom blends! Cilantro, oregano, garlic and shallot. Basil, garlic and onion. You could even make some cubes up with fresh ginger, turmeric, garlic and lime. Your imagination is your only limit! You should use what you find yourself using most to make herb cubes that will be needed for your favorite recipes on a regular basis. These should last at least six months in your freezer when properly sealed.
I also shared how to freeze tomato paste in little portions that are perfect for all those times when you need it and open that little can but have some left. We have all done it. Then it ends up in the back of the fridge either dried out or moldy and it gets tossed. No need to toss it! Freeze it! Now you have no excuses!
I hope these tips and tricks for preserving fresh herbs and tomato paste are helpful and I hope you give them a try and I hope you love them!
Happy Eating!
Get my cookbooks here: http://bit.ly/1czqM5R
Business Inquiries can be sent to:
info@noreenskitchen.com
Check me out on social media!
Facebook: http://on.fb.me/12bdibt
Twitter: @noreenskitchen
Instagram: http://bit.ly/12bdqrp
Google + http://bit.ly/1o5GMYy
***MAILING ADDRESS****
Noreen's Kitchen
PO Box 14173
New Bern, NC 28561
Have a question for me? Send me an email:
info@noreenskitchen.com
Noreen's Kitchen Community Guidelines (The Rules)
http://bit.ly/2i7VocU
Any links to Amazon are, in many cases, affiliate links.
Produced by Noreen's Kitchen ©2008-2016 all rights reserved All embeds must live link to Noreen's Kitchen channel. No Editorial Excerpts without permission, Violators agree to pay royalties, all court costs, all collections & all lawyers fees.
686
views
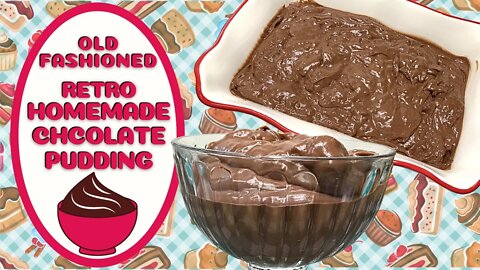
RETRO HOMEMADE CHOCOLATE PUDDING!!
Today we are going retro. Maybe you call it "old fashioned". No matter what you call it, you will call this delicious! Homemade cooked chocolate pudding that is easier than you think and uses ingredients right out of your pantry and fridge. This one is thickened with cornstarch instead of eggs so it is even more economical and dollar stretching! This one is a real throwback. The recipe is right out of my grandmother's recipe box and is one that my mom made from time to time when I was growing up. So lets take a trip down nostalgia lane and cook us up some happy memories!
If you have never made pudding from scratch, you don't know what you are missing! Yes, it's easy to pull a box of instant pudding from the cupboard but it's just not the same. This pudding is rich, thick and so chocolatey! It will evoke memories of childhood and if you top it with some whipped cream you will think you were being served a royal dessert! Honestly this is just delicious and I know you are going to love how easy it is to make from pantry staple ingredients.
This starts with some milk, whatever you keep on hand. I like to use half and half so I am mixing some 2% with some heavy cream, both of which I keep on hand. Of course you are going to need some sugar, some good quality cocoa powder. I used Dutch processed cocoa powder, some corn starch, salt, butter and vanilla extract. If you prefer to make this pudding vanilla flavored you can simply omit the cocoa powder and increase the vanilla. If I am making vanilla pudding I like to add in vanilla paste instead of extract and use 2 tablespoons to increase the vanilla flavor and it will add in the vanilla bean flecks that will make it very pretty as well as tasty.
To start, whisk together the sugar, cocoa, cornstarch and salt in your saucepan. Add in about a half cup of your milk and whisk until a thick paste forms. Be sure there are no pockets of dry ingredients in the edges of the pan. Then add in the remainder of the milk and cream or whatever combination you are using. Stir well. Place over medium high heat and stir constantly until it is bubbly and thickened. You will know it is ready to remove from the heat when the bubbles appear on the surface in the middle of the pan instead of only the edges. It may take 10 to 15 minutes to reach this point. Remember to keep stirring with either a whisk or spatula. I tend to go back and forth between the two to keep the sides scraped down.
Once the pudding has reached a full boil, remove from the heat and add the butter and vanilla extract and stir well until fully incorporated. Then transfer the mixture to a container and place plastic wrap on the surface of the pudding so a skin does not form. Refrigerate for at least two to three hours and if you are using this for a pie filling it is best to refrigerate this overnight.
When the pudding has set you are ready to serve. Remove the plastic and give it a gentle stir with a spoon or a whisk to lighten it up a bit and spoon into serving dishes or into a pie shell for a killer pudding pie. Yes! It was that easy! You may never go back to the instant version again. I will say, there is a place for the instant kind in the kitchen as a quick way to make pie or cake filling or to amend a cake mix, but honestly there is no comparrison to this delicious cooked pudding like grandma used to make!
I hope you give this homemade cooked chocolate pudding a try sometime soon and I hope you love it!
Happy Eating!
You can find a printable version of this recipe here: https://bit.ly/3ax1DR0
Get my cookbooks here: http://bit.ly/1czqM5R
Business Inquiries can be sent to:
info@noreenskitchen.com
Check me out on social media!
Facebook: http://on.fb.me/12bdibt
Twitter: @noreenskitchen
Instagram: http://bit.ly/12bdqrp
Google + http://bit.ly/1o5GMYy
***MAILING ADDRESS****
Noreen's Kitchen
PO Box 14173
New Bern, NC 28561
Have a question for me? Send me an email:
info@noreenskitchen.com
Noreen's Kitchen Community Guidelines (The Rules)
http://bit.ly/2i7VocU
Any links to Amazon are, in many cases, affiliate links.
Produced by Noreen's Kitchen ©2008-2016 all rights reserved All embeds must live link to Noreen's Kitchen channel. No Editorial Excerpts without permission, Violators agree to pay royalties, all court costs, all collections & all lawyers fees.
44
views
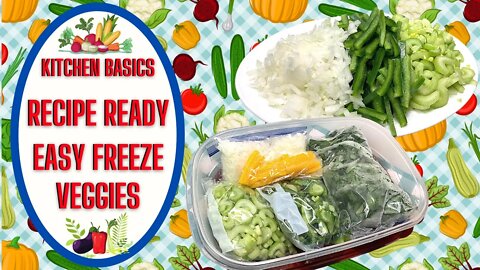
EASY FREEZE RECIPE READY VEGGIES!! NO MORE CASH IN THE TRASH!!
A couple years ago I posted a video on how to freeze and save green onions or scallions from the trash. Seeing as how I always was tossing them because we didn't use them quickly enough. Well that video really resonated with people and as a result is one of my most popular videos. I have received a lot of questions on that video. Mostly, what else can easily be frozen and used in recipes. Today I am addressing these questions and hopefully you will be inspired to freeze some of those veggies and keep them from the trash. Prolonging their useability and saving you money at the same time!
Today we are focusing on celery, bell peppers, onions and fresh spinach. These items freeze very well after just washing and chopping. I have cut my veggies in the way I would use them the most. Sliced celery, cut the peppers into sticks or "julianne" and fine diced the onions. These three veggies I would use in my chicken and sausage gumbo or in my chicken lettuce wraps or in any number of recipes. This is also a great way to have onion and bell pepper on hand for making eggs or your favorite wester omelette. Just toss those in a skillet with a little butter and you're good to go!
I would like to emphasize that this method is meant to preserve the vegetables for later use in hot or cooked applications. They are never going to eat like a fresh vegetable because the freezing process is going to break down the cellular structure of the vegetable and make them go soft. But they are still useful and flavorful for things like soups stews and stir fry. A great way to bulk up the veggie content in things like chili, spaghetti meat sauce and sloppy joes.
The process is simple. Wash your vegetables. Chop or cut in the way you like best and then pop into a zip lock bag, sealed with all the air removed or in an airtight container with a tight fitting lid such as a plastic keeper of some sort or even a mason jar. I am putting mine in freezer bags and then placing them in a larger airtight container in an effort to help my freezer from smelling and tasting like onions and peppers. Once these are frozen you can just break them up and take out what you need.
In the alternative you can "pre-freeze" the vegetables by laying them out in a single layer on a baking sheet that will fit in your freezer and allow them to freeze for a couple of hours or overnight, then putting them into the bag or container of your choice. Pre-freezing emulates the commercial process of "Quick freezing" wherein the item would be cleaned, sprayed with water on a conveyer and flash frozen and prepared for packaging.
This is an effort to save us money by saving us from tossing vegetables that we most likely paid a premium for and don't want to waste. Every penny counts especially in these times. We never want to waste if we don't have to and even though freezing bits and bobs of celery, peppers and onions may seem a little over the top it really isn't. When you go to make something and you realize you don't have the fresh counterpart you will feel good knowing you can reach into your freezer and grab what you need for your dinner.
I have also shared how to freeze baby spinach. I buy the bag at the store and put it in the freezer. These greens have already been triple washed and once frozen you can simply crunch up the bag and make spinach ready for smoothies, soups, stews, creamed spianch or tossed into scrambled eggs. This will also work for other tender greens as well like kale, turnip greens and more. Avoid freezing lettuce or cucumbers though they will be plain awful.
One thing I did not mention was zucchini! This abundant summer squash can be grated and popped into portion sized bags and frozen, ready to toss into your favorite zucchini bread, cake, muffin or soup.
Let me know if there are other vegetables or even fruits you would like me to address with regard to freezing methods. There are more things than you think that you can just wash and freeze. Surprisingly I am still learning a lot about what you can and cannot do with certain produce items. More often than not you can do this method. Even if you don't think you can!
I hope you give this a try and I hope you love it!
Happy Eating!
Get my cookbooks here: http://bit.ly/1czqM5R
Business Inquiries can be sent to:
info@noreenskitchen.com
Check me out on social media!
Facebook: http://on.fb.me/12bdibt
Instagram: http://bit.ly/12bdqrp
Have a question for me? Send me an email:
info@noreenskitchen.com
Noreen's Kitchen Community Guidelines (The Rules)
http://bit.ly/2i7VocU
Any links to Amazon are, in many cases, affiliate links.
Produced by Noreen's Kitchen ©2008-2016 all rights reserved All embeds must live link to Noreen's Kitchen channel. No Editorial Excerpts without permission, Violators agree to pay royalties, all court costs, all collections & all lawyers fees.
212
views
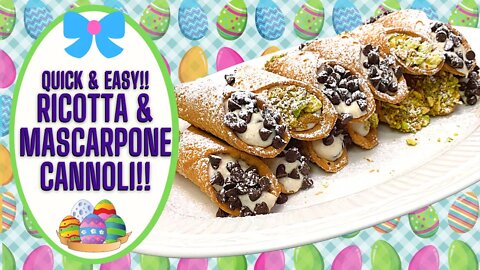
RICOTTA & MASCARPONE CANNOLI!! QUICK AND EASY EASTER DESSERT IDEA!!
I promised that I would share a recipe using the homemade mascarpone cheese substitute that I did in a video last week and this is it! My homemade cannoli cream with ricotta and mascarpone. I know that you will love these as much as the people that I made them for!
I am using a premade shell for my cannoli and mini ones at that. I purchased mine from a restaurant supply but you can easily find these at the bakery counter of better grocers or Italian delis who will gladly sell you the shells that in many cases may be made on the premises. If you cannot attain them like that I will leave you some links to where you can get some in as large or small amounts as you like. I did not choose to make the shells because I did not want to go to the effort of frying a bunch of shells knowing that most people will not go to that step. These premade shells are delicious and they fit the bill. You do what you prefer in this case!
My filling always starts with drained, whole milk ricotta cheese. A two pound tub in this case was set in a fine mesh sieve that I lined with paper towel and placed in the fridge for a few hours You can do this overnight as well. The brand I use "Galbani" is normally very thick and never too watery. So it is a good place to start. Draining just ensures no watery mess. I added half of the amount of homemade mascarpone cheese we made in a previous video which ended up being about 1 1/2 cups. This was whipped together with powdered sugar, vanilla bean paste and a very small amount of my magic ingredient, Fiore Di Sicilia. A wonderful infusion of orange oil and vanilla. There is no subsititue here but you can use orange extract and extra vanilla if you prefer as well as a heathly dose of freshly grated orange zest. My grandfather used finely chopped candied orange peel in his and it was fabulous! A sprinkling of allspice and cinnamon top off the mix. All this gets whipped up then mini chocolate chips are added if desired. We always add the chocolate. Optionally you can add finely chopped pistachios here, but I opted to use those as a decoration.
Homemade Mascarpone Cream Substitute video: https://bit.ly/3rGlzGy
At this point you can refrigerate the filling for a couple of hours to help it get nice and thick. Then put it in a piping bag or a ziplock bag and snip the corner amply. Use the tip to guide into the end of either a mini or standard cannoli shell and pipe gently until it is filled from end to end. Then you can proceed to fill what you need then dip each end in either mini chocolate chips, chopped pistachios or a combination of the two. Again, my grandfather used to use a piece of candided peel on one end and a candied cherry on the other. There is no wrong answer here. The only things required to have good cannoli are the shells and good cheese!
After all the cannoli are decorated, let a good bit of powdered sugar snow down upon them because a cannoli is not a cannoli in my book unless it has a bunch of sugar on top! And that's it! Easy homemade Cannoli! You can make the cream up to three days in advance. You can use it for up to a week after you make it. You should not freeze the filling or it will become watery upon thawing.
I suggest that you only fill what you will eat or give on the day you make these and have more in reserve to make more as the demand arises. You don't want the shells to become soggy. I will say I made these and took some to a friends for dinner the night we made the video. These were still nice and crunchy three hours after I made them and they were in the fridge for at least two of those hours. So if you make them for the same day you should be fine but they will not remain crisp if refrigerated for longer than a day and these do need to remain in the refrigerator.
I hope you give my homemade cannoli cream with ricotta and mascarpone cheese a try sometime soon and I hope you love it!
Happy Eating!
You can find a printable version of this recipe here: https://bit.ly/3cEREKU
You can find cannoli shells here; https://amzn.to/31DLBjc
Get my cookbooks here: http://bit.ly/1cqM5R
Business Inquiries can be sent to:
info@noreenskitchen.com
Check me out on social media!
Facebook: http://on.fb.me/12bdibt
Instagram: http://bit.ly/12bdqrp
***MAILING ADDRESS****
Noreen's Kitchen
PO Box 14173
New Bern, NC 28561
Have a question for me? Send me an email:
info@noreenskitchen.com
Noreen's Kitchen Community Guidelines (The Rules)
http://bit.ly/2i7VocU
Any links to Amazon are, in many cases, affiliate links.
Produced by Noreen's Kitchen ©2008-2016 all rights reserved All embeds must live link to Noreen's Kitchen channel. No Editorial Excerpts without permission, Violators agree to pay royalties, all court costs, all collections & all lawyers fees.
54
views
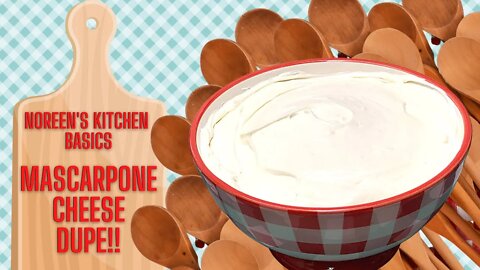
HOMEMADE MASCARPONE CHEESE DUPE!! NOREEN'S KITCHEN BASICS!!
I am getting ready to make a special dessert video and need mascarpone cheese as one of the ingredients. In my better grocery store, you know the one with the hoity toity cheese counter? They have mascarpone cheese in a 4 ounce container and it is over $12! That is a lot of cheddar for about a half cup of cheese! So I am sharing how you can make this very suitable substitute for that very fancy ingredient with items you most likely have in your fridge! This whips up quick and it is really only a few steps from being a no bake cheesecake filling! I will be using this soon for a special dessert that will be great for Easter or anytime the ocassion is special.
If you are not familiar with mascarpone cheese, it is Italian cream cheese that has a high butterfat content. It is a bit sweet and a bit tangy and very rich. It is used in many desserts including Tirimisu, cheesecake and as a topping for fruit. It is also used to thicken sauces and dress pasta. This cheese has a lot of uses and if you think about how many recipes we use our favorite cream cheese in, mascarpone is no exception.
With that in mind, my "substitute" or dupe for expensive mascarpone includes cream cheese as well as heavy whipping cream, sour cream and lemon juice. I have seen recipes that call for the addition for several tablespoons of softened butter, but with my combo I do not find the need to add the extra fat here. Of course it is your choice which recipe to go with, but I love this one and knew it had to be shared.
This is super simple! The trick is that the cream cheese should be softened at room temperature so it is very whippable. I am using my hand mixer to beat this to a creamy fluffy texture then add in the cream, sour cream and lemon juice and whip until smooth and creamy and has a soft peak consistency. Now you have your own version of mascarpone ready for recipes.
I like to put this in the fridge and chill it overnight before using it just so it's ready to go. It will not be super firm and will remain a bit plyable even when cool. You can use this to make a fabulous cream cheese frosting, or filling for a cake. I am excited to share my use in an upcoming recipe! Keep an eye out for that next week! But honestly this is a great dip to serve with fresh fruit especially with the warmer months coming up!
I hope that this solves the mystery of mascarpone cheese if you didn't know what it was. I hope it helps to know that you can make this yourself if you live in an area where you don't have access to such ingredients or if you are just thrifty like me and think that $12 for 1/2 a cup of cheese is asking a bit much!
I hope you give this a try and I hope you love it!
Happy Eating!
You can find a printable version of this recipe here: https://bit.ly/3st4YaH
Get my cookbooks here: http://bit.ly/1czqM5R
Business Inquiries can be sent to:
info@noreenskitchen.com
Check me out on social media!
Facebook: http://on.fb.me/12bdibt
Twitter: @noreenskitchen
Instagram: http://bit.ly/12bdqrp
Google + http://bit.ly/1o5GMYy
***MAILING ADDRESS****
Noreen's Kitchen
PO Box 14173
New Bern, NC 28561
Have a question for me? Send me an email:
info@noreenskitchen.com
Noreen's Kitchen Community Guidelines (The Rules)
http://bit.ly/2i7VocU
Any links to Amazon are, in many cases, affiliate links.
Produced by Noreen's Kitchen ©2008-2016 all rights reserved All embeds must live link to Noreen's Kitchen channel. No Editorial Excerpts without permission, Violators agree to pay royalties, all court costs, all collections & all lawyers fees.
41
views
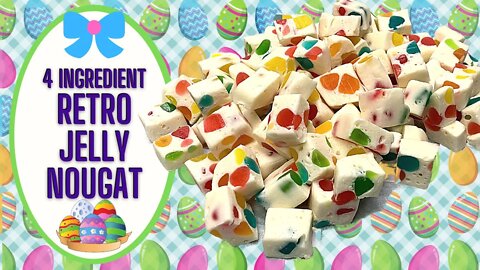
4 INGREDIENT RETRO JELLY NOUGAT! BRACH'S PICK A MIX COPYCAT!!
Today I am going to share with you a recipe that is a throwback to the treats of my childhood! The old Brach's Pick-A-Mix stands that were found in nearly every grocery and drug store in the 70s and 80s always included a wide variety of individually wrapped chocolate, caramel, chewy, nutty, and hard candies to tempt your palate. Young and old enjoyed these treats and all you needed to do was toss some in a bag and they were weighed at the check out like grapes or sweet potatoes. My favorite were the jelly nougats which they used to be called. Now they are called Jelly Bean Nougat and they are not the same. Today I give you a delicious, homemade version of jelly nougat as I remember it and I know you will love it too! Just in time for sharing Easter treats!
This jelly nougat showed up in my Facebook feed round about Thanksgiving time. In more than one incarnation. I had my doubts that it would be possible or delicious. So I set out to see if this could work. I have made this a few times in preparation for Christmas giving and it was a splendid success. Everyone who tried it loved it. It is so easy and only takes four ingredients. You will definitely want to give this one a try if you are a lover of those chewy nougats from Brach's so many years ago!
These start off with a copious amount of mini marshmallows. 10 cups then you add some butter, some white chocolate chips and another copious amount of non sugared gum drops. In this case I am using Dots. The kind you get in the movie theater. These are readily available in most grocery, drug and dollar stores. I have tweaked the recipe to suit my preference. I think this nougat is much better with more dots than less. I am also using the tropical version dots because the store subbed it for the regular version. Either way it was great.
Learn from my mistakes. The first time I made this I did it in a pot on the stove and scorched the marshmallow. While the candy was passable, it was not as good as it could have been. Lesson learned. This is a recipe much better done in the microwave! Melt the marshmallows and the butter on high for 1 minute. Stir. It will be sticky so spray your wooden spoon with some cooking oil. Return to the microwave for another minute. At this point watch so it does not cook over the edge. The last 10 seconds will be crucial. Remove from the microwave and stir to a velvety smooth texture.
Now you have this molten marshmallow bog in your bowl. Add the white chocolate chips and stir until melted. Then add the Dots. Get a good utensil because it gets really stiff as can be attested to by the broken wooden spoon. LOL! I sprayed a heavy spatula and folded the dots into the mixture. Then I poured it all into the prepared pan. Smooth this out evenly and cover. Refrigerate for at least 2 hours, but really overnight is best. Then you can slice and cut into cubes. This makes a ton of delicious nougat candy and I know you will love putting this fun and festive treat on your holiday table!
You should store this in the refrigerator until ready to serve or gift and let the recipient know to do the same. This is chewy and soft and delicious. It really takes you back if you remember the original! You can also make this in advance and freeze it tightly wrapped for up to three months! That makes this candy recipe a real keeper!
I hope you give this four ingredient, retro jelly nougat a try sometime soon and I hope you love it!
Happy Eating!
You can find a printable copy of this recipe here: https://bit.ly/3rfqHRP
Get my cookbooks here: http://bit.ly/1czqM5R
Business Inquiries can be sent to:
info@noreenskitchen.com
Check me out on social media!
Facebook: http://on.fb.me/12bdibt
Twitter: @noreenskitchen
Instagram: http://bit.ly/12bdqrp
Google + http://bit.ly/1o5GMYy
***MAILING ADDRESS****
Noreen's Kitchen
PO Box 14173
New Bern, NC 28561
Have a question for me? Send me an email:
info@noreenskitchen.com
Noreen's Kitchen Community Guidelines (The Rules)
http://bit.ly/2i7VocU
Any links to Amazon are, in many cases, affiliate links.
Produced by Noreen's Kitchen ©2008-2016 all rights reserved All embeds must live link to Noreen's Kitchen channel. No Editorial Excerpts without permission, Violators agree to pay royalties, all court costs, all collections & all lawyers fees.
31
views

CLASSIC DEVILED EGGS 2 WAYS FOR EASTER!! EASTER DINNER IDEAS!!
Easter is just a couple weeks away and I think its a good time to revisit a tried and true classic for the Easter table! Deviled eggs are as apt to make an appearance on this day as a delicious spiral ham. The styles may be different but deviled eggs are enjoyed by many. In our house we make two different styles. One in the fashion that my mom made and a fancier, sweeter version in the style that Rick prefers. No matter how you like them, these are definitely a winner for any time of year!
Of course you need to start with good hard boiled eggs. You can do them the old fashioned way, in boiling water or like I often do in my pressure cooker! I also have a cute little egg cooker that I use for hard boiled eggs, as well as poached, and soft boiled. If you are not a fan of making hard boiled eggs or find them a challenge, no worries, your grocery store deli or egg section is bound to have a package pre boiled and peeled for you, ready to take home! Work smarter, not harder, is what I always say!
Slice each egg in half the long way and scoop out the yolk into a bowl. I boiled six eggs which will render me 12 deviled eggs. I used half to make each type of our favorite fillings. Using a fork, mash the yolks until they are very fine and resemble coarse crumbs. Then you are ready to make the magic happen. What I will say is that making this filling is more about finesse than amounts. Each time may be a little different, so start with less, you can always add more, but its much harder to fix it the other way if you make it too loose.
To make my favorite version that I grew up with I added about a tablespoon of good quality mayonnase as well as about a teaspoon of prepared yellow mustard. In went about a teaspoon of dry mustard powder, some salt pepper to taste as well as about 1/4 teaspoon of onion powder. You can also choose to use a bit of finely minced onion or grated onion here if you prefer. I like to use both types of mustard. The prepared mustard adds tang and color while the dry mustard adds heat and body.
Mix all these up together and when it is the right consistency you can fill your egg halves with it. Start a bit on the shy side until every egg is filled, then go back and add more until they are filled to perfection. You can fill the eggs using a couple of spoons as I have done here or you can pop the filling into a pastry bag or a zip top bag with the corner snipped and squeeze the filling evenly into the egg halves. Whichever is easier for you.
Ricks style of deviled egg filling is very close to mine with the exception that we are using a bit of miracle whip in place of the mayonnaise and adding a bit more moisture by using about a tablespoon of sweet pickle relish. Mix this up in the same fashion as the other and fill those eggs up. To differentiate between the two for serving I garnished my version with a spinkling of paprika and Rick's version with a dollop of pickle relish to the top of those eggs.
That is how we make deviled eggs two ways in our house. I realize that a deviled egg can be a personal thing. Everyone's mom, grandma, meemaw and auntie makes them different. It doesn't mean that others are bad, it just means we have more to explore and enjoy! How do you make yours? Do you like them or are you not a fan? Let me know in the comments!
I hope you give our 2 versions of deviled eggs a try sometime soon, whether for Easter or any occassion and I hope you love them!
Happy Eating!!
Get my cookbooks here: http://bit.ly/1czqM5R
Business Inquiries can be sent to:
info@noreenskitchen.com
Check me out on social media!
Facebook: http://on.fb.me/12bdibt
Instagram: http://bit.ly/12bdqrp
Have a question for me? Send me an email:
info@noreenskitchen.com
Noreen's Kitchen Community Guidelines (The Rules)
http://bit.ly/2i7VocU
Any links to Amazon are, in many cases, affiliate links.
Produced by Noreen's Kitchen ©2008-2016 all rights reserved All embeds must live link to Noreen's Kitchen channel. No Editorial Excerpts without permission, Violators agree to pay royalties, all court costs, all collections & all lawyers fees.
86
views
BLACK FOREST POKE CAKE!! EASTER MENU IDEAS!!
Today we start a new series of videos all dedicated to spring and Easter celebrations that will be coming up in about a months time. This black forest poke cake is inspired by the real layer cake dessert, only made in the fashion of a poke cake. This is super easy and uses items you already have in your pantry and fridge. Delicious layers of chocolate cake, creamy chocolate pudding, cherries and whipped cream. What could be bad about that? This one is sure to make your family happy whether you make it for Easter or anytime!
This all starts with a cake. I have baked a Duncan Hines Butter Recipe Fudge cake using 1 stick of softened butter, 1 cup of milk and 4 eggs. This is different from the box instructions, however you should use a chocolate cake mix of your choice and make it according to the box instructions. You will also want to let your cake cool completely prior to filling it with all the pokey goodness!
Once cooled, you can poke your cake! Just take the handle of a wooden spoon or in my case a boba straw and poke several holes, evenly around the top of the cake. This will be for the creamy chocolate filling we will be putting in them. Speaking of that filling, I made mine using one small four serving size box of instant chocolate fudge pudding. However, I made mine using the instructions for the pie filling which uses less milk and gives you a thicker consistency. I put the pudding in a zip top bag and cut the corner off to make a makeshift piping bag. I used this bag to fill each pokey hole with the creamy filling and then whatever was left in the bag I simply squeezed over the top then smoothed with an offset spatula.
Next comes the cherry topping which is nothing more than one can of your favorite cherry pie filling spread evenly over the top of the pudding layer. Then to top everything off I piped some whipped cream that I sweetened with a bit of powdered sugar and vanilla extract and stabilized with a couple tablespoons of Ultra gel. You can choose to use a large tub of non dairy whipped topping from the freezer section if you like. I just don't really like cool whip that much so prefer to make mine using heavy cream. Your choice. There is no wrong answer here. Pipe or spread the whipped cream evenly over the cherry topping. If you like you can top this with a good dose of chocolate shavings or mini chocolate chips for a finishing touch.
Cover this and refrigerate for at least two hours before serving. Overnight is best and will give everything time to mix and mingle and flavors to soak into the cake layer. To serve simply spoon into parfait dishes or cut and serve like cake. You can see, I did not refrigerate mine and cut it It looks a hot mess, but boy is it delicious! No matter how it looks on the plate, your family and friends are bound to love this chocolate cherry dessert cake when presented to them!
I hope you give this black forest poke cake a try some time soon, whether for your Easter dinner, spring celebration or just because it's Thursday and I hope you love it!
Happy Eating!
Get a printable version of this recipe here: http://bit.ly/3rGMzqg
Get my cookbooks here: http://bit.ly/1czqM5R
Business Inquiries can be sent to:
info@noreenskitchen.com
Check me out on social media!
Facebook: http://on.fb.me/12bdibt
Twitter: @noreenskitchen
Instagram: http://bit.ly/12bdqrp
Google + http://bit.ly/1o5GMYy
***MAILING ADDRESS****
Noreen's Kitchen
PO Box 14173
New Bern, NC 28561
Have a question for me? Send me an email:
info@noreenskitchen.com
Noreen's Kitchen Community Guidelines (The Rules)
http://bit.ly/2i7VocU
Any links to Amazon are, in many cases, affiliate links.
Produced by Noreen's Kitchen ©2008-2016 all rights reserved All embeds must live link to Noreen's Kitchen channel. No Editorial Excerpts without permission, Violators agree to pay royalties, all court costs, all collections & all lawyers fees.
31
views
EASY GARLIC PARMESAN BREADSTICKS!
Today we are using another of our par baked pizza crusts to make some awesome garlic parmesan breadsticks to have with dinner! These will rival any of your favorite take out spots and they are super quick to make when you have the crusts already done in the freezer! I will also share how to make the garlic parmesan spread that goes on to the crust to make a mariage made in heaven! I know you will find yourself coming back to these again and again!
The garlic parmesan spread is super simple! 1 stick of softened butter, mashed in a bowl and then you add 1/4 cup of parmesan cheese, a couple cloves of minced garlic and some dry garlic, dried parsley, Italian seasoning and salt. Don't skip the salt unless you cannot have it because it simply makes these pure perfection!
I spread the entire amount but you can use as much or as little as you like over the frozen pizza crust then I popped it into a 375 degree oven for about 18 minutes. Just until the cheese and dough were golden brown and beautiful! Then all you have to do is cut this into strips with your pizza cutter and voila'! Breadsticks!
Having these pizza crusts on hand is really wonderful and they lend to the imagination! You can make everything from your favorite pizza to a dessert using pie filling and homemade brown sugar streusel. Your only limit is your creativity!
I hope you give these garlic parmesan breadsticks a try sometime soon and I hope you love it!
Happy Eating!
Get my cookbooks here: http://bit.ly/1czqM5R
Business Inquiries can be sent to:
info@noreenskitchen.com
Check me out on social media!
Facebook: http://on.fb.me/12bdibt
Twitter: @noreenskitchen
Instagram: http://bit.ly/12bdqrp
Google + http://bit.ly/1o5GMYy
***MAILING ADDRESS****
Noreen's Kitchen
PO Box 14173
New Bern, NC 28561
Have a question for me? Send me an email:
info@noreenskitchen.com
Noreen's Kitchen Community Guidelines (The Rules)
http://bit.ly/2i7VocU
Any links to Amazon are, in many cases, affiliate links.
Produced by Noreen's Kitchen ©2008-2016 all rights reserved All embeds must live link to Noreen's Kitchen channel. No Editorial Excerpts without permission, Violators agree to pay royalties, all court costs, all collections & all lawyers fees.
11
views