
Enjoyed this channel? Join my Locals community for exclusive content at
noreenskitchen.locals.com!
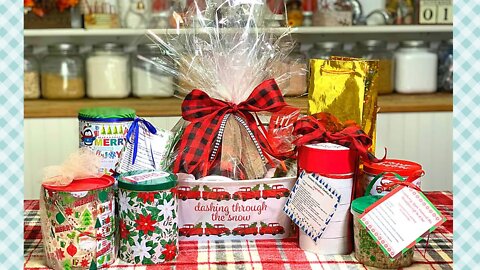
GIFT IN A JAR PACKAGING IDEAS!! HOLIDAY PACKAGING IDEAS!!
Today, as promised, I am sharing my ideas for alternative packaging for our gifts in a jar mixes that we have been making over the last few weeks! I went to a few places, did a bit of research, did a little shopping and found what I think are some awesome alternatives to the mason jars for these mixes. Bonus is that you don't have to worry about getting your jars back in this climate of shortages! These packaging ideas are so cute and easy and I know you are going to love them. As a treat, I also beefed up one of the mixes and turned it into an entire gift basket that is really beautiful!
The ideas here are just that. Ideas. I hope to inspire you and get your creativity going. Think outside the box. Use what you have, dig for bargains and make it work, but make it cute, because a beautiful gift is an anticipated gift and these will be sure to please! I got a few cute tins and some boxes from bot Hobby Lobby and Dollar Tree. I recycled one of my Herbalife canisters and turned it into the perfect package for a hot cocoa cookie mix. You can also use inexpensive wine bags or gift bags and if you use your imagination you can turn just about any vessel into a delightful container for a holiday gift!
Amazon can also be a great resource for you and you can find plastic jars and tins and bags and more that can be used to package your gifts. A little digging can yield great results. I have a shopping list that you can refer to for Amazon here: https://amzn.to/2Trw2XN
Another great place to get great deals on packaging including ribbons, pull bows, boxes, bags, tags and cellophane wrap and bags is the Paper Mart. I have been buying from them for many years and they never fail to come through. The quarter inch ribbon I use is in a 100 yard spool for less than $3 and they have a true rainbow of colors to choose from. Many more than I even have in my collection!
The cellophane bag is a real game changer when it comes to upping your packaging game! Cello bags are the crinkly kind not the poly bags that are like sandwich bags, which you really do not want to wrap up gifts in. It just lets me down in the "quality" department. You can find lots of different shapes and sizes. You can even get shrink plastic bags to use on your gift baskets and use a hair dryer to shrink it down and make it snug.
I put together this super cute gift basket with a tote from Dollar Tree along with matching dish towel, oven mitt and hot pads. The store did all the work for me. All I had to do was put it all together and wrap it up with some cellophane wrap and tie with a big bow! These are super easy and they are so well received. So if you want to bump up your giving game but stay within your budget, this is definitely the way to do it!
You can find the papermart items here: https://www.papermart.com/
You can purchase from the Dollar Tree online here: https://www.dollartree.com/
You can find Hobby Lobby items here: https://www.hobbylobby.com/
You can find my Amazon shopping list here: https://amzn.to/2Trw2XN
I hope this inspires you to get going on holiday gift ideas this year!
Happy Holidays!
Get my cookbooks here: http://bit.ly/1czqM5R
Business Inquiries can be sent to:
info@noreenskitchen.com
Check me out on social media!
Facebook: http://on.fb.me/12bdibt
Twitter: @noreenskitchen
Instagram: http://bit.ly/12bdqrp
Google + http://bit.ly/1o5GMYy
***MAILING ADDRESS****
Noreen's Kitchen
PO Box 14173
New Bern, NC 28561
Have a question for me? Send me an email:
info@noreenskitchen.com
Noreen's Kitchen Community Guidelines (The Rules)
http://bit.ly/2i7VocU
Any links to Amazon are, in many cases, affiliate links.
Produced by Noreen's Kitchen ©2008-2016 all rights reserved All embeds must live link to Noreen's Kitchen channel. No Editorial Excerpts without permission, Violators agree to pay royalties, all court costs, all collections & all lawyers fees.
19
views
LEMON CRINKLE CAKE MIX COOKIES!! GIFT IN A JAR!!
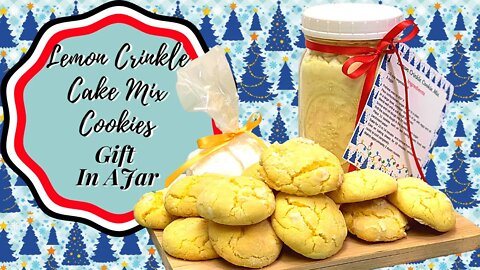
The time has come to present our last in the series of Gifts in a Jar Cookie Mixes. Today we share these amazing Lemon Crinkle Cake Mix Cookies! Yes, they start with a cake mix. I chose this method because there are a lot of people on a serious budget due to the current circumstances but they still will want to have a happy holiday season and share and give goodies to friends and family. The cake mix cookie is the answer! These are seriously lemony and decadent with the addition of white chocolate chips. This goes together quickly and will become a favorite of all the lemon lovers on your list!
You have seen me make cake mix cookies in the past and they are very nice and they go together quickly. They also lend themselves to making a great base for cookie mixes to give for any occasion. The possibilities and flavor combinations are endless and you can make them with just about any flavor you like. Today we are making these bright, citrusy lemon crinkles with white chocolate chips. They are super refreshing and the perfect way to brighten anyone's holiday.
As you may imagine we started this off with a lemon cake mix. I love and prefer the Duncan Hines variety. You can use what you prefer or what you have on your pantry shelf. To this I added half a cup of all purpose flour and two teaspoons of crystalized lemon juice, otherwise known as True Lemon. This can be found in the sugar/sweetener section or baking aisle of most grocery stores or it can be found online. If you cannot procure this ingredient you can substitute two teaspoons of a lemonade drink mix such as Countrytime.
These get all mixed together and placed in a quart jar or other container. Tap down several times to compact and settle and then top off with the white chocolate chips. Pop a lid on the jar and decorate to your hearts content. Be sure to add the preparation tags I made that will be included with the recipe download. This will help the recipient to know how to prepare the cookie dough and make these luscious cookies!
These get made with 1/2 cup of vegetable oil and 2 eggs! That's it! scoop and form into balls. Roll into confectioner's sugar that you will provide in a cello bag for giving and the recipient will have everything they need, sans the liquid ingredients to make these delicious, sweet and tangy treats for their holiday cookie tray!
One of the best benefits of making these mixes using a cake mix is the budget friendly factor. Cake mixes usually go on sale for $1 or less during the run up to the holidays and this is a great time to stock up. These can be made quickly with few ingredients and can help you stretch your gift giving dollar especially if you have a lot of people on your holiday list!
We have made lemon cookies today with lemon cake mix. But your imagination and availability of cake mix flavors is your only limitation! Chocolate, double or triple chocolate, apple spice, pumpkin, strawberry, birthday cake, toasted coconut and pina colada are just a few of the many ideas you can run with when it comes to cake mix cookies! Once you give them a try I know you will love them. Doubly certain you will love them as a gift in a jar concept!
I hope you give these lemon crinkle cookies a try sometime soon for gift giving or just for enjoying and I hope you love them!
Happy Eating!
Get the printable recipe and prep tags using this link: https://bit.ly/34xP9Ge
Find some of the items used in this video on my Amazon Store here: https://amzn.to/2Trw2XN
Get my cookbooks here: http://bit.ly/1czqM5R
Business Inquiries can be sent to:
info@noreenskitchen.com
Check me out on social media!
Facebook: http://on.fb.me/12bdibt
Twitter: @noreenskitchen
Instagram: http://bit.ly/12bdqrp
Google + http://bit.ly/1o5GMYy
***MAILING ADDRESS****
Noreen's Kitchen
PO Box 14173
New Bern, NC 28561
Have a question for me? Send me an email:
info@noreenskitchen.com
Noreen's Kitchen Community Guidelines (The Rules)
http://bit.ly/2i7VocU
Any links to Amazon are, in many cases, affiliate links.
Produced by Noreen's Kitchen ©2008-2016 all rights reserved All embeds must live link to Noreen's Kitchen channel. No Editorial Excerpts without permission, Violators agree to pay royalties, all court costs, all collections & all lawyers fees.
39
views

HOT COCOA COOKIE MIX!! GIFT IN A JAR!!
Today we are sharing another gift in a jar mix that you can consider for your holiday giving! We are planning only a couple more of these before we move into November and all things Thanksgiving! It was important to me to get these ideas out for you prior to the big holiday rush so you could start preparing! Today we are sharing this very different but nonetheless, delicious, hot cocoa cookie mix. Complete with marshmallows, these cookies are soft, chewy and have the flavor of hot cocoa and marshmallows that everyone loves, especially during the holidays! I know that you will love them!
This mix is a little different because it incorporates instant hot cocoa mix as one of the main ingredients. This gives the cookie its chocolate flavor and also helps give it a bit of chewiness. I have used the generic grocery store brand of instant hot cocoa that is inexpensive and comes in a large canister. Since we need 1 cup of that I thought that would be easier than opening a bunch of packets.
We start with flour, baking powder, baking soda and salt. That gets mixed together and compacted into the bottom of a quart size mason jar or other container. Next in goes the hot cocoa mix and it also gets compacted down. Brown sugar goes in on top to seal and then as a bonus some mini chocolate chips top everything off. Now all you need to do is put on a lid and decorate to your hearts content.
This mix is given with a dozen or so, standard size marshmallows which the recipient will cut in half and press into the almost baked cookie before returning to the oven to finish baking. This gives the cookie the perfect finish for the flavor of hot cocoa. The marshmallow gives a beautiful sweet and chewy topping for this lightly chocolate chewy cookie!
I know that these are going to be a hit with your family and friends! I certainly hope you give these a try for the holiday season or anytime and I hope you love them!
Happy Eating!
You can find a printable version of this recipe along with the prep tags here: https://bit.ly/31EkBkj
Get my cookbooks here: http://bit.ly/1czqM5R
Business Inquiries can be sent to:
info@noreenskitchen.com
Check me out on social media!
Facebook: http://on.fb.me/12bdibt
Twitter: @noreenskitchen
Instagram: http://bit.ly/12bdqrp
Google + http://bit.ly/1o5GMYy
***MAILING ADDRESS****
Noreen's Kitchen
PO Box 14173
New Bern, NC 28561
Have a question for me? Send me an email:
info@noreenskitchen.com
Noreen's Kitchen Community Guidelines (The Rules)
http://bit.ly/2i7VocU
Any links to Amazon are, in many cases, affiliate links.
Produced by Noreen's Kitchen ©2008-2016 all rights reserved All embeds must live link to Noreen's Kitchen channel. No Editorial Excerpts without permission, Violators agree to pay royalties, all court costs, all collections & all lawyers fees.
9
views
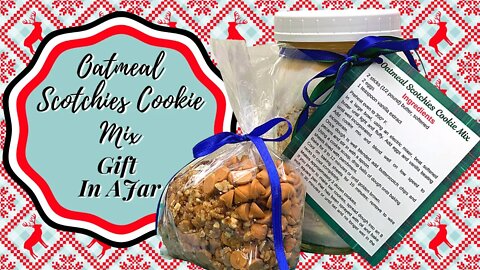
OATMEAL SCOTCHIES COOKIE MIX!! GIFT IN A JAR!!
We are just keeping on with our gift in a jar series today. I hope that you have been enjoying these suggestions to help you make holiday giving easy this year and beyond. I will be wrapping up this series soon but have something special in store for you as a finale that I think you are going to enjoy! Today we are sharing one of my childhood favorites! Oatmeal Scotchies! My mom never made these because she did not enjoy butterscotch but my best friend in Jr. High's mom made them and I was hooked the first time I tried them! I know you will love them too!
These are very similar to an oatmeal cookie, just without the raisins or fruit and with the added deliciousness of butterscotch morsels and chopped pecans. These get a great boost from the salt as well and they really taste like a delicious salted caramel cookie. These will be a welcomed gift mix for family and friends this holiday season!
This starts with, as you may have guessed, all purpose flour and old fashioned oats. Important to note that you should always use old fashioned oats for the best texture and the best end result for your cookies. Instant and/or quick oats will not render the same result. Salt, baking powder and cinnamon are added and all these are layered in a quart jar along with granulated and brown sugar. I like to put the brown sugar in all of my gifts in a jar last to seal and secure the layers and keep them beautiful. That is one of my top tips for making successful and lovely, gifts in a jar.
Now we have the butterscotch morsels and chopped pecans to deal with. Well, as you can see, there is little chance of those fitting into the jar we just packed. So, into a cello bag they go. You can find a wide variety of cello bag shapes and sizes on many websites. I will provide a listing of some of the sizes I keep on hand on my Amazon page. You will find the link below. I layered the morsels and the nuts into the cello bag, gave it a twist and tied with a ribbon. If the top is a little long for your taste, as it was for mine, snip it off with your scissors to make it look more presentable.
Now you can attach this packet to the jar or you can give it with the jar in a gift bag with the preparation tag so the recipient can make these festive treats at home and think of you while they do it! Gifts in a jar are a spectacular way of giving that is consumable but from the heart. Much nicer than a gift card and it says "I was thinking of you" when you made it and when you gave it!
Remember that you do not have to make these mixes in jars. If you are concerned about giving away your canning jars in the current climate of shortages, then I understand. The dollar or big box store offers many options for you. You can also recycle clean and dry glass jars from grocery items. You can sponge, chalk or spray paint the lids to make them festive and special. If you wanted to you could even just make these, mix them all together in lieu of layering and pop them in pretty cello bags. If you do that I do recommend that you use the old fashioned type of plastic storage bag with the twist ties. Sometimes called bread bags to put the mix in then slip into the festive cello bag for decorating and giving. This will keep the mix fresher than just using the cellophane bag.
I hope you will give these Oatmeal Scotchies a try this holiday season or anytime you want to give a gift from the kitchen and from the heart and I hope you love it!
Happy eating!!
You can find a printable version of this recipe along with the preparation tags here: https://bit.ly/3jatmbn
You can find a list of some of the items used in this video on my Amazon Influencer page here: https://amzn.to/2GC3oA9
Get my cookbooks here: http://bit.ly/1czqM5R
Business Inquiries can be sent to:
info@noreenskitchen.com
Check me out on social media!
Facebook: http://on.fb.me/12bdibt
Twitter: @noreenskitchen
Instagram: http://bit.ly/12bdqrp
Google + http://bit.ly/1o5GMYy
***MAILING ADDRESS****
Noreen's Kitchen
PO Box 14173
New Bern, NC 28561
Have a question for me? Send me an email:
info@noreenskitchen.com
Noreen's Kitchen Community Guidelines (The Rules)
http://bit.ly/2i7VocU
Any links to Amazon are, in many cases, affiliate links.
Produced by Noreen's Kitchen ©2008-2016 all rights reserved All embeds must live link to Noreen's Kitchen channel. No Editorial Excerpts without permission, Violators agree to pay royalties, all court costs, all collections & all lawyers fees.
42
views
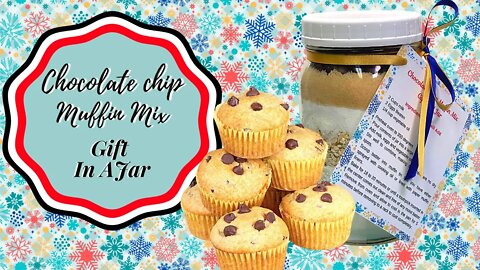
CHOCOLATE CHIP MUFFIN MIX!! GIFT IN A JAR!! THE HOLIDAYS ARE COMING!!
Let's continue with a breakfast theme for our next gift in a jar idea! Today we are sharing this delicious and simple pantry staple buster, chocolate chip muffin mix! These are quick, simple and delicious. They qualify for breakfast, snack or dessert and everyone is going to love them! This is also a versatile base for whatever you choose to use as an add in! Do you want to use some nuts? Add them in. Want cranberries instead? How about dried cherries? You make these yours and everyone will love them!
These start off like the rest. Mixing the salt, baking powder and baking soda into the flour mixture, then pouring into a quart jar. Tap this down to level so that all your ingredients will fit in the jar. Then add some old fashioned rolled oats on top along with layers of granulated and brown sugar. I always like to add the brown sugar to the top to sort of seal in the mixture to avoid ruining the layers. The striations are part of the fun and beauty of giving this gift! Next pop in some chocolate chips and you're done! Put a lid on it and decorate as you like!
Be sure to include the printable gift tag with your jar or if you are giving this in a gift bag, be sure to slip it in so the recipient knows how to prepare these delicious muffins. You don't have to use a mason jar if they are a precious commodity for you. You can layer this in a gusseted cellophane bag or in a recycled jar that has been washed and cleaned well. You can even spray paint or chalk paint the lid to make it pretty.
These muffins are easy to prepare with ingredients that people will already have on hand such as milk, eggs and oil. Just mix them up, scoop them and bake them and boom! Delectable muffins for breakfast, snack or dinner!
I hope you give this chocolate chip muffin gift in a jar a try sometime soon, whether it be for the holidays or anytime and I hope you love it.
Happy Eating!
You can find a printable version of this recipe along with the gift tags here: https://bit.ly/3jUggAi
Get my cookbooks here: http://bit.ly/1czqM5R
Business Inquiries can be sent to:
info@noreenskitchen.com
Check me out on social media!
Facebook: http://on.fb.me/12bdibt
Twitter: @noreenskitchen
Instagram: http://bit.ly/12bdqrp
Google + http://bit.ly/1o5GMYy
***MAILING ADDRESS****
Noreen's Kitchen
PO Box 14173
New Bern, NC 28561
Have a question for me? Send me an email:
info@noreenskitchen.com
Noreen's Kitchen Community Guidelines (The Rules)
http://bit.ly/2i7VocU
Any links to Amazon are, in many cases, affiliate links.
Produced by Noreen's Kitchen ©2008-2016 all rights reserved All embeds must live link to Noreen's Kitchen channel. No Editorial Excerpts without permission, Violators agree to pay royalties, all court costs, all collections & all lawyers fees.
10
views
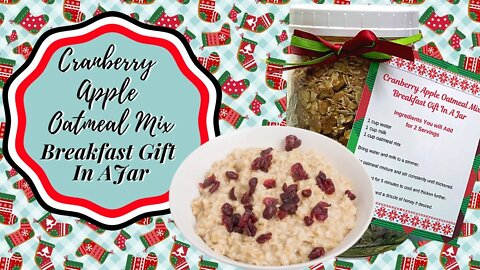
CRANBERRY APPLE OATMEAL MIX!! BREAKFAST GIFT IN A JAR!!
Today we are sharing another gift in a jar. Something a bit different from the cookies and brownies we have been sharing. This one is a breakfast gift in a jar! This cranberry apple oatmeal mix is a delicious alternative filled with whole grain goodness and the sweetness of dried fruit! This one is perfect for those on your list who like to be healthy but this is also a great treat! Simple to make for the recipient and easy to make for you! This one is definitely a keeper!
We are using a quart jar, just like all the rest of the mixes we have made. The difference with this mix is that we are not going to be layering the ingredients. These will all be well blended together and just popped right in the jar. This helps with the making of the end result. Because if you were to layer everything in the end user needs to dump it in a bowl and mix it up for themselves. Not a really nice thing to ask. So we will do it for them and save them the trouble.
This all starts off with some whole grain goodness. Whole, old fashioned oats are recommended here to give this recipe the best result try not to use quick or instant oats. Adding in brown sugar, dried or freeze dried apples, dried cranberries and cinnamon, allspice and salt. Don't leave out the salt. In the end it gives great flavor and since oats are very bland this will brighten things up a bit.
I like to mix the spices with the oats to start off. Giving everything a good mix. This helps with those fine ground items getting blended thoroughly before adding the rest. Then everything else goes in. Be sure to stir this for a while because incorporation is the key. You want to make sure there are no large lumps of brown sugar and you want to ensure good distribution of all the ingredients.
Now all you need to do is put this into your jar. Be sure to tap, tap, tap to settle as you go so all the ingredients will fit. As will see this recipe fits perfectly into that size jar. If you are not keen on giving gifts in jars this year, this mix is the perfect answer because there is no layering. This can be given in a recycled, washed and cleaned jar for which you have spray or sponge painted the jar lid. You can easily give this in an appropriately sized cellophane bag tied with a cute bow and slipped into a kraft gift bag for easy transport. Be sure to include the preparation tags that are included with the printable recipe. A link to which you will find at the end of this description box or pinned a the top of the comment section below the video.
These oatmeal mixes are versatile. If you don't want apples and cranberries, you can easily make this in a lot of different configurations. Peaches and cream, blueberries and cream, strawberries and cream using freeze dried fruits and the addition of 1/2 cup of instant creamer powder. instead of the nuts and some of the fruits. You can use banana chips and walnuts or dried cherries and chocolate chips. The possibilities are endless here. Make this your own and put your own stamp on it! In the end everyone will love getting a gift that they don't have to dust or make room for.
I hope that you give this cranberry apple oatmeal mix, breakfast gift in a jar a try this holiday season or anytime you want a quick and delicious gift to give from your kitchen and from your heart! I hope you love it!
Happy Eating!
Get a printable version of this recipe and the tags here: https://bit.ly/34I1w1e
Get my cookbooks here: http://bit.ly/1czqM5R
Business Inquiries can be sent to:
info@noreenskitchen.com
Check me out on social media!
Facebook: http://on.fb.me/12bdibt
Twitter: @noreenskitchen
Instagram: http://bit.ly/12bdqrp
Google + http://bit.ly/1o5GMYy
***MAILING ADDRESS****
Noreen's Kitchen
PO Box 14173
New Bern, NC 28561
Have a question for me? Send me an email:
info@noreenskitchen.com
Noreen's Kitchen Community Guidelines (The Rules)
http://bit.ly/2i7VocU
Any links to Amazon are, in many cases, affiliate links.
Produced by Noreen's Kitchen ©2008-2016 all rights reserved All embeds must live link to Noreen's Kitchen channel. No Editorial Excerpts without permission, Violators agree to pay royalties, all court costs, all collections & all lawyers fees.
12
views
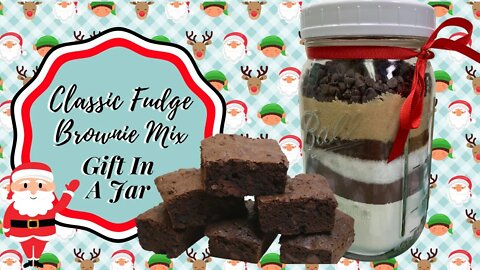
CLASSIC FUDGE BROWNIE MIX!! GIFT IN A JAR!! THE HOLIDAYS ARE COMING!!
Everyone loves a brownie and this mix is going to become a staple in your pantry! This classic fudge brownie mix is a great way to spread holiday cheer without breaking the bank! Its also a great way to share with loved ones far and near even if we are not able to spend a lot of time together due to the current climate! Gifts in a jar is the answer! This fudge brownie recipe is not only a great gift but it can be made in bulk and stored in your pantry for up to six months for when the need for a chocolatey treat arises! These are so easy to throw together using ingredients you already have in your pantry you are going to come back to this recipe time and time again, holidays or not!
Like our other gift in a jar mixes, this starts out with a clean and dry quart canning jar. Flour is mixed with baking powder and salt and placed in the bottom of the jar then tapped on the counter to level. Next we layer in some great quality cocoa powder. I love the brand from Prepared Pantry. The best Dutch processed cocoa I have ever used! You may want to use a spoon to get the cocoa powder into the jar evenly without it sticking to the sides. Then, Tap, tap, tap again to level. Granulated sugar goes in next, then some instant espresso or micro grind instant coffee on top of that. This is an optional ingredient but it really does enhance the chocolate richness and does not taste like coffee at all. You can leave it out if you like. Brown sugar in on top of that and seal it all in by tamping down with a tart tamper. Chocolate chips go in last for the win and you are ready to decorate your jar.
I have provided a printable recipe as well as 4 printable tags for your gift giving ease. Grab some ribbon and a hole punch and your job is nearly done! You an choose to cover the top with a cute little bonnet of festive fabric cut with pinking shears or maybe wrap the whole jar is some cellophane and tie with a great bow with a cute ornament for a decoration. No matter what you choose this gift is going to be very well received!
I hope you give this classic fudge brownie mix gift in a jar a try, sometime soon for the holidays and beyond and I hope you love it!
Happy Eating!
You can find a printable version of this recipe along with the gift tags here: https://bit.ly/3ljiOsi
Here is a shopping list of some of the things I have used in the Gift in a Jar series from my Amazon Influencer Page. I may receive a small fee when you make a purchase that costs you nothing. https://amzn.to/2GC3oA9
Get my cookbooks here: http://bit.ly/1czqM5R
Business Inquiries can be sent to:
info@noreenskitchen.com
Check me out on social media!
Facebook: http://on.fb.me/12bdibt
Twitter: @noreenskitchen
Instagram: http://bit.ly/12bdqrp
Google + http://bit.ly/1o5GMYy
***MAILING ADDRESS****
Noreen's Kitchen
PO Box 14173
New Bern, NC 28561
Have a question for me? Send me an email:
info@noreenskitchen.com
Noreen's Kitchen Community Guidelines (The Rules)
http://bit.ly/2i7VocU
Any links to Amazon are, in many cases, affiliate links.
Produced by Noreen's Kitchen ©2008-2016 all rights reserved All embeds must live link to Noreen's Kitchen channel. No Editorial Excerpts without permission, Violators agree to pay royalties, all court costs, all collections & all lawyers fees.
9
views
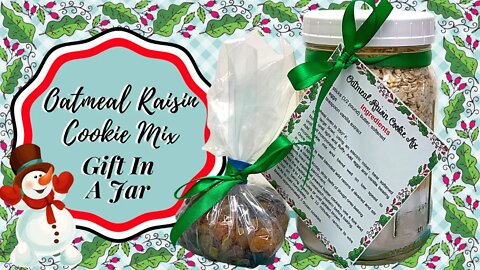
OATMEAL RAISIN COOKIE MIX!! GIFT IN A JAR!! THE HOLIDAYS ARE COMING!!
When you think of a classic cookie, oatmeal raisin is at the top of the list, right after chocolate chip. At least they are for me. Whenever my mom would do a day of baking cookies these were a close second and we all loved them! These soft and chewy oatmeal raisin cookies are a welcomed addition to any cookie platter! The beauty here is that the raisins are given on the side. If the recipient does not enjoy them, they are free to add whatever they prefer. You can also choose to mix things up and instead of including raisins, how about chocolate chips, white chocolate chips, dried cherries or cranberries or even coated chocolate candy pieces or, dare I say, chocolate covered raisins! You name it, its your call! These are going to be a great addition to your gift giving this holiday season!
These start off like the rest of our cookie mixes with all purpose flour leavening, some spices and of course oats. I am using old fashioned oats because they hold up the best. The quick oats tend to break down too quickly and do not add a lot of texture to the cookie, they also absorb a lot of the moisture and make the cookie dry and crumbly. The flour is whisked together with the spices, salt and baking powder and then we layer.
The flour goes in first and tap, tap tap to level. In goes the granulated sugar and then the brown sugar. I used my tart tamper to mash the brown sugar down and make a nice level layer. Next goes in the oats. This will fill a standard quart jar. There is no way any raisins or chips are going to fit in there. So we fixed it and just popped them into a little bag on the side.
Adding the raisins separately gives the recipient the option to add or not. Maybe they don't like raisins. Maybe they prefer chocolate chips. They can add those or as mentioned above, you can change this up and add chocolate chips and walnuts or white chocolate chips and cranberries or whatever you love best!
The raisins or add-ins can be tied to the jar along with the preparation tag or you can package them up in a cute little gift bag that you decorate with designer papers and ribbons. You can also use the cookie mix as the basis for a great gift basket by popping the jar and the mix ins into a mixing bowl along with a cute pot holder, some wooden spoons and a spatula! A sweet little gift for the baking aficionado in your life! These can be made on a budget by using inexpensive but nice supplies from the dollar store!
I hope you give this oatmeal raisin cookie mix in a jar a try this holiday season and beyond and I hope you love it!
Happy Eating and Happy Holidays!
You can find a printable version of this recipe along with the tags here: https://bit.ly/3itruuj
Get my cookbooks here: http://bit.ly/1czqM5R
Business Inquiries can be sent to:
info@noreenskitchen.com
Check me out on social media!
Facebook: http://on.fb.me/12bdibt
Twitter: @noreenskitchen
Instagram: http://bit.ly/12bdqrp
Google + http://bit.ly/1o5GMYy
***MAILING ADDRESS****
Noreen's Kitchen
PO Box 14173
New Bern, NC 28561
Have a question for me? Send me an email:
info@noreenskitchen.com
Noreen's Kitchen Community Guidelines (The Rules)
http://bit.ly/2i7VocU
Any links to Amazon are, in many cases, affiliate links.
Produced by Noreen's Kitchen ©2008-2016 all rights reserved All embeds must live link to Noreen's Kitchen channel. No Editorial Excerpts without permission, Violators agree to pay royalties, all court costs, all collections & all lawyers fees.
43
views
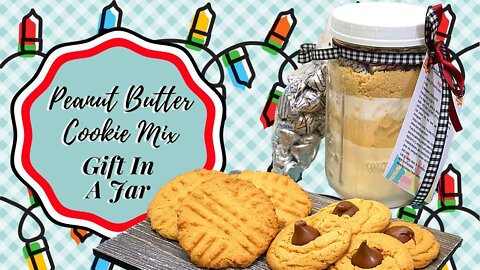
PEANUT BUTTER COOKIE MIX!! GIFT IN A JAR!! HOMEMADE HOLIDAY!!
Today we are continuing our gift in a jar recipes with a classic! Peanut Butter Cookie Mix, gift in a jar! This is super easy to put together and it even contains the peanut butter! We are taking advantage of great ingredients that are available to us now, more than ever before and peanut butter powder is one of those ingredients! The best part is that you can make this recipe to be the classic, cross hatched peanut butter cookie or you can turn it into Rick's favorite holiday treat, the peanut butter blossom! Just add some chocolate kisses to your gift and let the festivities begin!
This gift in a jar is seriously delicious! I did a little research and development on this one because I wanted to incorporate peanut butter powder in the mix so that the recipient only needed to add butter, egg and vanilla to make these fabulous cookies. I was pretty sure it would work, but the family said I should make sure. They, of course, worked and they are delicious! These are very easy to put together and whoever loves peanut butter cookies is going to love these!
This starts like the rest with all purpose flour and some leavening. That would be both baking powder and baking soda. Do not forget the salt in this. I forgot in my first batch and the flavor was flat. Salt is needed here to bring all the flavors together. These ingredients are whisked together and then placed first in the bottom of a quart mason jar. Be sure to tap down your flour layer to ensure it is level and compact. You want to make sure there is enough room for everything!
Next goes the magic ingredient! Peanut butter powder is easy to find these days and can be located in the same place as the regular peanut butter in your grocery store. Look on the upper shelves. We use the store brand and purchase in large containers because we use it often in protein shakes for extra flavor and nutrition. If you are planning to make a bunch of these mixes than go for the larger jar. It will be more economical. Pour this in on top of the flour mixture and give it a good tamp down. I use a tart tamper that is meant to be used to form tart shells but is perfect for this purpose!
Next goes granulated sugar which levels nicely with a quick shake. Finally the brown sugar, which is tamped as well to compact everything in the jar. With this recipe you will have a bit of head space which you can leave empty or you can add in some chocolate kisses to make peanut butter blossoms. The space will not hold enough kisses for the whole batch but its a start. You can also consider chocolate chips, M&Ms, Reese's Pieces or mini Reece's Cups as add in's to this dough. If you choose Kisses, you will need to add more in a bag to go along with the mix.
This mix is just as easy as the rest. All that is left is to decorate the jar with some ribbon and the preparation tags. I also added enough kisses in a cello bag along with the mix so that the recipient could prepare the entire batch as peanut butter blossoms. However you can also make these in the traditional fashion by depressing a fork in the dough balls in a cross hatch pattern to achieve the old fashioned peanut butter cookie look. There are some possibilities here and you can take liberties. However remember that the gift tag is designed for preparation with the kisses so adding anything else will require you to re do the tag on your own.
I think that this mix would be a great gift for fall and Halloween giving! Since I am fairly certain that traditional Fall Festivals and Halloween gatherings are going to be very different this year, if not cancelled all together. Wouldn't delivering a gift bag with this mix be a fun way to spread the love to neighbors, family and friends? This would be great anytime of year for the peanut butter lover! Birthdays are another great option! Nothing says I love you more than a gift from the kitchen and the heart!
I hope you give this peanut butter cookie mix gift in a jar a try this holiday season, or anytime the desire strikes! I hope you love it!
Happy Eating!
A printable version of this recipe is available here: https://bit.ly/30gqB1G
Get my cookbooks here: http://bit.ly/1czqM5R
Business Inquiries can be sent to:
info@noreenskitchen.com
Check me out on social media!
Facebook: http://on.fb.me/12bdibt
Twitter: @noreenskitchen
Instagram: http://bit.ly/12bdqrp
Google + http://bit.ly/1o5GMYy
***MAILING ADDRESS****
Noreen's Kitchen
PO Box 14173
New Bern, NC 28561
Have a question for me? Send me an email:
info@noreenskitchen.com
Noreen's Kitchen Community Guidelines (The Rules)
http://bit.ly/2i7VocU
Any links to Amazon are, in many cases, affiliate links.
Produced by Noreen's Kitchen ©2008-2016 all rights reserved All embeds must live link to Noreen's Kitchen channel. No Editorial Excerpts without permission, Violators agree to pay royalties, all court costs, all collections & all lawyers fees.
27
views

SNICKERDOODLE COOKIE MIX!! GIFT IN A JAR!! THE HOLIDAYS ARE COMING!!
Today we are continuing our "gift in a jar" series with snickerdoodles! Last time it was sugar cookies, and on the surface, some may say that a snickerdoodle is nothing more than a sugar cookie rolled in cinnamon sugar, that is true but not the whole story! Its a little deeper than that and for good reason! These are most likely a delicious Cookie with German roots but they are oh, so delicious! I know these are going to be a hit with family and friends! All they have to add is some butter, a couple eggs and some vanilla and then they are in for a fun treat, baking together as a family!
These go together super fast, much like the other "in a jar" recipes we have shared. All purpose flour, baking soda, salt and the most important ingredient in a snickerdoodle, cream of tartar are all whisked together and placed in the bottom of a quart jar. Tap this down well on the counter to level the layer. To make things pretty, I added about 2 teaspoons of cinnamon to the layer between the flour and the granulated sugar to make things look interesting. That is all that will go into this jar! Simple!
You can always tell the recipent to roll the cookie dough into cinnamon sugar that they prepare themselves, but what fun is that? I prepared a bit of cinnamon sugar and placed it in a little cellophane bag that I tied with a ribbon. This can be attached to the jar along with the tag or you can give this gift in a small gift bag if you desire, I actually think that would be the best bet for this particular mix! You can really wow the people you love with great packaging! Dig deep into your paper and craft stash or create some beautiful overlay for simple plain gift bags on your computer. Print and stick!
I created a sheet of instruction tags for you to make things easy. You can print these out on cardstock. I use 110 pound cardstock and cut these with a paper trimmer. I also print them on the "best" setting for my printer to give them a professional quality. I am all about packaging and graphics. Those things can make or break a gift and turn it from plain to amazing!
I attached the instruction sheet to the jar with a pretty satin ribbon and I also made a card using some double sided designer paper from my craft cupboard and affixed the instruction tag to the inside. I also used a statement sticker for the front to pretty things up a bit. You can go as simple or detailed as you like. That is up to you!
I hope you enjoyed learning how to make this Snickerdoodle gift in a jar mix and I hope you give it a try! Remember, these are great all year long not just for the holidays!
Happy Eating!
You can find a printable version of this recipe along with the tags here: https://bit.ly/309vFVP
Get my cookbooks here: http://bit.ly/1czqM5R
Business Inquiries can be sent to:
info@noreenskitchen.com
Check me out on social media!
Facebook: http://on.fb.me/12bdibt
Twitter: @noreenskitchen
Instagram: http://bit.ly/12bdqrp
Google + http://bit.ly/1o5GMYy
***MAILING ADDRESS****
Noreen's Kitchen
PO Box 14173
New Bern, NC 28561
Have a question for me? Send me an email:
info@noreenskitchen.com
Noreen's Kitchen Community Guidelines (The Rules)
http://bit.ly/2i7VocU
Any links to Amazon are, in many cases, affiliate links.
Produced by Noreen's Kitchen ©2008-2016 all rights reserved All embeds must live link to Noreen's Kitchen channel. No Editorial Excerpts without permission, Violators agree to pay royalties, all court costs, all collections & all lawyers fees.
11
views
FESTIVE SUGAR COOKIE MIX!! GIFT IN A JAR!! THE HOLIDAYS ARE COMING!!
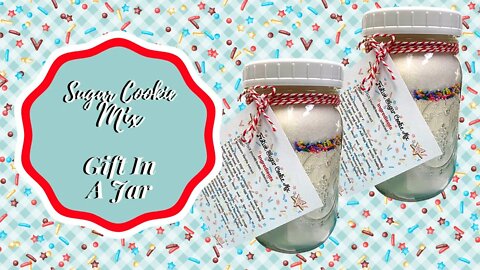
We had such tremendous positive feedback from our last gift in a jar cookie mix that we decided to go for it. The next couple of weeks we will be sharing some fabulous gift in a jar mixes that you can consider for your holiday giving! Today a holiday classic, festive sugar cookie mix that will be fun a fabulous! Everyone loves a sweet sugar cookie and they are the epitome of that fun cookie the kids like to leave for the big guy on Christmas eve! This one is sure to please everyone on your list!
This sugar cookie mix is super simple and even though the ingredients are few they can be livened up to be cute as a button in that classic mason jar! This obviously starts with some all purpose flour blended with the usual suspects. Baking powder, baking soda and salt are added and just for fun, because I had it, I added some Watkins organic vanilla powder to the mix. This is a totally optional item but it will richen the vanilla flavor and boost it when the extract is added when the recipient prepares the mix. You can find the vanilla powder here: https://amzn.to/33U774e Currently this is only offered in a pack of three. So store it or share it but you do not have to add this ingredient.
This flour mixture is packed into the bottom of one quart jar and tamped down or tapped down to settle and make room for the sprinkles and the sugar. I used some festive sprinkles but you can use holiday sprinkles if you like or no sprinkles at all. It's up to you! The sugar goes on top and then you put on a lid and decorate the jar as you like!
I have tied my jar with a bit of bakers twine and tied on the preparation tag which has the ingredients that will need to be added to make the dough along with the preparation instructions for both the rolled variety or the drop variety of these cookies. Either way will work. This is a great way to bring a family together and a wonderful interactive opportunity to spend quality family time during the holidays or anytime you need some together time!
I hope you give this sugar cookie mix, gift in a jar a try this holiday season and I hope you love it!
Happy Eating and Happy Holidays!
You can find a printable version of this recipe, as well as instruction tags here: https://bit.ly/3iUMACS
Get my cookbooks here: http://bit.ly/1czqM5R
Business Inquiries can be sent to:
info@noreenskitchen.com
Check me out on social media!
Facebook: http://on.fb.me/12bdibt
Twitter: @noreenskitchen
Instagram: http://bit.ly/12bdqrp
Google + http://bit.ly/1o5GMYy
***MAILING ADDRESS****
Noreen's Kitchen
PO Box 14173
New Bern, NC 28561
Have a question for me? Send me an email:
info@noreenskitchen.com
Noreen's Kitchen Community Guidelines (The Rules)
http://bit.ly/2i7VocU
Any links to Amazon are, in many cases, affiliate links.
Produced by Noreen's Kitchen ©2008-2016 all rights reserved All embeds must live link to Noreen's Kitchen channel. No Editorial Excerpts without permission, Violators agree to pay royalties, all court costs, all collections & all lawyers fees.
6
views
CHOCOLATE CHIP COOKIE MIX GIFT IN A JAR!! OLD FASHIONED HOLIDAY!!
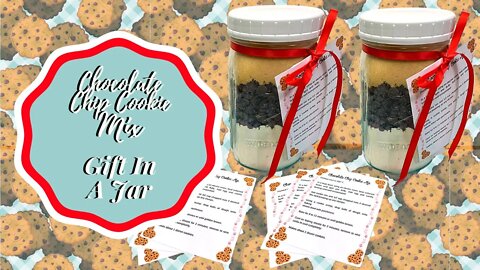
Nothing beats a gift from the kitchen or something handmade during the holidays! We all like to give and receive these welcomed items! In an effort to get a good jump on holiday gift giving ideas this year we are starting a bit early with this quick and easy, chocolate chip cookie mix in a jar! These go together fast and you can assembly line these in an afternoon and have a bunch of easy gifts ready to give all season long! I have prepared a sheet with four tags that you can print and cut and use to attach to the jars to help the recipient know how to make these delicious chocolate chip cookies!
I have received so many requests for gifts in a jar that I had to start this off with this chocolate chip cookie mix. So easy and budget friendly! Yes the person receiving has to make it up for themselves but who doesn't love a warm chocolate chip cookie, fresh from the oven? They will love you for thinking of them and they already have what they need to prepare the recipe which is butter, one egg and some vanilla. Everything else is in the jar!
Constructing these jars is easy but there are a few rules and tips to consider. First, you always want a jar that is large enough to fit the ingredients but you don't want one that is too large that the contents will just mix up. You want the separation to be seen, it is what gives this gift it's charm. Secondly you want to tamp. Each layer will need to be fully settled before adding the next otherwise you run the risk of running out of room in your jar. Tapping the jar on the counter several times can help as can a tamper to help things along.
The cookie mix starts with a blend of all purpose flour, baking soda and salt that is blended then poured into a one quart jar. Tamp that layer down well then add the chocolate chips on top. Tamp again and add the brown sugar, This is where you will want to really press that down with some sort of tamper. A bent spoon or a wooden tart tamper or even a small glass with a flat bottom will work. You will want to make sure you have enough room for the granulated sugar to sit on the top layer. Now all you need to do is tamp again and put a lid on it! Note, that the jar will be very full all the way to the top.
Filling the jar to the top helps to keep air out. If you have a vacuum sealer with a jar attachment you can use that with a standard canning flat lid and ring to ensure freshness. You can safely prepare these up to 8 weeks in advance of your gift giving. You will want to be sure to seal them accordingly and make sure the brown sugar does not harden making it difficult for the recipient to get the mix out of the jar.
Now for the fun part! Decorate that jar to your heart's content! I have prepared a sheet of tags that you can use to attach to the jars prior to giving. Just cut them apart and punch a hole then attach with a pretty ribbon. Or you can pop the jar in a cute small gift bag and give to your friends, family or coworkers.
I am aware that currently there is a problem in some parts of the country obtaining canning jars. Do not think that you must use a canning jar to give this mix! You can use recycled jars from your groceries that you have soaked the labels off of and washed and thoroughly dried. You can even spray pain the tops to coordinate with your theme. Alternatively you can build this mix in a cellophane bag that can be ordered online then tie with a bow and give with the instructions. If you really want to go all out, take that cello bag of cookie mix and pop it into a cute mixing bowl with a matching spatula, and a couple of wooden spoons. Pop into a shrinkable gift basket bag from the dollar store and use your hair dryer to shrink it down. Tie with a pretty ribbon and you have an impressive gift for anyone on your list!
I hope that you enjoyed learning about how you can make this chocolate chip cookie mix gift in a jar! I hope that you consider adding these to your gift giving list this holiday season and I hope you love them!
Happy Eating and Happy Holidays!
You can find a printable version of this recipe here; https://bit.ly/2HfdE1B
Get my cookbooks here: http://bit.ly/1czqM5R
Business Inquiries can be sent to:
info@noreenskitchen.com
Check me out on social media!
Facebook: http://on.fb.me/12bdibt
Twitter: @noreenskitchen
Instagram: http://bit.ly/12bdqrp
Google + http://bit.ly/1o5GMYy
***MAILING ADDRESS****
Noreen's Kitchen
PO Box 14173
New Bern, NC 28561
Have a question for me? Send me an email:
info@noreenskitchen.com
Noreen's Kitchen Community Guidelines (The Rules)
http://bit.ly/2i7VocU
Any links to Amazon are, in many cases, affiliate links.
Produced by Noreen's Kitchen ©2008-2016 all rights reserved All embeds must live link to Noreen's Kitchen channel. No Editorial Excerpts without permission, Violators agree to pay royalties, all court costs, all collections & all lawyers fees.
53
views
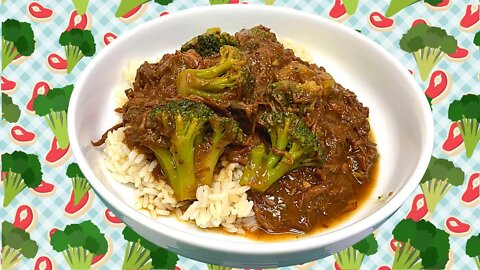
BEEF & BROCCOLI SLOW COOKER STYLE!! DUMP AND GO RECIPE!!
Today I am sharing a delicious slow cooker, dump and go recipe that will make your family ask for more! This slow cooker beef and broccoli is full of flavor but so easy to throw together you won't even believe it. You can use inexpensive cuts of beef or if you prefer, you can even do this with chicken and it will be amazing! I actually cooked mine for a bit longer than I should have and my steak literally fell apart, but no worries because it was very tasty and sometimes we all mess up but still need to put dinner on the table! I will share some tips for you after the fact so you won't experience the same foibles as I did! Yes you can make this in a skillet, but sometimes you just gotta do what you gotta do!
I started this out with about 3 pounds of sirloin steak that I trimmed well of all fat and gristle. You can use chuck steak, even cube steak or any other inexpensive cut of beef you like. Sometimes in my area you can find sliced "fajita meat" which sometimes is nothing more than thin round steak. That will work a treat as well! Do not use expensive cuts for this recipe! Totally defeats the purpose.
The sauce is built right in the vessel of your slow cooker. I used beef stock or broth, soy sauce, oyster sauce, brown sugar, garlic, ginger and a sliced onion. As an afterthought I added a pound of sliced fresh, baby bella mushrooms that I had in the fridge that needed to get used and they made an excellent addition to this dish! You can add whatever you like. Some matchstick carrots would be great here as well as some big dices of celery. You be the boss of your beef and broccoli sauce!
Once the sauce is all mixed together just toss the sliced steak in there and give everything a good nudge around to coat. Put your slow cooker on low and let this go for 4 to 6 hours. This is where I messed mine up. I accidentally realized too late that my cooker was set to high and then I went and did a bunch of chores and cleaning. By the time dinner rolled around and it was time to add the broccoli the meat was already so tender it was falling apart. Live and learn. Dinner still tasted amazing!
When your steak is cooked through but not falling apart you can move on to the next step, which is the broccoli. I am going to recommend that you either steam or cook fresh or frozen broccoli until it suits your taste. If using fresh, steam it on the stove. If you are using frozen, do the same either on the stove or in the microwave if you are so inclined. There is no wrong way to do it, just get it hot and cooked like you would for serving along side your main dish for any other meal. Once the broccoli is tender, add it to your simmering beef mixture and toss to coat. At this point the dish should be hot enough to still be bubbling and that is a good thing!
Now we want to tighten up that sauce and make it thick and luscious! I added equal parts of corn starch and water mixed together into a slurry. I used 1/4 cup of each. Poured that into the vessel and stirred. If your mixture is bubbly this should immediately start to turn the sauce from cloudy to clear in no time. Mine was not as fortunate and I had to wait a good long time for my vessel to come back up to temp. But it still tasted fabulous. Yours will be better than mine! As long as you follow my tips.
Now you are ready to serve this slow cooked beef and broccoli over some steamed rice or lo mein noodles or even zoodles would be great here! This is a rich and saucy meal that everyone in my family loved, even though I messed it up a bit. In the end, its all good. I am not perfect and I won't hide mistakes. It makes it easier for me to share how to fix something if you know I messed it up in the first place. Like Bob Ross used to say, there really are no mistakes! Only happy accidents! These are words to live by!
I hope that you give this slow cooker beef and broccoli a try and heed my tips! I hope you love it!
Happy Eating!
Get a printable version of this recipe here: https://bit.ly/2FwwYqt
Get my cookbooks here: http://bit.ly/1czqM5R
Business Inquiries can be sent to:
info@noreenskitchen.com
Check me out on social media!
Facebook: http://on.fb.me/12bdibt
Twitter: @noreenskitchen
Instagram: http://bit.ly/12bdqrp
Google + http://bit.ly/1o5GMYy
***MAILING ADDRESS****
Noreen's Kitchen
PO Box 14173
New Bern, NC 28561
Have a question for me? Send me an email:
info@noreenskitchen.com
Noreen's Kitchen Community Guidelines (The Rules)
http://bit.ly/2i7VocU
Any links to Amazon are, in many cases, affiliate links.
Produced by Noreen's Kitchen ©2008-2016 all rights reserved All embeds must live link to Noreen's Kitchen channel. No Editorial Excerpts without permission, Violators agree to pay royalties, all court costs, all collections & all lawyers fees.
83
views
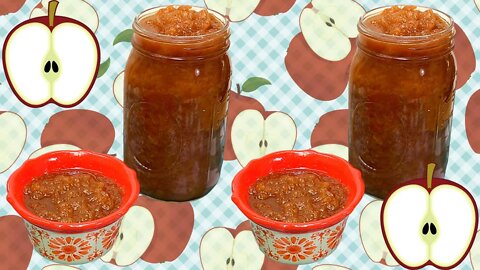
Pressure Cooker Apple Sauce!! Old Fashioned Goodness!!
Today we are going super basic! Apple sauce is a childhood favorite and honestly my family loves it still, even though my girls are for all intents and purposes grown. It is definitely something we often have on hand and it is a great way to use the bounty of the season! With fall, comes apples and with apples come apple sauce, apple butter, apple cake and apple pie. This is made even quicker and easier by making it in the pressure cooker! How's that for making something easy even easier? I know that you are going to love this for eating with your supper or tucking into your kid's lunch boxes!
This could not be easier! I have used 8 cups of apples roughly chopped. I used about 10 medium size honey-crisp apples that were peeled and cored. You can use the type of apple you like best, but do recommend a heartier variety such as that which you would use for your favorite pie. I have also added the juice of two lemons, 1 cup of brown sugar (but you can use less or none at all if you prefer) 1 tablespoon of apple pie spice and 1 cup of water. If you do not have apple pie spice use 2 teaspoons of cinnamon, 1 teaspoon of ground ginger, 1/4 teaspoon each of clove, nutmeg and allspice.
Apple Pie Spice Recipe: http://bit.ly/2dx63HT
GoWise pressurecooker: https://amzn.to/3k7H3sI
NOTE: Apples tend to "foam". Much like rice or dry beans in the pressure cooker. If you are using more apples than I am and filling more than half way you should be sure to add a pat of butter (like one tablespoon) to the top to help reduce any foaming that may occur that may destroy your machine. Just a friendly reminder.
I am using my 10 quart GoWise pressure cooker and I am using the manual setting on high for 6 minutes. I let that come up to pressure and then allowed natural release for just about 10 minutes then quick released the small remaining amount. Be sure to consult the manufacturer's booklet for your particular make and model of pressure cooker so that you can be sure you are on the right track for your machine.
Once your apples have cooked, you can decide how chunky you like your applesauce! I used a potato masher to to make a chunkier consistency. If you prefer a finer applesauce then you can use either a food mill or an immersion blender to make it almost the consistency of baby food. In fact you can make baby food by leaving out both the sugar and the spices and make fast, delicious applesauce for your little one that you can be confident is healthy and safe.
Now you will want to reduce or cook out some of the liquid and make your applesauce the consistency you prefer. I put my pressure cooker on the saute setting and allowed this to simmer for about 10 minutes until it became thick and some of the liquid reduced. This will also intensify the flavors and make everything even more delicious! Once the consistency is the way you prefer, just let the sauce cool down and put it in a jar or airtight storage container and refrigerate. This can be kept in the fridge for up to two weeks or in the freezer for up to three months. You can can this applesauce by using pint jars and water bath canning for 20 minutes in a boiling water bath canner according to canning safety guidelines.
This applesauce will thicken as it cools due to the high level of natural pectin in the apples. This can be enjoyed warm or cold. But give it a try and I hope you do sometime soon and I hope you love it!
Happy eating!
Get a printable version of this recipe here: https://bit.ly/2ZsmRd4
Get my cookbooks here: http://bit.ly/1czqM5R
Business Inquiries can be sent to:
info@noreenskitchen.com
Check me out on social media!
Facebook: http://on.fb.me/12bdibt
Twitter: @noreenskitchen
Instagram: http://bit.ly/12bdqrp
Google + http://bit.ly/1o5GMYy
***MAILING ADDRESS****
Noreen's Kitchen
PO Box 14173
New Bern, NC 28561
Have a question for me? Send me an email:
info@noreenskitchen.com
Noreen's Kitchen Community Guidelines (The Rules)
http://bit.ly/2i7VocU
Any links to Amazon are, in many cases, affiliate links.
Produced by Noreen's Kitchen ©2008-2016 all rights reserved All embeds must live link to Noreen's Kitchen channel. No Editorial Excerpts without permission, Violators agree to pay royalties, all court costs, all collections & all lawyers fees.
68
views
DELUXE BACON CHEESEBURGER DINNER SALAD!! LOW CARB DELICIOUS!
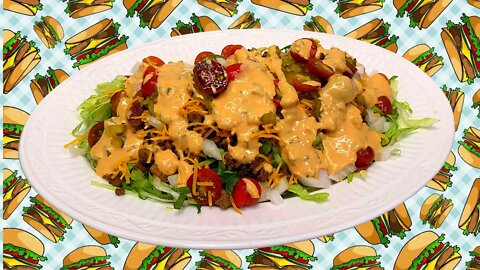
Today we are sharing a little low carb goodness! I have, more than once, seen this cheeseburger salad pop up in my Facebook feed. I asked myself, does it look good or does it not look good? I showed it to Rick and he though it was worth a try and to my surprise both girls thought we should give it a go as well. Let me tell you! This salad is kind of amazing! Tastes just like you are enjoying a delicious juicy, animal style burger with all the trimmings! Its so go I know it will end up making regular appearances for our weekly salad nights! You are totally going to want to try this one!
Making a salad, on the surface, may seem like the most basic of skills and you would be right if that is what you were thinking. The reality is that we all get in a rut from time to time and making our weekly salad night different can sometimes be a challenge. This cheeseburger salad was definitely a welcome change to our regular grilled chicken or taco salad offerings. We are all creatures of habit so falling back on a delicious, albeit boring chicken or steak salad is an easy thing to do. This Deluxe, bacon cheeseburger dinner salad is a fabulous way to avoid that rut!
This all starts with some ground beef, as you might expect. But first I crisped up about 8 slices of bacon in the skillet then I drained most of the drippings. Then, I browned the ground beef very well with some of my homemade burger and fry seasoning. The bacon drippings added lots of delicious flavor! I like to brown my ground beef for things like this and for tacos until it is actually brown and has a bit of crispiness to it. My mom used to say if it's bubbling, it's not yet browned and she was right! I like to say your ground beef should be sizzling, NOT simmering!
burger and fry seasoning: http://bit.ly/2tmSplJ
Once your ground beef is done, you are nearly done! I blended some iceberg and romaine lettuce together after I shredded it thin and used this as the base of my salad. Topped that with a couple good spoonfuls of that seasoned beef. Now what do you like on your bacon cheeseburger? Well, a good place to start would be some crispy bacon and some shredded cheddar or whatever your favorite cheese is! Next up some onions, tomatoes, chopped dill pickles and a generous drizzle of burger sauce, secret sauce or whatever you like to call it! Mine was a low carb sugar free version of our favorite Thousand Island dressing.
sugar free Thousand Island Dressing: http://bit.ly/2SFSw4M
I have to say that this salad was a very pleasant surprise and literally tasted like a juicy burger with all the trimmings! None of us even missed the bun and it satisfied that burger craving for sure! As you may know we have been on a journey to eat healthier this year and as a family have been dropping the pounds. I am currently on my way to busting my 60 pound goal, having lost nearly that much February of this year. Everyone in our household has lost weight and made use of this lockdown and we are quite happy with the result.
So if you are looking to add some new life to your salad night, I highly recommend you give this deluxe bacon cheeseburger salad a go! I know you will be so happy you did! I hope you give this a try sometime soon and I hope you love it!
Happy Eating!
Get my cookbooks here: http://bit.ly/1czqM5R
Business Inquiries can be sent to:
info@noreenskitchen.com
Check me out on social media!
Facebook: http://on.fb.me/12bdibt
Twitter: @noreenskitchen
Instagram: http://bit.ly/12bdqrp
Google + http://bit.ly/1o5GMYy
***MAILING ADDRESS****
Noreen's Kitchen
PO Box 14173
New Bern, NC 28561
Have a question for me? Send me an email:
info@noreenskitchen.com
Noreen's Kitchen Community Guidelines (The Rules)
http://bit.ly/2i7VocU
Any links to Amazon are, in many cases, affiliate links.
Produced by Noreen's Kitchen ©2008-2016 all rights reserved All embeds must live link to Noreen's Kitchen channel. No Editorial Excerpts without permission, Violators agree to pay royalties, all court costs, all collections & all lawyers fees.
13
views
PORCUPINE MEATBALL BAKE!! OLD FASHIONED GOODNESS!!
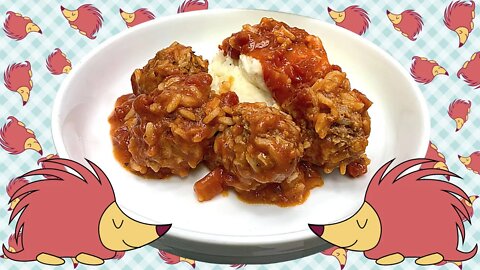
Today we are going way back! Porcupine meatballs may have been part of your childhood like they were mine! These delicious morsels never go out of style and they are definitely a delicious change of pace! Perfect for cooler months but wonderful anytime you want a taste of home. These are simple and made with few ingredients so the pure flavors shine through. These meatballs use rice as the binder and they cook in a delicious tomato sauce that has an unexpected ingredient! I know that you and your family will love these!
Be aware, that no porcupines were hurt in the making of this recipe! Seriously though, they are called porcupines because when the rice cooks in the sauce the meatballs look prickly. Thus the prickly name! It's all in good fun though and in the end you will have a delicious, stick to your ribs meal just like your mom or grandmother used to make!
This all starts with some ground meat. I am using a combination of beef and pork, but you should use what you like, whether it be all beef, all pork, chicken turkey or other. There is no wrong choice here. The ground meat is blended with simple spices and a good portion of uncooked rice. I prefer to use par-cooked or par-boiled rice which can also be referred to as converted rice. This rice takes 25% less liquid to fully cook and approximately 25% less time to be done. To moisten the meat mixture I like to add some tomato juice. You can use water or broth if you prefer. The tomato juice adds a great zip to the meatballs in the end.
The meatballs will cook in a sauce which will help to hydrate the rice to perfection and lend great flavor throughout. This is done with some petite diced tomatoes with their juice along with a family size can of condensed tomato soup! If you only have small cans of tomato soup, use three of them. I also like to have lots of sauce and would normally add two of the cans of tomato soup but I only had one this time. In the end it worked out fine.
The meatballs are formed and tossed into the casserole dish with the blended sauce mixture. I cover this with a layer of parchment as well as some foil and bake until done, about 1 hour or so. Oven performance can vary so you will need to test yours to make sure both the rice and the meat are cooked to perfection. Once done, allow the casserole dish to rest for about 30 minutes before serving. This will allow the rice to steam a little longer and allow everything to calm down before eating.
We like to serve this with mashed potatoes and a salad or vegetable on the side. You do what you like most. I serve mashed potatoes because that is how it was served growing up. Cabbage rolls were served the same way and I love it! This would be great with noodles or just a veg on the side. Your choice.
These porcupine meatballs are also a great option for freezer banking. You should cook completely and allow to cool before freezing. This is one time where you will hear me recommend cooking prior to freezing that way when you reheat all you are doing is heating through and not worrying about cooking thoroughly. Once cooled, wrap tightly and seal in a large zip top bag. Mark with a sharpie and freeze for up to three months.
Upon reheating from frozen cook for 1 hour at 400 degrees or 40 minutes if fully thawed. If freezing I recommend also adding a bit more water to the mixture just to be sure that it does not all get absorbed in the process.
I hope that you give these old fashioned porcupine meatballs a try sometime soon and I hope you love them!
Happy Eating!
You can find a printable version of this recipe here: https://bit.ly/3lO1We6
Get my cookbooks here: http://bit.ly/1czqM5R
Business Inquiries can be sent to:
info@noreenskitchen.com
Check me out on social media!
Facebook: http://on.fb.me/12bdibt
Twitter: @noreenskitchen
Instagram: http://bit.ly/12bdqrp
Google + http://bit.ly/1o5GMYy
***MAILING ADDRESS****
Noreen's Kitchen
PO Box 14173
New Bern, NC 28561
Have a question for me? Send me an email:
info@noreenskitchen.com
Noreen's Kitchen Community Guidelines (The Rules)
http://bit.ly/2i7VocU
Any links to Amazon are, in many cases, affiliate links.
Produced by Noreen's Kitchen ©2008-2016 all rights reserved All embeds must live link to Noreen's Kitchen channel. No Editorial Excerpts without permission, Violators agree to pay royalties, all court costs, all collections & all lawyers fees.
49
views

HOMEMADE SWEET HOT MUSTARD!! PERFECT FOR HOLIDAY GIVING!!
Today we are sharing a recipe that is totally giftable and one that we hope you will consider for your holiday gift giving this year! This sweet hot mustard recipe rivals that of the original Hickory Farms sweet hot mustard but it is super simple to make and only has whole ingredients! This is so delicious and everyone on your list, especially fans of mustard in general are going to be blown away by how good it is! I personally could not believe how easy it went together and how awesome the end result was! Keep this one in a playlist so you don't forget about it come holiday time!
This starts with Coleman's mustard powder. Do not be tempted to substitute with a lesser brand. The Coleman's is the magic ingredient here and it may not come out as good in the end, should you choose to use a different brand. I am using from an obnoxiously large tin that I obtained from Amazon (link below) but you can easily source a 4 ounce tin from the local grocer and it will be the exact amount for this recipe.
This all gets going by blending a bit of water with the mustard powder and setting aside to bloom. While that is resting, you heat up a saucepan and add the remainder of the ingredients which include, cider vinegar, more water, honey, brown sugar, flour and some seasonings. This all gets whisked together and stirred constantly over medium heat until thick and bubbly. Just when you think this is not going to thicken it starts and it goes fast, nearly like making a custard. So don't walk away and keep a close eye for the thickening to occur.
Once the mixture has thickened, remove immediately from the heat and add in the mustard paste that should now be nicely bloomed. Whisk the mustard into the thickened mixture until well blended. Now your sweet hot mustard is done. Transfer to an airtight container and refrigerate until completely cooled. It will thicken a bit more once it is cooled and may require a bit more whisking one more time.
Now you can divide among several small jars, I used 4 ounce mason jars which look like half size jelly jars. These should be stored in the refrigerator until ready go use or gift. These will last up to three months under refrigeration. Great on roast beef, ham or turkey sandwiches or as a dip for soft pretzels, veggies, chips or even as an accompaniment to a meat and cheese tray or the ever popular charcuterie boards that are making the rounds today!
IMPORTANT NOTE: Because I know that some people will ask, no this is not an appropriate recipe for canning. Period, end. This contains flour, it is not a safety tested recipe and it is not meant to be shelf stable. Additionally some will ask if they can sub out the flour for clear jel. Still, the answer is no. If you are seeking a recipe for sweet hot mustard with the intention of canning, I recommend that you look for one that has been safety tested for that purpose. Otherwise you risk making yourself or others sick or even cause death. So let's just put it in the fridge and call it good. When gifting, be sure to indicate to the recipient that this needs to be refrigerated so they will not leave it out or put it in the pantry.
I hope that you will give this delicious, sweet hot mustard recipe a try sometime soon and I hope you love it!
Happy Eating!
You can find a printable version of this here: https://bit.ly/2YTSOe5
You can find a list of some of the items I used in this video here on my Amazon Influencer page. I will make a small commission on your sale, should you choose to purchase anything. It does not add to your cost.
Get my cookbooks here: http://bit.ly/1czqM5R
Business Inquiries can be sent to:
info@noreenskitchen.com
Check me out on social media!
Facebook: http://on.fb.me/12bdibt
Twitter: @noreenskitchen
Instagram: http://bit.ly/12bdqrp
Google + http://bit.ly/1o5GMYy
***MAILING ADDRESS****
Noreen's Kitchen
PO Box 14173
New Bern, NC 28561
Have a question for me? Send me an email:
info@noreenskitchen.com
Noreen's Kitchen Community Guidelines (The Rules)
http://bit.ly/2i7VocU
Any links to Amazon are, in many cases, affiliate links.
Produced by Noreen's Kitchen ©2008-2016 all rights reserved All embeds must live link to Noreen's Kitchen channel. No Editorial Excerpts without permission, Violators agree to pay royalties, all court costs, all collections & all lawyers fees.
37
views
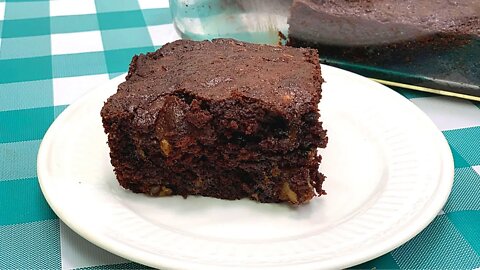
CHOCOLATE ZUCCHINI SNACK CAKE!! OLD FASHIONED GOODNESS!!
Today we are sharing some old fashioned goodness! I made a video of this cake 8 years ago and it looks a fright! So time to remake it! The recipe is the same and it is still just as delicious now as it was then. This is the perfect cake to make to use some of that summer bounty you have coming out of your garden and a great way to incorporate more veggies into your every day! This is rich, moist, chocolaty and irresistible! I know you are going to love this cake! Just like your mom or grandma used to make. You can enjoy this anytime of year but it is especially delicious with your home grown garden goodness!
This all starts with a zucchini! One large zucchini will yield what you will need for this snack cake, which is 2 cups. The rest of the ingredients are simple, pantry staples that you will already have on hand. Flour, sugar, butter or oil, eggs, cocoa, baking soda, salt and vanilla. I am adding chopped walnuts and some chocolate chips but you can leave those out or you can use pecans if you choose. This is a simple and versatile recipe that you can customize to your taste. You can even sub out the sugar for a baking blend sweeter, cup for cup if you prefer. Everything else is the same
This is an easy, dump and mix cake. I just blend the butter and the sugar, then add the eggs, one at a time or all at once, it won't matter then add in the zucchini, vanilla, baking soda and salt and give it a good blend. Switch up to a wooden spoon and blend in the flour, nuts and chocolate chips. There is no need to get out your mixer for this cake. Your mom and grandma whipped this up in a bowl and so can you!
I used a glass baking dish brushed with cooking oil and baked for 40 minutes at 350. Your oven may take more or less time than mine. I have an old finicky oven and I know that when I can smell it, I should check it. So, know your oven and adjust accordingly. I suggest starting off at 25 minutes and then check the cake to see if it needs more time.
Check the cake to see if it is done by inserting a toothpick in the center. When there is no sign of raw batter you can take it out of the oven. Rest on a rack and cool completely before cutting and serving. It is up to you whether or not you want to frost the cake with either a cocoa or cream cheese frosting. Either would be delicious, but in my opinion, unnecessary. This cake stands on it's own and is rich, moist and delicious. Frosting is almost too much.
Store this cake, covered, on the counter for up to three days. You can also cool completely, cut into squares and place each one in a sandwich bag and freeze for lunches or quick snacks. These are easy to toss into a lunch box and the cake will thaw in time to be enjoyed for lunch dessert.
I hope you give this old fashioned, chocolate zucchini cake a try sometime soon and I hope you love it!
Happy eating.
You can get a printable version of this recipe here; https://bit.ly/3gkjMBy
Get my cookbooks here: http://bit.ly/1czqM5R
Business Inquiries can be sent to:
info@noreenskitchen.com
Check me out on social media!
Facebook: http://on.fb.me/12bdibt
Twitter: @noreenskitchen
Instagram: http://bit.ly/12bdqrp
Google + http://bit.ly/1o5GMYy
***MAILING ADDRESS****
Noreen's Kitchen
PO Box 14173
New Bern, NC 28561
Have a question for me? Send me an email:
info@noreenskitchen.com
Noreen's Kitchen Community Guidelines (The Rules)
http://bit.ly/2i7VocU
Any links to Amazon are, in many cases, affiliate links.
Produced by Noreen's Kitchen ©2008-2016 all rights reserved All embeds must live link to Noreen's Kitchen channel. No Editorial Excerpts without permission, Violators agree to pay royalties, all court costs, all collections & all lawyers fees.
10
views
1
comment
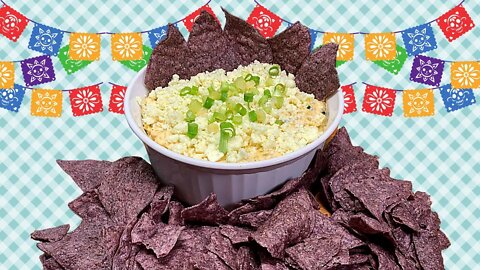
MEXICAN STREET CORN DIP!! SUMMER FLAVOR!!
Today we are sharing a delicious option for your next snack attack! This is also a great bring along for a BBQ, gathering or potluck that everyone is going to love! Mexican street corn dip combines all the delicious flavors of that favorite south of the border walking food and puts it into a dip that you can serve with chips or veggies or frankly, just eat with a spoon. Yes, it's that good! Sweet with fresh, local and, in season corn and other delicious veggies. Creamy with cream cheese, mayo and sour cream and lots of seasonings to give this just the right savory goodness that you will love!
This all starts out with some corn. Since it is summer and corn is in season and available from the local farm stand, we are going with fresh corn on the cob. I have cut about 4 cups off the cob to use in my dip. I am giving that a good sautee' in some butter along with some Poblano chili, onion and garlic. I have added in all the usual suspects from the spice rack! Cumin, Mexican oregano, onion powder, garlic powder, chili powder and of course a good sprinkling of salt and pepper. These all get tossed together over the heat in a large skillet for about 8 to 10 minutes or until the onion is translucent and the corn has a bit of a caramelization.
Next we build our creamy component. This starts with a brick of very soft cream cheese, some mayo and sour cream all whisked together until blended. Next we add in some chopped green onion and the juice and zest of one fresh lime. Now it's time to add in the corn while still warm. Give everything a good stir and you are just about done!
I popped my dip into a serving bowl and topped it with a generous sprinkling of Cotija cheese. That is the Mexican crumbling cheese that you find on your tacos in your favorite authentic Mexican restaurant. I also added some chopped green onion for color and appeal. I served this dip with some delicious, thin and crispy blue corn tortilla chips and they lent the perfect saltiness and crunch to this wonderful treat, making the flavor profile complete!
I hope you give this Mexican street corn dip a try sometime soon and I hope you love it!
Happy Eating!
You can find a printable copy of this recipe here: https://bit.ly/34akSgS
Get my cookbooks here: http://bit.ly/1czqM5R
Business Inquiries can be sent to:
info@noreenskitchen.com
Check me out on social media!
Facebook: http://on.fb.me/12bdibt
Twitter: @noreenskitchen
Instagram: http://bit.ly/12bdqrp
Google + http://bit.ly/1o5GMYy
***MAILING ADDRESS****
Noreen's Kitchen
PO Box 14173
New Bern, NC 28561
Have a question for me? Send me an email:
info@noreenskitchen.com
Noreen's Kitchen Community Guidelines (The Rules)
http://bit.ly/2i7VocU
Any links to Amazon are, in many cases, affiliate links.
Produced by Noreen's Kitchen ©2008-2016 all rights reserved All embeds must live link to Noreen's Kitchen channel. No Editorial Excerpts without permission, Violators agree to pay royalties, all court costs, all collections & all lawyers fees.
42
views
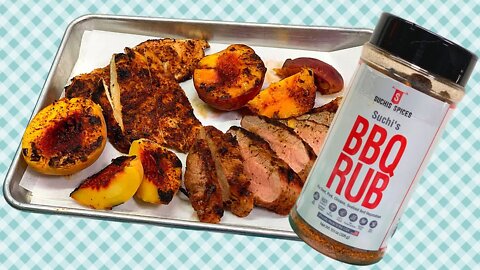
SIMPLE SUMMER GRILLED PORK AND PEACHES!! FT SUCHI'S SPICES BBQ RUB!
GET YOUR SUCHI'S SPICES BBQ RUB HERE: https://amzn.to/3fUt6Mh
USE COUPON CODE: NOREEN20OFF for a 20% discount off the price.
Today we are sharing a delicious option for you to consider when grilling for summer meals. This grilled pork tenderloin and fresh peaches and a few delicious pieces of chicken are a great way to enjoy a quick, summer meal without heating the kitchen. The meat is seasoned with our sponsor's delicious BBQ rub! Suchi's Spices BBQ rub is a delicious way to season up all your grilled treats this summer and beyond. We hope you give this pork tenderloin and grilled peaches a try!
When it comes to summer, cooking has a way of getting away from me. I am going to be honest. When it gets hot, I am in no mood to cook and heat the kitchen and then clean up over a steamy sink. I have been known to use my slow cooker in my carport so I can avoid further heating the house. Grilling is a great option! Season or marinate your favorite protein and toss it on the grill. Fix up some cool summer sides like a caprese salad, some sauteed mushrooms and we have been known to drive thru our favorite place to get fries or other delicious sides to go along with burgers and the like.
This pork tenderloin is a great option for quick grilled meal. Since we have the coals going, why not toss on some chicken as well? That way we kill two birds with one stone. One selection for tonight and another for a grilled chicken salad, later in the week. We have also tossed some peaches on the grill as well to go along with our pork. All of these were seasoned with Suchi's Spices BBQ Rub. We were honored to be among a small group of people who were given some unmarked seasoning blends from them a few months ago and asked for input. This is the blend the decided to market. I have to say, it is delicious!
This seasoning is the perfect combination of sweet, salty, smoky and spicy. It lends itself well to the pork and chicken but will also be delicious used on burgers, brisket, shrimp and seafood. Its as easy as shaking it on and tossing on the grill. You can use this as a dry rub and marinade and allow the meat to rest with the seasoning in the fridge for a few hours or just do a quick season and grill. This pork tenderloin was delicious! Cooked to perfection to an internal temperature of 145 degrees then allowed to rest for at least 10 minutes before slicing. It was made even more delicious with the addition of grilled peach halves which were also seasoned with the Suchi's Spices BBQ Rub! This gave the peaches the perfect sweet and savory bite to go along with that tenderloin and made for a great addition to the plate.
Suchi's Spices BBQ rub is free from additives and preservatives. It is non GMO, Vegan, Gluten Free, certified Kosher. Contains no trans fat or saturated fat and is cholesterol free. It is low carb, low sugar, contains no artificial flavors and is made in the USA! That is all great and important to me. Y'all know how much I love making a good spice blend. I also make a mean BBQ rub. Honestly Suchi's spices BBQ Rub is delicious and a great way to enjoy all your favorites on the grill this summer! You can get a 20% discount on your purchase by using the coupon code Noreen20off. Don't forget to register your purchase and they will send you an e-cookbooklet with hints tips and tricks for how to be a great at home pit master!
I hope you give this option for both meal prep and a great summer meal a try sometime soon! I hope you get your bottle of Suchi's Spices BBQ rub and don't forget your discount! I also hope that if you have never treated yourself to grilled peaches, you take the plunge and give them a try because they are going to knock your socks off!
I hope you give this a try sometime soon and I hope you love it!
Happy Eating!!
Get my cookbooks here: http://bit.ly/1czqM5R
Business Inquiries can be sent to:
info@noreenskitchen.com
Check me out on social media!
Facebook: http://on.fb.me/12bdibt
Twitter: @noreenskitchen
Instagram: http://bit.ly/12bdqrp
Google + http://bit.ly/1o5GMYy
***MAILING ADDRESS****
Noreen's Kitchen
PO Box 14173
New Bern, NC 28561
Have a question for me? Send me an email:
info@noreenskitchen.com
Noreen's Kitchen Community Guidelines (The Rules)
http://bit.ly/2i7VocU
Any links to Amazon are, in many cases, affiliate links.
Produced by Noreen's Kitchen ©2008-2016 all rights reserved All embeds must live link to Noreen's Kitchen channel. No Editorial Excerpts without permission, Violators agree to pay royalties, all court costs, all collections & all lawyers fees.
128
views
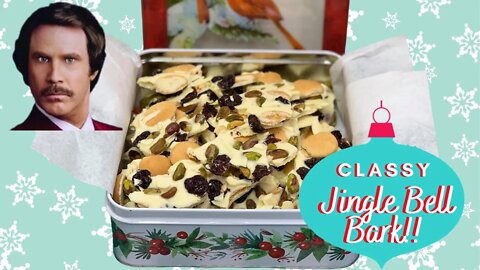
CLASSY JINGLE BELL BARK!! CHRISTMAS IN JULY!!
It isn't Christmas without candy bark! So it would make sense that it isn't Christmas in July without it either! Today we are sharing a delicious chocolate bark that is so classy, I almost called it "Ron Burgundy Bark". If you know, then you know. If you don't go watch the movie Anchorman. All kidding aside, this bark is a quick and easy make for the holidays or anytime. This is a big hit among my friends and family and everyone looks forward to chocolate bark during the holidays in their gift packages. This one is made with white chocolate, salted pistachios, dried cherries and for a twist, some vanilla wafers, just for fun! I know that this will put a jingle in your holiday or just in your July!
Like all chocolate bark mine starts off with chocolate. However, not just any chocolate. You could use the "almond bark" that you can find in the baking section of the store, however that isn't really chocolate and it's kind of gross. Let's be honest. If you are going to go to the trouble to make something delicious to share with the people you care about, lets use good ingredients! I use the Ghiradelli white chocolate baking bar. You, of course could use whatever type of chocolate is your preference, but I think the sweet, mellowness of the white chocolate lends itself to the salty of the pistachios as well as the tangy chewiness of the dried cherries. I used 4 bars and laid them out on a baking sheet that was lined with non stick foil. You can use parchment or just a spray of vegetable oil. However using the foil or parchment will help you get the bark off the pan easier.
I placed the chocolate bars in a low oven set at 200 degrees for less than five minutes. Just until it was soft enough to spread Seriously, this only takes a couple of minutes and saves a bunch of time and eliminates a double boiler and also eliminates the chance of burning the delicate chocolate in the microwave. Since this chocolate is already tempered, there is no need to add any oil.
When the chocolate has melted, remove it from the oven and using a rubber spatula, spread thin but not too thin. Then go to town topping it with the pistachios, cherries and cookies. You can scatter them haphazardly or take a bit more time building your masterpiece. I like to make sure that every bite has the perfect combination of flavors. This is a great way to satisfy your inner artist as well!
Once the toppings are all in place, I like to put a sheet of parchment over the entire thing and give everything a little press. This ensures that all the toppings are well seated in the chocolate and won't come loose when you break things apart. Now it goes into the fridge for a minimum of 30 minutes or until it is full hardened and you are able to pick up the entire slab in one piece to break it up.
When the bark is all set you can break or cut it into pieces. I much prefer to break this into shards that are not too big and not too small. This is a sweet treat and the recipient will not need but one or two small pieces to feel satisfied. It is a rich little delight that will last a while and be appreciated while it is being enjoyed. So keep that in mind when breaking it up for gift giving purposes.
I packaged my bark in a parchment lined holiday tin, but you could simply pack this in small cello bags tied with a ribbon to gift away as part of your holiday goody boxes. We love to give an assortment of items when we give out holiday treats so this would be included in a cello bag then put into a hand made box that is made from festive paper. No matter how you give this it is going to be loved by the recipient!
I hope you give this classy jingle bell bark a try sometime soon and I hope you keep it in mind for the upcoming holiday season!
Keep it Classy San Diego!
Get my cookbooks here: http://bit.ly/1czqM5R
Business Inquiries can be sent to:
info@noreenskitchen.com
Check me out on social media!
Facebook: http://on.fb.me/12bdibt
Twitter: @noreenskitchen
Instagram: http://bit.ly/12bdqrp
Google + http://bit.ly/1o5GMYy
***MAILING ADDRESS****
Noreen's Kitchen
PO Box 14173
New Bern, NC 28561
Have a question for me? Send me an email:
info@noreenskitchen.com
Noreen's Kitchen Community Guidelines (The Rules)
http://bit.ly/2i7VocU
Any links to Amazon are, in many cases, affiliate links.
Produced by Noreen's Kitchen ©2008-2016 all rights reserved All embeds must live link to Noreen's Kitchen channel. No Editorial Excerpts without permission, Violators agree to pay royalties, all court costs, all collections & all lawyers fees.
42
views
1
comment
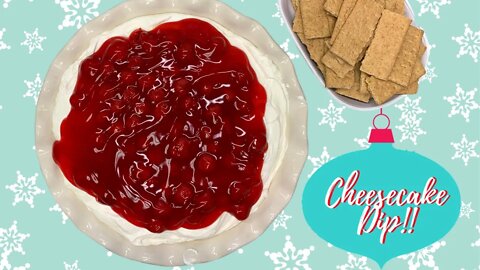
CHERRY CHEESECAKE DIP!! CHRISTMAS IN JULY!!
Today we are sharing another fun and festive recipe for our Christmas in July celebration! This cherry cheesecake dip is super easy to put together and even easier to enjoy! The best part is that this is versatile. You can make it like I have today or you can do a few other things to serve this in a wonderful and festive manner! I have used cherry topping, but you could do whatever you prefer! No matter how you top it, you are going to love this delicious, quick and easy dessert for the holidays or anytime of year!
Cheesecake is a great holiday treat. We love it in our house, but we don't have it that often. Usually it is what Rick will choose for his birthday cake in March. But there are always occasions to enjoy it! This cheesecake dip is a great way to have the flavors of cheesecake without having to bake it. This whips up super fast with easy ingredients. You can even choose to make this in a sugar free version and I will share how to do that in a moment.
This starts with cream cheese. As all good cheesecakes do. Softened at room temp is best. Whip this up with an electric mixer to make it light and fluffy. Then add in some sour cream marshmallow cream, lemon juice and vanilla. You could also add in some lemon zest if you like. Once this is nicely whipped together and smooth and creamy, you will want to fold in some whipped topping. The kind from the freezer but make sure it's thawed.
With regard to the whipped topping, you can use the old standby or I prefer one called TruWhip that is all natural. It is readily available in most parts of the country. If you prefer not to use that at all then I suggest 2 cups of stabilized whipped cream as a substitute. Once this is folded in, fluffy and smooth, you basically have a delicious, no bake cheesecake base ready to customize as you like.
Today we are going to spoon this into a festive pie dish or casserole dish. Then smooth nicely and top with the pie filling. Now all you need to do is serve this with some graham crackers, vanilla wafers, pound cake cubes, fresh strawberries or apple slices even work. You are the master of your cheesecake dip!
You can also use this cheesecake base and fruit filling to build individual cheesecake parfaits or even a large cheesecake trifle! Using crushed graham crackers, and layering with the cheesecake filling and the fruit topping you can fill up some plastic cocktail cups and make easy to serve cheesecake parfaits for your next party. Or you can do it large style and make this in a trifle bowl. Layering up the same way but maybe adding cubes of pound cake or angel food cake. This would make a stunning holiday dessert centerpiece for a buffet!
As promised, you can make this sugar free by subbing out a couple ingredients. The cream cheese and sour cream are the same. Add in sugar free frozen whipped topping, and yes, you can get sugar free marshmallow "dip". It is made by Walden Farms and is available in many fine grocery stores. It is also available on Amazon: https://amzn.to/3jq422r
Its not a cheap substitute, but it is sugar free and will get the job done. Alternatively if you did not want to use the marshmallow dip, you could easily just use 1 cup of your favorite cup for cup baking blend sweetener and mix it in. The pie filling can also be found in a sugar free version. I got mine at Walmart and they even have a store brand that is sugar free and affordable. So keep all this in mind should you want to make this a little more friendly for your diet restricted friends and family or yourself!
I hope you give this cherry cheesecake dip a try sometime soon and I hope you love it!
Happy Eating and Happy Holidays!
You can find a printable version of this recipe here: https://bit.ly/32CjouU
Get my cookbooks here: http://bit.ly/1czqM5R
Business Inquiries can be sent to:
info@noreenskitchen.com
Check me out on social media!
Facebook: http://on.fb.me/12bdibt
Twitter: @noreenskitchen
Instagram: http://bit.ly/12bdqrp
Google + http://bit.ly/1o5GMYy
***MAILING ADDRESS****
Noreen's Kitchen
PO Box 14173
New Bern, NC 28561
Have a question for me? Send me an email:
info@noreenskitchen.com
Noreen's Kitchen Community Guidelines (The Rules)
http://bit.ly/2i7VocU
Any links to Amazon are, in many cases, affiliate links.
Produced by Noreen's Kitchen ©2008-2016 all rights reserved All embeds must live link to Noreen's Kitchen channel. No Editorial Excerpts without permission, Violators agree to pay royalties, all court costs, all collections & all lawyers fees.
49
views

FROZEN HOT CHOCOLATE RECIPE!! CHRISTMAS IN JULY!!
Its summer and it's hot, but we won't let that stop our Christmas in July festivities will we? No way! Today we are going to share with you a delicious recipe for a quick, cool and refreshing frozen hot chocolate that you can enjoy anytime of year, but especially on a hot summer day! This is definitely made for sipping! A sweet slushy, chocolate treat that everyone in your family is going to love! If you are so inclined, add a splash of your favorite liqueur to boost this up and make a delicious adult beverage! I know, that no matter how you fix this it is going to be enjoyed by all, Holiday time or not!
This starts out with your favorite, instant hot chocolate mix. Whatever you like to keep on hand for warm wintertime treats. I am using my own, homemade version which happens to be sugar free, but you can use what you like. You can find my homemade hot cocoa mix recipes here;
Traditional hot cocoa mix: https://bit.ly/398b1bM
Sugar free hot cocoa mix: http://bit.ly/2OQaUck
1 cup of milk, 1 cup of heavy cream or 2 cups of half and half or whole milk or the non dairy milk of your choice. Blend with 1 cup of instant hot cocoa mix. I am using a blender because this is just the best way to achieve a smooth and frosty drink. Once the milk and the cocoa mix are blended well, add in 4 cups of ice and blend until frosty.
Swizzle some glasses with chocolate syrup, pour your drinks and top with whipped cream and Christmas sprinkles or like me, some mini chocolate chips! Make this one the way you like best! Like it minty? Add some mint extract! Like a mocha? Use some coffee ice cubes if you like or toss in a couple tablespoons of instant coffee granules to give that delicious coffee flavor! You can go a lot of places with this. Flavor it up your way and make everyone happy!
I hope you give this idea for frozen hot chocolate a try sometime soon and I hope you love it!
Happy Eating and Happy Christmas in July!
Get my cookbooks here: http://bit.ly/1czqM5R
Business Inquiries can be sent to:
info@noreenskitchen.com
Check me out on social media!
Facebook: http://on.fb.me/12bdibt
Twitter: @noreenskitchen
Instagram: http://bit.ly/12bdqrp
Google + http://bit.ly/1o5GMYy
***MAILING ADDRESS****
Noreen's Kitchen
PO Box 14173
New Bern, NC 28561
Have a question for me? Send me an email:
info@noreenskitchen.com
Noreen's Kitchen Community Guidelines (The Rules)
http://bit.ly/2i7VocU
Any links to Amazon are, in many cases, affiliate links.
Produced by Noreen's Kitchen ©2008-2016 all rights reserved All embeds must live link to Noreen's Kitchen channel. No Editorial Excerpts without permission, Violators agree to pay royalties, all court costs, all collections & all lawyers fees.
21
views
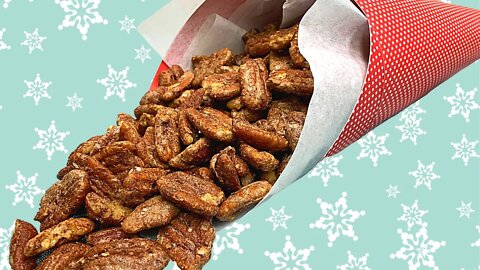
SUGAR FREE CANDIED PECANS!! CHRISTMAS IN JULY!!
Kicking off our Christmas in July celebration with a sweet treat! Candied pecans have long been a family favorite! An irresistible one at that! I get a lot of requests from people asking for sugar free version of their favorite treats and this one will not disappoint. Since we are still working hard to avoid extra sugar in our home these are the perfect way to enjoy a sweet snack without the sugar! These are actually packed with protein and still good for you. I dare you to tell the difference between these and some made with the real stuff! Candied pecans scream Merry Christmas no matter what time of year you make them!
I have shared a more traditional version of candied pecans that are made on the stove top with regular sugar and we love those. Everyone I know loves candied nuts. Don't limit yourself to pecans here! But not everyone can enjoy real sugar for whatever reason. Some simply don't eat it. Some can't. I believe everyone should be able to enjoy things and these nuts are no exception. These are simple to make and use few ingredients. Most of which you probably have in your kitchen right now! They are also quick to whip up and enjoy, but be sure to make enough because they will disappear quickly.
These start out with pecans or walnuts or raw cashews or even raw almonds. About 2 cups of nuts will do for a batch. Whip up one egg white with a bit of water until fluffy but not stiff. Add in those pecans and toss well to coat entirely. Next add in your vanilla extract and if you are a bit adventurous, a bit of maple extract as well. If you are using almonds add in a few drops of almond extract. Get the idea here? Stir the extract in to combine. Next I added some cinnamon to my sweetener. I am using a baking blend that will tolerate heat. You should use what you prefer, but make sure baking is acceptable, as not all artificial sweeteners can go in the oven.
Rada Handi Stir whisk: https://amzn.to/3ey5gFo
Add in the cinnamon and sweetener mixture and stir well. This is where the texture of the nuts will change as the ingredients all blend together and form a delicious outer shell on the pecans. Once you get this all well blended, pour the nuts out onto a baking sheet that is lined with either non stick foil or parchment or whatever you prefer. Using your spoon, spread the nuts out evenly. Even though they will break up after they cool, this makes it even easier to have nice looking product in the end.
Bake in a 325 degree oven for 12 to 15 minutes, removing to stir half way through the cooking time. Then remove from the oven and allow to cool completely. Store in an airtight container in a cool, dry place for up to one week. I promise they will not last that long though!
If you plan to use these as part of your holiday gift giving, I suggest making these a day or two before passing out among friends and family. These should not be refrigerated or frozen because the build up of condensation will ruin the delicate coating and turn the nuts soft and mushy and sticky.
These would be lovely packaged in decorator frosting cones and tied with a bow, or in a pretty cellophane bag with a nice holiday tag. Of course these could be packaged in mason jars or stuffed in coffee mugs for festive holiday giving, but honestly, the recipient will long forget the coffee mug and always remember "those nuts"! Truth be told! And who needs another coffee mug anyway? Am I right?
So that is how you make simple and delicious, sugar free candied pecans that are going to blow them away and have them asking for more! I hope you give them a try sometime soon and I hope you love them!
Happy Eating and Happy Christmas in July!
You can find a printable version of this recipe here: https://bit.ly/390n7DD
Get my cookbooks here: http://bit.ly/1czqM5R
Business Inquiries can be sent to:
info@noreenskitchen.com
Check me out on social media!
Facebook: http://on.fb.me/12bdibt
Twitter: @noreenskitchen
Instagram: http://bit.ly/12bdqrp
Google + http://bit.ly/1o5GMYy
***MAILING ADDRESS****
Noreen's Kitchen
PO Box 14173
New Bern, NC 28561
Have a question for me? Send me an email:
info@noreenskitchen.com
Noreen's Kitchen Community Guidelines (The Rules)
http://bit.ly/2i7VocU
Any links to Amazon are, in many cases, affiliate links.
Produced by Noreen's Kitchen ©2008-2016 all rights reserved All embeds must live link to Noreen's Kitchen channel. No Editorial Excerpts without permission, Violators agree to pay royalties, all court costs, all collections & all lawyers fees.
50
views

COMING SOON!! CHRISTMAS IN JULY!!
jJust a little announcement that starting this week I will begin sharing some fun and festive Christmas in July videos. Because I think we could all use some fun, hope and holiday cheer! Even if it is the middle of the summer. I don't think some of us can wait till December! Remember, we are all in this together and we will all make it through! Nothing says hope like the holidays and I think we can make this one amazing!
Get my cookbooks here: http://bit.ly/1czqM5R
Business Inquiries can be sent to:
info@noreenskitchen.com
Check me out on social media!
Facebook: http://on.fb.me/12bdibt
Twitter: @noreenskitchen
Instagram: http://bit.ly/12bdqrp
Google + http://bit.ly/1o5GMYy
***MAILING ADDRESS****
Noreen's Kitchen
PO Box 14173
New Bern, NC 28561
Have a question for me? Send me an email:
info@noreenskitchen.com
Noreen's Kitchen Community Guidelines (The Rules)
http://bit.ly/2i7VocU
Any links to Amazon are, in many cases, affiliate links.
Produced by Noreen's Kitchen ©2008-2016 all rights reserved All embeds must live link to Noreen's Kitchen channel. No Editorial Excerpts without permission, Violators agree to pay royalties, all court costs, all collections & all lawyers fees.
10
views