
Making All Partitions Sound on the Qolsys IQ Panel 2
In this video, Jarrett from Alarm Grid shows you how to make all the partitions sound on the Qolsys IQ Panel 2 Security System. Partitioning refers to the act of sectioning off a security system. In other words, different zones are assigned to different partitions that can be armed and disarmed individually. This means that you can have certain sections of the system armed, while others remain in a disarmed state.
Partitioning can be useful in many different situations. One example is if you have a business, and certain employees should not have access to certain parts of the office. You can give these employees a code that will allow them to access the main portion of the office, while not granting them access to the more restricted areas. Partitioning may also be used in a home. For instance, there may be a room with important or sensitive documents that you don't want your children accessing. The Qolsys IQ Panel 2 provides support for up to four (4) unique partitions.
When configuring partitions on the Qolsys IQ Panel 2, you must adjust the settings so that all of the partitions make system sounds. Otherwise, the system will not make sounds when partitions are activated. You can configure these settings within the Sound Settings Menu of the Qolsys IQ Panel 2. By enabling the "Global Intrusion Sounds and Sirens" option, the system will emit sounds, regardless of which partition is activated.
Please note that only partitions with at least one (1) zone added will appear on the system. Once you enable partitioning on the IQ Panel 2, you will be required to provide a code every time you go to access the system. You will not be able to use a code to arm or disarm a partition if it does not have appropriate access applied.
https://www.alarmgrid.com/faq/how-do-i-get-sensors-on-all-partitions-to-sound-on-a-qolsys-iq-p
http://alrm.gd/get-monitored
16
views
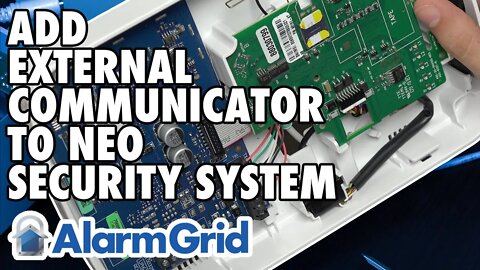
Adding an External Communicator to a DSC PowerSeries NEO
In this video, Michael from Alarm Grid shows you how to add an external communicator to a DSC PowerSeries NEO Security System. The main reason to add an external communicator to a DSC PowerSeries NEO is to get the system monitored. The system does not have built-in cellular or IP communication capabilities, so you must add a communicator to get it monitored.
Per Alarm.com requirements, a cellular communicator must be registered and activated for the system. This will allow the system to communicate with Alarm.com. When an alarm event occurs, the system will send the notification to Alarm.com. From there, Alarm.com can forward the notification to a central monitoring station and/or the end user directly via text and/or email, depending upon the user's alarm monitoring plan.
The main communicators to consider for the DSC PowerSeries NEO are the DSC TL880LEAT N and the DSC TL880LTVZ N. Both are dual-path communicators, meaning that they use both cellular and IP communication. Cellular connectivity is required for use with Alarm.com, and IP connectivity is just nice to have as an additional communication path. The difference between the two aforementioned communicators is the cellular service provider they use. Whether you go with AT&T LTE or Verizon LTE should depend upon which network provides more reliable service in your area.
Another benefit to adding a communicator to a DSC PowerSeries NEO Alarm System is that it will double as a Z-Wave Plus home automation controller. This will allow you to start building a smart home network around the system. Popular smart home devices include lights, door locks, and thermostats. Since the PowerSeries NEO does not allow for local automation control, you will need to access the Alarm.com platform to operate your connected smart home device. But you can create scenes through Alarm.com to have your smart home devices activate automatically based on a schedule or with certain system events.
https://www.alarmgrid.com/faq/how-do-i-add-an-external-communicator-to-a-dsc-powerseries-neo
http://alrm.gd/get-monitored
11
views

Program SiXMINICT to Lyric Controller
In this video, Michael from Alarm Grid shows you how to program a Honeywell SiXMINICT to a Honeywell Lyric Alarm System. The Honeywell SiXMINICT is a compact door and window contact sensor that is used with the Honeywell Lyric Controller. It lets the system know when a door or window is opened. This is done using the main sensor and an accompanying magnet. The sensor goes on the door or window frame, while the magnet goes on the moving portion of the door. The magnet should be within a half-inch of the sensor for reliable performance.
The Honeywell SiXMINICT is a more compact version of the Honeywell SiXCT, which is used for the same purpose. The Honeywell SiXCT offers a better wireless range than the SiXMINICT (300 nominal feet vs. 200 nominal feet). And unlike the SiXMINICT, the standard SiXCT has a terminal block for connecting a wired contact so that the SiXCT can operate as a wireless transmitter on behalf of the connected sensor. But the advantage to the SiXMINICT is that it is considerably smaller and less noticeable than the SiXCT. The compact nature can be very important for some users, especially when it is a sensor as prominent as a surface-mounted door and window contact.
As the Honeywell SiXMINICT is part of the Honeywell SiX Series Lineup, the sensor can only be used with the Honeywell Lyric Alarm Panel. It will not work with any other panels. The sensor uses 128-bit AES encryption for enhanced wireless security and protection. There is a green LED light on the Honeywell SiXMINICT that is used for enrollment purposes. When the light is blinking quickly, it means that the SiXMINICT is not actively enrolled with a Lyric System. But if the LED is blinking slowly, then the sensor is currently paired.
https://www.alarmgrid.com/faq/how-do-i-program-a-honeywell-sixminict-to-the-lyric-security-sys
http://alrm.gd/get-monitored
17
views
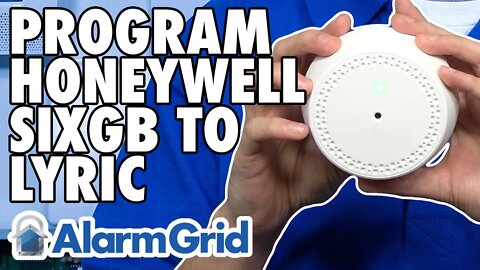
Honeywell SiXGB: Program to a Lyric Security System
In this video, Michael from Alarm Grid shows you how to program a Honeywell SiXGB to a Honeywell Lyric Alarm System. The Honeywell SiXGB is an encrypted wireless glass break detection sensor that is used exclusively for use with the Lyric. It sends an alert to the panel upon detecting an audible glass break event. It is great for monitoring windows and protective glass casings.
The Honeywell SiXGB uses 128-bit AES encryption when communicating with the panel. This helps prevent wireless hacking and takeover attempts. The sensor has a range of roughly (300) nominal feet, though thick walls and large metal objects can disrupt range. The sensor has a green LED light that assists with enrollment. When the device is unpaired with a Lyric Panel, the LED will blink quickly. Once it is successfully paired, then it will blink slowly. The sensor has a detection range of roughly (25) feet. It can be used to monitor multiple windows or casings when positioned properly. The device should have a direct line of sight to the glass that is being monitored. It uses a single CR123A battery for power. Use a lithium battery to ensure the longest life.
The Lyric System has a special SiX Programming Mode that you can use to enroll the Honeywell SiXGB. You can put the Lyric in this mode and then activate the sensor to send an enrollment signal. Either power on the sensor, or activate its tamper cover to send an enrollment signal. The panel will display the sensor on the screen. You can then edit the zone settings for the sensor. Most users will have the sensor set up with a Response Type of Perimeter. This means that if the sensor is faulted and detects a glass break event while the system is Armed Stay or Armed Away, then an immediate alarm will be triggered on the system.
https://www.alarmgrid.com/faq/how-do-i-program-a-sixgb-to-the-lyric-controller-security-system
http://alrm.gd/get-monitored
10
views
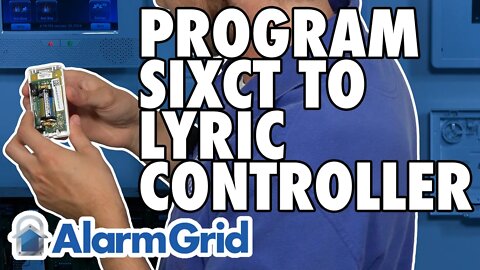
Program SiXCT to Lyric Controller
In this video, Michael from Alarm Grid shows you how to program the Honeywell SiXCT to the Honeywell Lyric Alarm System. The device is part of the Honeywell SiX Series of wireless sensors that are designed exclusively for use with the Lyric. The Honeywell SiXCT in particular is a door and window contact sensor that will let your system know when a door or window is opened.
As a SiX Series device, the Honeywell SiXCT uses 128-bit AES encryption, and it has a wireless range of roughly 300 nominal feet. In addition to being used as a standard door and window contact sensor, the SiXCT can also be used as a wireless transmitter for a single hardwired contact. When using the SiXCT as a regular contact, the magnet should be installed on the moving portion of the door or window, while the sensor should be on the stationary door or window frame.
The Honeywell SiXCT has an enrollment light that helps you with troubleshooting. When the green LED light is blinking quickly, it means that the device has not yet been enrolled. When it is blinking slowly, the device is actively paired with a system. The Honeywell SiXCT can only be paired with one (1) system at any given time. For power, the device uses a single CR123A camera battery. It can be mounted using screws or double-sided foam tape.
Honeywell also offers the SiXMINICT, which is a smaller version of the SiXCT. The Honeywell SiXMINICT has a slightly smaller wireless range of 200 nominal feet, and it lacks the auxiliary input for integrating a wired contact and having the sensor act as a wireless transmitter. However, some users prefer the smaller and more compact design of the SiXMINICT, which makes it more difficult to notice when the sensor is surface-mounted on a door or window.
https://www.alarmgrid.com/faq/how-do-i-program-a-sixct-to-the-lyric-security-system
http://alrm.gd/get-monitored
11
views

Qolsys IQ Panel 2: Using With a Phone Line
In this video, Michael from Alarm Grid explains how you cannot use the Qolsys IQ Panel 2 for phone line monitoring. Receiving alarm monitoring service through a telephone was once the most common type of communication path for a security system. But times have changed, and now most systems use cellular and/or internet protocol (IP) connectivity for alarm monitoring service. Many newer panels like the Qolsys IQ Panel 2 don't even offer phone line monitoring. This is because there are many disadvantages and problems that arise when using phone line connectivity with a security system.
One problem with phone line monitoring is that it is very slow. Just like a dial-up internet connection, it takes more time for the alarm signal to reach its intended destination when traveling through a phone line than it does for a WIFI connection or a cellular connection. This longer process means that help will arrive less quickly, and it can put your safety at risk. There is also the consideration that phone signals often fail to go through, which is less common for cell signals and internet signals. And if you have a physical phone line that your panel is dependent upon, then there is the possibility that an intruder may cut the phone line and disable the system.
The Qolsys IQ Panel 2 doesn't need a phone line because it is dual-path with both WIFI and LTE cellular connectivity for added redundancy. Per Alarm.com requirements, the system's internal cellular communicator must be registered and activated in order to use the IQ Panel 2 for alarm monitoring service. WIFI connectivity is technically optional, but most users set up WIFI for the sole purpose of having a second communication path available. Remember that you will need a monitoring plan that includes cellular connectivity in order to activate the IQ Panel 2 for monitoring.
https://www.alarmgrid.com/faq/will-a-qolsys-iq-panel-2-work-w-slash-a-phone-line
http://alrm.gd/get-monitored
14
views
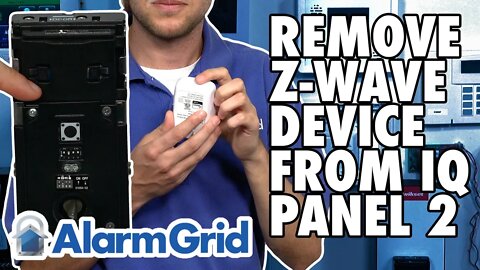
Removing a Z Wave Device from a Qolsys IQ Panel 2
In this video, Michael from Alarm Grid shows you how to remove or exclude a Z-Wave device from a Qolsys IQ Panel 2 System. By removing a Z-Wave device, you are actually wiping out the Z-Wave network data for the sensor, which will allow it to pair with a Z-Wave network. This exclusion process is typically performed before adding the sensor to the network, even if it is brand-new. It is also performed if a user intends on selling or giving away the Z-Wave device.
It is almost always best practice to clear a Z-Wave device from the network before attempting enrollment. Even new Z-Wave devices that are fresh out of the packaging may have residual network data from factory testing. This network data can prevent successful enrollment, so it is nearly always a good idea to exclude first and then attempt enrollment afterward. It is important to note that you can perform a successful exclusion process even if the Z-Wave device in question is not actively enrolled with a Z-Wave network. The IQ Panel 2 will still show that a device was cleared from the network successfully.
The general exclusion process for any Z-Wave controller, including the Qolsys IQ Panel 2, involves putting the controller or hub into its exclusion mode and then activating the exclusion function on the Z-Wave device. Many Z-Wave devices follow the same process for inclusion that they use for exclusion. It is often as simple as locating the Z-Wave inclusion/exclusion button and pressing it. Some Z-Wave devices, such as Z-Wave door locks, may require you to enter a specific code or command sequence in order to send the inclusion/exclusion signal. After performing the exclusion process, you won't be able to control the Z-Wave device from the system until you re-enroll it through a traditional pairing process.
https://www.alarmgrid.com/faq/how-do-i-remove-a-z-wave-device-from-a-qolsys-iq-panel-2
http://alrm.gd/get-monitored
16
views

Setting Up a Cellular Communicator for a 2GIG GC3e
In this video, Michael from Alarm Grid shows you how to set up a cellular communicator for a 2GIG GC3e Security System. The 2GIG GC3e requires a cellular communicator for connecting with the Alarm.com servers, which is needed for alarm monitoring service. You can use Alarm.com to control your GC3e System remotely, provided that access to the Alarm.com platform is included in your monitoring plan. Alarm.com allows for both security and automation control through a mobile app or web browser. This means that you can arm and disarm, check system status, control Z-Wave devices, and view the live feed for cameras all through Alarm.com.
The two (2) most popular communicators for the 2GIG GC3e are the 2GIG LTEA-A-GC3 AT&T LTE Communicator and the 2GIG LTEV1-A-GC3 Verizon LTE Communicator. Whether you go with the AT&T or the Verizon model should be based strictly on which network provides better coverage in the area where the system will be used. Choosing one over the other will not save you any money in terms on monitoring costs, and the decision has absolutely nothing to do with your personal cellular carrier.
When setting up the communicator, you want to first fully power down the panel. This is done to prevent damage to the panel and the communicator. The 2GIG GC3e has a convenient slot for you to insert the communicator. Align it properly, and then insert the module into the panel. You can then power the system back on. You will need your alarm monitoring company to activate the unit and register it with Alarm.com. Once you are done, you should perform a cellular radio test for the system to verify that it is communicating successfully. Keep in mind that your monitoring company will need to know the communicator's IMEI number to finish the activation.
https://www.alarmgrid.com/faq/how-do-i-set-up-a-cellular-communicator-in-a-2gig-gc3e
http://alrm.gd/get-monitored
9
views

Properly Opening Up a 2GIG GC3e
In this video, Michael from Alarm Grid shows you how to properly open up a 2GIG GC3e Security System. Opening up the panel involves separating the main panel from its back plate. If the system is wall-mounted, then you can do this by pressing the panel against the wall and then lifting upward to remove it from the back plate. If the system is not wall mounted, then simply lay the panel face down and pop off the back plate using your finger or a screwdriver. Remember to loosen the set screw first before opening.
There are many reasons why you might need to open up the 2GIG GC3e. One of the most common reasons is because you need to replace the battery for the system. The system uses the 2GIG BATTERY-GC3 for backup power, and it needs to be replaced every few years, as it will lose its ability to store a charge over time. Another reason you might open up the GC3e is because you need to access the inside terminal block. The terminal block can be used for providing power to the system, and you can also use it to connect hardwired zones. Lastly, you might open the GC3e to unplug the speaker to stop the panel from making sounds.
Many users think that they need to open up the GC3e to install a cellular communicator. This is not required, as the system has a side slot where you can insert the communicator, without needing to open up the panel. However, you might still open up the panel for the cellular installation, because you need to power down the panel completely before installing. And to power down the panel, you will need to access the backup battery and disconnect it. You must also unplug the transformer from the wall outlet.
https://www.alarmgrid.com/faq/how-do-i-properly-open-the-2gig-gc3-or-gc3e
http://alrm.gd/get-monitored
5
views

Enroll DSC PG9303 to IQ Panel 2 Plus
In this video, Michael from Alarm Grid shows you how to enroll the DSC PG9303 to a Qolsys IQ Panel 2 Plus. The DSC PG9303 is a PowerG Door and Window Sensor that can be enrolled with the system in one of two (2) ways. You can auto-enroll the sensor by putting the IQ Panel 2 Plus in auto-learn mode and then powering on the sensor. Or you can manually enter the sensor's Serial Number. If you perform manual enrollment, then you must activate the sensor's tamper cover to complete the enrollment process. The act of activating the sensor's tamper cover shares the encryption key between the sensor and the panel. The enrollment process isn't fully completed until the tamper cover is activated if the Serial Number was entered manually.
As a PowerG Door and Window Contact Sensor, the DSC PG9303 offers some great features. It can be used with any Qolsys IQ Panel 2 Plus System, as all versions of the IQ Panel 2 Plus have PowerG daughtercards. The sensor will work with the IQ Panel 2 Plus from up to 2,000 feet away in an open air environment. The DSC PG9303 uses 128-bit AES encryption when communicating with the IQ Panel 2 Plus, which prevents others from spoofing or hacking the sensor. This also prevents RF jamming techniques that could otherwise block signals from going through successfully. The sensor is powered by a single lithium CR2450 coin battery. It has a slim profile that helps it remain less noticeable on doors and windows. The sensor must be aligned properly with its included magnet for successful operation. There are indentations on the side of the sensor to assist users with aligning the magnet. The magnet spacing gap for the sensor is about half an inch. The sensor is for indoor use only.
https://www.alarmgrid.com/faq/how-do-i-enroll-a-dsc-pg9303-to-a-qolsys-iq-panel-2-plus
http://alrm.gd/get-monitored
14
views

Program SiXPIR to Lyric Controller
In this video, Michael from Alarm Grid shows you how to program a Honeywell SiXPIR Motion Detection Sensor to a Honeywell Lyric Alarm System. As motion sensor, the SiXPIR looks for changes in infrared energy to determine if movement is present. The sensor will send an alert to the Lyric System upon detecting movement. The system will then respond based on the Response Type for the associated zone. This usually means triggering an alarm on the system if movement is detected while the system is Armed Away.
The Honeywell SiXPIR is part of the Honeywell SiX Series Lineup. These sensors, including the SiXPIR, can only be used with the Honeywell Lyric. They cannot be used with any other system. The SiX Sensors use a special SiX Programming Mode on the Lyric System for enrollment. You just need to put the Lyric System into its SiX Programming Mode and either power on the sensor or activate the sensor's tamper switch. If you are using the sensor for the first time, then you will typically pull a battery tab to power on the sensor. If the sensor is already powered on and has been used previously, then just open up the sensor's cover to send an enrollment signal. You will notice that the sensor's green internal LED light, also known as the enrollment LED, blinks quickly when the sensor is not enrolled, and it blinks slowly once the sensor is paired with the Lyric successfully.
Overall, the Honeywell SiXPIR is an excellent residential motion sensor, and it also works well in many small businesses. The sensor offers a coverage area of 40 feet by 56 feet, and it can support pet immunity for small animals weighing up to (80) pounds. The recommended mounting height for the sensor is 7.5 feet. It uses 128-bit AES encryption when communicating with the panel. The wireless signal range for the sensor is about 300 nominal feet. Keep in mind that obstacles like thick walls and large metal objects can greatly reduce wireless signal range.
https://www.alarmgrid.com/faq/how-do-i-program-a-sixpir-to-the-lyric-security-system
http://alrm.gd/get-monitored
7
views

Properly Opening Up a 2GIG GC3e
In this video, Michael from Alarm Grid shows you how to properly open up a 2GIG GC3e Security System. Opening up the panel involves separating the main panel from its back plate. If the system is wall-mounted, then you can do this by pressing the panel against the wall and then lifting upward to remove it from the back plate. If the system is not wall mounted, then simply lay the panel face down and pop off the back plate using your finger or a screwdriver. Remember to loosen the set screw first before opening.
There are many reasons why you might need to open up the 2GIG GC3e. One of the most common reasons is because you need to replace the battery for the system. The system uses the 2GIG BATTERY-GC3 for backup power, and it needs to be replaced every few years, as it will lose its ability to store a charge over time. Another reason you might open up the GC3e is because you need to access the inside terminal block. The terminal block can be used for providing power to the system, and you can also use it to connect hardwired zones. Lastly, you might open the GC3e to unplug the speaker to stop the panel from making sounds.
Many users think that they need to open up the GC3e to install a cellular communicator. This is not required, as the system has a side slot where you can insert the communicator, without needing to open up the panel. However, you might still open up the panel for the cellular installation, because you need to power down the panel completely before installing. And to power down the panel, you will need to access the backup battery and disconnect it. You must also unplug the transformer from the wall outlet.
https://www.alarmgrid.com/faq/how-do-i-properly-open-the-2gig-gc3-or-gc3e
http://alrm.gd/get-monitored
10
views

Powering the TG-1 Express Using the On-Board Terminals
In this video, Michael from Alarm Grid shows you how to power on the Telguard TG-1 Express using its on board terminals. The TG-1 Express draws up to 115mA of power from the panel for power. Normally, this power comes from the RJ31X connection from the panel. There is a port inside the TG-1 Express where you can make this connection. However, some users might find that the power wires from the RJ31X cable have been cut, as they aren't needed for phone line connectivity. If that is the case, then you can still use the RJ31X connection to tip and ring, while creating a new 2-wire connection for power.
If you need to use a separate connection to the TG-1 Express for power, then the setup is very simple. This is just a 2-wire connection from the auxiliary power terminals on the panel to the designated power terminals on the TG-1 Express. You will notice that the terminal block on the TG-1 Express covers up the labels for the unit. If you use pliers to remove the terminal block, then you will see the labels underneath. Alternatively, you can also check the Quick Install Guide for the TG-1 Express to see the terminals labeled.
When powering the TG-1 Express using the on-board terminals, there are a few things to keep in mind. First, the RJ31X connection will still be used for tip and ring. The power connections are separate. Remember to run the RJ31X cable and the power cables through the opening of the TG-1 Express so that you can properly close the module later. Also remember that power polarity must be observed when making the connections. The black wire should go to the GND terminal for negative (-) power, and the red wire should go to the DC terminal for positive (+) power. Again, the connection labels are displayed underneath the terminal block and on the front of the Telguard TG-1 Express Quick Install Guide.
https://www.alarmgrid.com/faq/how-do-i-power-the-tg-1-express-using-the-terminals-on-the-commu
http://alrm.gd/get-monitored
27
views
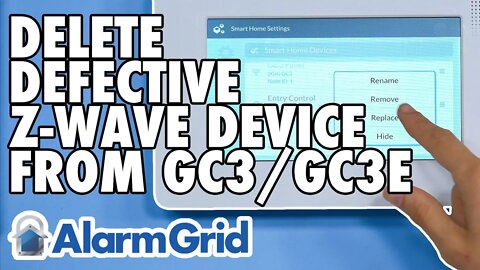
Deleting a Defective Z-Wave Device from the GC3 or GC3e
In this video, Michael from Alarm Grid shows you how to delete a defective Z-Wave device from a 2GIG GC3 or 2GIG GC3e. This is often done when the Z-Wave device is lost or broken, and the traditional exclusion process cannot be performed. You might also do this if the device has been paired with another Z-Wave network, without first deleting it from the GC3 or GC3e.
You will know that a device on the Z-Wave network is defective because it will have an error icon next to it in the list of smart home devices. The error icon can be identified by the yellow triangle with the exclamation mark inside of it. If you still have the device, and you haven't deleted it from the network, then bringing it within range and/or powering it back on will fix this issue. You will need to wait for the panel to perform a Z-Wave sync before the status will update. But if you cannot do this, then removing the device is advised.
You can delete a failed device by accessing the Smart Home Devices Menu. This is done by clicking the 2GIG logo in the upper-right corner of the main screen, entering the Installer Code (default 1561), choosing Smart Home Settings, and then selecting View All Devices. You should be able to find the device with the error icon next to it. By clicking the three (3) horizontal bars next to the device, you will be able to choose the option to delete it. This option is only available for failed devices. The system will indicate once the device has been successfully removed. You can then return to the home screen by repeatedly pressing the return arrow on the left-hand side. Remember that you will need to re-add the device to the Z-Wave network after it has been removed if you want to continue using it with the GC3 or GC3e.
https://www.alarmgrid.com/faq/how-do-i-delete-a-defective-z-wave-device-locally-at-the-2gig-gc
http://alrm.gd/get-monitored
32
views
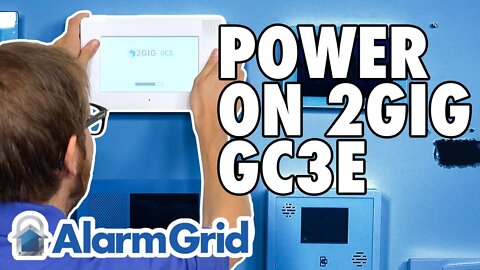
Powering On the 2GIG GC3e
In this video, Michael from Alarm Grid shows you how to power on the 2GIG GC3e. The 2GIG GC3e uses a plug-in transformer for primary power, and a battery for backup power. When performing the initial power on process, you should connect the backup battery first, followed by the transformer. The system uses a 14VDC, 1.7A transformer for power. The backup battery will need to be replaced every few years, as it will lose its ability to store a charge over time.
Alarm wiring is not included with the 2GIG GC3e Security System, so you must supply your own. Using thicker wire will allow for longer wire runs, which can be important in some installations. By going with 18-gauge wire, you can have a wire run of up to 135 feet. However, we recommend using a Honeywell LT-Cable if possible. The Honeywell LT-Cable is already pre-prepared, and it does not require any stripping or cutting.
There are two possible connections you can make at the panel for providing transformer power. If you are using conventional wire, then you must use the terminal block. But if you have the Honeywell LT-Cable, then you can connect at the barrel connector using the long portion of the Honeywell LT-Cable. Remember to run the wire through the back plate before making any connections so that you can properly close the panel. The back plate will click back onto the panel.
Since DC power is being used with the GC3e, you must observe polarity when wiring for power. Traditionally, the black wire is used for negative (-) power, and the red wire is used for positive (+) power. The included DC transformer will have the positive and negative terminals labeled. And if you are wiring at the terminal block, then you must observe polarity at those connections as well.
https://www.alarmgrid.com/faq/how-do-i-power-on-the-2gig-gc3e
http://alrm.gd/get-monitored
3
views
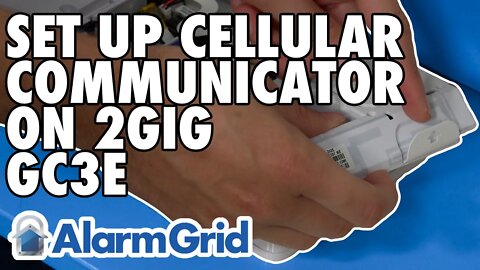
Setting Up a Cellular Communicator for a 2GIG GC3e
Note: When powering the GC3e back on, Michael plugs in the transformer before connecting the backup battery. This is bad practice, as you should connect the backup battery before plugging in the transformer when powering the system back on.
In this video, Michael from Alarm Grid shows you how to set up a cellular communicator for a 2GIG GC3e Security System. The 2GIG GC3e requires a cellular communicator for connecting with the Alarm.com servers, which is needed for alarm monitoring service. You can use Alarm.com to control your GC3e System remotely, provided that access to the Alarm.com platform is included in your monitoring plan. Alarm.com allows for both security and automation control through a mobile app or web browser. This means that you can arm and disarm, check system status, control Z-Wave devices, and view the live feed for cameras all through Alarm.com.
The two (2) most popular communicators for the 2GIG GC3e are the 2GIG LTEA-A-GC3 AT&T LTE Communicator and the 2GIG LTEV1-A-GC3 Verizon LTE Communicator. Whether you go with the AT&T or the Verizon model should be based strictly on which network provides better coverage in the area where the system will be used. Choosing one over the other will not save you any money in terms on monitoring costs, and the decision has absolutely nothing to do with your personal cellular carrier.
When setting up the communicator, you want to first fully power down the panel. This is done to prevent damage to the panel and the communicator. The 2GIG GC3e has a convenient slot for you to insert the communicator. Align it properly, and then insert the module into the panel. You can then power the system back on. Make sure to plug in the backup battery before reconnecting the transformer when powering on the system. You will need your alarm monitoring company to activate the unit and register it with Alarm.com. Once you are done, you should perform a cellular radio test for the system to verify that it is communicating successfully. Keep in mind that your monitoring company will need to know the communicator's IMEI number to finish the activation.
https://www.alarmgrid.com/faq/how-do-i-set-up-a-cellular-communicator-in-a-2gig-gc3e
http://alrm.gd/get-monitored
12
views

Properly Closing the Qolsys IQ Panel 2
In this video, Michael from Alarm Grid shows you how to properly close the Qolsys IQ Panel 2 Plus Security System. The trick to closing the Qolsys IQ Panel 2 is to align the four (4) tabs at the top first, then secure the two (2) bottom tabs, and lastly check the top tabs to make sure they are secured. Properly closing the IQ Panel 2 will ensure that the system doesn't emit reoccurring tamper alert sounds. When enabled, the system emits a sound every thirty (30) minutes to alert the user when the tamper is open.
The Qolsys IQ Panel 2 can be a very tricky system to close properly. Many users ultimately give up, and they either live with the sound, or they disable the panel's tamper cover so that it stops making the sound entirely. But with a little bit of effort, you can get the system properly closed. From there, you should rarely need to open up the panel. The IQ Panel 2 has a built-in LTE cellular radio and a built-in WIFI card, and you should never need to replace its wireless receiver. The only real reason to open it up is to replace the backup battery. We recommend only opening the system if absolutely necessary, since it can be very tricky to close.
If you simply cannot get the Qolsys IQ Panel 2 to properly close, and you want to stop the reoccurring sounds, then you do have the option of disabling the system's tamper cover. This is done in the Security & Arming Menu for the system. Keep in mind that you will need the Installer Code (default 1111) or the Dealer Code (default 2222) for the system to access this menu. This should only be done as a last resort if you simply cannot close the panel. But it is an effective option for stopping the reoccurring sound.
https://www.alarmgrid.com/faq/how-do-i-properly-close-the-qolsys-iq-panel-2
http://alrm.gd/get-monitored
7
views
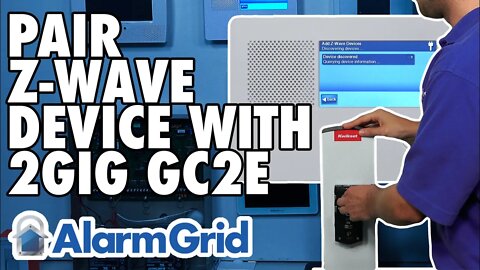
Pairing a Z-Wave Device with the 2GIG GC2e
In this video, Michael from Alarm Grid shows you how to pair a Z-Wave home automation device with a 2GIG GC2e Security System. The 2GIG GC2e has a built-in Z-Wave Plus controller for this purpose. A maximum of 232 Z-Wave devices can be used with the system, though 2GIG recommends using far fewer Z-Wave devices for optimal panel performance. It is also important to keep in mind that only the first 122 Z-Wave devices can be pushed over to Alarm.com for remote access and control.
By adding a Z-Wave device to the GC2e, you will be able to control the device from the panel. And if the system is monitored and set up with Alarm.com, then you will also be able to control it remotely through that platform by using a web browser or a mobile app on your phone. Alarm.com will also allow you to include your programmed Z-Wave devices with smart scenes so that they activate automatically based on a set schedule or with predetermined system events.
All sorts of Z-Wave devices can be used with the 2GIG GC2e. Some of the most popular options include devices like smart lights, door locks, and smart thermostats. It is important to note that only Z-Wave automation devices can be used with the GC2e. You cannot enroll Z-Wave security sensors with the system. It is recommended that you use Z-Wave Plus devices with the GC2e System if possible. Z-Wave Plus devices offer better range and battery life than classic Z-Wave devices when used with a Z-Wave Plus controller like the GC2e. However, you can certainly still use standard Z-Wave devices if you have some. After enrolling a new Z-Wave device, make sure to test it for proper function. You should also go and set up scenes for the Z-Wave device through Alarm.com.
https://www.alarmgrid.com/faq/how-do-i-pair-a-z-wave-device-to-the-2gig-gc2e
http://alrm.gd/get-monitored
37
views
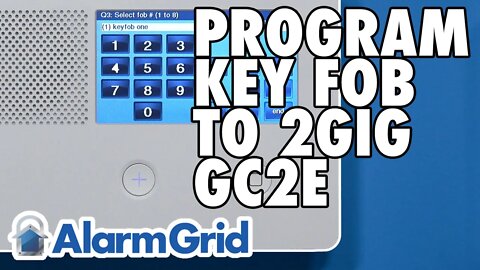
Programming a Key Fob for a 2GIG GC2e
In this video, Michael shows you how to program a key fob for a 2GIG GC2e Security System. The 2GIG GC2e uses 345 MHz key fobs, such as the Honeywell 5834-4 and the 2GIG KEY2-345. It can also use the encrypted 2GIG KEY2e-345, which is built specifically for the GC2e and GC3e. However, all key fobs for the system enroll in the same way.
A key fob is a small, handheld device that you can use to arm and disarm your system while you are on-site. It can be more convenient than having to get up to control your system, or open up a mobile app on your phone. Some key fob devices can also be used to trigger an alarm on the system in the event of an emergency, such as a break in. You may even use a key fob as a sort of "medical alert device" for an elderly or disabled loved one to carry around in the event of a slip or fall.
The 2GIG GC2e has a section within System Configuration dedicated to key fob programming. This is Q3 for key fob programming. Up to eight (8) key fob devices can be enrolled with a GC2e. When programming the key fob, you will apply various settings so that the device works in the way that you want it to. Another big part of programming a key fob involves enrolling the Serial Number and configuring the Equipment Code for the key fob slot so that the system can properly recognize the signals from the device.
After you have programmed the key fob, make sure to test it out so that you are sure that it works in the way that you want. If you plan to test the panic feature for the key fob, then remember to put your system on test mode first. The 2GIG GC2e only allows 2GIG Key Fobs to trigger emergency panics. Honeywell Key Fobs like the 5834-4 can be used to arm and disarm, but they cannot trigger panic alarms on the GC2e. For a 2GIG Key Fob like the KEY2e-345, you trigger a panic by pressing and holding the top two buttons on the key fob.
https://www.alarmgrid.com/faq/how-do-i-program-a-key-fob-into-a-2gig-gc2e
http://alrm.gd/get-monitored
41
views
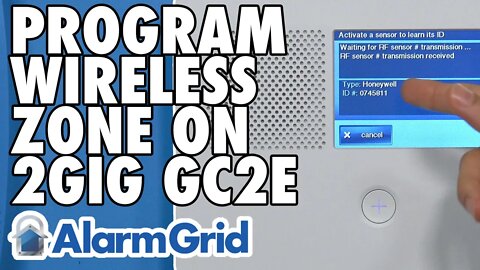
Programming a Wireless Zone On a 2GIG GC2e
In this video, Michael from Alarm Grid shows you how to program a wireless zone on a 2GIG GC2e Security System. The 2GIG GC2e uses 345 MHz wireless sensors, including those from the 2GIG 345 MHz Series and the Honeywell 5800 Series. Additionally, the 2GIG GC2e can also use the encrypted eSeries Sensors from 2GIG. However, all sensors are programmed into the system using the same menu and general process.
When setting up a new sensor, it is strongly recommended that you auto-enroll the sensor to learn-in the Serial Number. This is better than manually entering the Serial Number, because it will ensure that you do not make a mistake when entering the number. Also, by auto-enrolling, you can be sure that the system can successfully receive transmissions from the sensor. You must also set the Equipment Code for the sensor you are enrolling. This is very important for the 2GIG eSeries Sensors, as you may encounter RF supervision trouble if you enroll an eSeries Sensor with an improper Equipment Code.
The other big part of programming a new wireless zone involves telling the system how to respond when it detects that the sensor has been faulted. The biggest setting in this regard is the Sensor Type, which may also be known as the Response Type or the Sensor Group. There are many different Sensor Type options to choose from, and you must choose the proper one so that the system responds in the manner that you want. You can also configure a variety of settings, such as whether or not the zone is able to trigger an alarm on the system and whether or not the panel monitors the sensor for RF supervision. These settings can vary greatly depending on the type of sensor you are using and how you want to use the sensor with the system.
https://www.alarmgrid.com/faq/how-do-i-program-a-zone-to-a-2gig-gc2e
http://alrm.gd/get-monitored
16
views
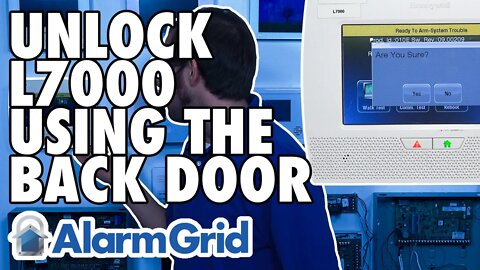
Getting Back Into Programming on an L7000 If You're Locked Out
In this video, Michael from Alarm Grid shows you how to get into programming on a Honeywell LYNX Touch L7000 if you become locked out. You will know that you are locked out of programming on an L7000 because nothing will happen when you click on Program within the Installer Tools Menu. The same is also true if you cannot access the Installer Tools Menu because you do not know the Installer Code.
There are two main reasons why you would become locked out of programming. The first reason is because you selected "No" when asked if you want to allow the installer to re-enter programming. You should always choose "Yes" at this question to avoid being locked out. The second reason is because you do not know the Installer Code for the system. You should always keep the system's Installer Code at its default of 4112 to prevent being locked out of programming.
If you are locked out of programming, then you must use the backdoor method to get back in. The backdoor method involves rebooting the panel and performing a special sequence of commands as the panel begins to boot back up. The first step of this process will be to reboot the panel. If you know the Master Code, then you can initiate a soft reboot by accessing the Test Menu within the Master Tools Menu. If do not know the Master Code, then you must perform a hard reboot by disconnecting the backup battery and unplugging the transformer, and then plugging the transformer back in.
One caveat is that the backdoor method cannot be used if the system is currently in an armed state. If the system is armed, then you must disarm it using a valid code before you can backdoor into programming. If you do not know a valid code, then you can try every code until you brute force your way in, or you must replace the panel.
https://www.alarmgrid.com/faq/how-do-i-get-back-into-programming-if-i-am-locked-out-on-my-l700
http://alrm.gd/get-monitored
11
views
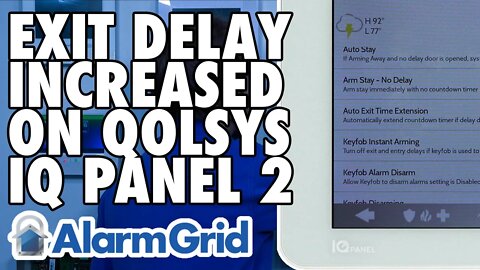
IQ Panel 2 Exit Delay Increased After Opening Door
In this video, Michael from Alarm Grid explains why the Exit Delay on your Qolsys IQ Panel 2 System automatically increased after you opened the door. The reason why this happened is because the Auto Exit Time Extension feature for the system is enabled. This feature will automatically increase the Exit Delay countdown timer by 60 seconds if an Entry/Exit Zone is faulted twice during the Exit Delay countdown. This can be the same Entry/Exit Zone being faulted twice, or it can be two (2) separate Entry/Exit Zones.
The logic behind the Auto Exit Time Extension feature is very straightforward. When you fault the first Entry/Exit Zone after Arming Away, the system assumes that you have left the building. Then when the second fault occurs, the system assumes that you have re-entered the building. This could be because you forgot something inside, and you needed to return to get it. The system then gives you more time to exit the building by automatically extending the countdown timer.
It is important to note that the timer extension only occurs after the second Entry/Exit Zone fault. It will not occur again after the 3rd fault, 4th fault, etc. The timer increase is always 60 seconds. There is no way to change the timer increase that occurs with Auto Exit Time Extension. If a user wants to manually increase the Exit Delay timer during an arming session, they can press the green +60 button to increase the timer by 60 seconds. This manual increase can be done in addition to the Auto Exit Time Extension.
If you want to permanently increase the Exit Delay countdown so that way you have more time to exit the building every time you arm, you can adjust the setting within the Security & Arming Menu. This is the same menu where you can enable and disable the Auto Exit Time Extension feature. Most users elect to keep the feature enabled for false alarm prevention purposes.
https://www.alarmgrid.com/faq/why-did-my-iq-panel-2-exit-delay-increase-after-i-opened-my-door
http://alrm.gd/get-monitored
15
views

Secure Arming On The Qolsys IQ Panel 2 Plus
In this video, Michael from Alarm Grid discusses the Secure Arming feature on the Qolsys IQ Panel 2 Plus. This feature is also found on the original IQ Panel 2. When Secure Arming is enabled, a user must enter a valid user code or the Master Code when they go to arm their system.
The user must also provide a valid user code if they go to cancel an arming session early by pressing the red X button during the Exit Delay countdown. The Secure Arming feature is disabled by default on the system. A user must enable the feature within the Security & Arming Menu if they want to use it.
Most users elect to keep the Secure Arming feature disabled, as it only slows them down when they go to arm their system. But some users choose to enable the feature to prevent accidental system arming. A common reasoning is that they have small children who may get into the security system and accidentally arm it. Requiring a code entry through secure arming can prevent this situation.
It is important to note that the Installer Code and Dealer Code cannot be used to initiate a secure arming session. Only the Master Code and valid user codes can be used to initiate an arming session when secure arming is enabled. You should make sure that everyone who is permitted to use the system knows a valid code. This is especially important if you enable secure arming, as they will not be able to cancel the arming session during the Exit Delay countdown without a valid code.
Remember that you will need the system's Installer Code or Dealer Code to access the Security & Arming Menu to enable or disable the feature. The default Installer Code is 1111, while the default Dealer Code is 2222.
https://www.alarmgrid.com/faq/how-does-secure-arming-work-on-the-iq-panel-2-plus
http://alrm.gd/get-monitored
15
views
Adding & Changing User Codes On a 2GIG GC2e
In this video, Michael from Alarm Grid shows you how to add change user codes on a 2GIG GC2e Security System. The panel provides support for up to 64 different user codes. Many users prefer to give everyone who uses the system regularly their own code so that they can see who controls the system at what time. It is very important that codes are not shared with anyone who shouldn't be accessing the security system. It is a major security risk to give a valid code to an unauthorized individual.
When setting up a user code on a 2GIG GC2e, you have the option of setting a schedule for the code so that it only works during certain times of the day. This can be useful if you give a code to a user who should only be able to use your system during designated times. This might be the case for someone like a maintenance person or a house sitter. User codes on the GC2e are 4-digits in length by default. You can also set 6-digit codes for the system if it is running Firmware Version 1.23 or higher.
There are a few special codes on the 2GIG GC2e Security System. The Master Code is hard-coded to Slot 01, and it cannot be deleted. There is also a duress code that is hard-coded to Slot 08. It is optional to set up the duress code. If you do decide to set up the duress code, then make sure to only use it during emergency situations. The system also has an Installer Code that is not assigned to any user slot. Unlike the other codes, the Installer Code isn't changed in the User Management Menu. That code is changed by accessing the corresponding section within System Configuration. The Installer Code is changed using Q43. However, we recommend keeping the Installer Code at its default of 1561. But the Master Code should be changed from its default of 1111.
https://www.alarmgrid.com/faq/how-do-i-add-or-change-user-codes-on-a-2gig-gc2e
http://alrm.gd/get-monitored
15
views
Using the Backdoor to Enter Programming on a Honeywell L5200 or L5210
In this video, Michael from Alarm Grid shows you how to get into programming on a Honeywell L5200 or Honeywell L5210 using the backdoor method. The reason why you would use the backdoor method to get into programming is because you became locked out of programming. The two most common reasons why a user would become locked out of programming are because they lost the system's Installer Code, or because they chose to not allow the installer to re-enter programming when they exited programming last.
To prevent being locked out of programming, a user should make sure to always choose "Yes" when asked if they want to allow the installer to re-enter programming. The user should also keep their system's Installer Code at its default setting of 4112. Keeping the Installer Code at its default does not represent a security risk, as long as they do not arm the system using this code. Instead, the user should always arm and disarm using the Master Code or a valid user code.
In the event that you become locked out of programming you can get back in by using a process known as the backdoor method. This process involves rebooting the panel and then performing a set sequence of commands once the system boots back up. The panel can be rebooted by choosing the menu option inside of Master Tools. If a user cannot access the Master Tools Menu, they can unplug the panel's transformer and disconnect its backup battery to power it down, and then plug the transformer back in to begin the reboot.
It is important to note that the backdoor method cannot be performed in the panel is in an armed state. If you are locked out of programming while the system is armed, then your only options are to either "brute force" your way into disarming the system by repeatedly trying codes until one disarms the system, or replace the panel.
https://www.alarmgrid.com/faq/how-do-i-get-back-into-programming-if-i-am-locked-out-on-my-l520
http://alrm.gd/get-monitored
14
views