
DSC PG9905: Programming to Qolsys IQ Panel 2 Plus
In this video, Michael from Alarm Grid shows you how to program the DSC PG9905 PowerG Temperature Sensor to the Qolsys IQ Panel 2 Plus Security System. Like most PowerG Sensors, the PG9905 is readily supported by all versions of the Qolsys IQ Panel 2 Plus. This sensor is designed to alert the system whenever the detected temperature goes outside a set threshold, typically because the HVAC system inside the building has stopped working.
You can configure the PG9905 for high temperature monitoring and/or low temperature monitoring. But there is one major restriction associated with this sensor. If you have configured the wireless zone so that the system will report out to Alarm.com upon the sensor being activated, then you will only be able to use the sensor for either low temperature monitoring or high temperature monitoring. The only way you can use both high temperature monitoring and low temperature monitoring with one single PG9905 Sensor is if you configure the zone so that the system will not report out to Alarm.com and only provide local alerts at the panel.
However, most users will want to have the system report out to Alarm.com, so you will likely need to choose whether low temperature or high temperature monitoring is needed. Of course, you can always reprogram the associated zone for the PG9905 to either low temperature monitoring or high temperature monitoring depending on the time of year. This can prevent you from needing to buy a second PG9905 Sensor.
When you go to program the zone, you will also set the low and/or high temperature thresholds that will determine when the sensor should notify the system. If the zone is configured so that the system will report out, then this will also determine when you are ultimately notified by Alarm.com regarding an unusually high or low temperature. High temperature monitoring can be crucial in the summer months for ensuring that you arrive home to a comfortable house, while low temperature monitoring is important in the winter months for ensuring that the pipes inside the building do not freeze.
https://www.alarmgrid.com/faq/how-do-i-program-a-dsc-pg9905-temperature-sensor-with-a-qolsys-i
http://alrm.gd/get-monitored
34
views

Glass Break Sound (3 minutes)
This is a sound clip that is designed to mimic the sound of a glass window being broken. A user can play this sound to make sure that their glass break detector is working properly. This is a good option if a user does not have access to a conventional glass break simulator for testing such sensors.
Before testing a glass break sensor, a user should make sure that their system is placed on test mode. Otherwise, they might inadvertently cause a false alarm. This could cause a call from a central monitoring station or unnecessary emergency dispatch to the user's home. The user may even have to pay a fine for their false alarm. Therefore, placing your system on test mode is a very important step to take before testing any glass break detector.
When used correctly, glass break detectors can be very useful devices. They are primarily used for monitoring windows and protective glass casings for breakages. Many stores will use them if they store their products in glass casings. And homeowners use them in case an intruder tries to enter their home by breaking a window. This makes them great for many different applications. Their operation is very simple, as they have integrated microphones that actively listen for the sound of breaking glass. Some alarm systems, like the Qolsys IQ Panel 2, even have built-in glass break sensors for this purpose.
If a glass breaker hears a sound that it determines to be breaking glass, it will alert the system to the situation. The system will then respond based on the settings for the glass break detector. This usually involves alerting a central station for emergency dispatch. However, a user will typically want to test their glass break sensor so that they can be sure it will pick up the sound of a breaking window in the room. They can do this using a glass break simulator.
But if a user doesn't have a conventional glass break simulator, they can play this clip on their phone. They should simply bring their phone within the detection range of the glass break sensor and then play this sound to test the sensor. But remember, just because this sound fails to activate the glass break sensor doesn't mean that the sensor isn't working properly. Make sure to read the instructions that come with your glass break sensor for proper testing procedures.
http://alrm.gd/get-monitored
38
views
Setting an ADC-T2000 Back to Factory Default
In this video, Michael from Alarm Grid shows you how to set an Alarm.com ADC-T2000 Z-Wave Plus Thermostat back to its factory default settings. The Alarm.com ADC-T2000 can be paired with almost any Z-Wave or Z-Wave Plus controller for inclusion with a smart home network. If you pair it with a Z-Wave-compatible alarm panel that is set up with an interactive platform like Alarm.com or Total Connect 2.0, then you will also be able to control it with that service as well. This includes the ability to configure smart scenes for the thermostat so that it activates automatically with certain predetermined system events, or on a set time-based schedule.
There are certain situations where you may want to set the Alarm.com ADC-T2000 Smart Thermostat back to its factory default settings. This is also referred to as a factory reset for the thermostat. If you are selling the thermostat, giving it away to someone else, or leaving it behind in your home when you are moving, then you may factory reset the thermostat so that the next user can start fresh with default settings, rather than working with whatever settings you were using with the device when it was under your ownership.
You may also perform a factory default if the thermostat is not working properly, and all other troubleshooting methods for the device have proven unsuccessful. Once you have performed a factory default or factory reset for the ADC-T2000 Z-Wave Thermostat, it cannot be undone. All the settings and configurations for the thermostat will be reset to how they were when the thermostat was brand-new and fresh out of the box. You will need to reprogram and reconfigure the thermostat from scratch. It is also likely that you will need to re-integrate it with your Z-Wave controller so that it is back on your smart home network.
https://www.alarmgrid.com/faq/how-do-i-set-an-adc-t2000-back-to-factory-default
http://alrm.gd/get-monitored
17
views
The Honeywell 5828 Wireless Keypad: Can't Be Used With a 2GIG GC3e
In this video, Jarrett from Alarm Grid explains why you cannot use a Honeywell 5828 Keypad with a 2GIG GC3e Security System. Some users are surprised by this lack of compatibility, due to the fact that the 2GIG GC3e accepts the 345 MHz frequency, which is the wireless frequency used by the Honeywell 5828 Keypad.
However, it's important to note that the Honeywell 5828 uses bi-directional (two-way) communication, and it enrolls using a House ID Setting. This House ID Setting is only found on Honeywell LYNX Touch Systems and Honeywell VISTA Systems that have a wireless transceiver module set up. You match the Honeywell 5828 House ID with the House ID on the compatible LYNX Touch or VISTA Alarm Panel, and they can then communicate with one another. This is important, as the keypad not only needs to be able to send arming and disarming commands to the panel, it must also receive status update commands from the panel. This is the only way for the keypad to know the current status of the system at all times.
Fortunately, there are some other options for the GC3e if a user is look for a secondary keypad. The most basic option, and arguably the one closest in performance and function to the Honeywell 5828 is the 2GIG PAD1-345. This is a no-frills numeric touchpad keypad that is really only useful for arming and disarming the system. Most users who were considering the Honeywell 5828, only to find out that it isn't compatible, will usually turn to the PAD1-345 instead, as they never really wanted a fancy or advanced keypad. Keep in mind that a big limitation of the PAD1-345 is that you will only be able to use it to control one single partition on the GC3e System.
But if you do want arguably the "best" keypad for the 2GIG GC3e, then you should strongly consider the 2GIG SP1 Keypad. The SP1 offers full touchscreen control, and the ability to perform both security and automation functions, much like you would be able to do from the panel. Additionally, the SP1 can be used to control any system partition, as long as a user has an appropriate access code. It is the only keypad for the GC3e that can control any partition at any time, provided that the user has a code to prove their authority.
https://www.alarmgrid.com/faq/can-i-use-a-honeywell-5828-with-a-2gig-gc3e
http://alrm.gd/get-monitored
11
views
The 2GIG GC3e: Syncing the Time
In this video, Jarrett explains how the time is synced on a 2GIG GC3e. If the 2GIG GC3e System is monitored and set up with the Alarm.com service, then the time will be automatically synchronized based on the Zip Code set for the user's Alarm.com account. When the Zip Code on the Alarm.com account is updated, the time associated for the Zip Code will be pushed down to the panel. The time sync may not occur right away, so just be patient. You can try to get the sync to perform more quickly by power rebooting the panel. Once the panel powers back on, syncing with Alarm.com will be one of the first things it does. And with the sync, the time will update based on the set zip code.
It is important to note that an Alarm.com end user is not able to change the Zip Code on their own account. Only the user's alarm monitoring company is able to update this information. The user should contact their monitoring provider and ask them to change the Zip Code if the current information is incorrect. Again, the displayed time and date will update once the information is pulled from Alarm.com, and the "sync" takes effect. The only way that the user can manually change the time locally at the panel is if the GC3e System is not monitored, and therefore, not set up with the Alarm.com service. There is a menu option within the system where you can make time and date adjustments manually. But remember, you can't do this if the system is set up with Alarm.com, as whatever time and date you set on the panel will get overwritten once the system fetches the current information from Alarm.com. One good thing about the fact that the panel automatically gets the time from Alarm.com is that you will not need to update the time for Daylight Savings. Alarm.com will do that for you!
https://www.alarmgrid.com/faq/how-do-i-sync-the-time-on-my-2gig-gc3e
http://alrm.gd/get-monitored
10
views
Honeywell Lyric: Troubleshooting With Apple HomeKit
In this video, Jorge from Alarm Grid shows you helpful troubleshooting techniques for a Honeywell Lyric Alarm System that is using Apple HomeKit. Being able to interface with the Apple HomeKit platform is one of the biggest selling points for the Honeywell Lyric. However, it is important to understand the limitations associated with the integration and understand what features you can expect, and what hasn't been integrated.
The key thing to remember about the HomeKit integration for the Lyric is that it is for security functions only. When you access your HomeKit ecosystem through your iOS device, such as your iPad, iPhone, or Mac Computer, you will only be able to see specific Lyric notifications for enrolled devices that have been programmed with one of a select range of Response Types. These Response Types are all security-based in terms of function, and they are not Response Types you would use with environmental sensors or life-safety sensors.
If you have a security sensor set up with one of the compatible security-based Response Types, then you will be able to access HomeKit through your iOS device and see when that sensor is faulted or triggered. You will know exactly which sensor was activated, and there won't be any question or confusion. But for sensors set up with a different Response Type, including all environmental sensors and life-safety sensors used with the Lyric Alarm System, accessing Apple HomeKit will only display a generic Lyric System Alert. You won't know which exact sensor was faulted, and you won't necessarily be able to take proper action. You won't even be able to tell which type of sensor was faulted. From the information obtainable from 'HomeKit, an activated temperature sensor will look the same as an activated smoke detector, which will also look the same as an activated carbon monoxide gas detector.
That is why it is strongly advised that you continue to use the Total Connect 2.0 platform with your Lyric System, even if you also take advantage of the HomeKit functionality. Total Connect 2.0 will display exactly which sensor on your Lyric System was triggered, as well as the type of sensor in question. This is the best way to know what type of activity your alarm system detected and what action you should take based on the situation at-hand.
https://www.alarmgrid.com/faq/how-do-i-troubleshoot-a-lyric-using-apple-homekit
http://alrm.gd/get-monitored
24
views

A Partitioned IQ Panel 2 Plus: Entering Programming
In this video, Jorge from Alarm Grid shows you how to enter programming mode on a Qolsys IQ Panel 2 Plus Security System that is using partitions. Once the system has partitions enabled, then you are required to enter a code upon first accessing the system, regardless of whether you are attempting to enter into programming. Based on the code you enter, your authority may be restricted, and you may be required to provide an additional code to access programming. But if you provide a code that has the proper authority, such as the Installer Code or the Master Code, then you will be able to get into programming right away, without providing an additional code.
Programming is used to make major changes on the system. You use programming mode to enroll new sensors and delete existing sensors from the system. Programming is also used to change the Sensor Group for any sensor enrolled with the system. The Sensor Group determines how the system responds when a sensor is faulted or activated, so changing this setting can have a big impact on how the system is used. You can also change other important system settings, such as timer settings, access settings, and much more.
Partitioning refers to the act of sectioning-off an alarm system into different segments. By doing this, part of the system can be armed, while the rest of the system remains in a disarmed state. This can be very helpful if the system is being used as part of an office, a multi-family home, or any other segmented location where it is useful to be able to arm one portion of the building, while keeping the rest of the building disarmed and readily accessible. Remember that you must enable partitioning for the system to begin using the feature. There are up to four (4) partitions available on the Qolsys IQ Panel 2 Plus System.
https://www.alarmgrid.com/faq/why-can-t-i-get-into-programming-on-my-partitioned-iq-panel-2-pl
http://alrm.gd/get-monitored
9
views
Advantages of Using a PowerG Motion Sensor
In this video, Jarrett from Alarm Grid explains the advantages associated with PowerG Motion Detection Sensors. The PowerG lineup of products refers to a set of wireless sensors made by DSC. These wireless sensors are specifically designed for use with systems that support PowerG Sensors, such as the Qolsys IQ Panel 2 Plus, the DSC Iotega, and any DSC PowerSeries NEO with an added PowerG Transceiver. If you have a security system that supports PowerG Sensors, then there is a very good chance that you will be using PowerG Motion Sensors as well.
PowerG Sensors are known for being some of the best wireless sensors in the entire security industry. This is due to a few different factors. For one, these sensors offer some of the best range in the entire industry of wireless security sensors. On a Qolsys IQ Panel 2 Plus System, a PowerG Motion Sensor can communicate from up to 2,000 feet away from the panel. And when a PowerG Motion Sensor is used with a DSC PowerSeries NEO, the maximum open air distance increases to two kilometers! And these wireless communication ranges can be further increased by using a PowerG Wireless Repeater.
Another major benefit of PowerG Motion Sensors is that they offer some of the best wireless security and protection available. A PowerG Motion Sensor will communicate with its paired alarm panel using 128-bit AES encryption, making it virtually impossible to hack or takeover wirelessly. These sensors also use a technique called Frequency Hopping Spread Spectrum to prevent techniques of RF jamming. There is also a good selection of PowerG Motion Sensors to choose from. You can pick from the PG9914 with pet immunity, the PG9994 Outdoor Motion Detection Sensor, the PG9924 Curtain Motion Sensor, and the PG9902 Outdoor Curtain Motion Sensor. And the PG9984P offers dual-tech capabilities with both microwave and PIR sensing. All make great additions to a PowerG System.
https://www.alarmgrid.com/faq/should-i-get-a-powerg-motion
http://alrm.gd/get-monitored
23
views
Using Automatic Bluetooth Disarming on a Qolsys IQ Panel 2 Plus
In this video, Jarrett from Alarm Grid covers the automatic Bluetooth disarming feature on the Qolsys IQ Panel 2 Plus Security System. This feature allows the IQ Panel 2 Plus System to disarm automatically when your Bluetooth phone is in close enough range. The idea is that you will always take your phone with you whenever you Arm Away and leave your system for the dat, Since you are away from home, your phone will not be within Bluetooth range. But then when you return home, your phone will be in Bluetooth range. And since disarming your system is one of the first things you will want to do upon returning home, the IQ Panel 2 Plus automatically detects your phone and disarms for you. This feature is completely optional, but it can be quite convenient. With the feature enabled, you won't have to hurry to quickly disarm your system upon returning home.
The process for setting up automatic Bluetooth disarming on your Qolsys IQ Panel 2 Plus is actually quite simple. You want to start by pairing your phone with the system as a Bluetooth device. The option can be found within the Advanced Settings Menu by entering your Master Code. A pairing code will appear on both your phone and the Qolsys IQ Panel 2 Plus System, and you should make sure that they match. When you go to adjust the Disarming Settings for your phone, you should make sure to choose "Allow Disarming. Then save your changes. From there, you must access the Bluetooth Settings Menu and make sure that the options for Bluetooth and Bluetooth Disarm are both enabled. There is also a Bluetooth Timeout option that you should configure. The Bluetooth Timeout option prevents your phone from immediately disarming your system right after your arm by requiring the system to wait a short period of time before automatic Bluetooth disarming goes into effect.
https://www.alarmgrid.com/faq/how-do-i-use-automatic-bluetooth-disarming-on-my-iq-panel-2-plus
http://alrm.gd/get-monitored
17
views
Activating a System for Monitoring with Alarm Grid
In this video, Jarrett talks about activating a security system for alarm monitoring service. Alarm monitoring service is what makes it possible for the user to receive automatic help and important notifications whenever there is activity on their security system Any alarm system that has not been set up with monitoring service is nothing more than a local sounder. The system can activate a siren locally to scare off intruders and alert building occupants to an event. But if the user wants to have assistance come automatically, then they need monitoring service. This is extremely important for when a user is off-site and not at the location to respond to an emergency. Various tasks are performed during an activation. These tasks may include setting up the central station document, configuring communication with the monitoring platform, performing various sensor tests to provide the user with a certificate of alarm (CoA), going over the false alarm passcode and duress passcode, and answering any questions or concerns the new user might have.
When you set up a system for alarm monitoring service, you must make sure it has a reliable communication pathway. This what allows the system to communicate with a monitoring platform so that alerts can be forwarded to a central monitoring station and/or the end user directly via text message and/or email. The most popular communication pathways used today are internet protocol (IP) and cellular. We recommend cellular alarm monitoring because it is more reliable. This is because cellular communication is not affected by power outages, and you rarely see cellular service go offline or become unavailable. But keep in mind that cellular is typically more expensive than IP-only. Most cellular monitoring plans will also allow for IP connectivity at no extra charge, so most users with cellular monitoring will ultimately set up dual-path connectivity with both IP and cellular.
https://www.alarmgrid.com/faq/how-do-i-activate-a-system-for-monitoring-with-alarm-grid
http://alrm.gd/get-monitored
22
views
Honeywell Lyric System & Garage Door Control
In this video, Jarrett from Alarm Grid explains how you can use a Honeywell Lyric Alarm System to control a garage door. The setup involve using a Honeywell 5877 Relay and a Honeywell 5822T Garage Door Tilt Sensor. The Honeywell 5877 is designed exclusively for use with compatible wireless Honeywell Systems, including the Honeywell Lyric and Honeywell LYNX Touch Systems. You connect the 5877 to the garage door motor and enroll with 5877 with the Lyric. When you control the garage door from the Lyric, the system will send a signal to the 5877. From there, the 5877 tells the garage door to open using its hardwired connection.
But the Honeywell 5877 Relay does not have any way of knowing the whether the garage door is opened or closed. That is why you must enroll a Honeywell 5822T Wireless Garage Door Tilt Sensor at a designated garage door zone. The system will check this sensor to see whether the garage door is opened or closed. Alternatively, you can also use a Honeywell 5816OD Outdoor Contact Sensor or a 2GIG DW30 Outdoor Contact Sensor for this same purpose. What matters is that the sensor is set up at the designated zone based on which garage door slot you assign the Honeywell 5877 Relay.
You can also set up a Z-Wave siren and strobe light as part of this complete set up. The Z-Wave siren and strobe light will provide both audible and visual indication of the garage door being opened and closed. You enroll the Z-Wave siren and strobe to the designated garage door slot used with the Honeywell 5877 Relay. Once everything is set up properly, you can use the Lyric Panel to open and close the garage door and check the current status of the garage door. And if the system is set up with Total Connect 2.0, then you will also be able to control the garage door and check its current status from that platform. This includes control through both a web browser and the Total Connect 2.0 Mobile App.
https://www.alarmgrid.com/faq/will-the-lyric-security-system-open-slash-close-garage-doors
http://alrm.gd/get-monitored
23
views

Time Needed to Activate My Alarm Grid System
In this video, Michael from Alarm Grid explains the amount of time it takes to activate a security system for Alarm Grid monitoring service. The activation process is something that must be completed whenever a new user signs up for monitoring service. During the activation, we must activate and register the system's communicator. Plus if the user is receiving central station monitoring service, then we must also set up the central station document and discuss the user's false alarm passcode and their verbal duress code if used. If the user is getting a certificate of alarm for an insurance discount, then we will also need to test certain sensors and system functions. Customers can also use the opportunity to ask the activating technician any questions they have about their system or their monitoring service.
Activation slots are one (1) hour in length. But most activations are completed in about half that time, or even less. The full hour gives the technician a chance to troubleshoot in case something goes wrong. A user will choose their one-hour activation slot when they sign up for monitoring service. An activator will call the user at the scheduled time to get started. The user must make sure to be on-site for the activation, or they must have a designated individual working in their place. A user cannot activate their system remotely or while traveling. They must be on-site and able to interact with the panel. The user should make sure to have their system properly set up and have their sensors programmed. The user should know both the Installer Code and the Master Code for their system before getting started. To make the activation go smoothly, the user should remember to listen to the activator carefully and complete all the necessary steps before the scheduled time slot. Keep in mind that the duration of an activation can also vary greatly based on the system that is being set up and the communication path that is being used.
https://www.alarmgrid.com/faq/how-long-should-it-take-to-activate-my-system
http://alrm.gd/get-monitored
15
views
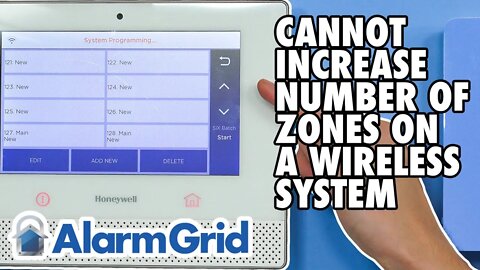
Number of Zones On a Wireless System Cannot be Increased
In this video, Michael from Alarm Grid explains why the number of zones on a wireless system cannot be increased. The maximum number of zones that a system can support is based on the firmware of the system. This information is hard-coded into the system's logic, and it cannot be changed or increased. That is why it is advised that a user gets a security system with more zones than they think they will need. This will make it easier for them to expand upon the system if they ever want to do so. Once a user runs out of zones, they will need to replace the entire panel if they want to upgrade.
A wireless system will readily support wireless sensors. This is because a wireless panel will have a built-in wireless receiver that will allow compatible wireless sensors to interface with the system. All the user needs to do is auto-enroll these sensors based on the enrollment process for the panel being used. Each sensor function will take up one (1) zone on the system. This means that every sensor will use at least one zone. If a sensor has multiple functions, then it might be enrolled to multiple zones, with each zone using a different programmed serial number.
Hardwired sensors cannot readily interface with wireless alarm panels. A wireless panel may have one or two on-board zones for support normally closed contact sensors, but that is the only wired sensor support available out of the box. The most common way to integrate a large number of wired sensors with a wireless panel is to use a wired to wireless converter. Wired sensors will connect with the converter module at its zone terminals. The converter unit will then send wireless signals to the panel on the behalf of the wired sensors. The wired sensors can then be enrolled with the system. When doing this, the system will see the wired sensors as wireless devices, and they will take up wireless zones on the system.
https://www.alarmgrid.com/faq/can-i-increase-the-max-number-of-zones-on-my-wireless-security-s
http://alrm.gd/get-monitored
20
views

Number of Zones On a Hardwired System Cannot be Increased
In this video, Michael from Alarm Grid explains how the number of zones on a hardwired alarm system cannot be increased. The number of zones that an alarm system is capable of supporting is built into its firmware, or system logic. This max number of total zones cannot be increased. That is why it is important to get a system that will support more zones than you think you will need, just in case you ever want to expand upon the system later.
For hardwired alarm systems, there is a special consideration. The number of zones that a wired system can support brand-new out of the box without any additional hardware is less than the total number of zones that the system has the capacity for supporting and exist within the system's logic. But not every system zone is accessible right away. This is because the only zones accessible without any additional hardware are the on-board hardwired zones that are associated with the actual panel. To access the other zones, you will need wired zone expansion modules for wired sensors, and/or a wireless receiver module for wireless sensors.
When you consider the total number of zones for a wired alarm panel, you need to remember that the number of wired zones plus the number of wireless zones can never exceed the number of total zones. Also, there are some zones that can only be wired, some zones that can only be wireless, and some zones that can be both. On-board panel zones are for wired sensors only. Wireless sensors cannot interface with those on-board zones. Conversely, key fob zones are for wireless sensors only. You cannot configure a wired sensor at a key fob zone, even through the use of a wired zone expander. For the remaining zones that can go either way, remember that when you set them for one zone type, you will lose out on the ability to use it with the alternative zone type. In other words, when you set one of those zones as wired, that means that you will lose out on a potential wireless zone. But conversely, if you set it as wired, then you are giving up a possible wireless zone.
https://www.alarmgrid.com/faq/can-i-increase-the-max-number-of-zones-on-my-hardwired-security-
http://alrm.gd/get-monitored
15
views
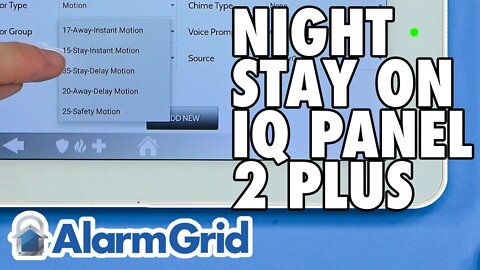
Night Stay On Qolsys IQ Panel 2 Plus
In this video, Michael from Alarm Grid explains how there is no Night Stay option on the Qolsys IQ Panel 2 Plus. But there is a good alternative to achieving very similar functionality. Night Stay refers to an arming mode found on most Honeywell and Resideo Alarm Systems. When you Night Stay, you are basically Arming Stay, but with one big difference. This difference is that all motion detection sensors that have been enabled for Arm Night will remain active in Night Stay, instead of being automatically bypassed like they normally would when you Arm Stay.
You might use the Arm Night feature for motion sensors that are not normally activated when you Arm Stay at night. For example, if you have a motion sensor in the basement, and you don't normally go down to the basement at night, then you might enable the Arm Night feature for the motion detector down there. That way, an alarm would occur if the basement motion sensor was activated, but you will still be able to move around the rest of the building freely, without having to worry about other interior motion sensors triggering an alarm.
But the Qolsys IQ Panel 2 Plus does not have the ability to set interior motion sensors for Arm Night. Luckily, there is a good workaround. You can set Sensor Group 15 or Sensor Group 35 for any sensor that you would usually use with Arm Night. These Sensor Groups will tell the motion sensors to remain active in both Arm Stay and Arm Away. This should not be confused with Sensor Group 17 and Sensor Group 20, which tell the motions to be active when Arming Away, but also to be automatically bypassed when the system is Armed Stay. Therefore, all motions assigned 15 and 35 are your "Arm Night" motions, and Arming Stay is your equivalent to Arming Night. Meanwhile, motions assigned 17 or 20 are your "non-Arm Night" motions, and they will only be active when you Arm Away, as Arming Stay will cause them to be bypassed.
https://www.alarmgrid.com/faq/does-the-qolsys-iq-panel-2-plus-have-an-option-for-night-stay
http://alrm.gd/get-monitored
7
views
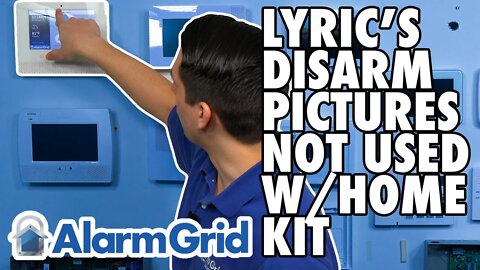
The Lyric Built-In Camera Disarm Pictures Cannot be Used With HomeKit
In this video, Jarrett from Alarm Grid explains how the Lyric disarm photos cannot be used with Apple HomeKit. The disarm photos produced from the Lyric front camera are for use with Total Connect 2.0 platform only. That is the interactive monitoring and automation service designed exclusively for use with Honeywell and Resideo Alarm Panels. Although the Lyric is compatible with Apple HomeKit, its compatibility is somewhat limited. Certain features for the Lyric, such as disarm photos cannot be used with Total Connect 2.0.
The interactions between the Lyric and HomeKit are for automation functions only. The main reason to use the Lyric with HomeKit is to have automation functions perform automatically when certain predetermined events occur on the security system. You can also get a limited selection of security notifications on your iPhone or iPad from HomeKit. Another feature is the ability to control your Lyric System remotely using spoken voice commands through Apple Siri. But the Lyric is only able to share a select range of information with the Apple HomeKit platform. The Lyric shares much more information with Total Connect 2.0. Unfortunately, there is not much of a way to have Total Connect 2.0 speak with Apple HomeKit. Some minor integrations can be made using a third-party program like IFTTT, but even then, this is extremely limited.
There is no way to share disarm photos from the Lyric with HomeKit. But there is no reason why you cannot use Apple HomeKit in conjunction with Total Connect 2.0. The two platforms make great complements for one another. You can use Apple HomeKit for your automation functions, and then use TC2 for security functions. When a disarm photo comes through, you will still be able to get it through Total Connect 2.0, and you can check that platform to view these photos if you want to check who has been using your system.
https://www.alarmgrid.com/faq/can-the-lyric-built-in-camera-s-disarm-pictures-be-used-with-hom
http://alrm.gd/get-monitored
56
views

Cameras that Work w/ the Lyric and Total Connect
In this video, Jarrett from Alarm Grid discusses which security cameras can be used with the Honeywell Lyric Alarm System and Total Connect 2.0. Only Honeywell IP Cameras can be used in this way. There are two (2) types of Honeywell IP Cameras. There are newer Honeywell HD Cameras that are still being manufactured and sold as of late 2020. There are also legacy Honeywell Cameras that are no longer being manufactured, but old existing models can still be used. Understanding the differences between these two main camera categories is very important for getting the most out of them.
There are three (3) Honeywell HD Camera models. These include the Honeywell IPCAM-WIC1, the Honeywell IPCAM-WIC2, and the Honeywell IPCAM-WOC1. The IPCAM-WIC1 and IPCAM-WIC2 are for indoor use only, while the IPCAM-WOC1 can be used indoors or outdoors. These cameras can all interface with Total Connect 2.0 for streaming through a web browser or the TC2 Mobile App. However, none of these cameras can be streamed locally from the Lyric. These cameras all stream in high-definition, with the IPCAM-WIC1 being 720p, and the IPCAM-WIC2 and IPCAM-WOC1 being 1080p. By accessing these cameras from Total Connect 2.0, you can stream them from pretty much anywhere in the world. The SkyBell HD Video Doorbell camera is also incapable of being viewed on the Lyric Alarm Panel.
The legacy Honeywell IP Cameras are no longer being manufactured, and they can only be used with TC2 if they were online to receive a critical firmware update when it was pushed down. For this reason, be careful when purchasing used cameras. Legacy cameras that were not online to receive this update are bricked, and they cannot be used. Also, these cameras only stream in standard definition (SD). But the good thing about the legacy Honeywell IP Cameras is that if you can manage to get them online with TC2, they can also be live-streamed directly from the Lyric Alarm Panel. This a big advantage of the legacy Honeywell IP Cameras, as they are the only ones that can be streamed locally from the Lyric.
https://www.alarmgrid.com/faq/which-cameras-work-w-slash-the-lyric-and-total-connect
http://alrm.gd/get-monitored
13
views

The FF345: Finding the Date Code
In this video, Michael from Alarm Grid shows you how to find the date code on an Encore FireFighter FF345 Smoke and CO Detector Takeover Module. The FF345 is a listening module for a 345 MHz security system. Upon detecting the T3 sound of an activated smoke detector or the T4 sound of an activated carbon monoxide (CO) sensor, the FF345 will transmit a 345 MHz wireless signal to a compatible alarm system. This allows the user to "takeover" existing smoke and CO detectors and integrate them with their system. This can be particularly useful for hardwired life-safety sensors, which otherwise cannot interface with alarm panels. And if the smoke detector or CO detector is part of a one-go-all-go network, where one triggered device causes all of the other sensors on the same network to activate, then a single FF345 unit can takeover an entire network of interconnected devices.
Finding the date code for an FF345 unit can be very important for determining system compatibility. The FF345 is designed to work with all Honeywell and 2GIG Systems that accept the 345 MHz frequency. But there was a batch of FF345 units that would not enroll successfully with Honeywell Systems. However, they still worked with 2GIG Systems just fine. FF345 units with a date code of 01/2020 will not enroll with Honeywell Systems. Units with a date code between 02/2020 and 08/2020 are also believed to be affected, but this has not been proven. Units with a date code of 09/2020 and onward will work with Honeywell Systems, but users may encounter a Sensor Trouble Condition with a reporting error code of E380 when clearing a smoke or CO alarm caused by an FF345. And FF345 units with a date code older than 01/2020 should work with Honeywell Systems as intended. When opening up the FF345 to check the date code, remember to remove the screws on the unit first. Then pop the cover open to access the inside of the sensor. The date code is found inside the front cover.
https://www.alarmgrid.com/faq/how-do-i-find-the-date-code-on-the-encore-ff345
http://alrm.gd/get-monitored
9
views

Providing AC Power to an Alarm System
In this video, Michael from Alarm Grid explains how AC power is provided to an alarm system. This represents the primary power source for a security system, and is provided from a plug-in transformer. The reason why the plug-in module is called a transformer is because it transforms the high-voltage power from the outlet into low-voltage power that won't overload or fry the alarm panel. That is why you will often hear alarm system transformers being referred to as "step-down" transformers.
A wire is connected between the plug-in transformer and the alarm panel. This wire transfers the current from the transformer to the panel. In most cases, the wire is detachable and can be removed from the transformer. This is important because it means that the entire transformer won't need to be replaced in the event that the wire becomes damaged. It also allows for an ideal length of wire to be cut for the installation job at-hand. You want the wire to be long enough to comfortably connect the panel to the transformer, but not much longer than that. Michael refers to the outer plastic portion of the wire as a shield. It is more commonly called a sheath. Unshielded wiring is usually preferred in alarm installations, though there can be exceptions to this rule.
It is important to understand that an alarm panel will only allow for a maximum wire run of a certain length based on the gauge. This is because a small amount of current is lost as electricity travels down the wire from the transformer to the panel. A sufficient amount of power must ultimately reach the panel, so if the wire is too long, then the system will not receive enough power, and an AC loss condition may occur. This can also result in issues with intermittent low battery conditions. Thicker wire retains electricity more effectively than thinner wire. By going with thicker cabling, that is, wire with a lower listed gauge also referred to as AWG, you will be able to perform a longer wire run. Check the specifications for the panel you are using to determine the maximum wire run based on the gauge and thickness of your wire. Most alarm wiring is between 18 AWG and 22 AWG.
https://www.alarmgrid.com/faq/how-is-ac-power-provided-to-a-security-system
http://alrm.gd/get-monitored
29
views
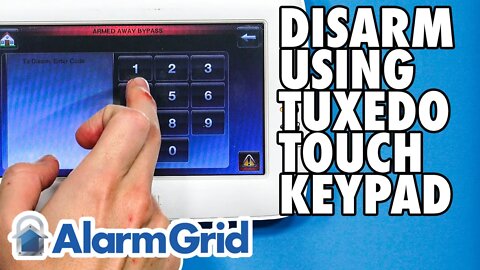
The Tuxedo Touch Keypad: Disarming
In this video, Jorge from Alarm Grid shows you how to disarm your Honeywell VISTA Security System using a Honeywell Tuxedo Touch Keypad. One of the primary functions of the Honeywell Tuxedo Touch is to serve as a keypad controller for a Honeywell VISTA. You use the keypad to check the current status of the system and to perform security system functions like arming and disarming. You can also use the Tuxedo Touch to bypass zones, and you can go into its special Console Mode to make deep-level programming changes to the system.
Disarming represents one of the most common actions you will perform on a security system. When you are disarming the system, you are taking it out of its secured, armed state. Certain zone types can only cause system alarms while the system is in an armed state. For example, zones with a Response Type of Perimeter, Entry/Exit, and Interior Follower can only trigger an alarm when the system is armed. When the system is disarmed, only 24-hour zones can trigger alarms. Examples of 24-hour zones include 24-hour audible, 24-hour silent, 24-hour fire, 24-hour carbon monoxide, and 24-hour auxiliary.
In order to disarm the system and take it out of its secured armed state, you will be required to provide a valid code. This code proves to the system that you are authorized to be using it. In most cases, the Master Code is the main code for arming and disarming. We strongly recommend that you change the Master Code on your VISTA System to something different from its default 1234. This is for security purposes. Change the code to something that you can easily remember, but will also be different for someone else to guess. Remember that you will be required to disarm the system upon faulting an Entry/Exit Zone while the system is armed to avoid setting off an alarm.
https://www.alarmgrid.com/faq/how-do-i-disarm-using-a-honeywell-tuxedo-touch-keypad
http://alrm.gd/get-monitored
19
views

The Tuxedo Touch Keypad: Checking the ECP and RIS Address
In this video, Jorge from Alarm Grid shows you how to check the ECP Address and RIS Address on a Honeywell Tuxedo Touch Keypad. This information is used to set up the Tuxedo Touch Keypad with the Honeywell VISTA System and Total Connect 2.0. The ECP Address is used when addressing the Tuxedo with the VISTA System, while the RIS Address is used when syncing the Tuxedo with AlarmNet and Total Connect 2.0.
When setting the ECP Address, you must choose an enabled AUI device slot on the system. For a VISTA-20P or VISTA-21iP, the possible AUI device slots are 1, 2, 5, and 6. Remember that Total Connect 2.0 will also use an AUI device slot, assuming you are using your VISTA System with the Total Connect 2.0 platform. In simple terms, the ECP Address tells the VISTA Panel where to find the Tuxedo Touch as a keypad controller.
As for the RIS Address, this settings tells AlarmNet and Total Connect 2.0 where to find the Tuxedo Touch as an automation controller. One thing to keep in mind is that you should not have the Tuxedo Touch set as the primary RIS device if Total Connect 2.0 is also being used with the system. Therefore, you should not check that corresponding box if Total Connect 2.0 is also being used.
Both the ECP Address and the RIS Address for the Tuxedo Touch are set within the same menu. This menu is accessed on the Tuxedo Touch by starting from the main screen and choosing the Settings icon in the bottom-left, followed by System, and then CS Setup. You will then be asked to provide the Installer Code. A Tuxedo Touch that hasn't been set up with a VISTA System has a default Installer Code of 4140. Otherwise, the Tuxedo Touch shares an Installer Code with the VISTA System, which has a default Installer Code of 4112. You can then choose the ECP Address button to access the menu.
https://www.alarmgrid.com/faq/how-do-i-check-the-ecp-address-and-ris-address-on-a-tuxedo-touch
http://alrm.gd/get-monitored
27
views
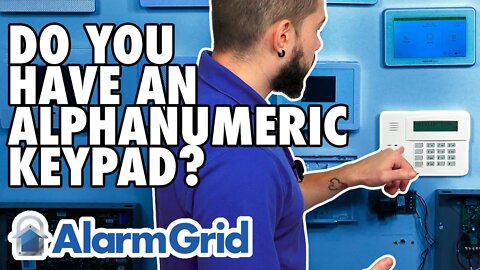
Determining if Your Keypad is Alphanumeric
In this video, Jorge from Alarm Grid helps you determine whether the keypad for your Honeywell VISTA Alarm System is an Alphanumeric keypad or a Fixed English keypad. An Alphanumeric keypad shows full written text on its LCD display screen, while a Fixed English keypad provides minimal information. While both keypad types are good for arming and disarming the system, you should only use an Alphanumeric keypad for deep level programming. If you try to program the panel using a Fixed English keypad, then you will be operating blindly, without having sufficient information on the screen. In that situation, you are very likely to make a mistake and mess up your system. That is why you should only program a wired system with an Alphanumeric keypad that provides programming info.
Getting into programming is a very easy way to determine whether your Honeywell VISTA Keypad is an Alphanumeric keypad like the 6160, or a Fixed English keypad like the 6150. If you have an Alphanumeric keypad, then the message "Installer Code 20" will be displayed on the LCD screen. But if you have a Fixed English Keypad, then you will instead get a message of just "20". You can enter programming on either keypad type by entering the command [Installer Code] + [8] + [00]. Remember that the default Installer Code for a Honeywell VISTA System is 4112. Once you enter into programming, you should see either "Installer Code 20" or "20", and that will let you know if your keypad is Alphanumeric or Fixed English. You can then exit programming with the command [*99]. Remember to only attempt deep level programming if you have an Alphanumeric keypad. If you have a Fixed English keypad, then you can still keep it as a controller for the system, but you should also get an Alphanumeric keypad for programming purposes.
https://www.alarmgrid.com/faq/is-my-honeywell-vista-20p-keypad-alphanumeric
http://alrm.gd/get-monitored
9
views
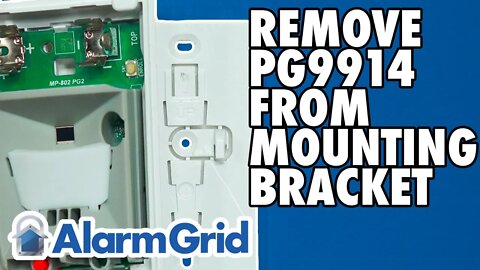
DSC PG9914: Removing From its Mounting Bracket
In this video, Jarrett from Alarm Grid explains how to remove a DSC PG9914 Motion Detection Sensor from its mounting bracket. To do this, you must remove the device battery and use a flat head screwdriver to release the tab securing the mounting bracket to the back of the device. You can then move the motion as needed or replace it entirely.
The DSC PG9914 Motion Sensor can be mounted using screws or double-sided foam tape. Hardware for mounting the motion sensor comes included with the device. The device comes with both a corner mount bracket and a flat mount bracket so that you can get up the device to your liking. These brackets help you more easily install the motion sensor and position it appropriately. However, it can be a bit tricky to remove the motion sensor from the mounting bracket so that the device can be moved or repositioned.
When removing the PG9914 from its mounting bracket, you want to start by opening up the sensor. After removing the set screw (if necessary), use your fingernail or a small flat head screwdriver to push in the bottom tab so that you can pull off the front cover. Then take out the CR123A battery. From there, use a small solid object and press against the arrow. Simultaneously press downward on the top of the motion sensor to remove it from the mounting bracket.
Once the device has been separated from the mount bracket, you can perform the needed action. This could include replacing a broken DSC PG9914 unit with a working unit, or removing the mounting bracket from its current location so that it can be installed in a new location. Remember to perform a Walk Test for the new or repositioned motion sensor to ensure that it is working properly. The sensor has a red LED light to assist with testing.https://www.alarmgrid.com/faq/how-do-i-remove-a-pg9914-from-the-mounting-bracket
https://www.alarmgrid.com/faq/how-do-i-remove-a-pg9914-from-the-mounting-bracket
http://alrm.gd/get-monitored
33
views
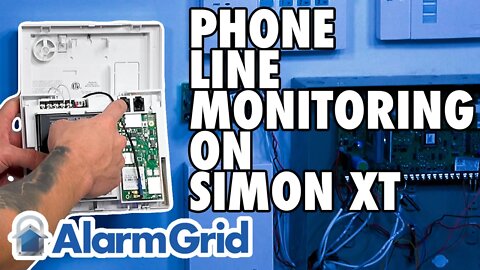
Interlogix Simon XT: Using Phone Line Monitoring
In this video, Jorge discusses how phone line monitoring can be used with an Interlogix Simon XT Alarm System. By default, phone line connectivity is the only possible method for monitoring a Simon XT. But most users will want to upgrade the system to use cellular or upgrade to a new panel entirely.
The Interlogix Simon XT has various cellular modules available that can be purchased and installed inside the system. Each cellular module connects with a particular cellular network, and the user should make sure to choose a network that works particularly well in their area. Interlogix has released cellular modules that connect with various LTE networks, like the AT&T LTE Network and the Verizon LTE Network. Going with an LTE network is recommended, as it will provide faster speeds and improved reliability over older, less efficient cellular networks. Please note that the Simon XT System must be running firmware version 1.3 to support any cellular communicator.
There are many reasons why a user would want to use cellular monitoring with their alarm system instead of phone line monitoring. Phone line connectivity is extremely unreliable by today's standards, and the connection is known for being very slow. Additionally, a potential intruder can gain access to the phone line and cut the connection to render the alarm system useless. Cellular connectivity is much faster and more reliable. It is also nearly impossible to tamper with a cellular connection. Finally, a cellular connection will continue to work even when the power is out.
When using a cellular communicator, all signal transmissions will be passed through the Alarm.com servers. This means that a user can access the Alarm.com service to gain greater control over their security system. A user can access Alarm.com at any time to arm and disarm their system, check the status of sensors, control smart home devices and more. Alarm.com can be accessed through a web browser or through the Alarm.com Mobile App on Android and iOS devices.
https://www.alarmgrid.com/videos/using-phone-line-monitoring-on-an-interlogix-simon-xt
http://alrm.gd/get-monitored
36
views
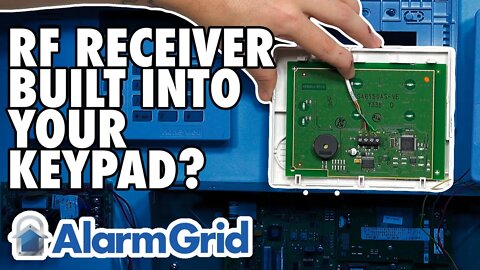
How to Tell If a Keypad Has an RF Receiver Built-In
In this video, Jorge from Alarm Grid explains how to tell if the keypad for a wired alarm panel has an RF receiver built-in. When a keypad on a wired panel has an RF receiver, it gives the system the ability to support wireless alarm sensors. Normally, a wired system can only support hardwired sensors. If you want to use wireless sensors on the system, then adding an RF receiver is required. You may also hear an RF receiver being referred to as a wireless receiver. And if the wireless receiver can send messages back to the sensor, then it is known as a wireless transceiver. Some sensors require the use of bi-directional transceivers, and they cannot be used with uni-directional, or one-way, receivers.
An example of a hardwired alarm system that can be upgraded to support wireless sensors is a Honeywell VISTA System. The VISTA Systems have certain keypad options that double as wireless receivers. One such keypad is the Honeywell 6160RF. The 6160RF Alphanumeric Keypad is used for controlling the Honeywell VISTA System, but it also has an integrated receiver. Once the keypad is properly set up with the system, you will also be able to start enrolling compatible wireless sensors. In the case of a Honeywell VISTA with an added receiver, the system will support 345 MHz wireless sensors from the Honeywell 5800 Series. But it can be a bit tricky to figure out if a 6160RF really has an RF transceiver built inside. This is because the 6160RF looks very similar to the standard 6160 Keypad model, which is the same keypad but without the integrated transceiver. Some ways that you can find out include checking the box for the keypad, checking its circuit board, looking for an RF antenna on the inside, and addressing the keypad with the system.
https://www.alarmgrid.com/faq/how-can-i-tell-if-my-keypad-has-an-rf-receiver-built-in
http://alrm.gd/get-monitored
13
views