
Honeywell Home PROA7PLUS: Add a User Code
In this video, Michael from Alarm Grid explains how to add a new user code to a Honeywell Home PROA7PLUS or other ProSeries Alarm Panel from Honeywell Home or Resideo. Up to 96 codes can be set up with the system. In order to add a new user code to a PROA7PLUS, you must know the Master Code for the system. This code is set to 1234 by default, but it is almost always changed. Alternatively, you can also add codes using any code that is Partition Master. When using a Partition Master Code, you can only create users that will have authority over the partition that the code has Master-level authority over. Additionally, while you can access the User Management Menu with the Installer Code, it will later ask you to provide the Master code for verification. With that in mind, you will ultimately need the Master Code for making user changes.
One important thing to keep in mind about user codes on the ProSeries Panels is that they can be assigned different levels of authority on a partition by partition basis. Users can only be assigned authority for partitions that are currently enabled on the system. A ProSeries System can have up to four (4) partitions set up and enabled, but only the first partition is enabled by default. The other three (3) partitons have to be enabled within programming in order to be used. Some of the different authority levels that a user code can be assigned include Partition Master, User, Guest, Arm Only, and Duress. Also, after you finish creating a new user, you can then go back into the User Management and assign options for automatic Bluetooth disarming and Z-Wave lock functionality. The Z-Wave lock feature lets you send user codes to programmed Z-Wave locks so that the code can unlock the device. You can also set it so that the PROA7PLUS Systen automatically disarms upon entering the code and unlocking the lock.
https://www.alarmgrid.com/faq/how-do-i-add-a-user-code-to-my-honeywell-home-proa7plus
http://alrm.gd/get-monitored
11
views
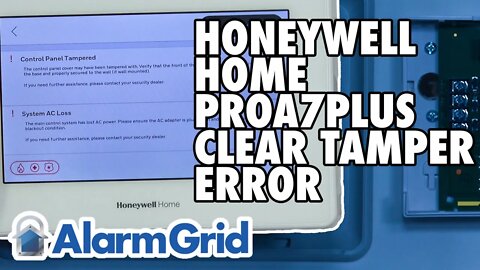
Honeywell Home PROA7PLUS: Clear a Tamper Error
In this video, Michael from Alarm Grid shows you how to clear a tamper error trouble condition from a Honeywell Home PROA7PLUS Security System. This same process also applies to the other ProSeries Alarm Panels like the PROA7PLUSC, the PROA7, and the PROA7C. A tamper error occurs on these systems when the red tamper switch on the backside is not held down properly. This is usually because the panel has been taken off its backplate. This will also usually result in an AC loss condition because the panel will not be receiving power from blue terminal block on the backplate. Also, if the system doesn't have battery power to fall back on, it will power down. Once a tamper condition or other trouble occurs on a ProSeries Panel, a red box with the type of trouble will show up in the bottom-right of the main system screen, and the panel will begin beeping rapidly. You can stop the button by clicking the red button.
The only way to clear a tamper condition is to have the tamper button held down by applying the panel to its backplate, and then acknowledging the tamper condition by clicking the alert on the main screen and providing the system's Master Code. The reason why the system makes you acknowledge the tamper condition before it clears and goes away is because the system wants you to know that someone tried to open up the system earlier. A big reason why a person would go and open the panel is because they were trying to disable the security system. While an AC loss condition will clear once power is restored, a tamper condition is more of a security violation, so the system wants to make sure you know about it. Note that you will not be able to clear the tamper trouble until you have fixed the cause of the problem and put the panel back on its backplate so that the tamper switch is held down as intended.
https://www.alarmgrid.com/faq/how-do-i-clear-a-tamper-error-on-my-honeywell-home-proa7plus
http://alrm.gd/get-monitored
9
views

2GIG GC2: Updating Using the Easy Updater Tool
In this video, Jorge from Alarm Grid shows you how to update the firmware on a 2GIG Go!Control GC2 System by using the 2GIG Easy Updater Tool. The 2GIG GC2 is one of the oldest wireless touchscreen alarm panels, and it helped pioneer the way for other wireless all-in-one alarm systems.
Ideally, the easiest was to upgrade the firmware on a 2GIG GC2 is to install a compatible LTE cellular communicator, activate the system for alarm monitoring, and then push down a firmware update from Alarm.com. Unfortunately, it is almost never that easy. With the GC2 being an older system by this point, many users come across old or used GC2 Systems that are not on a high enough firmware to support an LTE communicator for activation and monitoring. This means that the system cannot be set up with Alarm.com, and no firmware update can be sent down over-the-air (OTA).
If you cannot get a GC2 set up with Alarm.com for an OTA update, then you must instead update the system locally. This can be done using the 2GIG Easy Updater Tool or the 2GIG Updater Cable. Of these two options, using the Easy Updater Tool is much more practical. The process consists of connecting the Updater Tool to the panel and then applying the update at the panel.
When you connect the Updater Tool to the GC2 Panel and apply the update, whatever firmware version is on the updater tool will be applied to the system. With that in mind, it is likely that you will need to update the Updater Tool so that it carries the latest GC2 Firmware Version. In order to update the Updater Tool, you must connect it to a Windows Computer or another type of computer running virtual Windows software. You can then apply the latest firmware version by downloading it and saving it to the Updater Tool.
https://www.alarmgrid.com/faq/how-do-i-use-the-2gig-easy-updater-tool-to-update-a-gc2-panel
http://alrm.gd/get-monitored
16
views
2GIG Easy Updater Tool: Updating
In this video, Jorge from Alarm Grid shows you how to update the 2GIG Easy Updater Tool to the latest GC2 Firmware Version. When you connect the 2GIG Easy Updater Tool to the 2GIG GC2 and initiate the updating process, whatever firmware version that is on the Easy Updater Tool will be applied to the GC2 System.
However, there are many cases where a 2GIG Easy Updater device will not have the latest 2GIG GC2 Firmware. In that case, you must update the Updater Tool first and then update the GC2 System second. Updating the Updater Tool requires a Windows Computer, or another type of computer that can run a virtual Windows Operating System and act as a Windows Computer. You can then connect the Updater Tool to the computer by using a USB cord that is suitable for transferring data. From there, just download the proper firmware version and apply it to the Updater Tool.
When the Updater Tool is receiving power, the currently applied firmware version will be running across its LCD display screen. You should check this information to determine whether you need to update the Updater Tool first or just apply the firmware version directly to the GC2 System. Keep in mind that GC2 Firmware Updates can also be applied by pushing down an update from Alarm.com.
Of course, that can only be accomplished if the 2GIG GC2 System is connected with the Alarm.com servers for alarm monitoring service. If you have an older GC2 Panel on a firmware version that is too low to support LTE communicators, then updating locally will be your only option. Most users prefer using the Easy Updater Tool to the alternative local updating method of using the 2GIG Updater Cable. But both options can provide the same end result of updating the GC2 so that it can be used with ADC.
https://www.alarmgrid.com/faq/how-do-i-successfully-update-the-2gig-easy-updater-tool
http://alrm.gd/get-monitored
30
views
Honeywell Home PROA7PLUS: Delete a Zone
In this video, Jorge from Alarm Grid shows you how to delete a zone from a Honeywell Home PFOA7PLUS Security System. The PROA7PLUS has 127 encrypted zones for Honeywell SiX Series Sensors and Honeywell Home and Resideo PROSiX Sensors. The panel also has 123 legacy zones, but those can only be used if a PROTAKEOVER has been installed. In total, the system has 250 zones. Any Zone Number, 1 thru 250, can be used as an encrypted zone, or as a legacy zone. It just depends on the order you enroll the sensors. And don't forget that you can never exceed 127 encrypted zones, nor can you exceed 123 legacy zones.
When you delete a zone, you are clearing it up so that a new sensor can be used in that zone slot. You could also re-enroll the same sensor as before if you want. After a zone has been deleted, the associated sensor will no longer be programmed with the security system. If you fault or activate that sensor, then nothing will happen on the PROA7PLUS. You would need to re-enroll the sensor in order to get the system to respond to its activity.
Adding and deleing zones on the PROA7PLUS is done through the system's Local Programming Mode. When the ProSeries Panels were first released, Local Programming Mode was not available, and all programming had to be completed remotely by the user's monitoring provider. But Resideo released a firmware update in June 2021 to introduce local programming so that end-users could program their own panels. If you want to delete zones from a PROA7PLUS without needing to contact your monitoring provider, then you need access to Local Programming Mode. You must also know the Installer Code for the system, which is 4112 by default. If you do not know the IC, then you cannot access programming. It is advised that you do not change the Installer Code away from 4112. That will help prevent you from being locked out of programming.
https://www.alarmgrid.com/faq/how-do-i-delete-a-zone-from-my-honeywell-home-proa7plus
http://alrm.gd/get-monitored
21
views
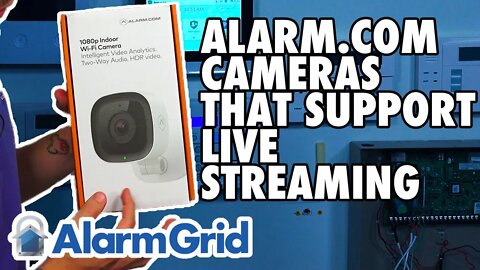
2GIG Edge: Alarm com Cameras that Support Live Streaming
In this video, Jorge discusses which Alarm.com Security Cameras can be used with the 2GIG Edge Alarm System for live video streaming. Some of these cameras, specifically the indoor residential models, can also be used for audio streaming. All of the Alarm.com Cameras that can be used for live video streaming are internet protocol (IP) cameras. The residential models typically use WIFI connectivity to communicate across the internet, while the commercial models are usually Power over Ethernet (PoE) devices that rely on wired Ethernet connections for network connectivity.
All sorts of Alarm.com IP Cameras support streaming on the 2GIG Edge. Some compatible models include the ADC-V515, the ADC-V523, the ADC-V723, the ADC-V622-WELL, as well as commercial cameras like the ADC-VC726, the ADC-VC736, the ADC-VC826, and the ADC-VC836. There are many more cameras that support the feature, and really the only Alarm.com models that don't are usually the older ones. In some cases, you may need to apply a firmware update to a camera before it can be used for streaming. If you need to do that, then just get the camera online, and then have your monitoring provider manually push down an update.
When you go to stream cameras on the 2GIG Edge, the system must be connected to a WIFI network. It also needs to be monitored and set up with Alarm.com. Keep in mind that any camera you want to stream will need to be programmed with the Alarm.com account associated with the 2GIG Edge System. Additionally, you must enable the stream to panel feature for any camera you want to stream. This can be done using the Alarm.com website or the Alarm.com Mobile App. Lastly, you may be interested to learn that streaming is not only possible through the main 2GIG Edge Panel, but it can also be done using any 2GIG Edge remote Keypads paired with the system.
https://www.alarmgrid.com/faq/which-alarm-com-cameras-are-supported-by-the-2gig-edge-for-panel
https://www.alarmgrid.com/faq/which-alarm-com-cameras-are-supported-by-the-2gig-edge-for-panel
http://alrm.gd/get-monitored
43
views

2GIG Edge: Alarm com Cameras that support 2 Way Audio via Live Streaming
In this video, Jorge from Alarm Grid explains which Alarm.com Cameras are supported by the 2GIG Edge Security System for its two-way audio streaming feature. In addition to streaming video, a more limited selection of Alarm.com Cameras can also stream audio on a 2GIG Edge Alarm Panel. Pretty much all of the non-outdoor, residential cameras can stream two-way audio. In other words, outdoor camera models and commercial-grade cameras are often incapable of streaming audio on the Edge.
Alarm.com Security Cameras like the ADC-V515 and ADC-V523, as well as monitoring devices like the ADC-V622-WELL can all stream audio with the 2GIG Edge. These cameras not only have built-in speakers, as they also have integrated microphones, thereby making two-way voice possible. You can actually have a live conversation with anyone near the camera. This can be very useful in certain situations. In addition, cameras can not only be streamed from the 2GIG Edge Panel, but they can also be streamed from any 2GIG Edge Remote Keypad devices.
In order to stream audio and video from the 2GIG Edge, the system must be connected to a WIFi network. The 2GIG Edge allows for connectivity with both 2 GHz and 5 GHz WIFI networks. Furthermore, the system must be monitored and connected with the Alarm.com Servers. This is because the cameras are actually connected with Alarm.com. The Edge System uses its built-in Alarm.com Cellular Communicator and its internal WIFI card to communicate with Alarm.com so that it can access the camera feed(s). It really is Alarm.com that makes the entire setup possible.
At the Edge Panel, there are various audio control functions that can be interacted with. The user can choose to mute the audio, or they can initiate two-way audio by activating the microphone function, Remember that this can also be done from the 2GIG Edge Remote Keypad. Functionality is identical across the board between the panel and a 2GIG Edge Remote Keypad.
https://www.alarmgrid.com/faq/which-alarm-com-cameras-support-2-way-audio-with-the-2gig-edge
http://alrm.gd/get-monitored
49
views
2GIG Edge: Sending a Cell Test
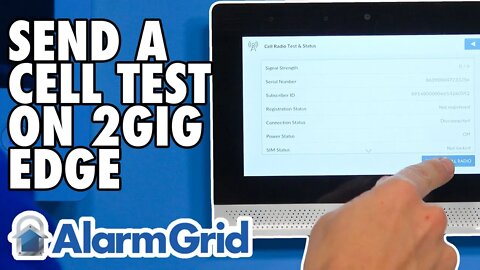
In this video, Jorge from Alarm Grid shows you how to send a cellular communication test signal from a 2GIG Edge Security System. This process is performed to check and make sure that the cellular communicator inside your 2GIG Edge is working properly. That is, the Cell Test will check that the communicator can both send and receive signals. Each 2GIG Edge Alarm Panel has a cellular communicator built inside. You can choose between AT&T and Verizon, and you should base this choice solely upon which cellular network provides better service in the area where the system will be used. You can check coverage maps if you are unsure as to which cellular network is best for you.
Sending a cellular test is something that you will do as part of activating the 2GIG Edge System for alarm monitoring service. When you go to activate the system, you will also be required to provide the IMEI number associated with the system's cellular communicator. This IMEI number may also be listed as the panel's Serial Number, so keep that in mind as well. Your alarm monitoring company will typically be able to help you find all the necessary information. Towards the end of the process is when you will perform a Cell Test to ensure that your system is indeed communicating like it should.
And don't forget that cellular connectivity only represents one communication pathway on the 2GIG Edge. The system can also connect with a WIFI network to provide an additional communication path. It is important to note though that Alarm.com, which is the monitoring platform used with the 2GIG Edge, requires that the system is activated across cellular, and you cannot set up the 2GIG Edge System for internet only or WIFI only. This means that you must choose a monitoring plan that includes cellular service, such as an Alarm Grid Gold or Platinum Level Plan.
In this video Jorge from Alarm Grid shows you how to send a cell signal test from a 2IGG Edge Security System. When you go to activate the 2GIG Edge for alarm monitoring service, you will likely be asked to perform a cell test as one of the final steps in the process. The cell test confirms that the 2GIG Edge is able to send and receive signals using its built-in cellular communicator (AT&T LTE or Verizon LTE). The Edge System uses this cellular module to communicate with the Alarm.com servers.
Although the system can also have a WIFI communication pathway set up for communicating with Alarm.com, setting up the cellular communication pathway used by the system's internal cellular communicator is essentially required. This is because the 2GIG Edge System uses Alarm.com as its security notification and automation platform, and it is the Alarm.com network that forwards system information, including alarm events, to the central station and/or the end-user directly via text message and/or email, depending upon the user's monitoring plan.
The reason why the use of Alarm.com is very important here is due to the fact that Alarm.com mandates that all systems using their network have cellular communication paths that are set up and ready to go. For that reason, the communicator inside your 2GIG Edge must be set up and registered with Alarm.com if you plan on using the system for alarm monitoring service. Meanwhile, the IP communication pathway that can be set up using the system's internal WIFI card is complete optional. However, most users ultimately set up the IP communication pathway anyway, because there is almost no real disadvantage to using it.
As for the cell test, this function tells anyone operating the system, including a DIY user or an installer, if the 2GIG Edge is communicating successfully with the Alarm.com servers using its built-in cellular communicator. A successful cell test indicates successful communication. You will usually perform a cell test at the end of the monitoring activation process to ensure that everything is working as intended. You can also initiate a cell test at any time thereafter to ensure that the system's cellular module is working properly. If your system fails a cell test, you might try to find out if the nearest cell tower is down or non-operational for some reason. You may also try reaching out to your alarm monitoring company for further assistance in troubleshooting the issue.
https://www.alarmgrid.com/faq/how-do-i-send-a-cell-test-for-a-2gig-edge
http://alrm.gd/get-monitored
95
views

2GIG EDGE: Connect to Wifi
In this video, Jorge from Alarm Grid shows you how to connect the 2GIG Edge Alarm System to a WIFI network. The system uses WIFI connectivity to communicate with Alarm.com. However, the system cannot be used as part of an IP-only monitoring setup. Instead, the system must be set up for cellular alarm monitoring service using its internal cellular communicator. This may be an AT&T LTE Communicator or a Verizon LTE Communicator, depending upon which version of the 2GIG Edge was purchased. Alarm.com mandates that a cellular communication pathway is properly set up and configured with the system for monitoring service. This will require that the user obtains a monitoring plan that includes cellular connectivity, such as an Alarm Grid Gold or Platinum Level Plan. Meanwhile, connecting the 2GIG Edge System to WIFI is optional.
Having said that, there is little reason not to connect the 2GIG Edge to WIFI. Most end-users have WIFI in their homes and businesses, and you may as well use it with your alarm system. The WIFI connectivity will complement the system's cellular connectivity and serve as an additional communication pathway for the system. This is often referred to as "dual-path" connectivity. In the event that one pathway goes down or becomes unavailable, the 2GIG Edge System will still have the other communication pathway to fall back on. Most alarm monitoring plans that include cellular service also include IP service at no extra charge. Additionally, WIFI connectivity is usually preferred over cellular for sending over-the-air (OTA) firmware updates for the panel. But in terms of sheer reliability and overall update, cellular is usually seen as superior. That doesn't mean that WIFI connectivity isn't important though. Really, your best option is to have both a strong WIFI communication pathway and a strong cellular communication pathway so that monitoring service for your 2GIG Edge is as reliable and as dependable as possible.
https://www.alarmgrid.com/faq/how-do-i-connect-my-2gig-edge-to-wifi
http://alrm.gd/get-monitored
9
views
2GIG GC2: Updating Firmware Using Updater Cable (UPCBL2)
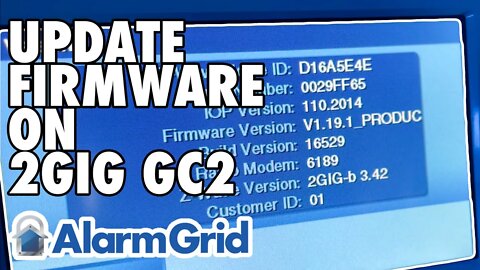
In this video, Julia from Alarm Grid shows you how to update the firmware on a 2GIG Go!Cointrol GC2 System by using the 2GIG UPCBL2 Updater Cable. The easiest way to update GC2 firmware is to activate the system for alarm monitoring, and then push a firmware update down from Alarm.com. Since the 2GIG GC2 can only communicate across cellular, and it does not have a popular IP communication pathway available, performing a remote OTA update on the GC2 takes longer than most other alarm panels. Furthermore, if you have a 2GIG GC2 System on a very old firmware version that cannot be set up with Alarm.com service, then you will need to update the firmware using an alternative method, namely the updater cable or the easy updater tool. These methods are much more inconvenient than performing an OTA update, so they ate only advised if there is no other option available.
The 2GIG GC2 is one of the first ever wireless alarm panels that was ever used as a DIY security system. Its ability to be programmed locally by the end-user, and the fact that it has a communicator that can be swapped out and replaced with a new one at any time made is a very popular opton for DIY users. Today, the most common reason to update the firmware on an existing 2GIG GC2 System is to get it to support a newer LTE communicator. In 2021, there is a big rush to update GC2 Systems to LTE radios, as older 3G radios will soon stop working as part of the 3G sunset. In order to use an LTE communicator on your GC2, it is likely that you may need to update the panel's firmware version. Once the panel has ts firmware update, you can install an LTE cellular communicator ibside the GC2, activate the unit for monitoring, and expect to use the system for a very long time.
http://alrm.gd/get-monitored
18
views

2GIG Edge: Pair the 2GIG PAD1 345
In this video, Jorge from Alarm Grid shows you how to pair a 2GIG PAD1-345 Keypad with a 2GIG Edge Security System. The 2GIG PAD1-345 is a classic keypad device that was originally created for use with the 2GIG Go!Control GC2 System as a secondary keypad controller. It was later used with the 2GIG GC3, 2GIG GC2e and 2GIG GC3e Systems. And now, it remains in production as a keypad option with the 2GIG Edge Security System. The 2GIG Edge has two (2) keypad options available, those being the 2GIG Edge Remote Keypad with Touchscreen Control and the 2GIG PAD1-345 that is highlighted in this video from Alarm Grid.
The 2GIG PAD1-345 is an extremely limited and primitive keypad, especially when compared with the highly advanced and state-of-the-art 2GIG Edge Remote Keypad. To call the 2GIG PAD1-345 simple would be an understatement. But if you only need bare-bones functionality with your new system keypad, then the 2GIG PAD1-345 might just get the job done. You can install it in a secondary location for controlling the 2GIG Edge System. Some popular locations for a 2GIG PAD1`-345 Keypad include by a back door, near a garage door, or inside the master bedroom. Remember that you can have up to eight (8) total keypads paired with a 2GIG Edge Security System. Both the 2GIG PAD1-345 Keypad and the 2GIG Edge Remote Keypad count towards this maximum keypad limit.
There are not many things you can do using the 2GIG PAD1-345. This device is good for arming/disarming and triggering police and fire panics, if panic keys are enabled in the settings for the keypad zone slot. You cannot use the 2GIG PAD1-345 to bypass sensors, and the keypad does not display the system's current arming status anywhere. You also cannot use the 2GIG PAD1-345 to control automation devices. Also, a 2GIG PAD1-345 Keypad can only control the system partition that it has been assigned to, and you cannot readily switch between system partitions. This can be a huge letdown if you have multiple partitions in use on your 2GIG Edge Security System. Fortunately, you have the option to assign the 2GIG PAD1-345 to any system partition for readily arming and disarming that assigned partition. If you are not actively using partitions on your 2GIG Edge Alarm System, then just assign the 2GIG PAD1-345 to Partition 1, or S1 in keypad programming. If you want a 2GIG Edge Keypad that will perform virtually all of the same functions as the main panel itself, then you should instead consider getting the 2GIG Edge Remote Keypad with touchscreen control.
https://www.alarmgrid.com/faq/which-keypad-works-w-a-2gig-edge
http://alrm.gd/get-monitored
27
views

2GIG Edge: Finding the IMEI Number
In this video Jorge shows you how to find the IMEI Number on a 2GIG Edge Security System. This may also be referred to as the panel's Serial Number. You will need this piece of information when you go to activate the system for alarm monitoring service. Specifically, you will provide the IMEI Number to your monitoring provider during the system's activation process. The IMEI Number is more specifically tied to the 2GIG Edge Panel's internal LTE cellular communicator
Every 2GIG Edge Alarm System has an LTE cellular communicator built inside. In order to activate the Edge System and its integrated cellular communicator for monitoring service, you will be required to provide the associated IMEI Number, or Serial Number, to your alarm monitoring provider. Remember that the system's associated monitoring platform, Alarm.com, requires that every system using its service has an active cellular communication path set up. Every though the 2GIG Edge also has an integrated WIFI card, setting up WIFI is technically optional, while setting up the cellular communication path is essentially required. Of course, most users will just simply set up both WIFI and cellular, as most users have a WIFI network readily available, and it doesn't really cost extra to set up WIFI.
However, when you are referring to the IMEI Number, you are strictly referring to the cellular communication pathway for the 2GIG Edge System. And it's not just the 2GIG Edge actually. Any device that uses cellular connectivity, whether it is an alarm system, a cell phone, or even something else entirely like a cellular asset tracking device, it will have an IMEI number. If you really want to get specific, an IMEI Number is sort of an identifier for a cellular communication device. It just so happens that this information is needed when you go to activate for monitoring service.
https://www.alarmgrid.com/faq/how-do-i-find-the-imei-number-for-a-2gig-edge
http://alrm.gd/get-monitored
32
views
2GIG Edge: Deleting Door/Window Sensors
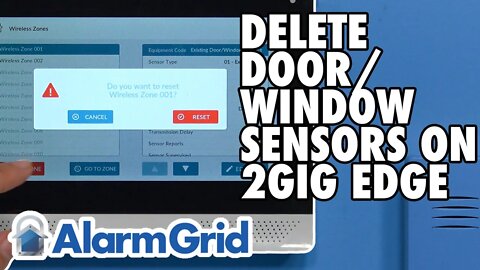
In this video, Michael from Alarm Grid shows you how to delete a door and window sensor from the 2GIG Edge Security System. The process for deleting a door and window alarm sensor from the 2GIG Edge is the same as any other sensor. When you delete a door/window sensor from the system, you are resetting that zone so that it is available for use with another sensor, or even the same sensor that is reprogrammed with the system.
The 2GIG Edge always has 100 wireless zones. Though the most likely scenario is that there will be some vacant zones on the system. Deleting or resetting a zone is the process of taking a programmed zone and then making it vacant or empty. Then that vacant or empty zone can be re-purposed and programmed with a new sensor, or it can just be left vacant. You certainly do not need to use all 100 zones on the system, and in all likelihood, you will not use all 100 zones on the system. In fact, it could be said that using each and every system zone is somewhat extreme, Though if you have a very large home or business, then you never know, you might seriously need all 100 zones.
There are a couple of reasons why you want to delete a door and window sensor. For one, you might no longer want to use that sensor with the system. Maybe you want that door or window to not be monitored by the system. That would be grounds to delete the zone. Another possibility is that you need to open up that zone and reset it so that it can be used with a different sensor. This can be needed if you run out of zones on the 2GIG Edge Alarm System.
https://www.alarmgrid.com/faq/how-do-i-delete-a-door-window-sensor-from-my-2gig-edge
http://alrm.gd/get-monitored
18
views

2GIG Edge: Changing the Master Code
In this video, Michael from Alarm Grid shows you how to change the Master Code on your 2GIG Edge. The default Master Code on a 2GIG Edge is 1111. However, this code is almost always changed for security purposes. If you keep the code at the default, then an intruder can easily guess the code and disarm the system and gain full access to the building. Changing the Master Code is almost always one of the very first things you will do after you first get a new system, whether that is a 2GIG Edge or another alarm system.
The Master Code is the main arming and disarming code. If you are the main user of the system, and you have access to the Master Code, then you will probably be entering that code every single day when you return home or return to your office. This will be during the Entry Delay countdown, as you need to disarm the system before the countdown expires, or else an alarm will occur. You should choose a Master Code that is easy for you to remember, but difficult for someone else to randomly guess. Fortunately, you as the owner of the system can change this important code.
You should not confuse the Master Code with the Installer Code. The Installer Code is simply used for getting into programming and making system changes. Normally, you keep the Installer Code at its default, which is 1561 on the 2GIG Edge. Keeping the Installer Code at the default will help prevent you from being locked out of programming accidentally. You cannot use the Installer Code to arm and disarm the system, so that is another reason why keeping the Installer Code at its default is an okay practice. But the Master Code should be changed.
https://www.alarmgrid.com/faq/how-do-i-change-the-master-code-on-a-2gig-edge
http://alrm.gd/get-monitored
12
views
2GIG Edge: Bypassing Zones
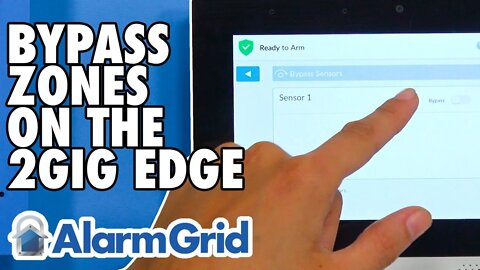
In this video, Michael from Alarm Grid shows you how to bypass a zone on the 2GIG Edge Security System. When you bypass a zone, you are telling the system to temporarily ignore that zone. Any bypassed zone still exists on the security system, but it is temporarily ignored by the system. In other words, if you fault, or activate, a bypassed sensor, then nothing will happen. The system will not make any response, because it is ignoring the sensor.
The great thing about bypassing a zone though is that you can easily un-bypass the zone so that it is active again. This usually beats the alternative of having to delete the sensor outright and then reprogram it from scratch. You can just bypass and un-bypass sensors as needed. There is a Bypass Sensors Menu that can easily be accessed using the system's Install Code (default 1561) or Master Code (default 1111, but usually changed). In the Bypass Sensors Menu, all programmed non-life-safety sensors will be listed so that they can be toggled for bypassed and non-bypassed. When the toggle button for a sensor is green, the sensor is bypassed, but when the toggle button is grey, then the sensor is not bypassed.
There is an important note regarding any life-safety sensors used on your 2GIG Edge System. This includes devices like smoke detectors and carbon monoxide sensors. For safety reasons, life-safety sensors cannot be bypassed on the 2GIG Edge. They will not appear in the Bypass Sensors Menu, thereby making them impossible to bypass on the 2GIG Edge Security System. Though if you were to change the programmed sensor type from a smoke detector or CO detector to something else, such as a door/window sensor, then the sensor would appear in the menu and be capable of bypassing. It's just a neat little theoretical trick you can perform.
https://www.alarmgrid.com/faq/how-do-i-bypass-a-zone-on-the-2gig-edge
http://alrm.gd/get-monitored
23
views
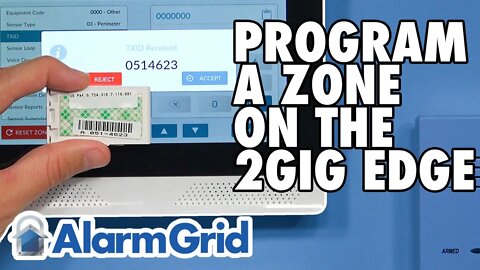
2GIG Edge: Programming a Zone
In this video, Jorge from Alarm Grid shows you how to program a zone on the 2GIG Edge. Programming a zone is the act of assigning a sensor to the system. There are 100 wireless zones on the 2GIG Edge. Each wireless sensor will use at least one wireless zone, and there are even some sensors that will take up multiple zones for the purposes of performing multiple functions on the system. Programming zones is one of the most important steps for setting up the security system. Not only will you assign the sensor to a system zone, you will also configure various settings so that the system responds in the appropriate manner when the sensor is faulted. This response can certainly vary depending on the type of sensor that is involved. For example, a faulted smoke detector will result in a very different system response than a faulted door and window sensor.
There are many things that go into programming a zone. A wireless sensor will have a TXID or Serial Number that is unique to that sensor. This allows the system to identify that sensor. You will also need to set the Sensor Type for the zone. Some examples of Sensor Types include doors, windows, motions, smokes, CO detectors, shock sensors, temperature sensors, and others. The Response Type is very important, as this tells the system what action to take when the sensor is faulted. There are also smaller settings, such as whether or not the system will produce a chime when the sensor is faulted, and if a chime is set to emit, what chime sound will be made. You will also provide a name for the sensor and set whether or not the system will report out if the zone causes an alarm. Supervision settings are also configured when programming a zone.
https://www.alarmgrid.com/faq/how-do-i-program-a-zone-on-a-2gig-edge
http://alrm.gd/get-monitored
28
views
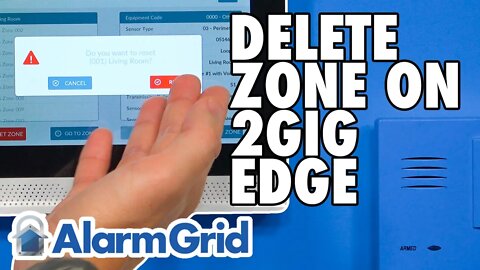
2GIG Edge: Deleting a Zone
In this video, Jorge from Alarm Grid shows you how to delete a zone on your 2GIG Edge Security System. Deleting a zone refers to the process of clearing out or resetting an existing zone so that it can be reprogrammed with a new sensor. You never really "delete" a zone from the 2GIG Edge. No matter what, the 2GIG Edge always, from a technical standpoint, has 100 wireless zones on the system. It's just a matter of whether or not all 100 of those zones are actively being used. It's actually pretty rare that you would go and use all 100 wireless zones on the 2GIG Edge, and it's fair to expect that some of the zones would be left open and unprogrammed on the security system.
When you delete a zone from the 2GIG Edge, it's not that you are making the zone "go away" or no longer exist. Rather, you are just clearing out the zone information so that the zone is open and available so that a new sensor can be programmed in place of the old one. This is normally required in two (2) situations. For one, if you no longer want to use a sensor with a system, and you no longer want the system to respond to activity from a given sensor, then deleting the associated zone is something that you will probably want to do. The second situation is if you have used up all 100 wireless zones and you have a sensor that you want to use with the system AND is more important than at least one (1) existing sensor that is still programmed with the system. You would delete the less important sensor so that its zone slot is open and available, and then program the more important sensor in its place.
https://www.alarmgrid.com/faq/how-do-i-delete-a-zone-from-my-2gig-edge
http://alrm.gd/get-monitored
8
views
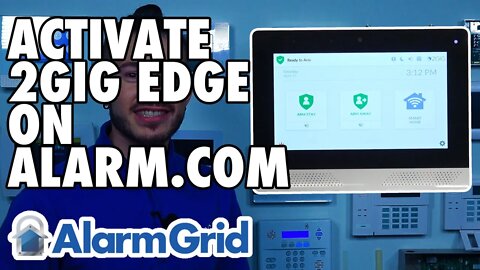
2GIG Edge: Activating on Alarm com
In this video, Jorge from Alarm Grid shows you how to activate the 2GIG Edge Security System for monitoring service on the Alarm.com platform. The majority of the activation process is handled by your alarm monitoring company. As an end-user, your responsibility is to provide them the IMEI number for the 2GIG Edge System's internal cellular communicator. And then, after the system has been activated, you will need to create your Alarm.com account. You will receive an email with instructions and steps to follow, which makes it possible to create a new ADC account.
As part of the Alarm.com account creation process, you will typically use the email address associated with your alarm monitoring account as the "username" for your new Alarm.com account. The only real creative component that you will need to come up with and set on your own is the password associated with the Alarm.com account. Totally optional is the process of setting up two factor authentication (2FA) for your Alarm.com account, which will provide an added layer of security and protection to keep your Alarm.com account safe and secure.
When your system needs to communicate out, all information is passed through the Alarm.com servers. Depending on your monitoring plan, Alarm.com will forward information to a central monitoring station and/or to you the end-user directly via text and/or email. Again, the actual details will vary based upon the monitoring service provided from your monitoring plan. Check with your monitoring company, and make sure that you have an adequate selection of services included on your monitoring account based upon your unique needs. As far as activating new Alarm.com Monitoring Service, your monitoring provider will handle the majority of the process and walk your through anything that you don't understand. Your biggest jobs during the activation process are to obtian and provide the system's unique IMEI number, which is also called the 2GIG Edge Serial Number, and to listen carefully to your activator and follow any instructions that they provide.
https://www.alarmgrid.com/faq/how-do-i-activate-the-2gig-edge-system-on-alarm-com
http://alrm.gd/get-monitored
20
views

Honeywell Lyric AT&T LTE 10 1 Kit
In this video, James the Video Guy from Alarm Grid shows off one of the most popular Alarm Grid Security System Kits, the Honeywell Lyric AT&T LTE 10-1 Kit. This complete system kit comes with a Honeywell Lyric Alarm Panel, ten (10) VERSA-2GIG Door/Window Sensors, one Honeywell SIXPIR Motion Detection Sensor, a Honeywell LYRICLTE-A AT&T LTE Communicator, and a Honeywell LT-Cable for connecting the Lyric Panel to its included plug-in transformer. This is every physical item you need to get started using the Lyric Security System. There is just the intangible aspect of signing-up for monitoring service on an appropriate monitoring plan.
The Lyric is a robust and powerful alarm system that is suitable for almost any home or business needing alarm monitoring service. In terms of getting started with a new security system, some good aspects of the Lyric include its touchscreen controls, its built-in WIFI, its 128 wireless zones, and its ability to simultaneously support both encrypted Honeywell SiX Sensors and non-encrypted 345 MHz sensors from the Honeywell 5800 Series and the 2GIG 345 MHz Series. With this kit, you will have an impressive and dependable wireless security system that is ready to protect your home or office.
One thing to keep in mind with this system kit is that it is intended for dual-path connectivity, with both IP and cellular. As a result, you will need a monitoring plan that includes cellular service in order to take full advantage of what this system kit can offer. A great example of a monitoring plan that is suitable for use with this Lyric Dual-Path System Kit is a Gold Plan from Alarm Grid. Either a Full Central Station Gold Plan or an Alarm Grid Self-Gold Plan would be fine. Additionally, if you wanted to add Honeywell Total Connect 2.0 IP Cameras in conjunction with your Honeywell Lyric System, then you would need to upgrade to a Platinum Plan from Alarm Grid.
http://alrm.gd/get-monitored
https://www.alarmgrid.com/products/honeywell-lyricpk10-lte-a
9
views
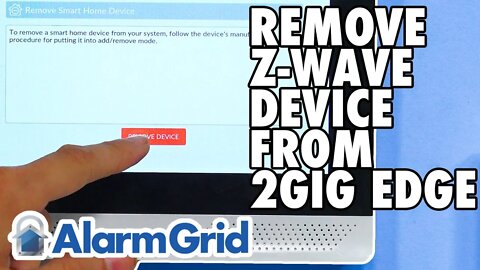
2GIG Edge: Removing a Z Wave Device
In this video, Michael from Alarm Grid shows you how to remove a Z-Wave device from a 2GIG Edge Security System. This may also be referred to as clearing a Z-Wave device from the network. When you do this, all Z-Wave network data will be cleared from the Z-Wave device, and you will need to enroll it with a new Z-Wave network in order to continue using it. You can clear a Z-Wave device whether it is paired with the 2GIG Edge, paired with a different Z-Wave controller, or not paired with any Z-Wave network at all. You will still get a notification stating that a Z-Wave device has been cleared. A good practice when adding a new Z-Wave device is to clear it from the network first, in order to ensure that all Z-Wave network data is properly wiped out.
The 2GIG Edge has a Z-Wave Plus V2 controller inside. This is also known as a Z-Wave 700-Series controller. It's because of this module that you are able to pair Z-Wave devices with the system. Paired Z-Wave devices can be controlled locally at the panel, as well as remotely through Alarm.com. You can also include the paired Z-Wave devices with smart scenes so that they activate automatically based on a set schedule or with predetermined system events. All sorts of Z-Wave home automation devices can be paired with the system, including lighting modules, door locks, smart thermostats, and more.
Like most Z-Wave hubs, the 2GIG Edge is capable of supporting up to 232 unique Z-Wave devices. Each paired Z-Wave device is assigned its own node on the system. When you clear a Z-Wave device, that node becomes free, allowing you to pair a new Z-Wave device in its place. This may be necessary if you have a very large number of Z-Wave devices set up with the system. In addition to the 2GIG Edge Z-Wave device limit, the system's automation platform of Alarm.com also has its own smaller Z-Wave device limit of 122 Z-Wave devices.
https://www.alarmgrid.com/faq/how-do-i-remove-a-z-wave-device-from-a-2gig-edge
http://alrm.gd/get-monitored
100
views
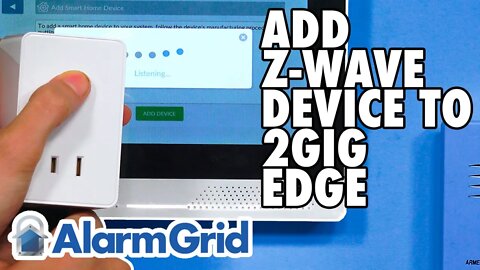
2GIG Edge: Adding a Z Wave Device
In this video, Michael from Alarm Grid shows you how to add a new Z-Wave device to a 2GIG Edge Security System. The 2GIG Edge has a Z-Wave Plus V2 Controller inside. This may also be referred to as a Z-Wave 700-Series Controller. Thanks to this controller, you can pair all sorts of compatible Z-Wave smart home automation devices with the system, including lights, door locks, smart thermostats, and more. Up to 232 Z-Wave devices can be paired with the 2GIG Edge. However, the system's automation platform, Alarm.com.com, has a smaller Z-Wave device limit of only 122 Z-Wave devices. Still, this is far more than most users will need for a typical home or business.
When you go to pair a Z-Wave device with your 2GIG Edge Alarm Panel, it is recommended that you clear it from the network first. This is also referred to as "removing" the device. Many brand-new Z-Wave devices have residual network data from factory testing, so clearing first and adding second is almost always advised. Even if a Z-Wave device is paired with a different network, or not actively paired with any network, it can still be cleared from the network. Once you have cleared the device, and you are sure that any Z-Wave network data has been wiped out, you can proceed to add it to the network.
Paired Z-Wave devices can be controlled locally at the 2GIG Edge, as the panel or any connected touchscreen keypads like the 2GIG Edge Remote Keypad will serve as automation controllers for operating your paired Z-Wave devices. If your 2GIG Edge is monitored with a plan that includes automation services, then you can also control paired Z-Wave devices remotely from Alarm.com. This can be done from virtually anywhere in the world by using a compatible web browser or the Alarm.com Mobile App on your phone. Alarm.com will also allow you to include your Z-Wave devices with smart scenes so that they activate automatically based on a set schedule or with certain predetermined system events.
https://www.alarmgrid.com/faq/how-do-i-add-a-z-wave-device-to-a-2gig-edge
http://alrm.gd/get-monitored
48
views
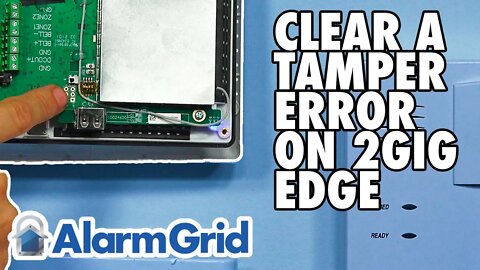
2GIG Edge: Clearing a Tamper Error
In this video, Michael from Alarm Grid shows you how to clear a tamper condition from a 2GIG Edge Security System. A tamper condition occurs when the system's tamper switch is not pressed down properly. The tamper switch is small black button found on the system's main circuit board. It is found near the upper portion of the circuit board. If you open up the panel and hold down the switch, then the system will show that the tamper condition has gone away. But once you release the switch, the tamper condition will come back. The only way to get rid of the tamper condition is to close the panel properly or to disable the tamper error in deep level installer programming.
Once you properly close the 2GIG Edge Alarm Panel, the tamper condition will go away on its own. You don't need to take any extra action or even acknowledge the error. However, you can acknowledge a tamper condition that is still in effect. When a tamper error occurs on the 2GIG Edge, the panel's top bar will begin flashing yellow, and there will be a circle with a number inside it, indicating how many errors are currently affecting the system. If the tamper condition is the only error, then the circle will have a 1 inside it. Once the tamper is fixed, the bar will stop flashing yellow, and all will appear as normal. You can revisit a tamper condition that occurred previously by clicking on the 2GIG logo in the upper-right corner of the main 2GIG Edge home screen, and then choosing history. This will show an event log of different events that have occurred on the system.
Furthermore, if you want to stop the 2GIG Edge from displaying tamper conditions, then access the Troubles sub-menu of panel programming inside the Installer's Toolbox. You will need the Installer Code (default 1561) to access this menu. The very last question within the Troubles sub-menu will allow you to enable or disable tamper errors.
https://www.alarmgrid.com/faq/how-do-i-clear-a-tamper-error-on-my-2gig-edge
http://alrm.gd/get-monitored
11
views

2GIG Edge: Adding a User Code
In this video, Michael from Alarm Grid shows you how to add a user code to the 2GIG Edge Security System. This is a great way to ensure that everyone who uses the system regularly has their own personal code that they can use for disarming the system. The 2GIG Edge Alarm System has support for up to 100 user codes, and you can set them up as needed. Additionally, a limited number of the users can also be set up with Automatic Bluetooth Disarming and Facial Recognition, which both serve as additional methods for disarming the system, beyond making a traditional code entry.
New users on the 2GIG Edge are added through the Users Menu. When you go to add a new code, you will need to enter that code and then confirm it by entering it a second time. The 2GIG Edge will also allow you to set up Automatic Bluetooth Disarming and/or Facial Recognition as you add the code, assuming that there are still slots open for pairing a Bluetooth Phone and/or Facial Biometrics. But setting up those functions is optional, and you can always do that later if you just want to set up a basic code for the time being. You will also provide a name for the user so that you can easily identify which person is associated with that code.
After a user code has been added, you can then use that code to disarm the system whenever it is in armed state. However, a standard user code will not be able to access advanced system settings. More settings can be accessed using the system's Master Code (default 1111), but you will need the system's Installer Code (default 1561) to access the full selection of system settings for configuring the 2GIG Edge Alarm System. Remember that if you perform a factory default of the Users setting, then any added codes will be deleted from the system. In addition, the Master Code will be reset to 1111, and the Installer Code will be reset to 1561.
https://www.alarmgrid.com/faq/how-do-i-add-a-user-code-to-my-2gig-edge
http://alrm.gd/get-monitored
19
views
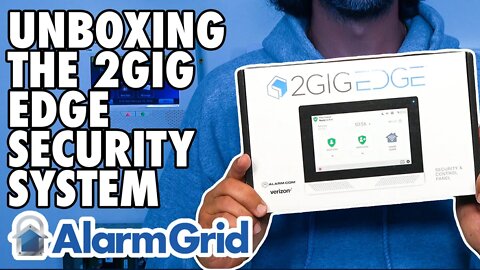
2GIG EDGE Unboxing
In this video, James the Video Guy from Alarm Grid unboxes the 2GIG Edge Alarm Panel. The Edge was first released by Nortek Control and 2GIG in early 2021. This highly advanced state-of-the-art security system provides all of the features and functions you could possibly want. Some of the more advanced features for the 2GIG Edge Alarm System include optional Automatic Bluetooth Disarming, Facial Recognition Disarming, built-in LTE cellular connectivity, integrated WIFI, and Z-Wave Plus V2 700-Series technology. This security system and automation controller will make an excellent addition to your home or business. It easily integrates with the Alarm.com Security Notification and Smart Home Automation Platform for added functionality and remote access from virtually anywhere in the world using a mobile app or web browser.
There are plenty of features that help make the Edge an extremely exciting alarm system that will certainly leave you on the EDGE of your seat. The system is operated and controlled using its 7-inch LCD touchscreen controller. There are four (4) configurable partitions that you can use to section-off the system so that different areas of your home or business are individually controlled. This is great for restricting access to certain areas, while making other areas fully accessible. The 2GIG Edge has support for up to 100 wireless zones, 100 different user codes, 32 key fob devices, eight (8) external keypads, and 232 Z-Wave devices. Keep in mind that Alarm.com has a smaller Z-Wave device limit of 122 Z-Wave devices. You can use encrypted 2GIG eSeries Sensors with the 2GIG Edge, as well as non-encrypted 345 MHz sensors from the Honeywell 5800 Series and the 2GIG 345 MHz Series. Other features for the system include an internal glass break detection sensor, one-touch arming, emergency panic buttons, a front panel camera, chime, 2-way voice, live-streaming for compatible Alarm.com Cameras, a wired bell output, two (2) open-collector outputs, and more!
https://www.alarmgrid.com/products/2gig-edg-na-va
http://alrm.gd/get-monitored
7
views
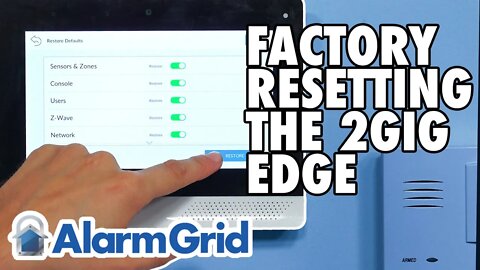
2GIG Edge: Factory Resetting
In this video, Michael from Alarm Grid shows you how to factory reset your 2GIG Edge Security System. This may also be referred to as factory defaulting the system. When you successfully factory default the 2GIG Edge, its settings will be restored to their factory default. There are some different settings that you can choose to factory default. These settings include Security & Zones, Console, Users, Z-Wave, Network, and IP Cameras. You do not need to reset everything on the 2GIG Edge System when you go to perform a factory default. Instead, you can pick and choose from the aforementioned categories as to what should be reset, and what should be left alone.
There are some important things to keep in mind regarding the factory defaulting process on the 2GIG Edge. For one, a factory default cannot be undone. Once you have initiated a factory reset, you cannot go back and undo it. That is why you should make absolutely sure you want to factory reset the system before doing executing this function. Factory defaulting can be an effective troubleshooting step in certain situations, but it should really only be performed as a last resort. Try all other possible methods for fixing or correcting the issue before resorting to a factory default.
Also remember that you will need to provide the Installer code for the system before you will be able to perform a factory reset. The default Installer Code for the 2GIG Edge Security System is 1561. It is possible to change this code, but it is usually kept at the default, due to the fact that keeping the Installer Code at the default does not present a security risk. Remember that if you factory default the Users option for the system, then the Installer code will be restored to its default.
https://www.alarmgrid.com/faq/how-do-i-factory-reset-my-2gig-edge-alarm-system
http://alrm.gd/get-monitored
27
views