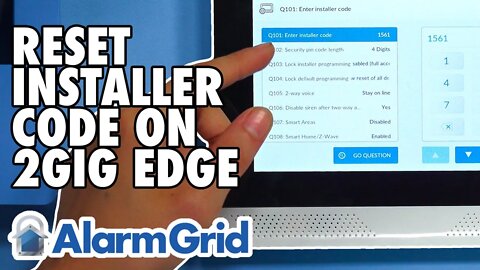
2GIG Edge: Resetting the Installer Code
In this video, Michael from Alarm Grid shows you how to reset the Installer Code on the 2GIG Edge Security System. The default Installer Code for a 2GIG Edge Alarm Panel is 1561. Alarm Grid recommends keeping this code at the 1561 default so that you can use it to get into programming without running into any issues. Even if you forget this code, you can always look it up later. But if you change the code, then you won't be able to look it up, and if you forget the changed code, then you won't be able to get into system programming.
There are two (2) main ways that you can change the Installer Code on the 2GIG Edge back to the 1561 default. In either case, you must know the system's current Installer Code. The first way to reset the code is to just manually change the code to 1561. Unlike other system codes, the Installer Code is not changed in the Users menu. Instead, you must access System Configuration. The very first programming field in System Configuration (Q101) is the option to change the Installer Code. You do not need to click save or anything after entering a new code at this menu. You can just back all the way out to the home screen, and the new code will be in effect.
Alternatively, you can also perform a factory default of the Users setting to get the Installer Code to revert to 1561. If you perform a default in this way, then any added user codes will be cleared from the system. Additionally, the system's Master Code will also be reset to its factory default of 1111. Make sure to change the Master Code to something else afterwards, as keeping the Master Code at its 1111 default is a major security risk.
https://www.alarmgrid.com/faq/how-do-i-reset-the-installer-code-on-a-2gig-edge-security-system
http://alrm.gd/get-monitored
26
views

2GIG Edge: Resetting the Master Code
In her video debut, Aja from Alarm Grid shows you how to reset the 2GIG Edge Master Code. This alarm system has a default Master Code of 1111. However, this code is almost always changed away from the default, as keeping the code at the default presents a major security risk. If you keep the code at the 1111 default and an intruder tries that easily recognizable code, then they will be able to disarm the system and get full access to the building, without worrying about triggering a system alarm.
The Master Code on the 2GIG Edge Security System is primarily used for disarming the system. You can also use the code to access a limited selection of system settings. However, you will not be able to access as many settings with the Master Code as you can with the Installer Code. The Installer code cannot be used to disarm the system, so keeping the Installer Code at its default of 1561 does not present a security risk. In fact, Alarm Grid advises users to keep the Installer Code at the default to avoid being locked out of programming.
But the Master Code is a very different story. You should absolutely change the Master Code away from its default. But there are some rare circumstances where you might want to reset the Master Code back to the factory default of 1111. The main reason is if you are no longer intending on using the system, and you are selling it or giving it away to someone else. This includes if you are leaving the system behind when you move. By leaving the system with its Master Code at the default, the new user will be able to access the Users Menu so that they can change the Master Code to something else. The code can also be changed by performing a factory default of the Users setting. If you go and factory default the Users setting, then the Installer Code will be reset to 1561, the Master Code will be reset to 1111, and any added user codes will be deleted from the system.
https://www.alarmgrid.com/faq/how-do-i-reset-the-master-code-on-a-2gig-edge-security-system
http://alrm.gd/get-monitored
22
views
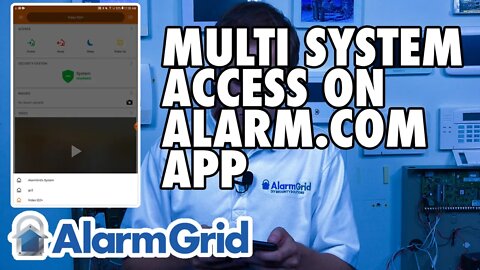
Alarm com Mobile App: Setting Up Multi System Access
In this video Michael from Alarm Grid shows you how to set up multi-system access through the Alarm.com Mobile App. Multi-system access allows you to access multiple Alarm.com Security Systems through one single Alarm.com account. You want to be signed onto the account you want to use for multi-system access when you go to set up the feature. You can then access the Login Information screen and choose to add a new system.
Multi-system access can be useful for users with multiple homes and/or businesses owners. Really, anyone with multiple Alarm.com Security Systems can take advantage of the feature. The security systems don't even have to be the same. In fact, in this example, we have a Qolsys IQ Panel 2 Plus, a 2GIG GC2, and an Interlogix Simon XT all set up on the same account. They are all linked together so we can get in with one set of login information.
Once you have finished setting up Alarm.com Multiple System Access, you can then use the single login information to access any of the paired Alarm.com Security Systems. There will be a dropdown menu you can use to choose between different alarm systems. Then you can perform a variety of different tasks, including arming and disarming your system, checking the current system status, controlling automation devices, viewing the live feed of Alarm.com Cameras, and much more!
https://www.alarmgrid.com/faq/how-do-i-set-up-multi-system-access-to-alarm-com-using-the-mobil
http://alrm.gd/get-monitored
17
views
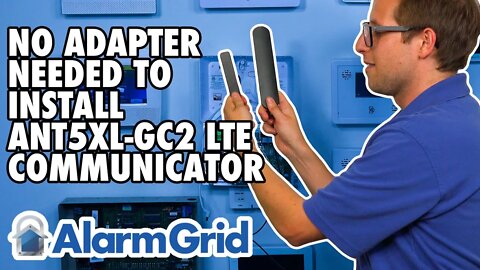
2GIG ANT5XL GC2: No Adaptor Needed for LTE Communicator
In this video, Michael from Alarm Grid sets up the 2GIG ANT5XL-GC2 Cellular Antenna with a 2GIG GC2e LTE Communicator. And as you can see from the video, no adapter is needed to complete the connection. You can easily plug the gold connector into the gold connector port to install the antenna. When installing the antenna, you should have the 2GIG ANT5XL-GC2 connected to the Main port, and the smaller stock antenna connected to the Div port. The large 2GIG ANT5XL-GC2 should be mounted up and away from the 2GIG GC2 or 2GIG GC2e, and the small stock antenna connected to the Div port should be tucked inside the panel.
Adding a cellular antenna like the 2GIG ANT5XL-GC2 will boost cellular signal strength, which can be crucial for users in rural areas in achieving a strong enough cellular signal. Today, most users will not need to add an external cellular antenna like the 2GIG ANT5XL-GC2. Cellular signals are quite strong today, especially with LTE radios, and no external hardware is needed in most situations. But if you are using the system in a particularly remote or rural area, them you may need an antenna to give your system's communicator an extra boost so that a proper cell signal can be achieved.
The 2GIG ANT5XL-GC2 can be used with any of the LTE communicators for a 2GIG GC2 or 2GIG GC2e Security System. It should last for the lifetime of the system's LTE cellular communicator. In the cellular industry, LTE stands for "Long Term Evolution", and it is widely accepted as the backup to newer 5G devices. It is expected that LTE cellular networks will be kept operational and in service for many years, with most estimates listing the mid to late 2030s to early 2040s as a probable shutdown date.
https://www.alarmgrid.com/faq/does-the-2gig-ant5xl-gc2-require-an-adaptor-to-fit-an-lte-commun
http://alrm.gd/get-monitored
19
views
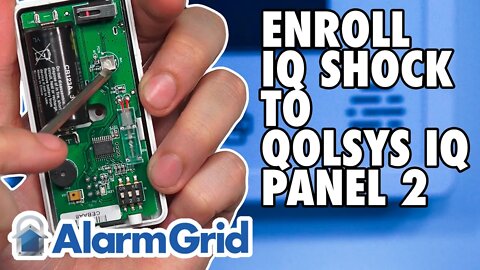
Qolsys IQ Shock S: Enroll with IQ Panel 2
In this video, Michael from Alarm Grid shows you how to enroll the Qolsys IQ Shock-S with the Qolsys IQ Panel 2 Security System. The Qolsys IQ Shock-S is a wireless shock sensor that operates at 319.5 MHz. It works with the original Qolsys IQ Panel 2, as well as the 319.5 MHz Qolsys IQ Panel 2 Plus. The sensor responds to the physical shock waves that occur when a door or window is broken down. You can also use it as a door and window contact sensor by turning ON sensor DIP Switch #3 and installing it alongside its included magnet.
The Qolsys IQ Shock-S enrolls with the Qolsys IQ Panel 2 by putting the system into its Auto-Learn Sensor Mode and then activating the tamper switch for the sensor. Once the system acknowledges the sensor, just confirm that you would like to enroll it, and then configure the zone settings. Before installing, you should open up the sensor and adjust its inside potentiometer to the desired level of sensitivity, and also configure the three (3) inside DIP switches to the proper positions based upon how you intend on using the sensor. It is a good idea to test the sensor after enrolling and installing it.
https://www.alarmgrid.com/faq/how-do-i-learn-the-qolsys-iq-shock-s-into-my-qolsys-iq-panel-2-p
http://alrm.gd/get-monitored
8
views

Honeywell Home Tuxedo: Web Interface Cannot Include/Exclude Z Wave Devices
In this video, Michael from Alarm Grid explains how you cannot include or exclude Z-Wave devices from the Tuxedo web interface. The Tuxedo web interface is a feature that allows you to control the Tuxedo Keypad and the connected Honeywell VISTA System from a web browser. You can do this using a computer, a tablet, or really any device on the same IP network as the Tuxedo Keypad.
You can use the Tuxedo web interface to perform a variety of features and functions. You can arm and disarm the connected VISTA System. You can control programmed Z-Wave devices. And you can access Console Mode to make changes to the VISTA System just like you would if you were using an Alphanumeric Keypad. But one thing you cannot do is add or remove Z-Wave devices from the Tuxedo. The Tuxedo is a fully functional Z-Wave smart home automation controller, but devices can only be added or deleted at the Tuxedo Keypad itself. If you try to access the same menu from the virtual interface, then it will not be there.
https://www.alarmgrid.com/faq/can-z-wave-devices-be-included-or-excluded-using-the-tuxedo-web-
http://alrm.gd/get-monitored
3
views
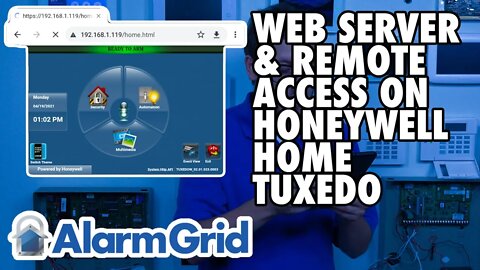
Honeywell Home Tuxedo: Setting Up Web Server & Remote Access
In this video, Michael from Alarm Grid shows you how to set up the web server for a Honeywell Tuxedo or Honeywell Tuxedo Touch Keypad for a Honeywell VISTA Security System. If you have a computer, a tablet, or any device connected to the internet on the same network as your Tuxedo Keypad, then you can access the Tuxedo's web interface and use it to control the Tuxedo, just like you would if you were at the Tuxedo itself.
Pretty much anything you can do from the Tuxedo web interface, you can also do from the actual Tuxedo. You can use the web interface to arm and disarm your system. You can access Console Mode to program your system and make system changes, You can even control any programmed Z-Wave automation devices. But the one thing you cannot do is enroll or delete Z-Wave devices. The only way that you can add and remove automation devices is to do so locally at the Tuxedo Keypad itself. Remember that when adding a new Z-Wave device, you should clear it from the network first. This will wipe out any residual Z-Wave network data and ensure that it can pair successfully. This is just a general rule that applies to most Z-Wave devices.
https://www.alarmgrid.com/faq/how-do-i-set-up-the-web-server-or-remote-access-feature-for-the-
http://alrm.gd/get-monitored
14
views
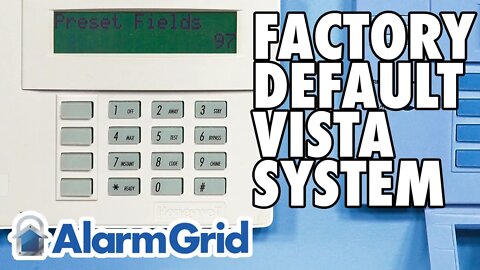
Honeywell VISTA System: Factory Defaulting
In this video, Michael from Alarm Grid shows you how to reset a Honeywell VISTA P-Series Security System to its factory default settings. In order to do this, you must first enter into programming. This is done with the command [Installer Code] + [8] + [00]. Since the default Installer Code is [4112], the command you will likely use to get into programming is [4112800]. You will know that you are in programming because the keypad will read "Installer Code 20" if it is an Alphanumeric Keypad, or it will just read "20" if it is a Fixed English Keypad.
Once you are in programming, you are then able to perform the factory default for the system. To do this, simply enter the command [*97]. The keypad will beep three (3) times to confirm that the system has been factory defaulted. Doing this will reset all system zones to their factory default settings. It will also reset the Master Code to its default of 1234 and the Installer Code to its default of 4112. All other programmed user codes will be erased. At this time, you may also want to enter the command [*96] to default the panel's account number and computer station ID (CSID).
Then when you are finished, press [*99] to exit programming. You will then have to reprogram the system from scratch. Never use [*98] to exit programming, as it could cause you to become locked out and unable to reenter programming. Always use the command [*99] to exit programming on a Honeywell VISTA P-Series System. Remember that the [*97] command for factory defaulting only applies to VISTA P-Series Systems. It does not apply to VISTA TURBO Panels. Also keep in mind that there is no way to "undo" a factory default. Once you perform the task, there is no way to go back.
https://www.alarmgrid.com/faq/how-do-i-factory-default-a-honeywell-vista-p-series-system
http://alrm.gd/get-monitored
26
views
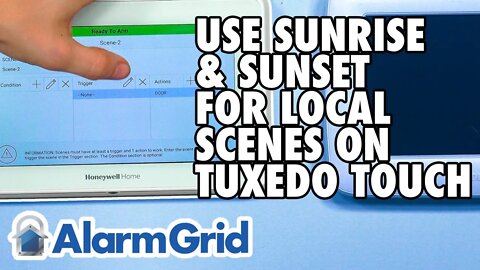
Honeywell Home Tuxedo: Local Scenes Using Sunrise & Sunset
In this video, Michael from Alarm Grid shows you how to set a local smart scene using sunrise or sunset as a trigger on a Honeywell Tuxedo Keypad Z-Wave Controller. Being able to create smart scenes with time-based triggers of your local sunrise or sunset is only possible when building the scene locally at the Tuxedo Keypad. If you try to make the smart scene remotely through Total Connect 2.0, then sunrise and sunset trigger options will not be available. This makes the local scenes slightly more valuable, and you may want to save some for use with sunrise or sunset triggers. For reference, the Tuxedo Keypad supports ten (10) local scenes and twenty (20) remote smart scenes through Total Connect 2.0.
A smart scene will have one or more predetermined actions occur automatically when a trigger takes place. The trigger could be something like arming or disarming the system or faulting a certain sensor on the system. You can even set a condition that will tell the smart scene to only go through if a certain prerequisite is validated when the trigger occurs. For example, you might have a smart scene that occurs at sunrise or sunset, but only if your system is in a disarmed state. In other words, in that hypothetical example, even if a time-based trigger of the sunrise time or sunset time occurred, the smart scene wouldn't occur if the system was armed away or armed stay based on the optional condition that was set.
https://www.alarmgrid.com/faq/why-can-t-i-create-a-scene-on-the-tuxedow-or-tuxedowc-using-sunr
http://alrm.gd/get-monitored
9
views

Wireless Alarm System: Resetting
In this video, Michael from Alarm Grid shows you how to reset a wireless alarm system. The term "resetting" can mean a power cycle reset, in which the system is powered off and then back on, or a factory default reset, in which the system is restored to its factory default settings. With a wireless alarm system, there is usually a menu option that you can use to perform a power cycle reset or a factory reset. This process will vary between different security systems, so it may be helpful to review the manual for the alarm system that you are using.
There are many reasons why you might power cycle reset your alarm system. This may also be referred to as a system reboot. One reason to power cycle your system is for general troubleshooting. Just like your phone or computer, turning your system off and then back on may fix your system if it is not responding properly. Another reason to reboot your system is to make hardware changes. You should always power your system down before making hardware changes. Then you can power it back on after the hardware has been installed. Some examples of hardware changes for a wireless system could include installing a new communicator or connecting a wired NC contact sensor or a siren to the on-board terminals.
The other type of reset is a factory reset. This will restore all of the system settings to their factory default values. This is a more extreme type of reset, and you will need to reprogram your system from scratch after you perform a factory reset. This will include reprogramming all system zones, and you will also need to re-add any user codes and reconfigure the Master Code away from the default. A user will usually only factory default their system as last resort troubleshooting step if all else fails, or if they plan on selling the system or giving it away to someone else for use in a new location.
https://www.alarmgrid.com/faq/how-do-i-reset-my-wireless-alarm-system
http://alrm.gd/get-monitored
22
views
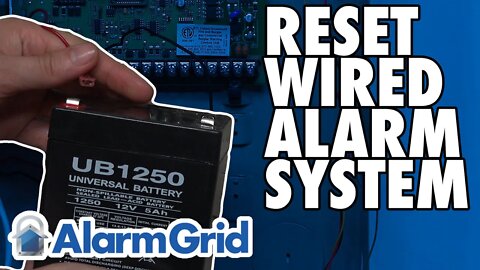
Wired Alarm System: Resetting
In this video, Michael from Alarm Grid shows you how to reset your hardwired security system. Just like with resetting a wireless system, there are two (2) types of resets that may be performed on a hardwired security system. For one, you can perform a power cycle reset, also known as a system reboot. This will involve powering off the system and then powering it back on. You may also perform a factory reset, or a factory default, for the system. This will restore all settings and configurations for the system back to their default setting. You cannot undo a factory reset, so make absolutely sure you want to perform one.
A power cycle reset is relatively basic, and you may perform one when making hardware changes, or as a simple troubleshooting step. The big thing to keep in mind with a wired alarm system is that there usually isn't a menu option for performing a system reboot, or as power cycle reset. Instead, you must perform the system reboot manually. You can do this by first powering down the system. You will need to remove AC power by unplugging the transformer or turning off power at the circuit breaker, and you will also need to remove battery power by disconnecting one of the battery terminals. Once you observe that the system has fully powered down, you can make any necessary hardware changes. Then you can restore system power by connecting AC power first, and then battery power second.
As for a factory reset, there will usually be some sort of command you can make within system programming to perform the factory reset. For example, on a Honeywell VISTA P-Series System, the command is *97, and you should also perform a *96 command to clear the panel's account and CSID. It is very important to note that those *97 and *96 commands are only for a VISTA P-Series System. Do not use those commands on a VISTA TURBO Series System, as they follow a different process.
https://www.alarmgrid.com/faq/how-do-i-reset-my-wired-alarm-system
http://alrm.gd/get-monitored
61
views

Honeywell VISTA-20P, VISTA-15P, VISTA-21iPLTE: Custom Word or Phrase on Alpha Keypad
In this video, Michael from Alarm Grid shows you how to set a customized word or phrase on an Alphanumeric Keypad for a Honeywell VISTA P-Series Security System. This is a great way to add a touch of personalization to your VISTA System, as the message will be there to greet you whenever you use the keypad to operate the system. It will also be displayed on any other Alphanumeric Keypad that is on the same partition as the message that you adjust. For reference, the Honeywell VISTA-15P is a single-partition system that you can just treat as Partition 1, while the Honeywell VISTA-20P, VISTA-21iP, and VISTA-21iPLTE Systems include Partitions 1 and 2, plus a Common Lobby Partition.
The process for setting the customized word or message can be a bit tricky at first, but it really isn't so bad once you get the hang of it. First, you must get into programming by using the command [Installer Code] + [8] + [00]. Remember that the default Installer Code is [4112], so try that code first if you don't know what else it may be. Then get into the Alpha Programming Field with the command [*82]. Choose [1] for Yes, and then enter the two-digit code for the partition whose custom word you are editing. This is [11] for Partition 1, [12] for Partition 2, or [13] for the Common Lobby Partition. Then you will enter the custom word or phrase. The word or phrase can be up to 16 characters maximum. Use [#] plus a two-digit code for enter a character, with character codes ranging from [#32] to [#90]. For reference, letters start at [#65] for A, and run thru [#90] for Z. You can use [6] to move to the next character slot to the right, and [4] to move to the previous character slot to the left. Refer to the system's Installation Manual for a complete list of two-digit character codes. Once you have the desired word or phrase entered, press [8] to save. Then exit programming by entering [00] at the Custom? screen, followed by [0] at the Program Alpha? screen, and lastly [*99] to exit programming. The change will be saved, as long as you pressed [8] at the screen when entering the custom word or phrase.
https://www.alarmgrid.com/faq/how-do-i-adjust-the-default-screen-on-an-alpha-keypad-for-a-vist
https://www.alarmgrid.com/faq/how-do-i-edit-the-default-screen-on-an-alpha-keypad-for-a-vista-
https://www.alarmgrid.com/faq/how-do-i-change-the-default-screen-on-an-alpha-keypad-for-a-vist
http://alrm.gd/get-monitored
25
views
Interlogix Simon XT: Setting Installer Code to Default
In this video, Michael from Alarm Grid shows you how to set the Installer Code on an Interlogix Simon XT Security System back to its default. For reference, the default Installer Code on an Interlogix Simon XT is 4321. This is also the same default Dealer Code for the system. The only way to have both the Installer Code and the Dealer Code as the same code entry on a Simon XT is to keep them at their identical default of 4321.
Once you change one of the codes, then you can't change it back to its 4321 default as long as the other code (the Installer Code or the Dealer Code) is still set at 4321. The system will not let you manually set two (2) codes to have the same entry. The only way that this rule does not apply is if you keep both codes at their defaults and do not change them. If you do change either code, then the only way to reset them both back to 4321 is to perform a full factory reset for the system. However, it is important to note that the Dealer Code will only revert to its 4321 default after a system factory default if the Phone Lock setting is turned OFF, which is the default selection. But if Phone Lock is ON, then only the Installer Code will revert to 4321 after a factory default reset.
Keeping in the Installer Code and the Dealer Code at their 4321 default is recommended by Alarm Grid. Even if you lose one of these codes and forget them, you can always look them up later on if they are kept at their default values. Furthermore, it is not a security risk if an intruder knows one of these codes. The Installer Code and the Dealer Code cannot be used to disarm the system. If an intruder tries to disarm the system with one of these codes, then nothing will happen. They must have the Master Code or a valid user code to successfully disarm the Interlogix Simon XT Security System.
https://www.alarmgrid.com/faq/how-do-i-set-the-installer-code-back-to-default-on-an-interlogix
http://alrm.gd/get-monitored
18
views
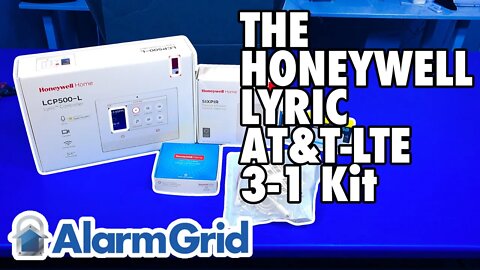
Honeywell Lyric Kit w/ an AT&T-LTE Communicator, 3 Door/Window Sensors, & 1 Motion Sensor
In this video, James from Alarm Grid unboxes the Honeywell Lyric AT&T LTE 3-1 Security System Kit. This complete system kit includes a Honeywell Lyric Alarm System, a Honeywell LYRICLTE-A AT&T LTE Communicator, three (3) door and window sensors, one (1) motion detection sensor, and a Honeywell LT-Cable.
Since the Lyric System already offers built-in WIFI, adding a cellular communicator like the Honeywell LYRICLTE-A will make the system dual-path ready. This can be very important for keeping the alarm system monitored during internet outages that would otherwise take the system offline. Remember though that when you go to sign up for monitoring service, you will need to get an alarm monitoring plan that includes cellular service. Some examples of monitoring plans that include cellular connectivity include the Gold and Platinum Level Plans from Alarm Grid. Both Self and Full Plans are fine, just make sure that it is at the Gold or Platinum Level if you decide to get service from Alarm Grid. With three (3) door and window contact sensors and one (1) motion sensor, this system kit is good for a smaller home or an apartment. Alarm Grid also offers 10-1 kits that are better-suited for larger homes and businesses.
https://www.alarmgrid.com/products/honeywell-lyricpk-lte-a
http://alrm.gd/get-monitored
14
views
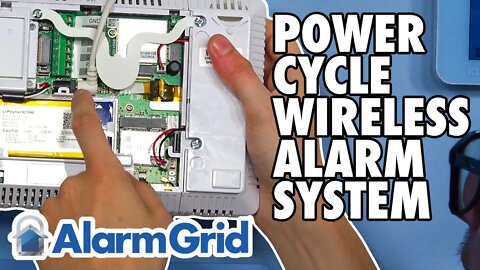
Wireless Alarm System: Power Cycling
In this video, Michael from Alarm Grid shows you how to power cycle reset your wireless security system, Power cycling just means turning the system off and then turning it back on to complete the full power cycle. You will typically power cycle a system as troubleshooting step or when you are making hardware changes.
Many wireless alarm systems have a menu option that you can use to power cycle or reboot them, without needing to disconnect their backup batteries and plug-in transformers. But for virtually all wireless systems, you can still power cycle the traditional way by opening up the panel, unplugging the backup battery from its port, and cutting AC power by either unplugging the transformer or cutting power at the circuit breaker to power the system down.
Then when powering back on, connect the backup battery first, and then restore AC power second. The system will power back on when AC power is restored, as it won't power on by having battery power reconnected. Still, you should restore battery power before restoring AC power, as that is best practice for a wireless security system.
https://www.alarmgrid.com/faq/how-do-i-power-cycle-my-wireless-alarm-system
http://alrm.gd/get-monitored
18
views
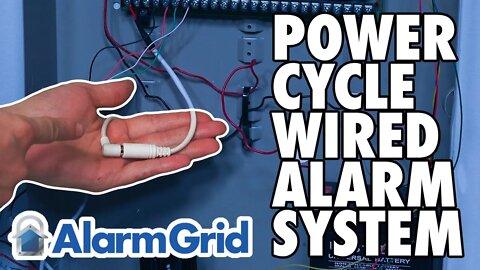
Wired Alarm System: Power Cycling
In this video, Michael from Alarm Grid shows you how to power cycle a wired security system. Unlike a wireless alarm system, a hardwired alarm system will not usually have a menu option for performing a power cycle reset. Instead, you can only complete a power cycle through the traditional method of first powering down the system by cutting all power, and then restoring power. AC power should be restored first on a wired panel, followed by battery power second.
One reason why you may perform a power cycle, or a system reboot, is as a general troubleshooting step. If you find that your system is not operating properly, then you might turn it off and then back on to see if that fixes the problem. This no different than what you might do to fix a smartphone or a computer that isn't operating properly. Another reason to perform a power cycle is when you are making hardware changes.
https://www.alarmgrid.com/faq/how-do-i-power-cycle-my-wired-alarm-system
http://alrm.gd/get-monitored
8
views
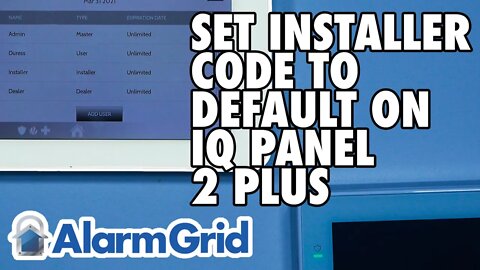
IQ Panel 2 Plus: Setting Installer Code to Default
In this video, Michael from Alarm Grid shows you how to set the Installer Code for a Qolsys IQ Panel 2 Plus Security System back to its default setting of 1111. Alarm Grid recommends always keeping the Installer Code for a security system at its default setting, and the Qolsys IQ Panel 2 Plus is no exception. There are two main reasons for this. First, keeping the code at the default prevents you from being locked out of programming. Even if you forget the default Installer Code, you can always look it up later. Second, the Installer Code cannot be used to disarm the system, so keeping it at its default does not present a security risk. Even if a savvy intruder happened to know the default Installer code for the system, it would not help them at all.
In order to change the Installer Code back to its default, you must edit the code manually through the User Management Menu by using the current Installer Code or the system's Dealer Code, or the other process is to factory default the system. You can only perform a factory default for the Qolsys IQ Panel 2 Plus if you know the Dealer Code for the system. Basically, what it comes down to, you can only get the Installer code back to the default if you know the Installer code or the Dealer Code for the system. We already mentioned that the Installer Code has a default setting of 1111, but it's also worth mentioning that the default Dealer Code is 2222. Again, keeping the Dealer Code at the default of 2222 is recommended. Just like the Installer Code, the Dealer Code can be used to get into programming, but it cannot be used to disarm the security system.
https://www.alarmgrid.com/faq/how-do-i-set-the-installer-code-back-to-default-on-a-qolsys-iq-p
http://alrm.gd/get-monitored
17
views

August Smart Lock Pro: Connecting to WIFI
In this video, Michael from Alarm Grid shows users how to connect the August Smart Lock Pro to a WIFI network. This is done using an August Connect WIFI Bridge. By connecting the Smart Lock Pro to a local WIFI network, you are able to control the lock remotely through the August Home App.
The August Connect WIFI Bridge allows you to connect your August Smart Lock Pro to a local WIFI network. This device effectively serves as a middleman between the lock and the IP router. But keep in mind that the August Connect module is optional. There are other ways you can operate the August Smart Lock Pro remotely that don't involve the August Connect WIFI Bridge. The other options include using Z-Wave connectivity or using a Bluetooth connection through a HomeKit Hub for connectivity with Apple HomeKit.
Interestingly the August Smart Lock Pro cannot connect with Apple HomeKit through WIFI, even if a Connect WIFI Bridge is set up. All HomeKit connectivity for the August Smart Lock Pro is done through Bluetooth. This means that you must always have the August Smart Lock Pro within Bluetooth range of the dedicated HomeKit Hub. The HomeKit Hub can be an iPad, AppleTV Gen 4 or higher, or an Apple HomePod.
The only other option besides Apple HomeKit for controlling the August Smart Lock Pro remotely is through a Z-Wave network. The August Smart Lock Pro can connect with a Z-Wave hub with no hardware needed. You just need to have a Z-Wave hub. Many security systems like the IQ Panel 2 Plus, the 2GIG GC3 and the Resideo Lyric Controller can serve as an effective Z-Wave hub. You can then control the August Smart Lock Pro remotely an interactive service platform like Total Connect 2.0 or Alarm.com. This will require active monitoring service.
By connecting the August Smart Lock Pro with Apple HomeKit, you can use your iOS device to operate it remotely. This includes the ability to control the lock through voice commands made through SIRI. You can do this from virtually anywhere, as long as your iPhone is connected to the network.
https://www.alarmgrid.com/faq/how-do-i-connect-the-august-smart-lock-pro-to-a-wifi-network
http://alrm.gd/get-monitored
14
views
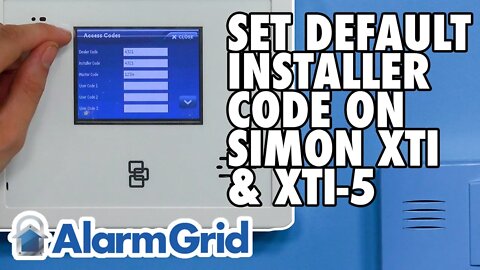
Interlogix Simon XTi & XTi-5: Setting Installer Code to Default
In this video, Michael from Alarm Grid shows you how to reset the Installer Code on an Interlogix Simon XTi or Interlogix Simon XTi-5 back to its default setting of 4321. On the Simon XTi and Simon XTi-5i, the default Installer Code is also shared with the default Dealer Code. That is, both codes have the same default of 4321.
The only way to have both of these codes the same is to keep them at their defaults. If you change either code, then you won't be able to change it back to 4321, as long as there is a system code already using 4321. However, if you perform a factory default reset for the system, then both the Installer Code and the Dealer Code will revert back to 4321. It is important to note though that the Dealer Code only reverts back to 4321 after a factory reset if the Phone Lock setting for the system is turned OFF. This is the default setting for Phone Lock. But if you turn Phone Lock ON and perform a factory reset, then the Installer Code will go back to 4321, but the Dealer Code will just stay at whatever it has been set to.
Keeping the Installer Code and the Dealer Code on an Interlogix Simon XTi or Interlogix Simon XTi-5 is recommended. There are a few reasons for this. First, losing these codes will cause you to become locked out of programming. Keeping them at the default prevents this, because you can always look up a lost Installer Code or Dealer Code if they are at the 4321 default. If you forget the code, then it won't be a major issue, unless you have changed the code, as then you can't look it up. Also, the Installer Code and the Dealer Code cannot be used to disarm the system. Even if an intruder happens to know the default Installer Code and the default Dealer Code of 4321, it won't do them any good, as it will not help them in disarming the security system.
https://www.alarmgrid.com/faq/how-do-i-reset-the-installer-code-back-to-default-on-an-interlog
http://alrm.gd/get-monitored
9
views

August Smart Lock Pro: Using With Apple HomeKit
In this video, Michael from Alarm Grid explains how the August Smart Lock Pro can be integrated with the Apple HomeKit platform. In order to do this, you will need to have completed the initial setup of the August Smart Lock Pro in the August Home App. You can then integrate the lock with your HomeKit network by choosing the corresponding setup option in the August App.
If you are an iOS user, then getting your August Smart Lock Pro connected with your HomeKit network will likely be one of your first priorities. Many iOS users love using Apple HomeKit to easily control the lock remotely using SIRI voice commands. You can also include the lock with HomeKit smart scenes for automatic operation with certain system events or on a set schedule. HomeKit is a great platform to build around, due to its flexibility and general ease of use.
The August Smart Lock Pro joins with a HomeKit network through Bluetooth. You must have August Smart Lock Pro within Bluetooth range of your HomeKit Hub. A HomeKit Hub can be an AppleTV 4th Gen or higher, an iPad or an Apple HomePod. But keep in mind that Bluetooth range is only about 10 to 15 feet. You will need to have your HomeKit Hub in a very specific area of the home for it to work.
Unfortunately, the August Smart Lock Pro cannot connect with HomeKit through WIFI. Even if you have the lock setup with the August Connect WIFI Bridge, the lock will always integrate with HomeKit through Bluetooth. This can be seen in the fact that if you disable Bluetooth for your HomeKIt Hub, then all HomeKit-related functions for the lock will ultimately fail.
Remember, the August Smart Lock Pro can also be used with a Z-Wave network. This is another way to control the lock remotely. The smart lock is Z-Wave-ready right out of the box. All you need is a Z-Wave controller. The lock will need to be within Z-Wave range of the hub. You may need to add some additional Z-Wave devices to strengthen the Z-Wave mesh network so that the lock can communicate successfully with the hub. Many wireless security systems also double as Z-Wave hubs.
https://www.alarmgrid.com/faq/how-do-i-use-the-august-smart-lock-pro-with-apple-homekit
http://alrm.gd/get-monitored
31
views
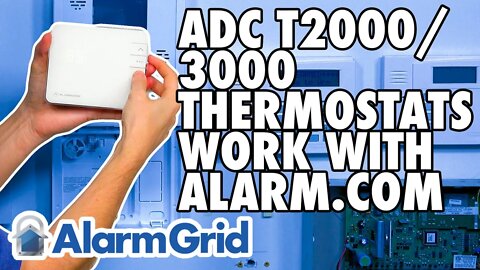
ADC-T2000 and ADC-T3000 Thermostats Work with Alarm.com
In this video, Michael from Alarm Grid explains how both the Alarm.com ADC-T2000 and ADC-T3000 Thermostats will work with the Alarm.com service. The Alarm.com ADC-T2000 and ADC-T3000 are both Z-Wave Plus thermostats. When you pair either one with a security system that has been set up with the Alarm.com service, the unit will subsequently appear on the user's Alarm.com account the next time that the system syncs with Alarm.com.
Both the ADC-T2000 and the ADC-T3000 are used in the same manner. They are designed to replace a user's existing thermostat and provide a way to integrate the connected HVAC with a smart interactive platform like Alarm.com. This will allow the end user to control the thermostat remotely by accessing that platform. In the case of the ADC-T2000 and ADC-T3000, they pair using the same process as any other Z-Wave device. You need to pair the thermostat with your Alarm.com Security System so that it is pushed over to your Alarm.com account.
Once the thermostat is made available on Alarm.com, several things happen. First, you can then access Alarm.com to control the thermostat. This is possible through the Alarm.com website or mobile app. The Alarm.com Mobile App is particularly useful, because it allows you to access the Alarm.com service from pretty much anywhere. All you have to do is open the app on your Android or iOS device, login using your credentials, and then navigate to the Automation section where you can control the thermostat alongside your other automation devices.
Another huge benefit of having the thermostat on Alarm.com is that you can have it activate automatically based on a schedule or with certain system events. This is made possible by building customized smart scenes in Alarm.com. By doing this, you can save money on energy bills and ensure that your HVAC system operates as efficiently as possible, all while keeping your home or office nice and comfortable for everyday living.
https://www.alarmgrid.com/faq/will-the-adc-t2000-or-adc-t3000-thermostat-work-w-slash-alarm-do
http://alrm.gd/get-monitored
28
views

2GIG GC2: Upgrading to LTE
In this video, Michael from Alarm Grid shows you how to upgrade a 2GIG Go!Control GC2 to LTE. With the 3G Sunset and CDMA Sunset, any GC2 System running an old 3G or CDMA Cellular Communicator can no longer be monitored, unless the system is upgraded to LTE. The upgrading process involves opening up the 2GIG GC2 System, powering it completely down, removing the old 3G or CDMA Communicator, adding the new LTE communicator in its place, powering the system back on, closing the panel, and activating the new LTE communicator for alarm monitoring service. You should make sure to write down the IMEI Number on the new LTE communicator, as your monitoring company will need that information during activation.
When choosing an LTE communicator for your 2GIG GC2 System, there is the 2GIG LTEA-A-GC2 AT&T LTE Communicator and the 2GIG LTEV1-A-GC2 Verizon LTE Communicator. Whether you decide to go with AT&T or Verizon should have nothing to do with your personal phone. This decision will have no impact on your monitoring expenses or the type of service that you receive. You should decide based solely on which cellular network provides better service in your area. You may want to check coverage maps if you are unsure. A good cellular connection should almost never become lost or cause disruptions.
After installing the communicator, you will activate it for monitoring service. If your monitoring plan includes access to Alarm.com, then you will also be able to use that service to control your 2GIG GC2 System remotely. This can be done from the Alarm.com Mobile App on your Android or iOS device, or by using the Alarm.com Website on any compatible web browser. Alarm.com allows you to arm and disarm your system, check current system status, control programmed Z-Wave devices, and so much more!
https://www.alarmgrid.com/faq/how-do-i-upgrade-my-2gig-gc2-to-an-lte-communicator
http://alrm.gd/get-monitored
8
views
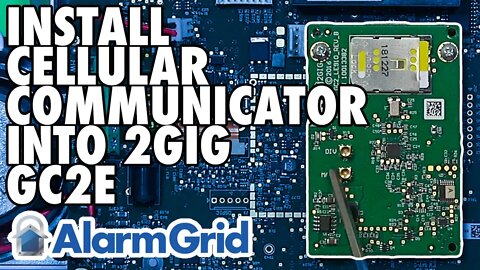
Installing A Cellular Communicator Into A 2GIG GC2e
In this video, Michael from Alarm Grid shows you how to install a cellular communicator for a 2GIG GC2e Security System. The 2GIG GC2e does not have a cellular communicator included by default. You must obtain a communicator and install it inside the system This is a requirement for getting the system monitored, as the 2GIG GC2e does not have another communication path available. The GC2e System will use its added communicator to send signals to the Alarm.com servers. From there, Alarm.com then forwards important information, such as alarm events, to a central monitoring station and/or the end user directly via text message and/or email.
After you have installed the communicator inside the GC2e Panel, you must then activate it for monitoring service. You will need to provide your monitoring company with the unique IMEI Number associated with the added communicator. This is required for activating the communicator, so make sure to have it on-hand and ready for your activation. The IMEI Number can be found on a sticker on the communicator itself, or you may be able to find it on the product packaging. You will also need a monitoring plan that includes cellular connectivity. An example of a good monitoring plan to use is the Alarm Grid Gold Plan.
If your monitoring plan includes access to Alarm.com, then you will also be able control your GC2e System remotely from that platform. This is made easy using the Alarm.com website and the Alarm.com Mobile App for Android and iOS devices. You can use Alarm.com to arm and disarm your system, check its current status, control programmed Z-Wave devices and much more. Remember that Alarm.com access is only possible once a compatible Alarm.com Cellular Communicator has been installed and activated for monitoring service. Make sure to confirm with your monitoring company that Alarm.com access is included with your monitoring plan.
https://www.alarmgrid.com/videos/how-do-i-install-the-cell-module-in-a-2gig-gc2e
http://alrm.gd/get-monitored
19
views
Adding the ADC-T2000 to an Alarm.com Account
In this video, Michael from Alarm Grid explains how you can use an ADC-T2000 Thermostat with Alarm.com. This is a Z-Wave Plus thermostats manufactured by Alarm.com. You can pair one of these thermostats with your Alarm.com account by pairing them with your Alarm.com Security System as Z-Wave devices. Once your security system syncs with the Alarm.com servers, the thermostat will be automatically pushed over to your Alarm.com account. This will allow you to control the thermostat remotely using the Alarm.com website in a web browser or the Alarm.com Mobile App on your Android or iOS device.
Being able to control your ADC-T2000 Thermostat from Alarm.com is a huge convenience, and it is why many people are so eager to upgrade and replace their standard programmable thermostat with a Z-Wave Plus model that can integrate with interactive smart home platforms. And if your security system is connected with the Alarm.com platform, then you may want to build around it by choosing a smart thermostat that is manufactured by the same group. That is where is the Alarm.com Smart Thermostats come into play. With the ADC-T2000, Alarm.com really proved that an easy-to-use smart thermostat was possible. This was later continued with the Alarm.com ADC-T3000 Thermostat, which replaced the ADC-T2000.
Pairing your ADC-T2000 with Alarm.com presents a few key advantages. For one, you can control the thermostat remotely from anywhere in the world using the Alarm.com platform. You can also include the thermostat with fully programmable and customizable smart scenes so that it activates automatically based on a set schedule or with certain predetermined system events. This is great for making your life more convenient and saving money on energy costs.This makes obtaining a new thermostat a great investment for any home or business! You are unlikely to find a new model of the ADC-T2000 Thermostat since it has been discontinued. But if you find a used model, then it should still work fine. You might also consider getting the newer Alarm.com ADC-T3000 Thermostat.
https://www.alarmgrid.com/faq/can-i-add-the-adc-t2000-to-my-alarm-dot-com-account
http://alrm.gd/get-monitored
30
views
Lyric System: Speaking Unexpectedly
In this video, Michael from Alarm Grid explains why your Honeywell Lyric Alarm System may be speaking at you unexpectedly, and also how to prevent this from happening to you again in the future. First and foremost, the reason your Honeywell Lyric Security System is speaking at you without warning is because of the system's "Voice Command" feature, in which you can control the Lyric System using spoken voice commands. If the Lyric thinks you have triggered a spoken voice command, then it may begin speaking at you, even if you never meant to trigger a voice command. This can leave a user confused and distressed when their Lyric System suddenly speaks at them without warning. If this is happening to you frequently, then you should either configure the feature so that the Lyric System is made less sensitive to audible voice commands, or you should disable the Voice Command feature entirely.
The Lyric Voice Command feature can serve as an easy and convenient way to quickly arm your system, perform various smart home commands, and more. But if the feature goes into effect unexpectedly, then it can be very disturbing or alarming. Fortunately, there are some ways you can prevent unexpected Voice Command triggers. If you intend on using the feature and keeping it enabled, then you should complete the Voice Command Training Module so that the Lyric System becomes more familiar with your voice. You should also lower the sensitivity for the feature, as well as any particular verbal command that your Lyric often thinks you are saying. This will make it less likely for you to activate the feature by mistake. Alternatively, if you do not intend on using the feature, then you can disable it entirely. This will eliminate any possibility of the system speaking unexpectedly and catching you off guard.
https://www.alarmgrid.com/faq/what-voice-commands-work-on-the-lyric-security-system
https://www.alarmgrid.com/faq/why-did-i-hear-my-lyric-alarm-system-speak-unexpectedly
http://alrm.gd/get-monitored
10
views