Premium Only Content

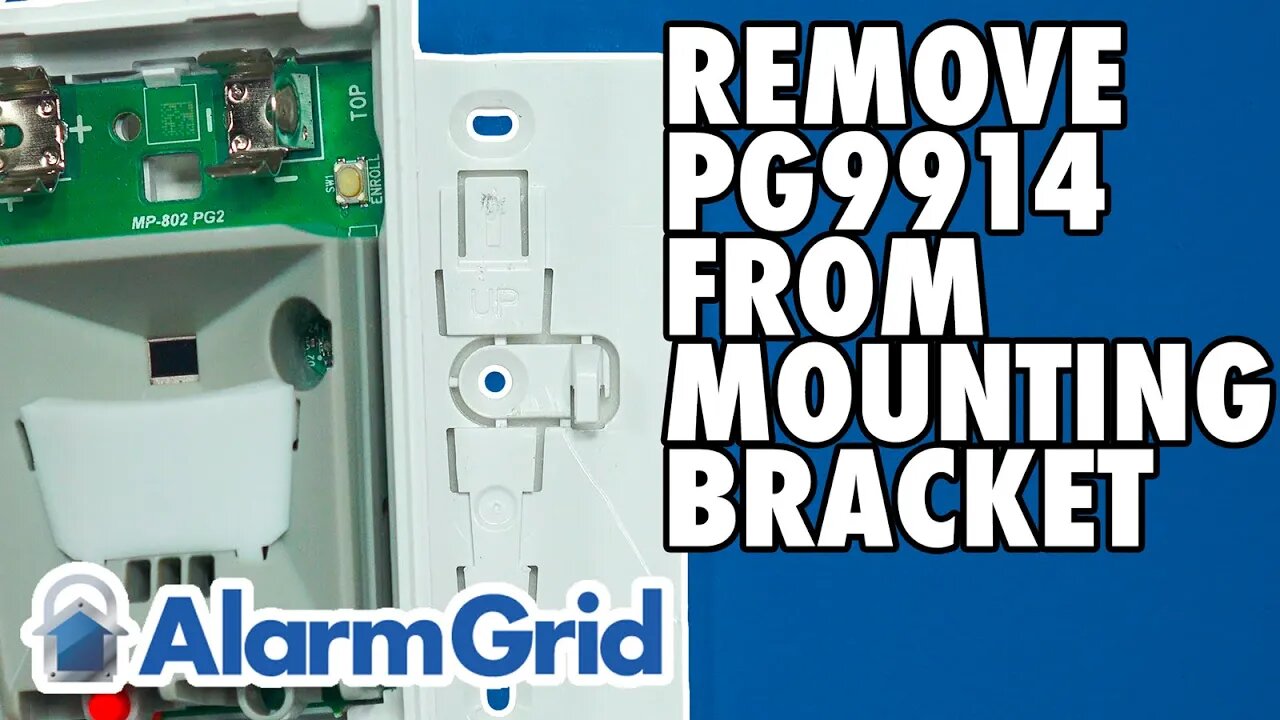
DSC PG9914: Removing From its Mounting Bracket
In this video, Jarrett from Alarm Grid explains how to remove a DSC PG9914 Motion Detection Sensor from its mounting bracket. To do this, you must remove the device battery and use a flat head screwdriver to release the tab securing the mounting bracket to the back of the device. You can then move the motion as needed or replace it entirely.
The DSC PG9914 Motion Sensor can be mounted using screws or double-sided foam tape. Hardware for mounting the motion sensor comes included with the device. The device comes with both a corner mount bracket and a flat mount bracket so that you can get up the device to your liking. These brackets help you more easily install the motion sensor and position it appropriately. However, it can be a bit tricky to remove the motion sensor from the mounting bracket so that the device can be moved or repositioned.
When removing the PG9914 from its mounting bracket, you want to start by opening up the sensor. After removing the set screw (if necessary), use your fingernail or a small flat head screwdriver to push in the bottom tab so that you can pull off the front cover. Then take out the CR123A battery. From there, use a small solid object and press against the arrow. Simultaneously press downward on the top of the motion sensor to remove it from the mounting bracket.
Once the device has been separated from the mount bracket, you can perform the needed action. This could include replacing a broken DSC PG9914 unit with a working unit, or removing the mounting bracket from its current location so that it can be installed in a new location. Remember to perform a Walk Test for the new or repositioned motion sensor to ensure that it is working properly. The sensor has a red LED light to assist with testing.https://www.alarmgrid.com/faq/how-do-i-remove-a-pg9914-from-the-mounting-bracket
https://www.alarmgrid.com/faq/how-do-i-remove-a-pg9914-from-the-mounting-bracket
-
 4:37
4:37
Alarm Grid Home Security DIY Videos
2 years agoQolsys IQ Panel 4: Change the Master Code
35 -
 1:01:48
BonginoReport
5 hours agoWaddle & Gobble Receive Presidential Pardons! - Nightly Scroll w/ Hayley Caronia (Ep.185)
101K31 -
 53:41
53:41
Katie Miller Pod
4 hours agoMike & Kelly Johnson on Marriage, Family, & Demands of the Job | The Katie Miller Podcast Ep. 16
21.8K14 -
 1:31:04
The Daily Signal
5 hours ago $3.94 earned🚨BREAKING: Judicial CHAOS—$7 Million Somalian Fraud Scandal Thrown Out, Trans Terrorist Released
16.8K11 -
 9:07:11
GritsGG
11 hours ago#1 Most Warzone Wins 4049+!
24.4K2 -
 1:05:43
TheCrucible
6 hours agoThe Extravaganza! EP: 65 (11/25/25)
114K15 -
 7:29:53
The Rabble Wrangler
18 hours agoBattlefield 6 Free Week | Come Play With The Best in the West!
15.8K -
 1:35:57
Kim Iversen
5 hours agoThe Macrons Tried To KILL Candace Owens?
52.7K111 -
 1:15:59
vivafrei
8 hours agoKash interview - 27 Minutes of No Answers! Another Soft-on-Crime Catastrophe! Pedo Coach? & MORE
186K103 -
 1:21:29
Winston Marshall
7 hours agoThe Dangerous Fracturing on the American Right Over Israel
37.5K102