
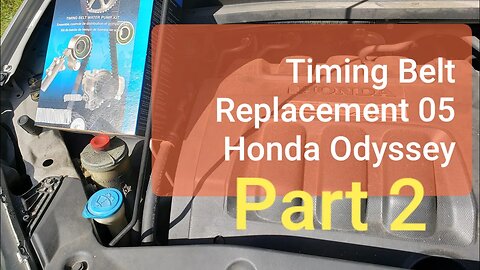
Timing Belt Replacement 05 Honda Odyssey: Part 2
This is part 2 of a two part series on the timing belt replacement on an 05 Honda Odyssey. The video starts with all the timing components removed and goes over how to install new timing components. You will notice in this video I make sure that the timing marks are still lined up after every move I make. This is extremely important especially after the belt has been installed and the crank shaft has been rotated 720 degrees. If the timing marks are not dead on you must start over and correct the concern. I am not sure if this engine is an interference engine. If it is, valve damage and potentially other damage to the engine can be occur if the timing is not correct.
Note: at about the 20 minute mark I have a note in text. I have a typo in it. The note is supposed to read "Once the mount and attaching brackets are installed then the floor jack and jack stand can be removed from underneath the engine. (That is JUST the engine. The vehicle will still need to be supported until the wheel is put back on.)"
Of course once the wheel is put back on properly then the remaining jack stands can be removed from under the vehicle.
Here is a link to "Timing Belt Replacement 05 Honda Odyssey: Part 1". Link: https://youtu.be/SPu_PU0KFcc
Here is a link showing the water pump replacement on an 05 Honda Odyssey 3.5L. It would be my strong suggestion to replace this component while the vehicle is apart as 1, its already apart and 2, there is a good chance that a link could have been caused by removing the engine mount bracket bolts. The pump potentially may not seal up after this. Link: https://youtu.be/Yafvxtd9jJQ
Here is a link to a video showing how to bleed and fill a cooling system using a vacuum filler. (this is the best way to bleed and fill a cooling system in my opinion)
https://youtu.be/OGuXoRV5xg4
Here is a link to a video showing how to collapse and reset the timing belt tensioner:
https://youtu.be/3trYGAoE458
Here is a link for the "special tool" used to tighten up the crank bolt. Its not actually that expensive. Now I wish I would have gotten one before doing the video. Oh well. https://www.amazon.com/Capri-Tools-21000-Pulley-Removal/dp/B00I3RLMIG
There is also a fat socket that you can buy to go into the center of that tool. It will probably show up down at the bottom of that page linked above. This socket may help in not rounding off the 19 milometer bolt head and help to make doing things a little more easy for you.
By the way, Amazon nor the makers of the tool shown in the link above are a sponsor of Barbour's Auto Help. Its just a helpful link.
Here is a link to a video showing how to use this tool. https://youtu.be/sddl2EbF10M (I don't suggest using an impact, but using hand tools. i.e. a torque wrench for tightening.)
Again Eric The Car Guy and Barbours Auto Help are not affiliated. (I wish) Just a helpful link.
DISCLAIMER
Barbour's Auto Help is not responsible for any damage or personal injury incurred in the process of performing any auto repairs done by you the viewer. Automotive repair is extremely dangerous. Repair your vehicle at your own risk. It is the viewers responsibility to verify all information and procedures as outlined in YOUR REPAIR MANUAL AND OWNERS MANUAL FOR YOUR VEHICLE. Owning and using a repair manual suited for your vehicle is essential for correctly and safely performing ANY repair to your vehicle. Always wear safety glasses and heed all instructions for use applicable to any piece of equipment you may use. Due to circumstances out of the control of Barbours Auto Help, Barbours Auto Help makes no guaranty that by the use of the information given in this video a quality repair will be made. Barbour'sAutoHelp makes no guaranty that the information provided is totally complete, syncronized and accurate. Verify everything using an appropriate repair manual.
Repair your vehicle at your own risk! Barbour's auto help does not guaranty a proper repair using these techniques.
Some information in this video was outlined in an instruction packet that came with the parts I purchased for this vehicle. The timing component kit used in the video is a Dayco kit. (Dayco not a sponsor.)
47
views
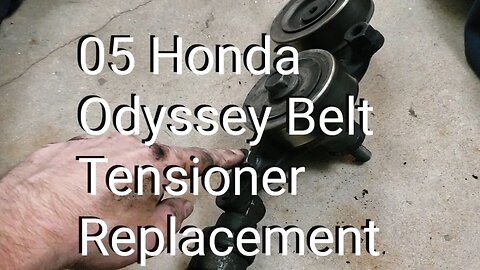
05 Odyssey Belt Tensioner Assembly Replacement
In this video I'll show how to replace a serpentine belt tensioner assembly on an 05 Honda Odyssey 3.5L. Of coarse, I don't actually replace my tensioner assembly but the way I removed and replaced my tensioner assembly is the same process as replacing it. This is a relatively simple job but, it can be difficult as the the working area is very tight and the tensioner can seem to be difficult to move. The tensioner used is not a typical spring loaded tensioner. You'll need to take your time when moving the tensioner. Constant pressure is key. You'll notice that the tensioner will slowly move. Just take your time.
Note: The technique used at the end to install the belt where I used a jack handle to extend the trow of the ratchet is not the correct way to use a ratchet. Use this technique at your own risk. Damage to tools may occur. I would actually recommend using a serpentine belt tool for this job.
DISCLAIMER
Barbour's Auto Help is not responsible for any damage or personal injury incurred in the process of performing any auto repairs done by you the viewer. Automotive repair is extremely dangerous. Repair your vehicle at your own risk. It is the viewers responsibility to verify all information and procedures as outlined in YOUR REPAIR MANUAL AND OWNERS MANUAL FOR YOUR VEHICLE. Owning and using a repair manual suited for your vehicle is essential for correctly and safely performing ANY repair to your vehicle. Always wear safety glasses and heed all instructions for use applicable to any piece of equipment you may use. Due to circumstances out of the control of Barbours Auto Help, Barbours Auto Help makes no guaranty that by the use of the information given in this video a quality repair will be made. Barbour'sAutoHelp makes no guaranty that the information provided is totally complete, syncronized and accurate. Verify everything using an appropriate repair manual. Follow the repair manual over this videos content. You can do it. Do it right and do it safely.
15
views
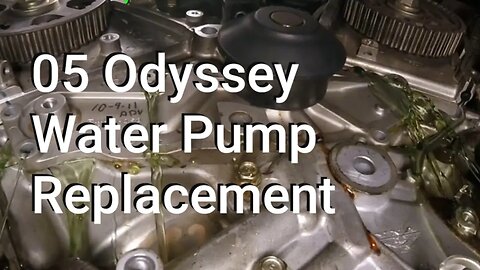
Water Pump Replacement 05 Honda Odyssey 3.5L
In this video I'll take you along as I replace the water pump on my 05 Honda Odyssey 3.5L. The video starts out with the water pump fully exposed with the timing cover, timing belt and timing components removed. You'll need to watch the video showing how I removed these components first before you watch this video. Also, I'll have another video available soon showing the installation of the timing belt and timing components. The links to both videos will be below.
Note: When the job is done (after the water pump is installed and the timing belt installed with the timing components and vehicle is fully reassembled as shown in the Part 2 Timing Belt Replacement 05 Honda Odyssey...coming soon) the cooling system will have to be filled and bleed properly to insure vehicle does not overheat. Please reference a repair manual for information on how to do this. I do not have this information available at this time.
Also, its important to pressure test your cooling system after a repair like this is made to insure that no leaks are present. I'll have a link to a video showing how to do this down below. The vehicle featured is not the Honda but the principle is the same.
Here is a link to "Timing Belt Replacement 05 Honda Odyssey: Part 1". This is the video showing how to removed all the components needed to get to the water pump as shown at the start of this video.
https://youtu.be/SPu_PU0KFcc
Here is part 2 of the timing belt replacement series.
https://youtu.be/Iv-RBX2wPR4
Here is a link to a video showing how to perform a pressure test on a cooling system.
https://youtu.be/ue86SVk4rGU
As far as what to use to clean the mating surface where the water pump bolts up to I would recommend the green scouring pads used for washing dishes. I would wash dishes with them for a few nights though before using them. It makes them a bit softer and bendable. Remember to use very light pressure when cleaning the mating surface.
DISCLAIMER
Barbour's Auto Help is not responsible for any damage or personal injury incurred in the process of performing any auto repairs done by you the viewer. Automotive repair is extremely dangerous. Repair your vehicle at your own risk. It is the viewers responsibility to verify all information and procedures as outlined in YOUR REPAIR MANUAL AND OWNERS MANUAL FOR YOUR VEHICLE. Owning and using a repair manual suited for your vehicle is essential for correctly and safely performing ANY repair to your vehicle. Always wear safety glasses and heed all instructions for use applicable to any piece of equipment you may use. Due to circumstances out of the control of Barbours Auto Help, Barbours Auto Help makes no guaranty that by the use of the information given in this video a quality repair will be made. Barbour'sAutoHelp makes no guaranty that the information provided is totally complete, syncronized and accurate. Verify everything using an appropriate repair manual. Follow the repair manual over this videos content. You can do it. Do it right and do it safely.
Repair your vehicle at your own risk! Barbour's auto help does not guaranty a proper repair using these techniques.
21
views

Welcome to Barbour's Auto Help!
Welcome to Barbour's Auto Help!
Created with MAGIX Movie Edit Pro 2016
2
views
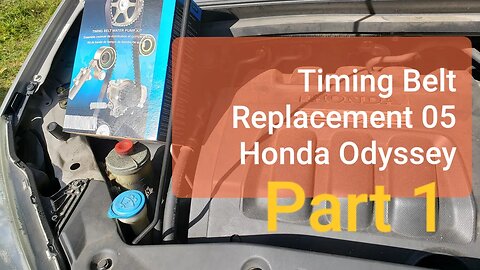
Timing Belt Replacement 05 Honda Odyssey: Part 1
This is the first part of a 2 part series showing how to replace a timing belt and timing component kit on an 05 Honda Odyssey 3.5L. This first video goes over the disassembly process. You'll see me take all the components off needed to get to the timing belt and then remove the timing belt and timing belt components.
**Be sure you have your radio code before disconnecting battery. Your radio may go into theft mode and the code will be needed to get it going again. Same thing for your navigation system if your vehicle is equipped. A separate code will be needed for your navigation system**
Note: After removing the crank pulley bolt make sure that the mark on the pulley still lines up with the arrow as shown in the video. There is a good chance that you may have moved it trying to remove the bolt. If the mark on the pulley does not line up then, put the bolt back in and adjust as needed. (The bolt does not have to be very tight for this) Be sure that the front cam is still lined up as shown in the video with the #1 showing. Once its all lined back up then remove the bolt and the pulley.
Here is a link for the "special tool" to hold the crank pulley still while loosening the crank bolt. Its not actually that expensive. Now I wish I would have gotten one before doing the video. Oh well. https://www.amazon.com/Capri-Tools-21000-Pulley-Removal/dp/B00I3RLMIG
There is also a fat socket that you can buy to go into the center of that tool. It will probably show up down at the bottom of that page linked above. This socket may help in not rounding off the 19 milometer bolt head and help to make doing things a little more easy for you.
By the way, Amazon nor the makers of the tool shown in the link above are a sponsor of Barbour's Auto Help. Its just a helpful link.
Here is a link to a video showing how to use this tool. https://youtu.be/sddl2EbF10M (I don't suggest using an impact, but using hand tools.)
Again Eric The Car Guy and Barbours Auto Help are not affiliated. (I wish) Just a helpful link.
Note: Also, when supporting the engine with a jack be sure to do so with a jack that does not leak down. Be sure to lock the jack into position (close the release valve) so that it does not leak down. The use of a jack stand would help to prevent the engine from dropping due to a faulty jack.
!!!Never drive your vehicle with an improperly torqued crank bolt. If the bolt is loose then driving the vehicle could cause catastrophic engine damage if the bolt were to back out. Just because I drove to the shop and loosened the bolt and then drove it back home does not mean its OK!!!
Here is a link to a video showing the water pump replacement on this engine. https://youtu.be/Yafvxtd9jJQ . In the end, I chose not to incorporate the water pump replacement video in this series as some people may chose to change their timing belt without replacing the water pump. However, it would be my suggestion to replace the water pump while you're in there. I'm sure you saw how mine was leaking even though I didn't have all the bolts out of it. If I didn't replace it there was a chance that the seal would not have sealed back up well enough to prevent a leak afterward. As soon as that video is available I'll post it below also.
Here is a link to part 2 of this job on replacing the timing belt.
https://youtu.be/Iv-RBX2wPR4
DISCLAIMER
Barbour's Auto Help is not responsible for any damage or personal injury incurred in the process of performing any auto repairs done by you the viewer. Automotive repair is extremely dangerous. Repair your vehicle at your own risk. It is the viewers responsibility to verify all information and procedures as outlined in YOUR REPAIR MANUAL AND OWNERS MANUAL FOR YOUR VEHICLE. Owning and using a repair manual suited for your vehicle is essential for correctly and safely performing ANY repair to your vehicle. Always wear safety glasses and heed all instructions for use applicable to any piece of equipment you may use. Due to circumstances out of the control of Barbours Auto Help, Barbours Auto Help makes no guaranty that by the use of the information given in this video a quality repair will be made. Barbour'sAutoHelp makes no guaranty that the information provided is totally complete, syncronized and accurate. Verify everything using an appropriate repair manual.
Repair your vehicle at your own risk! Barbour's auto help does not guaranty a proper repair using these techniques.
Some information in this video was outlined in an instruction packet that came with the parts I purchased for this vehicle. The timing component kit used in the video is a Dayco kit. (Dayco not a sponsor.)
58
views
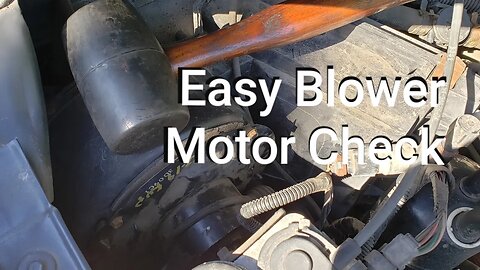
Quick Way To Check For a Bad Blower Motor
In this video I'll show you a quick and easy way to check for a bad blower motor. The blower motor featured in this video has a bad spot on the motor. By simply tapping on the side of the blower motor it caused it to work again. (Its not fixed though. The symptom will happen again. Blower motor replacement is needed.) The reason is that before the blower motor was tapped on the brushes inside the motor where sitting on a bad spot of the motor. When the motor is tapped on this causes the motor to move just enough for the brushes to come into contact with a better part of the motor, causing it to work again.
Note: This is only one way to diagnose a faulty blower motor and it only works, mostly, when the motor isn't working due to a bad spot on the motor. There are many other ways that a blower motor can become inoperative and the method used in the video is not suited to diagnose all of the ways a blower motor can become inoperative. The method used in the video is not a sure way to make a correct diagnosis. It can help you to better understand what is happening with a faulty blower but it is not always 100% accurate. A proper diagnosis should be performed for better diagnostic accuracy and of course the method used in the video would not constitute a "proper diagnosis". Use this method at your own risk.
Side note: You don't have to beat the mess out of the blower motor in order to perform this test. A light tap will do.
Here is a link to a video showing how to replace the blower motor on this truck. https://youtu.be/4D4X5T8Hq78
Here is a link to a video showing a "shade tree" method to diagnose a faulty fuel pump due to a bad spot on the motor. https://youtu.be/DRwsNZ0DC6U
DISCLAIMER
Barbour's Auto Help is not responsible for any damage or personal injury incurred in the process of performing any auto repairs done by you the viewer. Automotive repair is extremely dangerous. Repair your vehicle at your own risk. It is the viewers responsibility to verify all information and procedures as outlined in YOUR REPAIR MANUAL AND OWNERS MANUAL FOR YOUR VEHICLE. Owning and using a repair manual suited for your vehicle is essential for correctly and safely performing ANY repair to your vehicle. Always wear safety glasses and heed all instructions for use applicable to any piece of equipment you may use. Due to circumstances out of the control of Barbours Auto Help, Barbours Auto Help makes no guaranty that by the use of the information given in this video a quality repair or proper diagnosis will be made. Barbour'sAutoHelp makes no guaranty that the information provided is totally complete, syncronized and accurate. Verify everything using an appropriate repair manual. Follow the repair manual over this videos content. You can do it. Do it right and do it safely.
9
views
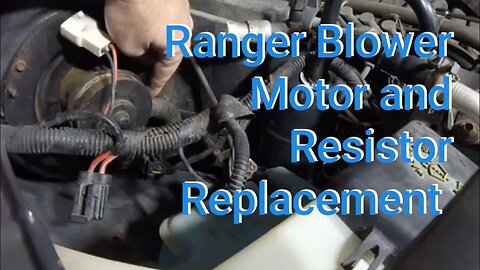
Blower Motor and Blower Resistor Replacement 04 Ford Ranger
In this video I'll show how to replace the blower motor and blower resistor on an 04 Ford Ranger 3.0L. The process is rather simple and getting the motor and resistor replaced is very easy once room is made to replace them. By simply removing the air filter housing, positioning the cruise control unit out of the way, and moving the coolant reservoir and washer reservoir forward a bit the room needed to replace the blower and resistor is easily created. Once room is made simply disconnect said parts, unbolt them and replace them. The processes involve in replacing said parts is similar to other model year Ford Rangers. (Similar not the same and care should be taken to recognize the differences. This is where a manual will help.)
Note: It is suggested to perform this repair with the engine off and completely cooled.
DISCLAIMER
Barbour's Auto Help is not responsible for any damage or personal injury incurred in the process of performing any auto repairs done by you the viewer. Automotive repair is extremely dangerous. Repair your vehicle at your own risk. It is the viewers responsibility to verify all information and procedures as outlined in YOUR REPAIR MANUAL AND OWNERS MANUAL FOR YOUR VEHICLE. Owning and using a repair manual suited for your vehicle is essential for correctly and safely performing ANY repair to your vehicle. Always wear safety glasses and heed all instructions for use applicable to any piece of equipment you may use. Due to circumstances out of the control of Barbours Auto Help, Barbours Auto Help makes no guaranty that by the use of the information given in this video a quality repair will be made. Barbour'sAutoHelp makes no guaranty that the information provided is totally complete, syncronized and accurate. Verify everything using an appropriate repair manual. Follow the repair manual over this videos content. You can do it. Do it right and do it safely.
5
views
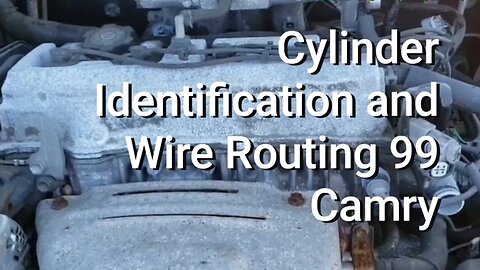
Cylinder Identification and Ignition Cable Routing 99 Camry 2.2L
In this video I go over the cylinder identification and ignition cable routing on a 1999 Toyota Camry.
Ignition coils are labeled with the cylinders that they fire. Each labeled coil tower has an ignition cable that goes to corresponding cylinder.
DISCLAIMER
Barbour's Auto Help is not responsible for any damage or personal injury incurred in the process of performing any auto repairs done by you the viewer. Automotive repair is extremely dangerous. Repair your vehicle at your own risk. It is the viewers responsibility to verify all information and procedures as outlined in YOUR REPAIR MANUAL AND OWNERS MANUAL FOR YOUR VEHICLE. Owning and using a repair manual suited for your vehicle is essential for correctly and safely performing ANY repair to your vehicle. Always wear safety glasses and heed all instructions for use applicable to any piece of equipment you may use. Due to circumstances out of the control of Barbours Auto Help, Barbours Auto Help makes no guaranty that by the use of the information given in this video a quality repair will be made. Barbour'sAutoHelp makes no guaranty that the information provided is totally complete, syncronized and accurate. Verify everything using an appropriate repair manual. Follow the repair manual over this videos content. You can do it. Do it right and do it safely.
4
views
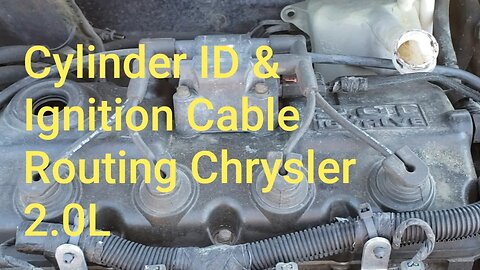
Cylinder Identification and Ignition Cable Routing Chrysler 2.0L
In this video I go over the cylinder identification and ignition cable routing on an 01 Dodge Neon. While the vehicle featured in the video is a Neon the engine used in it is also used in a lot of other Chrysler vehicles. The information will apply if the vehicle is a Chrysler and is equipped with a 2.0L four cylinder and if the vehicle is equipped with the same style ignition module as the vehicle in the video has.
I've done plenty of tune ups with ignition wire replacements on these engines. The ignition coils are usually labeled.
DISCLAIMER
Barbour's Auto Help is not responsible for any damage or personal injury incurred in the process of performing any auto repairs done by you the viewer. Automotive repair is extremely dangerous. Repair your vehicle at your own risk. It is the viewers responsibility to verify all information and procedures as outlined in YOUR REPAIR MANUAL AND OWNERS MANUAL FOR YOUR VEHICLE. Owning and using a repair manual suited for your vehicle is essential for correctly and safely performing ANY repair to your vehicle. Always wear safety glasses and heed all instructions for use applicable to any piece of equipment you may use. Due to circumstances out of the control of Barbours Auto Help, Barbours Auto Help makes no guaranty that by the use of the information given in this video a quality repair will be made. Barbour'sAutoHelp makes no guaranty that the information provided is totally complete, syncronized and accurate. Verify everything using an appropriate repair manual. Follow the repair manual over this videos content. You can do it. Do it right and do it safely.
7
views

How I Diagnose DTC P0128
In this video I'll go over some causes and symptoms associated with diagnostic trouble code P0128. I also give you a run down of how I usually diagnose this code. In the end of my diagnostic of the vehicle in the video I find that the thermostat is indeed stuck open. I even show you an example of what a stuck open thermostat looks like.
DTC P0128 means "Coolant temperature below thermostat regulating temperature."
The most common cause of this code is a stuck open thermostat. When a thermostat gets stuck in the open position the coolant flows freely through the radiator. This prevents the coolant from reaching the temperature that the thermostat is supposed to keep the coolant at. A thermostats opening temperature is usually around 180-190 degrees F. Other causes of this code could be low coolant, faulty wiring going to the coolant temperature sensor, and possibly a faulty coolant temperature sensor. There may be other causes not mentioned here.
Common symptoms are as follows. SES lamp on with code P0128 stored in the PCM, poor heater performance or warm or cool air coming from vents when heat is selected, and something not mentioned in the video, coolant temperature taking a long time to reach normal operating temperature or not reaching operating temperature.
WARNING! Never open your cooling system, wether its removing the radiator cap, taking a hose off, or disconnecting any part related to the cooling system without first allowing the vehicle to cool down. I would suggest letting the vehicle sit for a minimum of 2 hours before doing any repairs or opening the cooling system. Even then take protective measures. Wear safety glasses and protective gloves. Be sure there is no pressure in the cooling system. You can do this by gently squeezing the radiator hose.
The hose should give. If the hose does not give and the hose is hard then give the vehicle more time to cool down. When opening the radiator cap do so slowly and cautiously. Its a good idea to cover the cap with a damp cloth before removing it. Grab the cap with the cloth over the cap and remove it slowly. (not shown in this video.) If the cap wants to shoot off then keep constant pressure on the cap and screw the cap back on. Wait for the vehicle to cool more.
DISCLAIMER
Barbour's Auto Help is not responsible for any damage or personal injury incurred in the process of performing any auto repairs done by you the viewer. Automotive repair is extremely dangerous. Repair your vehicle at your own risk. It is the viewers responsibility to verify all information and procedures as outlined in YOUR REPAIR MANUAL AND OWNERS MANUAL FOR YOUR VEHICLE. Owning and using a repair manual suited for your vehicle is essential for correctly and safely performing ANY repair to your vehicle. Always wear safety glasses and heed all instructions for use applicable to any piece of equipment you may use. Due to circumstances out of the control of Barbours Auto Help, Barbours Auto Help makes no guaranty that by the use of the information given in this video a quality repair will be made. Barbour'sAutoHelp makes no guaranty that the information provided is totally complete, syncronized and accurate. Verify everything using an appropriate repair manual.
Repair your vehicle at your own risk! Barbour's auto help does not guaranty a proper repair using these techniques.
22
views
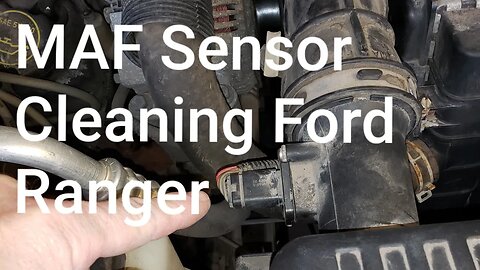
MAF Sensor Cleaning Ford Ranger
In this video I'll take you along and show you how I cleaned my MAF sensor on my 2004 Ford Ranger 3.0L. This is a very simple procedure that involves taking the MAF sensor out and spraying MAF sensor cleaner into the sensor to clean the parts inside.
Note: ONLY MAF sensor cleaner should be used to clean a MAF sensor. Consult your parts pro if you have any question about what MAF sensor cleaner is. Be sure to read the instructions on the can before using. Only use the product you purchase as directed by the manufacturer of that product. You should not have to spray an inordinate amount of MAF sensor cleaner on your MAF sensor in order to clean it. (I never really use any more that the amount I used in the video).
ALWAYS WEAR SAFETY GLASSES AND PROTECTIVE GLOVES WHEN HANDLING CHEMICALS AND WHEN REPAIRING VEHICLES.
DISCLAIMER
Barbour's Auto Help is not responsible for any damage or personal injury incurred in the process of performing any auto repairs done by you the viewer. Automotive repair is extremely dangerous. Repair your vehicle at your own risk. It is the viewers responsibility to verify all information and procedures as outlined in YOUR REPAIR MANUAL AND OWNERS MANUAL FOR YOUR VEHICLE. Owning and using a repair manual suited for your vehicle is essential for correctly and safely performing ANY repair to your vehicle. Always wear safety glasses and heed all instructions for use applicable to any piece of equipment you may use. Due to circumstances out of the control of Barbours Auto Help, Barbours Auto Help makes no guaranty that by the use of the information given in this video a quality repair will be made. Barbour'sAutoHelp makes no guaranty that the information provided is totally complete, syncronized and accurate. Verify everything using an appropriate repair manual.
Repair your vehicle at your own risk! Barbour's auto help does not guaranty a proper repair using these techniques.
10
views
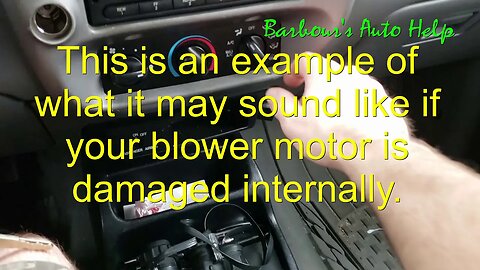
Noise A Bad Blower Motor May Make
In this video I have a great example of what it may sound like if your blower motor is damaged internally. The blower motor that's making the noise in this video likely has a bad bearing. Notice the noise comes and goes depending upon weather the blower motor is turned on or off. The pitch of the noise changes noticeably with the speed of the blower motor.
Please note: This is only and example of what it may sound like when a blower is damaged internally. Its been my experience that blower motors may make different noises when failing and in some instances they may not make noise at all. I make no guarantee that if you hear a similar noise under the same conditions on your vehicle that the blower motor is definitely faulty. You may need a technician to confirm that your blower motor is faulty. This is only an example of what it MAY sound like if your blower motor is damaged internally.
2
views
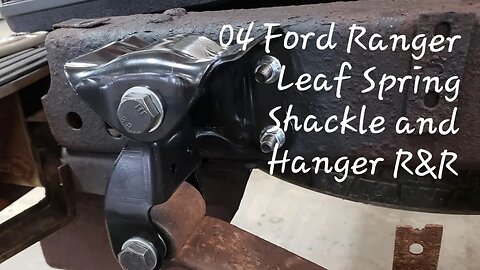
How I Replace My Leaf Spring Hangers and Shackles on My 04 Ford Ranger
In this video I share a few things that I learned in the process of replacing my leaf spring hangers and shackles on my 04 Ford Ranger 3.0L. Its very common for leaf spring hangers and shackles to rust out on ford rangers, especially if the vehicle is driven in the north where salt is used on the roads in the winter time.
Note: this video, while it does describe in some detail how to do this job, does not contain all the information you may need to do this job properly and safely. As always, read the instructions provided by any part you may purchase for your vehicle. Also, It is essential to use an appropriate repair manual. Always torque your nuts and bolts down to specification. I did not share torque specifications in this video. You will need a manual for that information.
Also, though I mentioned that the vehicle will need to be lifted and supported in the rear I did not go into detail on how to do this safely and properly. You will need to get that information elsewhere. Unfortunately, I do not have a video on that.
DISCLAIMER
Barbour's Auto Help is not responsible for any damage or personal injury incurred in the process of performing any auto repairs done by you the viewer. Automotive repair is extremely dangerous. Repair your vehicle at your own risk. It is the viewers responsibility to verify all information and procedures as outlined in YOUR REPAIR MANUAL AND OWNERS MANUAL FOR YOUR VEHICLE. Owning and using a repair manual suited for your vehicle is essential for correctly and safely performing ANY repair to your vehicle. Always wear safety glasses and heed all instructions for use applicable to any piece of equipment you may use. Due to circumstances out of the control of Barbours Auto Help, Barbours Auto Help makes no guaranty that by the use of the information given in this video a quality repair will be made. Barbour'sAutoHelp makes no guaranty that the information provided is totally complete, syncronized and accurate. Verify everything using an appropriate repair manual.
Repair your vehicle at your own risk! Barbour's auto help does not guaranty a proper repair using these techniques.
4
views
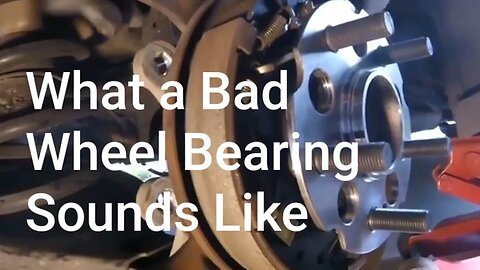
What a Bad Wheel Bearing Sounds Like
This is what a bad wheel bearing sounds like. Please be aware however, that there are other components on your vehicle that can cause similar noises.
Here is a link to that video... https://youtu.be/mWZIaQDUzD8
Created with MAGIX Movie Edit Pro 2016
2
views

What Faulty Heating and Air Conditioning Actuator Sounds Like
In this video you'll see and hear a great example of what a faulty heating and air condition actuator sounds like. The particular actuator that is faulty in this video is a recirculation door actuator. You'll notice is makes a popping noise when it is commanded. The popping will persist for a moment. Of coarse the actuator does not achieve the commanded position. Though only the recirculation door actuator is featured in the video other actuators in the heating and a/c system often fail in a similar fashion.
Note: The failure featured in this video only gives an example of one way an actuator can fail. Sometimes a faulty actuator can fail without making any noise. Its been my experience that GM, Ford, and Chrysler use actuators that can fail in the manner shown in the video. It is possible that other manufacturers use blend door actuators that fail similarly but I do not have experience with those.
Also, while this video gives an example of what a faulty actuator sounds like it is not necessarily a how to video to properly diagnose a faulty actuator. Its just an example of what it may sound like and I do not guaranty that if you here this noise in your vehicle that you have a faulty actuator. Further diagnosis is needed to pinpoint your problem.
4
views
CV Axle Replacement 05 Honda Odyssey
In this video I replace the CV axles on my 2005 Honda Odyssey. I mostly work on the passenger side and do not show the removal and installation of the drivers side. However, the drivers side doesn't differ from the passenger side too much and I do go over those differences in this video.
While this video is somewhat detailed and does go over the basic steps of axle replacement it is lacking in some respects. For instance: I don't show the removal and installation of the axle seal on the drivers side or the removal and installation of the bearing seal on the passenger side (I don't believe this seal is serviceable apart from the carrier bearing). I also, do not show the removal and installation of the circlips and I do not provide torque specifications. You gotta have a repair manual.
If you chose not to replace your axle seals I would suggest using great care not to damage the seals when removing and installing your cv axles. If the seal is grazed or stabbed by the cv axles then the seal could be damaged. Also, check for leaks at the axle seal a week or two after replacing the axles. Repair leaks.
You may loose transmission fluid when replacing the axles. Check and top off your fluid using the procedure outlined in a reputable repair manual for your vehicle. If the fluid is low transmission damage could result. So be sure it the fluid level is correct after the repair.
⚠️ At the 8:02 mark in the video. Use care not to stretch rubber brake hose between the strut and body while removing axle from wheel bearing. Damage an occur.
*Replace all fasteners. Use new cotter pins.*
A note on beating the CV axle out of the hub bearing: I used a metal hammer in this situation. But, a plastic hammer is actually recommended as a plastic hammer will not cause damage to the lug nuts or the surfaces of the wheel bearing. If a metal hammer is used, and in some situations a metal hammer will have to be used, extreme care should be taken not to hit anything other than the cv axle. Damaging other components could result in improper mating and installation which, in a worst case scenario, could result in your tire falling off. If a lip is created, by impact with a hammer, on the bearing surface where the rim fits over it, it could result in the wheel working it's self loose over time. Note there are probably other scenarios I cannot predict that can occur as a result of damage caused by a hammer.
Also, a note of the method I used to tighten down my axle nut using the pry bar through the lug studs, this method could potentially be dangerous as the pry bar could slip off. The axle nut requires lot of torque so a lot of force will need to be used to tighten this nut. If the pry bar slips then all that "static" force is going to be transformed into "kinetic" energy. In other works you could bust your knuckles, fall and hurt yourself(if you are pushing down on the torque wrench like I am). I should not have been pushing down on the torque wrench. I've always been taught that it is safer to pull a wrench than to push a wrench. I would advise pulling he torque wrench. Either way, do this at your own risk. Be careful.
Note: In regard to the method shown to separate the outer tie rod end. It is not recommended to use this method. There is a special tool made for this called an "outer tie rod end separator". Using this tool would reduce the risk of damaging your tie rode end. link video showing this tool: https://youtu.be/TYIDzXxeNwk
If you do not own this tool and can't afford it the method shown in the next video is the next best thing. : https://youtu.be/LDsci-izhhc
Vibration diagnosis video link:
https://youtu.be/OyXtBqExkec
DISCLAIMER
Barbour's Auto Help is not responsible for any damage or personal injury incurred in the process of performing any auto repairs done by you the viewer. Automotive repair is extremely dangerous. Repair your vehicle at your own risk. It is the viewers responsibility to verify all information and procedures as outlined in YOUR REPAIR MANUAL AND OWNERS MANUAL FOR YOUR VEHICLE. Owning and using a repair manual suited for your vehicle is essential for correctly and safely performing ANY repair to your vehicle. Always wear safety glasses and heed all instructions for use applicable to any piece of equipment you may use. Due to circumstances out of the control of Barbours Auto Help, Barbours Auto Help makes no guaranty that by the use of the information given in this video a quality repair will be made. Barbour'sAutoHelp makes no guaranty that the information provided is totally complete, syncronized and accurate. Verify everything using an appropriate repair manual.
Repair your vehicle at your own risk! Barbour's auto help does not guaranty a proper repair using these techniques.
Zombie Rock by Audionautix is licensed under a Creative Commons Attribution license (https://creativecommons.org/licenses/by/4.0/)
Artist: http://audionautix.com/
66
views
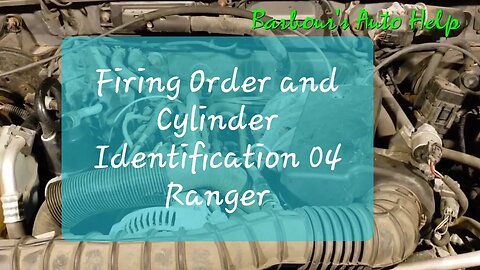
Firing Order and Cylinder Identification 04 Ford Ranger 3.0L
In this video I'll go over the firing order and cylinder identification and wire routing on an 04 Ford Ranger 3.0L.
The cylinder identification is (starting on the passenger side front of the engine and going back) 1/2/3 and (starting on the front driver side of the engine and going back ) 4/5/6.
The firing order is 1-4-2-5-3-6.
The above info can be found with a Google search.
The ignition wires are routed from the coil to the spark plugs. The ignition coil pack is numbered as shown in the video. The numbers on the coil pack corresponds to the particular cylinder that each coil tower fires . The wires should be connected to the coil towers. The opposite end of each wire should connect to the spark plug that is located in the cylinder indicated by the number on the coil.
Note: If you have a misfire, do not continue let the vehicle run in this condition. Driving or letting your vehicle run with a misfire can damage your catalytic converters. When a vehicle has an ignition misfire it allows raw fuel to enter into the exhaust. This will burn up the catalytic converter. Also, in rare instances it is possible that driving or running the vehicle with a misfire could damage the engine mechanically.
DISCLAIMER
Barbour's Auto Help is not responsible for any damage or personal injury incurred in the process of performing any auto repairs done by you the viewer. Automotive repair is extremely dangerous. Repair your vehicle at your own risk. It is the viewers responsibility to verify all information and procedures as outlined in YOUR REPAIR MANUAL AND OWNERS MANUAL FOR YOUR VEHICLE. Owning and using a repair manual suited for your vehicle is essential for correctly and safely performing ANY repair to your vehicle. Always wear safety glasses and heed all instructions for use applicable to any piece of equipment you may use. Due to circumstances out of the control of Barbours Auto Help, Barbours Auto Help makes no guaranty that by the use of the information given in this video a quality repair will be made. Barbour'sAutoHelp makes no guaranty that the information provided is totally complete, syncronized and accurate. Verify everything using an appropriate repair manual. Follow the repair manual over this videos content.
7
views
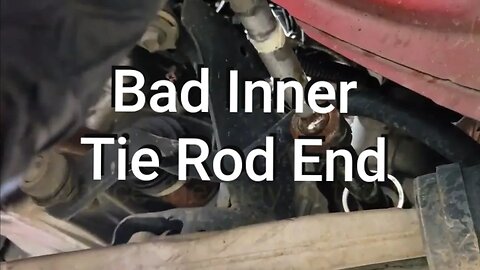
What a Bad Inner Tie Rod End Looks Like
In this video I'll show you an example of what a bad inner tie rod end looks like with the boot removed. I compare it to a good inner tie rod end to show the difference. Inner tie rod ends should not have any play in the ball socket. The bad inner tie rod end shown in the video is very bad. However, if the inner tie rod end ball socket has any play in it it should be replaced.
4
views

Serpentine Belt Replacement 05 Honda Odyssey 3.5L
In this video I'll take you along as I go over the process of replacing the serpentine belt on an 05 Honda Odyssey 3.5L. This is a relatively simple job but, it can be difficult as the the working area is very tight and the tensioner can seem to be difficult to move. The tensioner used is not a typical spring loaded tensioner. You'll need to take your time when moving the tensioner. Constant pressure is key. You'll notice that the tensioner will slowly move. Just take your time.
Note: The technique used at the end to install the belt where I used a jack handle to extend the trow of the ratchet is not the correct way to use a ratchet. Use this technique at your own risk. Damage to tools may occur. I would actually recommend using a serpentine belt tool for this job.
Also, at about the 3:50 make I actually called the top "dummy nut" a fake bolt. I meant to say "dummy nut" and not fake bolt. Just to be clear. I'm sure you understood that though.
DISCLAIMER
Barbour's Auto Help is not responsible for any damage or personal injury incurred in the process of performing any auto repairs done by you the viewer. Automotive repair is extremely dangerous. Repair your vehicle at your own risk. It is the viewers responsibility to verify all information and procedures as outlined in YOUR REPAIR MANUAL AND OWNERS MANUAL FOR YOUR VEHICLE. Owning and using a repair manual suited for your vehicle is essential for correctly and safely performing ANY repair to your vehicle. Always wear safety glasses and heed all instructions for use applicable to any piece of equipment you may use. Due to circumstances out of the control of Barbours Auto Help, Barbours Auto Help makes no guaranty that by the use of the information given in this video a quality repair will be made. Barbour'sAutoHelp makes no guaranty that the information provided is totally complete, syncronized and accurate. Verify everything using an appropriate repair manual. Follow the repair manual over this videos content. You can do it. Do it right and do it safely.
9
views
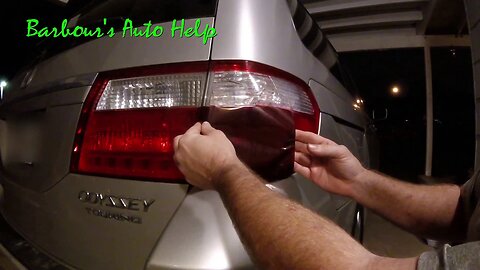
Tail Lamp Lens Replacement 05 Honda Odyssey
In this video I show you how to replace a tail lamp lens on an 05 Honda Odyssey. The particular tail lamp lens is the far right hand tail lamp but the far left is similar and the information in this video can be used to aid in replacing the left side.
Note: toward the end of the video when tightening the tail lamp lens bolts I put a warning up to warn you against over tightening the bolts. Using a hand ratchet instead of the tool shown in this video will help in preventing you from over tightening these bolts. Torque specifications are not given in this video. A repair manual is needed for this.
DISCLAIMER
Barbour's Auto Help is not responsible for any damage or personal injury incurred in the process of performing any auto repairs done by you the viewer. Automotive repair is extremely dangerous. Repair your vehicle at your own risk. It is the viewers responsibility to verify all information and procedures as outlined in YOUR REPAIR MANUAL AND OWNERS MANUAL FOR YOUR VEHICLE. Owning and using a repair manual suited for your vehicle is essential for correctly and safely performing ANY repair or diagnostic to your vehicle. Always wear safety glasses and heed all instructions for use applicable to any piece of equipment you may use. Due to circumstances out of the control of Barbours Auto Help, Barbours Auto Help makes no guaranty that by the use of the information given in this video a quality repair will be made. Barbour'sAutoHelp makes no guaranty that the information provided is totally complete, syncronized and accurate. Verify everything using an appropriate repair manual. Follow the repair manual over this videos content. You can do it. Do it right and do it safely.
5
views
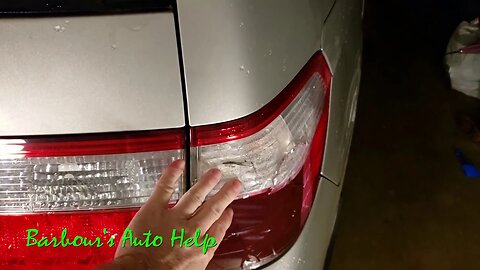
Cheap Temporary Fix For Cracked Tail Lamp
In this video I'll show you how to cheaply temporarily fix a busted tail lamp by using tail lamp tape. This is especially useful if at the time you find out that your tail lamp is busted you don't have enough money to replace it. The repair that you see me doing in this video is not my best work. I actually had my tail lamp assembly tapped up very well before and it has held up until the making of this video. The repair you see me making in this video was only meant to hold up for a few days as I had a new tail lamp assembly on the way. I purchased the tail lamp tape shown in the video for just a few bucks.
Note: In some states you may get a ticket if your tail lamp assembly is busted. Its important that the intended color of the tail lamp shine out when the brakes are applied. (in other words you want your brake lights to be red, not white). Make sure you cover your cracks completely with the correct color tape and follow the instruction provided by the manufacturer of the tail lamp tape you purchase.
DISCLAIMER
Barbour's Auto Help is not responsible for any damage or personal injury incurred in the process of performing any auto repairs done by you the viewer. Automotive repair is extremely dangerous. Repair your vehicle at your own risk. It is the viewers responsibility to verify all information and procedures as outlined in YOUR REPAIR MANUAL AND OWNERS MANUAL FOR YOUR VEHICLE. Owning and using a repair manual suited for your vehicle is essential for correctly and safely performing ANY repair or diagnostic to your vehicle. Always wear safety glasses and heed all instructions for use applicable to any piece of equipment you may use. Due to circumstances out of the control of Barbours Auto Help, Barbours Auto Help makes no guarantee that by the use of the information given in this video a quality repair will be made. Barbour'sAutoHelp makes no guarantee that the information provided is totally complete, syncronized and accurate. Verify everything using an appropriate repair manual. Follow the repair manual over this videos content. You can do it. Do it right and do it safely.
4
views
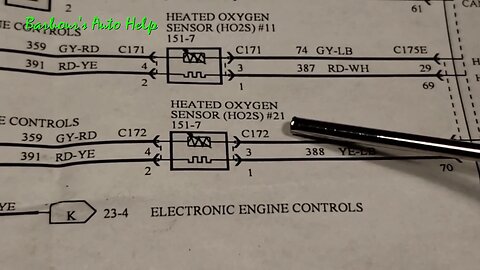
How to Test Resistance of O2 Sensor Heater
In this video I'll show you how to test the resistance of an O2 sensor heater using a digital volt/ ohm meter. The O2 sensor featured in this video is a 3 wire O2 sensor. However, the information is applicable for testing 4 wire O2 sensors also. The process is very simple. First, you have to identify the two wires going to the heater of the O2 sensor. Once these wires are identified by color you'll need to find out what pins the wires go to on the harness side of the O2 sensor connector. Then you disconnect the O2 sensor connector and prob the pins on the component side of the connector that the pins of the two heater circuit wires connect to. Take your resistance reading and compare it to the specification in your manual.
The O2 sensor heater is the component inside the oxygen sensor responsible for heating the sensor up more quickly than the exhaust would. Engineers found that by adding a heater to an oxygen sensor the sensor heats up more quickly. Of course the sensor only operates correctly at a very high temperature. So, the more quickly the sensor is heated up the more quickly the sensor can be used to accurately monitor the exhaust gas. This helps in getting the vehicle into "closed loop" more quickly and improves fuel economy and emissions.
Note: When probing pins inside connectors use care not to damage pins. Placing probes that are too large into connectors could spread female pins and cause a poor pin fitment condition. If probing a female pin be sure the probe is the same sized as the male pin that connects to the female pin. This will insure you don't cause damage to the pin.
Also, not every wire schematic will look like the one shown in the video. You'll need to read and understand your manual and wire schematic for the vehicle you are working on in order to identify the correct wires to prob.
DISCLAIMER
Barbour's Auto Help is not responsible for any damage or personal injury incurred in the process of performing any auto repairs done by you the viewer. Automotive repair is extremely dangerous. Repair your vehicle at your own risk. It is the viewers responsibility to verify all information and procedures as outlined in YOUR REPAIR MANUAL AND OWNERS MANUAL FOR YOUR VEHICLE. Owning and using a repair manual suited for your vehicle is essential for correctly and safely performing ANY repair or diagnostic to your vehicle. Always wear safety glasses and heed all instructions for use applicable to any piece of equipment you may use. Due to circumstances out of the control of Barbours Auto Help, Barbours Auto Help makes no guaranty that by the use of the information given in this video a quality repair will be made. Barbour'sAutoHelp makes no guaranty that the information provided is totally complete, syncronized and accurate. Verify everything using an appropriate repair manual. Follow the repair manual over this videos content. You can do it. Do it right and do it safely.
Repair your vehicle at your own risk! Barbour's auto help does not guaranty a proper diagnosis using these techniques.
20
views
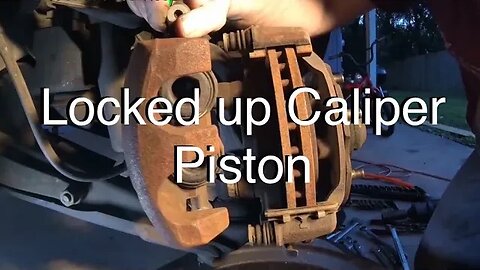
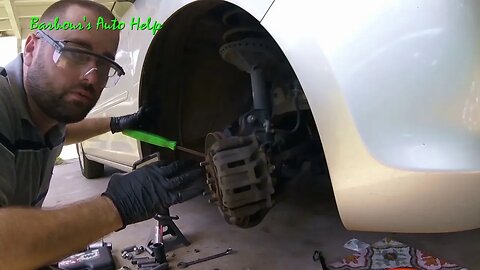
How I Diagnosed a Seized Caliper Piston
In this video I share my experience with a locked up caliper piston and how I diagnosed it on my 98 Nissan Frontier. While the vehicle featured in the video is a Frontier, caliper designs and points of failure are similar between most makes and models. (Always verify that any information in this video is applicable to the vehicle you are working on by using an appropriate repair manual.) There are a few methods I use in this video that may be helpful to you in your attempt to diagnose the vehicle you are working on. I did make a "more" comprehensive video going into better detail of how to diagnose locking up brakes. You are welcome to watch it. I'll have the link below. However, the video you are currently watching actually features a failed caliper. So, this video will be of help too.
!!Warning!! If your brakes are locked up its going to be very hot just after driving. The whole area that is affected is going to be very hot. Let the vehicle cool down before attempting to diagnose the problem. Don't touch a hot rotor or any hot brake component! Injury can occur. An infrared thermometer would be suggested to verify that the area is cool enough to work on.
Special notes: Some calipers have twist in pistons and will have to be collapsed in using a different method than the one shown in this video. Also, (Very Important) in the process of diagnosing you problem you may have to open the brake system (i.e. opening a bleeder or taking a line loose). If this is the case then you must make sure all the air is removed from the system before driving the vehicle. Brakes do not operate properly with air in the system. Also, of course, any loosened item will have to be tightened back up.
Here is a link to a video where I go into more detail on how to diagnose locked up brakes.
https://youtu.be/1Mor9N9Rv2w
Here is a link to a video that features a locked up brake caliper caused by a clogged brake hose.
https://youtu.be/kD8sBecArkE
Here is a link to a video showing 4 different ways to collapse a brake caliper.
https://youtu.be/3RYG0ymWEFE
How to replace front calipers, rotors, pads and hoses
https://youtu.be/8i245Y1Nu18
Here is a link to a video showing how to collapse a twist in caliper piston. (Usually used on the rear for parking brake applications)
https://youtu.be/hQfV0b75hgI
How to bleed brakes. (Note: special equipment may be needed for some cars which is not shown in the linked video.)
https://youtu.be/6DeuMPgQDrE
Disclaimer:
Barbour's Auto Help is not responsible for any damage or personal injury incurred in the process of performing any auto repairs done by you the viewer. Auto repair and diagnostics are very dangerous.
Repair and diagnose your vehicle at your own risk. It is the viewers responsibility to verify all information and procedures as outlined in YOUR REPAIR MANUAL AND OWNERS MANUAL FOR YOUR VEHICLE. Owning and using a repair manual suited for your vehicle is essential for correctly and safely performing ANY repair to your vehicle. Always wear safety glasses and heed all instructions for use applicable to any piece of equipment you may use. Also, I make no guarantee that the information given in this video is completely accurate for all situations and applications. I also make no guarantee that you will make a proper diagnosis for your problem by using this video. Use the information found in this video at your own risk.
24
views
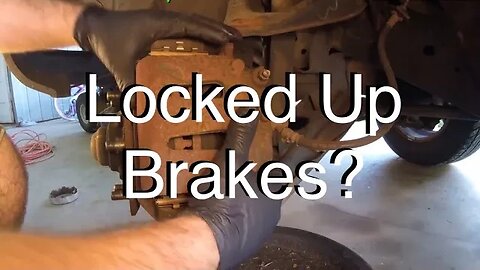
How To Diagnose a Locked Up Brake Caliper and/or Dragging Brakes
In this video I'll show you how to diagnose a locked up brake caliper and/or dragging brakes for one wheel. Usually, when brakes lock up on one wheel its caused by either a locked up caliper piston, stuck caliper slide pins, or a clogged flex hose going to the caliper. This video will give information on how to test each of these components in order to get a better idea of what is causing your brake problem.
!!Warning!! If your brakes are locked up its going to be very hot just after driving. The whole area that is affected is going to be very hot. Let the vehicle cool down before attempting to diagnose the problem. Don't touch a hot rotor or any hot brake component! Injury can occur. An infrared thermometer would be suggested to verify that the area is cool enough to work on.
Note: This video is designed to only diagnose brakes locked up on one single wheel. If your brakes are locking up on more than one wheel this video may help you but may not help you with all possible causes of your symptom.
Note: when collapsing a caliper piston on a caliper with more than one piston as shown at the 2:55 mark use care not to allow the other piston or pistons (calipers can come equipped with one, two, or even more pistons) to be pushed out by the build up of pressure inside the caliper. Notice the brake pad in the video is being used to prevent this from happening. If the opposite piston were to start to move outward, when using the method shown, then try bracing the piston using some other method to prevent it from coming out. You don't want your piston to be pushed out all the way. This can cause damage and brake fluid leaks.
Also, if any air has gotten into the system during testing, which is entirely possible, then you will need to bleed the system of air. And, it should go without saying, but I’ll say it. Everything that was loosened or taken off during testing will need to be reinstalled and tightened down properly.
At about the 1:59-2:35 mark I discus how the piston is supposed to retract back into the piston bore because of a seal inside the piston bore. If the piston is seized up on the bore then this seal will not be able to pull the piston back. The test we perform by compression the piston back into the caliper is meant to check to see if the piston is seized in the caliper bore which would prevent the seal from pulling the piston back....Just in case that needed clarification.
Also, for rear brakes, problems with the parking brake system could lead to rear brakes locking up on one or both sides of the vehicle. This video is not meant to aid in diagnosis of such situations. There is also a very small chance that air in the brake system could cause a caliper to lock up. This is very rare.... so rare that I've never seen it. This video is also not designed to diagnose a case such as this.
This video is also not intended to assist in diagnosis of drum brakes.
Here are links to other great videos that may help you!
Four Ways to Collapse a Caliper Piston
https://youtu.be/3RYG0ymWEFE
How to collapse/ compress a twist in rear brake caliper
https://youtu.be/hQfV0b75hgI
How to bleed brakes using the buddy system
https://youtu.be/6DeuMPgQDrE
Here is a link to a video that features a locked up caliper caused by a clogged flex hose: https://youtu.be/kD8sBecArkE
Disclaimer:
Barbour's Auto Help is not responsible for any damage or personal injury incurred in the process of performing any auto repairs done by you the viewer. Auto repair and diagnostics are very dangerous. Repair and diagnose your vehicle at your own risk. It is the viewers responsibility to verify all information and procedures as outlined in YOUR REPAIR MANUAL AND OWNERS MANUAL FOR YOUR VEHICLE. Owning and using a repair manual suited for your vehicle is essential for correctly and safely performing ANY repair to your vehicle. Always wear safety glasses and heed all instructions for use applicable to any piece of equipment you may use. Also, I make no guarantee that the information given in this video is completely accurate for all situations and applications. I also make no guarantee that you will make a proper diagnosis for your problem by using this video. Use the information found in this video at your own risk.
36
views
Engine Going Through The Throes Of Death
This video is of an engine running that is on its last leg. The vehicle actually wouldn't start when it arrived. Once the engine was freed up this is what it sounded like. Obviously it has a knocking rod. It also sounds like it has a spun bearing. This is where the chirping sound comes in. Yet another great example of what it sounds like.
This video is not intended to be used as an instructional video. Its just an example of what a knocking rod bearing sounds like and what a spun bearing sounds like.
2
views