

Inside Failed Evap Canister 05 Hyundai Sonata
In this video I take apart a failed evap canister to see what and how it failed. This canister was off of an 05 Hyundai Sonata. Once the canister was taken apart it was clear what part failed. It was the screen that keeps the charcoal pellets from getting out. A hole formed in it and allowed the pellets to enter the vent tube going to the fuel filler neck.
Here is a link to the video discussing the repair made to the Sonata.
https://youtu.be/UZhbxfiBfc8
Note: This is not a repair video or a "how to" video. It is solely to be used as information. Do not attempt to disassemble one of these. Fuel vapor is extremely flammable.
DISCLAIMER
Barbour's Auto Help is not responsible for any damage or personal injury incurred in the process of performing any auto repairs done by you the viewer. Automotive repair is extremely dangerous. Repair your vehicle at your own risk. It is the viewers responsibility to verify all information and procedures as outlined in YOUR REPAIR MANUAL AND OWNERS MANUAL FOR YOUR VEHICLE. Owning and using a repair manual suited for your vehicle is essential for correctly and safely performing ANY repair to your vehicle. Always wear safety glasses and heed all instructions for use applicable to any piece of equipment you may use. Due to circumstances out of the control of Barbours Auto Help, Barbours Auto Help makes no guarantee that by the use of the information given in this video a quality repair will be made. Barbour'sAutoHelp makes no guarantee that the information provided is totally complete, syncronized and accurate. Verify everything using an appropriate repair manual.
4
views
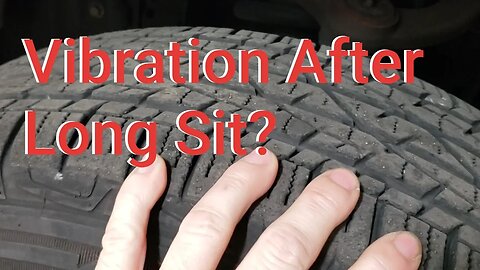
Two Common Causes of Vibration After Vehicle Sits
In this video I go over two common causes of a vibration, similar to a wheel vibration at high way speeds or slower, that develops on a vehicle that has been sitting for a long time and the repair. The causes are flat spotting of a tire or tires and rust build up on the rotors. The repair for flat spotting varies. Some times you can get rid of flat spotting just by driving the vehicle for a long distance. Other times the flat spotting cannot be worked out and the affected tire or tires will have to be replaced. Rust build up can usually be taken care of by aggressively braking. ( aggressive braking that is suggested is not recklessly slamming on brakes causing you to loose control. I just recommend braking a more aggressively than you normally do but in a safe way. It is recommended to do this on a clear and dry road.) Usually 10-20 aggressive stops will do. Sometimes it takes more braking to get rid of the rust. If this does not work then turning the affected rotor or rotors may be required.
CORRECTION: At about the 1:10 mark I make the commend that the flat spot shows up every 180 degrees. It's actually every 360 degrees that the flat spot shows. Pardon me.
Warning: There is a difference between a tires that is flat spotted and a tire that has a belt separating. This video does not compare and contrast these two types of tire concerns. This video also gives a very vague explanation of a flat spotted tire. It is recommended that further research by the viewer be done to insure that at tire that has a belt separating is not confused with a tire that is flat spotted. It would also be advised to do research on all sorts of tire failure so that you are informed as to weather or not your vehicle is safe to drive. DO NOT DRIVE A VEHICLE THAT HAS A TIRE THAT IS UNSAFE TO DRIVE ON. A TIRE THAT HAS A BELT COMING APART IS NOT SAFE TO DRIVE ON. ALSO, BE SURE THAT NO OTHER UNSAFE SCENARIOS EXIST BEFORE DRIVING THE VEHICLE.
DISCLAIMER
Barbour's Auto Help is not responsible for any damage or personal injury incurred in the process of performing any auto repairs done by you the viewer. Automotive repair is extremely dangerous. Repair your vehicle at your own risk. It is the viewers responsibility to verify all information and procedures as outlined in YOUR REPAIR MANUAL AND OWNERS MANUAL FOR YOUR VEHICLE. Owning and using a repair manual suited for your vehicle is essential for correctly and safely performing ANY repair to your vehicle. Always wear safety glasses and heed all instructions for use applicable to any piece of equipment you may use. Due to circumstances out of the control of Barbours Auto Help, Barbours Auto Help makes no guarantee that by the use of the information given in this video a quality repair will be made. Barbour'sAutoHelp makes no guarantee that the information provided is totally complete, syncronized and accurate. Verify everything using an appropriate repair manual.
Repair your vehicle at your own risk! Barbour's auto help does not guarantee a proper repair using these techniques.
22
views
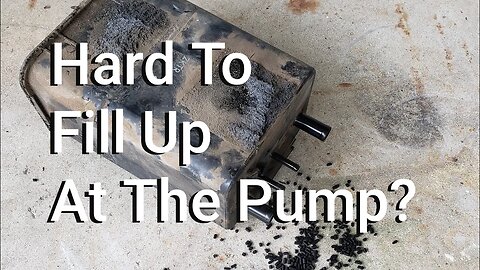
Hyundai Hard To Fill Up Repair Review
In this video I review a repair that I performed on an 05 Hyundai Sonata 2.7L. The repair was the replacement of the evaporative emissions charcoal canister (or vapor canister) and removing charcoal pellets, that came out of the damaged charcoal canister, from the fuel filler neck vent tube. These charcoal pellets that were clogging the vent tube were making is very difficult for the owner of the vehicle to fill his gas tank. He complained that when filling up the fuel nozzle would shut off repeatedly if he pumped the fuel too quickly. The clog was preventing his fuel tank from venting while being filled with fuel. this caused the fuel that was being feed into the filler neck to back up and make contact with the fuel nozzle causing it to shut off.
In this video I also explain why I think the charcoal canister came apart clogging the fuel filler neck vent tube. I believe it was caused by the owner over filling the fuel tank. The vehicle owner explained that he had a habit of over filling his fuel tank. He said that he would continue to add fuel even after the fuel nozzle shut off because his tank was full. This caused liquid fuel to be introduced into the charcoal canister causing the canister to become damaged as the canister is not designed to handle liquid fuel. (moral of the story is if you are overfilling your fuel tank you may want to stop).
Note: If this happens to you it is important that you inspect the other lines of the evap system to insure that none of the charcoal pellets got into them. While I only had pellets in the fuel filler neck vent tube it is possible that they can get into the rest of the system. If this is the case they must be removed.
Note: This video is not a "how to" video. Rather it is intended to bring light to a common issue that certain Hyundai vehicles have with charcoal canister coming apart. As mentioned in the video I am not sure what particular years are affected by this problem. I'm also not sure of all the models that are affected. However, this is easy to check for and it will be pretty obvious that this is your problem if you see loose pellets as shown in the video.
Also, it's fair to mention that the Hyundai mentioned in the video did not have any diagnostic trouble codes. There are other ways, other than overfilling your fuel tank, that liquid fuel can enter into charcoal canister. (A STUCK OPEN EVAP PURGE VALVE IS ANOTHER WAY. STUCK OPEN EVAP PURGE VALVES ARE COMMON TOO.) While I said in the video that I suspected one thing only when the owner of the vehicle told me what was happening I did not mean that this is the only thing that could cause this symptom or the only thing that can cause this problem. A full and proper diagnosis of the evaporative emission system is recommended before performing any repair to the system. THIS VIDEO IS NOT DESIGNED TO EDUCATE THE VIEWER ON HOW TO FULLY DIAGNOSE AN EVAPORATIVE EMISSIONS SYSTEM.
IF THE EVAPORATORATIVE EMISSION SYSTEM IS FOUND TO BE IN GOOD WORKING ORDER AND YOU KNOW YOU OVERFILL YOUR TANK AT THE PUMP THEN THE REPAIR EXPLAINED IN THE VIDEO WOULD PROBABLY WORK OUT FINE FOR YOU.
IT IS POSSIBLE THAT THESE EVAP CANISTERS ARE JUST PRONE TO COME APART LIKE THIS WITHOUT OVER FILLING OR PROBLEMS WITH THE EVAP SYSTEM CAUSING LIQUID FUEL TO ENTER THE CANISTER. THE THEORY EXPRESSED IN THE VIDEO IS JUST THAT.... A THEORY.
DISCLAIMER
Barbour's Auto Help is not responsible for any damage or personal injury incurred in the process of performing any auto repairs done by you the viewer. Automotive repair is extremely dangerous. Repair your vehicle at your own risk. It is the viewers responsibility to verify all information and procedures as outlined in YOUR REPAIR MANUAL AND OWNERS MANUAL FOR YOUR VEHICLE. Owning and using a repair manual suited for your vehicle is essential for correctly and safely performing ANY repair to your vehicle. Always wear safety glasses and heed all instructions for use applicable to any piece of equipment you may use. Due to circumstances out of the control of Barbours Auto Help, Barbours Auto Help makes no guarantee that by the use of the information given in this video a quality repair will be made. Barbour'sAutoHelp makes no guarantee that the information provided is totally complete, syncronized and accurate. Verify everything using an appropriate repair manual.
Repair your vehicle at your own risk! Barbour's auto help does not guarantee a proper repair using these techniques.
18
views
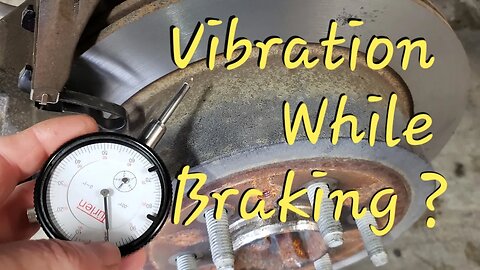
Vibration While Braking? (How I diagnose warped rotors)
In my estimation warped up brake rotors are usually the cause of a vibration while braking. It is very common and I deal with it as a technician regularly. In this video I I first explain how I diagnose warped up brake rotors using "guesstamation". Do note that the first method shown does use a little guess work but is usually pretty accurate when it comes to diagnosing a vibration caused by warped rotors. The second method I show is more accurate and is the "text book" way to confirm a warped rotor.
Once it is determined that the vehicle has a vibration while braking it will then be necessary to figure out weather the vibration is caused by warped front rotors or warped rear rotors. I do this by paying attention to the steering wheel while braking. Usually when the front rotors are warped up it will cause a wobble in the steering wheel while the brakes are applied. Usually when the rear rotors are warped up it will caused a vibration in the seat while the brakes are applied. Once I determine weather the front or the rear rotors are suspect I will then measure the thickness of the rotors to determine if they are able to be turned or not. Once they are measured and it is determined that they are thick enough I will then turn the rotors. Typically it will be very noticeable that a rotor is warped when they are being turned as you can see the wobble of the rotor against the bit of the brake lathe. Once the rotors have been turned I will then measure them again to be sure they are still within specifications. This is my way of addressing warped rotors.
A more accurate way to diagnose warped brake rotors would be to used a dial indicator. Of coarse you will still want to get an idea of which end of the vehicle the vibration is coming from by paying attention to where you feel the vibration as explained before. Once you determine which end of the vehicle the vibration is coming from you would then want to measure the warpage of the rotors that you suspect are warped. If you find the rotors are warped it would then be advised to turn them. (Always measure the thickness of the rotors before and after refinishing them to confirm that they are within specifications.) Note: you can find a specification for warpage or run out in a repair manual. )
As mentioned in the video, a faulty component other than the rotor can cause a false reading when measuring warpage. If you are suspicious that the warpage reading is caused by another component then it would be advised to measure rotor warpage while the rotor is mounted to a brake lathe. This will give you a true warpage measurement of the rotors in suspect.
Note: It is my recommendation that when turning rotors they should always be turned in pairs. i.e. front right and front left or rear right and rear left. It is also my recommendation that the pads be replaced on whichever rotors are turned. This in my opinion reduces the risk of brake squeak and helps the vehicle to have equal and even braking force.
Note: Do not turn rotors passed the specification for thickness outlined in you repair manual.
DISCLAIMER
Barbour's Auto Help is not responsible for any damage or personal injury incurred in the process of performing any auto repairs done by you the viewer. Automotive repair is extremely dangerous. Repair your vehicle at your own risk. It is the viewers responsibility to verify all information and procedures as outlined in YOUR REPAIR MANUAL AND OWNERS MANUAL FOR YOUR VEHICLE. Owning and using a repair manual suited for your vehicle is essential for correctly and safely performing ANY repair or diagnostic to your vehicle. Always wear safety glasses and heed all instructions for use applicable to any piece of equipment you may use. Due to circumstances out of the control of Barbours Auto Help, Barbours Auto Help makes no guaranty that by the use of the information given in this video a quality repair will be made. Barbour'sAutoHelp makes no guaranty that the information provided is totally complete, syncronized and accurate. Verify everything using an appropriate repair manual. Follow the repair manual over this videos content.
Repair your vehicle at your own risk! Barbour's auto help does not guaranty a proper diagnosis or repair using these techniques.
25
views
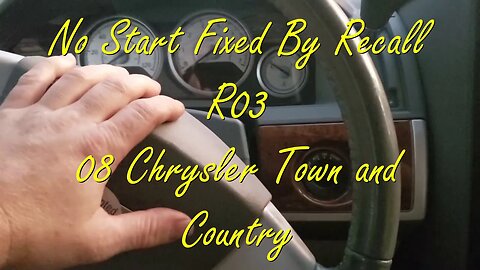
No Crank No Start Fixed By Recall R03 08 Chrysler Town and Country
This video is more of an informational video than a repair video. As mentioned in the video my mother in laws van had a "not start" or actually a "no crank no start" symptom caused by a faulty WIN module or "wireless ignition node" module. After testing some basic things on her vehicle, like battery, starter, and fuses, I came to the conclusion that the issue had to be ignition switch or key related. (albeit, the ignition switch on this vehicle is actually the WIN module and works differently than a regular ignition switch.) After doing some digging I found out that there was a recall, R03, still open for this vehicle. R03 involved the replacement of the WIN module and 2 keys. This service is provided free of charge to applicable vehicles. So, I sent it to the dealer with the hopes that replacing the WIN module would take care of the symptom. (R03 is intended to correct a problem with the key being turned from the "run" position to the "accessory" position due to being bumped. It is not intended to correct a "no crank no start" situation.) Much to my delight, the replacement of the WIN module and keys took care of the symptoms.
Here is a link to the recall. The particulars of the recall are outlined here:
https://www.chrysler.com/universal/webselfservice/pdf/R03.pdf
Give your dealership a call to see if this recall is applicable and is still open on your vehicle. If you have a "no crank no start" symptom on your vehicle a faulty WIN module COULD be the cause. If the recall is open for your vehicle then get the WIN and keys replaced. If it fixed your problem, then great. If not, then you will have to have the vehicle diagnosed to see what the actual cause of the problem is.
If you are having this symptom and the recall is not open on your vehicle or the recall does not apply to your vehicle then the "no crank no start" symptom could still be caused by a faulty WIN module. A proper diagnosis will be needed to confirm what the actual fault is. Repair accordingly.
Note: This symptom can be caused by many things other than a faulty WIN module. A proper diagnosis will be needed to confirm the cause and repair path for your vehicle. I do not in any way imply that replacing the WIN module and keys will fix your vehicle. This video is just meant to share my experience and share information. I wish you well and if you have questions comment bellow.
20
views

Serpentine Belt Replacement 04 Ford Ranger 3.0L
In this video I'll show you how a serpentine belt is replaced on an 04 Ford Ranger 3.0L. This job requires very few tools and is very easy to do. First, disconnect the negative battery clamp from the battery. Then remove the air intake duct from the throttle body and air filter housing. Then take the tension off the belt by applying clock wise torque to the tensioner pulley. Once the belt is loose it can then be removed from the vehicle. Installation is the reverse procedure.
Remember, there is a belt diagram on the vehicle if you forget how the belt is routed after it has been removed. If your vehicle is missing the diagram it would be best to make a drawing of the belt routing before removing the belt.
A note on the method I used by "doubling up" or "coupling" the two wrenches: This is a technique that an old timer taught me back in the day. This is not the correct way to use these tools. It's very easy to bust your knuckles using this method as the wrenches can slip apart. (also, other injuries could occur if the wrenches slip apart. Who knows what could happen?) Be careful, and use this method at your own risk if you choose to do so. There are other ways of doing this. There are tools specifically designed to do this job. If you feel that the method shown in the video would not be a good option for you then I would suggest getting a tool specifically for this job.
DISCLAIMER
Barbour's Auto Help is not responsible for any damage or personal injury incurred in the process of performing any auto repairs done by you the viewer. Automotive repair is extremely dangerous. Repair your vehicle at your own risk. It is the viewers responsibility to verify all information and procedures as outlined in YOUR REPAIR MANUAL AND OWNERS MANUAL FOR YOUR VEHICLE. Owning and using a repair manual suited for your vehicle is essential for correctly and safely performing ANY repair to your vehicle. Always wear safety glasses and heed all instructions for use applicable to any piece of equipment you may use. Due to circumstances out of the control of Barbours Auto Help, Barbours Auto Help makes no guarantee that by the use of the information given in this video a quality repair will be made. Barbour'sAutoHelp makes no guarantee that the information provided is totally complete, syncronized and accurate. Verify everything using an appropriate repair manual.
Repair your vehicle at your own risk! Barbour's auto help does not guarantee a proper repair using these techniques.
Special thanks to my wife for checking my spelling on this video and all my videos. You're the best Babe!
7
views
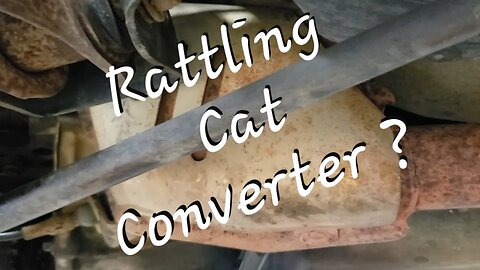
Rattling Catalytic Converter
This is a great example of a noise a catalytic converter may make if it comes apart internally. This is a somewhat common way in which a catalytic converter can fail. However, a catalytic converter dose not have to make noise to be bad. This is just one example and one symptom of a bad catalytic converter.
Note: While this is a somewhat common symptom of a catalytic converter that has come apart inside it is not common for a converter to come apart on its own. There is usually a root cause to why the converter came apart. Usually an ignition misfire is to blame. When an ignition misfire occurs the unburned fuel enters the cat converter and overwhelms it. The catalyst temperature rises above normal operating temperature and causes the catalyst to meld down. There are other things that can cause a catalytic converter to melt down also such as a leaking fuel injector, a faulty O2 sensor, a faulty MAP sensor, and the list goes on. Proper diagnosis and repair of root causes of catalytic converter failure must be address before replacing a catalytic converter or repeat failure could occur.
DISCLAIMER
Barbour's Auto Help is not responsible for any damage or personal injury incurred in the process of performing any auto repairs done by you the viewer. Automotive repair is extremely dangerous. Repair your vehicle at your own risk. It is the viewers responsibility to verify all information and procedures as outlined in YOUR REPAIR MANUAL AND OWNERS MANUAL FOR YOUR VEHICLE. Owning and using a repair manual suited for your vehicle is essential for correctly and safely performing ANY repair to your vehicle. Always wear safety glasses and heed all instructions for use applicable to any piece of equipment you may use. Due to circumstances out of the control of Barbours Auto Help, Barbours Auto Help makes no guarantee that by the use of the information given in this video a quality repair will be made. Barbour'sAutoHelp makes no guarantee that the information provided is totally complete, syncronized and accurate. Verify everything using an appropriate repair manual.
Repair your vehicle at your own risk! Barbour's auto help does not guarantee a proper repair using these techniques.
Special thanks to my wife for checking my spelling on this video and all my videos. You're the best Babe!
16
views
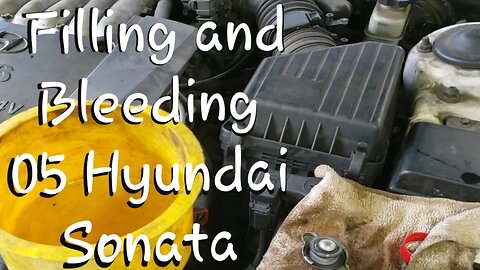
Filling and Bleeding Cooling System 05 Hyundai Sonata
In this video I take you along as I fill and bleed the cooling system on an 05 Hyundai Sonata 2.7L V-6. The method I'm using will requires a "spill free" funnel such as the one shown in the video. Lisle makes this funnel and it is available for ordering online through various sources. Using this funnel allows for excellent and easy removal of air in the cooling system. Apart from using a vacuum fill system this is the best way to fill the cooling system in my opinion.
As mentioned in the video, it's a good idea to drive the vehicle for a bit and then let it sit (turned off) for 1-2 hours to allow the system to cool down and then check and adjust the coolant level again. Fill the radiator all the way to the top. Fill the coolant reservoir/ overflow bottle all the way to the max level indicated on the side of the coolant reservoir. You to not want to fill the coolant reservoir all the way to the top of the fill neck, fill it to the level shown on the side. Coolant goes into the reservoir and goes out. So, if you over fill it and the radiator gets hot it could overflow.
Guys be careful. Use caution when working around the cooling system. Things get very hot and you could very easily get burned especially if you are not paying attention. Always wear safety glasses or goggles. Wear protective gloves also. (Even if I'm not wearing gloves in the video.) YOU TAKE A RISK NO MATTER HOW CAREFUL YOU ARE OF GETTING SERIOUSLY BURNED OR INJURED WHEN PERFORMING AUTOMOTIVE REPAIR. DO SO AT YOUR OWN RISK.
Follow the instructions provided in the spill free funnel kit for proper funnel installation.
Here is a link to a video showing how to use a vacuum filler to bleed and fill a cooling system.
https://youtu.be/1beZZCBUnt0
DISCLAIMER
Barbour's Auto Help is not responsible for any damage or personal injury incurred in the process of performing any auto repairs done by you the viewer. Automotive repair is extremely dangerous. Repair your vehicle at your own risk. It is the viewers responsibility to verify all information and procedures as outlined in YOUR REPAIR MANUAL AND OWNERS MANUAL FOR YOUR VEHICLE. Owning and using a repair manual suited for your vehicle is essential for correctly and safely performing ANY repair to your vehicle. Always wear safety glasses and heed all instructions for use applicable to any piece of equipment you may use. Due to circumstances out of the control of Barbours Auto Help, Barbours Auto Help makes no guarantee that by the use of the information given in this video a quality repair will be made. Barbour'sAutoHelp makes no guarantee that the information provided is totally complete, syncronized and accurate. Verify everything using an appropriate repair manual.
Repair your vehicle at your own risk! Barbour's auto help does not guarantee a proper repair using these techniques.
Special thanks to my wife for checking my spelling on this video and all my videos. You're the best Babe!
19
views
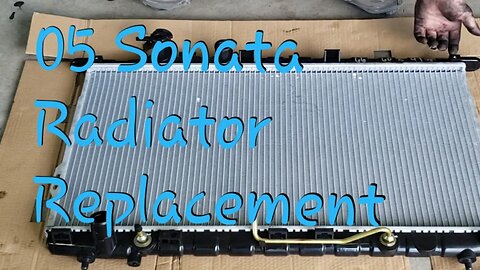
05 Hyundai Sonata 2.7L Radiator Replacement
In this video I'll take you along as I replace a radiator on an 05 Hyundai Sonata 2.7L. The job is pretty simple. I'll show you where all the bolts are located and how to get the old radiator out and install the new one.
Note: Torque specifications are not provided in this video. All fasteners have torque specifications and should be torqued down to specification when installing them with a torque wrench. Reference your repair manual for specifications.
There where many things done "off camera" in this video. Just know, if a bolt comes out it must go back. Replace everything you take off of your vehicle in the same way it was on the vehicle before you took them off. (Hopefully things were correctly installed before you got the the job).
At the 1:45 Mark I mention taking the shield off. While the job can be done without removing it, it would be my suggestion to remove it. It would be very difficult to get to the pepcock without damaging the shield. Also It helps to prevent coolant from splashing all over when draining.
At the 4:25 mark I show the hose clamp off pliers I used to clamp off the transmission cooler lines but did not show the application of them. The use of these pliers are self explanatory, but I'm sure you could find a video on youtube showing how to use them if you need. The application of these pliers helps to keep fluid from constantly leaking from the lines while replacing the radiator. (helps to keep things clean). BE SURE TO REMOVE THEM AFTER THE REPAIR IF YOU APPLIED THEM.
Always check for leaks after the repair including transmission fluid leaks and coolant leaks. Check before and after the vehicle is allowed to run.
***I also noticed that I was a bit of a bad example in this video. I had tools lying on top of my battery. Even though I had a rag there keeping the tools from the posts it's still not good. It's never a good idea to leave tools on top of the battery as the positive and negative post can be shorted out through the tools. This can not only scare the mess out of you but it could also cause a fire. DON'T LEAVE YOUR TOOLS ON TOP OF THE BATTERY.
Here is a link to a video showing how to fill and bleed the system:
https://youtu.be/93aWiO01g0o
Here is another link to a video showing how to vacuum fill the system:
https://youtu.be/1beZZCBUnt0
Here is a link to a video showing how to pressure test the cooling system.
https://youtu.be/ue86SVk4rGU
As far as topping off your transmission fluid, please refer to your owners manual and repair manual for that information.
DISCLAIMER
Barbour's Auto Help is not responsible for any damage or personal injury incurred in the process of performing any auto repairs done by you the viewer. Automotive repair is extremely dangerous. Repair your vehicle at your own risk. It is the viewers responsibility to verify all information and procedures as outlined in YOUR REPAIR MANUAL AND OWNERS MANUAL FOR YOUR VEHICLE. Owning and using a repair manual suited for your vehicle is essential for correctly and safely performing ANY repair to your vehicle. Always wear safety glasses and heed all instructions for use applicable to any piece of equipment you may use. Due to circumstances out of the control of Barbours Auto Help, Barbours Auto Help makes no guarantee that by the use of the information given in this video a quality repair will be made. Barbour'sAutoHelp makes no guarantee that the information provided is totally complete, syncronized and accurate. Verify everything using an appropriate repair manual.
Repair your vehicle at your own risk! Barbour's auto help does not guarantee a proper repair using these techniques.
Special thanks to my wife for checking my spelling on this video and all my videos. You're the best Babe!
7
views
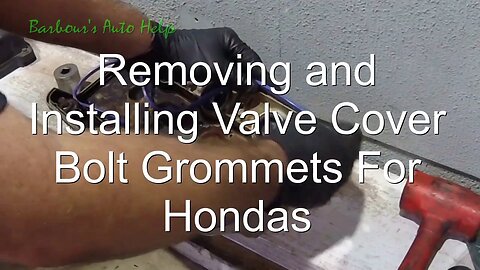
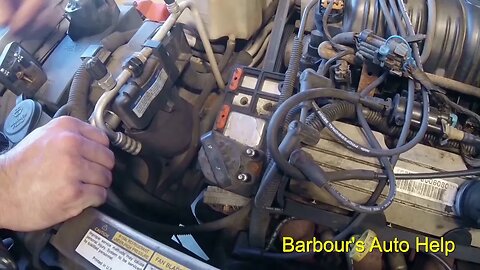
Removing and Installing Valve Cover Bolt Grommets For Hondas
In this video I'll show you how to remove old grommets and install new grommets onto valve cover bolts for SOME Honda vehicles. The particular Honda that is being worked on in the video is an 05 Honda Odyssey. The bolt designed used on this vehicle is similar to other Honda vehicles. (Sorry, I do not have a list of Honda vehicles that have this particular bolt design. If your bolts look similar to the bolts in the video then this video will likely work for you or at least help a little.) The bolt has a rib on it just above the threads of the bolt. This can make removing and installing new grommets a real pain. There is a trick though and I go over this in the video.
Folks, I don't guarantee that this video is right for all Honda vehicles out there. I would always suggest using an appropriate repair manual for the vehicle that you are working on to confirm the proper way to do this. Using incorrect repair methods could result in improper repair and or damage to your vehicle. Use this technique at your own risk.
Note: At about the 3:10 mark I have text on the video explaining "this is the same 32mm socket we used earlier". This whole video is actually taken from a larger video showing how to replace the valve cover gaskets on my van. So, if you where confused that's why. You'll have to see the whole video to see where I used it earlier.
Here is a link to the whole video sowing how to replace the valve cover gaskets on my 05 Honda Odyssey 3.5L Touring.
https://youtu.be/EyjD9QwhfJ8
For the folks that don't want to watch the whole thing at once...
Here is part 1
https://youtu.be/FyhY-whLEPA
Here is part 2
https://youtu.be/QWoKV2eDZKA
DISCLAIMER
Barbour's Auto Help is not responsible for any damage or personal injury incurred in the process of performing any auto repairs done by you the viewer. Automotive repair is extremely dangerous. Repair your vehicle at your own risk. It is the viewers responsibility to verify all information and procedures as outlined in YOUR REPAIR MANUAL AND OWNERS MANUAL FOR YOUR VEHICLE. Owning and using a repair manual suited for your vehicle is essential for correctly and safely performing ANY repair to your vehicle. Always wear safety glasses and heed all instructions for use applicable to any piece of equipment you may use. Due to circumstances out of the control of Barbours Auto Help, Barbours Auto Help makes no guarantee that by the use of the information given in this video a quality repair will be made. Barbour'sAutoHelp makes no guarantee that the information provided is totally complete, syncronized and accurate. Verify everything using an appropriate repair manual.
Repair your vehicle at your own risk! Barbour's auto help does not guarantee a proper repair using these techniques.
Special thanks to my wife for checking my spelling on this video and all my videos. You're the best Babe!
13
views
Ignition Module Replacement GM 3.8L Series 2
In this video I'll show how to remove and replace an ignition module on a GM 3.8L V-6. (Albeit I did not actually get the module off but the information needed was provided.) The particular vehicle being worked on is a 2001 Pontiac Bonneville. The procedure is similar for a wide variety of GM vehicles including some GM 3.4L V-6 engines. This is a very simple removal and installation. Do note there may be differences between years and models. You need to confirm this procedure in your repair manual. Please note that many parts stores have the equipment on hand to test if this ignition module is faulty. So if you are ever in doubt have it tested. Just take it off the vehicle and take it to the parts store to be tested. It only takes 5 minutes.
Also, please add dielectric grease ,or whatever grease or compound the manufacturer of your ignition module recommends, to the entire bottom surface of the ignition module where the module mates to the mounting bracket. this helps to remove heat from the module. Some applications may vary depending upon year and model. Thermal grease may be recommended for other applications. You'll need to verify the procedure in your manual and read all literature provided by the manufacturer of the ignition module you purchase. The life of your module could be cut short and warranty voided by not properly installing your module.
Note: The manual for this vehicle, 01 Pontiac Bonneville, did not mention anything about putting dielectric grease or thermal grease under the module before installation. The method of placing dielectric grease on the module was taught to me by some old timers back in the day. Even if your vehicle is equipped with a GM 3.8L series 2 engine, be sure to verify if the module you purchase requires a special grease to be applied to it. If it does then put it on.
DISCLAIMER
Barbour's Auto Help is not responsible for any damage or personal injury incurred in the process of performing any auto repairs done by you the viewer. Automotive repair is extremely dangerous. Repair your vehicle at your own risk. It is the viewers responsibility to verify all information and procedures as outlined in YOUR REPAIR MANUAL AND OWNERS MANUAL FOR YOUR VEHICLE. Owning and using a repair manual suited for your vehicle is essential for correctly and safely performing ANY repair to your vehicle. Always wear safety glasses and heed all instructions for use applicable to any piece of equipment you may use. Due to circumstances out of the control of Barbours Auto Help, Barbours Auto Help makes no guarantee that by the use of the information given in this video a quality repair will be made. Barbour'sAutoHelp makes no guarantee that the information provided is totally complete, syncronized and accurate. Verify everything using an appropriate repair manual.
Repair your vehicle at your own risk! Barbour's auto help does not guarantee a proper repair using these techniques.
Music by:
Zombie Rock by Audionautix is licensed under a Creative Commons Attribution license (https://creativecommons.org/licenses/by/4.0/)
Artist: http://audionautix.com/
Created with MAGIX Movie Edit Pro 2016
6
views
Valve Cover Gasket Replacement 05 Honda Odyssey 3.5L Touring (Full Video)
In this video I'll take you along with me as I replace my valve cover gaskets on my 05 Honda Odyssey Touring 3.5L. This video is the full video of the valve cover gasket replacement. In this video you'll get a great first person look at how things come apart and go back together. I also share some valuable tips and tricks regarding particular parts of this repair. I also made two half hour long parts of this process. They will be linked below for the person that doesn't have a full hour to watch this whole video. Please watch this entire video or both parts linked down below before repair.
Note: Torque specifications are not given. Manual not used when making this video. So, you'll need to obtain the specifications from a reputable manual. Also, the pattern in which I torque these parts down need to be verified as correct by your repair manual. Always follow your repair manual over any video I provide. If you chose to do things in the manner shown in the video do so at your own risk. (Risk meaning....risk of property damage and incorrectly installing parts). However, I've done a few of these and have done my own van in this manner without having any problem.
*****As for the other gaskets, such as the intake gaskets and other gaskets, it's my opinion an my suggestion that they be replaced with new gaskets. If a gasket or seal was removed then replace them with new ones. *****
Note: The vehicle in the video has the Touring package. There may be some differences between the Touring package and other packages. Different parts and procedures may be needed. So, if you notice differences in your gaskets from the ones show in the video, it doesn't necessarily mean that you got the wrong parts. Your vehicle may require different parts.
At the 21:00 mark I mention cleaning out the channels in the valve covers where the gasket sits with a scouring pad. I do recommend you do this also. You need to have a clean metal surface free of any sludge and varnish for the gasket to mate up to. Just cleaning it with brake clean in my opinion is not good enough for this particular area of the valve covers.
About the "special pliers" used in the video to break the seal loose on the hoses going to the intake. I used different sized pliers for different sized hoses. This helped to prevent damage to the hoses.
Toward the middle of the video you'll see me knocking the valve cover bolts out of there grommets using a rubber mallet. Please be aware that this will damage your mallet just as it did mine.
Also, at the 35:00 mark I mention that a 1/2 drive deep well socket would actually be better to use than a shallow 1/2 drive socket. This will help to keep the threads and the end of the bolt from getting damaged. Use silicon spray on the grommets to help prevent damage to the grommet during installation.
Also, as mentioned, in text, in the first half of this video, you'll see me install the rear valve cover in the second half this video. The removal is the reversal of the installation. It comes out in a similar fashion to the way it goes in.
The parts used in this video where from rockauto.com. Rockauto.com is in no way affiliated with Barbour's Auto Help. Barbour's Auto Help has not been paid to promote Rockauto.com.
I purchased the parts from Rockauto.com with my own money. That being said, I personally had a great experience getting my parts from them. Their website was very easy to use and, most importantly, I received the correct parts and it only took a few days to get them. I was also impressed with the quality of the parts received.
If you would rather see this repair a half our at a time then here are links to part 1 and 2.
Here is a link to part 1 of this series: https://youtu.be/FyhY-whLEPA
Here is a link to part 2 of this series: https://youtu.be/QWoKV2eDZKA
DISCLAIMER
Barbour's Auto Help is not responsible for any damage or personal injury incurred in the process of performing any auto repairs done by you the viewer. Automotive repair is extremely dangerous. Repair your vehicle at your own risk. It is the viewers responsibility to verify all information and procedures as outlined in YOUR REPAIR MANUAL AND OWNERS MANUAL FOR YOUR VEHICLE. Owning and using a repair manual suited for your vehicle is essential for correctly and safely performing ANY repair to your vehicle. Always wear safety glasses and heed all instructions for use applicable to any piece of equipment you may use. Due to circumstances out of the control of Barbours Auto Help, Barbours Auto Help makes no guarantee that by the use of the information given in this video a quality repair will be made. Barbour'sAutoHelp makes no guarantee that the information provided is totally complete, syncronized and accurate. Verify everything using an appropriate repair manual.
Repair your vehicle at your own risk! Barbour's auto help does not guarantee a proper repair using these techniques.
142
views
Valve Cover Gasket Replacement 05 Honda Odyssey 3.5L Touring (Part 2)
This is part 2 of a two part series on how to replace valve cover gaskets on an 05 Honda Odyssey. This part of the series goes over, mainly, the assembly process.
Note: Torque specifications are not given in the video. I did not use a manual when making this video. So, you'll need to obtain the specifications from a reputable manual. Also, the pattern in which I torque these parts down need to be verified as correct by your repair manual. Always follow your repair manual over any video I provide. If you chose to do things in the manner shown in the video do so at your own risk. (Risk meaning....risk of property damage and incorrectly installing parts). That being said, I've done a few of these and have done my own van in this manner without having any problem. This repair was performed on my van a full 2 months before this video series has been aired and I'm having no problems.
Also, as mentioned, in text, in the first video and in the description of the first video, you'll see me install the rear valve cover in this video. The removal is the reversal of the installation. It comes out in a similar fashion to the way it goes in.
*****As for the other gaskets, such as the intake gaskets and other gaskets, it's my opinion an my suggestion that they be replaced with new gaskets. If a gasket or seal was removed then replace them with new ones. ******
Here is a link to part 1 of this series: https://youtu.be/FyhY-whLEPA
Here is a link to the full video: https://youtu.be/EyjD9QwhfJ8
DISCLAIMER
Barbour's Auto Help is not responsible for any damage or personal injury incurred in the process of performing any auto repairs done by you the viewer. Automotive repair is extremely dangerous. Repair your vehicle at your own risk. It is the viewers responsibility to verify all information and procedures as outlined in YOUR REPAIR MANUAL AND OWNERS MANUAL FOR YOUR VEHICLE. Owning and using a repair manual suited for your vehicle is essential for correctly and safely performing ANY repair to your vehicle. Always wear safety glasses and heed all instructions for use applicable to any piece of equipment you may use. Due to circumstances out of the control of Barbours Auto Help, Barbours Auto Help makes no guarantee that by the use of the information given in this video a quality repair will be made. Barbour'sAutoHelp makes no guarantee that the information provided is totally complete, syncronized and accurate. Verify everything using an appropriate repair manual.
Repair your vehicle at your own risk! Barbour's auto help does not guarantee a proper repair using these techniques.
Special thanks to my wife for checking my spelling on this video and all my videos. You're the best Babe!
17
views
Valve Cover Gasket Replacement 05 Honda Odyssey 3.5L Touring (Part 1)
This video is part one of a two part series showing how to change valve cover gaskets on an 05 Honda Odyssey Touring 3.5L. This first video mainly goes over the disassembly, clean up and preparation of parts.
Note: The vehicle in the video has the Touring package. There may be some differences between the Touring package and other packages. Different parts and procedures may be needed. So, if you notice differences in your gaskets from the ones show in the video, it doesn't necessarily mean that you got the wrong parts. Your vehicle may require different parts.
In this video I did not show the removal of the rear valve cover. It comes out similarly to the way it is in stalled, just in reverse. I do actually show the installation of the rear valve cover in part 2. The valve cover comes out in a diagonal fashion. the rear of the valve cover toward the transmission comes out first followed by the front of the valve cover close to the accessory drive belt. If you watch part 2 just imagine the installation in reverse.
Note: at the 21:00 mark I mention cleaning out the channels in the valve covers where the gasket sits with a scouring pad. I do recommend you do this also. You need to have a clean metal surface free of any sludge and varnish for the gasket to mate up to. Just cleaning it with brake clean in my opinion is not good enough for this particular area of the valve covers.
Note: About the "special pliers" used in the video to break the seal loose on the hoses going to the intake. I used different sized pliers for different sized hoses. This helped to prevent damage to the hoses. Use care not to damage the hoses.
Toward the end of the video you'll see me knocking the valve cover bolts out of there grommets using a rubber mallet. Please be aware that this will damage your mallet just as it did mine.
Also, getting those grommets onto the valve cover bolts can be difficult to do without damaging them. Using a little silicon spray on them may help get the bolt in a little better.
The parts used in this video where from rockauto.com. Rockauto.com is in no way affiliated with Barbour's Auto Help. Barbour's Auto Help has not been paid to promote Rockauto.com.
I purchased the parts from Rockauto.com with my own money. That being said, I personally had a great experience getting my parts from them. Their website was very easy to use and, most importantly, I received the correct parts and it only took a few days to get them. I was also impressed with the quality of the parts received.
Here is a link to part 2 of this series: https://youtu.be/QWoKV2eDZKA
Here is a link to the full video: https://youtu.be/EyjD9QwhfJ8
DISCLAIMER
Barbour's Auto Help is not responsible for any damage or personal injury incurred in the process of performing any auto repairs done by you the viewer. Automotive repair is extremely dangerous. Repair your vehicle at your own risk. It is the viewers responsibility to verify all information and procedures as outlined in YOUR REPAIR MANUAL AND OWNERS MANUAL FOR YOUR VEHICLE. Owning and using a repair manual suited for your vehicle is essential for correctly and safely performing ANY repair to your vehicle. Always wear safety glasses and heed all instructions for use applicable to any piece of equipment you may use. Due to circumstances out of the control of Barbours Auto Help, Barbours Auto Help makes no guarantee that by the use of the information given in this video a quality repair will be made. Barbour'sAutoHelp makes no guarantee that the information provided is totally complete, syncronized and accurate. Verify everything using an appropriate repair manual.
Repair your vehicle at your own risk! Barbour's auto help does not guarantee a proper repair using these techniques.
Special thanks to my wife for checking my spelling on this video and all my videos. You're the best Babe!
56
views

Live Q&A #1
Live Q&A #1. This is the first live Q&A That I've given on Youtube, so forgive the quality. This was really a test run just to see how all this "live" stuff works. I think I have a handle on it. Maybe we can start doing this every other thursday night at 9 P.M.. We will see... Thanks for watching folks.
Disclaimer:
I make not guarantee that the information found in this video is complete and accurate. Verify everything with an appropriate repair manual for the vehicle that you are working on. Performing auto repair can be very dangerous. Do so at your own risk.
2
views
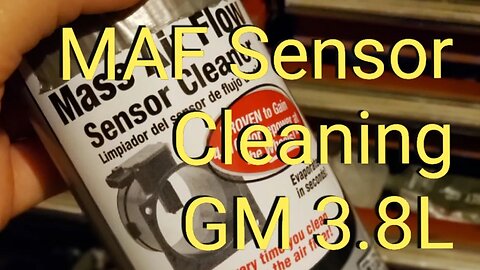
MAF Sensor Cleaning GM 3.8L Series 2
In this video I'll show you how to clean a mass air flow sensor on a GM 3.8L V-6 Series 2. The particular vehicle featured in this video is a 2001 Pontiac Bonneville, but this engine is used in a myriad of other GM vehicles, so this should help a lot of folks.
Be sure the vehicle is not running when performing this procedure. Also, be sure do read and follow the instructions given by the producer of the Mass Air Flow Sensor Cleaner that you will be using. Only used Mass Air Flow Sensor Cleaner to clean your mass air flow sensor. Cleaners such as brake parts cleaner, carburetor cleaner, intake cleaner, ect will damage your mass air flow sensor.
Perform this procedure in a well ventilated area. Keep a fire extinguisher handy just in case of fire.
Note: the condition and presence of the o-ring of MAF sensor should be checked. This is the o-ring that goes between the sensor and the throttle body. If missing or damaged it should be replaced.
DISCLAIMER
Barbour's Auto Help is not responsible for any damage or personal injury incurred in the process of performing any auto repairs done by you the viewer. Automotive repair is extremely dangerous. Repair your vehicle at your own risk. It is the viewers responsibility to verify all information and procedures as outlined in YOUR REPAIR MANUAL AND OWNERS MANUAL FOR YOUR VEHICLE. Owning and using a repair manual suited for your vehicle is essential for correctly and safely performing ANY repair to your vehicle. Always wear safety glasses and heed all instructions for use applicable to any piece of equipment you may use. Due to circumstances out of the control of Barbours Auto Help, Barbours Auto Help makes no guarantee that by the use of the information given in this video a quality repair will be made. Barbour'sAutoHelp makes no guarantee that the information provided is totally complete, syncronized and accurate. Verify everything using an appropriate repair manual. You can do it. Do it right and do it safely.
Repair your vehicle at your own risk! Barbour's auto help does not guaranty a proper repair using these techniques.
Music by:
Zombie Rock by Audionautix is licensed under a Creative Commons Attribution license (https://creativecommons.org/licenses/by/4.0/)
Artist: http://audionautix.com
7
views
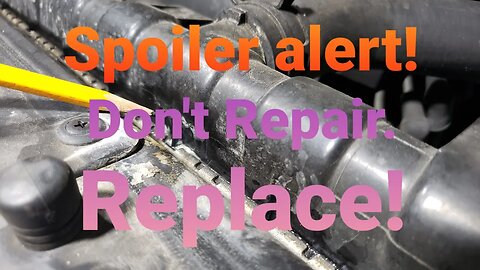
Do's and Don'ts of Fixing Radiator Tank Leak (Not A How To Video)
In this video I share some do's and don'ts of radiator tank repair. In particular I go over the do's and don'ts of repairing cracked plastic radiator tanks. I've been in the field of automotive repair for quite sometime. There have been more than one occasion that I've had to make a "creative" repair to a cooling system. When it comes to plastic radiator tanks I've never been able to "bubble gum" my way around a proper repair. Some "bubble gum" repairs, in my opinion, include using super glues, plastic welds (the two part epoxy kind, not the kind that use heat to actually weld the plastic), pepper, and egg. Though not mentioned in the video, I also doubt that "stop leak" would take care of a leak such as this one. In my opinion there are only two ways to properly repair a leak like a cracked radiator tank and that is to either replace the plastic radiator tanks or replace the whole radiator. Think about it... spending around a $100-$200 on a new radiator plus the labor to install it, if you aren't replacing it yourself, is a lot better than spending $2,000-$6,000 on an engine that blew up because of a cracked radiator tank. Just my 2 cents...
Note: It was brought to my attention that at the 45 second mark of the video I misspelled referring twice in the text on the video. Too late to correct that now but I'll notate it here.
Here is a link to a video that shows a great example of why I recommend replacement:
https://youtu.be/hzwQBZkWk8c
DISCLAIMER
Barbour's Auto Help is not responsible for any damage or personal injury incurred in the process of performing any auto repairs done by you the viewer. Automotive repair is extremely dangerous. Repair your vehicle at your own risk. It is the viewers responsibility to verify all information and procedures as outlined in YOUR REPAIR MANUAL AND OWNERS MANUAL FOR YOUR VEHICLE. Owning and using a repair manual suited for your vehicle is essential for correctly and safely performing ANY repair to your vehicle. Always wear safety glasses and heed all instructions for use applicable to any piece of equipment you may use. Due to circumstances out of the control of Barbours Auto Help, Barbours Auto Help makes no guarantee that by the use of the information given in this video a quality repair will be made. Barbour'sAutoHelp makes no guarantee that the information provided is totally complete, syncronized and accurate. Verify everything using an appropriate repair manual.
Repair your vehicle at your own risk! Barbour's auto help does not guarantee a proper repair using these techniques.
Special thanks to my wife for checking my spelling on this video and all my videos. You're the best Babe!
21
views
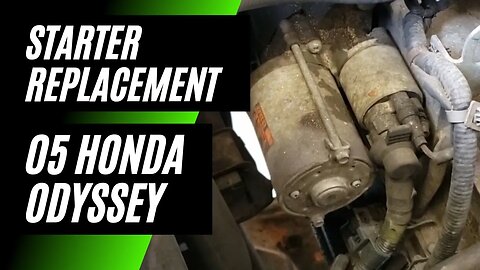
Starter Replacement 05 Honda Odyssey
In this video I'll show you how to replace a starter on an 05 Honda Odyssey 3.5L Touring. The video will take you step by step in the process of replacing the starter. Its a pretty simple job and should not take an enormous amount of time to complete. It is definitely a DIY kind of job.
Note: As mentioned in the video, the negative battery cable should be removed first before doing anything else to the vehicle. I did get ahead of myself by skipping this step at the beginning of the video.
As mentioned the family and I where on our way to church one Sunday. We stopped in a a gas station to get some drinks on the way and when it was time to leave the van would not start. I had it towed back to the house. At first I wasn't going to make a video because I didn't have my "good" tools at the house. But, I could not pass up this opportunity.
DISCLAIMER
Barbour's Auto Help is not responsible for any damage or personal injury incurred in the process of performing any auto repairs done by you the viewer. Automotive repair is extremely dangerous. Repair your vehicle at your own risk. It is the viewers responsibility to verify all information and procedures as outlined in YOUR REPAIR MANUAL AND OWNERS MANUAL FOR YOUR VEHICLE. Owning and using a repair manual suited for your vehicle is essential for correctly and safely performing ANY repair to your vehicle. Always wear safety glasses and heed all instructions for use applicable to any piece of equipment you may use. Due to circumstances out of the control of Barbours Auto Help, Barbours Auto Help makes no guarantee that by the use of the information given in this video a quality repair will be made. Barbour'sAutoHelp makes no guarantee that the information provided is totally complete, syncronized and accurate. Verify everything using an appropriate repair manual.
Repair your vehicle at your own risk! Barbour's auto help does not guarantee a proper repair using these techniques.
Special thanks to my wife for checking my spelling on this video and all my videos. You're the best Babe!
9
views
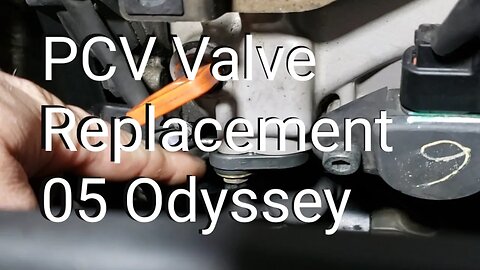
PCV Valve Replacement 05 Honda Odyssey
In this video I'll show you how a PCV valve is replaced on an 05 Honda Odyssey Touring with a 3.5L. The process is very simple. First remove the engine cover. The valve is located on the front of the left valve cover next to the oil dip stick. Its held in by a 10mm bolt. Remove this bolt and then pull the valve out. Insert your new valve. (Note: The new valve should come equipped with two o-rings, one near the tip of the valve and the other near flange of the valve that bolts to the valve cover. One seal is smaller than the other. Be sure your new valve has these o-rings or a leak could occur.) Once the new valve is in place put the 10mm bolt back in and torque the bolt to manufacturer's specification. (You will need a repair manual for the torque specification. Specification not provided here.) In order to torque the bolt properly a torque wrench will need to be used. Note: The use of a torque wrench was not shown in the video. To properly torque the bolt down use a torque wrench. Once the valve is in all you have to do is place the engine cover back on and then your done.
DISCLAIMER
Barbour's Auto Help is not responsible for any damage or personal injury incurred in the process of performing any auto repairs done by you the viewer. Automotive repair is extremely dangerous. Repair your vehicle at your own risk. It is the viewers responsibility to verify all information and procedures as outlined in YOUR REPAIR MANUAL AND OWNERS MANUAL FOR YOUR VEHICLE. Owning and using a repair manual suited for your vehicle is essential for correctly and safely performing ANY repair to your vehicle. Always wear safety glasses and heed all instructions for use applicable to any piece of equipment you may use. Due to circumstances out of the control of Barbours Auto Help, Barbours Auto Help makes no guaranee that by the use of the information given in this video a quality repair will be made. Barbour'sAutoHelp makes no guarantee that the information provided is totally complete, syncronized and accurate. Verify everything using an appropriate repair manual.
Repair your vehicle at your own risk! Barbour's auto help does not guaranty a proper repair using these techniques.
Special thanks to my wife for checking my spelling on this video and all my videos. You're the best Babe!
8
views
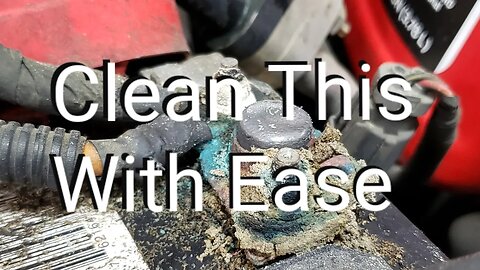
Fastest, Easiest, and Best Way To Clean Battery Terminals and Clamps
In this video I share a "trick of the trade" with you. It's an easy and quick way to clean corrosion from battery terminal clamps and posts that involves spraying water mist on these areas. It's very easy to do. You'll need a gallon jug full of water, vacuum hose, a blower and shop air. Place one end of the vacuum hose into the jug of water. Take the other end of the vacuum hose and place it in front of the component you want to clean. Then take your air blower and blow air diagonally across the tip of the vacuum hose. This will create a venturi effect and pull water up through the vacuum hose from the jug of water and out onto the object being cleaned. The water comes out of the tip of the vacuum tube and atomizes and mixes with the air being sprayed in the direction of the component being cleaned. The atomized water and compressed air clean the component as shown in the video. (super simple and easy).
As mentioned in the video, I've been using this method since I was taught it. It is my preferred way of cleaning battery clamps and terminals because it is so easy, quick and very effective. The end results of doing a battery service this way is far better than the results achieved by using chemicals or wire brushes. So, I'm doing a better job but quicker. (Why would I not do it this way?) (It's my opinion that this is the fastest, easiest and best way to clean battery terminals and clamps.)
Now, as mentioned in the video, I still had more work to do on my battery. This video is not intended to show you how to do a full battery cleaning but to show you a different method of doing a battery cleaning. Not only do the outsides of the terminal clamps need to be cleaned but the insides also need to be cleaned. All corrosion must be cleaned from each clamp and post. So the clamps must be removed and the insides cleaned too along with the posts. After the cleaning is completed and the clamps are reinstalled and tightened back up and battery dried it's not a bad idea to spray some terminal protector on both terminal clamps to slow down the growth of new corrosion.
Also, as mentioned, you must wear eye protection. I'd actually suggest a full face guard. While, ideally, you will be performing a controlled spray of water vapor it is highly possible that this could send battery acid or corrosion in the direction of your face. Battery acid and corrosion are bad news. It can blind you! You must protect yourself. Also, as mentioned in the video, you need to wear gloves. I would recommend nitrile gloves. Discard gloves when service is completed. Also, Its fair to mention that this acid and corrosion could get on your person and clothes. It is possible to get this corrosion and acid in your eyes even after the service is performed by touching your clothes and person in areas that the acid is and then rubbing your eyes. I'd even suggest changing clothes and then taking a shower after this... just to be sure you don't injure yourself.
Also, protect your vehicle. Cover any areas that have the potential of being sprayed in the process of performing this. Battery acid can also corrode other components of your vehicle including wiring, metal, paint, nuts and bolts, ect. If an area is suspected of being exposed to battery acid then clean the area completely with a wet cloth. If possible without flooding components that don't need to be flooded pour water on the area. Soak up excess water with a rag.
DISCLAIMER
Barbour's Auto Help is not responsible for any damage or personal injury incurred in the process of performing any auto repairs done by you the viewer. Automotive repair is extremely dangerous. Repair your vehicle at your own risk. It is the viewers responsibility to verify all information and procedures as outlined in YOUR REPAIR MANUAL AND OWNERS MANUAL FOR YOUR VEHICLE. Owning and using a repair manual suited for your vehicle is essential for correctly and safely performing ANY repair to your vehicle. Always wear safety glasses and heed all instructions for use applicable to any piece of equipment you may use. Due to circumstances out of the control of Barbours Auto Help, Barbours Auto Help makes no guaranee that by the use of the information given in this video a quality repair will be made. Barbour'sAutoHelp makes no guarantee that the information provided is totally complete, syncronized and accurate. Verify everything using an appropriate repair manual.
Repair your vehicle at your own risk! Barbour's auto help does not guaranty a proper repair using these techniques.
Special thanks to my wife for filming this video and checking my spelling on this video and all my videos. You're the best Babe!
86
views
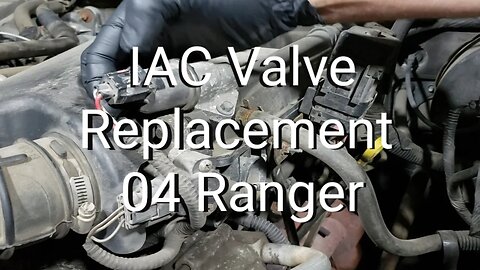
IAC Valve Replacement 04 Ford Ranger 3.0L
In this video I'll show you how I replace an IAC valve on an 04 Ford Ranger 3.0L. This task is as simple as they come. First, you disconnect the negative battery cable from the battery. (not shown in the video). Next, disconnect the sensor. Remove the two bolts that hold the valve to the intake. Remove the valve. Once the valve is removed clean the mating surface. Remove the inlayed rubber gasket with a pick using care not to scratch the mating surface of the intake in the process. Clean the channel where the gasket sits. Install new gasket. Install new IAC valve. Torque the two mounting bolts to specification. (You will need a manual for the specification. In the video I did not use a torque wrench to torque my bolts down. To do it properly I suggest using a torque wrench.) Reconnect the electrical connector until it clicks. Give it a tug afterward to make sure it is secure. Reconnect the negative battery cable. Your done.
Always wear safety glasses and wear gloves. Nitrile gloves are fantastic.
DISCLAIMER
Barbour's Auto Help is not responsible for any damage or personal injury incurred in the process of performing any auto repairs done by you the viewer. Automotive repair is extremely dangerous. Repair your vehicle at your own risk. It is the viewers responsibility to verify all information and procedures as outlined in YOUR REPAIR MANUAL AND OWNERS MANUAL FOR YOUR VEHICLE. Owning and using a repair manual suited for your vehicle is essential for correctly and safely performing ANY repair to your vehicle. Always wear safety glasses and heed all instructions for use applicable to any piece of equipment you may use. Due to circumstances out of the control of Barbours Auto Help, Barbours Auto Help makes no guarantee that by the use of the information given in this video a quality repair will be made. Barbour'sAutoHelp makes no guarantee that the information provided is totally complete, syncronized and accurate. Verify everything using an appropriate repair manual.
Repair your vehicle at your own risk! Barbour's auto help does not guaranty a proper repair using these techniques.
Special thanks to my wife for filming this video and checking my spelling on this video and all my videos. You're the best Babe!
4
views
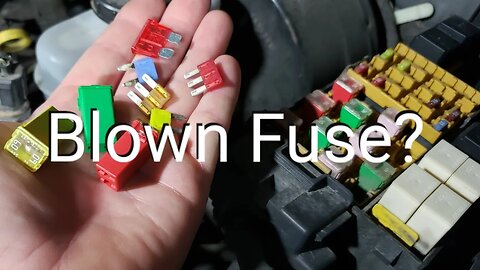
How To Check For a Blown Fuse
In this video I show you how to check for a blown fuse on your automobile. I actually show you 3 different ways that you can do this. The first way, which is the simplest way, involves simply looking at the fuse. Of course, depending on what kind of fuse you are inspecting, the fuse will have to be removed in order to get a good visual on it. The second way, which in my opinion is the simplest way, is to check your fuses with a test light. This method involves checking a hot fuse on both sides for power. If both sides has power and lights up the test light then the fuse is good. If not, and it only lights up the test light on one side of the fuse, then it's blown. I also give an example of a 3 prong fuse, which is a 2 in one fuse. This type of fuse should have power on all 3 legs. If not the fuse is blown. The third way of checking a fuse involves using a digital volt ohm meter to check for continuity through the fuse. A good fuse should have little to no resistance through it. If resistance greater than a tenth of an ohm (and that's high) is found then the fuse should be replaced. Typically thought a fuse will either be open or have perfect continuity. It is very rare to have a fuse with high resistance.
DISCLAIMER
Barbour's Auto Help is not responsible for any damage or personal injury incurred in the process of performing any auto repairs done by you the viewer. Automotive repair is extremely dangerous. Repair your vehicle at your own risk. It is the viewers responsibility to verify all information and procedures as outlined in YOUR REPAIR MANUAL AND OWNERS MANUAL FOR YOUR VEHICLE. Owning and using a repair manual suited for your vehicle is essential for correctly and safely performing ANY repair to your vehicle. Always wear safety glasses and heed all instructions for use applicable to any piece of equipment you may use. Due to circumstances out of the control of Barbours Auto Help, Barbours Auto Help makes no guarantee that by the use of the information given in this video a quality repair will be made. Barbour'sAutoHelp makes no guarantee that the information provided is totally complete, syncronized and accurate. Verify everything using an appropriate repair manual. Follow the repair manual over this videos content. You can do it. Do it right and do it safely.
Repair your vehicle at your own risk! Barbour's auto help does not guaranty a proper repair using these techniques.
22
views
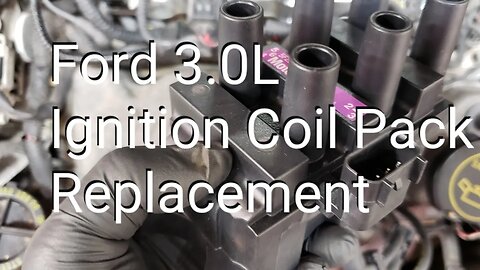
Ford 3.0L Ignition Coil Pack Replacement
In this video I'll show you how to replace an ignition coil pack on an 04 Ford Ranger 3.0L. While this video features the 04 Ford Ranger this procedure is applicable to more than just the Ranger. Ford has used this particular ignition coil pack design or many years on may different models.
DISCLAIMER
Barbour's Auto Help is not responsible for any damage or personal injury incurred in the process of performing any auto repairs done by you the viewer. Automotive repair is extremely dangerous. Repair your vehicle at your own risk. It is the viewers responsibility to verify all information and procedures as outlined in YOUR REPAIR MANUAL AND OWNERS MANUAL FOR YOUR VEHICLE. Owning and using a repair manual suited for your vehicle is essential for correctly and safely performing ANY repair to your vehicle. Always wear safety glasses and heed all instructions for use applicable to any piece of equipment you may use. Due to circumstances out of the control of Barbours Auto Help, Barbours Auto Help makes no guarantee that by the use of the information given in this video a quality repair will be made. Barbour'sAutoHelp makes no guarantee that the information provided is totally complete, syncronized and accurate. Verify everything using an appropriate repair manual.
Repair your vehicle at your own risk! Barbour's auto help does not guaranty a proper repair using these techniques.
8
views
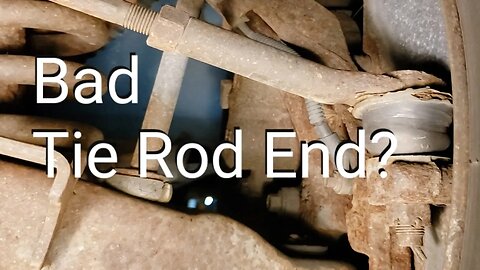
Bad Tie Rod End? How To Check.
In this video I'll show you how to check your inner and outer tie rod ends for excessive play. The particular portions of the tie rod ends that we will concern ourselves with in this video are the ball sockets, and more specifically, we are checking for play in these ball sockets. The tie rod ends are what connect your steering gear to the wheels. There is not supposed to be any play in these tie rod ends. Loose tie rod ends or tie rod ends that have excessive play in them can cause loose steering and abnormal tire wear. Usually on the inside or out side tread. So, its pretty important to take care of any issues of looseness in the steering for obvious reasons. It's very easy to check for excessive play. Just follow the instructions in the video.
Note: I use the term "accordion" to describe the bellows boot because it looks like and acts like one. Just to clear up any confusion.
DISCLAIMER
Barbour's Auto Help is not responsible for any damage or personal injury incurred in the process of performing any auto repairs or diagnostics done by you the viewer. Automotive repair is extremely dangerous. Repair and diagnose your vehicle at your own risk. It is the viewers responsibility to verify all information and procedures as outlined in YOUR REPAIR MANUAL AND OWNERS MANUAL FOR YOUR VEHICLE. Owning and using a repair manual suited for your vehicle is essential for correctly and safely performing ANY repair diagnostic to your vehicle. Always wear safety glasses and heed all instructions for use applicable to any piece of equipment you may use. Due to circumstances out of the control of Barbours Auto Help, Barbours Auto Help makes no guaranty that by the use of the information given in this video a quality repair or diagnosis will be made. Barbour'sAutoHelp makes no guaranty that the information provided is totally complete, syncronized and accurate. Verify everything using an appropriate repair manual.
Repair and diagnose your vehicle at your own risk! Barbour's auto help does not guaranty a proper repair or diagnosis using these techniques.
19
views
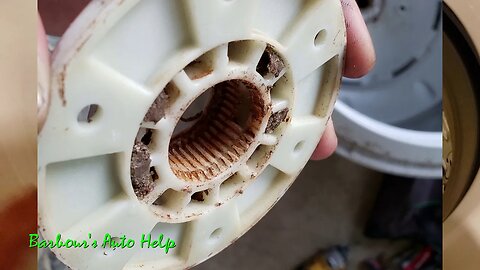
My Maytag Brovos Drive Hub Replacement Experience
In this video I share my experience dealing with a stripped out drive hub on my Maytag Brovos top loader washing machine. The model number of my washer is MVWX655DW1. As I understand it this design is used on more than just Maytage high efficiency designs. So, this video may help with other applications. (which ones I don't know. ) This video, though it does go into some detail of how I replaced the drive hub, is not a "how to" video. It's mainly a video showing how your washing machine may sound and act if the drive hub is stripped out. Also, this video makes not guaranty that if your machine sounds like this that it is in fact a stripped out drive hub causing it. You will have to properly diagnose your machine before performing a repair. This is also not a "how to" video on how to properly diagnose your machine.
Now, if you need a how to guide on how to replace the drive hub then I'd suggest watching the video linked below. It was the best one by far I've found on this job. Note: I make no guaranty regarding the work of another channel. I make no guaranty that by following the video linked below that you will fix your washing machine. I make no guaranty that you will be safe performing the repair shown in said video. Use the information found in this video linked below at your own risk.
https://youtu.be/XEpV9p2urmA
Disclaimer: Performing appliance repair can be very dangerous. Be sure to disconnect the appliance from electricity before performing any repair. I'd always suggest using the manufacturers manual for any repair you may perform. Compare the information with any video you may find on youtube.com. Use the manufacturers information found in their manual above any information found in a video on youtube. Repair you appliance at your won risk. Do your own research.
5
views