

How to Kiss Someone with Braces
Don't be afraid to kiss a mouth full of metal—the challenge can make it all the more worthwhile!
Step 1: Wait 30 days
Wait until the person has had the braces on for 30 days. The first month, their mouth is going to be very sensitive.
Step 2: Be gentle
Be gentle. If you press too hard against their lips, they could cut the inside of their mouth.
Step 3: Watch your tongue
Watch your tongue. You don’t have to avoid the braces entirely; just proceed gingerly until you know where the sharp areas are. This forced, slow exploration can actually be an exciting thing!
Step 4: Try dental wax
Suggest that the person cover rough spots in generous amounts of dental wax or silicone before a make-out session.
Tip
If there are a lot of rough spots, tell your partner that the orthodontist can smooth them out without affecting the braces.
Step 5: Be supportive
Don’t make fun of the person’s braces, or make a big deal out of it. After all, having a mouth full of braces is harder than kissing a mouth full of them!
Did You Know?
Tom Cruise got braces when he was 39 years old.
19
views

6 Kicking Techniques | Shaolin Kung Fu
Hi. And welcome to our demonstration of Shaolin Kicking Techniques.
To begin with, we're going to start with the side kick. This is a very basic kick. Ready? He's going to bring his hands up. We're going to do it nice and slow first. Bring your hands up, and he's going to step in with the rear foot. As he brings the rear foot in, he's going to lift the front foot and strike with the bottom or the heel of his foot. Okay? Let's try it full speed.
Okay? Let's go to the next kick now. The roundhouse kick. Many styles use this kick. It's very important that as you do it in this scenario that you snap the kick back. Let's take a look at that in full speed, the roundhouse kick.
Hi. I'm Carl Romaine. Welcome to our demonstration of Shaolin Kicking Techniques.
We'll start from the very basic kicks all the way to a little bit more advanced.
To begin with, we'll start with the side kick. From this ready position, he's going to step in with the rear foot, lift the front knee, and extend his leg out, striking with the bottom of his foot. A little faster. This is a very effective kick for self defense. This kick can be placed at the knee, as well as the hip, or even the head.
The next kick we're going to demonstrate is the roundhouse kick. It's a very common kick. You see it in a lot of different styles. As he steps in, he's going to lift his knee, point his toe this time, and extend the leg towards the head. One more time, slowly. Step in, lift the knee and point the toe, extend and strike the head, making sure that he recoils after the kick. Now full speed.
Our next kick will be the hook kick. In this kick, he's going to extend his leg out, just like he did in the side kick, and then hook or loop the kick towards his back. And slowly kick. And again. And now full speed.
Our next kick will be the variation of that. It will be this spinning hook kick. It's a little bit more advanced. And in this scenario he's going to actually take a step as he goes into his spin and then execute a hook kick right from there. It's a very powerful kick. And one more time.
The next kick he'll demonstrate is a crescent kick. This kick will come up towards the center and then out. Now striking with the bottom outside portion of his foot. Notice that the leg is straight. One more time.
And the last kick we'll demonstrate is a very effective kick. It can be used either to strike the leg and break the knee, or even used to stop a kick. It's called in Cantonese. So he's going to do a cross-over knee kick, striking with the heel. One more time. Good. And full speed.
This concludes our demonstration of Shaolin Kicking Techniques.
13
views
How to Double Crossover Dribble | Basketball
Man 1: Alright, Swoop.
Swoop: Yes.
Man 1: We're back at it again.
Swoop: Again!
Man 1: We're showing them the double cross over.
Swoop: Wait, wait. I already showed you the cross over. I definitely got the double one, because the double one is boom boom, boom boom. Eh, eh! Boom, boom!
Man 1: We want to show them the double cross over, go two times on them. You're going to cross and cross back. I don't know what that was that you were doing right there.
Swoop: I'm trying to work on my game.
Man 1: You got to let the experts do their jobs!
Swoop: Oh, and teach me.
Man 1: Yeah.
Swoop: Okay, let's go.
Man 1: If we was in dance class, you'd be teaching. Because you a dancer
Swoop: I am a dancer. A private dancer, dancing for money.
Man 1: Here we go, OK. Double cross over. Here comes the road runner cross over. Two times, back and forth. Right to left, left to right. Cross over Then when you get to be an expert like the roadrunner, you can do it really fast.
See that? See that? Damn. He's on the move.
Swoop: And that move really works?
Man 1: Obviously it works.
Swoop: Okay. I got to test it. I got to see the proof in the pudding, here.
Man 1: Hey, hey, hey. Swoop.
Swoop: What?
Man 1: This could be dangerous.
Swoop: No, no, no. Look. I got my LeBron's tied up nice.
Man 1: Nice, here we go.
Swoop: Okay, okay. Here we go.
Man 1: Double cross over.
Swoop: Do it again, do it again. That was fast. Do it again.
Man 1:You look good on defense though.
Swoop: I'm going to get this one.
Man 1: Get it, get it. Reach out there for it. Hey Swoop, you know what?
Swoop: Watch it.
Man 1: That's a cross up.
Swoop: Okay.
Man 1: You got crossed up.
Swoop: Oh.
Man 1: You got your ankles broken.
Swoop: Broken? But I got sneakers on.
Man 1: No, they're broken though. So, that's a double cross over with road runner. Keeping his head up, going on the move, going right to left, then back to his right hand. Keeping it under control. The double cross over.
21
views
How to Make Perfect Pancakes
Impress your brunch guests—or just treat yourself—to light, fluffy, delicious pancakes.
Step 1: Whisk the dry ingredients
In one bowl, mix the dry ingredients thoroughly together with a whisk so they're fully incorporated into each other. Break up any lumps.
Tip
Diner pancakes are often made with malted milk powder instead of sugar. Using malt in your recipe will impart that pancake-house flavor.
Step 2: Separate the eggs
Separate the eggs into the other two bowls. Whip the whites with a hand mixer until they form stiff peaks and set aside.
Step 3: Mix the wet ingredients
Add the milk to the egg yolks and beat them together with the mixer until they're bubbly. Then, mix in the oil or butter.
Step 4: Add dry to wet
Add the dry ingredients to the egg yolk mixture, and whisk them together very gently until they're just incorporated. Don't mix too much; overworked batter results in tough, dense pancakes. Fold in the egg whites in two additions, and let the batter rest for 15 to 20 minutes.
Step 5: Heat your pan
Heat your pan or griddle to about 350 degrees, and lightly coat the surface with cooking spray or vegetable oil. Test the temperature by sprinkling a droplet of water onto the surface; if it's hot enough, the water will skitter and evaporate.
Tip
Don't use butter to grease your pan, unless it's clarified butter. Regular butter will burn.
Step 6: Make a trial pancake
Test your temperature by making a trial pancake. Use your 1/3-cup measure to gather a scoop of batter & pour it onto your pan or griddle. When the edges have browned & bubbles appear, flip the pancake, & cook the other side until it's golden brown. Don’t press down on the pancake; it won't help it cook faster, and it'll crush the light texture.
Tip
To make blueberry pancakes, scatter a handful of frozen blueberries into the batter as soon as you pour it onto the griddle.
Step 7: Cook your pancakes
When you're satisfied that you've got the right temperature, use your 1/3-cup measure to pour on as many helpings of batter as you can comfortably fit on the griddle. There should be a bit of space between them, so that they don't overlap or touch when you flip them.
Step 8: Keep them warm
Pancakes should be served as soon as they're cooked through. If you're whipping up a big batch, don't let your cooked cakes get cold while the new ones are just hitting the griddle. Instead, lay the pancakes on a cookie sheet. Make sure not to overlap or stack them, and place them in a just-warm oven until you're ready to serve.
Step 9: Serve and enjoy
Serve your pancakes with traditional sides like butter and maple syrup, but don't be afraid to experiment! Give whipped cream, jams or jellies, peanut butter, sliced fruit, and even melted chocolate a try!
Did You Know?
The origins of the pancake date back to prehistoric times, when early cultures cooked their grain-and-water mixtures on hot rocks to make flatbreads.
25
views

How to Do Scissors | Ab Workout
Now I'm going to demonstrate how to do scissors. Okay, this is primarily a lower abdominal exercise. What I'm doing is lying down on my back. Okay, hands at my side, or if you need to palm some back support, you can place your hands underneath your uh, glutes. Okay, and your legs are gonna be extended. Okay, and you're actually going to twist your legs in and out. Okay, or you can do it straight on. So there's two different variations. You can go inner, outer, both work your lower abdominal's, or you can go straight. Okay, keep the knees slightly bent, so it takes off a little pressure in the back. Okay, or you can do another variation and you're bringing the legs inner and then outer. But primarily this exercise is working the lower abdominal region. Okay, so that is the proper way to a scissor.
10
views
How to Load a Bobbin | Sewing Machine
Hi. I'm Jennifer from Workroom Social, and I'm going to show you how to load a bobbin into your sewing machine. So, the first thing you want to do is thread your sewing machine. After your sewing machine is threaded, you want to take your wound bobbin and you kind of want to just extend a little thread to have as a small tail.
Now, my machine has an arm here that comes off, so I'm going to take that off and move it aside. My sewing machine is a vertical bobbin. There are also some machines that are horizontal bobbins. So, you should just go back to your user's manual to see instructions for loading your bobbin.
On my machine, I have a casing here. This is a bobbin casing, and I'm going to take my bobbin and I want to place it inside my casing with the thread going counter clockwise. And I'm just going to look and see that this notch, which is where the thread is going to go through, is going sort of to the left.
So, I want my thread to go in the same direction as the bobbin casing, and then I'm going to take the thread and kind of pull it under there. And now you can see when I pull the thread, the bobbin turns.
So, now with the bobbin in the casing, you're going to go ahead and load it into your machine. You'll take this little lever and hold it out. That will keep your bobbin from falling out of the casing, because that is kind of annoying when it's rolling all around on your floor. And then you are just going to place it into your machine. There is this little notch up at the top, that there is a corresponding notch in the machine, so you can't really mess it up.
Just put it in until it gets into place and it doesn't turn, and then you can let go of that lever. Now, that's in and that's steady. The last thing you want to do is you want to pull this thread up though your throat plate, so that both threads are underneath your presser foot.
So, to do that, you'll just hold your needle thread. And using the hand wheel on the right, you're going to twist it towards you to send the needle down, and back up, and then you'll kind of tug on this thread, and there is a bobbin thread. They're two different colors, so you can see this one is the bobbin thread and the purple is the needle thread. You'll just put those towards the back of your machine, and now you're ready to sew.
24
views

How to Feed a Baby Bird
Baby birds sometimes fall from their nests, and sometimes are knocked out by storms or other natural causes. If you find a baby bird, here's how to feed it.
Step 1: Place bird in berry container
Place the baby bird in an empty berry container on top of a heating pad to it keep warm.
Tip
Handle the bird only when necessary.
Step 2: Prepare food
Prepare the food by soaking dog kibble in hot sugar water for 1 hour.
Step 3: Add egg and baby cereal
Remove the kibble from the water and mix it with baby cereal and a hardboiled egg. Feed the baby bird with this mixture for the first couple of days.
Step 4: Make a small ball of mixture
Make a pea-size ball with the food mixture and place it in the baby’s mouth using a toothpick.
Tip
Never force food or water into the bird’s mouth.
Step 5: Feed every 15 minutes
Feed the bird every 15 minutes over the first couple of days. When it's stronger, feed it every 30 to 60 minutes.
Step 6: Feed cat or dog food, meat, and fruit
Feed the baby bird room temperature canned dog food, lean raw beef, and fruit after the first couple of days.
Step 7: Wean away food
Wean it away from hand-feeding once it starts moving around.
Did You Know?
In 2007, an ostrich egg set a record for the largest egg from a living bird at 5 pounds 9 ounces.
10
views
How to Train Your Bird to Talk
Birds aren't like babies—you can't expect them to pick up speech just by babbling away at them. You need a plan.
Step 1: Pick the right breed
If you haven’t already bought Tweety, pick a breed that is known for its chattiness. Amazon parrots and African greys are the gabbiest, followed by macaws, male cockatiels, mynahs, and parakeets.
Tip
Female cockatiels, female budgies, grass parakeets, rosellas, and canaries don’t talk.
Step 2: Choose an inquisitive bird
Once you’ve narrowed your choices to a talkative breed, focus your attention on choosing a bird that seems alert and interested in what’s going on around him. These are clues that he’ll make a good talker.
Step 3: Get a young bird
Get a young bird. Like the proverbial old dog who can’t learn new tricks, an older bird is going to have more trouble picking up speech.
Step 4: Name that bird
Give the bird a name that is no more than two syllables. A longer name reduces the chances that he will learn to say his own name.
Step 5: Designate a teacher
If you’re married and/or have children, pick one person to teach the bird. If several people are trying to instruct the bird, it will only confuse it.
Tip
Birds learn more easily from women.
Step 6: Time your training
Start training at the optimal time. For smaller birds, that’s at four to six months. For bigger birds, wait until they’re six to twelve months.
Tip
Don’t teach a bird to whistle before training him to talk, or it will make the speech lessons that much harder.
Step 7: Keep it simple
Start training by saying a few simple words to Tweety, always using them under the same circumstances. For example, you could say 'Good morning' every day when you first rise, and you could reserve 'Bye' for when the bird can see you walk out the door.
Step 8: Repeat words
Repeat the words several times in each instance. You want the bird to start associating the sound you are making with the context.
Step 9: Reward speech
Give Tweety a treat every time he repeats something you are teaching him.
Tip
Remember that birds don’t just repeat what you want them to; they mimic sounds they hear. So if you’re suffering a bout of loud flatulence, or getting ready to rip someone a new one, stay out of Tweety’s earshot.
Step 10: Unteach them
If Tweety has picked up a bad word, washing his mouth out with soap won’t work. But ignoring him when he repeats the word will, because getting your attention is his main incentive.
Step 11: Enjoy
Now enjoy chatting with your fine-feathered friend!
Did You Know?
Talking birds often will imitate your phone’s ring tone because they get a kick out of watching you come running.
12
views
How to Make Rice Krispie Treats
Adults and kids alike love delicious, chewy Rice Krispie treats. Create these tasty homemade snacks in only a few minutes with this easy recipe.
Step 1: Melt butter and marshmallows
Melt the butter in a large saucepan over low heat or in the microwave. Then add the marshmallows and stir until the marshmallows are completely melted. Remove the pan from the heat.
Step 2: Stir in cereal
Use the rubber spatula to stir the Rice Krispies cereal into the marshmallow mixture. Stir until the cereal is well coated.
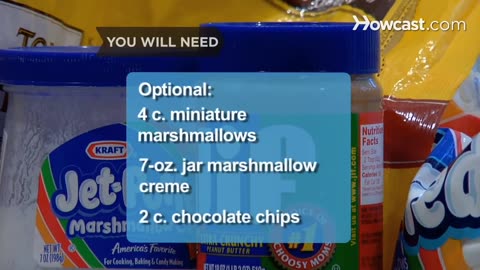
Tip
You can use miniature marshmallows or a 7-ounce jar of marshmallow creme instead of regular-sized marshmallows.
Step 3: Coat baking dish with cooking spray
Completely coat the inside of the baking dish with cooking spray.
Step 4: Press cereal mixture into dish
Pour the cereal mixture into the prepared baking dish. Cover the mixture with a sheet of wax paper and use your hands or the spatula to press the mixture until it is spread evenly over the bottom of the baking dish.
Tip
Try melted chocolate chips and peanut butter instead of butter with the marshmallows to make chocolate and peanut flavored treats.
Step 5: Cool and cut into 2-inch squares
Allow the mixture to cool completely and cut the treats into 2-inch squares.
Step 6: Serve immediately or freeze
Serve the treats immediately or freeze them for up to six weeks in an airtight container. Allow the frozen treats to sit at room temperature for 15 minutes before serving. Then dig in and enjoy.
Did You Know?
Mildred Day invented Rice Krispies treats in the 1930s for a fundraiser for the Camp Fire Girls. Soon after, Kellogg's began printing her recipe on their cereal boxes.
15
views
How to Fake Being Sick
Pulling a Ferris Bueller is easier than you think—if you plan ahead.
Step 1: Commit this list to memory ...
Commit this list to memory: a fever of 100 degrees or more, vomiting, diarrhea, earache, and sore throat. Doctors say these are valid reasons to miss school, so what parent would disagree?
Step 2: Keep a log
Keep a log of dates and excuses so you can prevent patterns from developing.
Tip
Never brag about missing days over the phone, e-mail or IM. You never know when your communications might be intercepted by an adult.
Step 3: Fake onset of symptoms
Become skilled at faking the onset of symptoms. Digestive ailments generally occur suddenly, while other maladies begin presenting themselves the night before.
Tip
Lay the necessary groundwork—at dinner, mention how scratchy your throat is and don’t eat a thing, especially dessert!
Step 4: Make fake vomit
If necessary, pull out the big guns. Broken cornflakes mixed with a little water make an excellent stand-in for vomit.
Step 5: Fake your temperature
If your parents demand further proof, drink hot liquids before taking your temperature to produce a false reading.
Step 6: Enjoy your success
Congratulations! Your mom ordered you to stay home. When you sneak out, make sure you’re back before anyone notices you’re missing.
Did You Know?
An estimated 150,000 young people, usually in their late teens or early twenties, are diagnosed with infectious mononucleosis each year.
9
views

How to Levitate
Levitating has always been one of the most difficult and expensive magic tricks, usually involving a harness and rig. Thanks to the Balducci technique, it's now one of the easiest and cheapest.
Step 1: Wear baggy pants
Wear baggy and/or flared pants. You don’t want anyone to have to clear a vision of your feet.
Step 2: Keep your distance
Make sure you are at least eight feet from your audience.
Step 3: Get into position
Get into position with your back to the audience. The position is critical to the trick—you must have your body at an angle that results in your left foot completely blocking the front of your right foot (or vice versa) from the audience’s vision.
Tip
Experiment with different angles until you perfect this.
Step 4: Divert attention
Lift both arms, as if you’re trying to balance yourself on an unsteady surface. One of the keys to any good trick is 'misdirection'—you want the audience looking at your upper body, not your feet.
Step 5: Draw it out
Close your eyes in concentration. Flex your fingers. Build suspense!
Step 6: Step up
Raise yourself two inches by putting all your weight on the ball of your right foot, and simultaneously lifting your left foot off the ground. Keep your heels together as you go up. Done correctly, you will appear to mysteriously levitate a few inches.
Step 7: Be theatrical
Be theatrical! You’re floating in midair, so throw in a wobble or two. Furrow your brow. Grimace.
Step 8: Land hard
After several seconds, let your left foot and right heel down, landing hard, as if your body has been plopped back to earth.
Step 9: Practice
Practice until you can pull this off flawlessly.
Did You Know?
British and Dutch scientists succeeded in levitating a live frog using a magnetic field.
55
views

5 Kissing Game Tips | Kissing Tutorials
Maya: Hi there, you beautiful specimen. I am Maya Klausner featuring in this How Cast kissing video. Some call me Klaus or Klausey or on Twitter specifically, Klausey28 if you want to follow some of my quips.
As of now, you've probably noticed that I'm deliciously comedic. I do stand-up comedy all around New York if you want to check me out. You can find me at my personal, unique website, facebook.com/mayaklausner.
I do comedy all over New York. I act and I write and I'm really happy to be doing this How Cast video. It's been a ton of fun and I've worked with a great group of people.
Harrison: Alright cool. I'm Harrison Tweed, originally from Durham, North Carolina. Go Tar Heels. I do shows all over New York City. So I don't know any that are coming up.
I also host a lot of shows at rock concerts like, Tammy Hall, Webster Hall, and Gramercy Theater. If you follow me on Facebook or follow me on Twitter, my Twitter handle is Harrison Comic.
If you look me up on Facebook. Just look up Harrison Tweed and I'll give you some updates on when I 'm performing next or what shows I'm hosting. Just give me a shout man.
16
views

How to Hold It In When You Have to Pee & There's No Bathroom
Warning
Don't hold in your urine if you have a bladder infection; it will make the condition worse by allowing the bacteria to flourish.
Step 1: Fantasize about sex
Fantasize about sex. Experts say thinking about sex preoccupies your brain, reducing your discomfort.
Step 2: Scratch or rub your calf
Scratch or rub the back of your calf. Australian researchers found that doing this vigorously may interrupt the message from your bladder to your brain that you need to go.
Step 3: Squeeze your butt
Reduce the urge by squeezing your butt as tightly as you can, holding it for several seconds, and then repeating five times.
Tip
Doing butt squeezes will firm your bottom, too.
Step 4: Cross your legs
Cross your legs and bend forward slightly, especially if you feel a cough, sneeze, or laugh coming on. Researchers found that this prevented leakage in 73 percent of women.
Step 5: Be smarter next time
Reduce the chances of finding yourself in this position again by using the bathroom before you know one will be unavailable for a long stretch. It was good advice when you were four years old, and it's good advice now!
Did You Know?
Hugh Jackman accidentally peed on stage during a performance.
13
views

How to Survive a Hurricane
Don't wait until a storm is heading your way! Survive a hurricane with these safety precautions.
Step 1: Plan ahead
Plan ahead. Know the location of local shelters and how you'll evacuate if you don't have a car. If you have family members with special medical needs, ask local officials if there's a registry so they get help in the event of power outages. Pick a place for family members to meet in case you become separated, and designate an out-of-town friend as the person everyone calls to report that they're safe. Get flood insurance if you don't already have it.
Tip
Make sure you know how to shut off electricity, gas, and water in case you're instructed to do so.
Step 2: Be prepared
Have the following supplies on hand at the start of hurricane season: a 3-day supply of water that provides 1 gallon per person per day; a 3-day supply of non-perishable food that doesn't require cooking; a flashlight and extra batteries; a battery-powered radio that can receive broadcasts from the National Oceanic and Atmospheric Administration; a first-aid kit; and a 7-day supply of medications.
Tip
The Atlantic and Central Pacific hurricane season runs from June 1 to November 30; the Eastern Pacific is from May 15 through November.
Step 3: Get ready
If a hurricane warning is issued -- meaning one is expected in the next 36 hours -- bring in anything that can be tossed around by the wind; close and board up all windows and doors with 5/8" marine plywood, unless you have hurricane shutters; clear rain gutters and downspouts; trim trees and shrubs; put your refrigerator and freezer on the coldest setting; and fill your car's gas tank in case you're ordered to evacuate.
Step 4: Go to a safe place
If you live on the first or 2nd floor of a high rise, make plans to take refuge with neighbors between floors 3 and 10 when the storm begins. Residents who live above the 10th floor should evacuate, as should mobile home dwellers and anyone living on a floodplain, near a river, or on an inland waterway.
Step 5: Do last-minute preparations
Shortly before the storm is expected to start, fill your bathtub with water so you have an extra supply on hand. Unplug small appliances and sensitive electronics, and turn off propane tanks.
Step 6: Ride out the storm
When the storm starts, stay away from windows and glass doors and avoid using the phone. Go to your home's lowest level and stay in an interior room, closet, or hallway. Have a mattress or pillow to protect your head. Monitor weather conditions on your radio and don't leave your safe place until local officials say it's okay to do so.
Step 7: Avoid post-storm dangers
If you lose electricity, keep circuit breakers turned off until power is restored, then check for frayed wires. If you see any, call the power company. Leave the house immediately if you smell gas. If you're returning home, don't enter your house if floodwaters remain around the building; you see loose power lines or structural damage; or you smell a gas leak. If you have any safety concerns at all, stay elsewhere until your home is checked by a building inspector or structural engineer.
Did You Know?
2/3 of the hurricanes that hit land in the United States between 1981 and 2011 struck the Gulf Coast. The other third hit the Atlantic Coast.
82
views

How to Make Homemade Doughnuts
If delicious rings of dough dance in your head more often than sugar plums, this guide will have you serving up glazy goodness without leaving your kitchen.
Step 1: Proof the yeast
Proof the yeast by soaking it in 1 cup warm water for 10 minutes. Then add 1 cup all-purpose flour and set aside.
Step 2: Combine butter and sugar
Combine the butter and sugar in the mixing bowl and cream them together. Slowly add the eggs, one at a time.
Step 3: Combine vanilla, salt, bread flour
Combine the vanilla, salt, and bread flour and add it to the butter, sugar, and egg mixture a little at a time until they're fully incorporated.
Step 4: Add the yeast mixture
Stir in the yeast mixture and let everything sit for 1 to 2 hours.
Step 5: Roll out the dough
Roll out the dough to a thickness of ½-inch on a floured surface to prevent sticking. Cut out doughnuts using a doughnut cutter.
Tip
Use holiday cookie cutters to create fun-shaped doughnuts for any occasion.
Step 6: Fry the doughnuts
Fry the doughnuts in a deep fryer or cast iron skillet filled with oil heated to 370 degrees Fahrenheit. Fry in small batches, until they're golden brown on both sides.
Tip
Use wood skewers to gently flip doughnuts after 3 to 4 minutes per side.
Step 7: Cool and decorate
Cool the doughnuts on a cooling rack and then decorate them or chow them plain.
Did You Know?
The 1,500-calorie "Luther Burger" was created in Decatur, Georgia and uses two glazed doughnuts instead of a bun.
7
views
How to Hand Train a Bird
You may not be able to get your parakeet to balance a ball on his beak, but every hook-billed species -- from parakeets to cockatoos -- can be trained to step onto your finger when you tell him to.
Step 1: Train only wing-clipped birds
Don’t try to take your bird out of his cage unless his wings have been clipped.
Step 2: Desensitize bird
To get your bird not to flip out when you put your hand into his cage, several times a day insert your hand into the cage and wave it slowly in the bird’s direction. Repeat this daily until the bird gets used to it.
Tip
Try holding a bird treat when you put your hand into the cage. Once you can get your bird to eat from your hand, you’re well on the way toward establishing 'hand trust.'
Step 3: Hold perch or stick
For the next two weeks, insert your hand into the cage several times a day--but this time, hold a perch or stick in your hand. Your goal: getting the bird to step onto the perch.
Step 4: Trigger “step up” reflex with perch
When the bird gets used to the perch in your hand, start getting him to step onto it. Hold it at a right angle to the bird’s body and gently nudge him in the chest. This will trigger his 'step up' reflex.
Tip
Always say 'Up, up' or 'Step up' when you nudge the bird with the perch. Give him lots of praise when he steps onto it. He’s making progress!
Step 5: Replace perch with hand
When the bird is comfortable standing on a hand-held perch, you can start training him to stand on your hand alone. During each training session, move your hand farther down the perch -- and closer to the bird.
Step 6: Discard perch
After a few days, your bird should assume that a perch comes with a hand attached--so now it’s time to up the ante once again. What’s next? That’s right: your hand without the perch.
Step 7: Trigger “step up” reflex with hand
Moving slowly and smoothly and repeating the 'Up, up' command, nudge the bird in the chest until he has no choice but to step onto your pointer finger to steady himself.
Step 8: Repeat
Repeat this procedure until the bird has no problem stepping onto your finger and perching there.
Step 9: Practice outside of cage
Now you and your feathered friend can begin working outside the cage. With the bird perched on your finger, slowly and smoothly bring him out through the cage door.
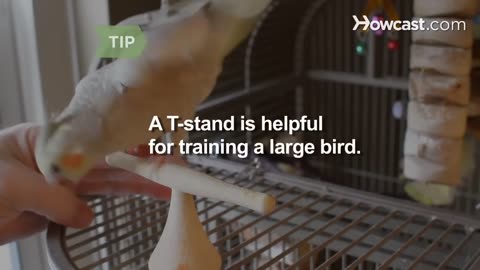
Tip
If you have a large bird, a T-stand will be a helpful training tool when working outside the cage. Practice putting the bird onto the T-stand and taking him off again.
Step 10: Practice verbal command
Practice the 'Up, up' command diligently until the bird knows that he should always step onto your 'finger perch' when you say so.
Tip
If the bird gets startled and flutters off your hand, calmly follow him to where he lands and nudge him, saying 'Up, up.' Usually, he’ll step right back onto your finger.
Step 11: Enlist friends and relatives
Encourage your friends and relatives to work with your bird as much as possible. The tamer a bird becomes, the happier his relationship with his human flock will be.
Did You Know?
Birds in the parrot family have two toes facing forward and two facing backward, to help them hold onto things while they’re climbing.
21
views
How to Make an Old Fashioned | Cocktail Recipes
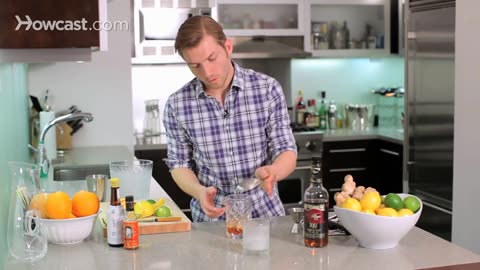
The Old-Fashioned cocktail is so old that 100 years ago they still called it an Old-Fashioned. A lot of classic cocktails were invented in the 19th century. We're talking 18th century. So it's definitely earned its name. We're going to start with two ounces of rye whiskey, rye not bourbon, in this case. Because I think it tastes better, bourbon is a little sweeter, and rye is also what they used back in the 19th century. It was much more popular then. For our sweetener we're going to use a little bit of simple syrup. You could also muddle a sugar cube if you want. I just think this mixes better.
Just bar spoon of that, not too much or it's going to get way too sweet. Two dashes of angostura bitters and two dashes or orange bitters, which are a little harder to find, but they are available at some specialty stores and I think they're really important in making a great Old-Fashioned. You can make a good Old-Fashioned without them two dashes, but not a great one, for my money anyway. Now you notice I'm not going to muddle anything in this drink. I'm just going to stir it the way it is right now.
The muddling of the orange and the cherry was something that came about in the 20th century in the '50's post-Prohibition. A lot of stuff got changed around in Prohibition. People forgot how to make certain drinks, taste's changed, so I'm not saying that's a bad drink. I just don't think that's the most classic way to make it and I prefer it this way. So we're stirring it the way it is. All right, let's get our ice, and I'm going to get my frozen glass, and the Old-Fashioned is served on the rocks. And because it's all spirit, and we're going to sip this drink, it's a really stiff drink.
We don't like those ice cubes to be really small, because they melt really fast. They dilute the drink too much. Give it a nice stir there. So what I did was I took a muffin tin and I put some water in that and made these big giant ice cubes. So it keeps the drink cold, but doesn't dilute it too much. It doesn't get too watery. The perfect balance of both worlds. All right, let me grab that ice. Tell me that doesn't look awesome. All right, that should be good enough. And now we're going to garnish this, as we strain it over our nice hockey puck, with a lemon peel and an orange peel.
That's the only fruit we're going to put in this. I think maybe that's how the orange and cherry muddling thing started to make it's way into an Old-Fashioned. They used to put peels on them, and then maybe people started putting the whole fruit in them, I don't know not recommended. So holding the pith towards us, the white part towards us, and just squeezing gently the oils out into the glass. As there's the lemon and drop them in there, and there you go. It may not be how Don Draper makes it, but it's probably how George Washington did the classic Old-Fashioned.
💌 Let's stay Connected 💌
➡️ our website:https://www.howcast.com/
➡️ Facebook:https://www.facebook.com/howcast
➡️ https://www.instagram.com/howcast/
✨ If you liked this video, I'm sure you'll like these videos as well
▶️ https://youtu.be/q-gYcvipozY
▶️ https://youtu.be/ofwTyfKo8Mg
About us:-
Emphasizing high-quality instructional video production, Howcast brings you leading experts and accurate, reliable information on makeup tutorials, cute hairstyles, and nail art designs to soccer tricks, parkour, and skateboarding, plus how to Dougie, how to kiss, and much, much more. Howcast empowers people with engaging, useful how-to information wherever, whenever they need to know-how
#Howcast #cocktail #cocktailrecipes
Related searches:
how to make an old fashioned
how to make an old fashioned cocktail
how to drink
classic old fashioned
whiskey old fashioned
52
views

Baby Bumble Bee | Kids' Songs
Learn how to sing the classic kid's song Baby Bumble Bee with this Howcast video.
"I'm bringing home a baby bumblebee."
Jamie: Hi, friends. I'm Jamie.
Kelly: And I'm Kelly.
Jamie: And this is "Baby Bumblebee." We're going to be bringing some crazy animals home with us today. Let's get out our baby bumblebees and make them go, "Bzz bzz bzz bzz bzz bzz bzz bzz bzz bzzz bzz bzz bzz." And now, we're going to get out our baby dinosaur that goes, "Clomp clomp clomp." And how about our crocodile that goes, "Snap snap snap." And our grizzly bear goes, "Growl growl growl." Now let's put that all together. Don't forget those hand movements, okay?
Let's get our baby bumblebee out, just like this. "I'm bringing home a baby bumblebee/Won't my mommy be so proud of me/I'm bringing home a baby bumblebee/Bzz bzz bzz bzz bzz bzz bzz bzz bzz bzz." Ouch. It stung me.
"I'm bringing home a baby dinosaur/Won't my mom be running out the door/I'm bringing home a baby dinosaur/Clomp, clomp, clomp." Let's get that dinosaur out of there and get our crocodile in. Are we ready?
"I'm bringing home a baby crocodile/Won't my mommy wear a great big smile/I'm bringing home a baby crocodile/Snap, snap, snap." Let's get him out of there and get our grizzly bear out. Ready? Get out your grizzly bear hands.
"I'm bringing home a baby grizzly bear/Won't my mom be pulling out her hair/I'm bringing home a baby grizzly bear/Growl, growl, growl." Let's get him out of there. Shut the door. Let's not bring home these crazy animals anymore. That got really nuts in here.
That was "Baby Bumblebee."
32
views
How to Dance to Dubstep | Hip-Hop How-to
What's up? My name is Matt Steffanina and today I'm going to teach you guys how to dance to dubstep. Now, the first thing to know when you're dancing dubstep is that there's not as much of a groove in it as there is when you dance to hip-hop music. It's a lot more isolated and this is a chance for you to really show off your animation skills.
So, popping, waving, tutting, ticking, strobing, slow motion. All these effects are perfect for dubstep. We're going to go over a couple of them today and the first one is slow motion and speed changes. So, anything that you would normally do in a hip hop freestyle, you can do in slow motion to dubstep. Because it has all of those wow and those different sounds, you want to really listen closely to your music and to the patterns and find moves that you can accentuate with quick moves and then go back to a slow pace.
We call this style "warping." And it's characterized by a really quick motion at the beginning, followed by something really slow. For instance, if I'm walking forward and I want to add some warps in there on the beat, I can take a step, slow motion, onto my left foot and warp to the right. You want the warp to be really quick with your chest and you want to stop it. But what's going to happen at the end of it is that my arms are going to keep going to the left, so that it looks like my body created this slow motion with my arms.
Same thing, here. If I'm stepping forward again onto my right foot, I can take my torso to the left, knock it and then have my arms come in slow motion across. You can play with this effect in any direction.
There's one more isolation that we're going to work on today that you can practice in dubstep and that's isolating your shoulders from your head. The first thing we're going to do is rock our shoulders side to side. You want to create the illusion that your head is staying in the center. To create this illusion, we have to push our head the opposite direction that our torso is moving.
So, as I push my torso to the left, my head is going to pull to the right. It's important to practice this step in front of a mirror because it's hard to get a feel for what you're actually doing. Once you can rock side to side, you're going to also go front and back and eventually, you're going to make circles with your shoulders.
This is difficult to see when facing straight on. So, I'm going to bend down so that you can see the circles. Now, when you're going around in circles again, we want our head to stay in the center. So, whichever way your shoulders and your torso go, your head is going to push the opposite direction to create that illusion.
You can mix this isolation in with your warps, your other waves, your ticks, your pops and all your other animation skills. Just remember the most important thing is to stay on beat. And with dubstep, you have a lot of sounds to play around with.
37
views
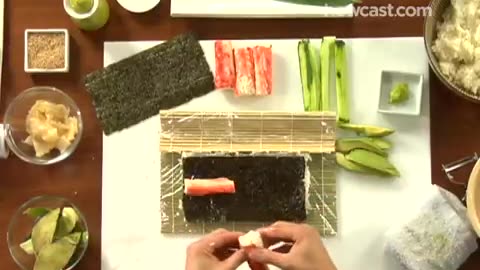
How to Make an Inside Out California Roll
True to its name, this rolled sushi was invented in California by an enterprising Japanese sushi chef in the early 1970s.
Step 1: Encase mat in plastic
Cut a large piece of plastic wrap a little more than twice the size of your bamboo mat and place it on the table. Place the bamboo mat on top and encase it in the plastic by smoothing the wrap evenly over both sides. Set the mat aside.
Step 2: Prepare cucumber
Peel the cucumber and scoop out the seeds with a small spoon. Cut the cucumber half into thin strips about 1/8 - to 1/4-inch wide and set them aside.
Step 3: Prepare avocado
Cut the avocado in half lengthwise and twist the two halves until they separate. Cut the half without the pit into two quarters. Remove their skin and cut them lengthwise into quarter-inch slices. Set the slices aside and clean your hands and knife with the damp kitchen cloth.
Tip
To prevent the avocado from oxidizing, or turning brown, squeeze some fresh lemon juice on the cut avocados.
Step 4: Put rice on nori
Lay a half sheet of nori shiny side down. Moisten your hands with a little water and grab a handful, or about a cup, of prepared sushi rice. Ball it up and put it on top of the nori.
Step 5: Spread rice
Spread and pat the rice across the nori, leaving a 1/2-inch margin uncovered at the bottom edge.
Tip
Don't use too much rice. It should be no more than 1/4-inch thick and you should be able to see the nori sheet through it.
Step 6: Sprinkle sesame seeds
Sprinkle sesame seeds over the rice.
Step 7: Flip nori onto mat
Lay the plastic-wrapped bamboo in front of you. Flip the prepared nori sheet rice-side down at the bottom end of the mat.
Step 8: Lay filling in nori
Lay a strip of shredded crab across the middle of the nori, add a strip or two of cucumber next to it, and lay avocado slices on top.
Step 9: Roll with mat
Use the bamboo mat to roll the bottom edge of the nori over the filling in the center, tucking it over firmly so the filling is enclosed.
Step 10: Continue to roll
Pull the mat back and lay it over the roll again. This time continue to roll forward, applying even pressure and tightening as you roll, using your mat as leverage.
Step 11: Smooth out roll
Once it's taken shape, take the roll off the mat and lay the mat over it. Press and smooth the roll, compressing it tightly and evening out the ends.
Step 12: Cut roll
With a very sharp knife use a delicate but firm sawing motion to cut the roll in half. Cut each half into three equal pieces.
Step 13: Repeat process
Repeat the process with your remaining half of nori, lightly layering it with rice, adding the filling, and rolling and cutting the sushi. Eat at your leisure—after all, this is California-style.
Did You Know?
Fallbrook, California, the self proclaimed 'avocado capital of the world,' has been hosting an annual Avocado Festival since 1962.
17
views
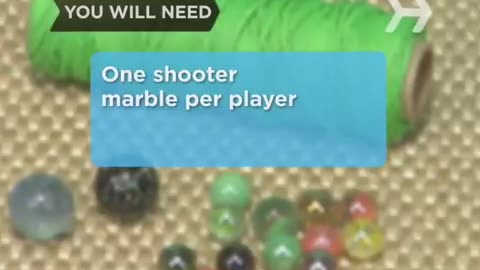
How to Play Marbles
There are lots of ways to play this classic marbles game called "Ringer." You can learn this simple version in no time!
Warning
Be careful if you have a little brother or sister who's 3 years old or under—he or she could choke on a jack or ball this small, so don't leave them out.
Step 1: Draw circle
On your playing surface, draw or mark a circle that's anywhere from 3 feet to 10 feet across. The bigger your circle, the harder the game will be.
Tip
If you're playing inside, use piece of string that's about 9 and a half feet long to make a circle that's 3 feet across.
Step 2: Draw lines
Draw or mark a line next to the circle so that the circle just touches the middle of the line. Draw another line that mirrors the first line on the other side of the circle.
Step 3: Pick first player
Decide who's going first. Each player should stand behind one of the lines and toss or shoot one marble toward the other line. This is called "lagging." The person whose marble lands closest to the second line goes first. The next closest player goes next, and so on.
Step 4: Set up marbles
In the very center of the circle, set up the marbles in the shape of a plus sign.
Tip
The marbles, which are also called "mibs," can also be set up in a circle or scattered randomly.
Step 5: Knuckling down
The first player kneels down anywhere outside of the circle holding his shooter in one hand with at least one knuckle touching the ground. This is called "knuckling down." Get it?
Step 6: Flick shooter
With his thumb, the player flicks his shooter toward the marbles. His goal is to knock one or more of them outside of the circle while leaving his shooter inside the circle.
Tip
Shooters are usually one of your favorite marbles, and are usually a little bigger than the 13 marbles in the circle.
Step 7: Pick up marble
If the first shooter hits a marble outside of the circle, he picks up the marble and keeps it, for one point. He can now shoot again from the spot where his shooter landed.
Tip
You can play this game for fun or for "keepsies," which means at the end of the game everyone gets to keep the marbles they knock out. Decide before you start which way you want to play!
Step 8: Next person's turn
The first shooter's turn continues until he doesn't knock out a marble. Then he has to leave his shooter where it is, and it's the next person's turn.
Tip
You're more likely to hit your marble target if you look at it—and not your hand—as you knuckle down and flick your thumb.
Step 9: Next player goes
The next player now knuckles down and shoots from anywhere outside the circle. If she knocks out a marble, she picks it up and keeps it.
Step 10: Knock out shooter
A player can also try to knock out another person's shooter. If she does, on that player's next turn, he won't have the advantage of shooting from inside the circle, closer to the marbles. He'll have to shoot from a spot outside the circle.
Step 11: Game over
The game is over when all the marbles have been knocked outside of the circle. The player with the most marbles wins.
Did You Know?
Every summer, kids from across the U.S. compete for prizes and scholarships at the four-day National Marbles Tournament, first held in 1922.
21
views
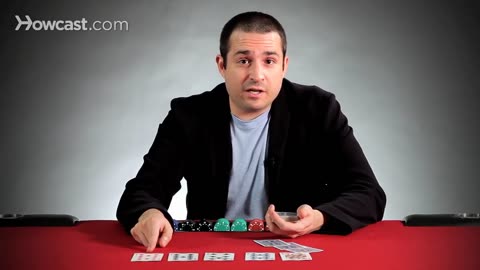
Poker Rules | Poker Tutorials
Hey, I'm Nicky Numbers, Professional Poker Player, and today, I'm going to talk to you about the rules of poker. Hold em is a game where each player starts with two down cards. However, before they even deal, there are two players that are forced to put out bets, known as the blinds. There is typically a small blind, and a big blind, and these are forced bets that players have to put out, before the hand is even dealt. Each hand, the blinds move from player to player, around the table, so that it's fair. After the blinds are posted, which means the blinds have been put up, and actually are out in front of the players, the hand begins. The dealer gives each player two cards, one at a time.
So, the cards are dealt, and each player is given two down cards. They then have to choose whether to stay in the hand, or fold. A round of betting then takes place starting immediately after the big blind, which is known as under the gun, because they're forced to act first. Players choose to either stay in the hand by calling the big blind, meaning they put in the same amount of chips, or increasing the size of the wage of this round, often based on their hole cards, by raising. Alternatively, and most commonly, players decide not to participate in the hand, put in no further chips into the pot, and fold their cards. Once all the players have acted, three cards are dealt, known as the flop. These are community cards that any player in the hand can use. After the three community cards, known as the flop, appear, another round of betting takes place, except this time, there's no forced bets, like there are pre-flop, with the blinds.
Players have two options, they can check, or they can bet. Checking is when you choose to let the other players act before you, typically indicated by saying, "I check," or tapping the table. If all the players in the hand check, then the next card comes, which nobody put money to see. The next card, is known as the turn. If instead of checking, one of the players had bet, then they would force the other players in the hand to commit more chips in order to continue, otherwise, those players would have to fold, and the player who made the bet would be awarded the pot. Otherwise, if one or more players call the bet, the hand will continue to the turn. The turn is another additional community card, that unlike the flop, comes off as one card, instead of three. However, like the flop, a betting round takes place in the same way. If all the players in the hand check on the turn, or there's a bet, and it's called, the final community card comes, known as the river. The river is another single community card after which a round of betting takes place, just like it did on the flop, and the turn.
The only difference is, that after this round of betting, if two or more players are still in the hand, then a showdown occurs, where all the players still in the hand, after the river, show their cards, and the dealer awards the pot to the best five card hand. So, there you go, the down and dirty rules to poker. Like Mike Sexton says, Poker Hall of Famer, and Ambassador for the World Poker Tour, "It takes a minute to learn, and a lifetime to master."
32
views
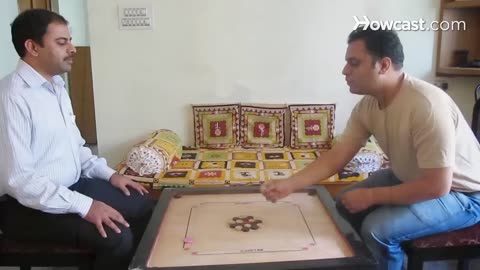
How to Play Carroms
Carroms is a game similar to billiards but is played on a plywood board using wooden pucks called carroms. Players use a striker to push their carroms into pockets at the board's corners before their opponents sink theirs.
Step 1: Arrange the carroms
Arrange the carroms in a hexagon at the center of the board with the red queen in the center.
Step 2: Flip a coin
Flip a coin to determine which player goes first. The winner plays the white carroms.
Step 3: Take a seat
Seat yourself at one side of the board. You will only be allowed to initiate carrom strikes from that side of the board.
Step 4: Try to sink your carroms
Move the striker with your fingers from your baseline as you try to sink your carroms. Your turn continues as long as you continue to sink carroms.
Step 5: Try to sink the red queen
When you have sunk one of your carroms, try to sink the red queen.
Tip
If you sink the red queen, you must sink one of your carroms on the next shot. Otherwise the queen is returned to the center of the board.
Step 6: Continue the game
Continue the game until one player has sunk all of their carroms and the red queen has been sunk. That player is the winner of the game.
Did You Know?
The first international carroms match was held in the 1960s, when a team from India competed against one from Sri Lanka.
20
views
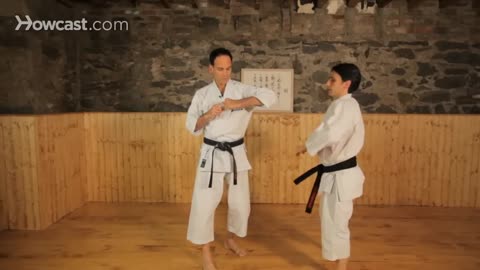
Top Self-Defense Moves | Karate Lessons
Today I'm going to do a few different self-defense moves.
Obviously with self-defense the variables are tremendous so the first one will be a simple take down and a submission. The others will be quick strikes. So they're quite different in the approach.
So for the first one if someone grabs you strongly here. If we're of similar size and build then I could certainly use my strength against his. But, even if he's much stronger than me, grabbing his wrists you don't have to reach over and do anything clever you can just grab the wrist here. But the closer you are to having a bit of leverage, the better. Grab this, this one doesn't have to do anything clever either because you're going to just bend at the waist. Bend and take him down and get you knee involved any way you like along this arm. But in the corner of the shoulder is probably better.
And of course, in a situation you'll be in danger you can lean on that and that's probably going to hurt. Okay? So you're just going to submit the partner and control him. Let's say perhaps you expect some one to come and help you.
So just going through that again. And as he's here no fancy turns or anything else. Just grabbing here, you can even grab lower if you want here. It's the body that does the work and then you're here. Be comfortable going down on your knee.
What you don't want to do is, sorry I just want to do that one again. What you don't want to do is bend over, leave your backside in the air. You come over the top even if you slap him in the face, come over the top, go down onto that knee and submit your partner. At the first one, if he comes at a little stronger and you don't have so much ability to turn, let's say with both hands, there is, of course, many things that you can do. But personally, I prefer to strike rather than to be wrestling someone because I'm not a massively built person. So a kick to the shin either one low, high, and then you should probably let go.
So varying your strikes by long distance is very discombobulated to the opponent. So from here...Of course if he gets in really close make sure you're the one to headbutt first and not him. So that depends on height and everything else. But, you know, headbutts you're in danger of hurting yourself as well unless it's so close you feel that happening. So hitting low or hitting high will take him down.
When you hit with the elbow this wrist position is quite important. Make sure your wrist is this way so that your bicep is broad. That will give solidity to the elbow strike. This way it'll bounce back a little bit. You need to hit hard twice and then clear yourself of the situation. Alex and I are both guys so we'll bring Yong in. She's obviously much more petite and she pretty more likes to be grabbed by one arm or both arms. This is a possibility, of course. But let's say that the grab is here, I'm going to be expecting to be dominant of this situation. She's going to reach quickly and kick to the groin. Crack! And then importantly, just get out of there. So turning away this way is very awkward to me. If she were to make a mistake and turn the other way. So let's say she strikes low, crack and turns the other way, she's going to roll into me and then, I mean, really it might be over for her.
So here's the grab, quick reaction, boom! And then quick turn away, and then she's gone. And before I have time to recover it's already too late, she's gone into the crowd.
Those are my self-defense moves. Of course there are many variations you can do off those but that's a very good start.
11
views

How to Perform a Striptease
Drive the man in your life wild with a striptease he'll never forget.
Step 1: Choose an outfit
Choose an outfit. It can be anything from a conservative business suit to a sexy French maid costume -- the important thing is that each article can be removed with a minimum of fuss.
Tip
Make sure that no item is tight enough to create bulges or leave marks on your skin.
Step 2: Snag stilettos
Pick shoes that will make the most of your legs, meaning something with a high, skinny heel -- the higher and skinnier the better.
Step 3: Put on stockings
Put on some silky stockings with garters. Go with classic fishnets, or get a pair with a racy seam up the back.
Step 4: Set the music
Get your music ready so you don't run out of tunes in the middle of your performance. Make a sultry mix or playlist, so you know what's coming up.
Step 5: Set the mood
Use a light dimmer and/or candles to create flattering lighting, and put a straight-backed chair in the middle of the room.
Tip
If necessary, take a swig of something before you begin to calm your nerves and lower your inhibitions, but don't get drunk -- no one likes a sloppy striptease.
Step 6: Walk the walk
Begin your striptease by striding into the room like a professional catwalker, one foot directly in front of the other, shoulders back, head raised high.
Step 7: Begin to strip
Turn your back on your man and slide your jacket or top off your shoulders. Turn back around and toss it aside.
Tip
Maintain eye contact throughout your act.
Step 8: Tease
Put your hands behind your head and gyrate a bit before moving on to the skirt. Turn your back to him, grab the sides of your skirt, lean slightly forward, and slowly tug your skirt down as you wiggle your hips. When the skirt reaches the floor, kick it aside.
Step 9: Lose the garters
Move around some more, running your hands along your body, before kicking off a shoe and throwing that leg on top of the chair. Undo the garter and slowly begin to unfold the stocking until it's off. Repeat with the other stocking, then step back into stilettos.
Step 10: Take off the bra
Push your bra straps off your shoulder, unhook your bra, slip it off, and fling it at him. Then languidly caress your breasts.
Step 11: Slip off panties
Time for the finale! Turn your back on him, slip your hands, palms down, into the sides of your panties, bend forward, and slowly push them down, keeping your legs as straight as you can. When they reach your ankles, step out of them.
Step 12: Prepare
Prepare to be ravaged by your very turned-on lover!
Did You Know?
Prostitution is legal in Iceland, but strip shows are against the law.
797
views