
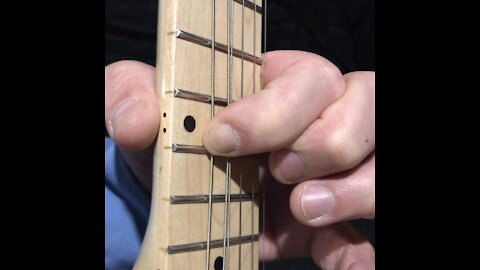
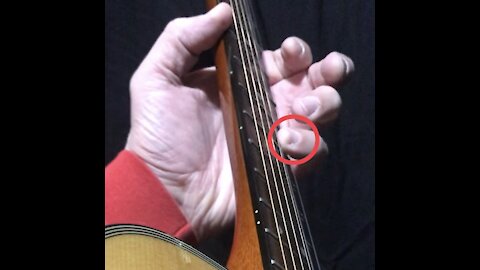
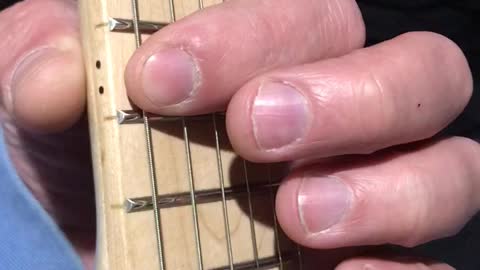
Using Left Hand Pointer Finger To Bend String Up Two Half Steps, Or A Whole Step
In this exercise, we bend the string so that the note goes up in pitch TWO half steps, or ONE whole step.
“Use your ears!” ~ Yngwie Malmsteen
49
views
1
comment
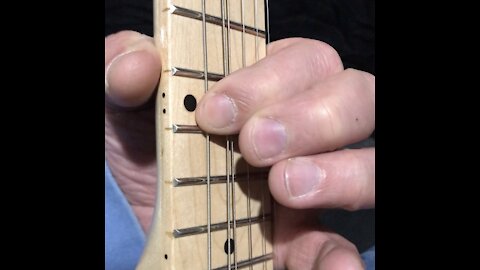
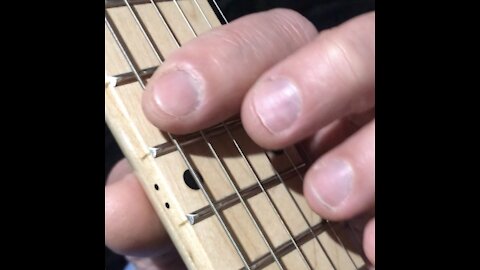
Using The Left Pointer Finger To Bend A Note Up A Half-Step By Ear
This bending exercise is similar to the previous exercise, except now we focus on using our EARS to bend the note up to the pitch we want to hear.
next video:
Using Left Hand Pointer Finger To Bend String Up Two Half Steps, Or A Whole Step
https://rumble.com/vd2yez-using-left-hand-pointer-finger-to-bend-string-up-two-half-steps-or-a-whole-.html
36
views
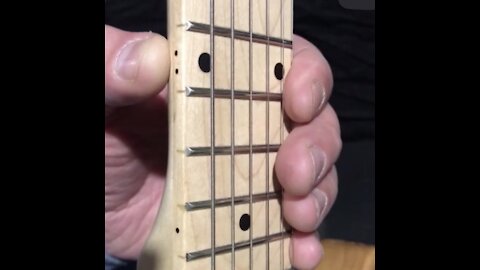
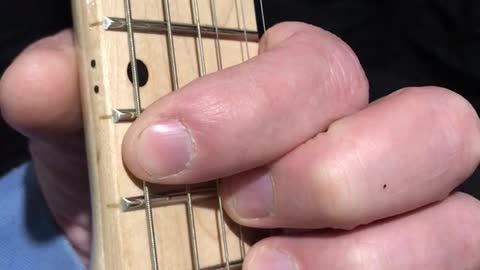
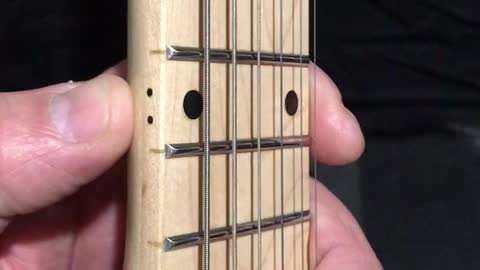
Using Your Thumb As Anchor Point, And Your Pointer Finger To Fret Many Notes
In this video, we focus on using the thumb as an anchor point, while using the pointer finger to fret any note.
The idea of this exercise is to
1) familiarize yourself with the concept of anchor points, or reference points, or pivot points, that you can use to feel your way around the guitar.
Anchor/reference/pivot points allow you to develop your hand-ear coordination,
and allow you take your eyes off your hands, so you are more free to do other things with your eyes, especially to close your eyes.
Its OK to use your eyes at the beginning, to develop some hand-eye coordination, but that should only be a temporary crutch, a bridge you can use to cross over to hand-ear coordination.
The best way to bridge from hand-eye coordination to hand-ear coordination is simply to close your eyes.
You will be more sloppy at first, but within a few hours practice, you should notice remarkable improvement.
Shift your thinking from the way your fingers LOOK, to the way your fingers SOUND.
2) break yourself of the idea that you have to use a certain finger to fret a certain note. While it is good to “practice perfect”, its also a good idea to unlock and unleash your fingers, so that your fingers will eventually just work together to get the note you need, when you need it, by any means necessary.
Instead of having your mind get confused by trying to dictate to each finger what it should do, practice letting your mind go, and allowing your fingers to just work it out amongst themselves, to get the sound you want to hear.
next video:
Learning Guitar, One Half Step At A Time. From E to F at the 12th and 13th fret of low E string
https://rumble.com/vc0m3p-learning-guitar-one-half-step-at-a-time.-from-e-to-f-at-the-12th-and-13th-f.html
28
views
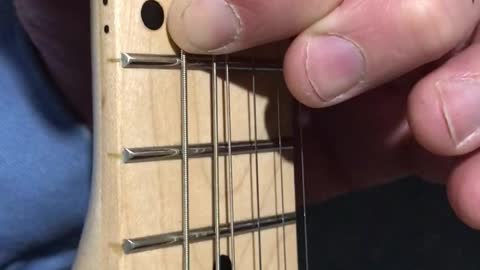
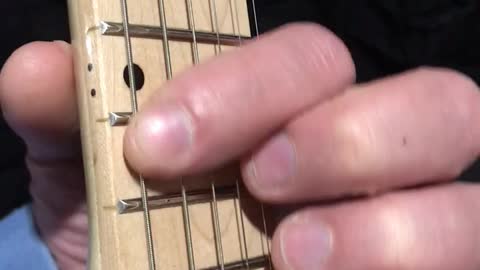
Using Left Pointer Finger To Bend Low E String
One of the fundamental characteristics of the guitar is how the sound of a note is modulated, or changed.
And one of the fundamental ways the sound of a note is modulated, is by bending a string.
Bending a string is not easy, and requires dedicated practice of the technique.
First of all, if you are a beginner, you won’t have callouses on your fingertips. Therefore, your fingertip will be soft and squishy and instead of your finger bending the string, the string will want to cut into the flesh of your fingertip.
Therefore, its very important to wash and completely DRY your hands like 30 minutes before practice.
NEVER practice guitar right after you get out shower, while your fingers are moist. The strings will cut your fingers like warm butter, and you won’t even feel it until your fingers are bleeding.
ALWAYS visually inspect your fingertips every few minutes, to make sure your skin is not broken.
If your skin shows any sign of damage, STOP immediately, and do not use that finger the rest of the day.
Use broken skin on a finger as an opportunity to learn how to play without that finger, and to learn how to shift fretting responsibilities to other fingers.
As you develop callouses, your fingertips will become more impervious to damage. Your fingertips will become like shoe leather. The strings won’t sink into your flesh, so you’ll have more control of the string, and more control of your tone.
“Tone comes from your fingers” ~ Joe Satriani
In addition to soft, squishy skin, you will also have soft, squishy muscles in your fingers and hands.
So what you need to do is treat these muscles like you are at the gym. Think in terms of increasing resistance, sets and reps.
Its hard work, so just get it in your mind that you are going to have to bust your ass if you want progress and results.
Doing these bending exercises should start out as a hand-eye exercise, and then shift to a hand-ear exercise as soon as possible.
So start out by WATCHING how far you want to bend the note, and then shift to LISTENING to how far you want to bend the note.
At first, try to bend the string up a 1/4 tone/step, then bend up 1/2 tone/step, then a full tone/step.
Developing your fingertip callouses, and hand/finger muscles is the first step in developing vibrato.
Start on the low E string, and bend the string down, away from you, toward the A string.
If you bend the E string up, the string will fall off the edge of the frets. Give it a try just to see why you don’t want to bend the E string up.
Move your bending exercises thru ADGB strings.
When you get to the high E string, you’ll have to focus on bending the string up, toward you, toward the B string.
Again, if you bend the high E string down, it will fall off the edge of the frets. Go ahead and bend the high E string down until it falls off the frets, so you know why you don’t want to do that.
So, for the Low E and high E, you can only really bend them one way, toward the middle of the fretboard.
But for the ADGB strings, you can bend them either way, up or down.
Practice bending the ADGB strings both up and down.
Once you have mastered these bend exercises on your pointer finger, master them on all the other fingers.
Again, be very careful with moist fingers, and stop immediately at any sign of skin damage. Its far better to cut your practice short today, than to have to miss practice tomorrow.
If all 4 of your finger tips are showing skin damage, use it as an opportunity to either practice using the finger pads, or just stop using the left hand altogether and focus your practice time on right-hand technique, or other music skills like singing, drums etc
Learn the mental habit of using your temporary set-backs as opportunities to practice something different
next video:
Using The Left Pointer Finger To Bend A Note Up A Half-Step By Ear
https://rumble.com/vd2iw3-using-the-left-pointer-finger-to-bend-a-note-up-a-half-step-by-ear.html
206
views
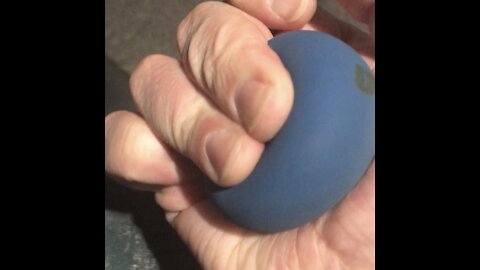
Squeeze Racquetball For Finger Pad Grip Strengthening Exercise
Racquetballs are cheap, and easy to find wherever sporting goods are sold.
Get yourself a few different colored balls, for different hardness of balls, and increased difficulty of finger strength exercises
These exercises are slightly different in that instead of using the finger tips, we keep the last finger joint straight and squeeze with the finger pads not finger tips.
Squeeze the easiest ball with all 4 fingers, with each finger helping.
Then squeeze the ball with every 3 finger combination possible
Then squeeze the ball with every 2 finger combination possible
Finally squeeze the ball with 1 finger at a time.
Increasing your finger tip grip strength will help you fret notes on the guitar better.
Once you can do all these exercises on the easiest ball, move up to the next hardest ball.
Do these exercises like you would any gym exercise. Like 3 sets of 10 reps
next video:
Using Left Pointer Finger To Bend Low E String
https://rumble.com/vd2f8z-using-left-pointer-finger-to-bend-low-e-string.html
97
views
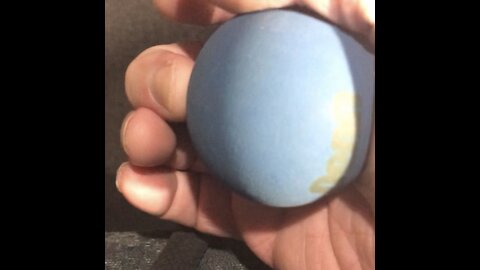
Squeeze Racquetball For Finger Tip Grip Strengthening Exercise
Racquetballs are cheap, and easy to find wherever sporting goods are sold.
Get yourself a few different colored balls, for different hardness of balls, and increased difficulty of finger strength exercises
Squeeze the easiest ball with all 4 fingers, with each finger helping.
Then squeeze the ball with every 3 finger combination possible
Then squeeze the ball with every 2 finger combination possible
Finally squeeze the ball with 1 finger at a time.
Increasing your finger tip grip strength will help you fret notes on the guitar better.
Once you can do all these exercises on the easiest ball, move up to the next hardest ball.
Do these exercises like you would any gym exercise. Like 3 sets of 10 reps
next video:
Squeeze Racquetball For Finger Pad Grip Strengthening Exercise
https://rumble.com/vd1pl3-squeeze-racquetball-for-finger-pad-grip-strengthening-exercise.html
Guitar Rote Exercises
https://rumble.com/c/c-462327
Beginner Guitar
https://rumble.com/c/BeginnerGuitar
Intermediate Guitar
https://rumble.com/c/c-433397
126
views
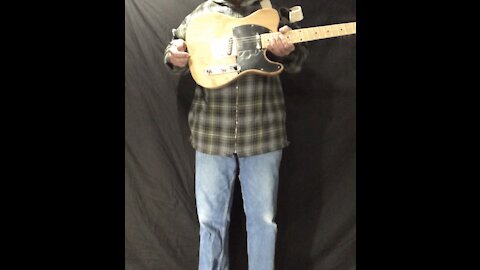
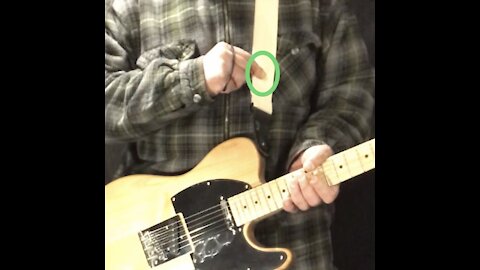
How To Adjust Your Guitar Strap Length
The guitar strap is the second most important guitar accessory, and its important to get it adjusted just right for your own unique body.
There is no right or wrong way to adjust your guitar strap length, there are only some lengths that work better for you than others
To adjust your guitar strap length, start with a medium length that puts the sound hole (or middle pickup) right over your belly button.
This position is the position that I’ve settled on that works best for me.
From this position, adjust your strap longer / down an inch and play it that way for a while, maybe for an hour, or even a whole day.
Then adjust it down another inch, and play it that way for a while.
Keep adjusting the strap longer and longer until the strap runs out of adjustment.
There are extra-long straps available if you think you need one.
Once your strap is extended to its full length, reverse the process and shorten the strap by an inch per hour or day, until the strap is as short as it will go.
Once the strap is as short as it will go, reverse the process yet again, and lengthen the strap by an inch per hour or day, but this time do not keep adjusting it to its full length, but instead just adjust it until it FEELS just a little lower than you would like.
Then reverse the process yet again, and keep shortening the strap until it FEELS a little higher than you would like.
Keep adjusting your strap slightly longer and shorter than where it FEELS right, until you dial it in to the perfect sweet spot where it feels perfect.
You probably do not want to adjust the strap so short that either of your elbows are bent more than 90°.
And you probably do not want to adjust the strap extra long, just because you like the way that LOOKS on someone else.
Just keep experimenting with the rough adjustment until it gets pretty close to feeling right, and then fine adjust by 1/2” or 1/4” at a time.
Once you develop a feel for a properly adjusted strap, any other adjustment will not feel right at all.
Having your strap adjusted properly will help keep both of your hands, and arms, in their optimum playing position, where strumming and picking feel right, and chords and scales feel right, all over the fingerboard.
Learning how do do this one simple strap adjustment can make a world of difference in your playing.
Not only will you be on your feet dancing, but your arms and hands will ergonomically correct, too
https://en.wikipedia.org/wiki/Ergonomics
next video 1:
Guitar Strap Fastened To Headstock Pulls On Neck
https://rumble.com/vc3ut3-guitar-strap-fastened-to-headstock-pulls-on-neck.html
next video 2:
ALWAYS Verify Your Guitar Strap Ends Are NOT Twisted, And Use Strap Locks Just In Case
https://rumble.com/vc4lxh-always-verify-your-guitar-strap-ends-are-not-twisted-and-use-strap-locks-ju.html
151
views
1
comment
Guitar Strap Is 2nd Most Important Guitar Accessory
The guitar STAND is the most important guitar accessory, because it lets you keep your guitar handy, which enables you to easily pick it up and practice, practice, practice...
If your guitar is in a case, in the closet, thats probably where it will stay, until one day you sell it as “barely used”...
The guitar STRAP is the second most important guitar accessory, because it lets you STAND UP to play.
You will need to STAND UP if you ever hope to take your guitar playing to the next level.
You need to be on your feet, on your toes, with your body weight able to be shifted from one foot to the other foot.
You need to play your guitar with every cell in your body, from head to toe.
You need to be able to DANCE.
Without DANCE, there would be no music, because Dance leads first, and then Music follows after...
If you can’t even dance to your own music, don’t expect anyone else to dance to your music!
Dance like nobody is watching!
To play lead guitar, you must first develop your rhythm chops, and to develop rhythm, you must first learn to let go, cut loose, and DANCE!
By shifting your body weight from side to side, it enables you to slow down, to feel the song, and to “flywheel” your playing through the passages where you might otherwise lose the beat and rhythm.
Its impossible to overstate the importance of a good (cotton!) guitar strap (with strap locks!) to the advancement of your guitar playing.
Yes I know B.B.King sat down to play, but he earned that right. When he was a young man, he STOOD on a street corner in Mississippi and developed his chops. You are not B.B.King, and you have not earned the right to sit down on the job.
Do not fool yourself by saying you will stand when you get good enough to stand, because you need to stand up first, and only then you will get better at playing, and maybe after many years of practicing on your feet, you will have earned the right to sit down.
The vast majority of every guitar hero you know stands up to play, and thats not a coincidence! They are good because they stand up!
I never really understood how to play guitar properly until I saw Angus Young of AC/DC DANCE with his guitar in a live video of “Let There Be Rock”
https://www.youtube.com/results?search_query=let+there+be+rock+ac%2Fdc+live+1977
next video:
Guitar Straps - Cotton Is Much Better Than Nylon
https://rumble.com/vc4rpt-guitar-straps-cotton-is-much-better-than-nylon.html
99
views
2
comments
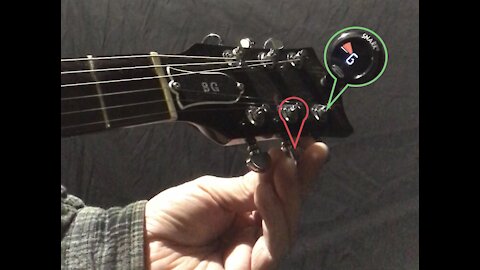
Rule 1, Rule 2, Rule 3 For Guitar Tuning Pegs, To Prevent Breaking Strings
Rule 1: never touch your tuning pegs, or let anyone else touch your tuning pegs, especially young children...
And especially if your guitar is tuned E standard, and it has a Floyd Rose tremolo, and your friend wants to tune it Drop C so he can show you this riff he’s been working on, and he will only play your guitar for 5 minutes before his ADHD kicks in, he gets bored, and leaves... because it will take you a very long time to get it back in tune, and even longer if he helpfully adjusts your tremolo springs for you. Yeah...
Rule 2: if you decide to break Rule 1, know WHY you are touching the tuning pegs, and know WHAT you expect to happen if you touch the tuning pegs.
Rule 3: Always, Always, Always pluck the string *before* turning the peg, and be actively LISTENING to the string as you turn the peg.
A possible exception to this rule of plucking and listening to the string is when you are changing strings, in which case you will want to either listen to the plucked string, OR have your other-hand fingers on the string, FEELING for the anticipated change in string tension. One way or the other, be actively MONITORING the string tension as you turn the peg.
WHY are you turning the peg?
Because you *think* you have a flat G string? Ok, good!
WHAT do you *expect* to happen when you turn the G peg?
You will HEAR the pitch of the G string go UP as you turn the G peg? Ok, good!
Now, if you *want* to do something with the peg, and you *expect* something to happen when you turn the peg, and that something doesn’t immediately *happen*, STOP!!!
Something is very wrong!
Check yourself, before you wreck yourself!
Your fingers are on the WRONG peg, or you are turning the peg the WRONG way.
Either way, by the time your slow brain catches up to your fast fingers, you will have broken a string!
I broke so many strings this way, smh...
I finally figured out what I was doing wrong, and made some rules for myself to obey, to stop it from happening again.
And I’m happy to report to you that ever since implementing Rule 1, 2 and 3, I have never broken another string since!
Also, if you ever break a string, INSPECT the part of the guitar where the break occurred.
If the string broke by the tuning peg, theres a good chance theres a sharp burr around the peg hole. De-burr the hole before installing new strings, or else you’ll keep breaking new strings.
Also, inspect and de-burr the other peg holes as long as you have to change your strings anyway. This can be a very tedious, time-consuming project, so kiss your practice time goodbye.
You can use a tiny rat tail hand file, and a bright light to see fine details.
Or you can use a Dremel power tool and cut the project time. Once you invest in a Dremel tool, you’ll find many other uses for it to help justify the investment.
next video:
How To Fine Tune Your Guitar With Snark Tuner
https://rumble.com/vbwys7-how-to-fine-tune-your-guitar-with-snark-tuner.html
182
views
Guitar Straps - Cotton Is Much Better Than Nylon
I have used nylon guitar straps for many years, but then one day I discovered cotton guitar straps, and I will never go back to nylon!
Nylon straps are like seat belts. They don’t have any give to them, so your shoulder takes the brunt of every movement of the guitar. Over time, this will probably cause shoulder problems!
Cotton straps have a little bit of “give” to them, and are so much more comfortable. I can play guitar standing up for much longer with a cotton strap than I ever could with a nylon strap.
Cotton straps make a world of difference!
For some reason my local guitar shops do not stock cotton straps, which is why I had always used nylon before.
You can buy cotton straps online, or request your local shop stock cotton straps as a service to all their customs, and so you can in turn support your local music shops.
The price of a cotton strap is close to the price of a nylon strap.
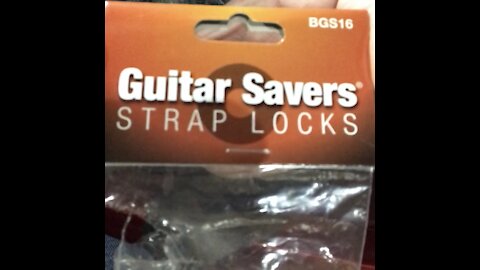
Also, get yourself some strap locks while you are shopping.
Cotton straps and strap locks are inexpensive, and in my opinion a very good investment.
next video:
ALWAYS Verify Your Guitar Strap Ends Are NOT Twisted, And Use Strap Locks Just In Case
https://rumble.com/vc4lxh-always-verify-your-guitar-strap-ends-are-not-twisted-and-use-strap-locks-ju.html
138
views
ALWAYS Verify Your Guitar Strap Ends Are NOT Twisted, And Use Strap Locks Just In Case
Always, Always, Always visually verify that your guitar strap is NOT twisted at either end, BEFORE you put the strap over your head, and hang the weight of the guitar on the strap.
Your guitar strap ends will want to rotate around the peg almost every time you handle your guitar, and if you don’t verify (and correct) the strap ends, your guitar WILL drop out of the strap and it WILL hit the floor, probably while you are standing, and your guitar WILL be seriously damaged.
If you are lucky, and your left hand is on the neck, you might be able to catch the guitar as it falls out of the strap, but thats not a risk you ever want to take.
So, just develop some good habits, and make a small investment, and you’ll save yourself a lot of trouble and heartache.
Also, there are many strap lock devices available, so research them all and see what you think will work best for you.
Will you want to take your strap off frequently, to put the guitar in its case? Or will you probably just leave the strap on all the time?
I like the rubber washer style strap locks, because i seldom, if ever, take my straps off. They are cheap, easy to install, and they work well for me.
Strap locking devices are well worth the investment, and i would recommend making that small investment BEFORE you learn the hard way why strap locks were invented.
next video:
How To Adjust Guitar Neck Angle For Best Playing Position
https://rumble.com/vbyrjl-how-to-adjust-guitar-neck-angle-for-best-playing-position.html
36
views
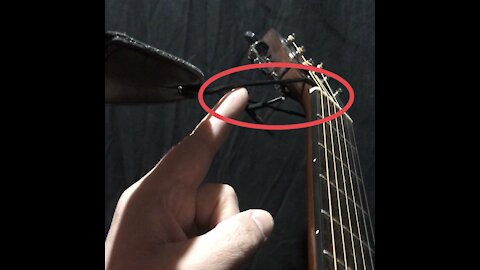
Guitar Strap Fastened To Headstock Pulls On Neck
#Guitar #GuitarStrap #GuitarTips #BeginnerGuitar #StrapLocks
Have you seen a guitar strap mounted to a headstock like this?
Its probably not a good idea, because the strap pulls the neck backward, which will pull your strings out of tune.
Instead, research how several other guitarists, or the factory, have mounted the strap to the body of (your model of) guitar, and copy what seems like the best ideas.
You can get a strap peg, and strap locks, from your local music shop.
Its also a good idea to use strap locking devices to retain the strap on the peg. Otherwise the strap will tend to rotate on the peg, and as soon as you put weigh on the strap, it will pop off the peg and your guitar will hit the floor, and probably cause serious damage to your guitar.
Guitar Rote Exercises
https://rumble.com/c/c-462327
Beginner Guitar
https://rumble.com/c/BeginnerGuitar
Intermediate Guitar
https://rumble.com/c/c-433397
45
views
Are You Doing Your Minor Pentatonic Scale Wrong?
#GuitarLessons #IntermediateGuitar #Guitar #MinorPentatonic #Aminor #Scale #Minor3rd
The A minor pentatonic, in the 5th hand position, is illustrated here, but the concepts can be applied everywhere else.
If you are like some guitar students, you were taught to do the minor pentatonic with 2 notes per string.
LowE5-8, A5-7, D5-7, G5-7, B5-8, HighE5-8
This works pretty good for coordinating “the count” with the up-pick and down-pick, and the balanced feel of fretting each string twice before moving to the next string.
However, a problem with doing the minor pentatonic this way is that you end (resolve) on a minor 3rd instead of ending (resolving) on a root note.
So while that high minor 3rd is technically part of the minor pentatonic scale, you probably don’t want to end your scale on that note.
To play this scale “more correctly” (in my opinion), and to resolve on the root note, simply do not play the very last note of the scale. (HighE8)
However when you don’t play that last note, the scale winds up having an odd number of notes, which can mess up your picking patterns, and doesn’t sound quite right.
So to solve this problem, simply break this two octave scale into its two respective octaves.
Then, start the scale as you normally would, on the lowest A note (LowE5), and end on the middle A note (D7). Play the middle A note TWICE. The first time resolves the lower part of the scale, and the second time starts the higher part of the scale.
Plus, by playing the middle A twice, it emphasizes that you are playing an A scale.
On the way back down the scale, just reverse everything, but instead of starting on the high minor 3rd (HighE8, above the root!) as you probably have been doing, start on the high A (HighE5), and walk down to the middle root A (D7) and play that root note twice, before moving on down and resolving on the low A (LowE5)
Guitar Rote Exercises
https://rumble.com/c/c-462327
Beginner Guitar
https://rumble.com/c/BeginnerGuitar
Intermediate Guitar
https://rumble.com/c/c-433397
63
views
Beginner Guitar, Slide Down And Up One Half Step
#OneHalfStepAtATime #HalfStep #SemiTone #GuitarExercises #Slide #Glissandro #Gliss
In this exercise, we slide, or gliss, down one half-step, and back up.
The slide, or gliss is one of the fundamental techniques and/or sounds of the guitar
https://en.wikipedia.org/wiki/Glissando
next video:
Using Left Pointer Finger To Bend Low E String
https://rumble.com/vd2f8z-using-left-pointer-finger-to-bend-low-e-string.html
53
views
Beginner Guitar, Slide Up And Down One Half Step
#OneHalfStepAtATime #HalfStep #SemiTone #GuitarExercises #Slide #Glissandro #Gliss
In this exercise, we slide, or gliss, up one half-step, and back down.
The slide, or gliss is one of the fundamental techniques and/or sounds of the guitar
https://en.wikipedia.org/wiki/Glissando
next video:
Beginner Guitar, Slide Down And Up One Half Step
https://rumble.com/vc1q0n-beginner-guitar-slide-down-and-up-one-half-step.html
391
views
Learning Guitar, One Half Step At A Time. From E to Eb at the 12th and 11th fret of low E string
#OneHalfStepAtATime #HalfStep #SemiTone #GuitarExercises
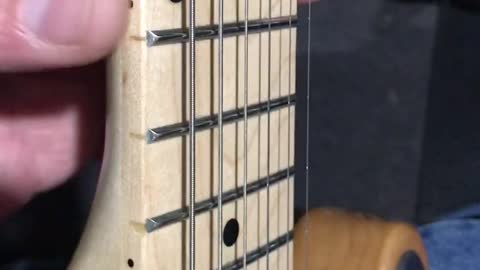
In this exercise, we use the elbow to move the hand and finger from a root note, down one half step, (or fret) and back up to the root note.
Note how the finger goes just behind the fret on each note.
Usually, we always want to aim “to fret a note” (verb) just behind a fret (noun), but as you progress you will be able to disregard the frets altogether and be able to find infinite colors/tones/sounds between each fret, but for now we want to focus on the part of the string just behind the fret, or the 12 half-steps (or semi-tones) per octave, as delineated by the frets.
next video:
Beginner Guitar, Slide Up And Down One Half Step
https://rumble.com/vc0q6b-beginner-guitar-slide-up-and-down-one-half-step.html
87
views
2
comments
Learning Guitar, Starting At The 12th Fret, Or Octave
#OneHalfStepAtATime #GuitarExercises #BeginnerGuitar #GuitarLessons #HandEye #HandEar
In this video, we start at the 12th fret, or octave, for some introductory guitar exercises.
At the 12th fret, is the middle of the string, where its easiest to fret notes, to bend notes, and most importantly, to see what we are doing
next video:
Using Your Thumb As Anchor Point, And Your Pointer Finger To Fret Any Note
https://rumble.com/vd2ibj-using-your-thumb-as-anchor-point-and-your-pointer-finger-to-fret-any-note.html
81
views
Learning Guitar, One Half Step At A Time. From E to F at the 12th and 13th fret of low E string
#OneHalfStepAtATime #HalfStep #SemiTone #GuitarExercises
In this exercise, we use the elbow to move the hand and finger from a root note, up one half step, (or fret) and back down to the root note.
Note how the finger goes just behind the fret on each note.
Usually, we always want to aim “to fret a note” (verb) just behind a fret (noun), but as you progress you will be able to disregard the frets altogether and be able to find infinite colors/tones/sounds between each fret, but for now we want to focus on the part of the string just behind the fret, or the 12 half-steps (or semi-tones) per octave, as delineated by the frets.
next video:
Learning Guitar, One Half Step At A Time. From E to Eb at the 12th and 11th fret of low E string
https://rumble.com/vc0o2t-learning-guitar-one-half-step-at-a-time.-from-e-to-eb-at-the-12th-and-11th-.html
67
views
How To Adjust Guitar Neck Angle For Best Playing Position
When you hold your guitar, there are almost an infinite number of possible neck angles you could use. While there are no right or wrong neck angles, you’ll want to find the neck angle that works best for you at any given moment. As you get better at playing guitar, you’ll be able to move your guitar neck around wildly and still hit every note, but today we are just trying to find a good starting / home point. To find your best position, experiment with every neck angle, from 0° (neck parallel to the floor) to 90° (neck perpendicular to the floor). Don’t expect your experimentation to give you the best answer right away. You’ll want to continue to experiment for months, constantly micro-adjusting up and down. A few things you’ll want to think about as you experiment and adjust are 1) is this position comfortable? if its not comfortable, adjust! 2) can i slide my hand comfortably up and down the section of neck that i am using? 3) can i make the chords i want to use comfortably? 4) can my fingers reach all the notes i want to use? 5) can i pick and strum the strings i want to play comfortably? 6) did i mention comfort? playing guitar should be the most comfortable thing you do all day, and if there is even the slightest discomfort anywhere, adjust! Everyones body is unique, and every guitar is unique, so it just takes a while to adjust your guitar to your body.
For me, my ideal playing position is with the sound hole (or middle pickup) over my belly button, and the neck angle adjusted so that when i look at the 2 DOTS marker, and line-of-sight eyeball the frets on each side of the dots, they appear to be perfectly parallel to each other. This is just a starting / home position. As soon as i start playing, the guitar neck angle starts getting micro-adjusted constantly as i need to make certain chords or hit certain notes.
next video:
Why Fingerboard Fretboard Neck Marker Dots?
https://rumble.com/vbyqrt-why-fingerboard-fretboard-neck-marker-dots.html
149
views
2
comments
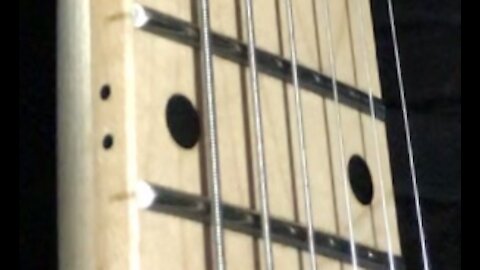
Why Fingerboard Fretboard Neck Marker Dots?
What are those dots on the fingerboard and neck for? The set of TWO dots is just behind the 12th fret, and marks the 12th fret, which is positioned at the exact half-way point of the string scale length, which is the functional, vibrating length of the string as measured between the nut and the bridge saddle. When a string is shortened by exactly half, or lengthened by exactly double, you get the exact same note, just one OCTAVE higher or lower, respectively. The root word of OCTAVE is OCT, which means 8, as in octopus, octagon, (October used to be the 8th month)... There are only 8 notes actually used in a Western natural scale, from the root note to the octave note, which is why there are 12 frets, or 12 half-steps, between any root and octave. (Technically 7 notes are each used once, and 1 note used twice, at the root and octave)(root-A-BCDEFG-A-octave)
next video:
Learning Guitar, Starting At The 12th Fret, Or Octave
https://rumble.com/vc0mwb-learning-guitar-starting-at-the-12th-fret-or-octave.html
145
views
E A D G B E - Guitar Strings From Thick to Thin
Elephants And Dogs Grow Big Ears!
E A D G B e
These are the letter names of the guitar strings from thick (E) to thin (e)
6 5 4 3 2 1
When numbering guitar strings, start with thinnest string as 1 and thickest string as 6.
There are many different ways guitar players count different things, and it can be a little confusing, but we will work thru all that as we go.
next video 1:
How To Fine Tune Your Guitar With Snark Tuner
https://rumble.com/vbwys7-how-to-fine-tune-your-guitar-with-snark-tuner.html
next video 2:
Why Fingerboard Fretboard Neck Marker Dots? Two dots at the octave, or where the notes begin to repeat
https://rumble.com/vbyqrt-why-fingerboard-fretboard-neck-marker-dots.html
72
views
How To Fine Tune Your Guitar With Snark Tuner
There are TWO distinct skills you must develop to advance your guitar playing, and you must develop BOTH skills at the same time!
FIRST, you must be able to tune your guitar,
SECOND, you must be able to play the notes you want to hear.
It can be a frustrating paradox because you can’t develop either skill without the developing the other skill first! Therefore you should plan on spending a lot of time developing both skills every day. Your guitar is a precision instrument, and will require daily, highly skilled maintenance in order for it to play right. Temperature and humidity are constantly changing, and therefore your guitar is constantly changing, especially in climates with 4 distinct seasons.
The wood parts and the metal parts of your guitar react differently to changing climates, creating constantly changing (what i call “weird”) tensions in all parts of your guitar. These weird tensions must be relaxed, released, removed, and re-tensioned every day, or else you’ll have endless problems with weird noises and tuning stability as you play. Even if your guitar is perfectly in tune the night before, it will develop weird tension over-night.
Even if your guitar tuner shows you are still in tune the next day, it will be in a state of (what i call) “false tuned”. There will be weird tension in the wood, in the strings, where the strings cross the bridge saddles and nut, in the tremolo system, and especially around the tuning pegs.
Therefore, to relieve all this weird tension, you must loosen every string a little bit, which in turn releases the weird tension in the wood of the neck, and everywhere else. Once the weird tension is released from the strings and neck, you can re-apply string tension to strings and neck and you’ll have good, clean normal tensions.
You may have heard you always want to “tune UP” a string to pitch, but you really need to take that a few steps further and tune up ALL strings at the same time in a deliberate, systematic way. If you try to tune just ONE string down and back up, it just shifts the weird tension from one string to the strings and guitar parts, and you’ll wind up chasing your own tail trying to get rid of the weird tensions.
So follows these steps for a perfectly tuned guitar.
1) Wash and dry your hands. Set your guitar in the exact place you plan to play at least 30 minutes before playing, to acclimate guitar to ambient temperature. Don’t set guitar near a vent, or in sunlight, especially around dawn or dusk when temperatures are changing quickly
2) Guitar will also need to acclimate to your body temperature as you hold it, so just rough-tune it to start and then begin your warm-up routine, for about 30 minutes. You’ll know your guitar is acclimated to your body temperature once the guitar stops feeling cold on your belly. Once your guitar is acclimated to room temperature AND your body temperature, its time to fine-tune.
3) loosen all of the strings just a little bit.
4) tighten each tuning peg slightly until the gears positively engage and there is no sloppy gear lash.
5) The Snark tuner indicator needle will point left when the string is flat, and point right when the string is sharp, and point straight up when the string is in tune. Gently turn (I call it squeeze) each tuning peg slightly tighter until your tuner indicator needle starts to move toward the right. Do not try to tune up to pitch on the first squeeze. Leave each string just a few clicks flat.
6) As you tighten one string, the neck will move forward just a hair, you’ll notice the other strings go slightly loose/flat. While this can be very frustrating, just try to understand the mechanics of what is happening, and come to expect it, and just consider it a normal part of your warm-up routine, and your guitar tuning skill development.
7) Follow a torque-sequence type pattern. This means start with one string, and then tighten it a little bit, and then go to the next string, etc and tighten each string just a little bit.
8) Then return to the first string again, and tighten each string a little more, without ever going up to pitch, and definitely without going over pitch, or sharp! If you go sharp on any string, you may as well start over! On a good day, you should be able to get the guitar in tune by going over each string 3 times.
9) On your final pass, squeeze each string up to perfect pitch. Verify pitch of each string one last time. I like to say theres no feeling in the world quite like that of a fresh squeezed guitar...
10) turn OFF your Snark tuner to save battery.
11) remove Snark from guitar if you are concerned about your guitar finish and/or the extra weight on your headstock.
next video:
Rule 1, Rule 2, Rule 3 For Guitar Tuning Pegs, To Prevent Breaking Strings
https://rumble.com/vc4zu1-rule-1-rule-2-rule-3-for-guitar-tuning-pegs-to-prevent-breaking-strings.html
498
views
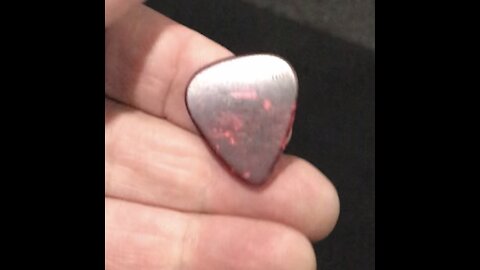
No Wrong Way To Hold A Pick - How To Experiment With Rotating Guitar Pick 360°
Most guitar teachers would tell you to hold the pick with the pointy side down toward the strings, but i never liked the way that felt. It always felt like the pick was going too deep and getting stuck on the strings, and that the ramp angle for the pick to get over the string was just too steep. So i started experimenting with rotating the pick thru all 360° and found a different corner of the pick that seems to work better for me. The corner i use now has a less steep ramp angle, so the pick gets over the string easier, without getting stuck. This corner also lets me put more of the surface of the pick on the string, which i feel gives me better control of the pick and the string. The pointy corner of the pick doesn’t get as much pick to string surface contact, resulting in a more thin, tinny sound. Ive been experimenting with rotating the pick for many years, and its just become a habit for me, so now i constantly rotate the pick as i’m playing, and can make any part of the pick work for me. There is no wrong way to hold a pick! Experiment, experiment, experiment!
next video:
How To Adjust And Experiment With Guitar Pick Stick Out
https://rumble.com/vbvv25-how-to-adjust-and-experiment-with-guitar-pick-stick-out.html
54
views
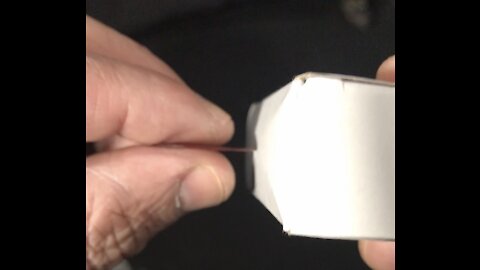
How To Adjust And Experiment With Guitar Pick Stick Out
Adjusting how much of your pick is sticking out is critical. I like to start with the pick, and my finger, and my thumb all on the same plane, and then micro-adjust how much pick is sticking out by rolling my pinch grip in and out. In the neutral, relaxed position, with the pick, finger and thumb all on the same plane, i am able to hit the string with just the pick, or just the finger, or just the thumb, or just the finger and pick, or just the pick and thumb, or with the finger, pick and thumb all at once! Keeping the pick stick-out to a minimum, and using your finger and thumb as a depth gage/stop, helps keep your pick from grabbing too much of the string and getting stuck. Using your thumb and finger to brush the string also helps improve your tone, and thickens up your sound. Experiment, experiment, experiment!
46
views
The Most Important Guitar Accessory - The Guitar Stand
I believe the guitar stand is the most important guitar accessory there is, because it helps keep your guitar right in your face, at arms length, and ready to pick up. A lot of my practice comes in several short 5 minute sessions per day. If i had to get my guitar out of its case every time, i would probably practice a lot less. Keeping your guitar on a stand also helps keep it room temperture, so its already acclimated when you are ready to play. If you have a guitar strap, be sure to always tuck it up so theres never a loop near the ground where your foot will snag it and pull your guitar off the stand, and probably damaging it. Ask me how i learned that lesson :’(
next video:
The Guitar Strap Is 2nd Most Important Guitar Accessory
https://rumble.com/vc51ln-guitar-strap-is-2nd-most-important-guitar-accessory.html
92
views