
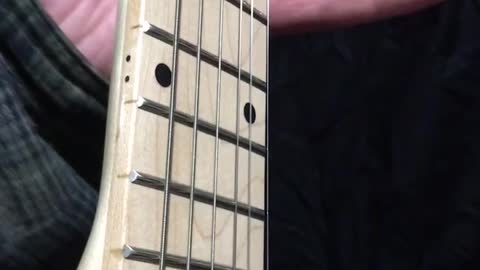
Guitar Theory - Using the Star Spangled Banner To Practice The Shape
In this exercise, we practice, (very badly)
the moveable F shape at different hand positions, by playing the opening notes to The Star Spangled Banner
This exercise is intended to help the student
1) practice the F shape, and get used to the way those notes sound together in a scale or chord
2) practice the star spangled banner.
3) get better at the Major shape/ sound
29
views
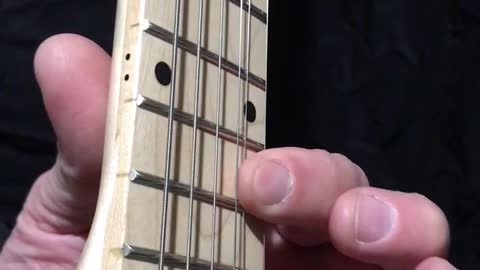
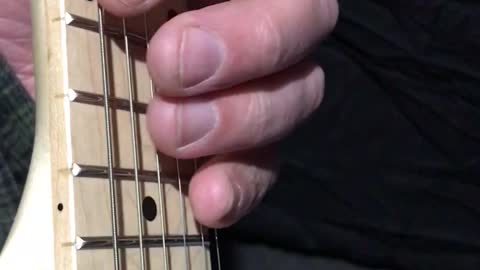
Guitar Theory - The F Shape - F chord
In this video, we practice the F shape, and the F chord.
This illustration starts out with the hand in the 13th hand position, which technically makes this an F chord, although this chord gets its name from when this shape is make in the 1st hand position.
This chord can be challenging to get comfortable with. You really have to experiment with moving your elbow etc to get it to work correctly.
Many guitar players really don’t like this chord, so they don’t practice it, and just figure out a work around.
However, this is a very important chord shape, and it can become the foundation on which to understand the strings, starting with the high E string.
If you think about learning guitar from the lowest note to the highest, we would start on Open Low E string, and go up by one half-step increments.
With this shape, and exercise, we start at the high note (the note on the high E string) and work our way down from there.
This shape ties together the two different octaves that exist across the 6 strings, by re-establishing and emphasizing the root/octave note on the D string.
That root note on the D string is the anchor point, the pivot point, where 2 different octaves come together.
That root note on the D string allows you to noodle around above and below the root/octave, and resolve on the root.
Practice this shape all the way up and down the fingerboard
113
views
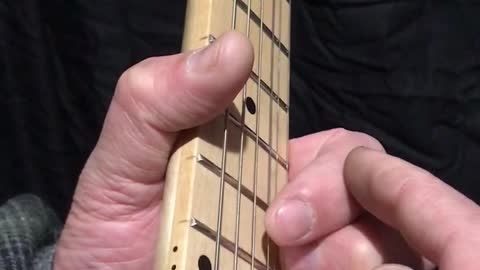
Guitar Theory - Power Chord - The Perfect 5th - 7 half-steps
In this video, we practice the Perfect 5th double-stop, which is a 2 note chord, consisting of the root note and the note that is 7 half-steps above the root note.
This is a very important chord shape to learn.
To put in perspective, if the root and octave notes were the 2 most important notes,
Then the Perfect 4th and Perfect 5th are the next 2 most important notes.
The perfect 5th double stop is called the power chord,
And its invention is attributed to a man named Link Wray in his song Rumble
https://www.npr.org/templates/story/story.php?storyId=5021946
Metallica uses a lot of power chords...
Since the power chord is 7 half steps, and we are on a journey of 12 half steps, we are 7/12ths of the way there.
This power chord shape will bring your ring finger into a position that its not used to being in, and your entire arm will have to adjust, from the shoulder, to forearm, to wrist, in order to get your ring finger where it needs to be...
But the good news is, not only is this chord important to learn for its own sake, but its also a chord that can be a stepping stone onto onto other chords.
This root-p5 shape will allow you to think about music differently, with your ring finger being the lead note, and the pointer finger being the follow note.
In other words, don’t think of your pointer finger as the root or anchor, and the ring finger in relation to that anchor... but rather, think of the ring finger as the anchor, and let the pointer finger find itself in relation to the ring finger.
By slowing moving your anchor points from one finger to the next, you eventually hope to develop all 4 fingers equally, so that any finger could be an anchor, and you can seamlessly move from anchor point to anchor point.
The first few notes of Twinkle Twinkle Little Star are the root and the perfect 5th
58
views

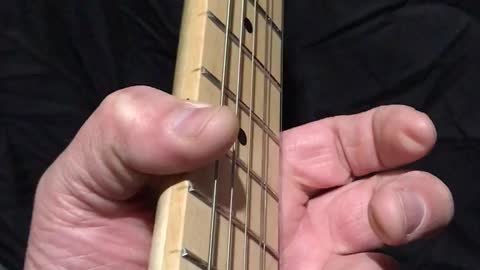
Guitar Theory - D shape - D chord - Anchor Exercise
In this video, we look at the D-shape up close, and then slide the D-shape all the way down the fretboard, to frets 2 and 3, where it will become the Open D chord.
While we only have our fingers on 3 strings, keep in mind that there is a 4th string right there that is open, and that is the D string.
So in theory, if you play that Open D string, as the lowest note sounded, that string would become your D root note, and this D shaped chord would simply have a different name depending on where you are on the fretboard.
It would be a matter of music theory to go thru and learn all the proper names of these chords, but for today, whats most important is to listen to how they sound.
Also, in this exercise, we do some
open-hand-close-hand exercises,
Where we start with our fingers gently resting on the strings (mute),
and then open all 3 of our fingers, so they just barely come off the strings, so theres a gap between your finger and the string, thats about as big as the gap between the open string and the fret.
Do these open-close hand exercises until you get to where you can lift all 3 fingers at the same time, and put them all back down at the same time, in the right place.
Also, these open-close exercises are good for developing a feel for the minimum grip strength needed to fret notes and make them sound right.
When we are beginners, our fingers are weak, our fingertips are soft, and so we really have to squeeze the strings as hard as possible to fret them good...
But as we play longer, we get stronger, and we no longer need to squeeze as hard as we can.
So you kinda have to re-calibrate your grip strength after you’ve been playing a while.
Do these open-close exercises two different ways.
1) try to make it sound slightly different each time for 100 times. (Pretending mistakes are on purpose)
2) try to make it sound exactly the same each time for 100 times
Lastly, in this exercise, we use the ring finger as an anchor, or pivot, that stays put, while the rest of the fingers move around.
This ring finger anchor, on this particular D chord, is a very important trick for every guitar player to know.
Why?
Because the “3 chord trick”, on guitar, is usually the G-C-D 1-4-5
And that ring finger anchor will stay there for all 3 chords, which could be the entire song.
By having just ONE anchor point, on these particular 3 chords, enables the guitar player to focus on more important things, like singing.
From a songwriting standpoint, its about the most simple way there is of putting your song lyrics to 3 chords
So if you have been following these beginning guitar videos from the start, you should know that you are getting very close to being at the intermediate level.
122
views
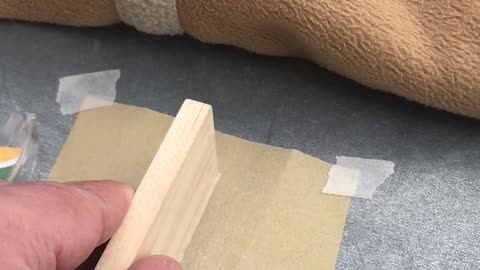
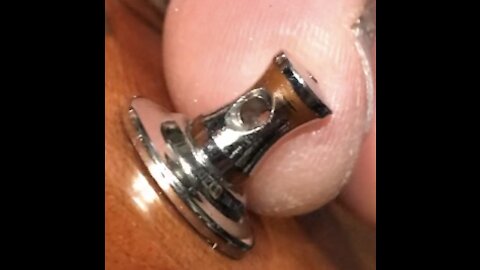
Guitar Shop - Making and Fitting a tapered nut shim o
In this video, we micro-adjust a tapered nut shim, by sliding it back and forth in the nut slot, and then cutting off the excess from both ends.
In an earlier video, we made a precision wood sanding block, for making these precision wood shims.
The reason i call these precision, is not because the wood shim itself is sanded down to high precision,
but because the nature of the taper shape makes it infinitely adjustable,
so you could, for example, do a precision adjustment by lowering the action until you start getting fret buzz, and then raise the action until fret buzz goes away, which isn’t really an adjustment you can do (and verify) any other way.
For this particular job, i had to do the nut shim adjustment 3 times before i was satisfied with the string action,
But this was no big deal, because making the nut over-long, and making these micro-adjustments, was part of the job plan.
One thing to watch out for are, when the shim is in the nut slot, and you are tightening the strings, its easy to hit the delicate, fragile ends of the shims and break them off.
Also, be sure not to push or pull too hard on the shim, or you might break it.
1) make a tapered shim thats over-long on both ends. (Longer than the nut)
2) make sure one end of shim is slightly over-thick, and the other end of the shim is slightly under-thick, with a smooth, even taper from one end to the other
3) dry fit the nut shim. Bring the guitar up to tune, (or very close to it, if the nut slides to the bass side) so that you can verify the nut action, and check for fret buzz, under the full load tension of the guitar, as normally tuned
4) keep micro-adjusting the nut back and/or forth, until you find the best action and least fret buzz
5) verify, verify verify. check every fret for fret buzz. check every string for action, especially at the nut end of the string.
6) once you are sure you have the adjustment as good as you can get it, mark both ends of the shim, and cut off excess length. Sand smooth.
7) use wood glue on a toothpick to glue shim and nut
8) if you use the strings as a clamp, be very careful to have the string tension exactly the same on the bass and treble sides of the nut.
When the glue is wet, its acts like lube, and makes it so the nut is slippery in the nut slot. This can become a problem, if you glue your nut down, and then it slips while its drying, and then drys out-of-place.
How much tension can make a difference? If you turn the low E string tuner just enough to make the string move the distance of just ONE string winding, it can be enough to make the nut slide sideways.
To prevent this, i used just the two outside E strings, so that i could more accurately control and balance the bass-treble side string tension.
Once you think you have the string tension balanced, verify by trying to gently nudge the nut and see if it wants to move either way.
Even after you think you have it clamped good, keep checking, and verifying that nothing has moved, for about 30 minutes, or enough time for glue to dry.
138
views
1
comment
Guitar Shop - How to make a precision sanding block, to make precision wood shims
In this video, we make a sanding block, in order to make very precise, delicate, infinitely adjustable nut shim.
The main idea of this video is to show how double-stick tape can be used to hold a very small, delicate shim, while you sand it down to a very precise thickness, without breaking it...
I started this job by using a paperboard shim to test fit the nut. The action on the bass strings was perfect, but the action on the treble strings was too high.
Therefore i knew the maximum thickness of my wood shim would be the thickness of the paperboard,
And the minimum thickness would be 0, which would be the nut sitting directly on the nut slot.
So i could spend all day looking up factory specs on this particular guitar,
Or get specs from other well-known guitar factories,
Or get specs from a luthiers webpage...
And i could get out a micrometer, and feeler gages, and a calculator, and a pencil and paper...
and spend time coming up with a very precise game plan, from where we start, to where we want to be, and how we are going to get there, measured down to the hundred thousandths...
In my experience, ive found TWO major problems with this approach.
1) its very easy to sand too much, and make your part smaller than you had intended, and therefore probably unusable. this could be the difference between just a few sanding strokes, and by then you have already invested a lot of time sanding it down to the size you had intended. so your time is a complete waste, and the part is too, for this job. It becomes a spare part that “might” get used someday on another job. it becomes shop clutter.
But for now you have to start over making a new part...
2) you make the part to the exact size you had intended, down to the hundred thousandths...
Feels good man
Then you install the part, and wait for the glue to dry...
then finish setting up the guitar, and then you tune the guitar, and when you go to test each fret for fret buzz,
and realize that even though you did everything right, according to your plan,
theres still a major fret buzz problem, and the part you *just* made, is too small...
So you need to start over.
So both problems 1) and 2) result in a part (guitar nut or shim) that is too small, and both problems require you to start the job over from scratch.
I can afford to make mistakes, because i am working on my own guitars,
but if you were trying to run a guitar repair shop and you had to start a job over, you would be put 24 hours behind on this job, and probably other jobs too.
And thats not “compensated work”
Or a “compensated nut”.
Thats work that you, or the guitar tech, will just have to do for free, because you can’t charge a customer for your own mistakes.
So anyway, what i have been doing for nut shims, is to make a long, tapered shim, to slide back and forth in the nut groove, to micro-adjust during a dry run test fit, until i get the action adjustment i want, and all the notes sound good everywhere.
the shim is longer than the nut, so that the shim sticks out on both ends, giving you something to grip, to pull on, during adjustment.
You can also use a combination of pull-push to gently adjust shim back and forth, so that you don’t break the shim you *just* spent an hour making...
One tricky thing is, when you go to tune the guitar, the bass strings will pull harder on the nut than the treble strings, and so the strings will pull the nut off to the side.
To compensate for this problem, tighten strings until they are close to intended tuning, but yet 3bass-3treble string tension is balanced enough so that the nut wont move, even if you try to gently nudge it side to side to see if it wants to move.
For this particular job, i had to make the micro-adjustment 3 times before i was satisfied with the action.
However, because of this over-long nut shim, i was able to make those adjustments quickly and easily.
Because making these micro-adjustments was already part of the job plan before i even started the job, i wasn’t even disappointed when my first test fit wasn’t as good as i wanted, because i knew the micro-adjustment was so easy.
Now instead of getting it “close enough”,
You can really dial-in that nut micro-adjustment to exactly where you want it, and test drive the guitar action, *before* committing to it with glue.
218
views
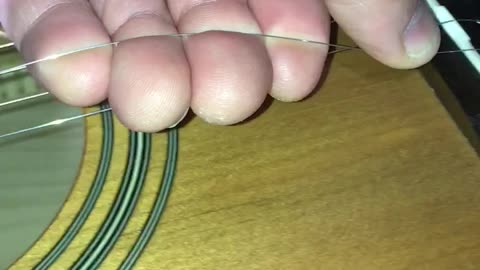
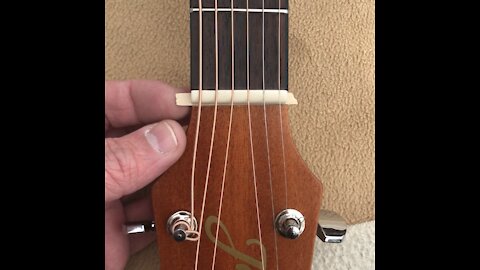
How To Stretch Brand New Guitar Strings - Guitar Maintenance and Repair
In this video, we talk about string stretching.
Brand new strings will stretch quite a bit, and this can be a problem when you are trying to play guitar and every time you bend a string, the string stretches a little bit and goes flat.
Multiply this problem by 6 strings...
So to help alleviate this problem, we stretch the brand new strings during the string change.
There is a fine line between over-stretching and under-stretching, so always try to err on the side of under-stretching, meaning you should only stretch the string maybe 2-4 times, instead of 20-30 times.
Some people will stretch the string, move their hand an inch, stretch, move, stretch, etc
In my opinion, this creates a situation where every inch you have an alternating pattern of a small section of “stretched string”, and “not-stretched” string.
Maybe thats a good thing?
Its the imperfections we love, so maybe an unevenly stretched string sounds better to our ears?
Different harmonic colors?
Let me know what you think in the comments below.
But anyway, presuming that you *want* a string that is stretched evenly...
Think about the string for its entire length, from bridge to tuning peg.
At the bridge, the string usually crosses over a sharp corner, leaving a mico-dent or mico-kink in the string.
If you continue to stretch the string, eventually you will pull that damaged part of the string forward, and you’ll have (another) imperfection in the vibrating length of the string...
This is why its so important to get the ball end of the string properly seated before you tighten string.
If ball end isn’t seated, and then tightening string causes the ball end to move up 1/8”, then the section of string that was just moments before being damaged by crossing the bridge, will now be 1/8” into the vibrating length of the string.
This has never bothered me enough to change the string, but if i was doing a job for pay, or paying someone to do the job, there should be no string damage like this on a brand new string job.
On the tuning peg, a string with a round cross section has to go around the radius of a peg, creating an uneven stretch on the string, between the inner diameter, and outer diameter of the string.
Multiply this by the number of wraps the string goes around the peg, and more headaches.
So, when installing strings, make strings slightly shorter, so you get ~ 2 wraps instead of 6 wraps
Even as the string passes over the nut, there will be places where the string is stretched unevenly.
For the vibrating length of the string, there will continue to be stretching going on, probably more toward the middle of the string, where bends are made, as opposed to bridge or nut end, where bends are not made.
Even along the middle of the string, the string bends made during normal guitar playing will be made at the frets, creating this situation of alternating stretched-not-stretched pattern on the string that we were trying to avoid...
So a few things you can do are
1) inspect the tuning pegs when the strings are off, and make sure they are smooth and free of irregularities.
2) inspect the nut, and smooth out any rough contact points.
3) inspect the saddle, bridge, and bridge pin holes, or tail piece, and smooth any rough contact points.
4) theres not much you can do about uneven stretching around tuning pegs, nut, bridge etc other than make fewer string winds on the tuning pegs, and lube contact points.
5) As for the vibrating section of the string, think of stretching the string as one continuous motion, that stretches the entire length of string evenly from end to end.
Depending on the strings, some strings you can actually feel the string kind of crinkle, or snap, crackle, pop, under your thumb.
Im not sure what causes this, but i tell myself that there are micro-tensions that are built into the string during the manufacture and packaging of strings.
For example, if a string is manufactured or stored in a coil, its going to want to stay in a coil.
This is why we inspect each new string when we take it out of the pack, and let it hang straight down, and look for any coiling, and then gentle run our fingers down the length of the string a few times to try and get the string to hang perfectly straight down.
Even after the string is installed, there are still millions (billions?) of micro-atomic level spots within the string, where there is string tension or ‘memory’ in the metals.
By stretching in one continuous motion, you get to feel the string stretch for the entire length of string, and you’ll be able to release far more of these micro-tensions with this method.
How do we know?
Because on the first, you’ll feel the string crinkle for the entire length of string,
But on the second pass, there will still be crinkling, but not nearly as much.
By the third pass, the crinkling may have stopped.
It just seems to me that the strings just feel and sound better when you stretch the strings this way.
The strings feel silky and smooth,
And when you are playing, you just ‘feel’ like you are bending *an entire length of string*, as opposed to, for example, feeling like you are merely bending *a note* at the 7th fret
620
views
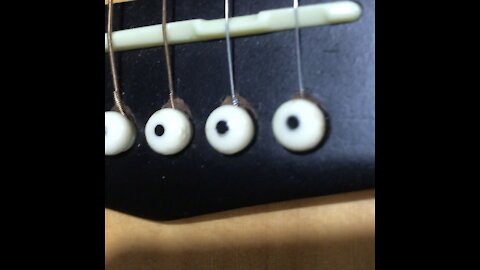
Guitar Maintenance - Blackening Bridge Pin Holes For Cosmetic Purposes
In this video, we do an A-B comparison of two guitars that have both had their bridge pin holes worked on.
In the first guitar, we can clearly see where the wood was removed during the job, leaving a lighter colored wood exposed, and contrasting with the black color of the bridge.
In the second guitar, we did the exact same job, except this time we used a black sharpie to color in the hole.
This sharpie trick is probably one of those things where people won’t notice if you do the job, but will probably notice if you don’t do the job
26
views
Guitar Maintenance and Repair - Bridge Pin Holes
In this video, we look at the notch left on the bridge pin hole edge, from where the string comes in contact with the bridge, usually at a sharp angle.
These bridge pin holes are factory drilled at 90°, so the string cuts across a sharp edge at the exact anchor point of the string.
Fortunately, this sharp edge is just wood, so the string just cuts into the wood and leaves a notch.
In this job, we clean up that string notch, without making it any deeper!
we just contour the edges and give it a nice gentle radius for the string to contact, and hopefully get more vibration transfer.
Also, we want to make sure the ball ends of the strings aren’t too fat, that they impede the bridge pin from seating properly.
On the ball end of the string, the core of the string wraps around the ball, and then doubles-back on itself.
Closely inspect the ball end during string installation, and make sure the stub end side of the string is turned AWAY from the string notch, so that the string can lay perfectly across the nice gentle radius you just made...
also, in this job we use a sharpie marker to blacken the insides of the bridge pin holes, and the string notch we just cleaned up.
This gives it a nice look that you can only really appreciate by A-B comparing with a guitar that hasn’t been blackened.
This video is part of a series on guitar maintenance and repairs.
In particular, this job is part of a routine string change job,
that also entailed inspecting and de-burring the tuning peg string holes.
If you break a guitar string, LOOK very closely at which end the string broke on, (bridge or tuning peg) theres a very good chance that theres a sharp edge or burr that caused the string to break.
And if you don’t fix this sharp edge, it will probably cause another string to break.
153
views
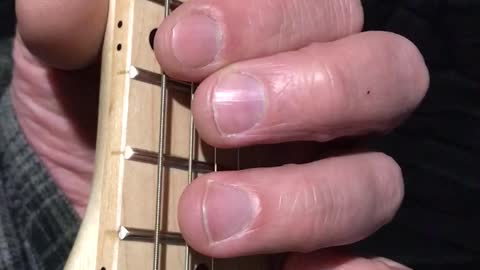
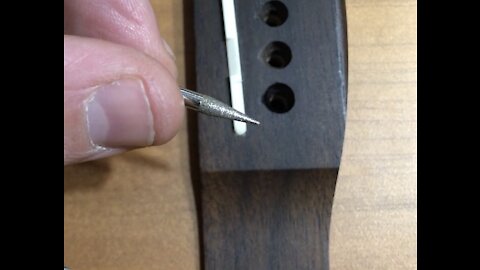
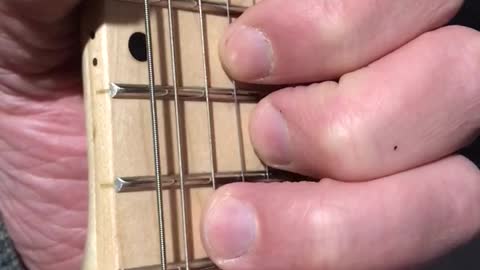
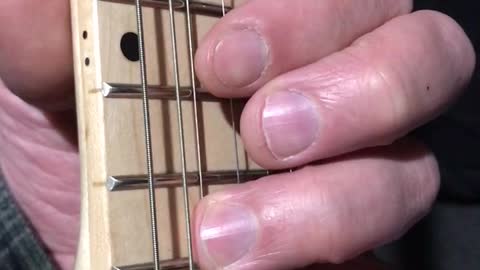
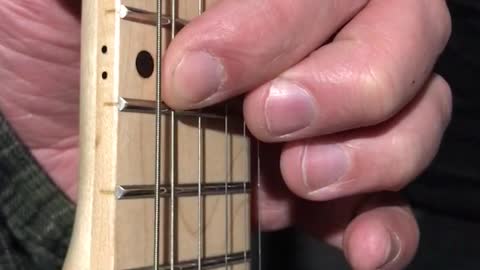
Guitar Maintenance and Repair - Inspecting tuning machine holes for burrs
In this video, we inspect the tuning machines during a routine string change job.
We are looking closely at the hole where the string goes thru the peg, looking for burrs or rough edges that the string might touch.
I use a 1/8” shank diamond tip bits, and just use them like a tiny file.
The metal on these tuning machines is kind of soft, so beware not to use power tools for this job, as you may grind away more material than you intended.
By doing thus job by hand, you can keep your eye on the tool, and make single, gentle, targeted strokes, so that you remove exactly enough material, and not any more.
Nice things about this job are
1) you could prevent an unplanned string break, which usually occurs at the least convenient time, like, when you are trying to play your guitar...
2) as far as i know, you only have to do this job once, unless the strings actually create new burrs. Just have to inspect pegs during each string change to see.
Also, when you have the strings off is a good time to exercise the tuning pegs and see how they turn.
Lube if necessary.
Snug up loose screws at end of tuner knob to make tuner turn harder. Turn peg as you adjust the screw. Micro-adjust all tuner screws until all tuning pegs turn, and feel, the same
I started looking at the tuner peg holes on my guitars after i broke THREE!!! brand new strings in one day!
I finally took a look at the peg, because the string always broke on the same end.
Sure enough, there was a sharp burr in the tuning peg hole, that the string would go over under tension as the (brand new!!) string was being tuned.
I would say most of the tuning pegs i have inspected, have had these burrs.
Also, inspect the bridge end of the string, for any burrs or sharp edges.
The guitar in this video has string notches carved out in the bridge pin holes, but i will probably take a small file and put a nice gentle radius on those string notches.
For the above job, plan on 6 hours of your own labor. 1 hour for each peg. Each peg has 2 holes that need de-burred. It may take you less than 6 hours, but if you plan for 6 hours you won’t be rushed, and can take as much time as you need to do A+ work.
Note in the video thumbnail, the size of the burr compared to the size of my fingerprint ridges.
To to this job well, you will need a bright light so you can watch your progress while you work.
You’ll need to be comfortable, and a well-adjusted, ergonomically correct work station.
88
views
Guitar Theory - Moving Between G and C chords quickly and smoothly
In this exercise, we continue working on moving back and forth between the G and C chords, until that motion feels very natural, and you can get the chords to sound good each time.
Try this exercise these different ways.
1) try to get the chord to sound pretty close each time, for 8 times
2) try to get the chord to sound slightly different each time, for 8 times
3) do exercises to practice control of your grip force.
For example play the same chord 8 times in a row, but squeeze the strings slightly harder each time, until you are squeezing almost as hard as you can...
Then reverse the process, and play the same chord 8 times in a row, but squeezing slightly softer each time, until you are squeezing “too” lightly...
This will help re-calibrate your grip, which has gotten stronger since you first started playing guitar, so therefore you don’t need to squeeze as hard, but you probably still do.
The purpose of this lesson would be to train you to grip as lightly as necessary, and no harder.
There is a similar exercise for calibrating grip strength on your pick grip. You are probably gripping your pick too tightly, now that you are stronger...
95
views
Guitar Theory - Moving Between G and C Chords
In this exercise, we practice moving from a G chord to a C chord.
Note that the pinky finger and ring finger both stay put, in a perfect 4th shape, and become dual anchor points for the rest of the maneuver,
While the middle finger and pointer finger, become a moveable Major 3rd shape, for both the G and C chords.
This exercise would be helpful if you were trying to learn AC/DC You Shook Me All Night Long,
And this exercise is good for many other reasons, in particular, for 3 chord songs that use G-C-D
Also, this G shape outlines part of the notes of the E minor pentatonic scale
This maneuver will be combined with another lesson to bring together G-C-D chord changes.
What is still amazing to me, is what this one little trick can do,
Which is to allow you to use your ring finger to post up an anchor point on the B string, 3rd fret,
And then use that ring finger as a pivot point to move between G-C-D just by feel, without having to look at your fingers.
With your ring finger set up as ONE single anchor point, from which to access the three chords you need,
your attention is now free to do more important things, like sing, and work out new songs.
Always remember that a guitar is an accompany instrument, and its job is to accompany the human voice,
So the job of the guitar, is to serve the singer.
Eventually, you will be wanting to write actual songs, with actual lyrics, which become your intellectual property...
So there are kind of two paths you can take as a guitar player,
1) continue playing guitar until you get good enough to play lead guitar, but never sing.
2) work on rhythm guitar, and singing lead.
Personally, i believe all musicians should aspire to be singers, and the leader of a band
251
views
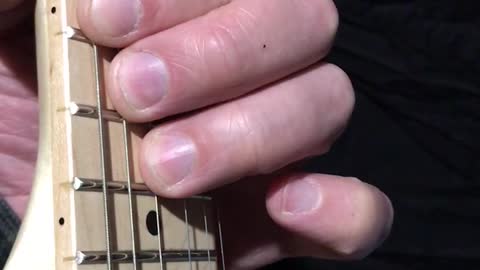
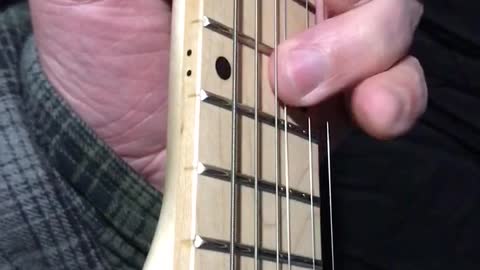
Guitar Theory - Moveable C shaped chord - From C to C
In this exercise, we continue practicing making this moveable C chord shape in every hand position, starting at C in the 12th hand position, and working our way down to C in the 1st hand position, and back up.
What you can’t see here, is that my hand needs to get into the 0th hand position, with my pointer finger behind the nut.
You probably noticed that all of the notes of my chords didn’t ring clean, and thats just an indication to me that i need more practice myself, and/or that i should avoid that chord shape in songs until it gets better.
24
views
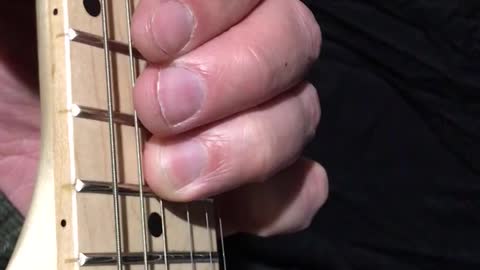
Guitar Theory - The Moveable C Shaped Chord
In this exercise, we practice on this movable C shaped chord.
Its important to note that this is NOT how to make a standard C shaped chord in the first hand position, although it does use the exact same notes.
The difference being that with a standard C chord, the G string is open, and the B string is fretted on the 1st fret.
But as soon as you move into any other hand position, that G string needs to be fretted correctly relative to surrounding notes.
Please note that the pointer finger is NOT in the root or octave position for this particular chord,
The pointer finger is only in relative root position for that pair of two fingers.
This 4 finger shape incorporates 2 different 2 finger shapes,
which are the Major 3rd shape on pinky and ring fingers,
and Blue note shape on the pointer and middle fingers.
If you are doing these lessons in order, you should have already done some exercises for these two shapes
116
views
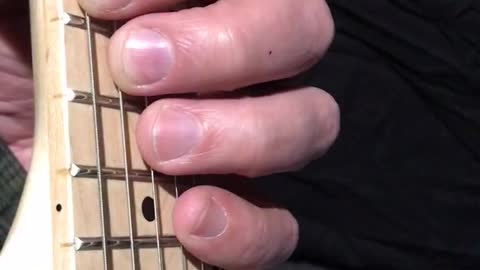
Guitar Theory - The Minor Pentatonic Scale on E-A-D strings
In this exercise, we listen to the root note and all 5 notes of the minor Pentatonic
This scale is movable up and down the strings, so practice these maneuvers on every fret.
Try doing this scale every way possible. For example, use just one finger to do the entire scale, and then use the next finger, and so on...
This scale consists of the root note (1), the minor 3rd (3) perfect 4th (4) perfect 5th (5) minor 7 (7) octave (8)
1, 3, 4, 5, 7, 8
From 1 to m3 is 3 half steps on same string.
From m3 to p4 is 2 half steps on adjacent strings, but looks like M2 shape
From p4 to p5 is 2 half steps on same string.
From p5 to m7 is 3 half steps across adjacent strings, and looks like m3 shape.
From m7 to 8 is 2 half steps on same string.
65
views
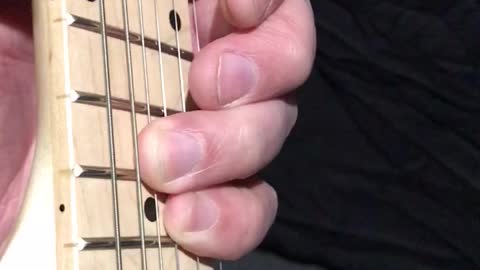
Guitar Theory - Perfect 4th - 5 half steps on two strings, using all four fingers
In this exercise, we listen to the sound of the root note and the perfect 4th, or 5 half steps,
on the E and A strings at the 12th fret on a guitar that is tuned E standard,
Using each of the 4 fingers.
This exercise is meant to reinforce the idea that you can use any finger to make any sound,
And to reinforce the idea that you can pick-up your anchor finger, or root, and move it to a new location, which is a Perfect 4th up, and usually a safe bet when ascending or descending scales.
Do this exercise across all pairs of adjacent strings, and on all frets,
Making sure to sharpen the note on the B string by one half step when doing GB pair of strings
These exercises are not meant to teach anyone how to play any song,
But rather, these exercises are meant to prepare anyone who is new to guitar,
These exercises are meant to systematically work our way thru every finger, every maneuver, on every string, on every fret...
So that there is literally no note that you haven’t played, with every finger, at every tempo, ...
These lessons are meant to teach people how to play the guitar itself, as a stand-alone instrument,
So that when they are ready to learn ‘songs’, they will not be fumbling around trying to learn ‘guitar’
It is my opinion that if you can teach someone how to play just one guitar,
they should then be able to play any song they want to...
But you can teach someone 10 songs, and they still won’t know how to play guitar.
85
views
Guitar Theory - Major 2nd shape - 2 half steps
In this exercise, we listen to the sound of the root note and the Major 2nd note, which is 2 half steps, or one whole step, above the root note.
We also listen and compare the sounds of the root note and the minor 3rd, the Major 3rd, and Perfect 4th
This maneuver is useful as a foundation that you can use to build more on later.
48
views
Guitar Theory - Blue Note and Blues Scale - 6 half steps
In this exercise, we practice chord and finger shapes centered on using the Blue note, which is 6 half steps above the root note, and also 6 half steps below the octave note...
Not only is the Blue note exactly half way in between the root note and the octave note,
The Blue note is also exactly half way in between the Perfect 4th and Perfect 5th.
25
views
Guitar Theory - The Octave Shape - 12 half steps
In this exercise, we listen to the sound of the root note, and the octave note, which is 12 half steps above the root note, and has the same letter name like A to A, B to B, etc
By using the pointer finger, and ring finger.
This exercise should be done using all possible finger combinations, on all strings, on all frets,
And remembering to sharpen the B string note when necessary.
This is a very important chord shape, because it is the root and the octave,
which together, are arguably the foundation of all other music theory
Also, this shape is exercising your fingers and getting them to work together, so seamlessly that they both become like co-anchor points, co-reference points,
With neither finger being any more or less than the other finger.
Instead of just using your pointer finger as the root, master, reference, anchor point,
And moving UP to the other finger(s) as the scale degree, the slave, the traveller, the tentacle, the claw, the ...
You now use your ring finger as the equally important root, reference, anchor point,
And work your way DOWN thru the scale degrees, one half step at a time...
Eventually we will practice using each of the 5 fingers and thumb as the root, anchor, reference note,
But for today, i hope the overall significance of this particular octave shape, using these two fingers, is not lost on the listener.
And eventually each of the 5 fingers will become equally capable of being the anchor,
By which point you may not even need the crutch of anchor points anymore,
and each finger would be equally capable of being its own independent anchor point, knowing where it is, without any need for help from other fingers or anchor point crutches
This exercise is also useful because it is bringing the ring finger into a slightly awkward position,
And that will prepare the ring finger to go into an even more awkward position, which is the Perfect 5th, which is a very important note.
38
views
2
comments
Guitar Theory - Moveable Blue Note Shape - 6 Half Steps
In this exercise, we listen to the sound of the root note and its blue note, which is 6 half steps above, and also 6 half steps below, the root note and/or octave note.
We listen to how this shape sounds relatively as we move up and down the length of the strings.
When using this shape, you don’t have to fret all 4 strings all the time. You could fret just 1 string, and mute the other 3 strings.
So practice muting and fretting each of the strings while using this hand shape.
This shape is useful because it is the 6th half step, and the next lesson will be the 7th half step, or the Perfect 5th.
This chord shape is preparing your ring finger for its next task, which will be to move from its position 2 strings away from the root note, to a position just 1 string away from the root note.
Once the ring finger can establish itself as an anchor point, reference point, pivot point, at the Perfect 5th,
then the other fingers can use the ring finger to find other nearby notes
Since we have already counted UP one half step at a time from 0 to 6, we could keep counting UP from 7 to 12,
OR,
We could count DOWN one half step at a time from 12 to 7, etc.
Why?
Because music moves too fast for you to be fumbling around trying to figure out how to count 11 half steps UP, when you could just as easily just count 1 half step DOWN.
So, just like we learned where the 1st fret is,
And we learned where the first hand position is,
But then we skipped to the 12th hand position, without needing to know anything about hand positions 1-11.
So far, we have been counting UP from the root note, and each half step farther we get away from the root note, is another half step we have to “count” if we are counting frets.
And so 1 half step, and 2 half steps, and 3 half steps,
were kind of easy to visualize, and were easily within your reach
But as we get to the 6th half step, and beyond, it gets harder to visualize, and reach.
to work around this problem, we just go up an octave, and begin counting DOWN by half steps.
If i know 12 half steps is an octave, and 11 half steps is a major 7th,
Then all i have to do is go UP 12 half steps, to the octave, and then back DOWN one half step to the Major 7
And down 2,3,4,5,6,7 half steps,
So that you can intuitively “count frets” from bottom to top, and top to bottom,
As for the perfect 4th and perfect 5th,
You’ll intuitively know how to find these important notes, several different ways,
and your ear-hand will just know what to do to make it work, to get the next note you want to hear, in any situation.
The next lessons will be about 7,8,9,10,11,12 half steps
if we counted UP by one half step at a time, from 1,2,3,4,5,6,7
We will now count DOWN by one half step at a time, from 12,11,10,9,8,7,6,5
Note that half steps 5,6,7 get counted both from the bottom UP, AND from the top DOWN,
Whereas half steps 1,2,3,4 and 12,11,10,9 only get counted ONCE from the bottom, or top, respectively
102
views
Guitar Theory - Root Note and Blue Note - 6 half steps
In this exercise, we practice listening to the sound of the root note and the blue note, on the EADG strings on E standard tuned guitar.
If we did this exercise on the ADGB strings, we would have to sharpen the B string by a half step.
This shape is moveable up and down full length of the strings.
This one shape can be played for extended time, as a slide or gliss, to practice your arm intonation.
I have played this single shape for a several hour practice session, just playing along with songs i like, and i would recommend it to others as a practice idea.
To me, i think it can sound good as you move around, because no matter where your root note is, if you move the whole hand up or down a half step, the fingers that were in your blue notes will now be either on a perfect 4th or a perfect 5th, both of which sound good, and are not inherently minor or major sounds.
Theres just something about how this shape sounds, moving up and down the strings.
The blue note is 6 half steps above the root note
The blue note is exactly half way between a root and its octave
The blue note has been banned as the Devils Chord etc
The blue note can be used as a passing-note or pick-up note between P4-P5
The blue note is what distinguishes the blues scale from the minor pentatonic scale.
The blue note can be used as an anchor or pivot point, from which to find and reference other notes.
As far as my lesson plans go, this lesson is an exciting milestone, because to me it means im half-way thru all 12 half steps to an octave.
This root-blue-octave-blue shape itself is exciting because it symbolizes the half-way point on all scales and chords
This shape is easy to remember. Easy to visualize, easy to explain.
This shape also symbolizes your progress as a guitar player. from not being able to fret a single note, to being able to use all 4 fingers, to fret 4 strings, across 4 frets.
This shape can be used as the anchor, or reference, or structure, or skeleton, ...
For making future progress.
So to summarize where we started, where we are now, and where we are going...
We started at zero. 0. Silence. Mute. Rest.
Then we learned the names of the open guitar strings, EADGBE,
and then we learned that the 2 dots at the 12th fret signify the exact center of the scale length of the string, from nut to bridge.
2 dots in sheet music means repeat,
and 2 dots on a guitar fingerboard also means repeat.
So at the 12th fret, the notes on each string repeat, and so we get EADGBE again, just an octave higher.
And so we used the 12th fret as our arbitrary root note, and practiced maneuvers and shapes based on that root note.
So we learned the root note is the first note,
And then we went up, one half step at a time, 1,2,3,4,5,6 half steps
And then we learned the proper names of 2nd notes (1 and 2 half steps)
(minor 2 and Major 2)
And then we learned the 3rd notes (3 and 4 half steps)
(minor 3 and Major 3)
And then we learned about the Perfect 4th, which is a huge milestone. 5 half steps.
And here we are now at the blue note, at 6 half steps.
Next, will be 7 half steps, or a perfect 5th, which is another huge milestone, equally important to the perfect 4th.
And after that, all that will be left is the 8,9,10,11,12 half steps, also known as the
minor 6th and Major 6th ( 8 and 9 half steps)
minor 7th and Major 7th (10 and 11 half steps)
And then back to the root note at the 12th half step, otherwise known as the 8th note or
Octave
73
views
Guitar Theory - The Blue Note - 6 half steps
In this exercise, we listen to the blue note, which is 6 half steps above the root note.
We use one finger to play both notes,
Then we use two fingers to play both notes.
This maneuver will get you from any root note, to its blue note, on every pair of adjacent strings,
except G-B, where you would need to sharpen the B string by one half step, (which would be the same shape as a Perfect 5th or power chord elsewhere)
The blue note is an interesting note because its 6 half steps which is exactly half of the 12 steps in any octave.
The blue note is the only note in between the perfect 4th and perfect 5th.
The blue note is not claimed by the major or minor scale.
The blue note is the only note that distinguishes the blues scale from the minor pentatonic scale.
The blue note serves as an excellent pick-up note or passing-note when moving from P4-P5 or P5-P4
What that means is, if you are playing A blues scale in 5th hand position, and you have 3 fingers on the A string, then your middle finger will be on the blue note.
The blue note, and its perfect 4th, which is technically the Major 7th, usually sound pretty good together in a blues scale, double stops, chord, etc
There are songs written about the blue note
The St Louis Blues Hockey Club is named after the blue note
This interval has been officially banned by the Church, and called the Devils Chord
Its hard to overstate the significance of this note, or interval, or chord
110
views
Guitar Theory - The D shape
In this exercise, we use 3 fingers on 3 strings to make the D chord shape.
While we will be fretting the G-B-E strings, the D string will always be there, open, creating an Open D string root note for all of this chord shape in every hand position.
This D chord shape is moveable up and down the length of these 3 strings.
Practice this chord shape up and down the strings. It will require you to sightly adjust your fingers at every new hand position.
You will want to open and close your hand, and land precisely, where your fingers are positioned such that all 3 strings can be clearly heard. The strings are all fretted correctly enough, and the fingers are not accidentally touching somewhere.
Lift or open all 3 fingers OFF the strings, and then lower or close all 3 fingers together ON the strings.
Open-Close-Open-Close
Off-On-Off-On
Keep practicing making this chord shape on the fly, having it come together at the same time, instead of using one finger as an anchor point, and then placing your other fingers down one at a time. Music goes by too fast, so you’ll need to get faster at putting this chord shape together.
Once you master one chord shape, and being able to apply it, and remove it, smooth and quick, then we will move into changing between this D chord shape and some other chord shapes that commonly go along with it, such as the G shape and the C shape
This D shape is one of the 3 fundamental chord shapes for the 3 chord songs that use G-C-D cowboy chords
89
views
Guitar Theory - combining two shapes into a bigger chord
In this exercise, we combine two of the ideas we learned earlier
1) the two finger Major 3rd shape on the EA strings
2) the two finger Perfect 4th shape on the Be strings
And because of those earlier rote exercises you have already practiced, your fingers are now prepared to work well together on this more complicated chord.
This shape of this chord the G shape. The G chord is one of the most important chords on guitar, for several reasons.
52
views
Guitar Theory - The Perfect 4th - using pinky and ring fingers on adjacent strings
In this listening exercise, we listen to the sound of the Perfect 4th interval, while using the pinky and ring ringers across two strings.
On a standard E tuned guitar, there is a perfect 4th interval, or offset, between all pairs of adjacent strings, except between G-B strings.
So to do this exercise, use your pinky and ring fingers, to fret all possible notes, on all possible strings, on all possible frets...
Between the G and B strings, you will have to adjust your pinky finger UP one fret, to get the Perfect 4th shape and sound.
To train your ear to hear the perfect 4th interval, use the song ‘Here Comes The Bride’
E A A A
A D D D
D G G G
G B# B# B#
B E E E
This exercise is important because it gets your pinky and ring fingers exercised, and strong, and working independently, and working together,
And most importantly, it gets these 2 fingers prepared to become HALF of a G chord shape.
29
views