
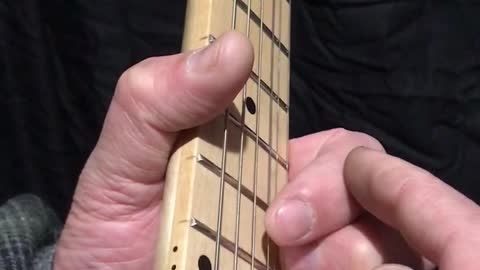
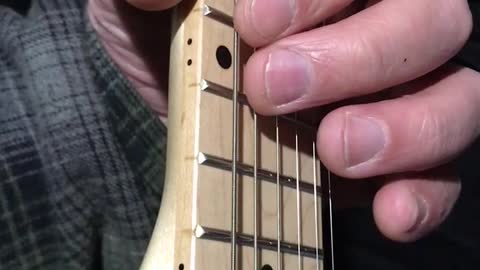
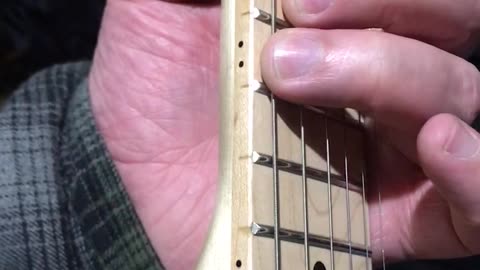
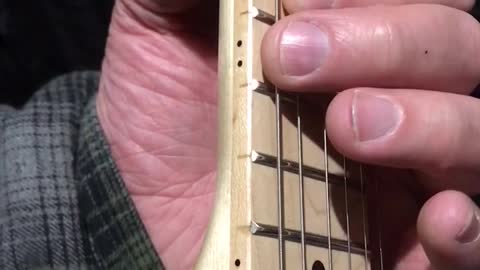
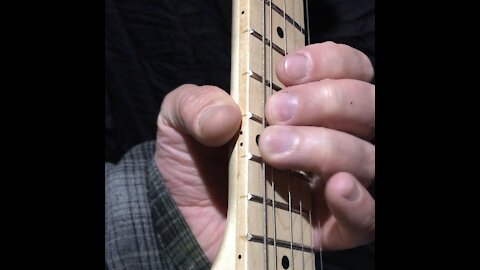
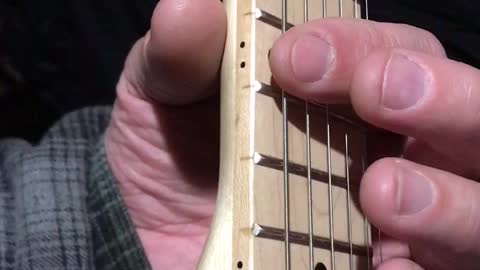
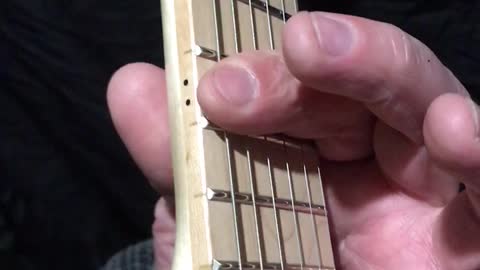
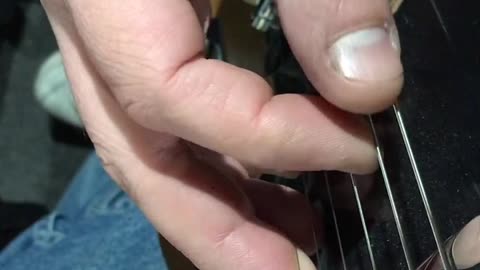
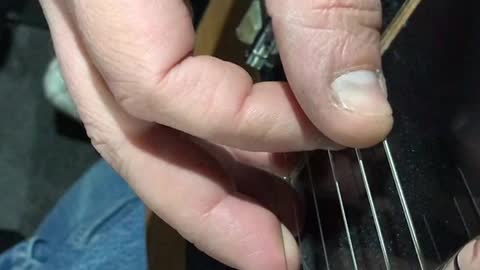
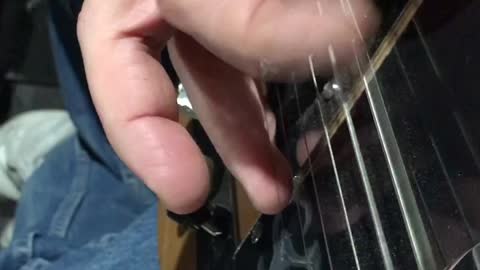
Guitar Theory - The D shape
In this exercise, we use 3 fingers on 3 strings to make the D chord shape.
While we will be fretting the G-B-E strings, the D string will always be there, open, creating an Open D string root note for all of this chord shape in every hand position.
This D chord shape is moveable up and down the length of these 3 strings.
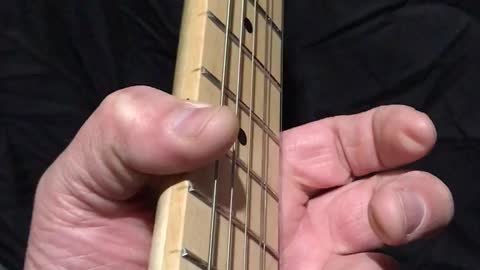
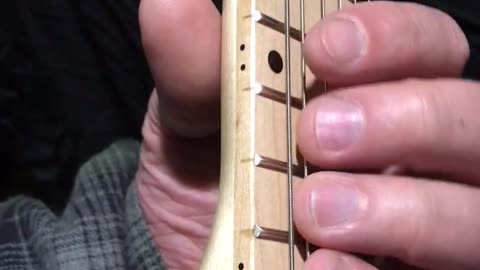
Practice this chord shape up and down the strings. It will require you to sightly adjust your fingers at every new hand position.
You will want to open and close your hand, and land precisely, where your fingers are positioned such that all 3 strings can be clearly heard. The strings are all fretted correctly enough, and the fingers are not accidentally touching somewhere.
Lift or open all 3 fingers OFF the strings, and then lower or close all 3 fingers together ON the strings.
Open-Close-Open-Close
Off-On-Off-On
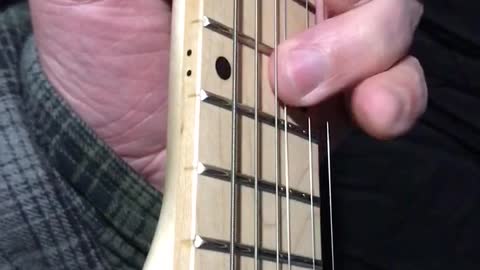
Keep practicing making this chord shape on the fly, having it come together at the same time, instead of using one finger as an anchor point, and then placing your other fingers down one at a time. Music goes by too fast, so you’ll need to get faster at putting this chord shape together.
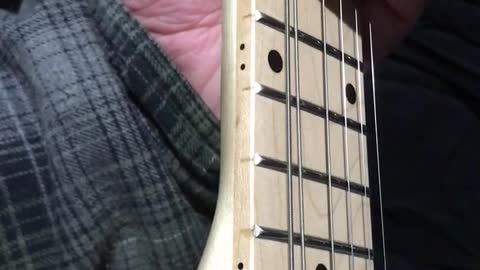
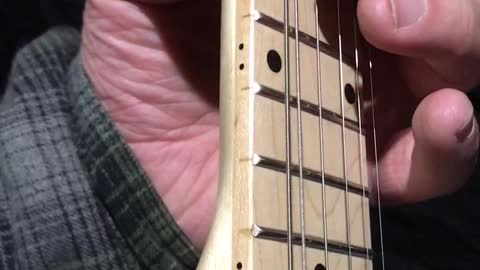
Once you master one chord shape, and being able to apply it, and remove it, smooth and quick, then we will move into changing between this D chord shape and some other chord shapes that commonly go along with it, such as the G shape and the C shape
This D shape is one of the 3 fundamental chord shapes for the 3 chord songs that use G-C-D cowboy chords
89
views
Guitar Theory - combining two shapes into a bigger chord
In this exercise, we combine two of the ideas we learned earlier
1) the two finger Major 3rd shape on the EA strings
2) the two finger Perfect 4th shape on the Be strings
And because of those earlier rote exercises you have already practiced, your fingers are now prepared to work well together on this more complicated chord.
This shape of this chord the G shape. The G chord is one of the most important chords on guitar, for several reasons.
52
views
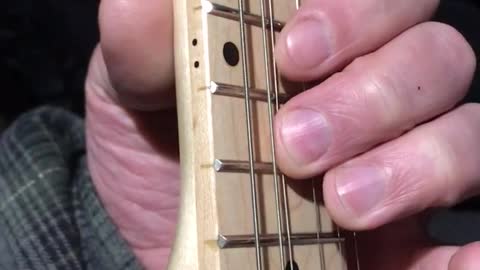
Guitar Theory - The Perfect 4th - using pinky and ring fingers on adjacent strings
In this listening exercise, we listen to the sound of the Perfect 4th interval, while using the pinky and ring ringers across two strings.
On a standard E tuned guitar, there is a perfect 4th interval, or offset, between all pairs of adjacent strings, except between G-B strings.
So to do this exercise, use your pinky and ring fingers, to fret all possible notes, on all possible strings, on all possible frets...
Between the G and B strings, you will have to adjust your pinky finger UP one fret, to get the Perfect 4th shape and sound.
To train your ear to hear the perfect 4th interval, use the song ‘Here Comes The Bride’
E A A A
A D D D
D G G G
G B# B# B#
B E E E
This exercise is important because it gets your pinky and ring fingers exercised, and strong, and working independently, and working together,
And most importantly, it gets these 2 fingers prepared to become HALF of a G chord shape.
29
views
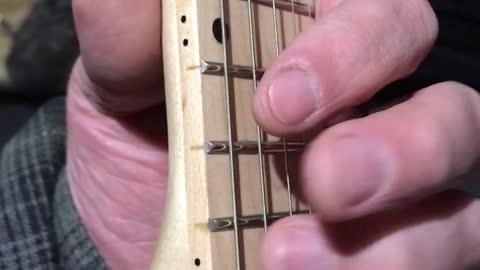
Guitar Theory - Practicing Perfect 4th using all fingers, on all strings, on all frets...
In this exercise we continue to practice listening to the perfect 4th interval,
But now we will be using the two middle fingers,
to fret two adjacent strings, at the same fret.
The idea of this exercise is to develop a good ear, and a sense of the way the perfect 4th / 5 half-step interval “should” sound, over the entire register and range of your guitar... every string, every fret...
During this exercise, you’ll want to think of the root note as variable, and moveable, and that any note can be a root note,
and the root note can change from one note to the next, during a song...
But that for the purpose of this exercise, the root note will be considered to be the lower sounding note, and the perfect 4th interval will be the higher sounding note.
The other purpose of this exercise is to develop the muscle memory, and ear-hand coordination,
across all possible combinations of fingers, strings, and frets...
So that when you are playing, and you want to hear the sound of the perfect 4th interval,
from the root note where you are right now, using a certain finger, on a certain string, on a certain fret,
As long as your ear knows what it wants to hear, your fingers will naturally cooperate, and find the note, using whichever finger is necessary, or available.
Your fingers will know what to do, because they have already done it before, because you have taken the time, to do the rote exercises, of practicing every possible perfect 4th interval on the guitar, using every possible combination of fingers.
Conversely, even if you aren’t consciously thinking about music theory when you move from note to note, your fingers will just naturally move into a perfect 4th position by habit, because after enough practice your fingers get so comfortable with the go-to maneuver of the perfect 4, they will just go there out of habit, because its usually a safe note, even if you just use it as a transition, or pick-up note, or noodle, or slur, or gliss, or scale degree, or chord, or...
As these exercises progress, you will use pinky and ring finger to make perfect 4th shape.
This is important, because that shape is HALF of the G chord shape.
This is why i believe G chord is intermediate level guitar lesson.
Because in order to do a proper G chord, student must be able to use all 4 fingers individually to fret notes,
and student must also be able to get all 4 fingers to cooperate and work together in every possible shape.
If you introduce a G chord on day 1 guitar lesson, you are asking student to use 4 clumsy fingers, and play 6 strings...
After years of fruitless attempts to master several notes at once (chords)
It occurred to me that i hadn’t even mastered a single note.
I mean, i could make my guitar make sounds, but i could’t make a single note sound good,
at the right time, the right loudness, the right bend, the right gliss,
So while these exercised are meant to get you used to listening to the full range of sounds your guitar is capable of making,
When you are done with the exercise, forget about every other sound your guitar could make,
and just focus on ONE sound that you are making right now, and whether it sounds good in the mix,
and if not, what you are going to do about it, and when...
97
views
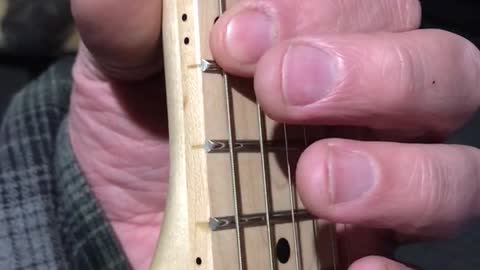
Mostly the Perfect 4th across two adjacent strings
In this exercise, we practice using two fingers to fret two adjacent strings on the same fret.
Depending on guitar tuning, usually most pairs of adjacent strings has this perfect 4th offset, or 5 half steps.
except G-B pair of adjacent strings in standard E tuning, which is a Major 3rd offset, or 4 half-steps.
This is an exercise to familiarize yourself with listening to the sound of the perfect 4th interval.
and to practice one of the most fundamental aspects of guitar playing, and guitar design, which is the perfect 4th.
This exercise should be practiced using every pair of fingers, on every pair of adjacent strings, on every fret.
The song “Here Comes The Bride” is one easy way to practice, and to remember, the sound of a perfect 4th interval.
Here-comes-the-bride = E-A-A-A etc
Practice listening to the sound of that perfect 4th interval on every possible pair of adjacent strings and frets
Except!
The G-B strings in standard E tuning,
Which will require you to fret the B string one fret higher, to get the perfect 4th interval.
Then verify that ‘Here Comes The Bride’ sounds correct on G-B strings, on all frets, with all possible finger pairs.
25
views
Guitar Theory - Using the Perfect 4th as a reference point for finding other notes
In this exercise, we emphasize the perfect 4th, which is 5 half steps,
which is the fundamental offset between open adjacent strings on a standard tuned guitar
(except G-B string offset which is 4 half steps or a Major 3)
To find a perfect 4th in most situations, we can either go up the same string 5 half steps, or stay on the same fret and jump to the next string.
With the perfect 4th as your new reference point (the old reference point was the root note), you can now easily find the notes directly above and below the perfect 4th note.
In the realm of music theory, in order of importance, (probably)
Root - octave
Perfect 4th - Perfect 5th
minor - Major - 3rds and 7ths
So now, once you understand the root note, and the notes just above and below it, and you understand the perfect 4th and notes just above and below, you are able to develop a deeper understanding of each interval or scale degree, from several different reference, or anchor points.
To put it in basketball terms, if we have one foot as the pivot foot, we are kinda stuck in one small area, BUT we can pivot around and reach anywhere in that area with our other foot.
Lets call your pivot foot the root note.
Now imagine that you take a step, and now your other foot is your new pivot foot.
Lets call this new foot position the perfect 4th.
You now have the option of going backward, to the other foot (root) or you have the option of taking another step forward (perfect 5th)
By mastering the art of moving between these perfect 4th intervals, you give yourself a good foundation for anchoring and referencing other nearby notes.
227
views
Guitar shapes and intervals - minor 3rd shapes using all 4 fingers
In this exercise, we practice listening to the minor 3rd interval, and exploring the different shapes we can use to get the minor 3rd sound.
The minor 3rd sound is 3 half-steps above the root note sound.
These exercises are meant to build muscle memory for for all fingers equally, so that later on your fingers will just naturally cooperate to get the sounds you want to hear in your ears.
In these exercises, we train each finger individually, and as part of a team of fingers, so that the fingers can operate naturally in all possible scenarios
There are two brute-force approaches to getting thru these exercises on your own.
1) list and name the 12 half-step intervals in an octave, then practice every possible way of fingering each of those intervals
2) start with any note as a nominal root note. Practice every possible two-fingering shape with that root, and then figure out the proper name for each of those interval sounds
Between these two approaches, you should be able to practice all possible two-finger shapes, and all possible intervals.
Its not enough just to blow thru these exercises, do the bare minimum, and move on.
A better approach would be to make time and space for yourself.
Don’t say, im going to learn the proper names of 12 sounds today...
Say, im going to learn the proper sound of ONE interval today
You could start with any interval.
The perfect 5th is an excellent interval to start with, which is 7 half-steps,
and its power chord shape is the foundation and reference anchor point for many other shapes and chords
But wherever you start with these interval shapes, be sure to move around and practice all other intervals and shapes
This particular minor 3rd transition shape would be played on the middle two strings [DG] as part of the 5th position A minor pentatonic/blues scale and is also transposable
117
views
Guitar Shapes and Intervals - Minor 3rd - 3 half-steps above root note
In this listening exercise, we listen to the sound of the minor 3rd, which is 3 half-steps above a root.
These notes could be played together or by themselves.
Practice this interval with all fingers, everywhere (except G-B strings).
Find how to make a minor 3rd between G-B
This shape or interval is just one of many,
And this shape, interval, or transition is also used in other ways, with other names,
Meaning that what you learn today with this shape, will prepare you for tomorrow when you see the same shape somewhere else.
65
views

Guitar Shapes - Major 3rd shape using pinky and ring finger
In this exercise, we practice the Major 3rd shape on the pinky and ring finger.
While this particular shape isn’t used much, its important to know that its is theoretically possible, and that we know how to use it, but choose not to, because there are usually better alternatives available.
This shape could also be used as part of a minor pentatonic shape building exercise,
As this shape exercise uses two notes from the minor pentatonic, which would be the minor 3rd and the perfect 5th.
63
views
Guitar Shapes - Major 3rd shape using two middle fingers
In this exercise we practice the Major 3rd shape, up and down the fretboard, using the two middle fingers.
This shape is useable almost everywhere (except G-B string offset, first and last frets)
This shape can be used as a foundation, to build into an open C chord, for example.
54
views
Major 3rd shape, up and down the strings
In this exercise, we continue practicing the Major 3rd shape, which is 4 half-steps above any root.
But instead of practicing the shape with different fingers,
We practice the shape on different frets, up and down the fretboard.
And then we practice it with all different fingers.
Its hard to emphasize the importance of rote exercises, on focusing on using just one finger, or one note, or one shape, to build a foundation, so what you practice today helps you move into what you practice tomorrow
17
views
Major 3rd shape on two adjacent strings with two adjacent fingers
What is a shape?
the way, or shape, you hold your fingers in while making a chord, or part of a chord.
A shape usually has a name, such as “D shape”, and what this means is, that shape is most often associated with the shape of a D chord, however that basic D chord shape is transposable, and can be played elsewhere on those same strings, and could technically be called by its proper chord name when its played elsewhere other than D...
The major 3rd is 4 half-steps above the root note.
The major 3rd is 1 half-step below the perfect 4th.
In this exercise, we use all four fingers to fret the root note,
and practice the ways of using the shape with adjacent fingers to fret the Major 3rd sound.
This is a moveable shape, that works on every set of adjacent strings except G-B
(Between G-B the strings are offset by a Major 3rd, so instead of 1 fret offset, use the same fret for both strings, on all frets, like you would do P4 offsets on other strings.)
It also works on every fret, except near far ends of fretboard when you run out of frets.
So practice these two notes together, with all fingers, on all strings, on all frets.
Practice these notes individually, one after another, to get an opinion on the contrasting sounds.
Practice these notes together as a chord, as a double-stop (2 note chord)
This shape is just one of many shapes.
We can figure out how many shapes there are by starting with 1 fret and 1 finger, and then doing 2 frets with 2 fingers, 3X3, 4X4
And there are books available that describe every possible chord and its proper name, and why it is named what it is...
But for today, just worry about getting thru playing every note, on every string, on every fret, with every finger (1X1)
Then work on this Major 3rd shape for a day.
Here is how i practice this, and maybe its all wrong, but...
I decide im going to practice Major 3rds that day, which will probably be a 2–4 hour practice session...
I pick random songs as backing tracks and play along with them.
I practice these major 3rd shapes, everywhere, with every song.
And the next day i might pick something else, like minor 3rd, or perfect 5th, or octave
And just play that one interval all day, for every song.
After a few rotations thru the interval shapes, your hands will just naturally move to where they need to be...
And your ear will be able to discern the various intervals, in different registers.
This Major 3rd shape is also useful because it is the foundation for the open chords G and C, which are very important chords for beginners to learn,
But unfortunately both chords are quite difficult for the beginner to master, which i suspect leads to many beginners wanting to quit guitar.
Its literally like asking a kindergartner who is just now trying to learn the alphabet, to spell out a 4 letter or 6 letter word.
Learning shapes is so important on guitar. You can use one shape you have learned, to segue into the next shape to learn.
For example, i will probably use this Major 3rd shape, as a segue into a minor 3rd shape.
48
views
Perfect 4th interval between two adjacent strings
In this exercise we work on listening to the perfect 4th interval between two adjacent strings, in this case E and A, but it could be A and D, D and G, [NOT G and B], and B and E
Here Comes The Bride
32
views
Perfect 4th - 5 half steps or 1 adjacent string
In this exercise, we find the perfect 4th interval by picking a root note, and then playing a note that is 5 half steps higher.
Then pick that same root note, and play the adjacent string on the same fret, and it should be a perfect 4th between
E-A, A-D, D-G, [NOT G-E] then B-E
My guitar sounds like its out of tune. Sorry. Maybe thats part of ear training, to just be able to hear that something isn’t quite right.
That perfect 4th interval is able to be memorized by using the song Here Comes The Bride as a reference tone.
Practice these perfect 4ths on every string, every pair of adjacent strings, and every fret.
The perfect 4th is one of the most fundamental of all intervals,
The guitar itself is constructed such that there is a perfect 4th offset between most sets of adjacent strings.
So being able to quickly find a perfect 4th from where ever you happen to be will be important to your development as a guitar player.
16
views
Using 4 fingers to play 5 frets across 3 strings
In this exercise, we use 4 fingers to play 5 frets across 3 strings
Sometimes when you run out of fingers, you have to move your whole hand to allow you to use your leading finger on a higher note.
6
views
4 ways to play 5 half steps with 4 fingers, from higher to lower
In this exercise, we explore 4 ways to play 5 half steps with 4 fingers, moving from higher frets to lower frets.
17
views
4 ways to play 5 half steps with 4 fingers
In this exercise, we use 4 fingers to play 5 frets, or 5 half-steps.
Sometimes we do exercises to isolate our fingers, and make them work alone.
Sometimes we do exercises to join our fingers, and make them work together.
This exercise is meant to help unlock one of the secrets to playing guitar like a master,
And that is the secret that you can use any finger to fret any note.
You are not locked in to always having to use a certain finger to make a certain sound.
These exercises are meant to break that mental habit of thinking you must use a certain finger to make a certain sound,
And reinforce the mental habit that any finger can be used to make any sound.
As you develop as a guitar player, you will be able to smoothly and seamlessly shift from one note to the next note with minimal effort, and have an intuitive feel for which finger is best to use in any given situation.
You will know by ear which note you want to hear, and your fingers will know by muscle memory how best to find that note.
19
views
Counting on Guitar - 16th notes with thumb and finger - Learn To Count
In this exercise, we practice 16th notes,
Using thumb and finger.
Practice with all finger combinations, on all strings etc
More on 16th notes
http://totalguitarist.com/lessons/rhythm/16th-notes/
14
views
Counting on Guitar - Triplets with Thumb and Finger - 1 and a 2 and a 3 and a 4 and a ...
In this exercise, we use thumb and finger to count triplets like
1 and a 2 and a 3 and a 4 and a ...
This exercise combines the downstroke of the thumb, with the upstroke of a finger.
Practice with all possible combinations of fingers, on all strings etc.
More info on triplets at
http://totalguitarist.com/lessons/rhythm/8th-note-triplets/
14
views
Counting on Guitar - 1/8 notes - Thumb and Pointer Finger
In this exercise, we use our thumb and pointer finger to count 1/8th notes
1 and 2 and 3 and 4 and ...
More on 8th notes or 1/8 notes
http://totalguitarist.com/lessons/rhythm/8th-notes-and-rests/
18
views
Counting On Guitar - sixteenth notes - 1 e and a 2 e and a 3 e and a 4 e and a ...
In this exercise, we practice sixteenth notes
1 e and a 2 e and a 3 e and a 4 e and a ...
More on sixteenth notes http://totalguitarist.com/lessons/rhythm/16th-notes/
21
views
Counting on Guitar - triplets with pointer finger - 1 and a 2 and a 3 and a 4 and a ...
In this counting exercise, we use the pointer finger to pluck the low E and A string
1 and a 2 and a 3 and a 4 and a ...
1 e and 2 e and 3 e and 4 e and ...
This exercise should be practiced with all fingers, on all strings, on all frets and everywhere else...
This exercise is also with your pointer finger,
a finger which, when used during an upstroke, feels fundamentally different than a downstroke, not just in your finger, but in your hand, your arm, and your whole body.
So practice upstrokes all by themselves for several hours, to develop a good feel for them,
Before moving on and trying to integrate your downstroke-upstroke
We could add up the many different ways there could be to practice different combinations of time signatures, counts, strings, frets, fingers upstroke-downstroke and it would be a very big number...
So it is up to the beginner guitar player, to put forth the effort, to put in the time, to push yourself outside of your comfort zone.
It is up to the beginning guitar student to put forth the effort, to spend countless hours, practicing with their instrument, getting familiar with every string, every note, with every finger, with every chord shape, with every time signature...
In my personal experience as a music student, i didn’t ever ‘get’ the time signature intuitively,
Probably because it was taught to us in the context of a melody...
In my opinion, every music student, and every other student, should get a 4 hour drum kit lesson as the very first music lesson.
The lesson would start with how to experiment with holding drumsticks,
And it would fully explore time counting on every drum and cymbal combination.
The main idea of the lesson would be to feel the movement of all parts of your body, from head to toe.
Both hands, and both feet.
This is critical to later music practice,
Especially the foot-tapping toe-tapping habit that is so hard to get beginners to do.
Once you have developed a toe-tap foot-tap heel-tap kind of kickity-klak
Then you can segue that habit or skill into learning other instruments,
Such as the guitar...
The last half of the first drum kit lesson would be a free form jam session over good songs of the students choosing or by teacher suggestions.
This lesson is about 4 hours long, with short breaks.
When you are done with the lesson, you will never ‘hear’ music the same way.
You will feel it in your bones.
Music will animate you. Get your heart beating faster. The quickening.
Some people play music by sight
Some people play music by heart
Some people play music by ear
Some people play music by emotion
Some people play music in their bones
The motion of your own unique skeleton leaves a unique, distinct trail as your body moves thru space.
Nobody can dance like you.
And you can’t dance like anyone else.
So practice ‘dancing’ up and down the guitar fingerboard, until you are as smooth as a fish in water.
This is how to learn guitar,
learning to play an instrument. The whole instrument, from front to back, top to bottom, left to right, upside down, backwards, alt tuned, etc ...
As opposed to learning the individual guitar notes, of individual guitar songs, on your individual guitar.
Give a man a fish: teach him how to play one whole song
Teach a man to fish: teach him how to play one whole guitar
80
views
Counting on Guitar - Pointer Finger 1/8th notes - 1 and 2 and 3 and 4 and ...
In this exercise, we use the right hand pointer finger to pluck to 1/8th note pattern.
Part of what makes a guitar different from something like a drum, is that on guitar you are able to get a sound on the up-stroke, whereas on drums you usually don’t get a sound on the up-stroke.
But up-strokes are not merely the opposite of down-strokes.
Spend a lot of time practicing up-strokes all by themselves, to develop muscle memory and feel
45
views

Counting on Guitar - Using Right Hand Pointer Finger to Count 1,2,3,4 ...
In this exercise we count to 4 with our right hand pointer finger.
1,2,3,4 ... 1,2,3,4,...
16
views
Counting on Guitar - 16th notes - 1 e and a 2 e and a 3 e and a 4 e and a
Counting 16th notes.
1 e and a 2 e and a 3 e and a 4 e and a ...
http://totalguitarist.com/lessons/rhythm/16th-notes/
9
views