
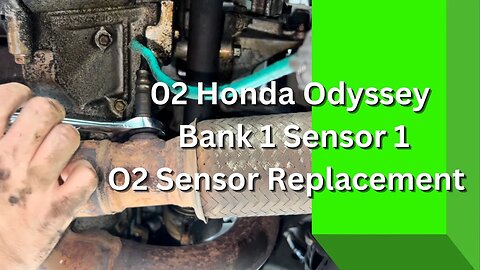
02 Honda Odyssey 3.5L Bank 1 Sensor 1 Oxygen Sensor Replacement
In this video I'll take you along as I replace the bank 1 sensor 1 oxygen sensor on an 02 Honda Odyssey equipped with a 3.5L V-6. The process is extremely simple. First the vehicle must be allowed at least 1 hour to cool down. Note: working around hot exhaust can be very dangerous. Once the vehicle is cooled down lift and support the front end of the vehicle to allow yourself room to work under the engine. Disconnect the oxygen sensor from the mounting bracket and disconnect the two halve of the connector. You will then need to take a 7/8" open end wrench and remove the O2 sensor from the exhaust. Installation is reverse procedure.
Note: Even after the vehicle has been cooled for at least an hour it is still possible that the exhaust could be hot. Use extreme caution.
Note: You do not have to disconnect the negative cable from the battery but it is not a bad idea to. If you do not please keep the keys outside of the vehicle. Vehicle must be off for this repair.
DISCLAIMER
Barbour's Auto Help is not responsible for any damage or personal injury incurred in the process of performing any auto repairs done by you the viewer. Automotive repair is extremely dangerous. Repair your vehicle at your own risk. It is the viewers responsibility to verify all information and procedures as outlined in YOUR REPAIR MANUAL AND OWNERS MANUAL FOR YOUR VEHICLE. Owning and using a repair manual suited for your vehicle is essential for correctly and safely performing ANY repair to your vehicle. Always wear safety glasses, protective gloves and heed all instructions for use applicable to any piece of equipment you may use. Due to circumstances out of the control of Barbour's Auto Help, Barbour's Auto Help makes no guarantee that by the use of the information given in this video a quality repair will be made. Barbour's Auto Help makes no guarantee that the information provided is totally complete, synchronized and accurate. Verify everything using an appropriate repair manual. Verify everything with your own research.
24
views
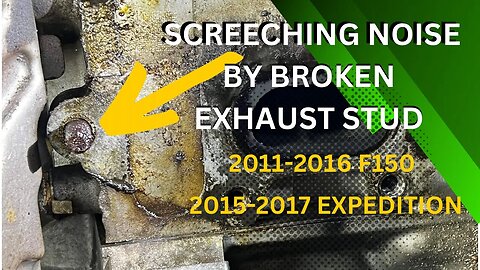
Screeching Noise From Broken Exhaust Stud, 2011-2016 F150 and 2015-2017 Expedition
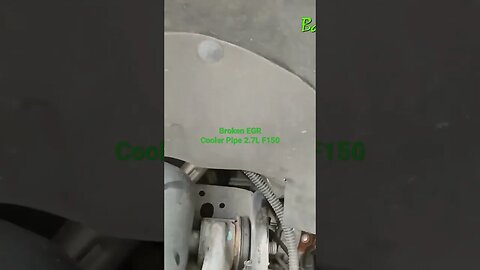
Some 2011-2015 Ford F150s and 2015-2017 Ford Expeditions equipped with a 3.5L Ecoboost may develop a screeching noise upon heavy acceleration. This noise may be due to a broken exhaust stud on the rear of either the right or left, or both, exhaust manifolds. In this video I discus this issue. I describe how this noise is created by exhaust back pressure escaping through the multi-layered metal gasket that goes between the exhaust manifold and the head. The broken stud at the back of the manifold allows for this back pressure to escape through the gasket. I also, describe how this issue can be easily checked. I then go into a few methods for repairing this issue.
Note: This is not a "how to" video. This video is simply informational at best. Please refer to a reputable repair manual suited for the vehicle you are working on for repair information. Furthermore, this video does not go into how to safely lift and support a vehicle for inspection. This information must also be obtained from a reputable repair manual.
Of course, stud extraction will have to be performed to get the broken stud out. Usually the stud is broken in a way that you will be able to grab onto it with a stud remover to remove it. However, in some cases the stud will have to be extracted in another way.
Warning!! Be sure your vehicle is totally cool before inspecting or working around the exhaust system. Exhaust systems get extremely hot!
Here is a link to the Chris Whitney channel: https://www.youtube.com/@chriswhitney5092
DISCLAIMER
Barbour's Auto Help is not responsible for any damage or personal injury incurred in the process of performing any auto repairs done by you the viewer. Automotive repair is extremely dangerous. Repair your vehicle at your own risk. It is the viewers responsibility to verify all information and procedures as outlined in YOUR REPAIR MANUAL AND OWNERS MANUAL FOR YOUR VEHICLE. Owning and using a repair manual suited for your vehicle is essential for correctly and safely performing ANY repair to your vehicle. Always wear safety glasses and heed all instructions for use applicable to any piece of equipment you may use. Due to circumstances out of the control of Barbours Auto Help, Barbours Auto Help makes no guarantee that by the use of the information given in this video a quality repair will be made. Also, Barbour'sAutoHelp makes no guarantee that the information provided is totally complete, syncronized and accurate. Use the information found in this video at your own risk.
24
views
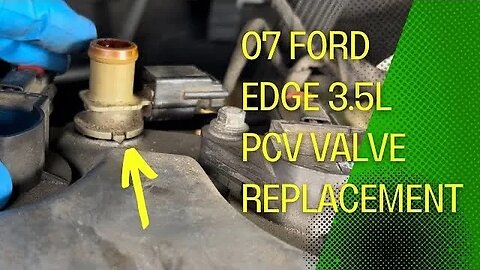
07 Ford Edge 3.5L PCV Valve Replacement
In this video I take you along as I demonstrate how a PCV valve is removed and installed on an 07 Ford Edge equipped with a 3.5L N/A engine. This process is similar to later model Ford Edges but may vary in some ways. Always consult your repair manual for proper removal and installation instructions.
Note: when disconnecting the vapor management valve you will need to press down the lock at the top of the connector that connects to the vapor management valve while pulling the connector way from the valve. I did not explain this in the video.
Also, this should be obvious,but I did not actually change the PCV valve on the vehicle featured in the video. I simply removed and installed the existing valve. It’s not recommended to remove the valve unless you intend on replacing it. The valve doesn’t lock down as well once it is removed.
When installing new valve insure that it is locked into place and twisted fully into place.
DISCLAIMER
Barbour's Auto Help is not responsible for any damage or personal injury incurred in the process of performing any auto repairs done by you the viewer. Automotive repair is extremely dangerous. Repair your vehicle at your own risk. It is the viewers responsibility to verify all information and procedures as outlined in YOUR REPAIR MANUAL AND OWNERS MANUAL FOR YOUR VEHICLE. Owning and using a repair manual suited for your vehicle is essential for correctly and safely performing ANY repair to your vehicle. Always wear safety glasses, protective gloves and heed all instructions for use applicable to any piece of equipment you may use. Due to circumstances out of the control of Barbour's Auto Help, Barbour's Auto Help makes no guarantee that by the use of the information given in this video a quality repair will be made. Barbour's Auto Help makes no guarantee that the information provided is totally complete, synchronized and accurate. Verify everything using an appropriate repair manual. Verify everything with your own research.
14
views
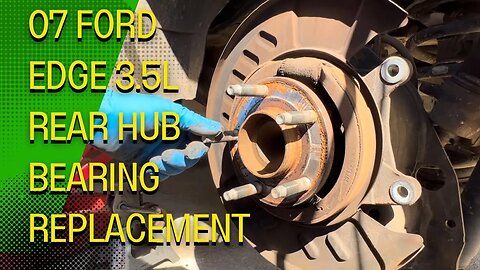
Rear Hub Bearing Assembly Replacement 07 Ford Edge 3.5L N/A Front Wheel Drive
In this video I'll take you along as I replace the rear hub bearing assembly on my 07 Ford Edge 3.5L. The process is pretty straight forward. Hopefully you can glean some helpful information and visuals from watching this video.
Note: As mentioned in the video, information on how to properly and safely lift and support your vehicle is not given in the video. You must obtain this information from a reputable repair manual or other source. Failure to properly lift and support your vehicle can have dire consequences.
Note: Also, as mentioned in the video, a torque wrench must be used to properly torque fasteners. The use of a torque wrench is not shown in the video. Failure to properly torque fasteners can result in parts becoming loose. Parts becoming loose can result in automobile accidents.
DISCLAIMER
Barbour's Auto Help is not responsible for any damage or personal injury incurred in the process of performing any auto repairs done by you the viewer. Automotive repair is extremely dangerous. Repair your vehicle at your own risk. It is the viewers responsibility to verify all information and procedures as outlined in YOUR REPAIR MANUAL AND OWNERS MANUAL FOR YOUR VEHICLE. Owning and using a repair manual suited for your vehicle is essential for correctly and safely performing ANY repair to your vehicle. Always wear safety glasses, protective gloves and heed all instructions for use applicable to any piece of equipment you may use. Due to circumstances out of the control of Barbour's Auto Help, Barbour's Auto Help makes no guarantee that by the use of the information given in this video a quality repair will be made. Barbour's Auto Help makes no guarantee that the information provided is totally complete, synchronized and accurate. Verify everything using an appropriate repair manual. Verify everything with your own research.
21
views
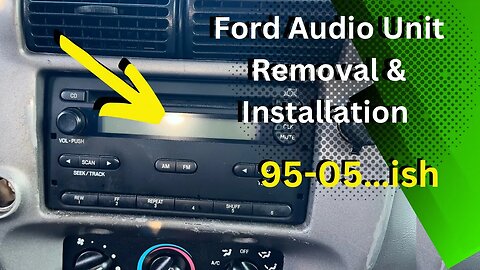
Ford Audio Unit Removal And Installation 95-05...ish
In this video I'll show you the basics of removing and installing a Ford audio unit, aka radio. The particular design was, I believe, used from 1995-2005 by Ford on many of their models. One common feature can be found on these particular units and that's the four square holes on the face of the unit. There are two on either side of the face of the unit. These holes are for the purpose or removing and installing the unit. A special tool fits into these holes releasing a spring on either side of the unit allowing the unit to be pulled out. Once the unit is pulled out it can be disconnected electrically and then the new unit can be installed.
Full disclosure, I am an amazon affiliate and may receive compensation for qualifying purchases.
Here is a link to the special removal tool:
https://www.amazon.com/Automotive-Disassembly-Frequency-Converter-Stainless/dp/B09MCC5Y2N/ref=sr_1_1_sspa?crid=2WKUSUZX7OU8T&keywords=ford+radio+removal+tool&qid=1678550018&sprefix=ford+radio%2Caps%2C274&sr=8-1-spons&psc=1&spLa=ZW5jcnlwdGVkUXVhbGlmaWVyPUExV0JCQzUxRFRMMURRJmVuY3J5cHRlZElkPUEwNzg0NjI0NlNaR1NMUlFZNzlaJmVuY3J5cHRlZEFkSWQ9QTAxNTk0NDAzNVpTVDUzNjYyQVJEJndpZGdldE5hbWU9c3BfYXRmJmFjdGlvbj1jbGlja1JlZGlyZWN0JmRvTm90TG9nQ2xpY2s9dHJ1ZQ==
DISCLAIMER
Barbour's Auto Help is not responsible for any damage or personal injury incurred in the process of performing any auto repairs done by you the viewer. Automotive repair is extremely dangerous. Repair your vehicle at your own risk. It is the viewers responsibility to verify all information and procedures as outlined in YOUR REPAIR MANUAL AND OWNERS MANUAL FOR YOUR VEHICLE. Owning and using a repair manual suited for your vehicle is essential for correctly and safely performing ANY repair to your vehicle. Always wear safety glasses, protective gloves and heed all instructions for use applicable to any piece of equipment you may use. Due to circumstances out of the control of Barbour's Auto Help, Barbour's Auto Help makes no guarantee that by the use of the information given in this video a quality repair will be made. Barbour's Auto Help makes no guarantee that the information provided is totally complete, synchronized and accurate. Verify everything using an appropriate repair manual. Verify everything with your own research.
18
views
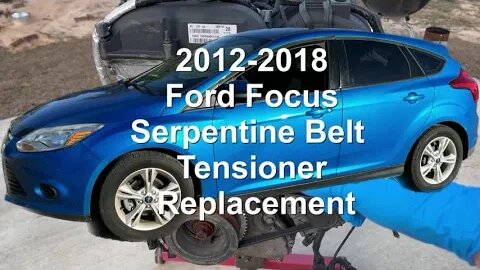
Serpentine Belt Tensioner Replacement 2012-2018 Ford Focus 2.0L
In this video I show how to replace a serpentine belt tensioner on the 2012-2018 Ford Focus equipped with the 2.0L N/A engine. The procedure is very simple and does not require the complete removal of both of the drive belts. However, it is likely that if you have a tensioner failure that requires the tensioner to be replaced then its probably time for new belts anyway, so I included the removal and installation information for both the alternator belt and the A/C belt as well.
Note: This video is limited in its completeness. As mentioned in the video the A/C belt was not present on the engine, so I substituted video from another video, that did not feature a Focus, to help convey the basics of the removal and installation of a stretchy belt. Also, because the vehicle was not present, I was not able to show the removal of the engine splash shield and also could not show the proper process for lifting and supporting the vehicle safely. Please refer to your owner's manual and repair manual for this information.
Warning! Improperly lifting and supporting your vehicle may result in serious injury or death. Please refer to your repair manual and owners manual for this information.
***Note: If your vehicle is equipped with a manual transmission it will be necessary to place the transmission into neutral in order to rotate the crankshaft as shown in the video. Warning: Be sure that the parking brake is applied and that the wheels are chocked when the vehicle is in neutral.
Here is a link to the tool:
https://www.amazon.com/Drake-Off-Road-Stretch-Installer/dp/B00AC60VEC/ref=sr_1_22?crid=QO83SSPY734X&dchild=1&keywords=stretch+belt+remover%2Finstaller&qid=1604018377&sprefix=stretch+belt+remo%2Caps%2C208&sr=8-22
DISCLAIMER
Barbour's Auto Help is not responsible for any damage or personal injury incurred in the process of performing any auto repairs done by you the viewer. Automotive repair is extremely dangerous. Repair your vehicle at your own risk. It is the viewers responsibility to verify all information and procedures as outlined in YOUR REPAIR MANUAL AND OWNERS MANUAL FOR YOUR VEHICLE. Owning and using a repair manual suited for your vehicle is essential for correctly and safely performing ANY repair to your vehicle. Always wear safety glasses, protective gloves and heed all instructions for use applicable to any piece of equipment you may use. Due to circumstances out of the control of Barbour's Auto Help, Barbour's Auto Help makes no guarantee that by the use of the information given in this video a quality repair will be made. Barbour's Auto Help makes no guarantee that the information provided is totally complete, synchronized and accurate. Verify everything using an appropriate repair manual. Verify everything with your own research.
27
views
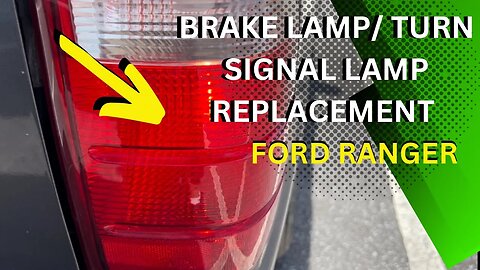
Ford Ranger Brake Lamp Bulb/ Rear Turn Signal Bulb Replacement
In this video I show how to replace a brake lamp bulb on a 2004 Ford Ranger. The tail lamp bulb actually serves as the tail lamp, brake lamp, and turn signal lamp. The bulb is a 3157 and is readily available at most parts stores.
As mentioned in the video the particular vehicle that is featured in the video is an 04 Ford Ranger. However, the bulb replacement should be the same or similar for many Rangers through out the years. (Always verify)
Note: be sure to verify the correct part number for your vehicle. The bulb used in this video is a 3157. However, the Ranger may require a different part number depending upon the year of the Ranger. (Always verify)
DISCLAIMER
Barbour's Auto Help is not responsible for any damage or personal injury incurred in the process of performing any auto repairs done by you the viewer. Automotive repair is extremely dangerous. Repair your vehicle at your own risk. It is the viewers responsibility to verify all information and procedures as outlined in YOUR REPAIR MANUAL AND OWNERS MANUAL FOR YOUR VEHICLE. Owning and using a repair manual suited for your vehicle is essential for correctly and safely performing ANY repair to your vehicle. Always wear safety glasses and heed all instructions for use applicable to any piece of equipment you may use. Due to circumstances out of the control of Barbours Auto Help, Barbours Auto Help makes no guarantee that by the use of the information given in this video a quality repair will be made. Also, Barbour'sAutoHelp makes no guarantee that the information provided is totally complete, syncronized and accurate. Use the information found in this video at your own risk.
11
views
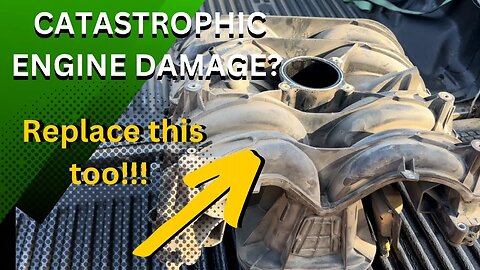
Intake Manifold Replacement Recommended With New Engine
It's not as well know as it should be. But, intake manifold replacement is a must on some vehicles when catastrophic upper end engine damage has occurred. In this video I have a great example of why this is needed after replacing an engine due to this type of failure. Many intake manifolds used on today's vehicles are complex with several passage ways inside the intake manifold for air to travel through. These complex designs make it near impossible to remove debris that may have gathered inside th intake manifold due to catastrophic upper end engine failure and in some cases lower end engine damage.
Note: While the scenario used in this video involved replacing the intake manifold along with a new engine not every scenario will look the same. You may be able to repair the upper end engine damage without complete engine replacement. In these cases it may still be recommended to replace the intake manifold.
Note: This is an informational video and not a "how to" video. The information will not apply to every vehicle out there. Please refer to a reputable repair manual and any information that may come with your new, used, or remanufactured engine for proper and fitting information.
DISCLAIMER
Barbour's Auto Help is not responsible for any damage or personal injury incurred in the process of performing any auto repairs done by you the viewer. Automotive repair is extremely dangerous. Repair your vehicle at your own risk. It is the viewers responsibility to verify all information and procedures as outlined in YOUR REPAIR MANUAL AND OWNERS MANUAL FOR YOUR VEHICLE. Owning and using a repair manual suited for your vehicle is essential for correctly and safely performing ANY repair to your vehicle. Always wear safety glasses and heed all instructions for use applicable to any piece of equipment you may use. Due to circumstances out of the control of Barbours Auto Help, Barbours Auto Help makes no guarantee that by the use of the information given in this video a quality repair will be made. Also, Barbour'sAutoHelp makes no guarantee that the information provided is totally complete, syncronized and accurate. Use the information found in this video at your own risk.
12
views
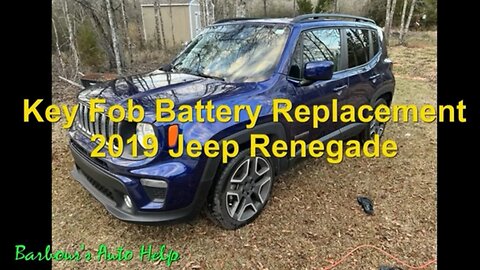
Key Fob Battery Replacement 2019 Jeep Renegade
In this video I'll demonstrate how to replace a battery in the key fob of a 2019 Jeep Renegade.
DISCLAIMER
Barbour's Auto Help is not responsible for any damage or personal injury incurred in the process of performing any auto repairs done by you the viewer. Automotive repair is extremely dangerous. Repair your vehicle at your own risk. It is the viewers responsibility to verify all information and procedures as outlined in YOUR REPAIR MANUAL AND OWNERS MANUAL FOR YOUR VEHICLE. Owning and using a repair manual suited for your vehicle is essential for correctly and safely performing ANY repair to your vehicle. Always wear safety glasses and heed all instructions for use applicable to any piece of equipment you may use. Due to circumstances out of the control of Barbours Auto Help, Barbours Auto Help makes no guarantee that by the use of the information given in this video a quality repair will be made. Also, Barbour'sAutoHelp makes no guarantee that the information provided is totally complete, syncronized and accurate. Use the information found in this video at your own risk.
9
views
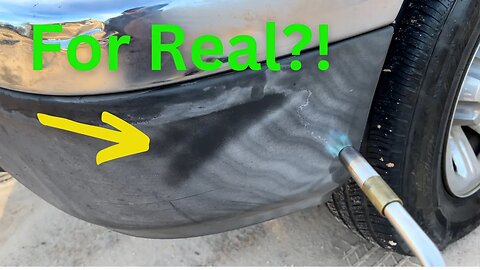
My Thoughts On Reconditioning Black Plastic Trim With Torch
This video is in response to a video that is circulating on the internet that shows a person reconditioning black plastic trim on an automobile effortlessly with a handheld torch. At first I was skeptical. But then I tried it. To my surprise it actually works and it is effortless.
Note: This is not a "how to" video. I am not an expert on the topic covered in the video. If you attempt this yourself do so at your own risk.
Note: There is a warning at the very beginning of the video. Please pause the video and read the warning.
DISCLAIMER
Barbour's Auto Help is not responsible for any damage or personal injury incurred in the process of performing any auto repairs done by you the viewer. Automotive repair is extremely dangerous. Repair your vehicle at your own risk. It is the viewers responsibility to verify all information and procedures as outlined in YOUR REPAIR MANUAL AND OWNERS MANUAL FOR YOUR VEHICLE. Owning and using a repair manual suited for your vehicle is essential for correctly and safely performing ANY repair to your vehicle. Always wear safety glasses, protective gloves and heed all instructions for use applicable to any piece of equipment you may use. Due to circumstances out of the control of Barbour's Auto Help, Barbour's Auto Help makes no guarantee that by the use of the information given in this video a quality repair will be made. Barbour's Auto Help makes no guarantee that the information provided is totally complete, synchronized and accurate. Verify everything using an appropriate repair manual. Verify everything with your own research.
12
views
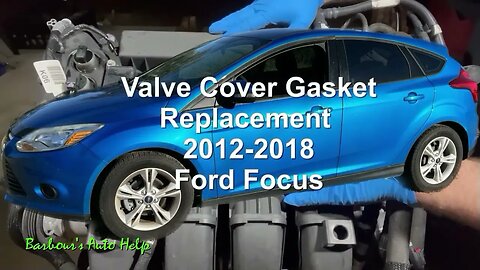
Valve Cover Gasket Replacement 2012-2018 Ford Focus 2.0L
In this video I go over the process I use to replace the valve cover gasket set on the 2012-2018 Ford Focus equipped with the duratec N/A 2.0L. I even go over a few tips and tricks that I've learned over the years of doing these valve cover gasket replacements.
Note: Please use caution when performing this service to your vehicle and use care not to get any foreign materials into the engine in the process. During the process of cleaning the mating surfaces I used a green scouring pad. These pads can shed fibers that can potentially get into the engine.
Note: Use any and all methods shown in the video at your own risk. As noted in the video I used my screw driver incorrectly as a chisel. Also, using a razor blade or a pocket screw driver on mating surfaces could potentially damage the mating surface which could result in leaks. However, if you were to scrape or damage your mating surface RTV could possibly be used in those areas to give you the forgiveness you need.
Note: When using RTV, you only have a short time to get the valve cover on and bolted down securely from the time the RTV is applied. The RTV should still be wet after the valve cover is bolted down securely.
Note: Over tightening the valve cover bolts can cause them to break. Do not over tighten the valve cover bolts.
Also, when ensuring that the valve cover gasket has not been knocked out or scraped out as shown at around the 29:00 mark, be sure not to rake off the RTV that was applied to the cylinder head earlier. If the RTV has been raked off, by your fingers, the valve cover must be removed and RTV reapplied properly.
Warning!! Use care when working around the low pressure and high pressure line at the high pressure fuel pump toward the rear of the valve cover. You will be working very closely to these and it is possible to damage these lines by being too rough around them. BE GENTLE when removing and installing the valve cover.
DISCLAIMER
Barbour's Auto Help is not responsible for any damage or personal injury incurred in the process of performing any auto repairs done by you the viewer. Automotive repair is extremely dangerous. Repair your vehicle at your own risk. It is the viewers responsibility to verify all information and procedures as outlined in YOUR REPAIR MANUAL AND OWNERS MANUAL FOR YOUR VEHICLE. Owning and using a repair manual suited for your vehicle is essential for correctly and safely performing ANY repair to your vehicle. Always wear safety glasses, protective gloves and heed all instructions for use applicable to any piece of equipment you may use. Due to circumstances out of the control of Barbour's Auto Help, Barbour's Auto Help makes no guarantee that by the use of the information given in this video a quality repair will be made. Barbour's Auto Help makes no guarantee that the information provided is totally complete, synchronized and accurate. Verify everything using an appropriate repair manual. Verify everything with your own research.
183
views
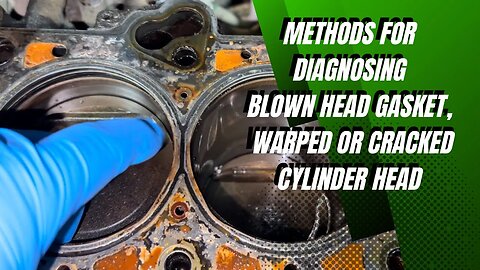
Methods For Diagnosing Blown Head Gasket, Warped or Cracked Head
In this video I go over some methods that are commonly used to diagnose a blown head gasket or warped cylinder head or cracked cylinder head. In this video these methods are actually employed on a vehicle with a cylinder head gasket leak. The first method used involves using a block tester to check for combustion gasses in the cooling system. The presence of these gasses in the cooling system usually indicates one of the three previously mentioned conditions. (Further diagnosis needed to determine root cause.) The second method discussed was the use of a cooling system pressure tester and a bore scope to check for internal coolant leaks into the cylinders. (Usually leaks can be seen originating from the head gasket inside the cylinder. Further testing and tear down needed to determine root cause.) The third method used in the video involves the use of a compression test. Compression tests allow you to see if there is a difference in compression from one cylinder to the next. Substantial differences in compression from cylinder to cylinder indicates an issue internal to the engine. (Further testing and tear down needed to determine the root cause of concern.) I also briefly explain the uses of a smoke machine in aiding in the diagnosis of the above conditions. I was able to obtain some pretty cool footage of smoke leaking from the smoke machine leaking into the cylinder using a bore scope camera. The fourth method shown in this video is using a cylinder leak down tool. This tool is great in aiding you to determine how much a particular cylinder is leaking and from where the cylinder is leaking. (Further testing and tear down needed to determine root cause.) Finally, after ample data has been obtained by performing above tests, tear down to point of failure is needed. I do tear the engine featured in the video down to point of failure and give a final diagnosis explaining the cause.
Note: It is recommended to perform as many tests as possible gathering as much information as possible about the condition of the engine and where the problem lies before tearing down to point of failure.
Note: This video mainly involves the diagnosis of either combustion gasses leaking into the cooling system from a cylinder into the cooling system or coolant leaking into the combustion chamber from the cooling system.
Note: Head gaskets and cylinder heads can leak externally. This video does not address these types of leaks. Head gaskets can also allow leaks between the oil system and the cooling system as well. This video does not explain this or show how to test for this.
DISCLAIMER
Barbour's Auto Help is not responsible for any damage or personal injury incurred in the process of performing any auto repairs done by you the viewer. Automotive repair is extremely dangerous. Repair your vehicle at your own risk. It is the viewers responsibility to verify all information and procedures as outlined in YOUR REPAIR MANUAL AND OWNERS MANUAL FOR YOUR VEHICLE. Owning and using a repair manual suited for your vehicle is essential for correctly and safely performing ANY repair to your vehicle. Always wear safety glasses and heed all instructions for use applicable to any piece of equipment you may use. Due to circumstances out of the control of Barbours Auto Help, Barbours Auto Help makes no guarantee that by the use of the information given in this video a quality repair will be made. Also, Barbour'sAutoHelp makes no guarantee that the information provided is totally complete, syncronized and accurate. Use the information found in this video at your own risk.
21
views
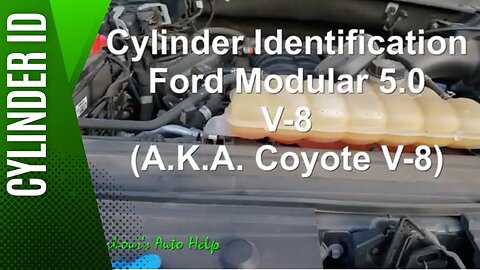
Cylinder Identification Ford 5.0L Coyote Engine
In this video I go over the cylinder Identification for the Ford 5.0L Coyote engine. The cylinder identification is as follows. Right bank, bank 1, starting from the front of the engine and going back 1-2-3-4. On the left bank, bank 2, starting from the front of the engine and going back 5-6-7-8.
This information is absolutely vital in attempting to diagnose "cylinder specific" diagnostic trouble codes such as cylinder misfire codes or injector codes.
Here are some back up sources information pertaining to the Ford 5.0L Coyote engine.
Cylinder ID
https://en.wikipedia.org/wiki/Firing_order
Ford Coyote engine info
https://en.wikipedia.org/wiki/Ford_Modular_engine#5.0_L_Coyote
GENERAL DISCLAIMER
Barbour's Auto Help is not responsible for any damage or personal injury incurred in the process of performing any auto repairs done by you the viewer. Automotive repair is extremely dangerous. Repair your vehicle at your own risk. It is the viewers responsibility to verify all information and procedures as outlined in YOUR REPAIR MANUAL AND OWNERS MANUAL FOR YOUR VEHICLE. Owning and using a repair manual suited for your vehicle is essential for correctly and safely performing ANY repair to your vehicle. Always wear safety glasses, protective gloves and heed all instructions for use applicable to any piece of equipment you may use. Due to circumstances out of the control of Barbour's Auto Help, Barbour's Auto Help makes no guarantee that by the use of the information given in this video a quality repair will be made. Barbour's Auto Help makes no guarantee that the information provided is totally complete, synchronized and accurate. Verify everything using an appropriate repair manual. Verify everything with your own research.
29
views
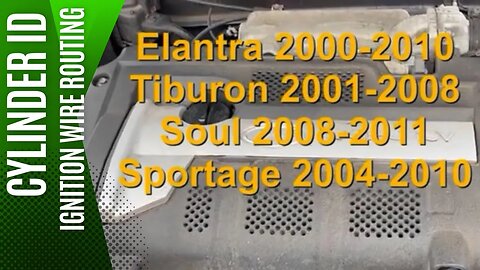
Cylinder Identification and Ignition Wire Routing Hyundai Beta II 2.0L
In this video I go over the cylinder identification and ignition wire routing for the 2000-20010 Hyundai Elantra 2.0L, 2001-2008 Hyundai Tiburon 2.0L, 2008-2011 Kia Soul 2.0L, and the 2004-2010 Kia Sportage 2.0L. This particular 2.0L engine is Hyundai's Beta II engine.
Wikipedia was sourced for the information pertaining to the years and vehicles that Hyundai used the Beta 2 2.0L in. Please verify this information with a repair manual suited for your vehicle. There are some models that are not sold in my market. I could not verify this information for you for those models. I'd also suggest you verify regardless as I am human.
Here is a link to the wikipedia page with that information:
https://en.wikipedia.org/wiki/Hyundai_Beta_engine
GENERAL DISCLAIMER
Barbour's Auto Help is not responsible for any damage or personal injury incurred in the process of performing any auto repairs done by you the viewer. Automotive repair is extremely dangerous. Repair your vehicle at your own risk. It is the viewers responsibility to verify all information and procedures as outlined in YOUR REPAIR MANUAL AND OWNERS MANUAL FOR YOUR VEHICLE. Owning and using a repair manual suited for your vehicle is essential for correctly and safely performing ANY repair to your vehicle. Always wear safety glasses, protective gloves and heed all instructions for use applicable to any piece of equipment you may use. Due to circumstances out of the control of Barbour's Auto Help, Barbour's Auto Help makes no guarantee that by the use of the information given in this video a quality repair will be made. Barbour's Auto Help makes no guarantee that the information provided is totally complete, synchronized and accurate. Verify everything using an appropriate repair manual. Verify everything with your own research.
9
views
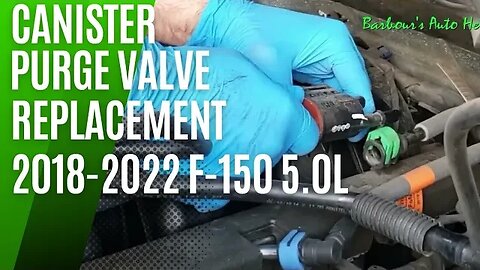
Canister Purge Valve Replacement 2018-2022 F150 5.0L
In this video I show you how I replace an evaporative emissions canister purge valve on a late model Ford F150 equipped with a 5.0L V-8. The process is super simple.
Note: while this valve is similar between the years there may be variations in the way the part is built from year to year. Always have a parts pro verify correct part fitment.
Here are some more helpful videos....
Quick Easy Test For Stuck Open Evap Purge Valve
https://youtu.be/94DT7aR5YWk
How To Disconnect and Reconnect Ford Line Connector With Blue Lock (this is similar to the green lock connectors shown in the video.)
https://youtu.be/XTMiupi78PE
How To Disconnect and Reconnect Ford Electrical Connector With White Slide Lock
https://youtu.be/MGIH2rRJjpU
GENERAL DISCLAIMER
Barbour's Auto Help is not responsible for any damage or personal injury incurred in the process of performing any auto repairs done by you the viewer. Automotive repair is extremely dangerous. Repair your vehicle at your own risk. It is the viewers responsibility to verify all information and procedures as outlined in YOUR REPAIR MANUAL AND OWNERS MANUAL FOR YOUR VEHICLE. Owning and using a repair manual suited for your vehicle is essential for correctly and safely performing ANY repair to your vehicle. Always wear safety glasses, protective gloves and heed all instructions for use applicable to any piece of equipment you may use. Due to circumstances out of the control of Barbour's Auto Help, Barbour's Auto Help makes no guarantee that by the use of the information given in this video a quality repair will be made. Barbour's Auto Help makes no guarantee that the information provided is totally complete, synchronized and accurate. Verify everything using an appropriate repair manual. Verify everything with your own research.
13
views
I found it! lol
Snippet from "How To Find An Exhaust Leak With Smoke Machine".
Here is a link to the full video: https://youtu.be/Q5Kdgt3mEZU
Disclaimer:
This is not an in depth how to video nor is it comprehensive. This is a video snippet taken from a larger video that contains a greater amount of information. This video is meant for entertainment and is not a diy guide. Please see video linked above for more context.
6
views

#Shorts/ what a bad strut mount (with built in bearing) sounds like
Great example of what a bad strut mount with a built in bearing sounds like when turning. this is a short section of a longer more in depth video. Please see longer video for more information. Please see description of longer video for disclaimer information.
Here is the link to the longer video: https://youtu.be/mWHsDy_qJpc
Disclaimer:
This is not an in depth how to video nor is it comprehensive. This is a video snippet taken from a larger video that contains a greater amount of information. This video is meant for entertainment and is not a diy guide. Please see video linked above for more context.
6
views
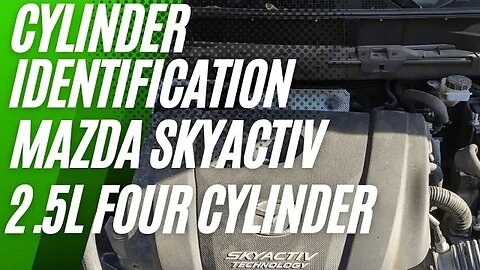
Cylinder Identification Mazda Skyactive 2.5L Four Cylinder
In this video I go over the cylinder identification for a Mazda Skyactive 2.5L four cylinder engine. Starting from the front of the engine, nearest the accessory drive, you have cylinder #1 and then moving toward the rear of the engine you have #2, then #3 and finally #4 nearest the transmission.
Knowing the identification of each cylinder of an engine is vital information when it comes to diagnosing cylinder specific diagnostic trouble codes. Once the cylinder is identified you can then test the components related to that cylinder.
As mentioned in this video, I'm using my experience in the making of this video. It's been my experience that most Mazda 4 cylinders have a similar lay out. However, I do not pretend to know everything nor do I claim this information is correct for every application that the Skyactive 2.5L is used. (I can't imagine there is an exception though.)
GENERAL DISCLAIMER
Barbour's Auto Help is not responsible for any damage or personal injury incurred in the process of performing any auto repairs done by you the viewer. Automotive repair is extremely dangerous. Repair your vehicle at your own risk. It is the viewers responsibility to verify all information and procedures as outlined in YOUR REPAIR MANUAL AND OWNERS MANUAL FOR YOUR VEHICLE. Owning and using a repair manual suited for your vehicle is essential for correctly and safely performing ANY repair to your vehicle. Always wear safety glasses, protective gloves and heed all instructions for use applicable to any piece of equipment you may use. Due to circumstances out of the control of Barbour's Auto Help, Barbour's Auto Help makes no guarantee that by the use of the information given in this video a quality repair will be made. Barbour's Auto Help makes no guarantee that the information provided is totally complete, synchronized and accurate. Verify everything using an appropriate repair manual. Verify everything with your own research.
10
views
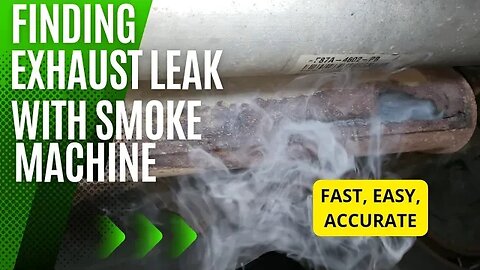
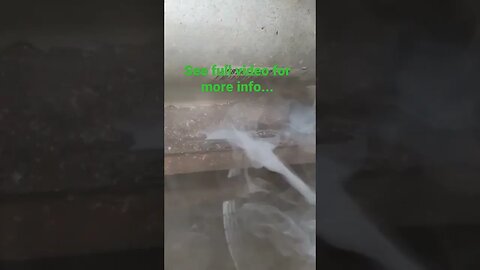
How To Find An Exhaust Leak With Smoke Machine
In this video I demonstrate how to find an exhaust leak on an automobile using a smoke machine. Using a smoke machine is one of the fastest, easiest and most accurate ways of finding an exhaust leak. In the video I literally find my exhaust leak in under 5 minutes using a smoke machine. My leak was coming from a hole in the side of my muffler. However, an exhaust leak can exist at any given point along the entirety of the exhaust system including manifolds, gaskets, flanges, unions, resonators, flex pipes, etc. etc..
(By the way... I know, I know... I didn't need a smoke machine to find this leak. I've actually known about this leak for a few years now. It's a demonstration video folks. Hope it helps)
Note: The exhaust system shown in the video was a "single" exhaust system. Vehicles equipped with a "dual" exhaust system may require that each exhaust system be tested separately. If the "dual" exhaust system is equipped with an H-pipe or some other means of unifying both systems then the outlet that does not have the adapter hooked up to it will need to be capped off.
Also, as mentioned, some things that are a part of the exhaust system can leak and it can be normal for them to leak. I only mentioned a few things in the video. It is possible that other components not mentioned have "normal" leaks as well.
Buy an Autoline Pro smoke machine (AFFILIATE LINKs)
Homepage: https://spn.so/gth5svwb
Shop Plus (w/ Compressor): https://spn.so/5sfx6vem
Shop Original (w/o compressor): https://spn.so/90dv16bd
Note (FULL DISCLOSURE): I earn from qualifying purchases using the affiliate link above.
GENERAL DISCLAIMER
Barbour's Auto Help is not responsible for any damage or personal injury incurred in the process of performing any auto repairs done by you the viewer. Automotive repair is extremely dangerous. Repair your vehicle at your own risk. It is the viewers responsibility to verify all information and procedures as outlined in YOUR REPAIR MANUAL AND OWNERS MANUAL FOR YOUR VEHICLE. Owning and using a repair manual suited for your vehicle is essential for correctly and safely performing ANY repair to your vehicle. Always wear safety glasses, protective gloves and heed all instructions for use applicable to any piece of equipment you may use. Due to circumstances out of the control of Barbour's Auto Help, Barbour's Auto Help makes no guarantee that by the use of the information given in this video a quality repair will be made. Barbour's Auto Help makes no guarantee that the information provided is totally complete, synchronized and accurate. Verify everything using an appropriate repair manual. Verify everything with your own research.
47
views
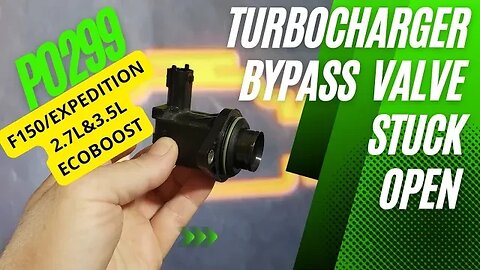
P0299 BY FAULTY TURBOCHARGER BYPASS VALVE/ ECOBOOST F150 & EXPODITION
In this video I discuss how a failed TCBY valve, also known as a turbocharger bypass valve, caused a code P0299 "turbocharger underboost condition" to set in a 2018 Ford F150 equipped with a 2.7L Ecoboost. The valve got stuck in the open position causing turbocharger boost to be bleed off when the vehicle was not supposed to be doing so. This lead to the SES lamp illuminating and a lack of power upon acceleration.
Note: This situation can affect many of the Ford F150s and Expeditions equipped with an Ecoboost engine, 2.7L or 3.5L. And to my knowledge the 3.5L Ecoboost has been being used on the F150 from 2013 to present day, 2022. Also, the 2.7L Ecoboost has been used in later years on the F150 to present day. The Expedition equipped with the 3.5L Ecoboost can also be affected. I believe that the 3.5L Ecoboost has been in use of the Expedition from around 2015 to present day, 2022. The turbo systems on all of these vehicles are very similar and almost the same. However, there are some differences. So, as always verify everything.
GENERAL DISCLAIMER
Barbour's Auto Help is not responsible for any damage or personal injury incurred in the process of performing any auto repairs done by you the viewer. Automotive repair is extremely dangerous. Repair your vehicle at your own risk. It is the viewers responsibility to verify all information and procedures as outlined in YOUR REPAIR MANUAL AND OWNERS MANUAL FOR YOUR VEHICLE. Owning and using a repair manual suited for your vehicle is essential for correctly and safely performing ANY repair to your vehicle. Always wear safety glasses, protective gloves and heed all instructions for use applicable to any piece of equipment you may use. Due to circumstances out of the control of Barbour's Auto Help, Barbour's Auto Help makes no guarantee that by the use of the information given in this video a quality repair will be made. Barbour's Auto Help makes no guarantee that the information provided is totally complete, synchronized and accurate. Verify everything using an appropriate repair manual. Verify everything with your own research.
37
views
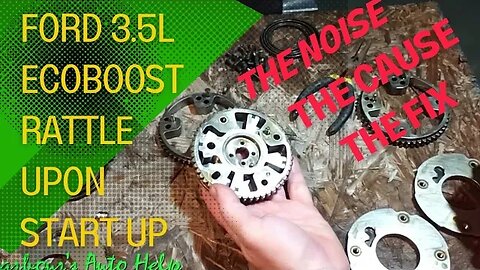
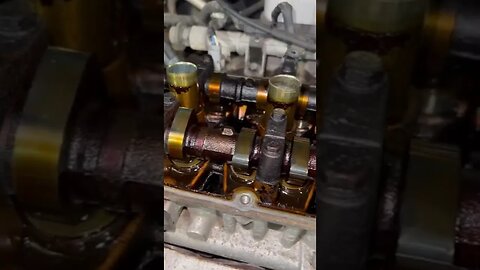
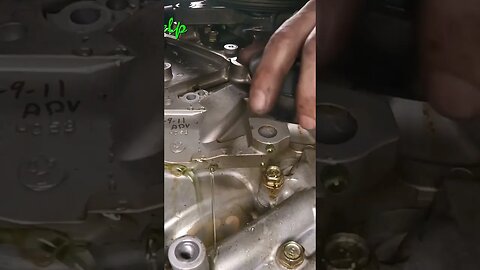
Ford 3.5L Ecoboost Cam Phaser Rattle/ The noise, The cause, The fix
In this video I share my experience and knowledge of the Ford F-150 3.5L Ecoboost cam phaser rattle upon start up. I give a great example of what the noise sounds like. I also explain what, in my understanding, causes this issue by dissecting a cam phaser and showing the failed part. In addition to this I display how the cam phaser and camshafts behave while this noise is happening by rotating the crankshaft of a 3.5L with the valve cover removed so that the valve train can be seen in motion. Finally, I share my experiences with two different repair methods made available for to rectify this issue.
This noise that usually occurs upon start up after the vehicle has been sitting, not running, for several hours. Ford F-150s equipped with the 3.5L Ecoboost from 2013- roughly present day can exhibit this noise. It can also show up in the Ford expedition and Lincoln navigator equipped with the 3.5L Ecoboost.
Note: This is not a " how to" video. It is an informational video sharing "my understanding and experience with this problem and its repair". Please do your own research to confirm that the information found in this video is applicable to your vehicle. Also, this video is in no way meant to be taken as a guarantee that if you experience this noise on your vehicle that replacing the VCT units, a.k.a. cam phasers, will fix your problem. You must have your vehicle properly diagnosed to confirm that the cam phasers have failed in the manner shown in the video. This video does not give information on how to properly diagnose this issue. I give no guarantee that by using this video you will correctly identify your problem and correctly repair it. Use the information found in this video at your own risk.
GENERAL DISCLAIMER
Barbour's Auto Help is not responsible for any damage or personal injury incurred in the process of performing any auto repairs done by you the viewer. Automotive repair is extremely dangerous. Repair your vehicle at your own risk. It is the viewers responsibility to verify all information and procedures as outlined in YOUR REPAIR MANUAL AND OWNERS MANUAL FOR YOUR VEHICLE. Owning and using a repair manual suited for your vehicle is essential for correctly and safely performing ANY repair to your vehicle. Always wear safety glasses, protective gloves and heed all instructions for use applicable to any piece of equipment you may use. Due to circumstances out of the control of Barbour's Auto Help, Barbour's Auto Help makes no guarantee that by the use of the information given in this video a quality repair will be made. Barbour's Auto Help makes no guarantee that the information provided is totally complete, synchronized and accurate. Verify everything using an appropriate repair manual. Verify everything with your own research.
141
views
1
comment