
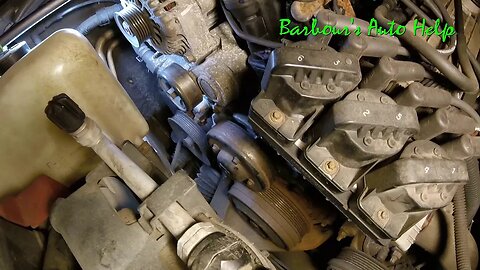
Serpentine Belt Replacement GM 3.8L V-6
In this video I'll show you how to replace a serpentine belt on GM 3.8L V-6 series 2. The particular vehicle featured in this video is an 01 Pontiac Bonneville. While the vehicle featured is an 01 Pontiac Bonneville the 3.8L series 2 was used in a lot of other GM makes and models and the procedure should be similar if not the same. (Do reference your repair manual to confirm proper procedure).
DISCLAIMER
Barbour's Auto Help is not responsible for any damage or personal injury incurred in the process of performing any auto repairs done by you the viewer. Automotive repair is extremely dangerous. Repair your vehicle at your own risk. It is the viewers responsibility to verify all information and procedures as outlined in YOUR REPAIR MANUAL AND OWNERS MANUAL FOR YOUR VEHICLE. Owning and using a repair manual suited for your vehicle is essential for correctly and safely performing ANY repair to your vehicle. Always wear safety glasses and heed all instructions for use applicable to any piece of equipment you may use. Due to circumstances out of the control of Barbours Auto Help, Barbours Auto Help makes no guaranty that by the use of the information given in this video a quality repair will be made. Barbour'sAutoHelp makes no guaranty that the information provided is totally complete, syncronized and accurate. Verify everything using an appropriate repair manual. You can do it. Do it right and do it safely.
Repair your vehicle at your own risk! Barbour's auto help does not guaranty a proper repair using these techniques.
Music by:
Zombie Rock by Audionautix is licensed under a Creative Commons Attribution license (https://creativecommons.org/licenses/by/4.0/)
Artist: http://audionautix.com
2
views

Firing Order and Cylinder Identification 98 Nissan Frontier 2.4L
In this video I go over the firing order and cylinder identification on my 1998 Nissan Frontier. Its important to know the firing order and cylinder identification when performing various procedures on your vehicle. Wire replacement is one of these procedures. Misrouting wires after a major tune up is a very common mistake. Knowing this information can get you out of a jam.
DISCLAIMER
Barbour's Auto Help is not responsible for any damage or personal injury incurred in the process of performing any auto repairs done by you the viewer. Automotive repair is extremely dangerous. Repair your vehicle at your own risk. It is the viewers responsibility to verify all information and procedures as outlined in YOUR REPAIR MANUAL AND OWNERS MANUAL FOR YOUR VEHICLE. Owning and using a repair manual suited for your vehicle is essential for correctly and safely performing ANY repair to your vehicle. Always wear safety glasses and heed all instructions for use applicable to any piece of equipment you may
1
view

Oil Sample from Engine with Bearing Damage
I took an oil sample on a vehicle that had bearing damage and this is what it looked like. Results may vary as well as causes.
A Cure for Preignition and Detonation
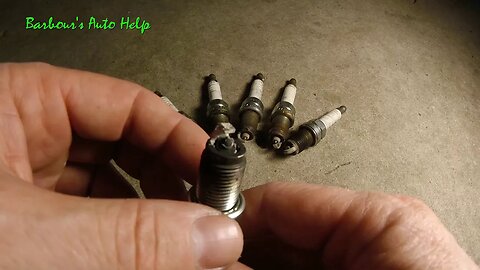
I recently replaced my spark plugs and to my surprise I found a damaged spark plug from one of my cylinders. The damage was caused by detonation. I was also experiencing symptoms of preignition, a rattling/ knocking/ pinging noise. Detonation and preignition are not good for an engine and can be caused by a number of things, carbon build up within the combustion chamber being one of them, which was the case for my vehicle. As seen in the video, I took a bore scope and looked down into the combustion chamber. I found tons of carbon which wasn't too much of a surprise given the condition of the spark plug I took out. In many cases, such as mine, carbon can be easily removed from the combustion chamber and tops of the piston by performing a simple air induction cleaning with the engine running. The cleaning agent used will get into the combustion chamber and clean things up. This video gives a good visual of the top of the piston before the cleaning and also of the results of the cleaning afterward. Not only did performing the air induction cleaning take care of the carbon build up but it also got rid of the symptoms of detonation and preignition. (Note: There is a root cause of the carbon build up on just that one cylinder in my vehicle. I believe it is leaking valve seals allowing oil to get into the combustion chamber. I'll have to get into it a little more to find out. Also, this will happen again if this problem is not fixed. At least for now we're good)
Note: Consult your repair manual to confirm that this procedure is right for your vehicle. Choose a good product to use and follow not only the instructions given by the manufacturer of that product but also the instructions given in your repair manual. In extreme cases performing an air induction service will not remove an appreciable amount of carbon. In these cases other means will be needed to get rid of the carbon.
Also, the title of the video is "A Cure for Preignition and Detonation" not "The Cure......." This will only work if carbon is the cause of your preignition and detonation. As noted several times, preignition and detonation can be caused by other factors apart from carbon build up and in those cases this video will not help.
Also note: This video is only a brief introduction to the subject of detonation and preignition and does not go into depth on the subject. Below are links to websites that I found to be very informative on the matter.
http://www.misterfixit.com/deton.htm
https://en.wikipedia.org/wiki/Engine_knocking
DISCLAIMER
Barbour's Auto Help is not responsible for any damage or personal injury incurred in the process of performing any auto repairs done by you the viewer. Automotive repair is extremely dangerous. Repair your vehicle at your own risk. It is the viewers responsibility to verify all information and procedures as outlined in YOUR REPAIR MANUAL AND OWNERS MANUAL FOR YOUR VEHICLE. Owning and using a repair manual suited for your vehicle is essential for correctly and safely performing ANY repair to your vehicle. Always wear safety glasses and heed all instructions for use applicable to any piece of equipment you may use. Due to circumstances out of the control of Barbours Auto Help, Barbours Auto Help makes no guaranty that by the use of the information given in this video a quality repair will be made. Barbour'sAutoHelp makes no guaranty that the information provided is totally complete, syncronized and accurate. Verify everything using an appropriate repair manual. You can do it. Do it right and do it safely.
Repair your vehicle at your own risk! Barbour's auto help does not guaranty a proper repair using these techniques.
Music by:
Zombie Rock by Audionautix is licensed under a Creative Commons Attribution license (https://creativecommons.org/licenses/by/4.0/)
Artist: http://audionautix.com
2
views
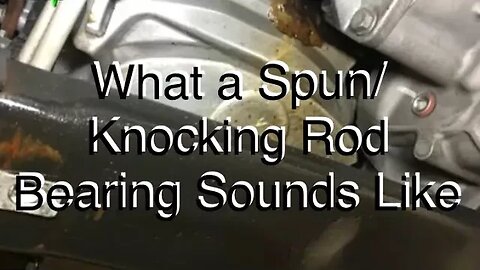
Spun / Knocking Rod Bearing Noise
This video has great audio of a spun and knocking rod bearing. This video is great for people that aren't familiar with what a spun or knocking rod bearing sounds like. When listening to the noise notice the chirping noise accompanied by the knocking noise.
23
views

Intake Air Temperature Sensor Replacement GM 3.8L V-6 Series 2
In this video I'll show you how to replace an intake air temperature sensor on a GM 3.8L V-6 series 2. The series 2 fits in a mirriad of GM vehicles. The particular vehicle featured in this video is an 01 Pontiac Bonneville. Note: procedure and location of sensor may differ from year to year and from model to model.
The intake air temperature sensor is the sensor responsible for informing the PCM what temperature the air is entering the engine. This helps the PCM determine the density of the air and further helps the PCM calculate the most efficient air fuel ratio.
While this sensor, in my opinion, seems to be very durable and typically outlast all the other sensors on the vehicle, it can and does go out. I hope this video helps in repairing your vehicle.
DISCLAIMER
Barbour's Auto Help is not responsible for any damage or personal injury incurred in the process of performing any auto repairs done by you the viewer. Automotive repair is extremely dangerous. Repair your vehicle at your own risk. It is the viewers responsibility to verify all information and procedures as outlined in YOUR REPAIR MANUAL AND OWNERS MANUAL FOR YOUR VEHICLE. Owning and using a repair manual suited for your vehicle is essential for correctly and safely performing ANY repair to your vehicle. Always wear safety glasses and heed all instructions for use applicable to any piece of equipment you may use. Due to circumstances out of the control of Barbours Auto Help, Barbours Auto Help makes no guaranty that by the use of the information given in this video a quality repair will be made. Barbour'sAutoHelp makes no guaranty that the information provided is totally complete, syncronized and accurate. Verify everything using an appropriate repair manual. You can do it. Do it right and do it safely.
Repair your vehicle at your own risk! Barbour's auto help does not guaranty a proper repair using these techniques.
Music by:
Zombie Rock by Audionautix is licensed under a Creative Commons Attribution license (https://creativecommons.org/licenses/by/4.0/)
Artist: http://audionautix.com/
4
views
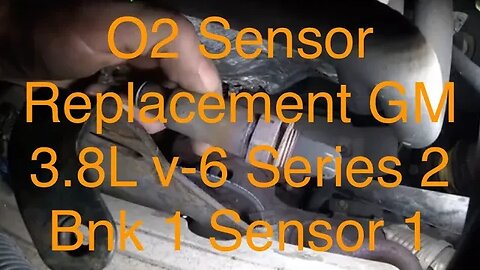
OXYGEN SENSOR REPLACEMENT GM 3.8l V-6 SERIES 2 (BANK 1 SENSOR 1)
In this video I'll show you how to replace an O2 sensor on a GM 3.8L v-6 series 2. While this video fits in a lot of different GM models and years the particular vehicle that is shown in the vehicle is an 01 Pontiac Bonneville. The procedure for your vehicle will be similar but may not be exactly the same, so a repair manual would be suggested.
The particular O2 sensor is Bank 1 sensor 1 and it is located on the back side of the engine on the exhaust manifold just beneath the heater hoses. Note: that some V-6 engines may have Bank 1 and Bank 2 O2 sensors so refer to your repair manual for correct locations. This vehicle only has a Bank 1 sensor 1 O2 sensor and an Bank 1 sensor 2 O2 sensor and for this year the location noted in this video for Bank 1 Sensor 1 is correct.
The "special" O2 sensor socket is a 7/8" socket with a slit up the side. As far as I know they only come in one size.
If your interested: Here is a link to a video showing how to replace the Bnk 1 Sensor 2 O2 sensor
https://youtu.be/8e4BrxXOtp0
Warning!! Be sure the vehicle is totally cooled down before doing this. The exhaust manifold gets extremely hot and can severely burn you. Give the engine at least 2 hrs cool down time (time not running).
DISCLAIMER
Barbour's Auto Help is not responsible for any damage or personal injury incurred in the process of performing any auto repairs done by you the viewer. Automotive repair is extremely dangerous. Repair your vehicle at your own risk. It is the viewers responsibility to verify all information and procedures as outlined in YOUR REPAIR MANUAL AND OWNERS MANUAL FOR YOUR VEHICLE. Owning and using a repair manual suited for your vehicle is essential for correctly and safely performing ANY repair to your vehicle. Always wear safety glasses and heed all instructions for use applicable to any piece of equipment you may use. Due to circumstances out of the control of Barbours Auto Help, Barbours Auto Help makes no guaranty that by the use of the information given in this video a quality repair will be made. Barbour'sAutoHelp makes no guaranty that the information provided is totally complete, syncronized and accurate. Verify everything using an appropriate repair manual. You can do it. Do it right and do it safely.
Repair your vehicle at your own risk! Barbour's auto help does not guaranty a proper repair using these techniques.
Music by:
Zombie Rock by Audionautix is licensed under a Creative Commons Attribution license (https://creativecommons.org/licenses/by/4.0/)
Artist: http://audionautix.com/
19
views
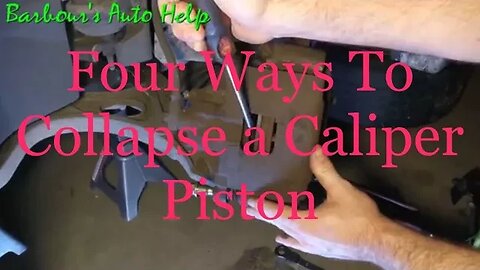
Four Ways to Collapse a Caliper Piston
In this video I'll show you how to collapse/ compress a caliper piston using four different methods. I wanted to make this video to help the person that doesn't have, and may not be able to afford, the proper tools for the job. These methods work in a pinch.
The first two methods are great if you don't have the proper tools to do the job. However, the tools used are not the "proper tools" and may get the job done but not without complications. Using a pry bar or screw driver places force on one side of the piston when collapsing the caliper causing it to cock to one side. It is my opinion that this "possibly" may cause complications such as a stuck caliper piston after service. I'm not saying this will be the case 100% of the time but it seems to me that doing it this way isn't the best. Also, if your pads are equipped with electrical sensors I would not suggest using this method at all. The second method is a better way to collapse the piston but still does not provide the direct and uniform inward pressure that i prefer. Use the first two methods at your own risk. I prefer the later two methods as they apply pressure uniformly to the piston directly inward without causing the piston to cock in the piston bore.
If your caliper pistons are made of phenolic material you could damage and crack the piston by prying on it. I would not recommend using a pry bar or screwdriver directly to the piston if it is phenolic. I prefer and recommend using the later two methods of collapsing the caliper piston. These two methods place pressure directly to the piston and presses the piston in uniformly.
Note: When collapsing the piston have the bleeder screw open to allow the old brake fluid to escape. (use a catch pan to catch the fluid). Keep the bleeder screw at the upward most position and do not tilt the caliper while the bleeder screw is open. Doing this could allow air to be introduced into the brake system and cause your brakes not to operate correctly. Close bleeder when done.
Note: One reason you will need to collapse brake calipers is to make room for new pads. When collapsing the piston using the existing brake pad as something to pry on you may damage the pad a bit. Only use old brake pads to collapse calipers using these methods.
Note: After the job is done be sure to press your brake pedal several times until the pedal is hard. Do this before placing the vehicle in drive as it will take some time to get the piston to travel back out to make contact with the pads to stop the vehicle. If this is not done, personal injury or property damage may occur.
Also, If the pedal does not get firm after pumping the pedal several times then you may have gotten air into the system and the brakes will need to be bleed until the problem is taken care of.
Here is a link to the video showing how to collapse a twist in style caliper used on rear brakes....Calipers equipped with integrated parking brakes will not collapse using conventional methods. Watch the video below for more info.
https://youtu.be/fSCYMfRBIC8
Please reference your repair manual for any additional information and cautionary information pertaining to performing a brake job on your vehicle.
DISCLAIMER
Barbour's Auto Help is not responsible for any damage or personal injury incurred in the process of performing any auto repairs done by you the viewer. Automotive repair is extremely dangerous. Repair your vehicle at your own risk. It is the viewers responsibility to verify all information and procedures as outlined in YOUR REPAIR MANUAL AND OWNERS MANUAL FOR YOUR VEHICLE. Owning and using a repair manual suited for your vehicle is essential for correctly and safely performing ANY repair to your vehicle. Always wear safety glasses and heed all instructions for use applicable to any piece of equipment you may use. Due to circumstances out of the control of Barbours Auto Help, Barbours Auto Help makes no guarantee that by the use of the information given in this video a quality repair will be made. Barbour'sAutoHelp makes no guarantee that the information provided is totally complete, syncronized and accurate. Verify everything using an appropriate repair manual. You can do it. Do it right and do it safely.
Repair your vehicle at your own risk! Barbour's auto help does not guaranty a proper repair using these techniques.
Music by:
Zombie Rock by Audionautix is licensed under a Creative Commons Attribution license (https://creativecommons.org/licenses/by/4.0/)
Artist: http://audionautix.com/
Created with MAGIX Movie Edit Pro 2016
75
views

Sound of an Exhaust Manifold Gasket Leak on Turbo Charged Engine
This is a gasoline turbo charged engine with an exhaust manifold gasket leak. It made an awful noise. It was the first time that I'd heard an exhaust manifold gasket leak sound this way. On this particular engine a considerable amount of back pressure is built up in the manifold before the waste gate opens. This pressurized exhaust gas pushed through the multi-layered metal gasket and made a whistling noise....I'm sure not every turbo charged engine that has an exhaust manifold gasket leak will sound just like this one, but I thought is was interesting and worth adding to my channel..... I hope it helps!
1
view

Throttle Body Cleaning GM 3.8L Series 2 (Naturally Aspirated/ None Super Charged)
Please read entire description before attempting this!
In this video I'll show you how to clean the throttle body on a GM 3.8L Series 2. The vehicle featured in this vehicle is a 2001 Pontiac Bonneville. (note: this procedure may not apply to every 3.8L series 2 engine out there. If your vehicle has a super charged 3.8L then It would not be advised to do this. Do not clean the throttle body in this manner if you have a super charged engine.)
Cleaning the throttle body is one of the easiest and best things you can do for your vehicle. It helps to maintain throttle response, engine idle and overall performance. Also, its supper cheap!
Use intake cleaner not carburetor cleaner.
Do note: Disconnecting the battery on some vehicles will put the radio into "anti-theft" mode. If this is the case for your vehicle you will need a code to get your radio working again after the battery has been disconnected. This code is usually located on a card in your owners manual. Be sure you have it before doing this.
Also Note: After spraying intake cleaner through the mesh let the vehicle idle for a while and then rev it a few times to help get the intake cleaner off the mesh. Also, after letting it run and reaving it a few times take some compressed air and spray it though the mesh. The goal is to remove all of the chemical from the mesh so you'll need to clean every inch of the mesh, every hole. MAKE SURE ALL THE INTAKE CLEANER IS COMPLETELY REMOVED FROM THE MESH. Do this before putting the MAF sensor back into the throttle body. By making sure all the chemical is off the mesh before installing the sensor you will prevent potential damage to the sensor from contamination.
Read and follow the instructions provided by the maker of the intake cleaner used.
Perform cleaning in a well ventilated area!
Warning! Doing automotive repair is dangerous. Use extreme caution! Heed all warnings applicable to the project you are performing. Read, understand and follow all warning labels located on the container of any chemical you may be using! Keep hands face and body away from intake as back fires can happen. Have a fire extinguisher readily available. Repair your vehicle at your own risk!
DISCLAIMER
Barbour's Auto Help is not responsible for any damage or personal injury incurred in the process of performing any auto repairs done by you the viewer. It is the viewers responsibility to verify all information and procedures as outlined in YOUR REPAIR MANUAL AND OWNERS MANUAL FOR YOUR VEHICLE. Owning and using a repair manual suited for your vehicle is essential for correctly and safely performing ANY repair to your vehicle. Always wear safety glasses and heed all instructions for use applicable to any piece of equipment you may use. Due to circumstances out of the control of Barbours Auto Help, Barbours Auto Help makes no guaranty that by the use of the information given in this video a quality repair will be made. Barbour'sAutoHelp makes no guaranty that the information provided is totally complete, syncronized and accurate. Verify everything using an appropriate repair manual. You can do it. Do it right and do it safely.
Repair your vehicle at your own risk! Barbour's auto help does not guaranty a proper repair using these techniques.
Here's that link to to the video mentioned in the video:
https://youtu.be/GU_Nsafnwuk
Here's a link to another video showing this done in a similar manner on a different car:
https://youtu.be/u6UeJXkzDW8
Music by:
Zombie Rock by Audionautix is licensed under a Creative Commons Attribution license (https://creativecommons.org/licenses/by/4.0/)
Artist: http://audionautix.com/
16
views
Firing Order and Cylinder Identification GM 3.8L Series 2 V-6
In this video I'll go over the firing order and cylinder identification on a GM 3.8L series 2 V-6. Not only this, but I also go over wire routing, which is very important when doing a tune up.
This information is readily available through many sources on the internet for free. Here is one source other than this video: https://en.wikipedia.org/wiki/Buick_V6_engine
Warning! Doing automotive repair is dangerous. Use extreme caution! Heed all warnings applicable to the project you are performing. Read, understand and follow all warning labels located on the container of any chemical you may be using! Keep hands face and body away from intake as back fires can happen. Have a fire extinguisher readily available. Repair your vehicle at your own risk!
DISCLAIMER
Barbour's Auto Help is not responsible for any damage or personal injury incurred in the process of performing any auto repairs done by you the viewer. It is the viewers responsibility to verify all information and procedures as outlined in YOUR REPAIR MANUAL AND OWNERS MANUAL FOR YOUR VEHICLE. Owning and using a repair manual suited for your vehicle is essential for correctly and safely performing ANY repair to your vehicle. Always wear safety glasses and heed all instructions for use applicable to any piece of equipment you may use. Due to circumstances out of the control of Barbours Auto Help, Barbours Auto Help makes no guaranty that by the use of the information given in this video a quality repair will be made. Barbour'sAutoHelp makes no guaranty that the information provided is totally complete, syncronized and accurate. Verify everything using an appropriate repair manual. You can do it. Do it right and do it safely.
Repair your vehicle at your own risk! Barbour's auto help does not guaranty a proper repair using these techniques.
Here's that link to to the video mentioned in the video:
https://youtu.be/GU_Nsafnwuk
Here's a link to another video showing this done in a similar manner on a different car:
https://youtu.be/u6UeJXkzDW8
Music by:
Zombie Rock by Audionautix is licensed under a Creative Commons Attribution license (https://creativecommons.org/licenses/by/4.0/)
Artist: http://audionautix.com/
1
view
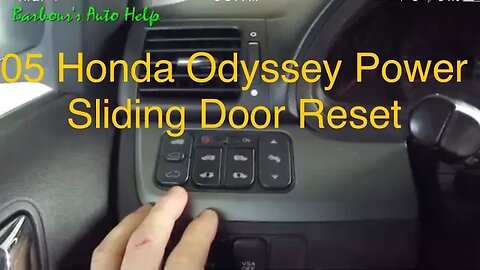
05 Honda Odyssey Power Sliding Door Reset
In this video I'll show you how to reset your Power Sliding doors on your 05 Honda Odyssey. The particular Odyssey featured in this video is a Touring model. I believe the EX and LX use the same method, but don't quote me on this.
Note: The Power Sliding doors may have stoped working due to a problem with the sliding doors such as an obstruction, excessive resistance to movement ect. Perceived problems could set a trouble code in the module responsible for controlling the sliding doors. I believe the module in turn shuts down the Sliding doors. Pulling this fuse, I believe, erases any trouble codes in this module thus allowing the Power Sliding doors to operate again. (That's my educated "theory" if you will. I know for sure that this procedure works, however.)
16
views
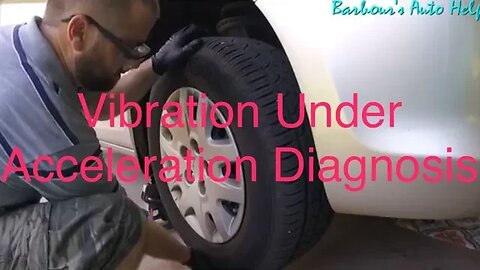
Vibration Under Acceleration Diagnosis
In this video I'll be diagnosing a vibration issue on my 05 Honda Odyssey. This van has always had somewhat of a vibration upon acceleration since the day we bought it. (It was used by the way). Over time the symptom has become more pronounced and noticeable. The road speed at which it would vibrate or wobble was from 60mph to 70mph. The wobbling would only happen under acceleration. Once you would let your foot off the gas the wobbling would immediately go away.
Keep in mind as you watch this video that I only go over, what I have found to be, the usual suspects for this symptom. Its been my experience that a worn CV axle is the #1 cause of this followed by a worn wheel bearing and then tie rod ends. This symptom can also be caused by something internal in the transmission and possibly the engine too. This is not a comprehensive video on this subject but its bound to help a ton of people. I may not have covered the cause of your vibration in this video. If you do not have confidence in you ability to properly diagnose your vehicle then you can always have a pro look at it. And by the way a lot of what is shown in this video requires experience to be able to interpret correctly.
Here is a link to the video of me replacing the cv axles.
https://youtu.be/564JQRgzYjk
Good luck on your endeavors!
!!!!WARNING!!!!
Repair your vehicle at your own risk. While this channel will always strive to give you the most accurate information regarding automotive repair it would be foolish to assume that by watching a 5-30 minute video you too will be able to repair your vehicle without any errors or risk to your safety or risk to others safety. Costly mistakes can and will happen. When performing automotive repairs there is a high risk of personal injury. There is also a high risk for EXTREME frustration. There is also a risk of damaging your vehicle. This channel assumes no responsibility or liability for any personal injury or property damage that may take place using the information found in this channels videos. It is absolutely imperative that you the viewer, and performer of said repairs, receive as much education concerning automotive repair and particularly the repair you are considering performing. While the videos featured on this channel do go into detail about particular repairs this channel does not claim that the information provided in said videos are 100% complete and accurate. YOU MUST HAVE A REPUTABLE REPAIR MANUAL FOR THE VEHICLE THAT YOU PLAN TO WORK ON THAT CONTAINS THE INFORMATION YOU NEED TO PROPERLY REPAIR SAID VEHICLE. Follow all repair procedures as outlined in your repair manual. Compare the information in your manual with the information in this channels videos. Follow your repair manual over this channels videos. Follow all safety instructions and warnings found in your manual. Also, read and follow the instructions for any piece of equipment, chemical, or tool that you may use in any repair. Also, check out the owners manual for the vehicle you are working on. There is a lot of good, important, and helpful information that can be found in it. Finally, above all, do everything you can to keep yourself safe. WEAR SAFETY GLASSES. WEAR IMPERMIABLE GLOVES. UNDERSTAND THE CHEMICALS YOU WILL BE EXPOSED TO AND GUARD YOURSELF FROM THEM.
Note: Even the most educated, seasoned, and talented technicians, or mechanics, are still subject to personal injury and property damage while performing automotive repair. I say again, use the information found in this channels videos at your own risk. Repair your vehicle at your own risk.
Music by:
Zombie Rock by Audionautix is licensed under a Creative Commons Attribution license (https://creativecommons.org/licenses/by/4.0/)
Artist: http://audionautix.com/
Created with MAGIX Movie Edit Pro 2016
I created this video with the YouTube Video Editor (http://www.youtube.com/editor)
3
views
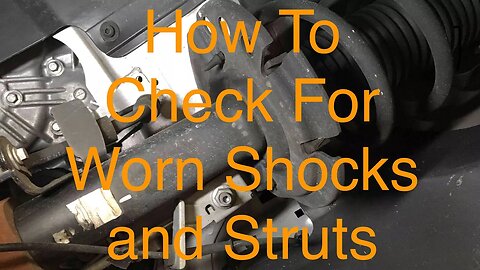
How To Test For Worn Or Weak Shocks
In this video I'll show you an easy test that you can do to see if your shocks or struts are worn or weak. Its called the bounce test.
!!!!WARNING!!!!
Repair your vehicle at your own risk. While this channel will always strive to give you the most accurate information regarding automotive repair it would be foolish to assume that by watching a 5-30 minute video you too will be able to repair your vehicle without any errors or risk to your safety or risk to others safety. Costly mistakes can and will happen. When performing automotive repairs there is a high risk of personal injury. There is also a high risk for EXTREME frustration. There is also a risk of damaging your vehicle. This channel assumes no responsibility or liability for any personal injury or property damage that may take place using the information found in this channels videos. It is absolutely imperative that you the viewer, and performer of said repairs, receive as much education concerning automotive repair and particularly the repair you are considering performing. While the videos featured on this channel do go into detail about particular repairs this channel does not claim that the information provided in said videos are 100% complete and accurate. YOU MUST HAVE A REPUTABLE REPAIR MANUAL FOR THE VEHICLE THAT YOU PLAN TO WORK ON THAT CONTAINS THE INFORMATION YOU NEED TO PROPERLY REPAIR SAID VEHICLE. Follow all repair procedures as outlined in your repair manual. Compare the information in your manual with the information in this channels videos. Follow your repair manual over this channels videos. Follow all safety instructions and warnings found in your manual. Also, read and follow the instructions for any piece of equipment, chemical, or tool that you may use in any repair. Also, check out the owners manual for the vehicle you are working on. There is a lot of good, important, and helpful information that can be found in it. Finally, above all, do everything you can to keep yourself safe. WEAR SAFETY GLASSES. WEAR IMPERMIABLE GLOVES. UNDERSTAND THE CHEMICALS YOU WILL BE EXPOSED TO AND GUARD YOURSELF FROM THEM.
Note: Even the most educated, seasoned, and talented technicians, or mechanics, are still subject to personal injury and property damage while performing automotive repair. I say again, use the information found in this channels videos at your own risk. Repair your vehicle at your own risk.
Music by:
Zombie Rock by Audionautix is licensed under a Creative Commons Attribution license (https://creativecommons.org/licenses/by/4.0/)
Artist: http://audionautix.com/
Created with MAGIX Movie Edit Pro 2016
4
views
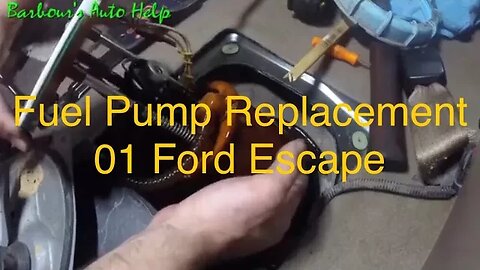
Fuel Pump Replacement 01 Ford Escape 3L
In this video I'll be showing you how I replaced a fuel pump on an 01 Ford Escape 3.0L. The method I use in this video is not “by the book". Its a method I learned from some fellow technicians years back. Its a great improvisation for when you don't have the right tool for the job. However, special care needs to be taken when removing and installing the retaining nut. Make sure the nut was not damaged in the process of replacing the fuel pump. Also, be sure the nut is completely seated after installation. Make sure it does not leak. Fill up completely with fuel after repair and check for leaks around the fuel pump retaining nut. After you have check for leaks drive the vehicle making aggressive turns. Check for leaks again. Check for leaks through the access under rear seat.
Repair as needed. Note: Use the method shown for installing the fuel pump retaining nut at your own risk. The method shown is not the proper way to remove and install the retainer. You do run the risk of not sealing the fuel tank properly by doing it this way. This could result in a check engine light, fuel leaks and or fire. That being said this task can be done this way. It just takes someone with the mechanical aptitude to do it well without problems.
Fuel pump diagnosis video is no longer available.
Please note: Barbour's Auto Help makes no guarantee that by following the steps and information found in this video that you will make an accurate diagnosis or quality repair. This video is very superficial in nature and is only intended to assist you in diagnosing your vehicle.
!!!!WARNING!!!!
Repair your vehicle at your own risk. While this channel will always strive to give you the most accurate information regarding automotive repair it would be foolish to assume that by watching a 5-30 minute video you too will be able to repair your vehicle without any errors or risk to your safety or risk to others safety. Costly mistakes can and will happen. When performing automotive repairs there is a high risk of personal injury. There is also a high risk for EXTREME frustration. There is also a risk of damaging your vehicle. This channel assumes no responsibility or liability for any personal injury or property damage that may take place using the information found in this channels videos. It is absolutely imperative that you the viewer, and performer of said repairs, receive as much education concerning automotive repair and particularly the repair you are considering performing. While the videos featured on this channel do go into detail about particular repairs this channel does not claim that the information provided in said videos are 100% complete and accurate. YOU MUST HAVE A REPUTABLE REPAIR MANUAL FOR THE VEHICLE THAT YOU PLAN TO WORK ON THAT CONTAINS THE INFORMATION YOU NEED TO PROPERLY REPAIR SAID VEHICLE. Follow all repair procedures as outlined in your repair manual. Compare the information in your manual with the information in this channels videos. Follow your repair manual over this channels videos. Follow all safety instructions and warnings found in your manual. Also, read and follow the instructions for any piece of equipment, chemical, or tool that you may use in any repair. Also, check out the owners manual for the vehicle you are working on. There is a lot of good, important, and helpful information that can be found in it. Finally, above all, do everything you can to keep yourself safe. WEAR SAFETY GLASSES. WEAR IMPERMIABLE GLOVES. UNDERSTAND THE CHEMICALS YOU WILL BE EXPOSED TO AND GUARD YOURSELF FROM THEM.
Note: Even the most educated, seasoned, and talented technicians, or mechanics, are still subject to personal injury and property damage while performing automotive repair. I say again, use the information found in this channels videos at your own risk. Repair your vehicle at your own risk.
Music by:
Zombie Rock by Audionautix is licensed under a Creative Commons Attribution license (https://creativecommons.org/licenses/by/4.0/)
Artist: http://audionautix.com/
Created with MAGIX Movie Edit Pro 2016
I created this video with the YouTube Video Editor (http://www.youtube.com/editor)
48
views
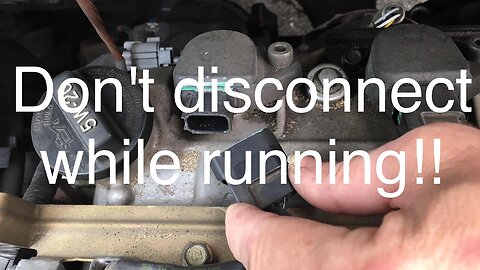
Disconnecting Ignition Coils Can Cause Damage
Disconnecting "three wire" ignition coils while the engine is running can cause damage. Three wire ignition coils have the coil driver built into them. Disconnecting them while the engine is running may possibly damage the vehicles computer and or the ignition coil.
For as long as I can remember it has been a common practice to disconnect ignition coils while the engine is running to diagnose misfire concerns. If the ignition coil was disconnected and there was no RPM drop then that cylinder would be suspect. This was not only common but it was accepted. Of coarse the design of "earlier" ignition coils was different and damaging the PCM was not a concern. A lot of these coils where "two" wire ignition coils and the driver was either located in the PCM or an ignition module.
It would be my advise not to disconnect 3 wire ignition coils while the vehicle is running. I found this out the hard way first and then learned about it in school. Always check your repair manual.
Created with MAGIX Movie Edit Pro 2016
11
views
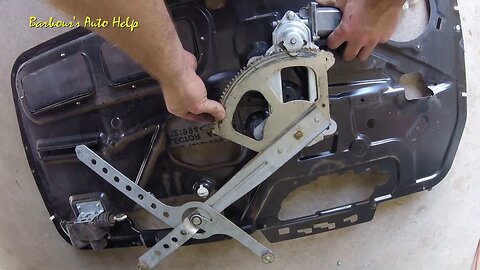
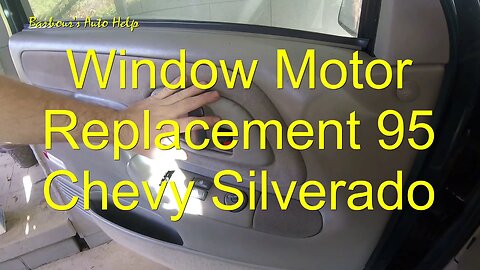
Window Motor Replacement 95 Chevy Silverado (Regulator already out)
In this video I'll be showing you how to remove and install a window motor on a 95 Chevy Silverado. This video is actually a portion of a larger video and does not show how to remove the regulator from the vehicle. If you are interested in seeing the whole video here is the link-- https://youtu.be/n7Pocfa-lbc
Note: this procedure is probably applicable to a wide range of GM pick ups. So if you don't have a Silverado, you may still be in luck.
Also, I know I've said it in the video, but be careful and do this at your own risk. Though I've done my best to warn you of all possible "misfortunes" that you may experience while doing this repair, there is undoubtedly something that could go wrong that I could not predict. Keep a clear and alert mind when repairing your vehicle.
On securing the regulator while removing the window motor and installing the window motor: You may or may not be as fortunate as I when doing this. I was lucky enough to have a hole in the gear and a hole in the window regulator that lined up that would receive a locking pin. If things are not aligned as shown in the video then you may have to find another way to secure the regulator so that it does not "get away" from you.... Some other ways that may work, (note: I've not tried this), are strapping the gear in place to the regulator with a strap strong enough to handle the pressure, or using channel locks to hold the gear in position....... (sorry I don't have a video showing how to do this and my writing skills aren't such that I could instruct you on how to do this using alternative methods here in the description)
!!!!WARNING!!!!
Repair your vehicle at your own risk. While this channel will always strive to give you the most accurate information regarding automotive repair it would be foolish to assume that by watching a 5-30 minute video you too will be able to repair your vehicle without any errors or risk to your safety or risk to others safety. Costly mistakes can and will happen. When performing automotive repairs there is a high risk of personal injury. There is also a high risk for EXTREME frustration. There is also a risk of damaging your vehicle. This channel assumes no responsibility or liability for any personal injury or property damage that may take place using the information found in this channels videos. It is absolutely imperative that you the viewer, and performer of said repairs, receive as much education concerning automotive repair and particularly the repair you are considering performing. While the videos featured on this channel do go into detail about particular repairs this channel does not claim that the information provided in said videos are 100% complete and accurate. YOU MUST HAVE A REPUTABLE REPAIR MANUAL FOR THE VEHICLE THAT YOU PLAN TO WORK ON THAT CONTAINS THE INFORMATION YOU NEED TO PROPERLY REPAIR SAID VEHICLE. Follow all repair procedures as outlined in your repair manual. Compare the information in your manual with the information in this channels videos. Follow your repair manual over this channels videos. Follow all safety instructions and warnings found in your manual. Also, read and follow the instructions for any piece of equipment, chemical, or tool that you may use in any repair. Also, check out the owners manual for the vehicle you are working on. There is a lot of good, important, and helpful information that can be found in it. Finally, above all, do everything you can to keep yourself safe. WEAR SAFETY GLASSES. WEAR IMPERMIABLE GLOVES. UNDERSTAND THE CHEMICALS YOU WILL BE EXPOSED TO AND GUARD YOURSELF FROM THEM.
Note: Even the most educated, seasoned, and talented technicians, or mechanics, are still subject to personal injury and property damage while performing automotive repair. I say again, use the information found in this channels videos at your own risk. Repair your vehicle at your own risk.
Music by:
Zombie Rock by Audionautix is licensed under a Creative Commons Attribution license (https://creativecommons.org/licenses/by/4.0/)
Artist: http://audionautix.com/
Created with MAGIX Movie Edit Pro 2016
16
views
Window Motor Replacement 95 Chevy Silverado
In this video I will take you from start to finish. The whole process of the window motor replacement, from door panel removal to regulator disassembly to installation, is outlined in the video. This video is rather long so I'll have it broken up into three parts here soon so you don't have to watch it all in one sitting. I'll have links soon.
Note: this procedure is probably applicable to a wide range of GM pick ups. So if you don't have a Silverado, you may still be in luck.
Also, I know I've said it in the video, but be careful and do this at your own risk. Though I've done my best to warn you of all possible "misfortunes" that you may experience while doing this repair, there is undoubtedly something that could go wrong that I could not predict. Keep a clear and alert mind when repairing your vehicle.
On securing the regulator while removing the window motor and installing the window motor: You may or may not be as fortunate as I when doing this. I was lucky enough to have a hole in the gear and a hole in the window motor that lined up that would receive a locking pin. If things are not aligned as shown in the video then you may have to find another way to secure the regulator so that it does not "get away" from you.... Some other ways that may work, note I've not tried this, are strapping the gear in place to the regulator with a strap strong enough to handle the pressure, or using channel locks to hold the gear in position....... (sorry I don't have a video showing how to do this and my writing skills aren't such that I could instruct you on how to do this using alternative methods here in the description)
!!!!WARNING!!!!
Repair your vehicle at your own risk. While this channel will always strive to give you the most accurate information regarding automotive repair it would be foolish to assume that by watching a 5-30 minute video you too will be able to repair your vehicle without any errors or risk to your safety or risk to others safety. Costly mistakes can and will happen. When performing automotive repairs there is a high risk of personal injury. There is also a high risk for EXTREME frustration. There is also a risk of damaging your vehicle. This channel assumes no responsibility or liability for any personal injury or property damage that may take place using the information found in this channels videos. It is absolutely imperative that you the viewer, and performer of said repairs, receive as much education concerning automotive repair and particularly the repair you are considering performing. While the videos featured on this channel do go into detail about particular repairs this channel does not claim that the information provided in said videos are 100% complete and accurate. YOU MUST HAVE A REPUTABLE REPAIR MANUAL FOR THE VEHICLE THAT YOU PLAN TO WORK ON THAT CONTAINS THE INFORMATION YOU NEED TO PROPERLY REPAIR SAID VEHICLE. Follow all repair procedures as outlined in your repair manual. Compare the information in your manual with the information in this channels videos. Follow your repair manual over this channels videos. Follow all safety instructions and warnings found in your manual. Also, read and follow the instructions for any piece of equipment, chemical, or tool that you may use in any repair. Also, check out the owners manual for the vehicle you are working on. There is a lot of good, important, and helpful information that can be found in it. Finally, above all, do everything you can to keep yourself safe. WEAR SAFETY GLASSES. WEAR IMPERMIABLE GLOVES. UNDERSTAND THE CHEMICALS YOU WILL BE EXPOSED TO AND GUARD YOURSELF FROM THEM.
Note: Even the most educated, seasoned, and talented technicians, or mechanics, are still subject to personal injury and property damage while performing automotive repair. I say again, use the information found in this channels videos at your own risk. Repair your vehicle at your own risk.
Music by:
Zombie Rock by Audionautix is licensed under a Creative Commons Attribution license (https://creativecommons.org/licenses/by/4.0/)
Artist: http://audionautix.com/
I created this video with the YouTube Video Editor (http://www.youtube.com/editor)
3
views
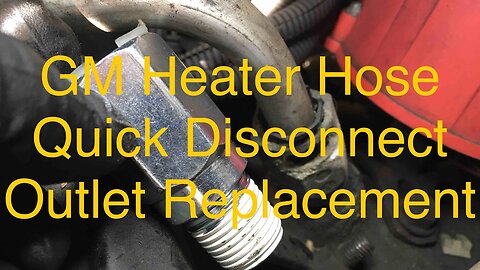
GM Heater Hose Quick Disconnect Outlet Replacement
The quick disconnect featured in the video is notorious for breaking off when you try to replace it. If you are watching this video chances are that you found this out the hard way. I'll show you how remove the part of the quick disconnect outlet that broke off in your intake in this video, minus taking the intake manifold off. It really is best to take the intake manifold off to prevent all the foreign material from entering the cooling system. It is possible, maybe not very likely, that if all the debris created from doing this is not totally removed from the cooling system that damage to the cooling system and maybe even the engine could result. I strongly caution you before you attempt to do this... If you are not mechanically inclined and you are not familiar with auto- repair you may not want to do this. You can really make a mess of things and this job could turn out to be a nightmare $$$$$$. Do this at your own risk.
The tap size is 1/2-14 NPT. aka 1/2" pipe thread.
!!!!WARNING!!!!
Repair your vehicle at your own risk. While this channel will always strive to give you the most accurate information regarding automotive repair it would be foolish to assume that by watching a 5-30 minute video you too will be able to repair your vehicle without any errors or risk to your safety or risk to others safety. Costly mistakes can and will happen. When performing automotive repairs there is a high risk of personal injury. There is also a high risk for EXTREME frustration. There is also a risk of damaging your vehicle. This channel assumes no responsibility or liability for any personal injury or property damage that may take place using the information found in this channels videos. It is absolutely imperative that you the viewer, and performer of said repairs, receive as much education concerning automotive repair and particularly the repair you are considering performing. While the videos featured on this channel do go into detail about particular repairs this channel does not claim that the information provided in said videos are 100% complete and accurate. YOU MUST HAVE A REPUTABLE REPAIR MANUAL FOR THE VEHICLE THAT YOU PLAN TO WORK ON THAT CONTAINS THE INFORMATION YOU NEED TO PROPERLY REPAIR SAID VEHICLE. Follow all repair procedures as outlined in your repair manual. Compare the information in your manual with the information in this channels videos. Follow your repair manual over this channels videos. Follow all safety instructions and warnings found in your manual. Also, read and follow the instructions for any piece of equipment, chemical, or tool that you may use in any repair. Also, check out the owners manual for the vehicle you are working on. There is a lot of good, important, and helpful information that can be found in it. Finally, above all, do everything you can to keep yourself safe. WEAR SAFETY GLASSES. WEAR IMPERMIABLE GLOVES. UNDERSTAND THE CHEMICALS YOU WILL BE EXPOSED TO AND GUARD YOURSELF FROM THEM.
Note: Even the most educated, seasoned, and talented technicians, or mechanics, are still subject to personal injury and property damage while performing automotive repair. I say again, use the information found in this channels videos at your own risk. Repair your vehicle at your own risk.
Music by:
Zombie Rock by Audionautix is licensed under a Creative Commons Attribution license (https://creativecommons.org/licenses/by/4.0/)
Artist: http://audionautix.com/
Created with MAGIX Movie Edit Pro 2016
11
views

My 2005 Odyssey DePAX experience
In this video I'll be sharing my experience DePAXing, or de-run flatting, my 2005 Honda Odyssey. I just couldn't afford spending the money required to put "run flat" tires on my vehicle. While "run flat" tires are much safer, in my opinion, than your run of the mill tire they are not a viable option for many people because of the expense required to replace them. I'm not necessarily recommending this for anyone. The DePAX option was right for me. Perhaps this video will help you in deciding if the DePAX option is right for you.
While this video does go into some detail on the process it is not meant to be your only source for information on this project. This video is very superficial in nature and does not go over all the factors that need to be considered when DePAXing your vehicle. I would suggest doing a google search on DePAX kits and getting your information from one of the web sites, that is reputable, listed. There are a couple of sites that sell DePAX kits, one of which I purchased my kit from. I can't really say which one it is as I'm not advertising for them, but not only did they sell the kits but they also had a great deal of very specific information and specifications.
Use extreme caution If you decide to use a hole saw to access your TPMS sensors as a hole saw was not made for this. Also, wear safety glasses whenever you are working on your vehicle.
Do your own research and, if you decide to do this, do so at your own risk.
Barbour's Auto Help makes no claim that the information given in this video is complete and should be used as a sole source of information for this project. Furthermore, Barbour's Auto Help makes no claim that this is safe to do to your own vehicle. Note: the parts and specifications, such as tire size, information found on stickers, and any part numbers shown on packages featured in this video may not be correct for your vehicle. This video was not intended to be the source for that information.
Repair you vehicle and follow the examples shown in this video at your own risk!!
Music by:
Zombie Rock by Audionautix is licensed under a Creative Commons Attribution license (https://creativecommons.org/licenses/by/4.0/)
Artist: http://audionautix.com/
Created with MAGIX Movie Edit Pro 2016
2
views
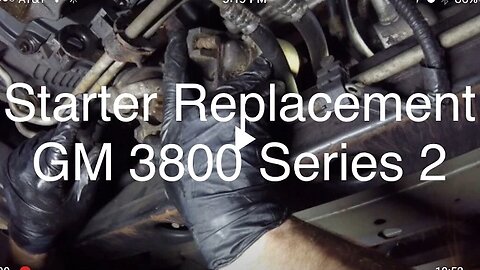
Starter Replacement GM 3800 Series 2
In this video I'll demonstrate how to replace a starter on a 2001 Pontiac Bonneville 3.8L series 2 V-6. This engine is used in many, many GM vehicles, so this procedure will be similar if not the same for many GM vehicles. Please comment if you have questions.
Do note: on some vehicles a theft code may be needed to get the audio system to work after this repair is completed. Please consult your owners manual and repair manual for that information.
!!!!WARNING!!!!
Repair your vehicle at your own risk. While this channel will always strive to give you the most accurate information regarding automotive repair it would be foolish to assume that by watching a 5-30 minute video you too will be able to repair your vehicle without any errors or risk to your safety or risk to others safety. Costly mistakes can and will happen. When performing automotive repairs there is a high risk of personal injury. There is also a high risk for EXTREME frustration. There is also a risk of damaging your vehicle. This channel assumes no responsibility or liability for any personal injury or property damage that may take place using the information found in this channels videos. It is absolutely imperative that you the viewer, and performer of said repairs, receive as much education concerning automotive repair and particularly the repair you are considering performing. While the videos featured on this channel do go into detail about particular repairs this channel does not claim that the information provided in said videos are 100% complete and accurate. YOU MUST HAVE A REPUTABLE REPAIR MANUAL FOR THE VEHICLE THAT YOU PLAN TO WORK ON THAT CONTAINS THE INFORMATION YOU NEED TO PROPERLY REPAIR SAID VEHICLE. Follow all repair procedures as outlined in your repair manual. Compare the information in your manual with the information in this channels videos. Follow your repair manual over this channels videos. Follow all safety instructions and warnings found in your manual. Also, read and follow the instructions for any piece of equipment, chemical, or tool that you may use in any repair. Also, check out the owners manual for the vehicle you are working on. There is a lot of good, important, and helpful information that can be found in it. Finally, above all, do everything you can to keep yourself safe. WEAR SAFETY GLASSES. WEAR IMPERMIABLE GLOVES. UNDERSTAND THE CHEMICALS YOU WILL BE EXPOSED TO AND GUARD YOURSELF FROM THEM.
Note: Even the most educated, seasoned, and talented technicians, or mechanics, are still subject to personal injury and property damage while performing automotive repair. I say again, use the information found in this channels videos at your own risk. Repair your vehicle at your own risk.
Music by:
Zombie Rock by Audionautix is licensed under a Creative Commons Attribution license (https://creativecommons.org/licenses/by/4.0/)
Artist: http://audionautix.com/
Created with MAGIX Movie Edit Pro 2016
11
views
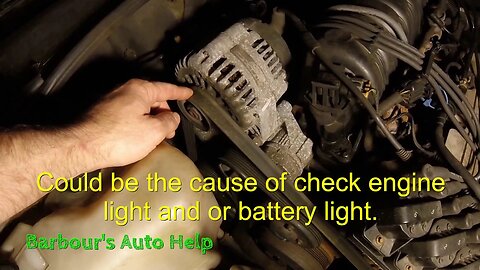
First thing to check when everything goes wrong!
In this video I'll show you the first thing you should check when your vehicle experiences a bunch of symptoms at once. These symptoms are usually a battery light on, engine over heating, no power steering, checking engine lamp on, and no A/C. Your vehicle may experience one of these symptoms, a combination of these symptoms, or all of the symptoms together. These symptoms are many times caused by a broken, slipping, or missing serpentine belt. If this is the case on your vehicle then this video could be a good tool for you to use to find out the reason your serpentine belt is broken, or missing. I go over a few common issues that can cause this problem. Of course once you find the reason for the belt, breaking, slipping, or coming off then you need to make appropriate repairs. Unfortunately I was not able to provide any repair information in this video. If you have any questions please comment below.
Hear are some links to other videos that may help
How to replace a tensioner on a 5.2L and 5.9L dodge
https://youtu.be/3-yPFaT97PM
Alternator replacement on an 01 Pontiac Bonneville
https://youtu.be/gHF5wKWydbA
How to diagnose a whining noise in the accessory drive
https://youtu.be/JRHj9_pwx7o
!!!!WARNING!!!!
Repair your vehicle at your own risk. While this channel will always strive to give you the most accurate information regarding automotive repair it would be foolish to assume that by watching a 5-30 minute video you too will be able to repair your vehicle without any errors or risk to your safety or risk to others safety. Costly mistakes can and will happen. When performing automotive repairs there is a high risk of personal injury. There is also a high risk for EXTREME frustration. There is also a risk of damaging your vehicle. This channel assumes no responsibility or liability for any personal injury or property damage that may take place using the information found in this channels videos. It is absolutely imperative that you the viewer, and performer of said repairs, receive as much education concerning automotive repair and particularly the repair you are considering performing. While the videos featured on this channel do go into detail about particular repairs this channel does not claim that the information provided in said videos are 100% complete and accurate. YOU MUST HAVE A REPUTABLE REPAIR MANUAL FOR THE VEHICLE THAT YOU PLAN TO WORK ON THAT CONTAINS THE INFORMATION YOU NEED TO PROPERLY REPAIR SAID VEHICLE. Follow all repair procedures as outlined in your repair manual. Compare the information in your manual with the information in this channels videos. Follow your repair manual over this channels videos. Follow all safety instructions and warnings found in your manual. Also, read and follow the instructions for any piece of equipment, chemical, or tool that you may use in any repair. Also, check out the owners manual for the vehicle you are working on. There is a lot of good, important, and helpful information that can be found in it. Finally, above all, do everything you can to keep yourself safe. WEAR SAFETY GLASSES. WEAR IMPERMIABLE GLOVES. UNDERSTAND THE CHEMICALS YOU WILL BE EXPOSED TO AND GUARD YOURSELF FROM THEM.
Note: Even the most educated, seasoned, and talented technicians, or mechanics, are still subject to personal injury and property damage while performing automotive repair. I say again, use the information found in this channels videos at your own risk. Repair your vehicle at your own risk.
Music by:
Zombie Rock by Audionautix is licensed under a Creative Commons Attribution license (https://creativecommons.org/licenses/by/4.0/)
Artist: http://audionautix.com/
Created with MAGIX Movie Edit Pro 2016
18
views
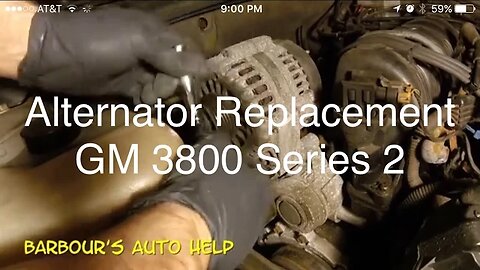
Alternator Replacement 01 Pontiac Bonneville 3.8l
This video is a step by step tutorial on how to replace an alternator on a 2001 Pontiac Bonneville 3.8L V-6 series 2.
Do note: on some vehicles a theft code may be needed to get the audio system to work after this repair is completed. Please consult your owners manual and repair manual for that information.
!!!!WARNING!!!!
Repair your vehicle at your own risk. While this channel will always strive to give you the most accurate information regarding automotive repair it would be foolish to assume that by watching a 5-30 minute video you too will be able to repair your vehicle without any errors or risk to your safety or risk to others safety. Costly mistakes can and will happen. When performing automotive repairs there is a high risk of personal injury. There is also a high risk for EXTREME frustration. There is also a risk of damaging your vehicle. This channel assumes no responsibility or liability for any personal injury or property damage that may take place using the information found in this channels videos. It is absolutely imperative that you the viewer, and performer of said repairs, receive as much education concerning automotive repair and particularly the repair you are considering performing. While the videos featured on this channel do go into detail about particular repairs this channel does not claim that the information provided in said videos are 100% complete and accurate. YOU MUST HAVE A REPUTABLE REPAIR MANUAL FOR THE VEHICLE THAT YOU PLAN TO WORK ON THAT CONTAINS THE INFORMATION YOU NEED TO PROPERLY REPAIR SAID VEHICLE. Follow all repair procedures as outlined in your repair manual. Compare the information in your manual with the information in this channels videos. Follow your repair manual over this channels videos. Follow all safety instructions and warnings found in your manual. Also, read and follow the instructions for any piece of equipment, chemical, or tool that you may use in any repair. Also, check out the owners manual for the vehicle you are working on. There is a lot of good, important, and helpful information that can be found in it. Finally, above all, do everything you can to keep yourself safe. WEAR SAFETY GLASSES. WEAR IMPERMIABLE GLOVES. UNDERSTAND THE CHEMICALS YOU WILL BE EXPOSED TO AND GUARD YOURSELF FROM THEM.
Note: Even the most educated, seasoned, and talented technicians, or mechanics, are still subject to personal injury and property damage while performing automotive repair. I say again, use the information found in this channels videos at your own risk. Repair your vehicle at your own risk.
Music by:
Zombie Rock by Audionautix is licensed under a Creative Commons Attribution license (https://creativecommons.org/licenses/by/4.0/)
Artist: http://audionautix.com/
Created with MAGIX Movie Edit Pro 2016
15
views
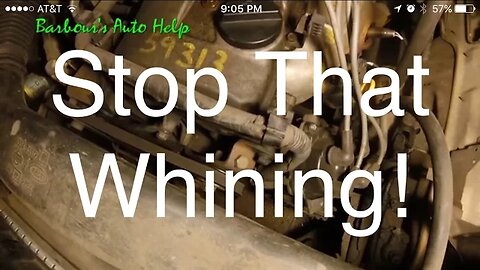
How to diagnose a whining noise in your accessory drive
In this video I'll be showing you how to diagnose a whining noise in the accessory drive. Whining noises are usually caused by worn out bearings. These bearing live in the pulleys of your accessory drive or belt drive. Bearings are also located in the alternator, power steering pump, water pump, and a/c compressor.
There are two different tools utilized in this video to help diagnose this problem. One is the mechanics stethoscope and the other is a long screw driver or pry bar. This video demonstrates the use of both tools.
Please note: Barbour's Auto Help makes no guarantee that by following the steps and information found in this video that you will make an accurate diagnosis or quality repair. This video is very superficial in nature and is only intended to assist you in diagnosing your vehicle.
!!!!WARNING!!!!
Repair your vehicle at your own risk. While this channel will always strive to give you the most accurate information regarding automotive repair it would be foolish to assume that by watching a 5-30 minute video you too will be able to repair your vehicle without any errors or risk to your safety or risk to others safety. Costly mistakes can and will happen. When performing automotive repairs there is a high risk of personal injury. There is also a high risk for EXTREME frustration. There is also a risk of damaging your vehicle. This channel assumes no responsibility or liability for any personal injury or property damage that may take place using the information found in this channels videos. It is absolutely imperative that you the viewer, and performer of said repairs, receive as much education concerning automotive repair and particularly the repair you are considering performing. While the videos featured on this channel do go into detail about particular repairs this channel does not claim that the information provided in said videos are 100% complete and accurate. YOU MUST HAVE A REPUTABLE REPAIR MANUAL FOR THE VEHICLE THAT YOU PLAN TO WORK ON THAT CONTAINS THE INFORMATION YOU NEED TO PROPERLY REPAIR SAID VEHICLE. Follow all repair procedures as outlined in your repair manual. Compare the information in your manual with the information in this channels videos. Follow your repair manual over this channels videos. Follow all safety instructions and warnings found in your manual. Also, read and follow the instructions for any piece of equipment, chemical, or tool that you may use in any repair. Also, check out the owners manual for the vehicle you are working on. There is a lot of good, important, and helpful information that can be found in it. Finally, above all, do everything you can to keep yourself safe. WEAR SAFETY GLASSES. WEAR IMPERMIABLE GLOVES. UNDERSTAND THE CHEMICALS YOU WILL BE EXPOSED TO AND GUARD YOURSELF FROM THEM.
Note: Even the most educated, seasoned, and talented technicians, or mechanics, are still subject to personal injury and property damage while performing automotive repair. I say again, use the information found in this channels videos at your own risk. Repair your vehicle at your own risk.
Music by:
Zombie Rock by Audionautix is licensed under a Creative Commons Attribution license (https://creativecommons.org/licenses/by/4.0/)
Artist: http://audionautix.com/
Created with MAGIX Movie Edit Pro 2016
23
views
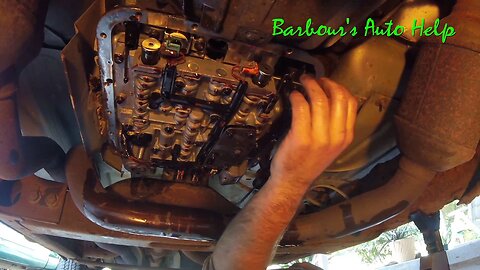
How to replace a transmission filter
In this video I'll be showing you how to replace a transmission filter. While the vehicle featured in this video is a Chevy Silverado, this procedure is similar to many automatic transmissions. (Please consult your repair manual for any differences in procedure).
Children should not attempt to do this procedure.
Please note: Barbour's Auto Help makes no guarantee that by following the steps and information found in this video that you will make an accurate diagnosis or quality repair. This video is very superficial in nature and is only intended to assist you in diagnosing your vehicle.
!!!!WARNING!!!!
Repair your vehicle at your own risk. While this channel will always strive to give you the most accurate information regarding automotive repair it would be foolish to assume that by watching a 5-30 minute video you too will be able to repair your vehicle without any errors or risk to your safety or risk to others safety. Costly mistakes can and will happen. When performing automotive repairs there is a high risk of personal injury. There is also a high risk for EXTREME frustration. There is also a risk of damaging your vehicle. This channel assumes no responsibility or liability for any personal injury or property damage that may take place using the information found in this channels videos. It is absolutely imperative that you the viewer, and performer of said repairs, receive as much education concerning automotive repair and particularly the repair you are considering performing. While the videos featured on this channel do go into detail about particular repairs this channel does not claim that the information provided in said videos are 100% complete and accurate. YOU MUST HAVE A REPUTABLE REPAIR MANUAL FOR THE VEHICLE THAT YOU PLAN TO WORK ON THAT CONTAINS THE INFORMATION YOU NEED TO PROPERLY REPAIR SAID VEHICLE. Follow all repair procedures as outlined in your repair manual. Compare the information in your manual with the information in this channels videos. Follow your repair manual over this channels videos. Follow all safety instructions and warnings found in your manual. Also, read and follow the instructions for any piece of equipment, chemical, or tool that you may use in any repair. Also, check out the owners manual for the vehicle you are working on. There is a lot of good, important, and helpful information that can be found in it. Finally, above all, do everything you can to keep yourself safe. WEAR SAFETY GLASSES. WEAR IMPERMIABLE GLOVES. UNDERSTAND THE CHEMICALS YOU WILL BE EXPOSED TO AND GUARD YOURSELF FROM THEM.
Note: Even the most educated, seasoned, and talented technicians, or mechanics, are still subject to personal injury and property damage while performing automotive repair. I say again, use the information found in this channels videos at your own risk. Repair your vehicle at your own risk.
Music by:
Zombie Rock by Audionautix is licensed under a Creative Commons Attribution license (https://creativecommons.org/licenses/by/4.0/)
Artist: http://audionautix.com/
Created with MAGIX Movie Edit Pro 2016
13
views