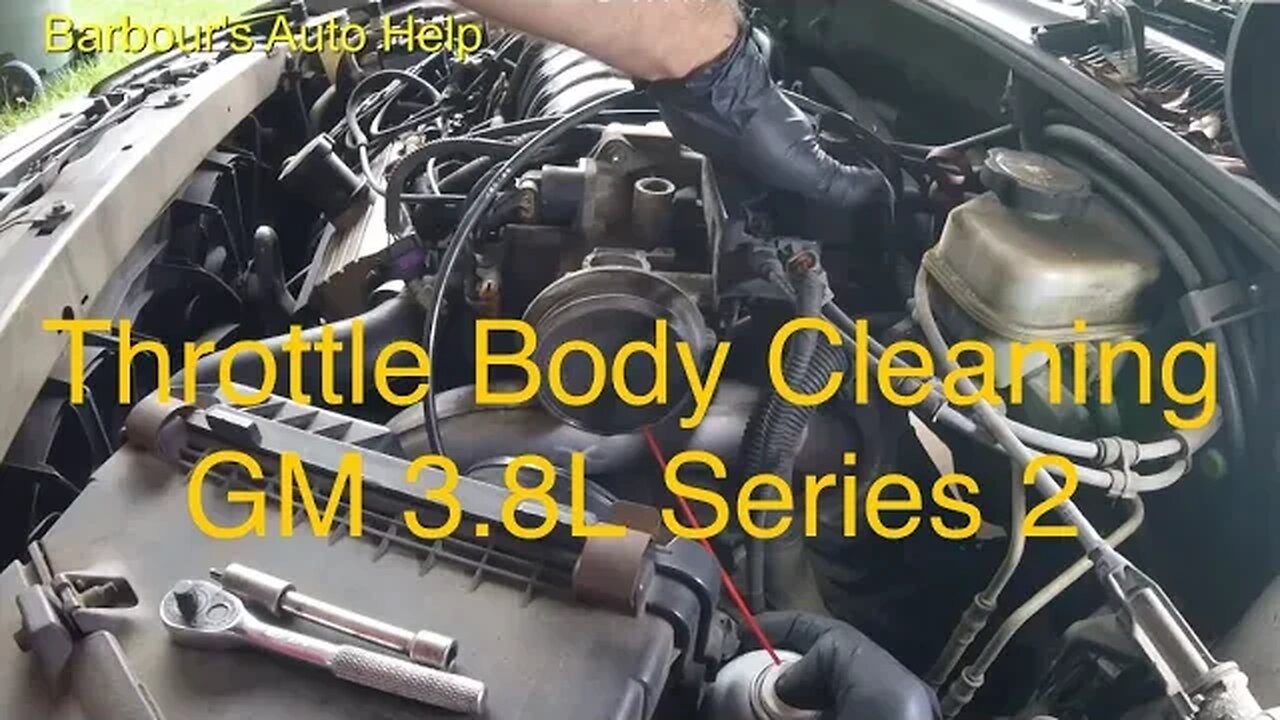
Throttle Body Cleaning GM 3.8L Series 2 (Naturally Aspirated/ None Super Charged)
Please read entire description before attempting this!
In this video I'll show you how to clean the throttle body on a GM 3.8L Series 2. The vehicle featured in this vehicle is a 2001 Pontiac Bonneville. (note: this procedure may not apply to every 3.8L series 2 engine out there. If your vehicle has a super charged 3.8L then It would not be advised to do this. Do not clean the throttle body in this manner if you have a super charged engine.)
Cleaning the throttle body is one of the easiest and best things you can do for your vehicle. It helps to maintain throttle response, engine idle and overall performance. Also, its supper cheap!
Use intake cleaner not carburetor cleaner.
Do note: Disconnecting the battery on some vehicles will put the radio into "anti-theft" mode. If this is the case for your vehicle you will need a code to get your radio working again after the battery has been disconnected. This code is usually located on a card in your owners manual. Be sure you have it before doing this.
Also Note: After spraying intake cleaner through the mesh let the vehicle idle for a while and then rev it a few times to help get the intake cleaner off the mesh. Also, after letting it run and reaving it a few times take some compressed air and spray it though the mesh. The goal is to remove all of the chemical from the mesh so you'll need to clean every inch of the mesh, every hole. MAKE SURE ALL THE INTAKE CLEANER IS COMPLETELY REMOVED FROM THE MESH. Do this before putting the MAF sensor back into the throttle body. By making sure all the chemical is off the mesh before installing the sensor you will prevent potential damage to the sensor from contamination.
Read and follow the instructions provided by the maker of the intake cleaner used.
Perform cleaning in a well ventilated area!
Warning! Doing automotive repair is dangerous. Use extreme caution! Heed all warnings applicable to the project you are performing. Read, understand and follow all warning labels located on the container of any chemical you may be using! Keep hands face and body away from intake as back fires can happen. Have a fire extinguisher readily available. Repair your vehicle at your own risk!
DISCLAIMER
Barbour's Auto Help is not responsible for any damage or personal injury incurred in the process of performing any auto repairs done by you the viewer. It is the viewers responsibility to verify all information and procedures as outlined in YOUR REPAIR MANUAL AND OWNERS MANUAL FOR YOUR VEHICLE. Owning and using a repair manual suited for your vehicle is essential for correctly and safely performing ANY repair to your vehicle. Always wear safety glasses and heed all instructions for use applicable to any piece of equipment you may use. Due to circumstances out of the control of Barbours Auto Help, Barbours Auto Help makes no guaranty that by the use of the information given in this video a quality repair will be made. Barbour'sAutoHelp makes no guaranty that the information provided is totally complete, syncronized and accurate. Verify everything using an appropriate repair manual. You can do it. Do it right and do it safely.
Repair your vehicle at your own risk! Barbour's auto help does not guaranty a proper repair using these techniques.
Here's that link to to the video mentioned in the video:
https://youtu.be/GU_Nsafnwuk
Here's a link to another video showing this done in a similar manner on a different car:
https://youtu.be/u6UeJXkzDW8
Music by:
Zombie Rock by Audionautix is licensed under a Creative Commons Attribution license (https://creativecommons.org/licenses/by/4.0/)
Artist: http://audionautix.com/
-
 2:05:33
TheSaltyCracker
12 hours agoTech Bros try to Hijack MAGA ReeEEeE Stream 12-27-24
242K452 -
 2:01:25
Roseanne Barr
17 hours ago $35.92 earnedJeff Dye | The Roseanne Barr Podcast #80
118K65 -
 7:32
7:32
CoachTY
14 hours ago $10.93 earnedWHALES ARE BUYING AND RETAIL IS SELLING. THIS IS WHY PEOPLE STAY BROKE!!!
93.6K8 -
 1:01:00
Talk Nerdy 2 Us
11 hours ago💻 From ransomware to global regulations, the digital battlefield is heating up!
32.8K1 -
 3:00:24
I_Came_With_Fire_Podcast
14 hours agoHalf the Gov. goes MISSING, Trump day 1 Plans, IC finally tells the Truth, Jesus was NOT Palestinian
70.8K30 -
 4:11:49
Nerdrotic
16 hours ago $39.38 earnedThe Best and Worst of 2024! Sony Blames Fans | Batman DELAYED | Nosferatu! |Friday Night Tights 334
193K32 -
 7:55:51
Dr Disrespect
20 hours ago🔴LIVE - DR DISRESPECT - WARZONE - SHOTTY BOYS ATTACK
238K33 -
 1:30:23
Twins Pod
19 hours agoHe Went From MARCHING With BLM To Shaking Hands With TRUMP! | Twins Pod - Episode 45 - Amir Odom
149K32 -
 1:02:30
Exploring With Nug
21 hours ago $4.46 earned2 Duck Hunters Missing After Kayak Capsizes!
72K4 -
 46:48
46:48
Mally_Mouse
14 hours agoLet's Hang!! -- Opening Christmas gifts from YOU!
78.8K1