
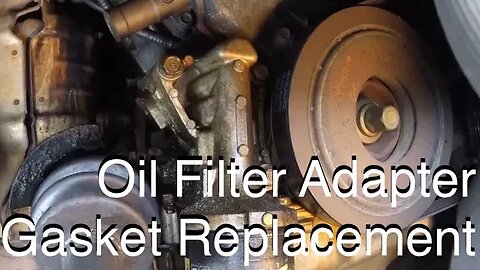
Oil Filter Adapter Gasket Replacement 05 Honda Odyssey
In this video I'll share how I replaced my oil filter adapter gasket , aka oil filter housing gasket. on my 05 Honda Odyssey 3.5L Touring. Over the course of the last year my Odyssey has developed several leaks. This was one place that started leaking. The gasket that failed is a rubber inlaid gasket. These type of gasket on Hondas typically failed. When they get old they get hard and are not able to seal. So replacement becomes necessary.
Note: I would suggest disconnecting the negative battery clamp before performing this task as this will prevent accidental start up while the vehicle is taken apart. You will need the code to reset your radio so be sure that is handy before disconnecting it.
Note: Be sure your oil level is full before starting the vehicle up after the repair has been completed. Also, you may have to add some oil after the vehicle has been started.
Before starting the vehicle also make sure the splash shield is out of the way of any rotating parts. If you chose to tuck your splash shield to gain access to the filter housing you will need to be sure of this.
Also: Verify correct part numbers with your parts pro. Do not rely on this video alone for this information. Your vehicle may require a different part number and you must verify at a parts house or at your dealership what the correct part number is for your vehicle. (It may differ from year to year. It may even differ in the same year of production).
At the 7:40 mark I mention a grey shadow on the mating surface where the oil filter housing mates up. This is just some discoloration where the old gasket mated up to it. It is cleaned, however down to the bare metal.
DISCLAIMER
Barbour's Auto Help is not responsible for any damage or personal injury incurred in the process of performing any auto repairs done by you the viewer. Automotive repair is extremely dangerous. Repair your vehicle at your own risk. It is the viewers responsibility to verify all information and procedures as outlined in YOUR REPAIR MANUAL AND OWNERS MANUAL FOR YOUR VEHICLE. Owning and using a repair manual suited for your vehicle is essential for correctly and safely performing ANY repair to your vehicle. Always wear safety glasses and heed all instructions for use applicable to any piece of equipment you may use. Due to circumstances out of the control of Barbours Auto Help, Barbours Auto Help makes no guaranty that by the use of the information given in this video a quality repair will be made. Barbour'sAutoHelp makes no guaranty that the information provided is totally complete, syncronized and accurate. Verify everything using an appropriate repair manual. Follow the repair manual over this videos content. You can do it. Do it right and do it safely.
Repair your vehicle at your own risk! Barbour's auto help does not guaranty a proper repair using these techniques.
All branded auto parts and equipment shown in video where purchased by me. I.E. the WIX oil filter and the Oreilly's brake cleaner. I am in no way affiliated with said brands.
10
views
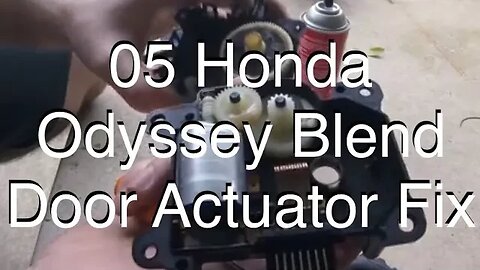
05 Honda Odyssey Drivers Side Temperature Blend Door Actuator Repair
In this video I'll show you how to take a drivers side temperature blend door actuator on an 05 Honda Odyssey apart and clean the position sensor.
Temperature blend door actuators malfunctioning is somewhat of a common issue. My wife's started to act up a couple months ago and it got to the point where she could not adjust the temperature setting on the drivers side of her 05 Honda Odyssey Touring. (This vehicle is equipped with dual climate control) So I did some shopping and found that I would probably be spending around $150 to replace then sensor. Needless to say I didn't want to spend that kind of money. So, I did some digging and found that some people have had luck fixing this concern by taking their actuators apart and cleaning the position sensor inside. So, I figured I'd at least try it and share my experience with you and also show you how to do it. So far as I write this description on 4/17/2018 the repair has been a success. The repair was actually performed a month before this video was posted. I'll also post regularly in the comments to let you know if it fails again and when it fails....or if it doesn't. (keep your fingers crossed)
Note: Only use fast drying electronics parts cleaner to clean the surface of the wheel and the contacts. You will need to replace the dielectric grease with fresh grease when you are done cleaning the surfaces. (I believe that dielectric grease is used for this application. However, I don't have any "official" knowledge that this is the correct lubricant to use. So far its been working fine on my actuator. I do not know if using dielectric grease could adversely affect the actuator. I don't think it will. (Use it at your own risk). Just throwing that out there.
Also, it's not a bad idea to mark the position of the electric motor, just in case if falls out or you take it out. Installing the motor in backwards will cause the motor to work in the opposite direction intended. I would suggest not taking the motor out and using care not to let if fall out.
Also note: Do this repair at your own risk. I do not guaranty that by performing this repair you will fix your vehicle. I do not even guaranty that this is the problem with your vehicle. You will of coarse need to have your vehicle properly diagnosed to confirm that this is your problem. Also, I do not guaranty that you will not have any complications while performing this repair. Perform this task at your own risk.
Note: This is not an "official repair". Results may vary. The best way to fix a problem involving a faulty blend door actuator is to replace it, in my opinion.
Here is a link to a video showing how to remove and installed the temperature blend door actuator.
https://youtu.be/IuekQMwy3sw
DISCLAIMER
Barbour's Auto Help is not responsible for any damage or personal injury incurred in the process of performing any auto repairs done by you the viewer. Automotive repair is extremely dangerous. Repair your vehicle at your own risk. It is the viewers responsibility to verify all information and procedures as outlined in YOUR REPAIR MANUAL AND OWNERS MANUAL FOR YOUR VEHICLE. Owning and using a repair manual suited for your vehicle is essential for correctly and safely performing ANY repair to your vehicle. Always wear safety glasses and heed all instructions for use applicable to any piece of equipment you may use. Due to circumstances out of the control of Barbours Auto Help, Barbours Auto Help makes no guaranty that by the use of the information given in this video a quality repair will be made. Barbour'sAutoHelp makes no guaranty that the information provided is totally complete, syncronized and accurate. Verify everything using an appropriate repair manual. You can do it. Do it right and do it safely.
Repair your vehicle at your own risk! Barbour's auto help does not guaranty a proper repair using these techniques.
Created with MAGIX Movie Edit Pro 2016
22
views
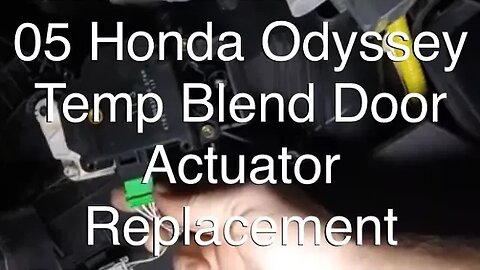
Driver Side Temperature Blend Door Actuator Replacement 05 Honda Odyssey
In this video I show you how to replace a driver side temperature blend door actuator on an 05 Honda Odyssey touring equipped with dual climate control for the front A/C.
Link to video showing how I fixed my blend door actuator.
https://youtu.be/jWcWUlbksco
DISCLAIMER
Barbour's Auto Help is not responsible for any damage or personal injury incurred in the process of performing any auto repairs done by you the viewer. Automotive repair is extremely dangerous. Repair your vehicle at your own risk. It is the viewers responsibility to verify all information and procedures as outlined in YOUR REPAIR MANUAL AND OWNERS MANUAL FOR YOUR VEHICLE. Owning and using a repair manual suited for your vehicle is essential for correctly and safely performing ANY repair to your vehicle. Always wear safety glasses and heed all instructions for use applicable to any piece of equipment you may use. Due to circumstances out of the control of Barbours Auto Help, Barbours Auto Help makes no guaranty that by the use of the information given in this video a quality repair will be made. Barbour'sAutoHelp makes no guaranty that the information provided is totally complete, synchronized and accurate. Verify everything using an appropriate repair manual. You can do it. Do it right and do it safely.
Repair your vehicle at your own risk! Barbour's auto help does not guaranty a proper repair using these techniques.
4
views
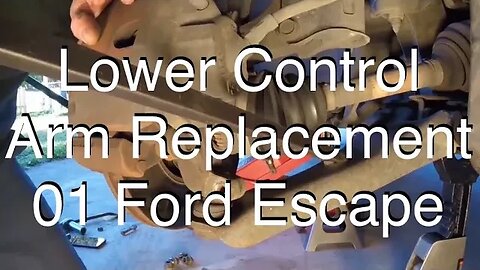
Lower Control Arm Replacement 01 Ford Escape
This video was made to be a visual aid in assisting you in you project of replacing a lower control arm on a 01 Ford Escape. This design has been used on the Ford Escape for many years and they commonly fail in a similar fashion. (torque specifications may vary from year to year) I believe that you'll find that this video extremely helpful in your project. If you have questions please comment below. I usually respond within a 24hr period of time. Good luck!
Note: The method shown in the video for separating the outer tie rod end from the steering knuckle is a method that I've used for years with no problems. However, I do not guarantee that you will not damage your vehicle using this method. There is a tool out there called, a "tie rod end separator". The use of this tool can greatly help in separation of the outer tie rod end without causing damage.
Here is a link to a video showing the use of this tool.
https://youtu.be/TYIDzXxeNwk
DISCLAIMER
Barbour's Auto Help is not responsible for any damage or personal injury incurred in the process of performing any auto repairs done by you the viewer. Automotive repair is extremely dangerous. Repair your vehicle at your own risk. It is the viewers responsibility to verify all information and procedures as outlined in YOUR REPAIR MANUAL AND OWNERS MANUAL FOR YOUR VEHICLE. Owning and using a repair manual suited for your vehicle is essential for correctly and safely performing ANY repair to your vehicle. Always wear safety glasses and heed all instructions for use applicable to any piece of equipment you may use. Due to circumstances out of the control of Barbours Auto Help, Barbours Auto Help makes no guaranty that by the use of the information given in this video a quality repair will be made. Barbour'sAutoHelp makes no guaranty that the information provided is totally complete, syncronized and accurate. Verify everything using an appropriate repair manual. Follow the repair manual over this videos content. You can do it. Do it right and do it safely.
Repair your vehicle at your own risk! Barbour's auto help does not guaranty a proper repair using these techniques.
.
8
views
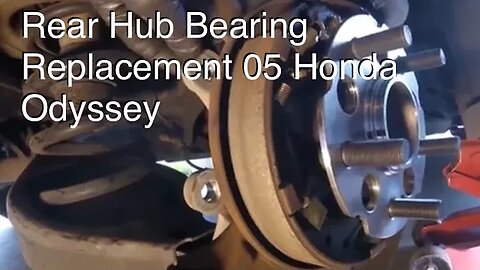
Rear Hub Bearing Assembly Replacement 05 Honda Odyssey
In this video I'll show you how to replace a rear hub bearing assembly on an 05 Honda Odyssey. (opposite side similar) This particular Odyssey is a generation 3 Honda Odyssey so this procedure should be similar if not the same for all generation 3 Honda Odysseys. (confirm this in your repair manual).
Worn and failing hub bearing assemblies can be somewhat of a common issue. Here are links to a couple videos that explain more about hub bearing failure and how to diagnose them. Note: these videos are superficial and only show a few techniques for diagnosing this problem. I place no guarantee that by using the techniques in these videos that you will make a proper diagnosis.
Rear Wheel Bearing Replacement on a 2003 Saturn Vue
https://youtu.be/mWZIaQDUzD8
What a Bad Wheel Bearing Sounds Like
https://youtu.be/q5zvSD-Kwfk
Here is a link to a video showing how to remove seized rotor screws.
https://youtu.be/KCAeXsKz3ng
DISCLAIMER
Barbour's Auto Help is not responsible for any damage or personal injury incurred in the process of performing any auto repairs done by you the viewer. Automotive repair is extremely dangerous. Repair your vehicle at your own risk. It is the viewers responsibility to verify all information and procedures as outlined in YOUR REPAIR MANUAL AND OWNERS MANUAL FOR YOUR VEHICLE. Owning and using a repair manual suited for your vehicle is essential for correctly and safely performing ANY repair to your vehicle. Always wear safety glasses and heed all instructions for use applicable to any piece of equipment you may use. Due to circumstances out of the control of Barbours Auto Help, Barbours Auto Help makes no guaranty that by the use of the information given in this video a quality repair will be made. Barbour'sAutoHelp makes no guaranty that the information provided is totally complete, syncronized and accurate. Verify everything using an appropriate repair manual. You can do it. Do it right and do it safely.
Repair your vehicle at your own risk! Barbour's auto help does not guaranty a proper repair using these techniques.
Created with MAGIX Movie Edit Pro 2016
12
views
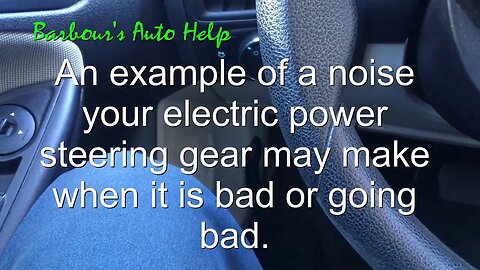
A Noise An Electric Power Steering Gear May Make When Bad
In this video I give you an example of what it may sound like when your electric power steering gear is bad or is going bad. Note: They don't always make this sound. In fact sometimes they wont make a sound at all when they are faulty. This particular electric power steering gear if mechanically faulty and thus the noise.
Here is a link to a video demonstrating another noise that an electric power steering gear may make when bad or going bad.
https://youtu.be/nW1seLT7WTA
Note: This video is only meant to be an example of a noise that your electric power steering gear may make. This video is not to take the place of a proper diagnosis of the problem that you are having. A repair manual would be recommended when diagnosing your vehicle. If you are not confident that you can properly diagnose your vehicle then it would be best to take your vehicle to a shop and have a professional automobile technician diagnose it for you. Properly diagnosing your vehicle is essential in preventing you from buying parts you don't need.
2
views
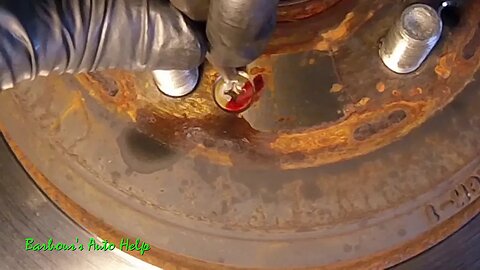
Removing Seized Rotor Screws
In this video I'll show you a couple ways that I use to remove seized rotor screws. Seized rotor screws is a pretty common problem on many vehicles. Many times it can be very difficult to remove them. This video gives you a couple of methods that you could use to remove them.
Note: this video is meant to be used to help people that have seized rotor screws. Always try to remove rotor screws using a regular screw driver first. If that does not work then feel free to use these methods.
Note: Use these methods at your own risk. Not damage can be caused to the head of the screw making it impossible to remove the screw without drilling it out. The method of drilling the screw out is not shown or explained in this video.
DISCLAIMER
Barbour's Auto Help is not responsible for any damage or personal injury incurred in the process of performing any auto repairs done by you the viewer. Automotive repair is extremely dangerous. Repair your vehicle at your own risk. It is the viewers responsibility to verify all information and procedures as outlined in YOUR REPAIR MANUAL AND OWNERS MANUAL FOR YOUR VEHICLE. Owning and using a repair manual suited for your vehicle is essential for correctly and safely performing ANY repair to your vehicle. Always wear safety glasses and heed all instructions for use applicable to any piece of equipment you may use. Due to circumstances out of the control of Barbours Auto Help, Barbours Auto Help makes no guaranty that by the use of the information given in this video a quality repair will be made. Barbour'sAutoHelp makes no guaranty that the information provided is totally complete, synchronized and accurate. Verify everything using an appropriate repair manual. You can do it. Do it right and do it safely.
Repair your vehicle at your own risk! Barbour's auto help does not guaranty a proper repair using these techniques.
4
views

What Lifter Tap Sounds Like
In this video I'll show you what "lifter tap" sounds like. Lifter tap is a pretty common issue on vehicles that use hydraulic lifters. This video has great audio of lifter tap with a little commentary explaining "lifter tap".
Note: This video is only to be used for the purpose of giving viewers an idea of what lifter tap sounds like. Just because your vehicle sounds this way does not necessarily mean that your lifters are the cause of this noise. All noises should be properly diagnosed before repairs are made. This video does not explain how to properly diagnose "lifter tap".
4
views
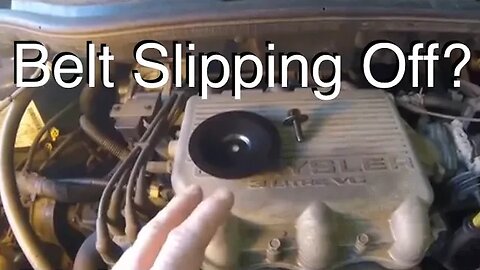
Keep Belt From Slipping Off Chrysler 3.0L
The Alternator/ Power steering belt slipping off in wet conditions is a pretty common problem with some Chrysler 3.0L V-6 vehicles. In this video I'll share an easy and cheap fix for this problem. It involve placing a shield on the serpentine belt tensioner. This shield keeps the belt from slipping off. It takes about 5 minutes to perform this repair and will probably cost less than $15 for the parts.
The particular years and vehicles that this problem is common on are the 2000 Chrysler Voyager 3.0L, and the 1997-2000 Dodge Cravan 3.0L and the 1997-2000 Plymouth Voyager 3.0L.
The part number of the pulley shield is 82570 (This is a Dorman product. Part number given for convenience not as an advertisement for Dorman)
Note: Do consult your parts professional for proper fitment. Always verify that the part is correct for your vehicle.
Note: I do not guarantee a proper and quality repair using this method. It has worked for me and many others. Hopefully it will work for you.
DISCLAIMER
Barbour's Auto Help is not responsible for any damage or personal injury incurred in the process of performing any auto repairs done by you the viewer. Automotive repair is extremely dangerous. Repair your vehicle at your own risk. It is the viewers responsibility to verify all information and procedures as outlined in YOUR REPAIR MANUAL AND OWNERS MANUAL FOR YOUR VEHICLE. Owning and using a repair manual suited for your vehicle is essential for correctly and safely performing ANY repair to your vehicle. Always wear safety glasses and heed all instructions for use applicable to any piece of equipment you may use. Due to circumstances out of the control of Barbours Auto Help, Barbours Auto Help makes no guaranty that by the use of the information given in this video a quality repair will be made. Barbour'sAutoHelp makes no guaranty that the information provided is totally complete, synchronized and accurate. Verify everything using an appropriate repair manual. You can do it. Do it right and do it safely.
Repair your vehicle at your own risk! Barbour's auto help does not guaranty a proper repair using these techniques.
15
views
VVT Solenoid Replacement Third Generation Honda Odyssey
In this video I'll show you how to change a VVT solenoid on a third generation Honda Odyssey 3.5L. The particular Odyssey featured in the video is a 2005 touring. I believe this procedure is similar for all third generation Odysseys, but do verify your repair manual to confirm this. I've done a little digging and there may be some differences. By the way, your dealer may refer to this part as the "spool valve".
The VVT solenoid is a very common source of oil leaks for this vehicle. Usually the gasket that goes between the solenoid and the cylinder head leaks, but also the gasket that goes between the two halve of the assembly will leak too. This gasket, unfortunately, when I made this video was not available. IT IS AVAILABLE NOW THOUGH. SO, YOU DON'T HAVE TO REPLACE THE WHOLE THING. If decide to replace the solenoid any way you can expect to spend $200-$600.
Here is a link to the website that sells this gasket for the inside of the valve. Please speak to a parts pro to confirm this part is correct for your vehicle.
https://www.napaonline.com/en/p/NDP91702681
Here is a link to a video that can give you some understanding of how to take this thing apart to replace that gasket. In this video, I did not replace the gasket but the video does show how to take it apart.
Here is that link: https://youtu.be/abELbsoi90g
Note: I would recommend disconnecting the battery to prevent accidental start up. Disconnect the negative battery clamp. Be sure you have the radio code before disconnecting the battery.
As far as the scouring pads go. I use Scotch Brite scouring pads to clean mating surfaces. They are abrasive enough to clean oil sludge but will not tear up your metal. I would wash dishes with them for a week before using them for this application. It makes them a little more soft and pliable. (I work at a dealership and this is what we use. I have and all my co-workers have have great success using these) Something to watch out for... there is a chance that some of fibers of the scouring pad could come loose and cling to the surface of the metal. Be sure to clean all fibers off the gasket mating surface. Use a lint free rag soaked in brake clean.
Note: use scouring pads in on a metal surface close the the gasket mating area to insure the pad does not score the metal. If the pad scores the metal use a less abrasive scouring pad. Repeat test until desired result is achieved. (there are softer ones out there)
Here is a link to a video showing other methods of cleaning mating surfaces on engines and engine parts.
https://youtu.be/Uy5p-cUge5s
Here is a part number for the VVT solenoid. This is an Autozone part. (note: this is not an endorsement of autozone parts and I am not being paid to provide this information to you. Also, always verify proper part is ordered for your vehicle by providing your parts pro with all needed information such as VIN, Year, Make, Model and engine sized. Part comes with gasket)
Part# TS1145
And for the record when I mentioned that "some people call the vvt solenoid a vtec solenoid" I did not intend for anyone to interpret that to mean I said its a vtec solenoid. I'm only refering to the fact that as you look online and shop around that some places will call this a vtec solenoid.
If you want to replace the gasket instead of replacing the whole valve then I would call NAPA. I believe that they carry that part.
The plate that I removed on the back of the head under the VVT solenoid is call a "rear camshaft thrust cover". I believe the part# 91301-P8A-A00. Don't quote me on this. The parts dept is keeping this a secret. Always confirm correct parts with your parts pro.
DISCLAIMER
Barbour's Auto Help is not responsible for any damage or personal injury incurred in the process of performing any auto repairs done by you the viewer. Automotive repair is extremely dangerous. Repair your vehicle at your own risk. It is the viewers responsibility to verify all information and procedures as outlined in YOUR REPAIR MANUAL AND OWNERS MANUAL FOR YOUR VEHICLE. Owning and using a repair manual suited for your vehicle is essential for correctly and safely performing ANY repair to your vehicle. Always wear safety glasses and heed all instructions for use applicable to any piece of equipment you may use. Due to circumstances out of the control of Barbours Auto Help, Barbours Auto Help makes no guaranty that by the use of the information given in this video a quality repair will be made. Barbour'sAutoHelp makes no guaranty that the information provided is totally complete, synchronized and accurate. Verify everything using an appropriate repair manual. You can do it. Do it right and do it safely.
Repair your vehicle at your own risk! Barbour's auto help does not guaranty a proper repair using these techniques.
31
views
How To Cheaply Fix a Noisy Honda Power Steering Pump
Power steering noise such as moaning or whining can be common and easily fixed for many Honda vehicles. For Honda vehicles, that are equipped with the power steering pump shown in the video, this noise is usually caused by old worn out O-rings that fit onto the suction and high pressure lines where they bolt up to the power steering pump.
Usually what happens is that these O-rings will allow air to be introduced into the power steering system and cause the power steering pump to cavitate. This is where the noise occurs.
"Burping the system": As mentioned in the video, once the power steering system has been filled you will need to start the engine and then turn the steering wheel to the left and right all the way from stop to stop. Shut the engine off. Check and adjust the fluid level as the level should have gone down. Repeat process until fluid is full and power steering system stops whining. Do not over fill the fluid reservoir. *Fluid level should always be checked and adjusted when the engine is off.* After the system has been filled to the correct level it may be necessary to continue turning the steering wheel from stop to stop several times to get all the air out.
If the system continues to whine after it is filled and the system has been bleed then the vehicle may be ingesting air into the system through another rout. Further repair will be needed.
This video is designed to help you to understand what may be the problem with your vehicle and also to help you to understand how to repair this problem.
Note: Please use care not to contaminate your drive belts with power steering fluid. If you do, it’s been my experience that quickly cleaning the belt with brake clean will help to prevent damage to the belt from oil contamination. However, it’s best to not even have to do that as brake clean is not great for the belt either but it will clean the belt.
The vehicle featured in the video is a 2005 Honda Odyssey Touring 3.5L
As promised the part #s for the o-rings are as follows
91370-sv4-000 and 91345-rda-a01
Both o-rings where purchased for just $6.52
DISCLAIMER
Barbour's Auto Help is not responsible for any damage or personal injury incurred in the process of performing any auto repairs done by you the viewer. Automotive repair is extremely dangerous. Repair your vehicle at your own risk. It is the viewers responsibility to verify all information and procedures as outlined in YOUR REPAIR MANUAL AND OWNERS MANUAL FOR YOUR VEHICLE. Owning and using a repair manual suited for your vehicle is essential for correctly and safely performing ANY repair to your vehicle. Always wear safety glasses and heed all instructions for use applicable to any piece of equipment you may use. Due to circumstances out of the control of Barbours Auto Help, Barbours Auto Help makes no guaranty that by the use of the information given in this video a quality repair will be made. Barbour'sAutoHelp makes no guaranty that the information provided is totally complete, synchronized and accurate. Verify everything using an appropriate repair manual. You can do it. Do it right and do it safely.
Repair your vehicle at your own risk! Barbour's auto help does not guaranty a proper repair using these techniques.
31
views

What Piston Slap Sounds Like
In this video I have some pretty good audio of what "piston slap" sounds like. I also give a brief and superficial explanation of what "piston slap" is.
Please note: In order to determine 100% what is causing a noise in your engine it must be properly diagnosed. The use of equipment such as a "mechanics microphone" or a stethoscope should be used to get a better idea of what area of the engine is the noisiest. Engine tear down is needed to pinpoint the point of failure. So, that being said just because you have a noise similar to mine does not necessarily mean that you have "piston slap". The video is just an example of what it may sound like.
3
views
OXYGEN SENSOR REPLACEMENT GM 3.8l V-6 SERIES 2 (BANK 1 SENSOR 2)
In this video I'll show you how to replace the bank 1 sensor 2 oxygen sensor on a GM 3.8L series 2 V-6. The particular vehicle featured in this video is a 2001 Pontiac Bonneville. Note: The procedure should be the same for many GM 3.8L Series 2 vehicles. However you will need to check you repair manual to confirm this.
Note: You will be exposed to metal shavings when drilling the heads of the rivets off. Use care not to get this metal on your cloths or your person. Use eye protection such as safety glasses or goggles before during and after repairs. Be sure your clothing is clean of metal shavings after repair as there is a chance that metal could still get into your eyes if you rub your eyes with a piece of clothing that has metal in it. Clean the area completely after repair has been made to insure you do not have future contact with metal shavings.
Here is a link to a video showing how to replace the bank 1 sensor 1 oxygen sensor on this vehicle.
https://youtu.be/GAMbYw6NfMU
DISCLAIMER
Barbour's Auto Help is not responsible for any damage or personal injury incurred in the process of performing any auto repairs done by you the viewer. Automotive repair is extremely dangerous. Repair your vehicle at your own risk. It is the viewers responsibility to verify all information and procedures as outlined in YOUR REPAIR MANUAL AND OWNERS MANUAL FOR YOUR VEHICLE. Owning and using a repair manual suited for your vehicle is essential for correctly and safely performing ANY repair to your vehicle. Always wear safety glasses and heed all instructions for use applicable to any piece of equipment you may use. Due to circumstances out of the control of Barbours Auto Help, Barbours Auto Help makes no guaranty that by the use of the information given in this video a quality repair will be made. Barbour'sAutoHelp makes no guaranty that the information provided is totally complete, syncronized and accurate. Verify everything using an appropriate repair manual. You can do it. Do it right and do it safely.
Repair your vehicle at your own risk! Barbour's auto help does not guaranty a proper repair using these techniques.
10
views

MAP Sensor Replacement GM 3.8L Series 2
In this video I'll show you how to replace a MAP sensor on a GM 3.8L V-6 series 2. The particular vehicle featured in this video is a 2001 Pontiac Bonneville. This procedure should be similar or the same for all GM 3.8L series 2 engines. (verify in your repair manual.)
Here is a link to that video about replacing the PCV valve
https://youtu.be/5hpX-CPCWAE
DISCLAIMER
Barbour's Auto Help is not responsible for any damage or personal injury incurred in the process of performing any auto repairs done by you the viewer. Automotive repair is extremely dangerous. Repair your vehicle at your own risk. It is the viewers responsibility to verify all information and procedures as outlined in YOUR REPAIR MANUAL AND OWNERS MANUAL FOR YOUR VEHICLE. Owning and using a repair manual suited for your vehicle is essential for correctly and safely performing ANY repair to your vehicle. Always wear safety glasses and heed all instructions for use applicable to any piece of equipment you may use. Due to circumstances out of the control of Barbours Auto Help, Barbours Auto Help makes no guaranty that by the use of the information given in this video a quality repair will be made. Barbour'sAutoHelp makes no guaranty that the information provided is totally complete, syncronized and accurate. Verify everything using an appropriate repair manual. You can do it. Do it right and do it safely.
Repair your vehicle at your own risk! Barbour's auto help does not guaranty a proper repair using these techniques.
Music by:
Zombie Rock by Audionautix is licensed under a Creative Commons Attribution license (https://creativecommons.org/licenses/by/4.0/)
Artist: http://audionautix.com
5
views

Vtec Solenoid Gasket Replacement
In this video I'll be replacing the Vtec solenoid gasket on a 2002 Honda Accord 2.3L. Vtech solenoid gaskets are very common for leaking oil. This one is no exception. It was leaking very badly for some time. The the gaskets are made of rubber and usually become very hard after many years of being exposed to very hot temperatures. As they get hard they loose their ability to seal.
The method I use in this video, as mentioned in the video, is not "by the book". Its a short cut. By doing it this way taking the thermostat housing and the EGR valve off will not be needed.
There is a draw back to doing it this way though. As mentioned in the video, you will not have enough room to get to the 3 bolts that hold the Vtec solenoid to the cylinder head with a torque wrench. This may prevent proper torquing of the bolts resulting in an oil leak potentially catastrophic engine damage. (As in you may ruin you engine if all the oil leaks out due to this oil leak).....SO DO THIS AT YOUR OWN RISK. I make no guarantees that by using this video you will make a quality repair. However, if your mechanically inclined and are experienced in auto repair then this video may help.
As for what to use to clean the mating surfaces of the Vtec solenoid and the cylinder head, I would recommend something equivalent to Scotch-Brite Heavy Duty scour pads. (NOTE: WASH SOME DISHES WITH SCOURING PAD FOR AT LEASE A WEEK OR TWO BEFORE USING. THIS WILL SOFTEN THEM UP. INITIALLY THEY ARE A LITTLE HARD. ALSO WET THE PAD WITH BRAKE CLEAN BEFORE USING) They are green and should not be too abrasive as to cause deep scratches on the mating surfaces. I wouldn't go with a metal scouring pad or anything more abrasive that the Scotch-Brite pads. Note: only use very light pressure when cleaning surfaces. Use scouring pad on another like surface that isn't a mating surface to insure the pad used does not damage the surface before cleaning mating surfaces. If it damages the surface then use something lighter and repeat test.
Here is a link to a web page showing the recommended scour pad.
https://www.homedepot.com/p/Scotch-Brite-Heavy-Duty-Scour-Pad-6-Count-226-CC/202511521
Here is a link to a video showing other methods of cleaning mating surfaces on engines and engine parts.
https://youtu.be/Uy5p-cUge5s
DISCLAIMER
Barbour's Auto Help is not responsible for any damage or personal injury incurred in the process of performing any auto repairs done by you the viewer. Automotive repair is extremely dangerous. Repair your vehicle at your own risk. It is the viewers responsibility to verify all information and procedures as outlined in YOUR REPAIR MANUAL AND OWNERS MANUAL FOR YOUR VEHICLE. Owning and using a repair manual suited for your vehicle is essential for correctly and safely performing ANY repair to your vehicle. Always wear safety glasses and heed all instructions for use applicable to any piece of equipment you may use. Due to circumstances out of the control of Barbours Auto Help, Barbours Auto Help makes no guaranty that by the use of the information given in this video a quality repair will be made. Barbour'sAutoHelp makes no guaranty that the information provided is totally complete, syncronized and accurate. Verify everything using an appropriate repair manual. You can do it. Do it right and do it safely.
Repair your vehicle at your own risk! Barbour's auto help does not guaranty a proper repair using these techniques.
Created with MAGIX Movie Edit Pro 2016
20
views
What Bad Strut Mounts (with built in bearings) Sound Like
In this video I'll give you a good example of what a bad strut mount, that has an integral strut bearing, sounds like. The audio is pretty good however, the sound is a little different in person. Note, this is typically what a bad strut mount, that has an integral strut bearing, sounds like but it is not always the case. I don't make the claim that if you are hearing this sound that it automatically means that its a bad strut mount. You should alway perform a thorough chassis diagnosis before making a call on replacing a part. The video is only meant to serve as an example of what it could sound like when a strut mount, such as the one featured in the video, goes bad.
Please note: the vehicle featured in the video is equipped with strut mounts that has strut bearings integral to them. Some vehicles have strut bearings that are sold separately from the strut mount. In this case you would need to purchase bearings with the strut mounts if you are attempting to fix a noisy strut bearing. The noise in the video is from the bearing portion of the strut mount. If you have a vehicle that is equipped with a like set up and the noise is coming from the bearings in the strut mount then you would need to purchase strut mounts. Just to clear up any confusion.
DISCLAIMER
Barbour's Auto Help is not responsible for any damage or personal injury incurred in the process of performing any auto repairs done by you the viewer. Automotive repair is extremely dangerous. Repair your vehicle at your own risk. It is the viewers responsibility to verify all information and procedures as outlined in YOUR REPAIR MANUAL AND OWNERS MANUAL FOR YOUR VEHICLE. Owning and using a repair manual suited for your vehicle is essential for correctly and safely performing ANY repair to your vehicle. Always wear safety glasses and heed all instructions for use applicable to any piece of equipment you may use. Due to circumstances out of the control of Barbours Auto Help, Barbours Auto Help makes no guarantee that by the use of the information given in this video a quality repair will be made. Barbour'sAutoHelp makes no guaranteew that the information provided is totally complete, syncronized and accurate. Verify everything using an appropriate repair manual. You can do it. Do it right and do it safely.
Repair your vehicle at your own risk! Barbour's auto help does not guaranty a proper repair using these techniques.
Music by:
Zombie Rock by Audionautix is licensed under a Creative Commons Attribution license (https://creativecommons.org/licenses/by/4.0/)
Artist: http://audionautix.com
24
views

Ford Electric Power Steering Screeching Sound
This is the sound that late model Ford electric power steering rack and pinions sometimes make when they go bad. If your Ford sounds like this and the sound is accompanied by your power steering being inoperative then you will most likely need to have the EPAS steering gear replaced. (Do have it properly diagnosed by a professional of corse.) I make no guarantee that if you hear this noise that the power steering rack is the cause.
2
views
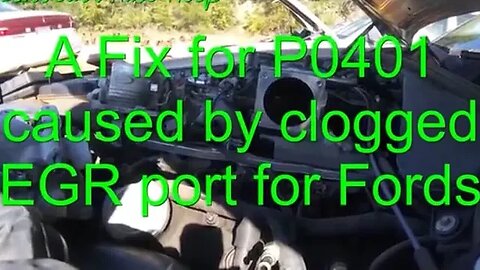
How To Fix a P0401 Due To Clogged EGR Ports On a Ford
In this video I'll show you how to unclogged a restricted EGR port that is causing a P0401 "EGR flow insufficient" on a Ford vehicle that has a DPFE EGR set up. Clogged EGR ports are a common issue no only for Fords but many different vehicles out there. The fix is simple. I also explain how to easily diagnose a clogged EGR port. Note: A faulty EGR valve can also behave like a clogged EGR port.
Note: Please keep all foreign material out of the intake. Do not allow the carbon that is built up in the EGR ports to get into the intake. When done cleaning the ports I would suggest using some compressed air to clean the area around the port and inside the port.
Also, you will need to use your repair manual for instructions on how to access the egr ports for what ever Ford model you are working on.
Note: Some models may have more that one EGR port. Reference your repair manual for more information. These ports may not be visible through the throttle body.
DISCLAIMER
Barbour's Auto Help is not responsible for any damage or personal injury incurred in the process of performing any auto repairs done by you the viewer. Automotive repair is extremely dangerous. Repair your vehicle at your own risk. It is the viewers responsibility to verify all information and procedures as outlined in YOUR REPAIR MANUAL AND OWNERS MANUAL FOR YOUR VEHICLE. Owning and using a repair manual suited for your vehicle is essential for correctly and safely performing ANY repair to your vehicle. Always wear safety glasses and heed all instructions for use applicable to any piece of equipment you may use. Due to circumstances out of the control of Barbours Auto Help, Barbours Auto Help makes no guaranty that by the use of the information given in this video a quality repair will be made. Barbour'sAutoHelp makes no guaranty that the information provided is totally complete, syncronized and accurate. Verify everything using an appropriate repair manual. You can do it. Do it right and do it safely.
Repair your vehicle at your own risk! Barbour's auto help does not guaranty a proper repair using these techniques.
Music by:
Zombie Rock by Audionautix is licensed under a Creative Commons Attribution license (https://creativecommons.org/licenses/by/4.0/)
Artist: http://audionautix.com
23
views
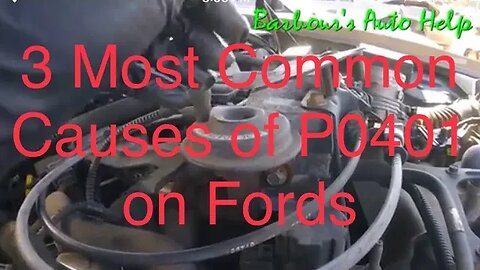
Three Most Common Causes of P0401 on Fords
In this video I'll share, by my experience, what has been the three most common causes of P0401 on Ford vehicles with a DPFE EGR system. The definition of P0401is "Exhaust Gas Recirculation flow insufficient". Its been my experience that this code is usually caused by a faulty DPFE sensor, clogged EGR ports in the intake, or damaged hoses going to the DPFE sensor.
Note: This video is not meant to be used for diagnostic purposes. I'm just sharing my experience about what has been the top 3 causes of this code on Ford vehicles with this EGR set up.
Let me know if you have questions. I'll be happy to help you with more information.
DISCLAIMER
Barbour's Auto Help is not responsible for any damage or personal injury incurred in the process of performing any auto repairs done by you the viewer. Automotive repair is extremely dangerous. Repair your vehicle at your own risk. It is the viewers responsibility to verify all information and procedures as outlined in YOUR REPAIR MANUAL AND OWNERS MANUAL FOR YOUR VEHICLE. Owning and using a repair manual suited for your vehicle is essential for correctly and safely performing ANY repair to your vehicle. Always wear safety glasses and heed all instructions for use applicable to any piece of equipment you may use. Due to circumstances out of the control of Barbours Auto Help, Barbours Auto Help makes no guaranty that by the use of the information given in this video a quality repair will be made. Barbour'sAutoHelp makes no guaranty that the information provided is totally complete, syncronized and accurate. Verify everything using an appropriate repair manual. You can do it. Do it right and do it safely.
Repair your vehicle at your own risk! Barbour's auto help does not guaranty a proper repair using these techniques.
The use and distribution of any materials provided by Barbour's Auto Help is strictly prohibited outside the Youtube platform unless written permission has been provided. This includes embedded videos on websites other than Youtube.
Music by:
Zombie Rock by Audionautix is licensed under a Creative Commons Attribution license (https://creativecommons.org/licenses/by/4.0/)
Artist: http://audionautix.com
9
views
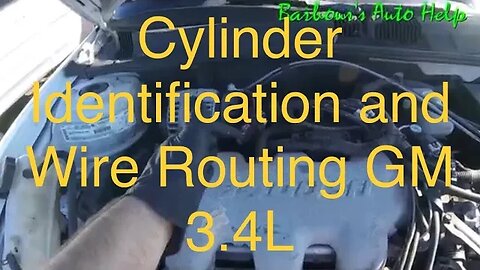
Cylinder Identification and Wire Routing GM 3.4L
In this video I'll go over the firing order, cylinder identification, and ignition wire routing for a GM 3.4L V-6 (VIN E). The firing order is 123456. This is the order in which the cylinders are fired, not to be confused with the lay out of the ignition coils.
It's a very common mistake to rout the ignition wires incorrectly during wire replacement. If your vehicle is running roughly after performing this task then check your wire routing using this video. Chances are that you may have a couple wires routing incorrectly.
DISCLAIMER
Barbour's Auto Help is not responsible for any damage or personal injury incurred in the process of performing any auto repairs done by you the viewer. Automotive repair is extremely dangerous. Repair your vehicle at your own risk. It is the viewers responsibility to verify all information and procedures as outlined in YOUR REPAIR MANUAL AND OWNERS MANUAL FOR YOUR VEHICLE. Owning and using a repair manual suited for your vehicle is essential for correctly and safely performing ANY repair to your vehicle. Always wear safety glasses and heed all instructions for use applicable to any piece of equipment you may use. Due to circumstances out of the control of Barbours Auto Help, Barbours Auto Help makes no guaranty that by the use of the information given in this video a quality repair will be made. Barbour'sAutoHelp makes no guaranty that the information provided is totally complete, syncronized and accurate. Verify everything using an appropriate repair manual. You can do it. Do it right and do it safely.
Repair your vehicle at your own risk! Barbour's auto help does not guaranty a proper repair using these techniques.
The use and distribution of any materials provided by Barbour's Auto Help is strictly prohibited outside the Youtube platform unless written permission has been provided. This includes embedded videos on websites other than Youtube.
Music by:
Zombie Rock by Audionautix is licensed under a Creative Commons Attribution license (https://creativecommons.org/licenses/by/4.0/)
Artist: http://audionautix.com
4
views
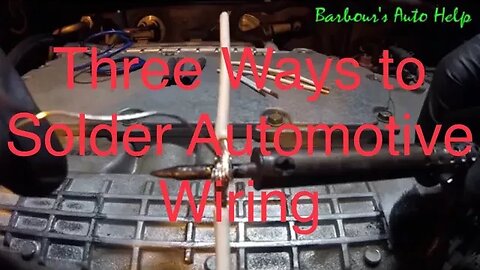
Three Ways to Solder Automotive Wiring
In this video I’ll show you three different ways of soldering Automotive Wiring.
Note: Do this in a well ventilated area. Also, use special care when using a soldering iron. They get extremely hot and will easily burn you. Be sure to follow all instructions provided by the manufacturer of an tool or piece of equipment you may use. Wear nitrile gloves and always wear safety glasses.
DISCLAIMER
Barbour's Auto Help is not responsible for any damage or personal injury incurred in the process of performing any auto repairs done by you the viewer. Automotive repair is extremely dangerous. Repair your vehicle at your own risk. It is the viewers responsibility to verify all information and procedures as outlined in YOUR REPAIR MANUAL AND OWNERS MANUAL FOR YOUR VEHICLE. Owning and using a repair manual suited for your vehicle is essential for correctly and safely performing ANY repair to your vehicle. Always wear safety glasses and heed all instructions for use applicable to any piece of equipment you may use. Due to circumstances out of the control of Barbours Auto Help, Barbours Auto Help makes no guaranty that by the use of the information given in this video a quality repair will be made. Barbour'sAutoHelp makes no guaranty that the information provided is totally complete, syncronized and accurate. Verify everything using an appropriate repair manual. You can do it. Do it right and do it safely.
Repair your vehicle at your own risk! Barbour's auto help does not guaranty a proper repair using these techniques.
The use and distribution of any materials provided by Barbour's Auto Help is strictly prohibited outside the Youtube platform unless written permission has been provided. This includes embedded videos on websites other than Youtube.
Music by:
Zombie Rock by Audionautix is licensed under a Creative Commons Attribution license (https://creativecommons.org/licenses/by/4.0/)
Artist: http://audionautix.com
18
views
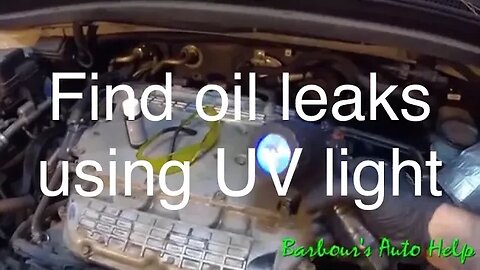
Find Oil Leaks Easily With a UV Dye Light
In this video I'll demonstrate how to use engine oil dye and a UV dye light to find oil leaks.
Be sure to use the instructions provided by the manufacturer of the dye kit and oil dye you will be using.
Note: Run time may differ greatly depending upon the severity, or lack of severity, of the oil leak. Some times a day or two may be needed to get dye to leak out. Also, if you plan to look for the leak right after you run the vehicle please be carefull. The engine and exhaust system can be very hot and burn you.
DISCLAIMER
Barbour's Auto Help is not responsible for any damage or personal injury incurred in the process of performing any auto repairs done by you the viewer. Automotive repair is extremely dangerous. Repair your vehicle at your own risk. It is the viewers responsibility to verify all information and procedures as outlined in YOUR REPAIR MANUAL AND OWNERS MANUAL FOR YOUR VEHICLE. Owning and using a repair manual suited for your vehicle is essential for correctly and safely performing ANY repair to your vehicle. Always wear safety glasses and heed all instructions for use applicable to any piece of equipment you may use. Due to circumstances out of the control of Barbours Auto Help, Barbours Auto Help makes no guaranty that by the use of the information given in this video a quality repair will be made. Barbour'sAutoHelp makes no guaranty that the information provided is totally complete, syncronized and accurate. Verify everything using an appropriate repair manual. You can do it. Do it right and do it safely.
Repair your vehicle at your own risk! Barbour's auto help does not guaranty a proper repair using these techniques.
Music by:
Zombie Rock by Audionautix is licensed under a Creative Commons Attribution license (https://creativecommons.org/licenses/by/4.0/)
Artist: http://audionautix.com
3
views
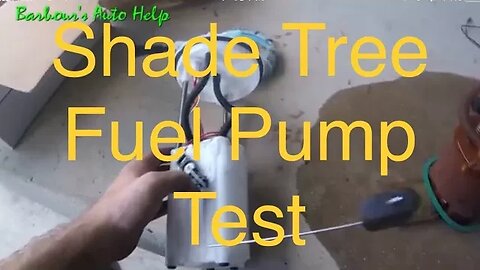
Shade Tree Method for Diagnosing a Fuel Pump
!!Warning!! Please read entire description for safety info!
In this video I'll show you an old trick to help you diagnose a faulty fuel pump. This trick is nothing new and was shown to me by some old timers that have been around the block a time or two. Over the years I've had the opportunity to use this to help me diagnose faulty fuel pumps on many occasions.
How it works: On the vehicle shown in the video the fuel pump was frozen because the brushes in the fuel pump where not able to make good electrical contact with the motor. The motor had a "bad spot" on it, or a spot that has high resistance on it. Knocking on the fuel tank will jar the fuel pump just enough to get the fuel pump brushes to make contact with a better spot on the motor. Once the contact has been made then the motor will then begin to operate as designed and create fuel pressure.
Note: Just because the fuel pump works after performing this does not mean your vehicle is fixed. This problem is likely to occur again. Fuel pump replacement is likely the solution. Also, as state in the video, I don't really think this test can really take the place of an appropriate fuel pump diagnosis. (Appropriate fuel pump diagnosis not shown or described here). In some cases this test can be misleading as knocking on the fuel tank could not only jar a frozen fuel pump into working again, but it could also jar a poor electrical connection (not inside the fuel pump) just enough to where fuel pump function is restored.
Also note: There are three ingredients needed for an engine to run, Fuel, Spark, and Compression. If any one of these ingredients are missing then you will get a "crank not start" much like the one shown in the video. You should confirm that no fuel pressure is present, using proper procedures outlined in your repair manual, before trying this.
Guys, this is some good information. But, I don't make any guarantees that by using this information you will make a proper diagnosis of your vehicles problem. There are just too may variables involved in a "crank no start" for me to go over in this video and this description. Take the information given with a grain of salt.
Warning! If you do this procedure be sure that the vehicle is in park, the parking brake is applied securely, and that the person inside the vehicle doing the cranking has his or her foot on the brake to prevent the vehicle from rolling. This procedure involves an individual going under the vehicle while it is being cranked. If the vehicle where to roll while you are under the vehicle it could result in serious injury or death!!
DISCLAIMER
Barbour's Auto Help is not responsible for any damage or personal injury incurred in the process of performing any auto repairs done by you the viewer. Automotive repair is extremely dangerous. Repair your vehicle at your own risk. It is the viewers responsibility to verify all information and procedures as outlined in YOUR REPAIR MANUAL AND OWNERS MANUAL FOR YOUR VEHICLE. Owning and using a repair manual suited for your vehicle is essential for correctly and safely performing ANY repair to your vehicle. Always wear safety glasses and heed all instructions for use applicable to any piece of equipment you may use. Due to circumstances out of the control of Barbours Auto Help, Barbours Auto Help makes no guaranty that by the use of the information given in this video a quality repair will be made. Barbour'sAutoHelp makes no guaranty that the information provided is totally complete, syncronized and accurate. Verify everything using an appropriate repair manual. You can do it. Do it right and do it safely.
Repair your vehicle at your own risk! Barbour's auto help does not guaranty a proper repair using these techniques.
The use and distribution of any materials provided by Barbour's Auto Help is strictly prohibited outside the Youtube platform unless written permission has been provided. This includes embedded videos on websites other than Youtube.
Music by:
Zombie Rock by Audionautix is licensed under a Creative Commons Attribution license (https://creativecommons.org/licenses/by/4.0/)
Artist: http://audionautix.com
31
views
01 Pontiac Bonneville Under Hood Fuse Box Location
In this video I'll show you the location of the under hood fuse box on a 2001 Pontiac Bonneville. I'll also show you some basic information about what can be found inside the fuse box and how to use it.
DISCLAIMER
Barbour's Auto Help is not responsible for any damage or personal injury incurred in the process of performing any auto repairs done by you the viewer. Automotive repair is extremely dangerous. Repair your vehicle at your own risk. It is the viewers responsibility to verify all information and procedures as outlined in YOUR REPAIR MANUAL AND OWNERS MANUAL FOR YOUR VEHICLE. Owning and using a repair manual suited for your vehicle is essential for correctly and safely performing ANY repair to your vehicle. Always wear safety glasses and heed all instructions for use applicable to any piece of equipment you may use. Due to circumstances out of the control of Barbours Auto Help, Barbours Auto Help makes no guaranty that by the use of the information given in this video a quality repair will be made. Barbour'sAutoHelp makes no guaranty that the information provided is totally complete, syncronized and accurate. Verify everything using an appropriate repair manual. You can do it. Do it right and do it safely.
Repair your vehicle at your own risk! Barbour's auto help does not guaranty a proper repair using these techniques.
Music by:
Zombie Rock by Audionautix is licensed under a Creative Commons Attribution license (https://creativecommons.org/licenses/by/4.0/)
Artist: http://audionautix.com
3
views
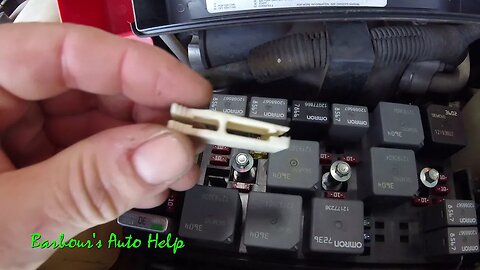
Easiest Way to Check a Relay
In this video I'll show you the easiest way to check a relay on your vehicle. Its the old switcharoo method. You just take a like relay that should be available in your fuse box and swap it with the relay you suspect is bad. If the component that the relay controls then starts to work then you most probably have a bad relay. In my opinion, this is the first thing you should do after checking fuses when diagnosing certain electrical problems.
Note: Try to swap relays that are not related to each other. If you swap a suspect relay with the PCM or Main Power relay then chances are the relay you are trying to check may cause other things not to work, including the relay you swapped. Also, only swap relays that are identical. Make sure they have the same number of terminals, are the same color, are the same brand, and have the same part number. If you are not sure if two relays are interchangeable then contact your parts store to verify.
Also, if you are not familiar with relays you should educate your self. If you are not sure what a relay is, what they look like or how they function then I would not suggest using this information. Swapping a relay with a part that is not a relay can cause damage to your vehicle, so make sure you know what parts you are handling before you do this.
DISCLAIMER
Barbour's Auto Help is not responsible for any damage or personal injury incurred in the process of performing any auto repairs done by you the viewer. Automotive repair is extremely dangerous. Repair your vehicle at your own risk. It is the viewers responsibility to verify all information and procedures as outlined in YOUR REPAIR MANUAL AND OWNERS MANUAL FOR YOUR VEHICLE. Owning and using a repair manual suited for your vehicle is essential for correctly and safely performing ANY repair to your vehicle. Always wear safety glasses and heed all instructions for use applicable to any piece of equipment you may use. Due to circumstances out of the control of Barbours Auto Help, Barbours Auto Help makes no guaranty that by the use of the information given in this video a quality repair will be made. Barbour'sAutoHelp makes no guaranty that the information provided is totally complete, syncronized and accurate. Verify everything using an appropriate repair manual. You can do it. Do it right and do it safely.
Repair your vehicle at your own risk! Barbour's auto help does not guaranty a proper repair using these techniques.
Music by:
Zombie Rock by Audionautix is licensed under a Creative Commons Attribution license (https://creativecommons.org/licenses/by/4.0/)
Artist: http://audionautix.com
17
views