
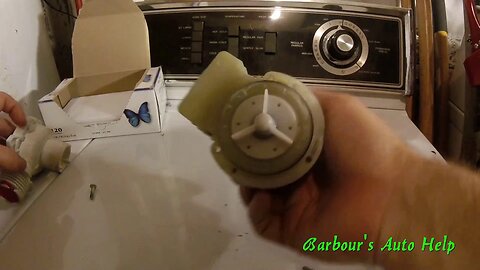
Washing machine drain pump diagnostic and replacement
In this video I'll take you through the process that I went through to diagnose and replace a washing machine drain pump. As I've said in the video, I am not an expert on appliance repair. However, I've managed to successfully repair this washing machine. I hope this video helps you in the diagnosis and repair of your washing machine!
And as always, be safe, use a repair manual, verify all information given in this video, wear safety glasses.
Note: Be careful not to short the wiring or test leads to the washing machine body. If this happens then there will be a risk of electrical shock by touching the washing machine.
Barbour's Auto Help gives no guarantee that by following the processes outlined in this video that you will make an accurate and quality repair. This channel also does not claim that the information given in this video is totally correct and accurate.
Repair your appliances at your own risk!!!!!!!
Created with MAGIX Movie Edit Pro 2016
2
views

How to replace an evaperative emission purge solenoid on a GM 3.8L V-6 series 2
How to replace an evaperative emission purge solenoid on a GM 3.8L V-6 series 2
Please note: Barbour's Auto Help makes no guarantee that by following the steps and information found in this video that you will make an accurate diagnosis or quality repair. This video is very superficial in nature and is only intended to assist you in diagnosing your vehicle.
!!!!WARNING!!!!
Repair your vehicle at your own risk. While this channel will always strive to give you the most accurate information regarding automotive repair it would be foolish to assume that by watching a 5-30 minute video you too will be able to repair your vehicle without any errors or risk to your safety or risk to others safety. Costly mistakes can and will happen. When performing automotive repairs there is a high risk of personal injury. There is also a high risk for EXTREME frustration. There is also a risk of damaging your vehicle. This channel assumes no responsibility or liability for any personal injury or property damage that may take place using the information found in this channels videos. It is absolutely imperative that you the viewer, and performer of said repairs, receive as much education concerning automotive repair and particularly the repair you are considering performing. While the videos featured on this channel do go into detail about particular repairs this channel does not claim that the information provided in said videos are 100% complete and accurate. YOU MUST HAVE A REPUTABLE REPAIR MANUAL FOR THE VEHICLE THAT YOU PLAN TO WORK ON THAT CONTAINS THE INFORMATION YOU NEED TO PROPERLY REPAIR SAID VEHICLE. Follow all repair procedures as outlined in your repair manual. Compare the information in your manual with the information in this channels videos. Follow your repair manual over this channels videos. Follow all safety instructions and warnings found in your manual. Also, read and follow the instructions for any piece of equipment, chemical, or tool that you may use in any repair. Also, check out the owners manual for the vehicle you are working on. There is a lot of good, important, and helpful information that can be found in it. Finally, above all, do everything you can to keep yourself safe. WEAR SAFETY GLASSES. WEAR IMPERMIABLE GLOVES. UNDERSTAND THE CHEMICALS YOU WILL BE EXPOSED TO AND GUARD YOURSELF FROM THEM.
Note: Even the most educated, seasoned, and talented technicians, or mechanics, are still subject to personal injury and property damage while performing automotive repair. I say again, use the information found in this channels videos at your own risk. Repair your vehicle at your own risk.
Music by:
Zombie Rock by Audionautix is licensed under a Creative Commons Attribution license (https://creativecommons.org/licenses/by/4.0/)
Artist: http://audionautix.com/
Created with MAGIX Movie Edit Pro 2016
3
views
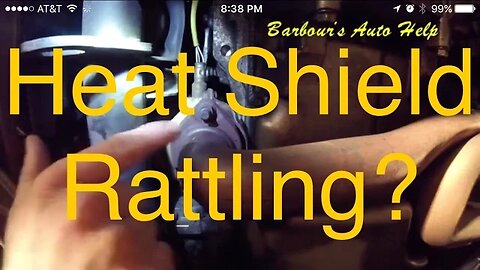
How to fix (temporarily) a rattling heat shield on a catalytic converter
In this video I'll show you a "temporary fix" for an rattling catalytic converter heat shield. I've used this technique on more than one vehicle with great success. In this video I'll be using this technique on my own 05 Honda Odyssey. It worked well! Hope this helps!
Please note: Barbour's Auto Help makes no guarantee that by following the steps and information found in this video that you will make an accurate diagnosis or quality repair. This video is very superficial in nature and is only intended to assist you in diagnosing your vehicle.
!!!!WARNING!!!!
Repair your vehicle at your own risk. While this channel will always strive to give you the most accurate information regarding automotive repair it would be foolish to assume that by watching a 5-30 minute video you too will be able to repair your vehicle without any errors or risk to your safety or risk to others safety. Costly mistakes can and will happen. When performing automotive repairs there is a high risk of personal injury. There is also a high risk for EXTREME frustration. There is also a risk of damaging your vehicle. This channel assumes no responsibility or liability for any personal injury or property damage that may take place using the information found in this channels videos. It is absolutely imperative that you the viewer, and performer of said repairs, receive as much education concerning automotive repair and particularly the repair you are considering performing. While the videos featured on this channel do go into detail about particular repairs this channel does not claim that the information provided in said videos are 100% complete and accurate. YOU MUST HAVE A REPUTABLE REPAIR MANUAL FOR THE VEHICLE THAT YOU PLAN TO WORK ON THAT CONTAINS THE INFORMATION YOU NEED TO PROPERLY REPAIR SAID VEHICLE. Follow all repair procedures as outlined in your repair manual. Compare the information in your manual with the information in this channels videos. Follow your repair manual over this channels videos. Follow all safety instructions and warnings found in your manual. Also, read and follow the instructions for any piece of equipment, chemical, or tool that you may use in any repair. Also, check out the owners manual for the vehicle you are working on. There is a lot of good, important, and helpful information that can be found in it. Finally, above all, do everything you can to keep yourself safe. WEAR SAFETY GLASSES. WEAR IMPERMIABLE GLOVES. UNDERSTAND THE CHEMICALS YOU WILL BE EXPOSED TO AND GUARD YOURSELF FROM THEM.
Note: Even the most educated, seasoned, and talented technicians, or mechanics, are still subject to personal injury and property damage while performing automotive repair. I say again, use the information found in this channels videos at your own risk. Repair your vehicle at your own risk.
Music by:
Zombie Rock by Audionautix is licensed under a Creative Commons Attribution license (https://creativecommons.org/licenses/by/4.0/)
Artist: http://audionautix.com/
Created with MAGIX Movie Edit Pro 2016
4
views
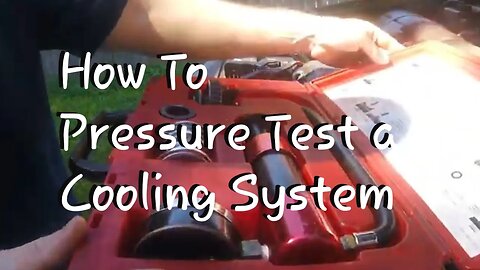
How to find a coolant leak using a radiator pressure tester
In this video I'll show you how to check for coolant leaks using a radiator pressure tester. Having the system pressurized helps to locate hard to find coolant leaks.
!!!!WARNING!!!!
Repair your vehicle at your own risk. While this channel will always strive to give you the most accurate information regarding automotive repair it would be foolish to assume that by watching a 5-30 minute video you too will be able to repair your vehicle without any errors or risk to your safety or risk to others safety. Costly mistakes can and will happen. When performing automotive repairs there is a high risk of personal injury. There is also a high risk for EXTREME frustration. There is also a risk of damaging your vehicle. This channel assumes no responsibility or liability for any personal injury or property damage that may take place using the information found in this channels videos. It is absolutely imperative that you the viewer, and performer of said repairs, receive as much education concerning automotive repair and particularly the repair you are considering performing. While the videos featured on this channel do go into detail about particular repairs this channel does not claim that the information provided in said videos are 100% complete and accurate. YOU MUST HAVE A REPUTABLE REPAIR MANUAL FOR THE VEHICLE THAT YOU PLAN TO WORK ON THAT CONTAINS THE INFORMATION YOU NEED TO PROPERLY REPAIR SAID VEHICLE. Follow all repair procedures as outlined in your repair manual. Compare the information in your manual with the information in this channels videos. Follow your repair manual over this channels videos. Follow all safety instructions and warnings found in your manual. Also, read and follow the instructions for any piece of equipment, chemical, or tool that you may use in any repair. Also, check out the owners manual for the vehicle you are working on. There is a lot of good, important, and helpful information that can be found in it. Finally, above all, do everything you can to keep yourself safe. WEAR SAFETY GLASSES. WEAR IMPERMIABLE GLOVES. UNDERSTAND THE CHEMICALS YOU WILL BE EXPOSED TO AND GUARD YOURSELF FROM THEM.
Note: Even the most educated, seasoned, and talented technicians, or mechanics, are still subject to personal injury and property damage while performing automotive repair. I say again, use the information found in this channels videos at your own risk. Repair your vehicle at your own risk.
Music by:
Corporation Motivation by Audionautix is licensed under a Creative Commons Attribution license (https://creativecommons.org/licenses/by/4.0/)
Artist: http://audionautix.com/
Zombie Rock by Audionautix is licensed under a Creative Commons Attribution license (https://creativecommons.org/licenses/by/4.0/)
Artist: http://audionautix.com/
Created with MAGIX Movie Edit Pro 2016
4
views
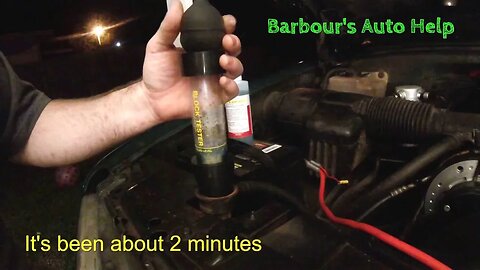
How to test for a blown head gasket with a block tester
!!!WARNING READ ENTIRE DESCRIPTION!!!!
In this video I'll show you how to used a block tester to check for combustion gases in the cooling system. Combustion gases found in the cooling system are usually the result of either a blown head gasket, cracked head or cracked block. When these gases come into contact with the block tester fluid it causes it to turn from a blue color to a yellow color. Using a block tester is a great way to determine if you have combustion gases in the cooling system and is a great way to gain a little piece of mind about tearing down the engine to fine the leak. (Further testing will be needed to determine the exact source of the intrusion and this video does not explain how to do this)
!!!!WARNING!!!!
Repair your vehicle at your own risk. While this channel will always strive to give you the most accurate information regarding automotive repair it would be foolish to assume that by watching a 5-30 minute video you too will be able to repair your vehicle without any errors or risk to your safety or risk to others safety. Costly mistakes can and will happen. When performing automotive repairs there is a high risk of personal injury. There is also a high risk for EXTREME frustration. There is also a risk of damaging your vehicle. This channel assumes no responsibility or liability for any personal injury or property damage that may take place using the information found in this channels videos. It is absolutely imperative that you the viewer, and performer of said repairs, receive as much education concerning automotive repair and particularly the repair you are considering performing. While the videos featured on this channel do go into detail about particular repairs this channel does not claim that the information provided in said videos are 100% complete and accurate. YOU MUST HAVE A REPUTABLE REPAIR MANUAL FOR THE VEHICLE THAT YOU PLAN TO WORK ON THAT CONTAINS THE INFORMATION YOU NEED TO PROPERLY REPAIR SAID VEHICLE. Follow all repair procedures as outlined in your repair manual. Compare the information in your manual with the information in this channels videos. Follow your repair manual over this channels videos. Follow all safety instructions and warnings found in your manual. Also, read and follow the instructions for any piece of equipment, chemical, or tool that you may use in any repair. Also, check out the owners manual for the vehicle you are working on. There is a lot of good, important, and helpful information that can be found in it. Finally, above all, do everything you can to keep yourself safe. WEAR SAFETY GLASSES. WEAR IMPERMIABLE GLOVES. UNDERSTAND THE CHEMICALS YOU WILL BE EXPOSED TO AND GUARD YOURSELF FROM THEM.
Note: Even the most educated, seasoned, and talented technicians, or mechanics, are still subject to personal injury and property damage while performing automotive repair. I say again, use the information found in this channels videos at your own risk. Repair your vehicle at your own risk.
Music by:
Corporation Motivation by Audionautix is licensed under a Creative Commons Attribution license (https://creativecommons.org/licenses/by/4.0/)
Artist: http://audionautix.com/
Zombie Rock by Audionautix is licensed under a Creative Commons Attribution license (https://creativecommons.org/licenses/by/4.0/)
Artist: http://audionautix.com/
Created with MAGIX Movie Edit Pro 2016
4
views
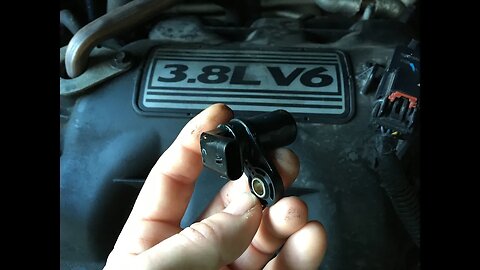
Crankshaft position sensor replacement 08 Chysler Town and Country 3.8L
In this video I'll be showing you how to replace a crank shaft position sensor on an 08 Chrysler Town and Country 3.8L V-6. This sensor is located on the transmission bell housing just behind the engine and underneath the cross over exhaust pipe.
A faulty crank shaft position sensor can cause a not start or stall. It can also cause random misfires.
Please Note:
Your vehicle may run a little awkwardly for the first day or so after replacing this sensor and erasing the computers memory. Your power train control module has to go through what is called a "relearn process". Once the PCM has learned you vehicle should run normally.
!!!!WARNING!!!!
Repair your vehicle at your own risk. While this channel will always strive to give you the most accurate information regarding automotive repair it would be foolish to assume that by watching a 5-30 minute video you too will be able to repair your vehicle without any errors or risk to your safety or risk to others safety. Costly mistakes can and will happen. When performing automotive repairs there is a high risk of personal injury. There is also a high risk for EXTREME frustration. There is also a risk of damaging your vehicle. This channel assumes no responsibility or liability for any personal injury or property damage that may take place using the information found in this channels videos. It is absolutely imperative that you the viewer, and performer of said repairs, receive as much education concerning automotive repair and particularly the repair you are considering performing. While the videos featured on this channel do go into detail about particular repairs this channel does not claim that the information provided in said videos are 100% complete and accurate. YOU MUST HAVE A REPUTABLE REPAIR MANUAL FOR THE VEHICLE THAT YOU PLAN TO WORK ON THAT CONTAINS THE INFORMATION YOU NEED TO PROPERLY REPAIR SAID VEHICLE. Follow all repair procedures as outlined in your repair manual. Compare the information in your manual with the information in this channels videos. Follow your repair manual over this channels videos. Follow all safety instructions and warnings found in your manual. Also, read and follow the instructions for any piece of equipment, chemical, or tool that you may use in any repair. Also, check out the owners manual for the vehicle you are working on. There is a lot of good, important, and helpful information that can be found in it. Finally, above all, do everything you can to keep yourself safe. WEAR SAFETY GLASSES. WEAR IMPERMIABLE GLOVES. UNDERSTAND THE CHEMICALS YOU WILL BE EXPOSED TO AND GUARD YOURSELF FROM THEM.
Note: Even the most educated, seasoned, and talented technicians, or mechanics, are still subject to personal injury and property damage while performing automotive repair. I say again, use the information found in this channels videos at your own risk. Repair your vehicle at your own risk.
Created with MAGIX Movie Edit Pro 2016
8
views

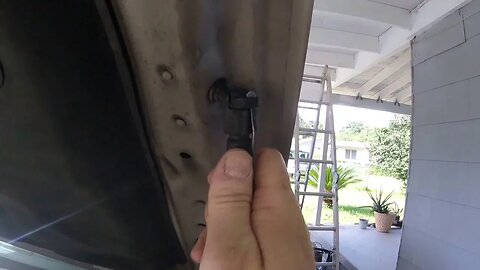
Hood Strut/ Shock Replacement
In this video I'll show you how to replace hood struts. Some people call them hood struts or hood shocks. While others call them hood supports. It is a very common problem for them to go out and not properly support the hood properly. The owner or technician working on the car usually doesn't find out until hood falls on their head or shuts unexpectedly. Its an easy fix and is usually inexpensive.
Barbour's Auto Help is not responsible for any damage or personal injury incurred in the process of performing any auto repairs done by you the viewer. It is the viewers responsibility to verify all information and procedures as outlined in YOUR REPAIR MANUAL AND OWNERS MANUAL FOR YOUR VEHICLE. Owning and using a repair manual suited for your vehicle is essential for correctly and safely performing ANY repair to your vehicle. Always wear safety glasses and heed all instructions for use applicable to any piece of equipment you may use. You can do it. Do it right and do it safely.
Music by:
Zombie Rock by Audionautix is licensed under a Creative Commons Attribution license (https://creativecommons.org/licenses/by/4.0/)
Artist: http://audionautix.com/
Created with MAGIX Movie Edit Pro 2016
2
views
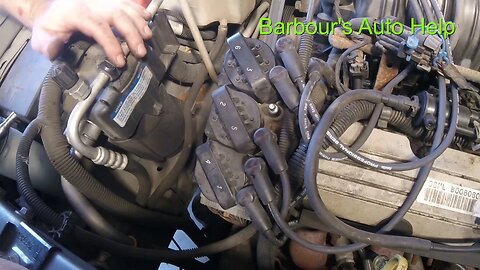
Igniton Coil Replacement GM 3.8L V-6
In this video I'll be showing you how to install an ignition coil on a GM 3.8L V-6. This engine is used in a myriad of GM vehicles. A 2001 Pontiac Bonneville is one of them. Its a quick and easy project and with the use of this video it should be even more quick and easy.
Note: It's not a bad idea to disconnect the battery before replacing the ignition coil. This will prevent someone from accidentally starting the vehicle on you.
GENERAL DISCLAIMER
Barbour's Auto Help is not responsible for any damage or personal injury incurred in the process of performing any auto repairs done by you the viewer. Automotive repair is extremely dangerous. Repair your vehicle at your own risk. It is the viewers responsibility to verify all information and procedures as outlined in YOUR REPAIR MANUAL AND OWNERS MANUAL FOR YOUR VEHICLE. Owning and using a repair manual suited for your vehicle is essential for correctly and safely performing ANY repair to your vehicle. Always wear safety glasses and protective gloves and heed all instructions for use applicable to any piece of equipment you may use. Due to circumstances out of the control of Barbour's Auto Help, Barbour's Auto Help makes no guarantee that by the use of the information given in this video a quality repair will be made. Barbour's Auto Help makes no guarantee that the information provided is totally complete, synchronized and accurate. Verify everything using an appropriate repair manual.
Repair and service your vehicle at your own risk! Barbour's auto help does not guarantee a proper repair using these techniques. Because of unforeseen circumstances and situations Barbour's Auto Help makes no guarantee that you will not damage your vehicle using the information in this video.
Music by:
Zombie Rock by Audionautix is licensed under a Creative Commons Attribution license (https://creativecommons.org/licenses/by/4.0/)
Artist: http://audionautix.com/
Created with MAGIX Movie Edit Pro 2016
5
views

Air Filter Replacement 01 Pontiac Bonneville 3.8L
Air Filter Replacement 2001 Pontiac Bonneville 3.8L V-6. This procedure is similar to other GM vehicles and could be used to help with those tasks.
Barbour's Auto Help is not responsible for any damage or personal injury incurred in the process of performing any auto repairs done by you the viewer. It is the viewers responsibility to verify all information and procedures as outlined in YOUR REPAIR MANUAL AND OWNERS MANUAL FOR YOUR VEHICLE. Owning and using a repair manual suited for your vehicle is essential for correctly and safely performing ANY repair to your vehicle. Always wear safety glasses and heed all instructions for use applicable to any piece of equipment you may use. You can do it. Do it right and do it safely.
Music by:
Zombie Rock by Audionautix is licensed under a Creative Commons Attribution license (https://creativecommons.org/licenses/by/4.0/)
Artist: http://audionautix.com/
Created with MAGIX Movie Edit Pro 2016

Home made mechanics soap test
This is a video that I made as a companion to a money savings tip I shared a few years back. The tip was how to make mechanics soap out of just sugar and dish detergents. Really simple. This video shows how well it actually works.
Here is a link to the video on how to make this stuff!
https://youtu.be/_WqNT58_RDQ
Created with MAGIX Movie Edit Pro 2016
2
views
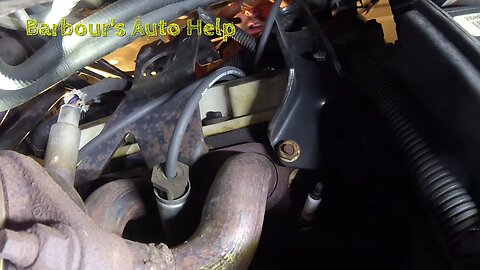
Rear spark plug replacement on a 2001 Pontiac Bonneville 3.8L series 2
In this video I'll be sharing some of the tips and tricks I've learned over the years for doing the rear spark plugs on a GM 3.8L series 2 V-6. These spark plugs are extremely difficult to do. Especially if the spark plugs have not been replaced in a long time. The spark plug boots tend to stick to the spark plugs increasing the difficulty of an already difficult task. The tips and tricks shown in this video should help in reducing this difficulty a bit.
Here is a video on how to gap spark plugs. Please read the description of video for further info.
https://youtu.be/jJU0T1A1ujk
. Music by:
Zombie Rock by Audionautix is licensed under a Creative Commons Attribution license (https://creativecommons.org/licenses/by/4.0/)
Artist: http://audionautix.com/
Repair your vehicle at your own risk!
Barbour's Auto Help is not responsible for any damage or personal injury incurred in the process of performing any auto repairs done by you the viewer. It is the viewers responsibility to verify all information and procedures as outlined in YOUR REPAIR MANUAL AND OWNERS MANUAL FOR YOUR VEHICLE. Owning and using a repair manual suited for your vehicle is essential for correctly and safely performing ANY repair to your vehicle. Always wear safety glasses and heed all instructions for use applicable to any piece of equipment you may use. You can do it. Do it right and do it safely.
Created with MAGIX Movie Edit Pro 2016

Hazard Flasher Replacement 01 Pontiac Bonneville
Hazard Flasher Replacement 01 Pontiac Bonneville
Music by:
Zombie Rock by Audionautix is licensed under a Creative Commons Attribution license (https://creativecommons.org/licenses/by/4.0/)
Artist: http://audionautix.com/
Created with MAGIX Movie Edit Pro 2016
Repair your vehicle at your own risk!
Barbour's Auto Help is not responsible for any damage or personal injury incurred in the process of performing any auto repairs done by you the viewer. It is the viewers responsibility to verify all information and procedures as outlined in YOUR REPAIR MANUAL AND OWNERS MANUAL FOR YOUR VEHICLE. Owning and using a repair manual suited for your vehicle is essential for correctly and safely performing ANY repair to your vehicle. Always wear safety glasses and heed all instructions for use applicable to any piece of equipment you may use. You can do it. Do it right and do it safely.
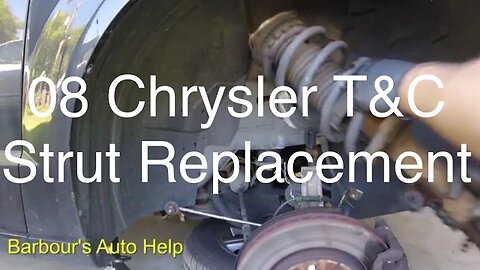
08 Chrysler Town and Country Struts and Strut Mounts Replacement
08 Chrysler Town and Country Touring Struts and Strut Mounts replacement.
Torque specifications
Clevis bolt 65 ft/lbs + 90 deg
Sway bar end links 65 ft/lbs
Strut mount to tower bolts 22 ft/lbs
Lug nuts 100 ft/lbs
Note: torque specs are available to the public through many sources including web sites hosted by parts stores.
DISCLAIMER
Barbour's Auto Help is not responsible for any damage or personal injury incurred in the process of performing any auto repairs done by you the viewer. Automotive repair is extremely dangerous. Repair your vehicle at your own risk. It is the viewers responsibility to verify all information and procedures as outlined in YOUR REPAIR MANUAL AND OWNERS MANUAL FOR YOUR VEHICLE. Owning and using a repair manual suited for your vehicle is essential for correctly and safely performing ANY repair to your vehicle. Always wear safety glasses and heed all instructions for use applicable to any piece of equipment you may use. Due to circumstances out of the control of Barbours Auto Help, Barbours Auto Help makes no guaranty that by the use of the information given in this video a quality repair will be made. Barbour'sAutoHelp makes no guaranty that the information provided is totally complete, syncronized and accurate. Verify everything using an appropriate repair manual. You can do it. Do it right and do it safely.
Repair your vehicle at your own risk! Barbour's auto help does not guaranty a proper repair using these techniques.
The use and distribution of any materials provided by Barbour's Auto Help is strictly prohibited outside the Youtube platform unless written permission has been provided. This includes embedded videos on websites other than Youtube.
Music by:
Zombie Rock by Audionautix is licensed under a Creative Commons Attribution license (https://creativecommons.org/licenses/by/4.0/)
Artist: http://audionautix.com
3
views

07-12 Nissan Altima Air Filter Replacement
In this video I'll be showing you how to replace an engine air filter on an 07 Nissan Altima. I believe the 07-12 Nissan Altima has a similar set up so this procedure could be used for this model year range.
Created with MAGIX Movie Edit Pro 2016
1
view

07 Nissan Altima 2.5L Spark Plug and Ignition Coil Replacement
This is a detailed "how to video"that will show you how to properly replace the spark plugs and an ignition coil on an 07 Nissan Altima 2.5L 4 cylinder. This video should have everything you need to successfully perform this task. Gap and torque specifications are provided. Spark plug fitment information is also supplied. Good Luck!
Sorry the video showing diagnosing a faulty ignition coil is no longer available.
Barbour's Auto Help is not responsible for any damage or personal injury incurred in the process of performing any auto repairs done by you the viewer. It is the viewers responsibility to verify all information and procedures as outlined in YOUR REPAIR MANUAL AND OWNERS MANUAL FOR YOUR VEHICLE. Owning and using a repair manual suited for your vehicle is essential for correctly and safely performing ANY repair to your vehicle. Always wear safety glasses and heed all instructions for use applicable to any piece of equipment you may use. You can do it. Do it right and do it safely.
MUSIC BY
Zombie Rock by Audionautix is licensed under a Creative Commons Attribution license (https://creativecommons.org/licenses/by/4.0/)
?Artist: http://audionautix.com/
Created with MAGIX Movie Edit Pro 2016
7
views

Battery Replacement 00-05 Bonneville and Lesabre
This is a step by step how to video on replacing the battery on 00-05 Pontiac Bonneville and 00-05 Buick Lesabre. I'll show you how to locate it and how to properly and safely remove and replace the battery.
Do note: A code may be needed, for some vehicles, to get the audio system operating again after the battery has been disconnected. This is usually located in your owners manual. Verify the code is there before replacing the battery.
Barbour's Auto Help is not responsible for any damage or personal injury incurred in the process of performing any auto repairs done by you the viewer. Repair your vehicle at your own risk!!! It is the viewers responsibility to verify all information and procedures as outlined in YOUR REPAIR MANUAL AND OWNERS MANUAL FOR YOUR VEHICLE. Owning and using a repair manual suited for your vehicle is essential for correctly and safely performing ANY repair to your vehicle. Always wear safety glasses and heed all instructions for use applicable to any piece of equipment you may use. You can do it. Do it right and do it safely.
MUSIC BY
Zombie Rock by Audionautix is licensed under a Creative Commons Attribution license (https://creativecommons.org/licenses/by/4.0/)
?Artist: http://audionautix.com/
Created with MAGIX Movie Edit Pro 2016
2
views
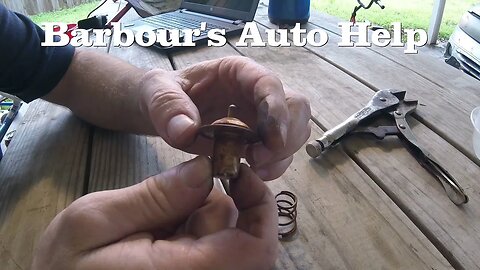
Detailed explanation and demonstration of thermostat operation
In this video you will be given a detailed explanation, verbal and visual, of how a thermostat works. The purpose of the thermostat is to quickly bring the coolant up to optimal temperature. Once that temperature is reached the thermostat then regulates that temperature. This is achieved through the use of a heat motor that is built into the thermostat. The heat motor is wax pellet design and starts to open the thermostat at the thermostats temperature rating. Once the coolant is 10 degrees above the temperature rating of the thermostat the thermostat is fully opened. The thermostat opens when temperature rises and closes when temperature falls thus regulating the coolant temperature. This video also includes the disection of the thermostat for further clarity.
Created with MAGIX Movie Edit Pro 2016
3.8L Coolant Elbow/Water Pump Bypass Elbow "Repair Tip"
In this video I'll be discussing the advantage of using metal coolant elbows/ water pump bypass elbows for a GM 3.8L series 2 engine. The first time I replaced these elbow I used the plastic black plastic ones like the ones the vehicle comes equiped with originally. This was a mistake as they where leaking again not very long after making that repair. If you planing on doing this project just go ahead and get the metal ones. They only cost a few bucks more and it will prevent you from having to make a repeat repair. Good luck to ya!
music
Corporation Motivation by Audionautix is licensed under a Creative Commons Attribution license (https://creativecommons.org/licenses/by/4.0/)
Artist: http://audionautix.com/
Zombie Rock by Audionautix is licensed under a Creative Commons Attribution license (https://creativecommons.org/licenses/by/4.0/)
Artist: http://audionautix.com/
Created with MAGIX Movie Edit Pro 2016
1
view

MUSTANG WATER LEAK SOLUTION
Parking underneath trees can really cause you a head ache! Especially if you are the owner of a late model Mustang. I you own a Mustang and have noticed your passenger side floor board getting wet then this vidoe may be for you. The video applies to Mustangs from 2005, I believe, to 2014. Take a look and see if the information helps!
Barbour's Auto Help is not responsible for any damage or personal injury incurred in the process of performing any auto repairs done by you the viewer. It is the viewers responsibility to verify all information and procedures as outlined in YOUR REPAIR MANUAL AND OWNERS MANUAL FOR YOUR VEHICLE. Owning and using a repair manual suited for your vehicle is essential for correctly and safely performing ANY repair to your vehicle. Always wear safety glasses and heed all instructions for use applicable to any piece of equipment you may use. You can do it. Do it right and do it safely.
music
Corporation Motivation by Audionautix is licensed under a Creative Commons Attribution license (https://creativecommons.org/licenses/by/4.0/)
Artist: http://audionautix.com/
Zombie Rock by Audionautix is licensed under a Creative Commons Attribution license (https://creativecommons.org/licenses/by/4.0/)
Artist: http://audionautix.com/
Created with MAGIX Movie Edit Pro 2016
1
view

Nylon fuel line repair kit "Repair Review"
In this video I discuss the pros and cons for installing a nylon fuel line repair kit on a GM 3.8l V-6. This repair was performed on a 2001 Pontiac Bonneville 3.8l. Hopefully the information given in this review will help you in you decision on weather or not to install one yourself. There is a special tool out there that was made just for this. However, most people do not own this tool and the installation of this kit is very difficult without it.
MUSIC
Corporation Motivation by Audionautix is licensed under a Creative Commons Attribution license (https://creativecommons.org/licenses/by/4.0/)
Artist: http://audionautix.com/
Zombie Rock by Audionautix is licensed under a Creative Commons Attribution license (https://creativecommons.org/licenses/by/4.0/)
Artist: http://audionautix.com/
Created with MAGIX Movie Edit Pro 2016
1
view
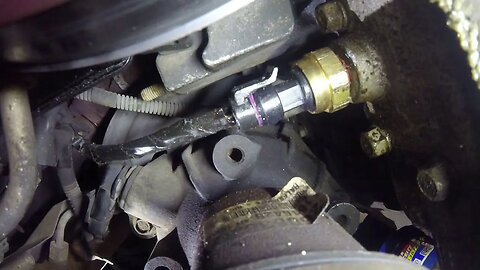
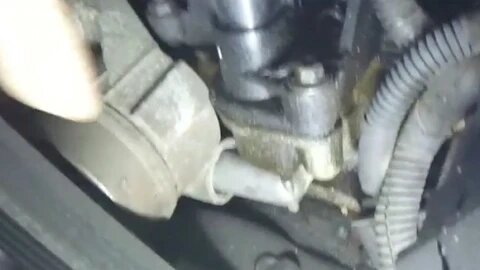
How To Replace an Oil Pressure Sending Unit On a GM 3.8l V6
This is a simple video outlining the procedures for replacing the oil pressure sending unit on a GM 3.8L series 2 engine. This particular engine is in a myriad of General Motors vehicles like the Impala, Bonneville, and GM mini-vans. A leaking oil pressure sending unit seems to be a very common problem for these automobiles fitted with this engine. This video coupled with your repair manual should give you the information needed to take on this project successfully. Have fun and be safe!
Torque specification for the oil pressure sensor on this vehicle, 2001 Pontiac Bonneville, is 89 inch/ lbs.
Note: torque may differ from vehicle to vehicle.
Here is a link to another video going further into the location of the sensor.
https://youtu.be/V4dCp2oQgYg
Barbour's Auto Help is not responsible for any damage or personal injury incurred in the process of performing any auto repairs done by you the viewer. It is the viewers responsibility to verify all information and procedures as outlined in YOUR REPAIR MANUAL AND OWNERS MANUAL FOR YOUR VEHICLE. Owning and using a repair manual suited for your vehicle is essential for correctly and safely performing ANY repair to your vehicle. Always wear safety glasses and heed all instructions for use applicable to any piece of equipment you may use. You can do it. Do it right and do it safely.
Created with MAGIX Movie Edit Pro 2016
Special music-
Corporation Motivation by Audionautix is licensed under a Creative Commons Attribution license (https://creativecommons.org/licenses/by/4.0/)
Artist: http://audionautix.com/
Zombie Rock by Audionautix is licensed under a Creative Commons Attribution license (https://creativecommons.org/licenses/by/4.0/)
Artist: http://audionautix.com/
8
views

How to replace a PCV valve on a GM 3.8L V-6
In this video I'll show you how to replace the PCV valve on a GM 3.8L V-6. The particular vehicle I'm working on in this video I'm actually working on a 2001 Pontiac Boneville, but this engine was used by GM for a number of vehicles over several years.
If you plan to do this project yourself just be careful. The MAP sensor mounts just over the valve and is easily broken. Move slowly and deliberately.
Barbour's Auto Help is not responsible for any damage or personal injury incurred in the process of performing any auto repairs done by you the viewer. It is the viewers responsibility to verify all information and procedures as outlined in YOUR REPAIR MANUAL AND OWNERS MANUAL FOR YOUR VEHICLE. Owning and using a repair manual suited for your vehicle is essential for correctly and safely performing ANY repair to your vehicle. Always wear safety glasses and head all instructions for use applicable to any piece of equipment you may use. You can do it. Do it right and do it safely.

How To Change a Belt Tensioner - Dodge Tensioner
This is a step by step instructional video on how to change a serpentine belt tensioner. The particular vehicle that's being worked on is a 1998 Dodge Durango with a 5.2 liter V-8, but this 5.2 liter can be found in many other Dodge vehicles spanning years of production. I also get into how the tensioner is supposed to work and what to look for in a "bad" tensioner.
The torque specification for the tensioner nut is 50 ft/lbs
Barbour's Automotive Training is not responsible for any damage or personal injury incurred in the process of performing any auto repairs done by you the viewer. It is the viewers responsibility to verify all information and procedures as outlined in YOUR REPAIR MANUAL AND OWNERS MANUAL FOR YOUR VEHICLE. Owning and using a repair manual suited for your vehicle is essential for correctly and safely performing ANY repair to your vehicle. Always wear safety glasses and heed all instructions for use applicable to any piece of equipment you may use. You can do it. Do it right and do it safely.
2
views

Money Saving Tip #2 - How To Make Your Own Mechanics Soap
In this video I'll show you how to make your own mechanics hand soap. I've used a lot of mechanics hand soap in my time and this stuff works just about as good, but cost a lot less. The recipe is 3 parts granulated sugar and 1 part dish detergent. (I prefer the blue kind). Mix the parts together and your all set. Store the remaining unused soap for future use.
Here is a link to a video showing how well this recipe works.
https://youtu.be/3A5qqjwIHLQ