

Enjoyed this channel? Join my Locals community for exclusive content at
noreenskitchen.locals.com!

3 FAMILY FAVORITE SOUP RECIPES!! WARM & WONDERFUL!!
Soup may be the theme of January! There is no denying that when the cold sets in soup comes to mind! Nothing is more warming or soothing than a steaming bowl of your favorite soup and these three definitely fall into the category of favorite! Our family loves all of these soups. One you make on top of the stove. One you make in the slow cooker and the last you make in the pressure cooker. They are all adaptable and versatile to your taste and you can put your own spin on things, should that be something you desire!
The potato soup is a family favorite and is the recipe of Rick's mom Judy. She makes hers with the addition of some homemade dumplings but we made it without. It is utterly delicious with the dumplings though and I highly recommend the addition of them! this is a brothy potato soup full of veggies and warm deliciousness.
The beef barley soup is the favorite of Rick and my dad but the girls love it equally as much. Slow cooked to break down the stew meat which makes this soup rich and delicious. The addition of lots of veggies and pearl barley make this soup irresitable and a meal in a bowl. The only thing you might like to add is some homemade biscuts or warm crusty bread on the side.
The last soup is my pressure cooker chicken tortilla soup. This goes together super fast with ingredients from your pantry shelf, freezer and spice rack. I am using tomatoes with green chilies but you can simply use some diced tomatoes if the heat is not your style. Same with the chipotle pepper, if you are not a fan, leave it out. This soup will be delicious without the heat. This cooks up quick in the pressure cooker, but you could easily make this in the slow cooker. Shred up the chicken when it's tender and falling apart, add it back to the tomatoey broth and serve with sour cream, shredded cheese, diced avocado, chopped onion, fresh springs of cilantro, lime wedges and tortilla chips. This will quickly become a family favorite in your house!
I hope you give all these a try this cold winter season or anytime!
You can find printable versions of these recipes here:
Judy's Potato Soup: https://bit.ly/3A568xL
Slow Cooker Beef Barley Soup: http://bit.ly/2XzEzJf
Pressure Cooker Chicken Tortilla Soup: http://bit.ly/2VlEisa
Happy eating!
Get my cookbooks here: http://bit.ly/1czqM5R
Business Inquiries can be sent to:
info@noreenskitchen.com
Check me out on social media!
Facebook: http://on.fb.me/12bdibt
Twitter: @noreenskitchen
Instagram: http://bit.ly/12bdqrp
Google + http://bit.ly/1o5GMYy
***MAILING ADDRESS****
Noreen's Kitchen
PO Box 14173
New Bern, NC 28561
Have a question for me? Send me an email:
info@noreenskitchen.com
Noreen's Kitchen Community Guidelines (The Rules)
http://bit.ly/2i7VocU
Any links to Amazon are, in many cases, affiliate links.
Produced by Noreen's Kitchen ©2008-2016 all rights reserved All embeds must live link to Noreen's Kitchen channel. No Editorial Excerpts without permission, Violators agree to pay royalties, all court costs, all collections & all lawyers fees.
128
views

MAINE STYLE SHRIMP AND LOBSTER ROLL!! DECADENT AND DELICIOUS!!
Let's use the lobster we made in the pressure cooker along with some shrimp I made the same way as well as that delicious, creamy, lemon dill dijonnaise to create our own version of a regional North Eastern classic, the lobster roll! My version of this northeastern favorite is chock full of cooked lobster tail meat and jumbo shrimp tossed with some crispy, crunchy veggies and that creamy lemony dressing. All stuffed into the obligitory top split brioche bun. This one is truly decadent and delicious! A great way to wind up summer with friends and family when you really want to treat them right!
This one is super simple and when you have all the components in place it is lightening fast! I am using both shrimp and lobster to put my spin on a traditional Maine style lobster roll sandwich. I used four lobster tails but this did not really render enough meat for me to make even two sandwiches stuffed properly so I cooked up some additional jumbo shrimp that I had in the freezer from earlier in the summer. I cooked the shrimp in the pressure cooker as well and just rapid cooled it in some ice water after it was finished cooking. The lobster and the shrimp have both been cut up into similiarly sized chunks. Not too big and not too small. Like Goldilocks would like them, just right!
The lobster and shrimp get tossed in a bowl with some minced celery, green onion and parsley. Then pour on just enough of that delicious creamy, lemon dill Dijonnaise to coat everything lightly. You do not want to over dress this filling and you don't want to have any of the sauce pooling in the bottom of the bowl. Over dressing is going to be the enemy here. Then using a fork, gently toss the whole mixture together so as not to break up the meat further. Remember, we want nice chunks of lobster and shrimp. We aren't trying to make a tuna salad.
When your filling is ready, stuff this into some delicious split to brioche buns. If you cannot find the split top buns or even the brioche buns, a standard hot dog bun will do. You want a nice soft bread here, not a hard roll. A great alternative would be a potato hot dog bun. Then stuff the filling in those buns, again, not too much, and not too little. Don't be stingy but don't give away the farm either!
Now it's time to enjoy! Serve these up with pints of your favorite lager, pale ale or grolsch and some kettle cooked chips! Extra points if you fry up your own chips! Waffle fries would be a great option here as well! Then feast to your hearts content with friends and family because good food is even better with good company!
I hope that this gives you a great idea for your next get together! Something a little different and a lot delicious! I hope you give this Maine style shrimp and lobster roll with lemon dill Dijonnaise a try sometime soon and I hope you love it!
Happy Eating!
A printable version of this recipe can be found here: https://bit.ly/3jQBG3U
Get my cookbooks here: http://bit.ly/1czqM5R
Business Inquiries can be sent to:
info@noreenskitchen.com
Check me out on social media!
Facebook: http://on.fb.me/12bdibt
Twitter: @noreenskitchen
Instagram: http://bit.ly/12bdqrp
Google + http://bit.ly/1o5GMYy
***MAILING ADDRESS****
Noreen's Kitchen
PO Box 14173
New Bern, NC 28561
Have a question for me? Send me an email:
info@noreenskitchen.com
Noreen's Kitchen Community Guidelines (The Rules)
http://bit.ly/2i7VocU
Any links to Amazon are, in many cases, affiliate links.
Produced by Noreen's Kitchen ©2008-2016 all rights reserved All embeds must live link to Noreen's Kitchen channel. No Editorial Excerpts without permission, Violators agree to pay royalties, all court costs, all collections & all lawyers fees.
155
views

PANTRY SHELF CHICKEN NOODLE SOUP!! PANTRY COOKING RECIPE!!
Today I am coming at you with another quick and easy but delicious pantry shelf recipe. This recipe is going to take all it's ingredients from my pantry shelf to make a delicious, homestyle chicken noodle soup that is full of flavor and noodle goodness! This is a great way to start getting used to cooking from your pantry and making your food dollar stretch! Pair this with a tossed salad, a baked potato, some grilled cheese sandwiches or homemade biscuits and you have a satisfying meal that is sure to please even the pickest eater. When times are tough and we have a hard time sourcing ingredients, we can still eat like kings and feed the bellies and nourish the bodies of our loved ones with ease. It just takes a little planning and a little creativity!
Can you open a can of chicken noodle soup from your pantry shelf. Yes! Of course you can! However it will take more than one to make the amount we are going to make here and making it with the ingredients we are using we are controlling the over all "extras" that may be found in the processed soup. This is a great way to stretch your food dollar and use leftover grilled or roasted chicken. If you are a home canner use your homemade chicken stock and canned chicken to make this even more "homemade". My goal here is to encourage people who may be seeing bare grocery shelves, and who have never considered keeping more than a week's worth of groceries in their home to expand their thinking and prepare for the future, even if it's just a little. To quell fears and put minds at ease. With just a few ingredients you can eat well and be nourished.
This all starts with a quart of stock. I am using bone broth, but you can use canned chicken stock, regular chicken broth, fancy stock, or make up the equivalent amount with chicken bullion powder. To that I have added one large can of chunk white meat chicken, a can of mixed vegetable medley and one small bag of Fideo noodles as well as a selection of spices that I know my family will enjoy. This is simmered until the noodles are soft and served with your choice of sides and toppings or mix ins.
I know, on the surface this looks very simple, but sometimes we need to be reminded not to over think and the simplicity in this soup is just beautiful. Who doesn't love sitting down to a big bowl of chicken noodle soup. It calms the soul and feeds the mind as well as the body. There really is something to be said for it.
If you want to think a bit outside the box, you can easily take this idea and turn it into a creamy chicken and rice with mushroom soup by leaving out the noodles, adding in some cooked long grain or wild rice and stirring in some shelf stable heavy cream or crema or even a can of cream of mushroom or chicken soup and a can of drained mushrooms. Toss in a splash of sherry as well as a dash of worcestershire sauce and you have something worthy of company!
Prefer a chicken tortilla soup? You can leave out the noodles if you like, but leaving them in would be fine. Take away the mixed veggies, add in a can of sweet corn, and a can of tomatoes and green chilies, stir in some taco seasoning and other Mexican spices along with a bit of chopped chipotle chilies and simmer. You can use noodles or rice here, your choice! Top with crushed tortilla chips or if you don't have those, season some corn flakes up with taco seasoning and a little butter, in a skillet! Instant taco-y crunch!
Think outside the box to make this your own. What do you have on your pantry shelf that would make a delicious pot of simmering soup that your family would love? I think once you start tossing this around in your brain, you will come up with something amazing!
The cost breakdown for this soup as I made it is as follows. I used mostly store brand items:
1 quart of bone broth: $2.56
1 large can chunk chicken: $1.62
1 can mixed vegetables: $0.62
1 bag Fideo Noodles: $0.38
Assorted seasonings: $0.25
Total cost: $5.43
Total cost per serving (6): $0.91
I hope you give this pantry shelf chicken soup a try sometime soon and I hope you love it!
Happy eating!
Get a printable version of this recipe here: https://bit.ly/3vtE5pp
Get my cookbooks here: http://bit.ly/1czqM5R
Business Inquiries can be sent to:
info@noreenskitchen.com
Check me out on social media!
Facebook: http://on.fb.me/12bdibt
Instagram: http://bit.ly/12bdqrp
Noreen's Kitchen Community Guidelines (The Rules)
http://bit.ly/2i7VocU
Any links to Amazon are, in many cases, affiliate links.
Produced by Noreen's Kitchen ©2008-2016 all rights reserved All embeds must live link to Noreen's Kitchen channel. No Editorial Excerpts without permission, Violators agree to pay royalties, all court costs, all collections & all lawyers fees.
183
views

ORIGINAL CALIFORNIA ONION DIP!! NOREEN'S KITCHEN
HAPPY HOLIDAYS!! The end of the year is upon us and all of these wonderful opportunities to be with our community of famiy and friends. Today is my launch of The Holidays are Coming for 2022 and in true form, we are going retro with this throwback Original California Onion Dip!! This ridiculously simply dip has been around as long as I have and it never disappoints. If you have never made it you are in for a treat. If you already know how to make it, maybe it's been a whle since you did. Here is your reminder of how delicious this simple dip is to make. Two ingredients, are all you need to make an amazing dip to serve at your holiday gatherings, game nights, community groups and open house events. I hope that you will give this a try sometime soon and I hope you love it!
Happy Eating and Happy Holidays!
#shorts
124
views
1
comment

HOW TO USE THE ALEX BY DASH ELECTRIC FLIP BUNDT CAKE MAKER!!
Last week, when I shared my “What I Got for Christmas” video and showed you this Alex by Dash Bundt Cake Maker and asked if you wanted to see it in action, the response was overwhelming! Nearly everyone who commented say YES! So here we are! Come see what this fun little gadget is all about! So many possibilities!
I will be sharing with you how to use this Bundt cake maker with a regular cake mix that I prepared my way. One cake mix makes two 8 inch Bundt cakes, each taking about 13 minutes to bake. The vessel is non stick and easy to wipe clean and it comes with a seriously genius lifter that you bake right in with the cake that helps to lift it out once it is done baking. I can’t say enough good things about this little gadget except that it is really the best one ever! I look forward to using it in the future to make more things like frittata, corn bread, monkey bread and more! I think there is so much potential here, that there are endless possibilities!
If you want to get one for yourself here is the QVC Link: https://qvc.co/32VO10Z
The only way I make my cake mix:
1 Duncan Hines Cake mix (This is only for this brand. I cannot guarantee how other brands will work)
1-4 serving size box of instant pudding that compliments the flavor of the cake mix.
1 cup water
½ cup oil
4 eggs.
Blend well with mixer until smooth.
Bake as desired. The mix will make 1-9x13 cake pan, 2-9 inch rounds, 3-8 inch rounds, 1-standard Bundt cake, 24 cupcakes or 2 of these Bundt cake maker cakes.
I hope you give this a try and I hope you love it!
Happy Eating!
Get my cookbooks here: http://bit.ly/1czqM5R
Business Inquiries can be sent to:
info@noreenskitchen.com
Check me out on social media!
Facebook: http://on.fb.me/12bdibt
Twitter: @noreenskitchen
Instagram: http://bit.ly/12bdqrp
Google + http://bit.ly/1o5GMYy
***MAILING ADDRESS****
Noreen's Kitchen
PO Box 14173
New Bern, NC 28561
Have a question for me? Send me an email:
info@noreenskitchen.com
Noreen's Kitchen Community Guidelines (The Rules)
http://bit.ly/2i7VocU
Any links to Amazon are, in many cases, affiliate links.
Produced by Noreen's Kitchen ©2008-2016 all rights reserved All embeds must live link to Noreen's Kitchen channel. No Editorial Excerpts without permission, Violators agree to pay royalties, all court costs, all collections & all lawyers fees.
106
views
1
comment

PANTRY PINEAPPLE PIE FILLING AND TOPPING!! A CAN A PAN A PLAN!!
#pineapple #piefilling #pantryrecipe #acanapanaplan #cookingonabudget
Today I have something a little different but very delicious! This is a pantry recipe that uses a can of crushed pineapple to make both a delicious fruity pie filling and a delicious ice cream topping! This is the perfect filling for no bake pies, tarts, pastries, hand pies or cake layers! Use the topping for your ice cream and banana splits or even as a base for a an amazing ham or chicken glaze! This is versatile and simple. It uses pantry staples that you may already have on hand. We will be using this in an upcoming recipe on the channel, so be sure to stay tuned! I know you are going to love it!
This is a pantry series I am officially calling "A Can, A Pan, A Plan". Meaning all you need comes from your pantry stock and uses a pan and a little planning. Easy peasy, lemon squeezy! As some of my friends like to say! This filling is super easy and goes together much like a lemon pie filling. You start by mixing the sugar and some corn starch along with a can of crushed pineapple and lemon juice. Heating that over medium high heat and stirring constantly until it is thick and translucent. Then you simply remove from heat, transfer to a container and allow to cool completely before storing in the fridge for up to two weeks.
I know some will ask if this can be canned and the answer is no. The cornstarch is a no go for canning and if you want to make a pineapple jam, I have an older video for that if you are interested. I also do not suggest freezing this for the same reason. Corn starch is not very stable and when it is frozen then thawed it breaks down and does not remain thick. You can also choose to use instant or cooked clear jel but I would not be sure of the measurements for those items, but also know that they will break down also over time.
I also turned this into a delicious ice cream topping or fruit syrup that can be used on your ice cream or even as a base for a delicious ham glaze for your Easter ham or as a wonderful option for a pineapple and mustard glaze for chicken or pork. There are a lot of possibilities here whether they are sweet or savory.
We will be using this in an upcoming recipe on the channel and I know you will love that as well, so be sure to stay tuned to see what we do with this! I know that we are all starting to feel that belt tighten and this series along with a couple others that are coming I hope will fill the need for more economical and creative ways to use them!
I hope you give this pantry pineapple pie filling and topping a try, sometime soon and I hope you love it!
Happy Eating!
You can find a printable version of this recipe here: https://bit.ly/3Kvs6hd
Get my cookbooks here: http://bit.ly/1czqM5R
Business Inquiries can be sent to:
info@noreenskitchen.com
Check me out on social media!
Facebook: http://on.fb.me/12bdibt
Twitter: @noreenskitchen
Instagram: http://bit.ly/12bdqrp
Google + http://bit.ly/1o5GMYy
***MAILING ADDRESS****
Noreen's Kitchen
PO Box 14173
New Bern, NC 28561
Have a question for me? Send me an email:
info@noreenskitchen.com
Noreen's Kitchen Community Guidelines (The Rules)
http://bit.ly/2i7VocU
Any links to Amazon are, in many cases, affiliate links.
Produced by Noreen's Kitchen ©2008-2016 all rights reserved All embeds must live link to Noreen's Kitchen channel. No Editorial Excerpts without permission, Violators agree to pay royalties, all court costs, all collections & all lawyers fees.
109
views
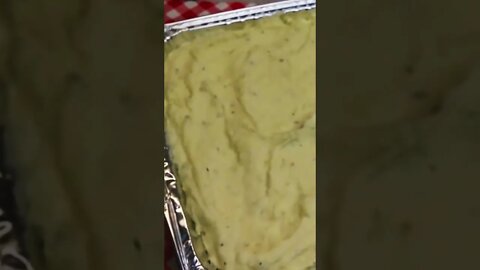
MEDITERRANEAN MARINATED FETA CHEESE!! FRESH AND FLAVORFUL!!
Keeping with our current Mediterranean theme, we are going to share this super simple recipe for marinated feta cheese, which is a lovely addition to a Mezza or Mediterranean appetizer platter that is a great option for a light lunch or supper and full of delicious bites that can be shared with a group of people. This marinated feta is delicious and versatile. You can snack on it as it or add to your salad, your wrap sandwich or as a wonderful accompaniment to your Gyro, Souvlaki or Schwarma. Full of flavor and spice, this creamy, marinated cheese is sure to please!
I have started off with some solid blocks of feta cheese and I recommend that this is where you start as well. You get a much fresher result, and you can cut the cubes into the size you like. I have use 12 ounces, mostly because I had one half of an open container and also cut up a full block. This will be easy for us to use up, so I am not worried. The goal here is to flavor and then submerge the cheese cubes in good quality olive oil. These do not take much longer than a day to marinate but the longer they sit the better and more flavorful they get. I cut my cubes about ½ inch in size.
Next, we will make a dressing of sorts. Using the juice and zest of one lemon then adding fresh chopped garlic, parsley, either dried or fresh, red pepper flakes and smoked paprika which will add a heat factor here. You can adjust the levels to suit your taste or leave them out if you prefer. I also added some Greek seasoning as well as some peppercorns and course grind black pepper. The truth is that you can add what you like. Fresh rosemary and thyme would be great here as well as a fresh chili pepper, pierced to add flavor. Some bay leaf would be nice too if you like.
Mix up the seasonings with the lemon juice, garlic and zest and add a splash of olive oil. You don’t have to be too specific here. A couple tablespoons will do the trick and its just to get everything coated and on the way to marination. Once you have the “dressing” mixed up add the cubed feta to the bowl and gently toss to coat. Being sure to coat all the cubes evenly. Once this is done transfer the cheese to a jar or container with a tight-fitting lid.
Once the cheese is in it’s final resting place, pour over some good quality olive oil of your choice. You can use extra virgin or light, whatever you prefer. Be sure to pour over enough oil to submerge the cheese so nothing dries out and everything gets even marination. Now you will want to seal this up and put it in your fridge for at least four hours before serving but overnight is best and honestly you can keep this in your fridge for ten days or longer as long as the cheese is kept under the oil. The cheese will eventually begin to break down, but that is the nature of the feta, so be sure to make what you will use in that period.
Marinated feta is great on that Mezza platter I mentioned but equally at home in a salad, on a pita or just by itself for snacking. I think you will find that the flavors are delicious together and everything compliments the creamy cheese and the oil flavors everything so well. Speaking of the oil, don’t throw that out! You have delicious, flavored oil that can be used as a base for a Greek style vinaigrette dressing, marinade or just drizzled over fresh sliced tomatoes or freshly grilled chicken, pork, lamb or beef. I think you will find a lot of versatility here.
I hope you give this marinated feta cheese a try sometime soon and I hope you love it!
Happy Eating!!
You can find a printable version of this recipe here: https://bit.ly/3Cf83QX
Get my cookbooks here: http://bit.ly/1czqM5R
Business Inquiries can be sent to:
info@noreenskitchen.com
Check me out on social media!
Facebook: http://on.fb.me/12bdibt
Twitter: @noreenskitchen
Instagram: http://bit.ly/12bdqrp
Google + http://bit.ly/1o5GMYy
***MAILING ADDRESS****
Noreen's Kitchen
PO Box 14173
New Bern, NC 28561
Have a question for me? Send me an email:
info@noreenskitchen.com
Noreen's Kitchen Community Guidelines (The Rules)
http://bit.ly/2i7VocU
Any links to Amazon are, in many cases, affiliate links.
Produced by Noreen's Kitchen ©2008-2016 all rights reserved All embeds must live link to Noreen's Kitchen channel. No Editorial Excerpts without permission, Violators agree to pay royalties, all court costs, all collections & all lawyers fees.
124
views
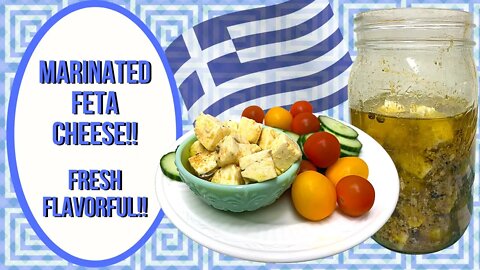
NO YEAST SANDWICH BREAD!! PANTRY COOKING!!
Today we are sharing this awesome alternative to a yeast sandwich bread. No yeast sandwich bread is like a quick bread. It is very simple to make with pantry staple ingredients and its a great way to get some bread on the table should you either have run out of yeast or find your yeast has died or you simply cannot find yeast. This is a substantial loaf and it's a bit heavier than a yeasted version of sandwich bread but it is no less delicious! This is a great way to dip your toe into bread making if you have been reluctant or overwhelmed at the idea of trying to bake bread on your own. There is no time like the present to give this a try!
This no yeast version of sandwich bread is technically a quick bread. Very reminiscent of Irish Soda bread but it is much softer, with a much tigher crumb and it has a bit of sweetness to it. Perfect for toasting or just making a delicious sandwich. This is going to be right at home next to your over easy eggs as it is for your tuna salad sandwich. It's also a great option to have in your recipe box for times when we are looking at limited resources.
This is a batter bread and it mixes up as you might expect, like a batter. All purpose flour, blended with salt, sugar and lots of baking powder! Not baking soda. Baking powder is our leavening agent here and it does the job nicely. Milk and oil are used as our liquids. You can choose to use refrigerated milk or any type of milk you like, canned milk such as evaporated milk that has been cut with water to the recommended rations will work fine here, just as any type of plant or nut milk, will do the trick. I have used sunflower oil but you can choose any type of oil such as olive, avocado or canola.
Everything gets put in the bowl and mixed up well. I am using my mixer today but you can easily do this by hand. It may take a bit longer to achieve that smooth consistency to the batter than it would with the mixer but still it can be done without much extra effor. A hand mixer might also work well here.
I prepared a standard, 9x5 inch loaf pan with cooking spray and lined it with some parchment that extended over both long sides as a way to later assist with getting the finished loaf out of the pan after it is baked. I also sprayed the parchment.
The batter is poured into the prepared pan and evenly distributed. I like to tap the top of the batter with a silicone spatula to be sure to smooth it down as best as I can this will help to give the top a nice finish. Into a 375 degree oven for between 40 and 55 minutes. Mine baked for 20 minutes at which point I checked it and it was nicely browned on top. So I placed a piece of foil on the loaf and returned it to the oven for the remainder of the cooking time. At the 40 minute mark I tested the loaf with a skewer and it was still a bit wet so I returned it to the oven for an additional 10 to 15 minutes. Once done, I tested it and removed it from the oven and left it in the pan on a cooling rack for 10 minutes. I removed the loaf from the pan and removed the parchment from the loaf and allowed it to cool for a hour before slicing with a serrated knife. This will slice very well once completely cooled, but it sliced just fine when it was a little bit warm.
We toasted a couple slices after we finished the video and it was delicious with some butter on it. This bread will be great used for sandwiches, next to eggs for breakfast or as French Toast or even a PB&J anytime.
I hope you give this no yeast sandwich bread a try sometime soon and I hope you love it!
Happy eating!
You can find a printable version of this recipe here: https://bit.ly/3GvBQXy
Get my cookbooks here: http://bit.ly/1czqM5R
Business Inquiries can be sent to:
info@noreenskitchen.com
Check me out on social media!
Facebook: http://on.fb.me/12bdibt
Twitter: @noreenskitchen
Instagram: http://bit.ly/12bdqrp
Google + http://bit.ly/1o5GMYy
***MAILING ADDRESS****
Noreen's Kitchen
PO Box 14173
New Bern, NC 28561
Have a question for me? Send me an email:
info@noreenskitchen.com
Noreen's Kitchen Community Guidelines (The Rules)
http://bit.ly/2i7VocU
Any links to Amazon are, in many cases, affiliate links.
Produced by Noreen's Kitchen ©2008-2016 all rights reserved All embeds must live link to Noreen's Kitchen channel. No Editorial Excerpts without permission, Violators agree to pay royalties, all court costs, all collections & all lawyers fees.
115
views
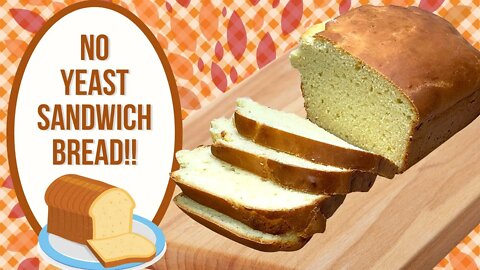
HONEY GARLIC GLAZED SALMON!! EASY AND ELEGANT!!
Time for a main dish so quick, easy and elegant you can serve it to guests on a weeknight! Yes, I said a weeknight! This honey garlic glazed salmon is a real winner. So fast and easy you won't even believe it! The glaze mixes up fast using ingredients that we all probably have on hand and all you need to do while its baking is fix a big salad or steam some veggies and make some rice on the side. I love a quick dinner, especially on a busy night. This one is good enough for company and I know you and your family are going to love it!
This starts off with some good, fresh salmon filets. I have some non frozen, wild caught, atlantic salmon, but love a good Alaskan version as well. I also prefer to purchase the whole side of salmon and remove the skin myself, but today my grocery store only had this prepackaged fresh version available. I have four nice filets that were also skinless. My preference but if you like, leave the skin on. It will not get crispy with this preparation so that I why I prefer to leave it off.
Mixing up this glaze is super simple. Some honey, soy sauce, grainy, brown or Dijon mustard, lemon juice and chopped garlic make an amazing glaze that goes on the filets. I just whisked this together and then brushed it on. Preheat your oven to 350 degrees and pop the salmon in for 20 to 25 minutes checking at the 10 minute mark to baste again with more glaze. You want to be sure not to overcook your salmon it should just flake and still be moist and if you prefer just a little less than well done in the middle. I like mine just done. Pull it from the oven and allow to rest while finishing up the rest of your meal.
I used about half the glaze on the baking fish and popped the rest in a saucepan. When the fish was done, I tipped the liquid from the roasting pan into the saucepan as well then turned that on full crack and monitored it until it reduced down to a lovely jammy consistency. I brushed this reduced glaze over the filets for a finishing touch. If desired sprinkle the salmon with some toasted sesame seeds for a great garnish.
This salmon is lovely eaten straight from the oven or it can be served cold on a salad platter later. The leftovers are lovely for this and later we will be sharing a video of a composed salad using one of these filets served cold and flaked to perfection.
I hope you give this honey garlic glazed salmon a try sometime soon and I hope you love it!
Happy Eating!
A printable version of this recipe can be found here: https://bit.ly/3CsLYxH
Get my cookbooks here: http://bit.ly/1czqM5R
Business Inquiries can be sent to:
info@noreenskitchen.com
Check me out on social media!
Facebook: http://on.fb.me/12bdibt
Twitter: @noreenskitchen
Instagram: http://bit.ly/12bdqrp
Google + http://bit.ly/1o5GMYy
***MAILING ADDRESS****
Noreen's Kitchen
PO Box 14173
New Bern, NC 28561
Have a question for me? Send me an email:
info@noreenskitchen.com
Noreen's Kitchen Community Guidelines (The Rules)
http://bit.ly/2i7VocU
Any links to Amazon are, in many cases, affiliate links.
Produced by Noreen's Kitchen ©2008-2016 all rights reserved All embeds must live link to Noreen's Kitchen channel. No Editorial Excerpts without permission, Violators agree to pay royalties, all court costs, all collections & all lawyers fees.
92
views

SLOW COOKER PORK CARNITAS!! DUMP AND GO CROCK POT MEAL IDEA!!
Today we are going to use some of that Carnitas seasoning blend to make a delicious slow cooked carnitas for tacos or whatever you like. This is super easy to do but as a dump and go recipe goes this is a little more entailed but so worth it in the end! Slow cooked pork shoulder with delicious spices until it falls apart and then gets crispy fried in a skillet then stuffed into a flavorful street taco with all the fixings. What could be better than that? Perfect for anytime you want to make tacos or burritos. Perfect for parties, tailgates or taco Tuesday! I know that you are going to love this!
Carnitas is a very traditional dish and while mine may be a bit untraditional, it is still delicious. Anyone who would like to tell me that I am doing it all wrong, can simply save it for someone who cares. Just because I don't do it your way just means I do it different. Kind of like math. If we reach the same end, what difference does it make how we got here? So I will leave at that.
This all starts off with a portion of boneless pork shoulder. I purchased a bone in shoulder and cut it into 2 inch chunks. You can also find boneless pork shoulder and use that or even better is boneless country pork ribs. Those are cut from the shoulder and they suffice here very well. You want to have a cut that is very fatty. The fat is very important here as the cooking process requires it. You cannot do this with a pork loin or a leaner cut of pork. It just won't work. If you are afraid of pork fat, this recipe may not be for you. Traditional carnitas are actually cooked in rendered lard. What we are doing here is using the rendered fat from the meat to cook the pork in. Kind of like duck Confit. Confit is a process where a meat is cooked, low and slow in it's own fat and is a very old way of preserving meat for the winter. Just go with it. You will thank me later.
Carnitas Seasoning video: http://bit.ly/2MUaZLi
I am going to douse the meat with a good portion of the seasoning blend and mix it up in the crock. Then I added a copious amount of garlic and a sliced onion as well as an orange that I quartered and squeezed the juice from and tossed the rest of the orange in for good measure. One of the secrets is one can or 12 ounces of Mexican Coca Cola or in my case a natural, all sugar Pepsi. You will not want to use regular Coke or Pepsi here as you will want to avoid anything containing regular or high fructose corn syrup due to the recipe not turning out just right with those ingredients. If you cannot find Mexican Coca Cola or all sugar natural Pepsi then you can leave it out.
All of these ingredients go into the crock and now we wait. This cooks on high for up to 8 hours or on low for 10 to 12 hours. This would be great on low, cooked overnight, if you can handle the delicious aroma wafting from the kitchen while you sleep. Once the meat is soft and easily shredded with a fork, it's done. Then you can move on to the next step and you are even closer to your tacos!
When the meat is fully shredable, remove it from the crock with a slotted spoon to a pan for holding. You want to avoid scooping as much liquid with the meat as possible. We are then going to strain the liquid from the crock and then skim all the rendered fat off of it. Now is a great time to get your gravy skimmer out to make this job really easy. You can discard all the cooking liquid but not the fat. In the end from 4 pounds of pork shoulder, I got 1 cup of rendered pork fat that was seasoned with all the flavors that we cooked the meat in. That is pure gold! We are going to use this fat to crispify our taco meat!
Take a bit of the fat and add it to a hot skillet. Toss in a good portion of the shredded carnitas. Cook until it begins to crisp and keep going until you attain your personal level of crispness. Then build your tacos any way you like. We used fresh cilantro, sour cream, salsa rojo and verde as well as some delicious pickled red onions to top them off perfectly!
I hope you give these slow cooked pork carnitas a try sometime soon and I hope you love them!
Happy Eating!
Get a printable version of this recipe here: http://bit.ly/36CPJRU
Get my cookbooks here: http://bit.ly/1czqM5R
Business Inquiries can be sent to:
info@noreenskitchen.com
Check me out on social media!
Facebook: http://on.fb.me/12bdibt
Twitter: @noreenskitchen
Instagram: http://bit.ly/12bdqrp
***MAILING ADDRESS****
Noreen's Kitchen
PO Box 14173
New Bern, NC 28561
Have a question for me? Send me an email:
info@noreenskitchen.com
Noreen's Kitchen Community Guidelines (The Rules)
http://bit.ly/2i7VocU
Any links to Amazon are, in many cases, affiliate links.
Produced by Noreen's Kitchen ©2008-2016 all rights reserved All embeds must live link to Noreen's Kitchen channel. No Editorial Excerpts without permission, Violators agree to pay royalties, all court costs, all collections & all lawyers fees.
144
views
2
comments
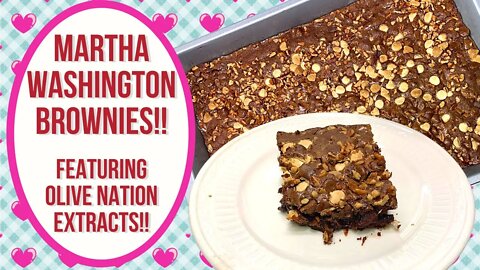
MARTHA WASHINGTON BROWNIES!! FT: OLIVENATION EXTRACTS!!
CHECK OUT THE OLIVENATION WEBSITE FOR ALL YOUR EXTRACT AND FLAVORING NEEDS: https://bit.ly/3shDPIN
USE COUPON CODE: NOREEN20 FOR 20% OFF YOUR ORDER!
Today we are making an inspired version of brownies! This one is inspired by the delicious Martha Washington candies so many people love to make! These soft centered chocolates are full of maraschino cherries, pecans and vanilla cream then enrobed in delicious milk chocolate. I decided to take my inspiration for these brownies from those candies. These are super easy to make when you use your favorite 9x13 brownie mix and add in some delicious ingredients to make these taste amazing! Perfect for a Valentine treat for your family or your favorite sweetheart, these are sure to please!
Thanks to our sponsor OliveNation for sharing their delicious extracts for our recipe today! Be sure to check out their amazing website for all the flavorings and spices, nuts and dried fruits as well as fabulous chocolate supplies you might need for all your candy making and baking! Their prices are fabulous and their selection is second to none! Use the coupon code to get 20% off your order!
These brownies are literally a chocolate cherry explosion of flavor! I am using a Duncan Hines chewy fudge brownie mix made using the cake like brownie formula. You can use any kind of boxed mix you like just be sure it is for a 9x13 pan and if you prefer to use a homemade brownie recipe be sure that it is for that size pan. If you have one that is formulated for an 8x8 square pan, be sure to double.
I am adding chopped marashino cherries, pecan halves, milk and white chocolate chips as well as Olive Nation vanilla extract and cherry baking emulsion to really give these brownies an amazing pop of flavor. I promise these are super tasty and if you are a fan of chocolate and cherry you are going to love these.
I baked these up for 30 minutes but they really should have been baked an additional 10 minutes to give them a fully set texture. But if you like an extra gooey brownie, bake them to your liking. Allow to cool before slicing and then enjoy on their own with as the base for a delicious brownie sundae with vanilla ice cream and hot fudge sauce and of course whipped cream and a cherry on top!
I hope you will check out the OliveNation website and give them a go if you like and if you are having a challenge finding a specific flavoring I bet you find what you are looking for there! Thanks to Olive Nation for sponsoring this video and supporting my channel!
I hope you will give these Martha Washington candy inspired brownies a try sometime soon and I hope you love them!
Happy Eating!
You can find a printable version of this recipe here: https://bit.ly/35Q5yc5
Get my cookbooks here: http://bit.ly/1czqM5R
Business Inquiries can be sent to:
info@noreenskitchen.com
Check me out on social media!
Facebook: http://on.fb.me/12bdibt
Twitter: @noreenskitchen
Instagram: http://bit.ly/12bdqrp
Google + http://bit.ly/1o5GMYy
***MAILING ADDRESS****
Noreen's Kitchen
PO Box 14173
New Bern, NC 28561
Have a question for me? Send me an email:
info@noreenskitchen.com
Noreen's Kitchen Community Guidelines (The Rules)
http://bit.ly/2i7VocU
Any links to Amazon are, in many cases, affiliate links.
Produced by Noreen's Kitchen ©2008-2016 all rights reserved All embeds must live link to Noreen's Kitchen channel. No Editorial Excerpts without permission, Violators agree to pay royalties, all court costs, all collections & all lawyers fees.
93
views
1
comment

SLOW COOKER GOLDEN MUSHROOM CHICKEN!! DUMP AND GO CROCK POT MEAL IDEA!!
The cooler weather is upon us in my neck of the woods and nothing beats a great slow cooker meal to welcome sweater weather! Today I am sharing a little something that falls into the "Dump and Go" recipe craze and sharing a distinct family favorite that we have been enjoying for years! Slow cooker golden mushroom chicken. This is super simple to throw together and perfect for a hearty, effortless evening meal, even on the busiest of days!
I love my slow cooker! I know many of you do as well and so many times I turn to it to cook dinner for my family when I know I am going to be busy and even when I am not. I use mine at least two times a week all year round. But in the warmer months I put it outside because it really does heat up the kitchen! In the cooler months it helps to keep my always cold kitchen warm and toasty.
This recipe is super simple and one that I have been enjoying nearly my entire life. It evolved from a stove top recipe that my mom used to make often then converted to an oven bake and now it is a slow cooker recipe. Heck you can even make this in your electric pressure cooker if you like. No matter how you make it, just make it because I know you will love it.
I do not often use canned "cream of" soups but I do use them from time to time and this recipe is one of those times. Campbell's golden mushroom soup is what makes the magic happen here. I understand that it supposed to be reminiscent of a "marsala" sauce. I don't know about that, but what I do know is that it is delicious and that there is not really any substitute for it. No shame in using a canned soup to get the job done and dinner on the table.
The whole idea of "dump and go" recipes is to use a protein, some veggies and some pantry stock to feed your family like royalty and this recipe fits the bill. Starting off with about 2 pounds of white meat chicken then adding in extra fresh mushrooms. I used about a pound of sliced Criminis but you can use what you like. Fresh or canned work here. If you don't like mushrooms you can leave out the extras but don't skip the soup. you won't notice the small amount of mushrooms in the sauce once this is done cooking. I also added a bag of baby cut carrots and then the saucy goodness.
The sauce is nothing more than two or three cans of golden mushroom soup. Campbell's is the only brand that offers this so you should have no problem finding it. However, big box stores don't carry it sometimes so check your local better grocer they will almost always have it! Stock up when it's on sale 4 for $5 and you will always have it in your pantry. SInce my store did not have any on hand today I used two cans from the pantry and then mixed it together with enough chicken bone broth to equal 4 cups. Pour this over the meat and veggies and pop a lid on it. cook on low for 8 to 10 hours or on high for 6 to 8 hours. Mine cooked on high for 5 hours and I turned it down to low for another 2 hours then the chicken was perfect for shredding.
I broke up the chicken using a tongs when it was tender enough to fall apart. At this point you can decide if it is thick enough for you. We like this sauce a bit on the thicker side so I added a slurry made up of 1/4 cup of corn starch and 1/4 cup of cold water. Since the slow cooker is super hot at this point just pour it in and stir. That sauce will thicken and turn beautiful and glossy. Now all you need to do is choose a side.
We serve this, often with egg noodles or rice. My mom loved to serve this with macaroni. Mostly because she had it on hand. It is also delicious served over mashed potatoes! You choose. You don't have to eat this over or with anything. Really it is a one pot if you want to forego the starchy side.
This is super economical and it feeds a lot of people. This meal made for a total of 7 servings. Four for dinner and three for lunches over the following days. It is rich and satisfying. You can leave it the way I made it which is very simple or add things. I often will toss in a sliced onion or two as well as a healthy dose of fresh, chopped garlic.
I hope you give this family favorite, golden mushroom chicken a try sometime soon and I hope you love it!
Happy Eating!
Get my cookbooks here: http://bit.ly/1czqM5R
Business Inquiries can be sent to:
info@noreenskitchen.com
Check me out on social media!
Facebook: http://on.fb.me/12bdibt
Twitter: @noreenskitchen
Instagram: http://bit.ly/12bdqrp
***MAILING ADDRESS****
Noreen's Kitchen
PO Box 14173
New Bern, NC 28561
Have a question for me? Send me an email:
info@noreenskitchen.com
Any links to Amazon are, in many cases, affiliate links.
Produced by Noreen's Kitchen ©2008-2016 all rights reserved All embeds must live link to Noreen's Kitchen channel. No Editorial Excerpts without permission, Violators agree to pay royalties, all court costs, all collections & all lawyers fees.
144
views

TUNA PATTIES!! RETRO SHELF COOKING RECIPE!!
Shelf cooking sometimes means, digging into tried and true recipes from mom and grandma's recipe box! In this day of digital everything, sometimes reaching for that hand written card can be easy to forget. Today I am sharing my mom's tuna patties. She used to call these "croquettes". She also used to make them with chicken and they were hand formed, triple dredged and deep fried. I think that is to much work for a regular weeknight meal. So patties it is! Tuna is the star here with other ingredients from the fridge and pantry. They come together quickly and they are oh so satisfying. Whip up a little cold sauce to serve on the side or over the top and you are in for a treat!
I grew up eating these, or something similar. Like I mentioned, my mom's "croquettes" were little cones of goodness that were seriously delicious. Mostly she made them with chicken that she pulled from the bone and chopped ever so fine. Sometimes she would make them with tuna. Still they were a process. And she would make a cream sauce to pour over the top. Nothing is cuter on your plate when you are a kid!
These start with four regular sized (5 ounce) cans of tuna, drained and flaked. I like solid white albacore but you can use what you prefer here. I add in dry bread crumbs, shredded cheese, chopped onion and celery along with a couple eggs and some mayo and mustard. You can add whatever you like. You should make the tuna much like you would tuna salad but I do not recommend using salad dressing (miracle whip).
The mixture is blended well. I like to do this by hand until it comes to a dough like consistency that you can pick up in the palm of your hand. Now you can divide into 8 patties or more if you like them smaller and bread them. I do not do anything more than dunk each patty into a tray of dry bread crumbs. You can compact them even more when doing this to ensure good coating.
I shallow fry these in about 1 1/2 cups of vegetable oil. I prefer sunflower or safflower oil. Heated to medium high heat, the patties can be fried in batches. I do four at a time and allow each side to fry for approximately 3 to 4 minutes or until nicely browned. If you need to turn occasionally for even browning, then please do. My skillet has obvious hot spots and I know that they need to be turned before being flipped.
Once the patties are done you can remove them from the oil and allow them to drain on some paper toweling. Allow them to cool for a bit before serving with some tartar sauce or some homemade cheese sauce or even a quick aioli. I made my cold sauce by blending some bottled ranch dressing with some Dijon mustard. These were simply delicious! Now about a week later the family is asking me to make them again!
Just goes to show you that something as simple as a few cans of tuna and a bit of chopped veggies some eggs, cheese and bread crumb can be turned into a full on main course that is definitely going to make the family happy! You can also turn these into tuna burgers by serving on a bun with all the toppings or even a tuna patty melt by popping under the broiler with some sliced American cheese on top! No tuna lover is going to turn this winner down!
I hope this inspires you to go to your pantry and give these a go! I hope you give these tried and true tuna patties a try sometime soon and I hope you love them!
Happy Eating!
#wecook
Get my cookbooks here: http://bit.ly/1czqM5R
Business Inquiries can be sent to:
info@noreenskitchen.com
Check me out on social media!
Facebook: http://on.fb.me/12bdibt
Twitter: @noreenskitchen
Instagram: http://bit.ly/12bdqrp
Google + http://bit.ly/1o5GMYy
***MAILING ADDRESS****
Noreen's Kitchen
PO Box 14173
New Bern, NC 28561
Have a question for me? Send me an email:
info@noreenskitchen.com
Noreen's Kitchen Community Guidelines (The Rules)
http://bit.ly/2i7VocU
Any links to Amazon are, in many cases, affiliate links.
Produced by Noreen's Kitchen ©2008-2016 all rights reserved All embeds must live link to Noreen's Kitchen channel. No Editorial Excerpts without permission, Violators agree to pay royalties, all court costs, all collections & all lawyers fees.
131
views
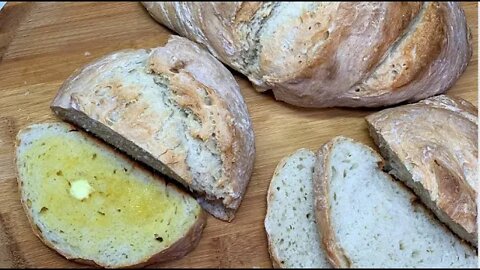
3 HOUR NO KNEAD BREAD!! EASY HOME BAKED BREAD RECIPE!!
Today I am sharing how you can make fresh bread with no kneading, no mixer, no special equipment and only 5 ingredients in less than 3 hours and have amazing, crusty, fresh, rustic, homemade bread on your table. I have been playing with this recipe for about three weeks. In an effort to help all of you have fresh, homemade bread whenever you want it. This bread is super economical and you can make it for pennies compared to the bakery style bread from the store. The best part is that you know what went in there! No preservatives, not extenders, no artificial anything! Just wholesome, bread that you and your family won't be able to stop eating! I promise, you will be addicted! If you thought you couldn't bake bread because it was too difficult, think again! I am here to bust that myth once and for all!
I have been baking bread for many years. I have shared how to make everything from my famous everyday sandwich loaf to homemade burger and hot dog buns to cinnamon rolls and even nursed a homemade sourdough. Bread baking is a passion and and education. It takes time, effort and finesse to bake some bread, but this one we are sharing today is super easy and cheap! You don't have to have prior experience and honestly if this was the only bread I could make I would be happy.
This all starts out with the basics. Flour, water, salt, yeast and a sweetener. This needs to be a true sugar, not an artificial sweetener. It is not intended to flavor the bread, but to feed the yeast and provide gassing for the rise. This starts out like any other no knead bread. Mix the flour and the salt in a large bowl. Mix warm water, no more than 110 degrees with the honey and yeast. Whisk this mixture to blend well then pour the whole thing in with the flour and salt. I am using a dough scraper to blend the flour and liquid mixture until it forms a ball. If you think you have too much flour, you don't. Just keep blending until everything comes together in a ball and the sides of the bowl are relatively clean. I like to gather the dough on the dough scraper and spray the bowl with cooking oil. Then place the dough back in the bowl, spray the top and cover. Set in a warm place and walk away for 2 to 3 hours. That's it!
A word about the yeast. I only ever use SAF instant yeast in my breads. Unless I am making sourdough this is the only yeast I ever use. It does not require proofing like active dry yeast and you can simply add it right into your recipes dry. I buy this yeast in vacuum sealed, one pound bags. Once opened, I transfer the yeast to a mason jar and seal with both a metal flat canning lid and a plastic storage lid. This jar is kept in the freezer, as is all my yeast that has not yet been opened. When yeast is kept frozen you suspend the life indefinitely. Yeast cannot go bad if you keep it in the freezer. Never keep your yeast on the shelf or at room temperature. Normally yeast, according to many manufacturers is good for up to 1 year past the date printed on the envelope. In order to ascertain the freshness and efficacy of the yeast, you need to "proof" it. Add it to warm water with a bit of sugar, and wait 5 to 10 minutes. If the yeast produces a bubbly foam, it is good to use and can be added to your dough recipe.
When the dough has finished fermenting and has risen at least twice it's original size, you can knock it down with a dough scraper that has been sprayed with cooking oil and divide into two loaves. You can roughly shape them by turning them on the side of the bowl and then transfer to a baking sheet lined with parchment. Clean up your loaves with wet hands and then slash with a very sharp knife a few times. This will help the dough to expand and rise into a lovely loaf.
Bake in a 375 degree oven for 25 to 30 minutes or until golden brown and when tapped on the bottom the loaves sound hollow. These are best if allowed to cool for at least an hour before slicing and always slice better the next day. Now dig in! Fresh bread is irresistable!
I hope you give this 3 hour no knead bread a try, sometime soon and I hope you love it!
Happy Eating!
#wecook
A printable version of this recipe can be found here: https://bit.ly/34KJQkW
SAF Yeast on Amazon: https://amzn.to/34JcRO9
SAF Yeast on KAF: https://bit.ly/2VQmV3Z
Business Inquiries can be sent to:
info@noreenskitchen.com
Check me out on social media!
Facebook: http://on.fb.me/12bdibt
Twitter: @noreenskitchen
Instagram: http://bit.ly/12bdqrp
***MAILING ADDRESS****
Noreen's Kitchen
PO Box 14173
New Bern, NC 28561
Have a question for me? Send me an email:
info@noreenskitchen.com
Any links to Amazon are, in many cases, affiliate links.
Produced by Noreen's Kitchen ©2008-2016 all rights reserved All embeds must live link to Noreen's Kitchen channel. No Editorial Excerpts without permission, Violators agree to pay royalties, all court costs, all collections & all lawyers fees.
141
views
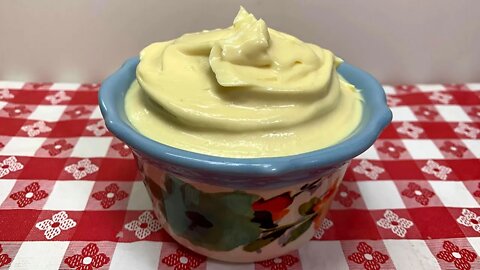
HOMEMADE MAYONNAISE!! HOW TO MAKE MAYONNAISE!! NOREEN'S KITCHEN BASICS!!
Time to get back to basics. If your pantry is a little light these days but you still have some things on hand and you want to enjoy the things you still love, knowing how to make things from scratch is the best possible thing! Today we are going to share with you how to make mayonnaise from scratch! This may seem like a difficult and daunting task but that could not be further from the truth! Homemade mayo is super easy and it's made even easier when you have the right tool for the job! So, immersion blenders in hand and let's get this ball rolling!
Mayonnaise is not one of the original French mother sauces. Those being the Voulate', Bechamel, Espagnole, Hollandaise and Tomato. Mayonnaise is the unofficial fifth mother sauce, in my opinion. As ubiquitous in our modern day fridge as that bottle of ketchup but we pay it so little respect! Making your own, just once will show you exactly what you are missing. Do not get me wrong! The commercial mayonnaise is awesome and we all have our favorites, but homemade silky, eggy mayo is a treasure to behold and you will agree when you give this a try!
The best part here is that you probably have all the things you need. That being three, four or five. Depending on how flavorized you want to go. 1 cup of neutral oil, 1 large egg, a good dollop of Dijon mustard or a teaspoon of dry mustard will work as well as some salt. You can stop there and that is where I stopped for the purposes of this video.You can also add a splash of either red or white wine vinegar to give this a bit of tang. Aside from that, your options are sort of endless! But I will touch upon that later.
I am using an immersion blender today because I find this to be the most effective and quickest way to create delicious, velvety homemade mayonnaise. In literal seconds you go from a weird science experiment to a smooth, creamy condiment. If you don't have an immersion blender, you can certainly use a regular blender to achieve a similar result. However you will want to add your egg, salt and mustard to the carfe then slowly stream in the oil as the blender is running. Immersion blenders are not expensive and you can pick one up at just about any big box store. Here is the one I am using: https://amzn.to/3cV5F4V
Start by placing your oil, egg, mustard and salt and vinegar if you are using it in a jug or deep bowl. Place the immersion blender on the bottom of your vessel and pulse a couple of times to get things going, they go full force and gently pull up as you do. You will see the mixture become opaque and creamy. Keep mixing for a few more seconds until you are satisfied with the consistency. Voila'! Mayonnaise! Now you can put this in a jar or airtight container and it will last for up to one week. Do not worry about the raw egg. The mustard and the salt along with the emulsification process have taken care of that. Be sure to obtain the freshest eggs possible to avoid any contamination issues.
This can easily be turned into a curried mayo by adding your favorite curry powder blend along with a generous dollop of chutney for a flavorful sandwich spread. Add in some chipotle peppers for a chipotle mayo, some roasted garlic for a delicious aioli to dip roasted vegetables in. Use this mayonnaise to make Louis sauce for dipping freshly steam shrimp or use it as a base for homemade Thousand Island or Russian dressing. The possibilities are as endless as your imagination!
I hope this clears up the mystery of homemade mayonnaise! I hope you give this a try sometime soon and I hope you love it!
Happy Eating!
Get my cookbooks here: http://bit.ly/1czqM5R
Business Inquiries can be sent to:
info@noreenskitchen.com
Check me out on social media!
Facebook: http://on.fb.me/12bdibt
Twitter: @noreenskitchen
Instagram: http://bit.ly/12bdqrp
Google + http://bit.ly/1o5GMYy
***MAILING ADDRESS****
Noreen's Kitchen
PO Box 14173
New Bern, NC 28561
Have a question for me? Send me an email:
info@noreenskitchen.com
Noreen's Kitchen Community Guidelines (The Rules)
http://bit.ly/2i7VocU
Any links to Amazon are, in many cases, affiliate links.
Produced by Noreen's Kitchen ©2008-2016 all rights reserved All embeds must live link to Noreen's Kitchen channel. No Editorial Excerpts without permission, Violators agree to pay royalties, all court costs, all collections & all lawyers fees.
138
views
2
comments

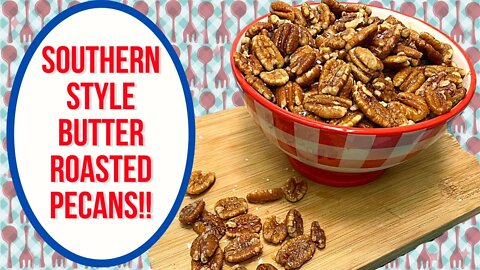
SOUTHERN STYLE BUTTER ROASTED PECANS!! FEATURING YORK PECAN COMPANY!!
Use this link to get 10% off your purchase at York Pecan Company! https://www.yorkpecanshop.com/discount/NOREEN
Today we are sharing a super simple yet delicious snack! Southern style butter roasted pecans hit all the notes if you are a fan of the salty snack! These are toasty, salty, buttery and just plain delicious! These are very simple to make and even easier to eat! These are going to add the perfect crunch to your salads or added to the top of ice cream with a drizzle of caramel. These are also delicious options for snacking if you are on a low carb diet! If you make these, don't expect them to hang around long!
Today I am using pecans from the York Pecan Company in our recipe today. It was kismet that they contacted all their customers with a question and asked for a reply. So I did and they reached out and said they had checked out the channel and could they send me their Valentine bundle, which I had already planned on purchasing so I said absolutely so I could share it with you! They are a family owned pecan company from Arkansas and they know what they are doing! Their pecan halves and mammoth pecan halves were used in my holiday baking as well as their pecan pieces. Top quality and taste! If you are a pecan lover, I highly recommend you give them a try. Getting one of their bundles is a great way to sample what they have to offer and I am here to tell you that their chocolate, cinnamon and salted caramel pecans do not disappoint! Perfect for sharing for the holidays or just because! They have been generous enough to give us a coupon code that you can find at the top of this post in the link to their page where you will be able to enjoy 10% off any purchase. I hope you will give them a try!
These butter roasted pecans are three ingredients to delicious! I have used a stick of melted butter, one pound of pecan halves and a generous sprinkling of salt. The pecans were tossed with the melted butter and I gave them two generous pinches of salt and tossed that in as well. The nuts were spread on a very clean baking sheet in a single layer and then popped into a 350 degree oven for 10 minutes. If you prefer your pecans a bit more toasty, keep them in longer, but keep a watchful eye on them so they don't burn and all your effort is for naught! Take them out, and allow them to cool for a few minutes before tasting for salt and then add more or leave them as is. Allow them to cool completely before transfering to an air tight container. These will store for up to one week on your counter but they won't last that long once your family gets a taste, I promise!
I hope you will give these southern style butter roasted pecans a try and I hope you love them. I hope you will also check out the good folks at York Pecan Company! Be sure to use the link listed above to get your discount.
Happy Eating!
Get my cookbooks here: http://bit.ly/1czqM5R
Business Inquiries can be sent to:
info@noreenskitchen.com
Check me out on social media!
Facebook: http://on.fb.me/12bdibt
Twitter: @noreenskitchen
Instagram: http://bit.ly/12bdqrp
Google + http://bit.ly/1o5GMYy
***MAILING ADDRESS****
Noreen's Kitchen
PO Box 14173
New Bern, NC 28561
Have a question for me? Send me an email:
info@noreenskitchen.com
Noreen's Kitchen Community Guidelines (The Rules)
http://bit.ly/2i7VocU
Any links to Amazon are, in many cases, affiliate links.
Produced by Noreen's Kitchen ©2008-2016 all rights reserved All embeds must live link to Noreen's Kitchen channel. No Editorial Excerpts without permission, Violators agree to pay royalties, all court costs, all collections & all lawyers fees.
78
views
1
comment

PHILLY CHEESE MEATLOAF STACK!! LEFTOVER MAKEOVER!!
Let's do something with that leftover meatloaf! Sometimes I find that people just need encouragement to step outside the box. Most people will just make the leftover meatloaf the same way that they ate it the first time. With gravy and whatever sides they enjoy. But if we think about the meatloaf as a vehicle, instead of leftovers, we can transform it into some amazing options. Today, I present to you a Philly cheese meatloaf stack topped with peppers, onions and mushrooms and melted Mozzarella cheese. Eat it as is or stuffed into a roll. No matter how you make it, I know you are going to love it!
The premise here is simple. Take your favorite dish. Think about how you can incorporate or transform leftovers into that with the main dish as the inspiration. Here we are taking our inspiration from the Philly cheesesteak sandwich. Usually, thin sliced ribeye meat topped with sauteed onions, mushrooms and peppers if you like. Either bell or banana. Then melted all together with mozzarella, provolone or if you are so inclined, "whiz". I have opted for the Mozz. Since that is what I had on hand when making the video. If you are a lover of your philly "wit wiz", then by all means, indulge your desires and use that here as well!
I sauteed up some onions, peppers and mushrooms in some butter until browned and caramelized. Then I pushed the veggies off to the side of the pan and browned up a couple of meatloaf slices cold from the fridge. I cooked them until they were nice and brown on each side and warmed through.
Now the magic happens. While the slices are still in the pan, top with the veggies and then with cheese. Pop a lid on the pan and allow the cheese to melt. Then, BOOM! You have a delicious way to enjoy your meatloaf that will taste different, fresh and delicious.
As I said above, you can eat this as is, like we did or you can make this into an open faced sandwich by serving on top of a piece of toasted garlic bread or stuff this into a toasted hoagie or sub roll to enjoy like a regular sandwich. Molly ate hers with the addition of ketchup because that is how we love our philly cheesesteak sandwiches, with ketchup on top. It may sound odd to you but it is the way I grew up eating them. Being from central Jersey, it's hard not to find a delicious cheesesteak sub and with Philadelphia just a hop, skip and a jump away, you have the best at your fingertips.
While this may not be a Pat's or a Geno's, it will be yours. A meatloaf philly cheese stack is a great way to use leftovers and give them new life. Sometimes the best way to eat leftovers is to turn them into something else altogether!
I hope you give this philly cheese meatloaf stack a try, sometime soon and I hope you love it!
Happy Eating!
Get my cookbooks here: http://bit.ly/1czqM5R
Business Inquiries can be sent to:
info@noreenskitchen.com
Check me out on social media!
Facebook: http://on.fb.me/12bdibt
Twitter: @noreenskitchen
Instagram: http://bit.ly/12bdqrp
Google + http://bit.ly/1o5GMYy
***MAILING ADDRESS****
Noreen's Kitchen
PO Box 14173
New Bern, NC 28561
Have a question for me? Send me an email:
info@noreenskitchen.com
Noreen's Kitchen Community Guidelines (The Rules)
http://bit.ly/2i7VocU
Any links to Amazon are, in many cases, affiliate links.
Produced by Noreen's Kitchen ©2008-2016 all rights reserved All embeds must live link to Noreen's Kitchen channel. No Editorial Excerpts without permission, Violators agree to pay royalties, all court costs, all collections & all lawyers fees.
116
views

SIMPLE SUMMER GRILLED PORK AND PEACHES!! FT SUCHI'S SPICES BBQ RUB!
GET YOUR SUCHI'S SPICES BBQ RUB HERE: https://amzn.to/3fUt6Mh
USE COUPON CODE: NOREEN20OFF for a 20% discount off the price.
Today we are sharing a delicious option for you to consider when grilling for summer meals. This grilled pork tenderloin and fresh peaches and a few delicious pieces of chicken are a great way to enjoy a quick, summer meal without heating the kitchen. The meat is seasoned with our sponsor's delicious BBQ rub! Suchi's Spices BBQ rub is a delicious way to season up all your grilled treats this summer and beyond. We hope you give this pork tenderloin and grilled peaches a try!
When it comes to summer, cooking has a way of getting away from me. I am going to be honest. When it gets hot, I am in no mood to cook and heat the kitchen and then clean up over a steamy sink. I have been known to use my slow cooker in my carport so I can avoid further heating the house. Grilling is a great option! Season or marinate your favorite protein and toss it on the grill. Fix up some cool summer sides like a caprese salad, some sauteed mushrooms and we have been known to drive thru our favorite place to get fries or other delicious sides to go along with burgers and the like.
This pork tenderloin is a great option for quick grilled meal. Since we have the coals going, why not toss on some chicken as well? That way we kill two birds with one stone. One selection for tonight and another for a grilled chicken salad, later in the week. We have also tossed some peaches on the grill as well to go along with our pork. All of these were seasoned with Suchi's Spices BBQ Rub. We were honored to be among a small group of people who were given some unmarked seasoning blends from them a few months ago and asked for input. This is the blend the decided to market. I have to say, it is delicious!
This seasoning is the perfect combination of sweet, salty, smoky and spicy. It lends itself well to the pork and chicken but will also be delicious used on burgers, brisket, shrimp and seafood. Its as easy as shaking it on and tossing on the grill. You can use this as a dry rub and marinade and allow the meat to rest with the seasoning in the fridge for a few hours or just do a quick season and grill. This pork tenderloin was delicious! Cooked to perfection to an internal temperature of 145 degrees then allowed to rest for at least 10 minutes before slicing. It was made even more delicious with the addition of grilled peach halves which were also seasoned with the Suchi's Spices BBQ Rub! This gave the peaches the perfect sweet and savory bite to go along with that tenderloin and made for a great addition to the plate.
Suchi's Spices BBQ rub is free from additives and preservatives. It is non GMO, Vegan, Gluten Free, certified Kosher. Contains no trans fat or saturated fat and is cholesterol free. It is low carb, low sugar, contains no artificial flavors and is made in the USA! That is all great and important to me. Y'all know how much I love making a good spice blend. I also make a mean BBQ rub. Honestly Suchi's spices BBQ Rub is delicious and a great way to enjoy all your favorites on the grill this summer! You can get a 20% discount on your purchase by using the coupon code Noreen20off. Don't forget to register your purchase and they will send you an e-cookbooklet with hints tips and tricks for how to be a great at home pit master!
I hope you give this option for both meal prep and a great summer meal a try sometime soon! I hope you get your bottle of Suchi's Spices BBQ rub and don't forget your discount! I also hope that if you have never treated yourself to grilled peaches, you take the plunge and give them a try because they are going to knock your socks off!
I hope you give this a try sometime soon and I hope you love it!
Happy Eating!!
Get my cookbooks here: http://bit.ly/1czqM5R
Business Inquiries can be sent to:
info@noreenskitchen.com
Check me out on social media!
Facebook: http://on.fb.me/12bdibt
Twitter: @noreenskitchen
Instagram: http://bit.ly/12bdqrp
Google + http://bit.ly/1o5GMYy
***MAILING ADDRESS****
Noreen's Kitchen
PO Box 14173
New Bern, NC 28561
Have a question for me? Send me an email:
info@noreenskitchen.com
Noreen's Kitchen Community Guidelines (The Rules)
http://bit.ly/2i7VocU
Any links to Amazon are, in many cases, affiliate links.
Produced by Noreen's Kitchen ©2008-2016 all rights reserved All embeds must live link to Noreen's Kitchen channel. No Editorial Excerpts without permission, Violators agree to pay royalties, all court costs, all collections & all lawyers fees.
127
views

MISSISSIPPI PORK ROAST SLOW COOKER MEAL IDEA! FREEZER MEAL COMPATIBLE!!
Today we are going to make a delicious slow cooker recipe that can easily be converted, in advance, to a freezer meal. This Mississippi pork roast is a spin on the wildly popular Mississippi roast that took the internet by storm a couple of years ago. I have made this using a pork loin and the basic ingredients with a few added flavorizers to take this over the top delicious. Slow cook this all day to fall apart perfection and serve however you like. This has a lot of possibilities aside from just popping this in a bun. I know your family is going to love this spin on a favorite! Plus it's super budget friendly!
I think this is another opportunity to show that almost any meal can be considered for freezer banking. This one is good for either the before prep or the leftover freezer banking opportunity! If you want to prep the slow cooker meal in advance in bulk, simply toss all the ingredients into several zip lock bags. Use our bread pan trick shared in other videos and freeze for up to four months. Then when ready just pop in the slow cooker for 6 to 8 hours and boom! Your main dish is done. Just add sides or fixins for a quick and easy dinner!
My Mississippi roast starts with a pork loin roast. To be more specific it starts with half of a whole pork loin. I find that purchasing the whole loin on sale is the most economical way. I get that home, cut it in half or into some butterfly chops and roast and I have great options for later down the road. Buying in bulk when you hit a sale is always a great idea if you have the freezer space!
I am popping the roast into my slow cooker frozen. You should check with your owners manual to see if that is ok for yours. I added one dry packet of Au Jus gravy mix. The equivalent of one dry packet of Ranch dressing. In my case I used my homemade, big batch ranch dressing mix and used 3 tablespoons. Just sprinkle all that goodness right on top. This is the seasoning for the dish and nothing more is required. Next a large onion, sliced thin, a couple cloves of minced garlic and one jar of sliced pepperoncini pickled banana peppers with their liquid. You can choose to drain yours if you like. I think that this briny juice adds a great flavor here and cuts through the richness of the pork. To top things off I place half a stick of butter cut into pats on top of the roast then drizzle a cup of water in around the roast. Now all you have to do is set it and forget it. I cooked my on high for about 7 hours until it was tender enough to submit to my tongs and just fell apart.
I served this over some homemade mashed potatoes with some glazed carrots on the side. You can do so many things here! It was delicious the way we ate this for supper. This is great on a sandwich, tucked into a hoagie roll with melted provolone and marinara sauce. Used as the base for a burrito bowl, over rice with cheese and all the toppings you love. Add this to some brothy ramen for a delicious spin on your average noodle bowl. Use this for taco filling, serve inside of a baked potato or even as an open faced "hot" sandwich sprinkled with some cheddar cheese. Your imagination is your only limit here. This is a super versatile dish that can go a lot of places.
If you want to, you can even freeze these leftovers after they are cooked and have them at the ready for a super quick reheatable meal for a night when you really run out of time and patience. It's always great to have those on hand. We all have nights like that and meals ready in the freezer can make or break us!
I hope you give this Mississippi pork roast a try some time soon and I hope you love it!
Happy Eating!
You can get a printable version of this recipe here: http://bit.ly/3aylPRw
Get my cookbooks here: http://bit.ly/1czqM5R
Business Inquiries can be sent to:
info@noreenskitchen.com
Check me out on social media!
Facebook: http://on.fb.me/12bdibt
Instagram: http://bit.ly/12bdqrp
***MAILING ADDRESS****
Noreen's Kitchen
PO Box 14173
New Bern, NC 28561
Have a question for me? Send me an email:
info@noreenskitchen.com
Noreen's Kitchen Community Guidelines (The Rules)
http://bit.ly/2i7VocU
Any links to Amazon are, in many cases, affiliate links.
Produced by Noreen's Kitchen ©2008-2016 all rights reserved All embeds must live link to Noreen's Kitchen channel. No Editorial Excerpts without permission, Violators agree to pay royalties, all court costs, all collections & all lawyers fees.
116
views

TAMPA STYLE CUBANO SANDWICHES!! VIEWER REQUEST!!
When we posted our last video for the mini muffaletta sandwiches a viewer requested that we do Tampa style Cubano sandwiches so I am here to deliver on that request! If are not familiar with the wildly popular cultural revolution that is the Cubano sandwich then let me help you. The Cubano is a sandwich made on traditional cassava bread with a soft texture and a crunchy crust. It is filled with tender roast pork, sweet ham, Swiss cheese pickles and mustard. The Tampa version include the addition of Genoa Salami. It is an homage to the immigrants that made the Tampa community what it is today. Built on these sandwiches that fueled the once grand cigar industry. A true gem in the crown of our nation that you may or may not know about. Today we learn.
I was excited at the request to share this sandwich. A number of years ago I did a burger inspired by the Tampa Cuban that was delicious but today we are going straight to the heart of things and creating this delicous yet simple sandwich that fed many a cigar factory worker but came to represent an entire city in the peninsula state.
Today I am using an accessible Bolillo roll as my bread because I do not have a source for the traditional Cassava bread that you will get in an authentic version of this sandwich. You can use a hard Italian roll or even a split baguette or french loaf to help recreate yours. The roll is smeared with a generous amount of yellow mustard and then we layer on the fillings each of which represent a group of immigrants that made Tampa great. First we layer on some pulled pork. I am using some that we smoked over fourth of July and I froze but you could easily use some leftover pork either sliced or pulled or procure some from the local deli. Next goes on some sweet ham, I am using black forest style ham. Top this with some Genoa salami and then a healthy dose of dill pickle slices. Place sliced Swiss cheese on top of everything and cap that off with the top bun. I used some quick garlic butter to brush on top.
I pressed my Tampa Cubano in my waffle iron that has flat plates included. This took a bit of work because we had to keep the top pressed down. But if you don't have a panini press or a waffle iron like I do, you can wrap your sandwiches in foil and put an iron skillet on the top and bake them in a 350 degree oven for 20 minutes. Alternatively you can place them in a hot skillet with another heavy skillet on top or a brick wrapped in foil. You can press a sandwich in many ways. Maybe you have a bacon press that would work in place of the brick. Get creative with what you have on hand in your kitchen.
The story of this Tampa style Cubano sandwich is that each of the filligs represent one of the cultures that made Tampa great. The bread and the pork represent the Cuban people. The ham the Spaniards, the Salami, the Italians and the pickles and mustard represent the German people. The Swiss cheese is what melts all these things together and makes them one cohesive and delicious represenatation of an entire culture and community that was built on the cigar industry.
If you are interested look up the history of Tampa. I find it quite charming and rich and one that everyone should know about! I hope that you will give this Tampa style Cubano sandwich a try sometime soon and I hope you love it!
Happy Eating!
You can get a printable version of this recipe here: https://bit.ly/2WglUWO
Get my cookbooks here: http://bit.ly/1czqM5R
Business Inquiries can be sent to:
info@noreenskitchen.com
Check me out on social media!
Facebook: http://on.fb.me/12bdibt
Twitter: @noreenskitchen
Instagram: http://bit.ly/12bdqrp
Google + http://bit.ly/1o5GMYy
***MAILING ADDRESS****
Noreen's Kitchen
PO Box 14173
New Bern, NC 28561
Have a question for me? Send me an email:
info@noreenskitchen.com
Noreen's Kitchen Community Guidelines (The Rules)
http://bit.ly/2i7VocU
Any links to Amazon are, in many cases, affiliate links.
Produced by Noreen's Kitchen ©2008-2016 all rights reserved All embeds must live link to Noreen's Kitchen channel. No Editorial Excerpts without permission, Violators agree to pay royalties, all court costs, all collections & all lawyers fees.
95
views
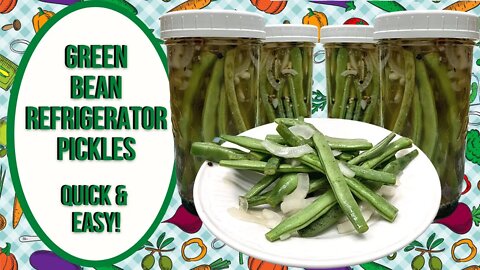
GREEN BEAN REFRIGERATOR PICKLES!! SUMMER GARDEN HARVEST RECIPE!!
Summer is here and that means bounty is going to be coming out of the garden. If you have a vegetable garden in the spring and summer then you know you are busier than a one armed paper hanger this time of year! There is pickling, jamming and canning to be done. Some don't wish to go to those lengths and would just love to pop down to the local farm stand or benefit from the benevolence of a neighbor with an over abundance of produce. Today I am sharing some delicious refrigerator pickles using the green beans my father's neighbor gave him! These are full flavored, dilly, garlickly, oniony and just plain delicious. They are easy to make and do not require any canning equipment, because as the name implies, these are kept in the refrigerator!
I love refrigerator pickles! They are easy and you can just make a couple jars if you want to. You don't have to go to lengths of sterilizing, water bathing or more. This is perfect if you love pickles without a lot of work! I have several refrigerator pickle recipes on the channel and if you want to have a look you can find the playlist here: https://bit.ly/35N23zQ
These start off with some fresh green beans that have been well washed and the ends cut off. I like to do this in pint and a half jars, but whatever containers you have will work. Just make sure they have a tight fitting lid and that the liquid will come up over the vegetables.
The pickles are enhanced by the addition of garlic, onion, pepper corns and dill seed. If you have access to fresh dill you can use it by just stuffing some of the fronds into the jar with the rest of the veggies. I do not like to use dried dill weed because it makes the liquid murky. Instead I prefer the dill seed since I had no fresh dill. You can also add some mustard seed here if you like. I was out. Bummer! If you would like to use pickling spice then you should feel free to do that as well!
The brine is mixed up using apple cider vinegar, water, salt, sugar and minced garlic. You can leave out the garlic or the onion if you do not prefer those flavors in your pickle, but you need to leave in the salt and the sugar. These are important to the pickling process as well ad the balance of flavor.
Pour all the brine ingredients into a saucepan and place over medium heat until it comes to a simmer. While you are waiting for that to happen, it's time to prep our jars. You can place the beans in first or last, up to you. I have mine in the jars already for speed. I placed the dill seed and peppercorns in the jars along with the sweet sliced onion. The beauty here is that there is no wrong way to do it. As long as you keep your brine ratios the same you are going to be fine.
When the brine comes to a simmer, it's time to ladle it into the jars to cover the vegetables. This made enough to fill both my jars and was the perfect amount for what I prepared. Now take the handle of your wooden spoon and insert it a few times into each of the jars to help get out any air bubbles and disperse the ingredients. Now put the lid on and allow to cool to room temperature before placing in the fridge.
These pickled beans are going to be at maximum deliciousness after about three days in the brine. You can eat them once they are cooled, but they will be better the longer they sit. Keep them in the fridge and eat from the jar. These will keep well for up to three months and if you finish and have brine left, there is nothing stopping you from tossing some peppers, onions, cucumbers or even more fresh green beans into that brine to pickle further.
I hope you give these green bean refrigerator pickles a try sometime soon whether it is with the bounty from your own garden, from a neigbhor's garden or from the local farm stand or even the grocery story! I hope you try them and I hope you love them!
Happy Eating!
You can find a printable version of this recipe here: https://bit.ly/35N3C0G
Get my cookbooks here: http://bit.ly/1czqM5R
Business Inquiries can be sent to:
info@noreenskitchen.com
Check me out on social media!
Facebook: http://on.fb.me/12bdibt
Twitter: @noreenskitchen
Instagram: http://bit.ly/12bdqrp
Google + http://bit.ly/1o5GMYy
***MAILING ADDRESS****
Noreen's Kitchen
PO Box 14173
New Bern, NC 28561
Have a question for me? Send me an email:
info@noreenskitchen.com
Noreen's Kitchen Community Guidelines (The Rules)
http://bit.ly/2i7VocU
Any links to Amazon are, in many cases, affiliate links.
Produced by Noreen's Kitchen ©2008-2016 all rights reserved All embeds must live link to Noreen's Kitchen channel. No Editorial Excerpts without permission, Violators agree to pay royalties, all court costs, all collections & all lawyers fees.
109
views