
Enjoyed this channel? Join my Locals community for exclusive content at
straightarrowrepair.locals.com!

Replacing Floor Joists
Phil and the guys walk you through how to support a floor.
⏱️⏱️Chapters⏱️⏱️
00:00 Most irritating thing when he first started out
00:15 This is something that someone else started on
00:30 The floor was caving in
00:50 Floor joist broke
01:10 The hallway needs to be fixed too
01:35 Put in new floor joists where it's needed
01:50 Put supports under the water heater first
02:12 We're going to pour concrete into that because she bought some
02:30 Tim fell in the cold water
03:00 They are balancing trying to stay out of the water under this house
03:15 They have supported the water heater under the floor
03:25 The beam off to the side is broken and we need to re-build it
03:45 Somebody else tried to fix it
04:00 The house will need more attention
04:10 And Phil fell when hammering on the floor joists, need to be careful
04:20 What they've done to support the floor
04:30 Put support piers under the floor
04:45 Adding floor joists
04:55 Why we added 2bys where the plywood meets
05:20 Put screws because they don't pull out
🙏 Subscribe, 👍, it helps a lot!!
➤❓/ 💬: ask@straightarrowrepair.com
➤ Follow https://straightarrowrepair.com/pipf
➤➤I get a little for the channel-no charge for you if you use the links:
➤➤Shop Amazon https://amzn.to/3CxD1T4
➤➤Tool lists & recommended products🧰 https://straightarrowrepair.com/0lvf
➤➤Services We use
➤➤MORNINGFA·ME https://morningfa.me/invite/StraightArrowRepair
➤➤A2 Hosting http://www.a2hosting.com/refer/140244
➤➤Tubebuddy https://www.tubebuddy.com/StraightArrowRepair
➤➤Apsumo http://fbuy.me/v/philbridges
➤➤VidIQ: https://vidiq.com/straightarrowrepair
#MobileHomeRepair, #MobileHomefloor, #waterdamagedfloorjoists
29
views
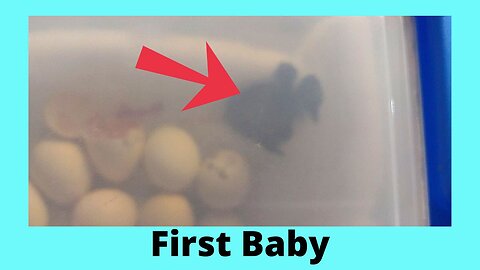
Silkie Hatchling
I'm so excited!! This is my very first hatchling. I will have MANY videos about it.
⏱️⏱️Chapters⏱️⏱️
00:00 First baby silkie. A showgirl
00:30 I'm a little excited
01:15 Surprised that they are hatching later
01:40 This baby had already zipped
02:20 Guess I'm supposed to leave them in for 24-48 hrs
03:00 Black showgirl silkie
🙏 Subscribe, 👍, it helps a lot!!
➤❓/ 💬: chris@chickensforchicks.com
➤➤I get a little for the channel-no charge for you if you use the links:
➤➤Shop Amazon https://amzn.to/3CxD1T4
➤➤Chickens Supplies https://a.co/8zehoAb
➤➤Services We use
➤➤Bitchute https://www.bitchute.com/accounts/referral/chickensforchicks/
➤➤MORNINGFA·ME https://morningfa.me/invite/ChickensForChicks
➤➤A2 Hosting http://www.a2hosting.com/refer/140244
➤➤Tubebuddy https://www.tubebuddy.com/StraightArrowRepair
➤➤Apsumo http://fbuy.me/v/philbridges
➤➤VidIQ: https://vidiq.com/straightarrowrepair
Instagram https://www.instagram.com/chickensforchicks/
Newsletter https://artisanal-leader-9310.ck.page/961509f39a
Website https://chickensforchicks.com/
Pinterest https://www.pinterest.com/cbridgesdesigns/
Facebook Page https://www.facebook.com/ChickensForChicksAR/
Rumble Channel https://rumble.com/c/c-17425
YouTube https://www.youtube.com/channel/UCeNbGSK1Ira-sBPyYCPLFiQ
#silkiechicken #silkiechick #showgirlchick
Transcript:
Okay. This is my first baby. Look at him.
He's moving around a little bit. I think that he'll start to move more. Still, only that pip. Hi, baby. Hi. Oh, my gosh. I am. I cannot believe this. He's so gorgeous. My. Oh, so this is my number one baby. It’s my first baby. Oh, I cannot believe it.
As you can see, I got at least 12 more eggs in there. So I'm going to keep videoing. What surprised me is these are bantams. And they said that they could hatch early and they're not. They're hatching right on time. This is the 20th. This is day 20. So, oh, my gosh, that one's just pipping.
And it can take 24 hours for it to zip. This one was already zipped when I come and looked at them. So I got into a beautiful video of that little baby. Oh. Oh, my gosh. Hi. Oh, you fell over. Oh, I'm so sorry. You fell over too quickly. Can you move? Can you move?
So I guess I'm supposed to leave them in for 24 to 48 hours at least till they're dry and fluffy. And it can be up to. Oh, my God. I’m in love. Um, it can be up to day 24. I am hoping that these babies, hearing that, is gonna make them hatch out faster. Oh, my God. I'm so excited.
I thought I was going to lose all of them. Wow. He's so cute. I think he's a naked neck. I think he's a little showgirl Silky, which would make sense because he's coming from a splash showgirl rooster and a partridge female.
80
views

Build A Motorized Bike at Home #1
First part of building a motorized bike. Using a Schwinn Stingray.
🙏 Subscribe, 👍, it helps a lot!!
➤❓/ 💬: ask@straightarrowrepair.com
➤ Follow https://straightarrowrepair.com/pipf
➤➤I get a little for the channel-no charge for you if you use the links:
➤➤Shop Amazon https://amzn.to/3CxD1T4
➤➤Tool lists & recommended products🧰 https://straightarrowrepair.com/0lvf
➤➤Services We use
➤➤MORNINGFA·ME https://morningfa.me/invite/StraightArrowRepair
➤➤A2 Hosting http://www.a2hosting.com/refer/140244
➤➤Tubebuddy https://www.tubebuddy.com/StraightArrowRepair
➤➤Apsumo http://fbuy.me/v/philbridges
➤➤VidIQ: https://vidiq.com/straightarrowrepair
#motorizedbike #motorizedbicycle #diymotorizedbike
103
views

Jazzing Up A Bathroom in a Mobile Home
Putting Wallcovering on a bathroom to make it look better.
⏱️⏱️Chapters⏱️⏱️
00:00 Putting paneling into a bathroom
00:28 Back after pulling the trim and cabinets off
00:48 Next need to drive down all the nails
01:15 You can feel it if you run a hammer over it
02:56 Starting on the side where the cabinets were, how he wants to piece it together
03:23 Customer bought the materials
03:38 Marking where the studs are on the ceiling
04:10 Pull the switch out and sit it on top of the material
05:07 Back after putting the back wall on
05:36 Used a pry bar on the bottom, keeping the gap there
06:04 How to butterfly with a nail gun
07:08 Have to go over it and hammer it down
07:19 What a change
07:29 You can cut this with a razor knife
🙏 Subscribe, 👍, it helps a lot!!
➤❓/ 💬: ask@straightarrowrepair.com
➤ Follow https://straightarrowrepair.com/pipf
➤➤I get a little for the channel-no charge for you if you use the links:
➤➤Shop Amazon https://amzn.to/3CxD1T4
➤➤Tool lists & recommended products🧰 https://straightarrowrepair.com/0lvf
➤➤Services We use
➤➤MORNINGFA·ME https://morningfa.me/invite/StraightArrowRepair
➤➤A2 Hosting http://www.a2hosting.com/refer/140244
➤➤Tubebuddy https://www.tubebuddy.com/StraightArrowRepair
➤➤Apsumo http://fbuy.me/v/philbridges
➤➤VidIQ: https://vidiq.com/straightarrowrepair
#MobileHomeRepair, #MobileHomeBathroomRemodel #Mobilehomebathroom
58
views
5
comments

Floor Damage from AC Unit Halted: Here's How!
Phil is repairing the subfloor, water damaged from a leaking AC unit. In this video he shows you several little tips to make your work look professional.
⏱️⏱️Chapters⏱️⏱️
00:00 Your floor joists in a mobile home
00:50 Cable wire we need to watch for
01:10 Interesting situation by the wall
01:38 To help support the weight
01:52 In mobile home there's usually a frame 3' from the outside wall
02:21 Cut materials, when doing several, write the measurements on your board
02:45 Better to use screws if you can
03:00 Why he doesn't build directly under the walls
03:37 Mobile home walls are never straight after moving and sitting for so long
03:38 You don't have to use 2x6s
04:55 It can be frustrating
05:05 Living right
05:35 Boring description and hard to live that way
07:07 Had to use big bars, long 2x4s just to pry up wood
07:22 Lot of ways to do it by yourself
07:52 You can put a scrap under the support, against the floor joist if you're worried about it
08:28 A 2x6 would set on the frame
08:45 You can do a 2x4 and then 2 by anything on the side and get 2x6
09:20 Can span the area and have a lot more weight support
09:30 Notched a board to add strength and join with the spacers
10:30 Thing about screws you can adjust
10:42 Making that area stronger because she had bookshelves right there
11:15 Went ahead and adjusted support board
11:40 If high traffic area you want to support
11:55 Plywood and 2x4s are exactly the size, they say
12:14 Lowe's tongue-and-groove plywood
12:30 If you don't use tongue-and-groove
12:55 Recommend you put two bys
13:15 They made the tongue and groove for flooring
13:30 Whenever you need to hammer a board in
13:41 Video to put floors in https://youtu.be/tXolAnaGu3E
14:05 Use 1 1/2 screws outside edges every 6"
14:20 Easy way to measure 6" other quick field measurements
16:45 His 265# jumping on the floor
17:00 We'll try showing you different floors and situations
17:40 He had to learn the hard way, trying to help you through that
17:52 Try to cut corners and you will pay a price
18:15 Don't overlay the wood
18:44 When you put in or patch a floor
19:05 Mix a floor leveler
19:20 Bigger the package the better the price
19:37 How to mix the floor leveler the easy way
20:44 Do the same thing with drywall mud
21:30 How can you tell when the leveler is mixed right
21:50 Like a really thick soup
22:40 Want to fill the cracks
23:53 How he was originally taught by a flooring guy
24:30 Mix the floor leveler on the floor
🙏 Subscribe, 👍, it helps a lot!!
➤❓/ 💬: ask@straightarrowrepair.com
➤ Follow https://straightarrowrepair.com/pipf
➤➤I get a little for the channel-no charge for you if you use the links:
➤➤Shop Amazon https://amzn.to/3CxD1T4
➤➤Tool lists & recommended products🧰 https://straightarrowrepair.com/0lvf
➤➤Services We use
➤➤MORNINGFA·ME https://morningfa.me/invite/StraightArrowRepair
➤➤A2 Hosting http://www.a2hosting.com/refer/140244
➤➤Tubebuddy https://www.tubebuddy.com/StraightArrowRepair
➤➤Apsumo http://fbuy.me/v/philbridges
➤➤VidIQ: https://vidiq.com/straightarrowrepair
#MobileHomeRepair, #acunitdamage, #waterdamagerepair
63
views
4
comments

How to Change Vinyl to Metal Skirting for a Mobile Home or Building
Metal Skirting the guys are installing skirting on a mobile home. They are replacing the vinyl with metal. Your vinyl skirting will last around 5 years and then will have little holes from weed eaters and chemicals.
They make metal skirting from the same metal that you use for your roof.
⏱️⏱️Chapters⏱️⏱️
00:00 Replacing vinyl skirting with metal skirting
00:14 Why you would want to change them out.
00:42 First want to pull off the top trim
02:06 Starting the metal
03:13 You can fold the metal to create your corners
04:15 Pushing the metal tight, and once screwed down, the wind doesn't blow it out
04:45 When cutting metal, use your bottom for changes in the ground height.
05:05 Reason you want to level from the bottom
05:45 Cutting for a gas line
07:57 Cutting corner trim and installing it
09:10 When ordering material, always make sure you have extra
🙏 Subscribe, 👍, it helps a lot!!
➤❓/ 💬: ask@straightarrowrepair.com
➤ Follow https://straightarrowrepair.com/pipf
➤➤I get a little for the channel-no charge for you if you use the links:
➤➤Shop Amazon https://amzn.to/3CxD1T4
➤➤Tool lists & recommended products🧰 https://straightarrowrepair.com/0lvf
➤➤Services We use
➤➤MORNINGFA·ME https://morningfa.me/invite/StraightArrowRepair
➤➤A2 Hosting http://www.a2hosting.com/refer/140244
➤➤Tubebuddy https://www.tubebuddy.com/StraightArrowRepair
➤➤Apsumo http://fbuy.me/v/philbridges
➤➤VidIQ: https://vidiq.com/straightarrowrepair
#MobileHomeRepair, #Vinylskirting, #MetalSkirting
59
views

Deck Installation - Gazebo Deck
Building a deck for a gazebo
⏱️⏱️Chapters⏱️⏱️
00:00 What we're doing on this job
00:16 Estimating a job, don't forget this
01:23 You want to account for board width
01:55 Deck layout and how to measure/mark
02:05 Using 16" centers instead of 20"
05:26 Measure twice, cut once
07:20 Layout is complete
07:45 Secured it to the fence
08:12 Why we laid the deck out the way we did
08:45 Who knew Phil spent all day screwing off, literally
09:10 Finished deck
🙏 Subscribe, 👍, it helps a lot!!
➤❓/ 💬: ask@straightarrowrepair.com
➤ Follow https://straightarrowrepair.com/pipf
➤➤I get a little for the channel-no charge for you if you use the links:
➤➤Shop Amazon https://amzn.to/3CxD1T4
➤➤Tool lists & recommended products🧰 https://straightarrowrepair.com/0lvf
➤➤Services We use
➤➤MORNINGFA·ME https://morningfa.me/invite/StraightArrowRepair
➤➤A2 Hosting http://www.a2hosting.com/refer/140244
➤➤Tubebuddy https://www.tubebuddy.com/StraightArrowRepair
➤➤Apsumo http://fbuy.me/v/philbridges
➤➤VidIQ: https://vidiq.com/straightarrowrepair
#MobileHomeRepair, #MobileHomeImprovement, #mobilehomedeck
45
views
2
comments

Floor Repair Water Damage From Below
How to repair a floor from water damage below
Hi guys, we were repairing a floor and got wet from underneath it. The line busted, sprayed up on the floor and they wanted us to pull the carpet back and see if we could save it and put new floor in. So this is what it looks like to begin with. We got some big old soft spots right here and a couple over in here, but.
Usually the factory will pull this carpet over the top of the floor and then staple it from the sides, set the walls on top of it, so we'll probably have to cut the carpet and then peel it back. Lots of fun.
Well, I was wrong. That's another reason to not think of me as perfect. But they did have a tack strip and we pulled it up. So that we can cut and put in the old particleboard and put in plywood.
The damage is also in this area here, and they're probably not going to get away with having to put in. Tile or linoleum.
So what they paid us to do is to replace this area because it got wet from underneath. That's what we're going to.
🙏 Subscribe, 👍, it helps a lot!!
➤❓/ 💬: ask@straightarrowrepair.com
➤ Follow https://straightarrowrepair.com/pipf
➤➤I get a little for the channel-no charge for you if you use the links:
➤➤Shop Amazon https://amzn.to/3CxD1T4
➤➤Tool lists & recommended products🧰 https://straightarrowrepair.com/0lvf
➤➤Services We use
➤➤MORNINGFA·ME https://morningfa.me/invite/StraightArrowRepair
➤➤A2 Hosting http://www.a2hosting.com/refer/140244
➤➤Tubebuddy https://www.tubebuddy.com/StraightArrowRepair
➤➤Apsumo http://fbuy.me/v/philbridges
➤➤VidIQ: https://vidiq.com/straightarrowrepair
#MobileHomeRepair, #MobileHomeImprovement, #waterdamagerepair
53
views
1
comment

Funny Sign #Shorts
We welcome you to Living Springs where Jesus Christ is King of Kings to find your place. This side of Heaven call Six, six, five, two, eight, eight, seven. One more thing. Add to this sign. The area code is four, seven, nine. I thought that was funny.
🙏 Subscribe, 👍, it helps a lot!!
➤❓/ 💬: ask@straightarrowrepair.com
➤ Follow https://straightarrowrepair.com/pipf
➤➤I get a little for the channel-no charge for you if you use the links:
➤➤Shop Amazon https://amzn.to/3CxD1T4
➤➤Tool lists & recommended products🧰 https://straightarrowrepair.com/0lvf
➤➤Services We use
➤➤MORNINGFA·ME https://morningfa.me/invite/StraightArrowRepair
➤➤A2 Hosting http://www.a2hosting.com/refer/140244
➤➤Tubebuddy https://www.tubebuddy.com/StraightArrowRepair
➤➤Apsumo http://fbuy.me/v/philbridges
➤➤VidIQ: https://vidiq.com/straightarrowrepair
#MobileHomeRepair, #MobileHomeImprovement, #DIYHomeRepair
52
views
1
comment

Laying Staggered Floor Tiles
Transcript:
If you look down here. We've already lined these up. Put spacers in between. I'll get them on that chalk line that we set. And now we're stagger and those pieces you saw us cut and staggered. The first one like that, you don't want to be too far away and then pull over because you end up squeezing up that grout up in there.
What we're doing now is putting that, the spacers like so getting it over. Now they make little rubber hammers for that. You do that too. And then I get a a full piece put the spacers in everywhere. Going to each side, and maybe two on the end. Woops. Okay then we have that other third. Ok, there you go. We’re going to start I got to... Now if you remember, we don't have to be that close because you're going to put trim on top of that.
But in this case I'm going to because it's not a big deal for me to do. Now, this is kind of a complex cut right here. All right. So you don't want to be terribly close, because remember we're going to get trim three quarters to five-eighths trim. And so I got my piece here and I'll measure to it. And remember we're going to have a spacer too, 3/16 Mm.
So I have room so I can do four and a half over and I got to have spacer here so I can go inch and a half there. So basically I’m going to have one half an inch for a quarter inch on this. A quarter inch. Yes. I be a little closer there. So inch and a half I'm doing this like drywall and a lot of people can't.
But this is just years and years of doing it. okay. Then the other side, mm, a quarter 12 and a half inches. If I go like that 12 and a quarter. That’s tight, to 12 and I go a quarter inch, I do 12 and three eighths. It shows you the tricky part here, which I brought my little table saw for, but you got to cut this section out so we're going to cut here and here and I'll have to help him with that.
And we'll see if we can figure out a way to cut this. Also, we have one right here, which will be like 11 inch piece. You can use a speed square, things like that. That's the waste which we could cut that down into one of those pieces there, but that's okay. Just keep that out there. There will end up being places.
So that these two pieces to cut, and I’ll go out there with him. But we'll get a rhythm going and we'll show you what's going on.
48
views
2
comments

How To Grout Tile Floor
The guys are back to show you some tips and tricks for grouting tile bathroom floors, an easier way to clean the mess
⏱️⏱️Chapters⏱️⏱️
00:00 Intro
00:12 Back after all the tile has been set
00:23 Made sure the customer was happy with the color
00:35 He's used to using drywall tools
00:50 Forcing the grout in the cracks
01:05 He suggested the kids get to pull the spacers out
01:25 How we mix our grout
01:35 Don't want to mix a lot because got to get it down it 45 mins
01:55 Wiping down the tile with a sponge
02:10 Using thrift store towels to clean
02:35 After the towel leaves a fine dust
02:55 Come back in an hour and knock the dust off all of this
🙏 Subscribe, 👍, it helps a lot!!
➤❓/ 💬: ask@straightarrowrepair.com
➤ Follow https://straightarrowrepair.com/pipf
➤➤I get a little for the channel-no charge for you if you use the links:
➤➤Shop Amazon https://amzn.to/3CxD1T4
➤➤Tool lists & recommended products🧰 https://straightarrowrepair.com/0lvf
➤➤Services We use
➤➤MORNINGFA·ME https://morningfa.me/invite/StraightArrowRepair
➤➤A2 Hosting http://www.a2hosting.com/refer/140244
➤➤Tubebuddy https://www.tubebuddy.com/StraightArrowRepair
➤➤Apsumo http://fbuy.me/v/philbridges
➤➤VidIQ: https://vidiq.com/straightarrowrepair
#bathroomremodeling #bathroom #bathroomrenovation
Transcript:
Hello friends, today we're after the grout and if you’ll pan through there, the tiles all been set and we're putting the grout in. Make sure the customer was happy with the color. And I'm using a sanded grout and use the finishing knife to push it in. That way.
I'm just really familiar with finishing knives, all your drywall finishing and we mixed it with a battery power drill and a beater. Which I'll show you here shortly, how that works and I’m forcing the grout in there. Of course, we've taken all the spacers out. We didn't do it. The kids that live here had a lot of fun doing it. I had suggested that would be some fun for the kids to do. And so we’ll let that set a little bit and we will keep on keeping on and we'll come back here, start wiping it out. Wiping it down and we'll show you how to do that.
Okay. In case you're wondering, go ahead keep mixing. This is how we make, use a beater like this and a battery powered drill. Don’t to mix a whole lot because I've got to get it down in 45 minutes. That's when it starts getting stiffer than to wipe it all down. So that's about the mixture that we want maybe a little thicker, but that'll work. And then we're going inside and put it in.
When we first start off, we do the sponge to watch how Drew’s doing this, getting the main part of it off. When we come back with the towel. If you look back here we’re using towels, Clay’s tracking it up. But this team is getting better and better at it and you can pull it down with a towel.
Believe it or not, that works better than sponges and it could be expensive if you buy them brand new towels. I go to thrift stores and pick them up, and then use them again and again. The sponge I can’t reuse, but a towel cleans it up and does a better job. Now, after that towel does its job, it’ll leave a fine dust. And here by the way we need to clean that up. It will leave a fine dust and then we'll come back with the towel again and wipe that dust down. We'll get it all cleaned up nice and pretty. And that’s how you grout.
Okay. The next thing we're going to do is if you let this dry for about an hour or so, we're going to take a towel knock the dust off of all this.
177
views
1
comment

Removing A Window Time Lapse
Here's a time lapse of the guys getting ready to change out a window.
⏱️⏱️Chapters⏱️⏱️
00:00 Intro
00:12 Inside wall
01:25 Outside wall
🙏 Subscribe, 👍, it helps a lot!!
➤❓/ 💬: ask@straightarrowrepair.com
➤ Follow https://straightarrowrepair.com/pipf
➤➤I get a little for the channel-no charge for you if you use the links:
➤➤Shop Amazon https://amzn.to/3CxD1T4
➤➤Tool lists & recommended products🧰 https://straightarrowrepair.com/0lvf
➤➤Services We use
➤➤MORNINGFA·ME https://morningfa.me/invite/StraightArrowRepair
➤➤A2 Hosting http://www.a2hosting.com/refer/140244
➤➤Tubebuddy https://www.tubebuddy.com/StraightArrowRepair
➤➤Apsumo http://fbuy.me/v/philbridges
➤➤VidIQ: https://vidiq.com/straightarrowrepair
#MobileHomeRepair, #MobileHomeImprovement, #DIYHomeRepair
49
views
5
comments

Installing An Exterior Door In An Existing Wall Cutting the Wall
Phil is installing a new door into a current wall.
⏱️⏱️Chapters⏱️⏱️
0:00 Intro
0:12 Figured out the height of the door and the gaps we need
00:40 Already determined where the sides of the door need to be
01:00 Cutting through the wall with a Sawzall
01:15 Took a drill bit and made areas to start the cutting
02:35 Should use ear protection
03:15 They put 1bys to fasten the tin too
🙏 Subscribe, 👍, it helps a lot!!
➤❓/ 💬: ask@straightarrowrepair.com
➤ Follow https://straightarrowrepair.com/pipf
➤➤I get a little for the channel-no charge for you if you use the links:
➤➤Shop Amazon https://amzn.to/3CxD1T4
➤➤Tool lists & recommended products🧰 https://straightarrowrepair.com/0lvf
➤➤Services We use
➤➤MORNINGFA·ME https://morningfa.me/invite/StraightArrowRepair
➤➤A2 Hosting http://www.a2hosting.com/refer/140244
➤➤Tubebuddy https://www.tubebuddy.com/StraightArrowRepair
➤➤Apsumo http://fbuy.me/v/philbridges
➤➤VidIQ: https://vidiq.com/straightarrowrepair
#ExteriorDoorInstall #CuttingExteriorWall, #ExteriorDoor
Transcript:
So now we figured out the height of this door, a gap above it and gap below it. Threshold, which is we still gotta cut that to fit threshold height. The jam up here, and it's a room for shimming and such. And we've made a mark right here. We've already determined where the side of the doors and we're going to cover up beside those two bys that we knocked over and then we'll shim those to fit with.
They have plenty of room. Now, although not surgery, like a doctor with a great big exam lights and all that, we're going to use a sawzall although with a little bit wise, we won't be so violent. I got to actually cut through tin on the other side. I'm going to graduate and then go through the tin and cut all the way down, cut all the way across.
I took a power bit and drilled some areas where I could start without having to work so hard at it, but I could have done it without. And here I go, making a bunch of noise and hurting my hearing. So eventually the world will be very quiet to me
Whoo actually, you should use your protection.
I'm just making fun of myself. Self-deprecation is just one of my skills, so. You haven't cut the bottom yet. Yeah. We had to go outside and cut snips. The tin that’s, they put some old tin on here is one of the reasons I had a hard time cutting through is not only did they put plywood here, they put one bys to fasten the tin to and I don't know why they did that maybe it to make it easier for the heat to dissipate bugs to get from one side of the building to the other highway superhighway.
Anyway, we're going to go out there and cut that. Take this all the way down, cut this two by here, and then remeasure and make sure and then we'll put in a header. We'll take you along with us.
50
views
1
comment

Installing A Hood Vent Over Stove
Kitchen Revamp & Supporting Floor 2020
⏱️⏱️Chapters⏱️⏱️
00:00 Intro
00:12 Need to move a cabinet
00:40 Measuring everything
01:00 The cabinets were pretty far out of level
01:25 Pulling the cover off of the hood vent
02:25 Moving the cabinet
04:05 The frame has 2-foot centers
05:00 Measuring the hood vent to the center
06:05 Marking for installation
06:55 Each job has to be adjusted for, things are never exact
07:15 Cutting a hole so can adjust the install
07:50 Cut away to get the hole drilled
🙏 Subscribe, 👍, it helps a lot!!
➤❓/ 💬: ask@straightarrowrepair.com
➤ Follow https://straightarrowrepair.com/pipf
➤➤I get a little for the channel-no charge for you if you use the links:
➤➤Shop Amazon https://amzn.to/3CxD1T4
➤➤Tool lists & recommended products🧰 https://straightarrowrepair.com/0lvf
➤➤Services We use
➤➤MORNINGFA·ME https://morningfa.me/invite/StraightArrowRepair
➤➤A2 Hosting http://www.a2hosting.com/refer/140244
➤➤Tubebuddy https://www.tubebuddy.com/StraightArrowRepair
➤➤Apsumo http://fbuy.me/v/philbridges
➤➤VidIQ: https://vidiq.com/straightarrowrepair
#hoodventinstall #kitchenimprovement #DIYHomeRepair
35
views
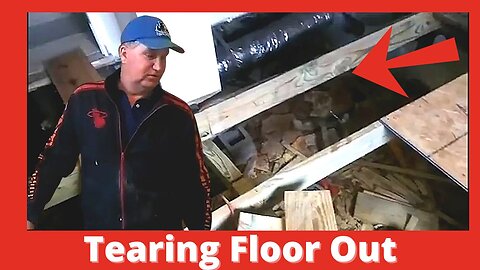
Damaged Flooring Repair Tear Out
The guys are putting in a new floor.
⏱️⏱️Chapters⏱️⏱️
00:00 New project, fixing the floor
00:15 Pulling the floor up
00:40 Pulled the floor up, can see the problems
00:55 Lots of water damage
01:10 All the layers on the floor
01:30 Get floor tore out, bring in new 2x6s
02:10 Fell through the floor, last year did that and had to wear a walking cast
02:50 Back after tearing the floor out, didn't break a foot this time
03:00 Put in new floor joists
03:15 Added support anywhere the floor joists felt strange
03:35 We have several videos that show exactly how to add support
03:48 Floor joists aren't even, so have to adjust for that
04:00 Supporting the hallway and will take you with us
🙏 Subscribe, 👍, it helps a lot!!
➤❓/ 💬: ask@straightarrowrepair.com
➤ Follow https://straightarrowrepair.com/pipf
➤➤I get a little for the channel-no charge for you if you use the links:
➤➤Shop Amazon https://amzn.to/3CxD1T4
➤➤Tool lists & recommended products🧰 https://straightarrowrepair.com/0lvf
➤➤Services We use
➤➤MORNINGFA·ME https://morningfa.me/invite/StraightArrowRepair
➤➤A2 Hosting http://www.a2hosting.com/refer/140244
➤➤Tubebuddy https://www.tubebuddy.com/StraightArrowRepair
➤➤Apsumo http://fbuy.me/v/philbridges
➤➤VidIQ: https://vidiq.com/straightarrowrepair
#MobileHomeRepair, #MobileHomeFloorJoists #waterdamageflooring
Transcript:
We've got a new project. We're fixing the floor. Sort of like walking down a staircase. Something's wrong. And so we're going to pull the floor up, find out, fix it. May take a day or two. What? I'll do is pull all trim off, pull this door off, pull that piece up, and then we're going to rebuild. The problem with the hallway is doing the same thing right here. So, we got to find out what’s going on. Here we go.
Well, we're getting an idea what happened. Looks like originally you had a half inch plywood over the top of these floor joists, which here's a piece kind of sad shape. There's been a lot of water bathtubs over that way. So I'd say that's where the water's coming from. 2x6s they need some help. And so anyway, they did plywood on top of particleboard on top of half inch plywood and felt paper inbetween each layer.
And then there's water underneath. And then I don't like the way this support is because the boards need to be turned on edge if you’re going to use a 2x6.
So we're making progress. We're going to get it all tore up, bring in new 2x6s and some of these are okay, but not great.
This one was pretty sad, but I'll probably put boards beside it and give it that much more strength and put a 4x4 underneath here because this one's broke. I'm not that strong, but actually I fell through the floor.
That's kind of an unusual, I would say. But last year I fell to the floor and got a dancer's fracture and I had to go around in a cast for six weeks. Where other people to work. I work and it was very clumsy, felt like a club for the cartoon character of The Hunchback of Notre Dame ‘Sanctuary, Sanctuary’
Anyway, I didn't stop, though. We kept working and I'm kind of glad we did. But here we go. We're going to do this tear this all up, and we'll show you some more when we get done.
Okay. So we tore out this room. I actually fell to the floor. At least I didn't broke a foot this time. We put a new floor joist over here.
We changed the support, laid over 2x6, 2x8 to a 4x4 that’s pressure treated. We screwed everything together. And wherever the floor joist felt strange or not good enough, we put in another one and we're going to add probably two more in there and then we'll fill all this area in. We put 2bys, 2bys in between.
And if you watch some of videos, you'll see how we screw that together. That way it's no weaknesses on the outside and everything screwed down some of these floor joists. We’re having to deal with the fact that one is 7 and 1/4 and one is 7 inches, but none of them are truly seven and a half what a 2x8 would be so anyway, we're now putting supports under the hallway.
We're going to tear out the hallway, we'll take you with us on that. But I do not step on that board or that board right there. Don't step on it.
79
views
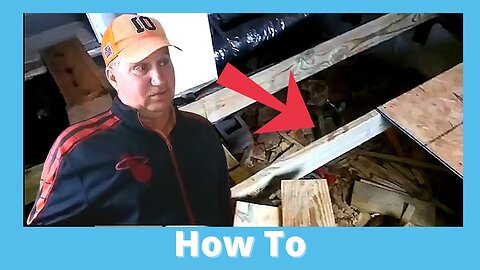
Fixing Uneven Floor Joists
Phil explains some of the hard things you can run into when replacing the floors in a mobile home or home.
00:00 Intro
00:12 Back after tearing the floor out, didn't break a foot this time
00:20 Put in new floor joists
00:35 Added support anywhere the floor joists felt strange
01:00 We have several videos that show exactly how to add support
01:10 Floor joists aren't even, so have to adjust for that
🙏 Subscribe, 👍, it helps a lot!!
➤❓/ 💬: ask@straightarrowrepair.com
➤ Follow https://straightarrowrepair.com/pipf
➤➤I get a little for the channel-no charge for you if you use the links:
➤➤Shop Amazon https://amzn.to/3CxD1T4
➤➤Tool lists & recommended products🧰 https://straightarrowrepair.com/0lvf
➤➤Services We use
➤➤MORNINGFA·ME https://morningfa.me/invite/StraightArrowRepair
➤➤A2 Hosting http://www.a2hosting.com/refer/140244
➤➤Tubebuddy https://www.tubebuddy.com/StraightArrowRepair
➤➤Apsumo http://fbuy.me/v/philbridges
➤➤VidIQ: https://vidiq.com/straightarrowrepair
#MobileHomeRepair, #MobileHomeFloors, #floorjoists
Transcript:
Okay. So we tore out this room. I actually fell to the floor. At least I didn't broke a foot this time. We put a new floor joist over here.
We changed the support, laid over 2x6, 2x8 to a 4x4 that’s pressure treated. We screwed everything together. And wherever the floor joist felt strange or not good enough, we put in another one and we're going to add probably two more in there and then we'll fill all this area in. We put 2bys, 2bys in between.
And if you watch some of videos, you'll see how we screw that together. That way it's no weaknesses on the outside and everything screwed down some of these floor joists. We’re having to deal with the fact that one is 7 and 1/4 and one is 7 inches, but none of them are truly seven and a half what a 2x8 would be so anyway, we're now putting supports under the hallway.
We're going to tear out the hallway, we'll take you with us on that.
37
views

Mobile Home Deck Ideas - Huntsville Back Porch
How to put in a safer porch, with wide landings and a shallow stair height.
⏱️⏱️Chapters⏱️⏱️
00:00 Helping an older couple with access to their tornado shelter
00:27 These steps are uneven and varying heights
00:40 With the differences, you are more likely to miss a step
01:30 First platform is framed in
02:11 How to put a porch in by yourself and keep it level
02:30 You can do increments of 3, 4, 5 then check it for square
04:30 Why I use 4x4s instead of blocks
05:25 Using cap blocks under our 4x4s
05:45 Back after putting in the 4x4s
05:55 Changed things up to make the customer safer
06:10 Much easier to cut your 4x4s and then put them up
06:25 Want to measure from block to top and add 28.5"
06:37 Don't do 42" because it's too high for comfort
07:18 We have made a frame
07:47 Handrail won't go all the way so they can get off the stair either way
08:00 We put supports in the corners
08:25 Next we'll put in the floor
08:35 End of the job
🙏 Subscribe, 👍, it helps a lot!!
➤❓/ 💬: ask@straightarrowrepair.com
➤ Follow https://straightarrowrepair.com/pipf
➤➤I get a little for the channel-no charge for you if you use the links:
➤➤Shop Amazon https://amzn.to/3CxD1T4
➤➤Tool lists & recommended products🧰 https://straightarrowrepair.com/0lvf
➤➤Services We use
➤➤MORNINGFA·ME https://morningfa.me/invite/StraightArrowRepair
➤➤A2 Hosting http://www.a2hosting.com/refer/140244
➤➤Tubebuddy https://www.tubebuddy.com/StraightArrowRepair
➤➤Apsumo http://fbuy.me/v/philbridges
➤➤VidIQ: https://vidiq.com/straightarrowrepair
#MobileHomeRepair, #MobileHomeImprovement, #MobileHomeSteps
41
views
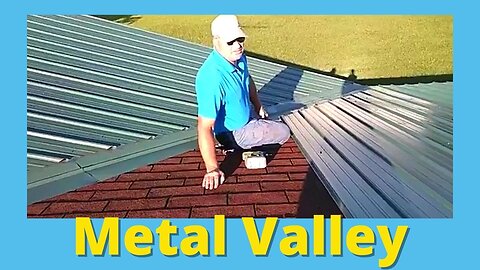
Metal Roof Valley Install for home, mobile home, commercial buildings
How to measure and cut the metal on a valley for metal roof.
⏱️⏱️Chapters⏱️⏱️
00:00 One of the tricky parts of doing a valley
00:48 Want to find the angle
01:06 Take a squared off piece, generally 36"
01:37 Keep it square with the piece you're measuring from
01:48 Other side even with the line you popped
02:05 Measure where you will lap, not the edge
02:30 When you get your angle, that will tell you where to pop a line to keep square
02:50 Measure up the roof
03:22 Cutting once you have your measurements
04:20 Here's where your angle comes in, go 38 1/4 up
05:10 How to cut if you work by yourself
06:10 Pop your line to cut the metal roofing
06:35 Types of snipes you can use
07:05 Trick for cutting metal roofing
08:35 Trick when placing your metal-run it along the rib
09:20 Want to screw into your 2 ft centers, keeps metal on even during high winds
10:00 Stay 2-3" up because will put in valley foam
10:25 Now you know the valley angle, you should be able to pop your lines
10:35 Check at first then you know your angles
11:00 Metal roof valley going down need to determine the angle
🙏 Subscribe, 👍, it helps a lot!!
➤❓/ 💬: ask@straightarrowrepair.com
➤ Follow https://straightarrowrepair.com/pipf
➤➤I get a little for the channel-no charge for you if you use the links:
➤➤Shop Amazon https://amzn.to/3CxD1T4
➤➤Tool lists & recommended products🧰 https://straightarrowrepair.com/0lvf
➤➤Services We use
➤➤MORNINGFA·ME https://morningfa.me/invite/StraightArrowRepair
➤➤A2 Hosting http://www.a2hosting.com/refer/140244
➤➤Tubebuddy https://www.tubebuddy.com/StraightArrowRepair
➤➤Apsumo http://fbuy.me/v/philbridges
➤➤VidIQ: https://vidiq.com/straightarrowrepair
#MetalRoof, #CommercialMetalRoof, #MetalRoofValley
54
views

Finished Deck and Privacy Fence Job, Wooden deck and fence on a budget
Walk through of the finished privacy fence and deck we did for a customer.
🙏 Subscribe, 👍, it helps a lot!!
➤❓/ 💬: ask@straightarrowrepair.com
➤ Follow https://straightarrowrepair.com/pipf
➤➤I get a little for the channel-no charge for you if you use the links:
➤➤Shop Amazon https://amzn.to/3CxD1T4
➤➤Tool lists & recommended products🧰 https://straightarrowrepair.com/0lvf
➤➤Services We use
➤➤MORNINGFA·ME https://morningfa.me/invite/StraightArrowRepair
➤➤A2 Hosting http://www.a2hosting.com/refer/140244
➤➤Tubebuddy https://www.tubebuddy.com/StraightArrowRepair
➤➤Apsumo http://fbuy.me/v/philbridges
➤➤VidIQ: https://vidiq.com/straightarrowrepair
#MobileHomeRepair, #MobileHomeImprovement, #OutsideDeck
32
views

Outdoor Deck Wooden Deck 8-8-18
We started with a custom deck for this customer, but the more he saw our work the more he added onto the job. We have done: Large Wooden Deck, Metal Roof, Skirting, and privacy fence.
When we first started, he said he would be thrilled if we could only have the deck completed by the end of Aug...I'd say we made it.
🙏 Subscribe, 👍, it helps a lot!!
➤❓/ 💬: ask@straightarrowrepair.com
➤ Follow https://straightarrowrepair.com/pipf
➤➤I get a little for the channel-no charge for you if you use the links:
➤➤Shop Amazon https://amzn.to/3CxD1T4
➤➤Tool lists & recommended products🧰 https://straightarrowrepair.com/0lvf
➤➤Services We use
➤➤MORNINGFA·ME https://morningfa.me/invite/StraightArrowRepair
➤➤A2 Hosting http://www.a2hosting.com/refer/140244
➤➤Tubebuddy https://www.tubebuddy.com/StraightArrowRepair
➤➤Apsumo http://fbuy.me/v/philbridges
➤➤VidIQ: https://vidiq.com/straightarrowrepair
#MobileHomeRepair, #MobileHomeDeck, #OutsideDeck
38
views

Fell Through Floor #Shorts
Actually, I fell through the floor. That's kind of an unusual, I would say. But last year I fell to the floor and got a dancer's fracture and I had to go around in a cast for six weeks. Where other people to work. I work and it was very clumsy, felt like a club for the cartoon character of The Hunchback of Notre Dame ‘Sanctuary, Sanctuary’
Anyway, I didn't stop, though. We kept working and I'm kind of glad we did. But here we go. We're going to do this tear this all up, and we'll show you some more when we get done.
🙏 Subscribe, 👍, it helps a lot!!
➤❓/ 💬: ask@straightarrowrepair.com
➤ Follow https://straightarrowrepair.com/pipf
➤➤I get a little for the channel-no charge for you if you use the links:
➤➤Shop Amazon https://amzn.to/3CxD1T4
➤➤Tool lists & recommended products🧰 https://straightarrowrepair.com/0lvf
➤➤Services We use
➤➤MORNINGFA·ME https://morningfa.me/invite/StraightArrowRepair
➤➤A2 Hosting http://www.a2hosting.com/refer/140244
➤➤Tubebuddy https://www.tubebuddy.com/StraightArrowRepair
➤➤Apsumo http://fbuy.me/v/philbridges
➤➤VidIQ: https://vidiq.com/straightarrowrepair
#MobileHomeRepair, #MobileHomeFloors #FunStory
38
views

Fell Through Floor Water Damage
Getting to know Phil. He doesn't often fall or get hurt, but this floor he did. That reminded him of a year before falling, getting a dancer's fracture and working hurt.
⏱️⏱️Chapters⏱️⏱️
00:00 Intro
00:12 Water damaged 2x6s
00:25 Fell through the floor
00:35 Last year did that and had to wear a walking cast
🙏 Subscribe, 👍, it helps a lot!!
➤❓/ 💬: ask@straightarrowrepair.com
➤ Follow https://straightarrowrepair.com/pipf
➤➤I get a little for the channel-no charge for you if you use the links:
➤➤Shop Amazon https://amzn.to/3CxD1T4
➤➤Tool lists & recommended products🧰 https://straightarrowrepair.com/0lvf
➤➤Services We use
➤➤MORNINGFA·ME https://morningfa.me/invite/StraightArrowRepair
➤➤A2 Hosting http://www.a2hosting.com/refer/140244
➤➤Tubebuddy https://www.tubebuddy.com/StraightArrowRepair
➤➤Apsumo http://fbuy.me/v/philbridges
➤➤VidIQ: https://vidiq.com/straightarrowrepair
#MobileHomeRepair, #MobileHomeFloors #FunStory
Transcript:
This one was pretty sad, but I'll probably put boards beside it and give it that much more strength and put a 4x4 underneath here because this one's broke. I'm not that strong, but actually I fell through the floor.
That's kind of an unusual, I would say. But last year I fell to the floor and got a dancer's fracture and I had to go around in a cast for six weeks. Where other people to work. I work and it was very clumsy, felt like a club for the cartoon character of The Hunchback of Notre Dame ‘Sanctuary, Sanctuary’
Anyway, I didn't stop, though. We kept working and I'm kind of glad we did. But here we go. We're going to do this tear this all up, and we'll show you some more when we get done.
36
views

Moving A Grain Bin On Trailer
Not something you see every day... Or we do every day, the guys are moving a 20' grain silo on a gooseneck trailer. The guy who dropped the silo did put a new hole it it, but it's fixable.
⏱️⏱️Chapters⏱️⏱️
00:00 Intro
00:12 Picking the grain bin
01:30 Wow, the guy dropped it
01:45 Back to loading the bin
02:15 Now that it's in position, they're backing the gooseneck under it
04:15 They're strapping it down
04:40 Not perfect condition, but fixable
05:23 The drop did smash the ladder
06:00 How much did it cost?
🙏 Subscribe, 👍, it helps a lot!!
➤❓/ 💬: ask@straightarrowrepair.com
➤ Follow https://straightarrowrepair.com/pipf
➤➤I get a little for the channel-no charge for you if you use the links:
➤➤Shop Amazon https://amzn.to/3CxD1T4
➤➤Tool lists & recommended products🧰 https://straightarrowrepair.com/0lvf
➤➤Services We use
➤➤MORNINGFA·ME https://morningfa.me/invite/StraightArrowRepair
➤➤A2 Hosting http://www.a2hosting.com/refer/140244
➤➤Tubebuddy https://www.tubebuddy.com/StraightArrowRepair
➤➤Apsumo http://fbuy.me/v/philbridges
➤➤VidIQ: https://vidiq.com/straightarrowrepair
#movinggrainbin, #movinggrainsilo #grainsilo
Trancript:
Yes, it's kind of like combat.
Oh, I
Oh, it's spinning. We popped a tire as we pulled in here yesterday. Blew a tire. Cause they have stuff laying around in the same spot. Pulled in with a trailer, blew a tire in the same spot. It is what it is.
So now they're going to strap it down. And hopefully that tire on the backside, the back right tire farthest one from us, they can. Yeah, take it home. Well, this is it. He’ll give you his price that he bought it for. It's not in perfect condition. It’s got holes in it. Like on the top it’s got a hole, the bottom has a hole.
Nothing, nothing that you can't fix. Someone else didn’t need it and he needs it for his chicken. Hard to believe he's getting this for chickens in his backyard. I know it's pretty crazy. Pretty invested, let's put it that way. Did no damage.
It did smash the ladder. I don't think you’re going to use that. You have to open the lid and close the lid. I can straighten that out and sledgehammer. You can’t bend these fenders. There’s a way to fix up on one of these ways. Hey, just please do what I tell you. You've got a lot of slack to pull up. It’s not even hanging off. How much you get for? Good? A whopping $200. He can do it.
You might have a souvenir wheeling around
45
views
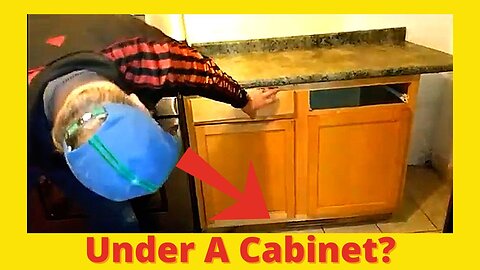
Installing A Cabinet Over A Vent
Phil walks you through, installing a cabinet over a vent. You can always make a box to angle the air out the bottom of the cabinet.
⏱️⏱️Chapters⏱️⏱️
00:00 Intro
00:12 Moving a cabinet
00:35 Cover the vent and build a box to vent outside the cabinet
01:05 Measured from the stove
01:35 Have to build a frame in the cabinet
02:30 He marked out where the vent goes, and they are drilling it out
02:50 You could use a Sawzall, but shakes the cabinet pretty bad
03:25 Doesn't have to look pretty just be there
04:05 Moving the cabinet over to where it goes
05:00 Putting the top back on
05:45 Set the little vent
06:15 Putting the drawers back
🙏 Subscribe, 👍, it helps a lot!!
➤❓/ 💬: ask@straightarrowrepair.com
➤ Follow https://straightarrowrepair.com/pipf
➤➤I get a little for the channel-no charge for you if you use the links:
➤➤Shop Amazon https://amzn.to/3CxD1T4
➤➤Tool lists & recommended products🧰 https://straightarrowrepair.com/0lvf
➤➤Services We use
➤➤MORNINGFA·ME https://morningfa.me/invite/StraightArrowRepair
➤➤A2 Hosting http://www.a2hosting.com/refer/140244
➤➤Tubebuddy https://www.tubebuddy.com/StraightArrowRepair
➤➤Apsumo http://fbuy.me/v/philbridges
➤➤VidIQ: https://vidiq.com/straightarrowrepair
#KitchenMakeover, #BudgetKitchenRemodel #DIYHomeRepair
Transcript:
We have a little bit of a dilemma, but they want to move this cabinet that’s here, here. So that sits right on top of a vent, which I would lay you odds. This used to be the hallway, but anyway, I don't care.
So we're going to cover that vent. What we're going to do is build a box around it and have a vent in the front of the cabinet, which we got the cabinet over here, and we're going to cut the little skinny vent in and build a box in here for the air to blow out to the main house, to the vent on the front and not be trapped underneath the cabinet and not have any heat in the kitchen.
So what I've done is measured from since it's all going to be up against. I measure from the stove and a 17 and a half and won't run on the floor, 17 and a half and 30 and five and a half inches over. I’ll literally pull that vent cover off and I'll put a different vent cover right here.
So right now I'm I said 17 and a half and 30, so so we'll have to build a frame in here so that probably what we'll do is put a two by and screw it together on the backside, maybe at five and a half inches, which would be from the backside here and that'll be the front side of our two by. This thing is pretty rotted.
And this thing's been wet. We'll put screws through here to hold it in place on the two by all the way across. So now, I'm able to run a two by in between here so it'll be sitting flat on the floor and then I'll have the vent hole cut in here and it will blow then theoretically out, which I know will. And then I'll be able to put the cabinet against the wall. That's what we're doing next.
So I keep catching myself, we roll so fast that we don't take you along with us. But anyway, we marked up the sides of the vent that we're going to put in there, or we mark the corners. He's drilling out with a paddle bit, which you can use pretty much anything that you can get a jigsaw bit into or a blade into, and then we'll cut all this out.
He was saying, you can use a Sawzall. You can, but it shakes the cabinet pretty rough. There you go. He's got it in the corners like that. You can go either direction. You.
Right now, we're trying to put in an enclosure and uh, this doesn’t have to look pretty inside there. We just needed to flow air and family's. That didn’t hold either. Fastening everything and then we'll just put some silicone around it just to keep it kind of air tight, getting back. It is second here and the sun is now fitting all. Here, right here. I don't need you. All right, fine. I was just trying to be helpful man.
Now going to put this over. I may just go ahead and fasten it to the wall. It's got a long three inch screw right through there. I can see there’s. Probably the only cabinet in this house that is sturdy. Incase the next stove is an eighth inch bigger.
Yeah. Nothing there? Nothing. Um, going to move that over here. Leave that one there. That’s good. This whole cabinet is about to fall apart? It's been wet so many times. Okay, let's get that top over there. OK. That’s way bigger than the cabinet itself. Yeah, that's what it was over here. But they're going to be happy cause she's got it right next to her stove instead of stove being over here where the refrigerator was. Anyway, now we just got to put this little vent. We need to set it where it'll point upwards ideally, so that you do that, that and put one inside it. Sure, you're going to come in. It’s all above and beyond really what I should be doing. And there it is so that's where the vents going to be coming out. Of course, you need to tilt it a little bit. that one single time.
141
views
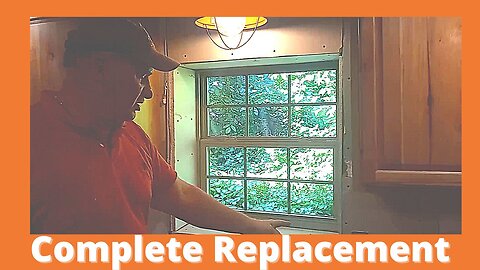
Complete Replacing A Mobile Home Window 2nd One
Phil is replacing a window in a difficult area. The previous owners built out the wall to install the window. We'll need to pull down the wall, cut an area for the new window, and then put it all back together.
⏱️⏱️Chapters⏱️⏱️
00:00 Intro
00:12 Here's the second window in the kitchen
00:25 Putting a larger cabinet in there
00:38 Outside starting to pull out the window
01:00 Measuring for the new window
02:08 Going to mark and then cut the window out
02:30 Cutting it out with a Sawzall
03:00 Will finish it cutting up with the skill saw
03:30 Now to tear that out
04:45 Usually you want to check where your electrical lines are
05:00 Prying the boards out
05:15 Hit a nail or screw with the saw
05:40 Removing the 2 by
06:55 Won't put a full length 2x4 in there
07:40 Put a 48" in there
07:52 Installing the 2x4 to support the window weight
08:45 May need to shim it up
08:55 Will need to support upper boards
09:18 Question is: Is it level?
09:40 Securing the top 2 by
10:40 Measurements for the other boards needed
11:10 Putting the 2 bys in
11:40 Even the best have boards drop
12:05 And our camera man need to lend a hand
12:30 Is it square?
12:55 Remeasuring the window to make sure we have enough room
13:20 Looks like the wall is angled, things you run into during remodels
14:20 We need to fill in one side of the window
14:45 Decided to put two layers of drywall
15:15 Back after checking the fit of the window
15:35 Got the window in. Now to screw it
16:15 Shimmed, still need to do corner bead and finishing
16:38 A larger cabinet that was special ordered
16:50 If you're shorter, you can look up and see the bluff line
🙏 Subscribe, 👍, it helps a lot!!
➤❓/ 💬: ask@straightarrowrepair.com
➤ Follow https://straightarrowrepair.com/pipf
➤➤I get a little for the channel-no charge for you if you use the links:
➤➤Shop Amazon https://amzn.to/3CxD1T4
➤➤Tool lists & recommended products🧰 https://straightarrowrepair.com/0lvf
➤➤Services We use
➤➤MORNINGFA·ME https://morningfa.me/invite/StraightArrowRepair
➤➤A2 Hosting http://www.a2hosting.com/refer/140244
➤➤Tubebuddy https://www.tubebuddy.com/StraightArrowRepair
➤➤Apsumo http://fbuy.me/v/philbridges
➤➤VidIQ: https://vidiq.com/straightarrowrepair
#windowremoval #windowreplacement #newmobilehomewindow
30
views