

How to Apply Primer | Makeup Tricks
Check out these amazing make-up products to apply flawless primer during your make-up routine!
Moisturizer for Scars and Stretchmarks:
🔗https://amzn.to/3r1yW6J
Foundation Blending Beauty Sponge:
🔗https://amzn.to/3JdQzXy
Kabuki Blush Concealer Eye Shadow Makeup Brush Kit:
🔗https://amzn.to/3NHhDSt
Makeup Remover Cleansing Face Wipes:
🔗https://amzn.to/3j4h6vG
Make Up Primer to Hide Wrinkles and Fine Lines:
🔗https://amzn.to/3uVj4E2
Full Playlist: https://www.youtube.com/playlist?list=PLLALQuK1NDrjebZVDLutJlUC8glHV-0mN
-
-
Watch more How to Apply Makeup videos: http://www.howcast.com/videos/511940-How-to-Apply-Primer-Makeup-Tricks
I'm going to talk about some of the benefits of primer. First, I'm going to start by applying it to the middle of the face. Right now, I'm using the Makeup Forever HD. This is actually a blue tinted primer. Basically, the tint of blue is going to brighten her skin tone.
Primers come in a lot of different shades. The blue, like I said, brightens. I also have a green one here which corrects redness. I also have this one which is a deeper, more rich tone and that actually is going to darken any type of foundation that you have, or just give yourself a little more color.
Say, you're feeling a little dull or sallow. You want a little more color, you want to look a little more tan, but not putting a darker foundation color on your face, you could add a little bit of a darker primer, and there you go.
So, yep, I'm just using my fingers, applying it all throughout the face. This one, specifically, is a water-based primer. There are two main different types, water-based and silicone-based. I like silicone because it really smooths out pores. The main function of a primer is to minimize fine lines and pores, and increase the longevity of your makeup. It really makes a huge difference if you do apply that.
The other kind of primer would be a water-based primer, which I suggest more for oilier skin types, acne prone skin types, just because the silicone can sometimes kind of seep into those pores. You don't really want that if you're breaking out or you're a little bit oilier.
So, we've applied the primer to half of the face now. I'm going to continue applying to the other side. Like I said, there are different color-correcting types of primers, but there are also plenty of other primers that you can use.
I also love primers with radiance. If you like that kind of dewy, sun-kissed J.Lo. glow type of look, you can use a primer with radiance. I love the Lauren Mercier one. There are also primers that have skincare properties. I know I have one that corrects dark spots overtime, which is really nice if you have any issues with pigmentation.
So as you see, this primer has just brightened her skin up so that when we put the foundation on top it's going to look a little brighter and her skin is going to look a little smoother. The next type of primer I want to talk about is actually eye shadow primer. The one that I'm using right now is Urban Decay.
Eye shadow primer is amazing. It really, really increases the longevity of your eye makeup. It increases the pigment so that it looks a little darker. You won't have to use as much shadow because it really picks up that pigment.
So I'm just kind of, once again, using a finger, applying it all over the lid. You really want to make sure since eye shadow primers are a little bit thicker than the ones for your face that you're getting it very evenly across the entire lid. This is great for people who have oilier lids and find that they get creasing right here of their shadow.
You use such a tiny amount for both eyes. There are other eye shadow primers, too, as well. I know I have one by Tart, which you can use 360 around the eye on the top lid and also around the bottom. Say, you have concealer that creases as well, you can use it both places. That one, the Tart one also has kind of pearl essence so it brightens the eyes too, which is nice for dark circles under eyes. But these would be my top tips for primers.
47
views
How to Do a Simple Step for Beginners | Step Dance
Hi, my name is Victor Sho, and this is my assistant Oscar Acevedo, and we are going to teach you a beginner level of how to combine a step to a bass beat. So we're going to start off teaching you the bass beat and then Oscar will always do the bass beat. And I will you another step, which is just one step routine that you will do one at a time and then together. Alright?
So, we start off with our bass beat. What we're going to do is do a single stomp with our right leg, and then you go onto your left and do a hand clap. Okay? So you're going to go boom, boom clap. Five, six, seven, and right, left right. Five, six, seven, and right, left, right. Then you're going to go right, left clap, boom, bop. Right, left clap, right stomp, right thigh. So it goes five, six, seven, and.
So now you're going to add your left stomp and another hand clap right after that. So it's going to go boom, boom bop, boom, bop, boom, bop. After we do this phrase right here, five, six, seven, and [dances], you're going to do another single stomp right here, another left single stomp, and a clap. Do another hand clap. Okay? So let's combine that right there. So you're going to go boom, boom clap, boom, bop, boom, bop. Boom, boom, bop. Cool? So now, right now, you've got to understand that we just, our last stomp was on our left leg but we're going to do another stomp on the left leg to now clap over the right and then under the right. Okay? So it's going to go, let's take it from here. Boom, boom bop, boom, clap, clap. Okay? So let's combine that all together.
So it should sound something like this. So it should go boom, boom bop, boom, bop, boom, bop. Boom, boom bop, boom, bop, bop. Okay? And then we're going to do this one more time. So now we loop it, yeah? So this right leg is up and you're just going to use that next stomp to start it all over again. And it's just going to go boom, boom bop, boom, bop, boom, bop. Boom, boom bop, boom, bop, bop, and finish, boom. So now, that is our bass beat. And it sounds pretty much like this. Five, six, five, six, five, six, seven, and [dances]. And that's your bass beat.
So now we're going to add the actual step that we need to learn to combine with this bass beat. You ready? Here we go. We stomp with our left leg, and clap over our right and then under our right. We Full playlist - https://www.youtube.com/playlist?list=PLLALQuK1NDrj1Kl-cv_lXXqoHK4FN_ClY
-
-
Want to stomp with our right leg and clap over our left and then under our left. And the beat goes boom, bop, bop, boom, bop, bop. One more time. Five, six, seven, and a [dances]. Okay?
So right now you're going to stomp this leg right here, boom, and then clap with your hand. Okay? Then you're going to go, to combine it together it's going to go boom, bop, bop, boom, bop, bop, boom, clap. Okay? And then you're going to take a stomp with your right leg, boom, and hit both your thighs with your hands, bop. So it's going to go five, six, seven, and boom, bop, bop, boom, bop, bop, boom, bop. Boom, bop.
To finish that off you're going to stomp with your left leg and clap twice with your hands. Boom, bop, bop. Cool? So let's add that on. So it's going to go boom, bop, bop, boom, bop, bop, boom, bop. Boom, bop, boom bop. Bop. Okay? So now to finish this you're going to do it one more time again but the ending is going to be a little bit difference. So after you said boom, bop, bop, boom, bop, bop, boom bop. Boom, bop, boom bop. Bop. You're going to do it one more time. Boom, bop, bop, boom, bop, bop, boom bop. Boom, bop, boom bop. And now this ending is where the difference comes.
You're going to do two doubles and end off with a single. Ba-boom, ba-boom, boom. Once again, after you hit your thighs right here you're going to go right left, right left, right. Okay? So let's combine it, just that second part. So you're going to go boom, bop, bop, boom, bop, bop, boom bop. Boom, bop, boom bop. Ba-boom, ba-boom, boom. Okay? So now when you put it all together for just the step alone it sounds like this.
So now we're going to take that step and mix it with the bass beat to create a whole new beat. Are you ready? I'm going to do it slow, in tempo, and then we're done. Here we go. Five, six, five, six, five, six, seven and. And that's how you do it.
92
views

How to Do a Bicycle Crunch | Boot Camp Workout
Bring your bicycle crunches to the next level with these awesome workout products!
Indoor Cycling Bike with Comfortable Seat Cushion:
🔗https://amzn.to/3J58Eac
Deep Tissue Muscle Treatment Massage Gun:
🔗https://amzn.to/3LvpoJ8
Track Massage Chair Recliner:
🔗https://amzn.to/3uKNTeL
Bike Trainer Stand for Indoor Riding:
🔗https://amzn.to/3K3GFZC
Padded Shorts for Snowboard:
🔗https://amzn.to/3IWI3Mj
Full Playlist: https://www.youtube.com/playlist?list=PL9E5DDBCFA8EA4B56
-
-
Boot Camp Workout Playlist - https://www.youtube.com/playlist?list=PL9E5DDBCFA8EA4B56
Looking for a Workout that kicks your ass? Check out these Hardcore fitness resources:
Rep 3 in 1 Wood Plyometric Box for CrossFit and Conditioning: http://amzn.to/1GwyDk9
Boot Camp and Group Training Routines Kindle Edition: http://amzn.to/1QZPdi0
The Official Five-Star Fitness Boot Camp Workout: http://amzn.to/1L0f2wR
Skinny Bitch Fitness: Boot Camp: http://amzn.to/1OlV81u
Tactical Fitness: The Elite Strength and Conditioning Program: http://amzn.to/1MePpq1
507053-How-to-Do-a-Bicycle-Crunch-Boot-Camp-Workout
I’m going to talk you through how to do a bicycle crunch. So to do a bicycle crunch, you could do them at a boot camp, in the grass, you could do them at home on a mat. You’re just going to come onto your back and I like to start by bring both knees up off the floor and making sure that before you even begin that you’re pulling the abdominal muscles in. So that when you breathe in naturally, the belly expands, on the exhale, the abdominal muscles draw inward. So that’s what you want to focus on, to engage the deep layer, the transverse abdominis, that kind of runs across your body like a belt. So just think of it as cinching a belt tightly around your waist. Then you want to engage the superficial layer, the rectus abdominis, aka, your six pack. So that muscle group is the muscle that flexes your spine. So drawing your belly in and then flexing your spine, and starting to engage the superficial layer. So now you’re firing up your entire core then you’re going to take the hands behind the head, open up the elbows. I’d like to have you think that you’re not able to see your elbows in your periphery. So instead of getting like this and potentially pulling on your head and stressing out the sternocleidomastoid and all those other muscles in your neck. Just keep it relaxed, open up, keep the heart open, one leg goes in as the other leg goes out. So this is the mechanics of the lower body in the bicycle crunch. The more you extend your leg, the more you’re going to fire up your quad muscle. If I keep my leg slack, I’m not getting as much recruitment of the quad. So if you can, fully extend energy all the way out through the legs. And then to really get the obliquus; the muscles of the abdominals. Rotate your body, you need to add in the rotation, so, you’re doing, opposite elbow to the knee, and again, try to keep your shoulder blades up off the matt if you really want to fire up the rectus abdominis at the same time.
39
views

How to Set Up an Ethernet Switch | Internet Setup
So, in this video I'm gonna talk about how to install your ethernet switch. So, let's say I have my laptop here, and I really want to connect it to my network. So, I'll take a little ethernet cable, and plug it to the laptop; and on the other side, of course, it has to go to my router. Let's, oh no, I'm out of ports on my router. All my ports are already full, because I've connected them to all my other computers. So, what are we gonna do?
This is where the ethernet switch comes in handy. As you can see, the ethernet switch just as a bunch of ports on it. So, to connect to the network what I have to do is first, take one of the ports that are already connected to the network, and move them over to the switch. Now, the reason I'm doing that is because I need a free port on my router, so I can connect my switch to it So I'm gonna take another ethernet cable, plug that one in; and then, the other side goes to my router.
Now, it doesn't really matter where you connect the cables to, as long as the order is correct. The specific port is of no importance. So, as long as I connected the switch to the router, everything that's connected to the switch, is also connected to the router. Basically, the switch just extends the ports that are on the router.
So, now I have to just connect my laptop over to the switch, and I'm done. Everybody's online. The laptop is connected to the switch, the switch is connected to the router, and everything that's connected to both the router and the switch, is on the network. Now, this is a really good trick if you have, for example, another room in your house that has a bunch of computers in it that you wanna connect to your network, not wirelessly, but with an actual cable. This means that you only have to really run one cable over to that room, and then just hook it up to a switch that has more ports.
15
views
How to Do a Tricep Dip | Boot Camp Workout
Firm up those triceps and get toned arms with these tools to boost your workout!
DSW Chair with Natural Wooden Legs:
🔗https://amzn.to/3Dxc5Fu
Women's Slim-Fit Camisole:
🔗https://amzn.to/3Dvf5BV
Men's Questar Flow Nxt Running Shoe:
🔗https://amzn.to/3K0fI9e
Wrist Support Braces:
🔗https://amzn.to/3LCfTrL
Water Bottle with Storage Sleeve & Straw Lid:
🔗https://amzn.to/3qSDY5J
Full Playlist: https://www.youtube.com/playlist?list=PL9E5DDBCFA8EA4B56
-
-
Boot Camp Workout Playlist - https://www.youtube.com/playlist?list=PL9E5DDBCFA8EA4B56
Looking for a Workout that kicks your ass? Check out these Hardcore fitness resources:
Rep 3 in 1 Wood Plyometric Box for CrossFit and Conditioning: http://amzn.to/1GwyDk9
Boot Camp and Group Training Routines Kindle Edition: http://amzn.to/1QZPdi0
The Official Five-Star Fitness Boot Camp Workout: http://amzn.to/1L0f2wR
Skinny Bitch Fitness: Boot Camp: http://amzn.to/1OlV81u
Tactical Fitness: The Elite Strength and Conditioning Program: http://amzn.to/1MePpq1
507067-How-to-Do-a-Tricep-Dip-Boot-Camp-Workout
I'm gonna show you how to do a Tricep Dip. So the major muscle group is the tricep. You can do it from a chair or a bench, you can even do it on the floor. So just getting yourself into position to start by rolling your shoulders down. You want to start from good posture. Sometimes we tend to slump forward and then we're gonna potentially cause an extra strain on the shoulder joint. So set yourself up by rolling the shoulders back, opening up the chest. Bringing your hands directly underneath your shoulders onto the bench or onto the ground. And you're gonna take your legs out keeping your knees bent. If you wanted to make it harder you could extend the legs. So start with the easier option, see how you feel first. You're gonna bend the elbows, lowering the hips down, and then exhale to extend the elbows and lift your body up. Inhale down, exhale up. The biggest mistake people make here is when they come down, sinking into the shoulders. You wanna really try to just depress the shoulder blades down your back, so that you keep your neck nice and long. And the other mistake is that people just tend to move their hips up and down. And there's no action going on in the elbow joint itself. The action in the elbow joint needs to be election and extension, because that's gonna engage the tricep muscle. And that's the whole focus of the tricep dip. Elbow flextion, elbow extension start to strengthen the tricep muscle group. Which is that muscle that tends to jiggle on some of us when we wave. So this is a great exercise to tighten it up.
23
views

How to Do a Dumbbell Row | Back Workout
Top Rated At Home Workout Gear:
Inred Dual Ab Wheel: http://amzn.to/1JwgNPy
LifelineUSA Chest Expander: http://amzn.to/1O6dlhA
Iron Gym Upper Body Workout: http://amzn.to/1igVj2p
Shake Weight Dumbell: http://amzn.to/1igS0YU
Perfect Pushup Elite: http://amzn.to/1hS0zJG
Valeo Deluxe Speed Rope: http://amzn.to/1L1QRv9
Watch more Home Back Workout for Men videos: http://www.howcast.com/videos/503062-How-to-Do-a-Dumbbell-Row-Back-Workout
Hey Guys, this is Max Tapper again for Howcast. And today I'm going to show you how to do a dumbbell row on the bench. Alright? Obviously that's going to be a one arm dumbbell row and it's going to target our lats, our rear delts, our rhomboids, our biceps, our forearms, so tons of muscles in this. And this is what I would call a prime exercise. So these are one of the exercises that if you're really looking to add some strength or size to your lats, these are going to be one of the ones that you're going to definitely go to. Basically you're able to lift the most amount of weight and you're going to be in a very stable position. Okay?
So this is what it's going to look like. Come along. We're going to get one knee on the bench, other leg out to the side. The reason that I like to do that is I like to put your abdominals over the floor. A lot of people do it differently where they are staggering their leg this way and you're going to put more tension on your lower back. So my version is going to be a lot safer. It may be harder to do but a lot safer and more effective. Okay?
Leg out to the side, stomach over the floor and we're going to grab a hold of this dumbbell. Now, the first thing you want to think about when you grab the dumbbell is let's use your hand as a hook. Instead of thinking of squeezing that dumbbell and putting everything into your bicep and your forearm, we're going to use it as a hook and think of lifting our elbow back. Alright? So that's a very important key to really isolate that lat muscle.
We're going to grab a hold, slowly lift, one. Allow yourself to extend down, back again, allow yourself to go step down. Now, this is the dumbbell row.
The one mistake a lot of people make is using their legs. Okay? Now, if you're using your legs then what you're effectively doing is making that weight lighter. So majority of the time when you see people lifting a weight that's too heavy for them, they're using their legs. So if you see this on your extension, up, that weight is too heavy for you, okay? We need to lock those legs in, your back's going to be stable, and you're going to allow your shoulder to drop maybe that is the only thing that'll happen. Contract and pull but the legs don't move.
Alright guys? So remember, use the hands as a hook. It's going to be so effective. This is an excellent exercise to really target those back muscles. This is going to be one of the top three that I do. I love dumbbell rows, I do them all the time and I think you should too.
29
views
1
comment

Top 3 Sexy Moves for Guys | Sexy Dance Moves
Get These Sexy Dance Accessories:
Stretching Band: http://amzn.to/1SnCojY
Portable Dance Bar: http://amzn.to/1c9bVFx
Portable Dance Pole: http://amzn.to/1F5PadH
Harem Pants: http://amzn.to/1EnA5To
Leg Warmers: http://amzn.to/1KoSzeA
Nike Dance Sneakers: http://amzn.to/1SnCU1u
Microphone: http://amzn.to/1HyItnH
Knee Pads: http://amzn.to/1F1xhf8
Watch more Sexy Dance Moves for the Club videos: http://bit.ly/1PALFXd
Hi, my name is Victor Show, and I want to show you the top three sexy moves for guys. So fellas, once again, less is more in this case. You always want to put your personality into it, and just have some swag when you're doing these steps. Cause they're just simple, and it's good. So here we go. So you want to do what I like to call, raise the roof. So all you do is just put your hands in the air, and then you just throw it up. Throw it up like this. And move from side to side, you can do one hand, and you can bury it just like that.
And that's your first move right there. Now your second move, it's a little bit more complicated. I like to call it, the Obama Groove. So you go, open, close, open, close, open, close, open, close, open, close, open, close, and a open, close, open, close, and open, close, open, close, open, close, open, close, open, close.
And that is the Obama Groove. Yep. Watch Ellen, you'll know what I'm talking about. Third step, is simple. All you want to do is have your hands in the air, well one hand in the air and I call it, rolling the dice. And you'll want to go one, two, three, four. You can even do like a little tip toe off of it to make it a little bit more exciting. Boom, hop, hop. And then you can just rock out just like that. And those are your three sexy moves for guys. Less is more, keep it simple, keep it swagged out and that's how you do it.
27
views
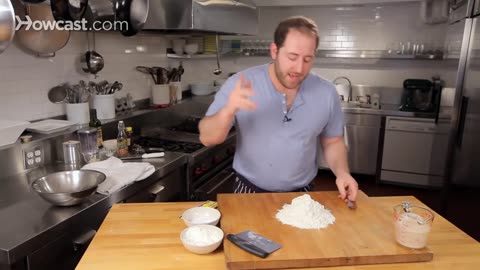
How to Make Pizza Dough without a Mixer | Homemade Pizza
2 cups (10 oz) unbleached all-purpose flour 1/2 tsp instant yeast 1 tsp honey 1 tsp sea salt or kosher salt Â_ cup warm water (110-115 degrees, Fahrenheit) Â_ cup olive oil Combine flour, yeast, honey & salt in food processor w. steel blade. Add water thru feed tube, then oil. Process till ball forms. Throw dough onto work surface several times; it should feel a bit sticky but not oily. If oily, mix in 1 tsp water; slap again. Refrig. dough in airtight plastic bag up to 48 hrs. Makes 2x 13" pies.
So I live in Manhattan. I do not have a ton of space. I don't have room for a giant machine so the way I make pizza dough at home is with little boy right here. All you need is a fork. So what I start with is about 3 cups of all purpose flour, I'm going to do what's called the well method. So I'm just going to kind of make this giant well just enough where I can kind of see the board, but I still have this barrier of all the flour alright?
It's kind of like go back to your sand castle days that's where you want to be. So I have a little bit of yeast in here, a little warm water and I let it bloom in here for about 10 minutes. 110 degrees is the optimum water temperature when you pour in your yeast so it kind of wakes it up and you know it's there if you can see this kind of foam. That's a good sign that you did the right thing. A little squeeze of honey in there just to give it some sweetness and then I'm going to pour the whole thing into the well.
Alright. Now, this is the part where it gets a little bit intense. If you break down one of the walls you've got a little bit of a mess to clean up. So you just kind of start bringing in the flour little by little from the walls, just kind of working it, right? Trying your best not to break a wall because if you do you’re kind of doing one of these things trying to scoop it off the ground. Just a little bit in, move it around, it's going to get a little thicker. Awesome.
And you just kind of keep working it and you can see the dough is just getting a little bit thicker and now, that it's kind of looking like a heavy creamer pancake batter I take a big pinch of salt. If I do the salt too early, it's going to kill the yeast, so you just want to add it right when the yeast is getting incorporated with the flour. Awesome. Alright, so you can see this kind of all happening.
Now I really don't care about the sides it's just kind of like a free for all. Get all that flour in there, do it's thing. I love doing this. This is like after a hard day at work, grab a fork make some dough, nothing better. Alright, beautiful. At this stage, your fork has kind of done it's job. So I like to move to this guy it's called a bench scraper. Really, really helps the process so I kind of get all my flour in there, you can kind of really see the dough taking shape now. This is kind of called a shaggy dough, and you can even kind of, I learned this in Italy, you can chop it up just to kind of get it a little more incorporated. Awesome.
And then this will even go so far right? So you have this dough and the only way to do it is to use your beautiful god-given tools. So, you get in there a little bit of flour, and you start kneading it. The way you knead it is you just kind of stretch out, fold and twist. So if it gets sticky, you just grab a little extra bench flour. So it's stretch out, fold, twist. Stretch out, fold, twist. And just keep on going, you can see it's really starting to shape form here.
And again, if it starts getting sticky just grab a little bit of that extra flour, get messy that's with pizza dough is all about. So, it's stretch, fold, twist. Awesome. And you’re going to do this for about 10 minutes until the dough really looks looking nice, coherent and has a really smooth texture throughout.
So, as you can see, it's been about 10 minutes and most of the flour on my board has absorbed into the dough so it's not too sticky but if you need a little more bench, go for it. And I'm just going to kind of tuck the sides right underneath of it, beautiful. And I'm just going to grab a bowl, a little bit of flour on the bottom so it doesn't stick, gentle with our little baby dough.
A little bit more on top, cover it up with a towel, forget about it for about 2 hours and let it rise in a warm place and you'll have a perfect dough made by hand.
31
views
How to French Kiss like a Pro
Want to make your lips even more Kissable?
100% Pure Fruit Pigmented Lip Glaze Cherry: http://amzn.to/1Oj7uYg
Beauty by Earth 100% Natural Beeswax Lip Care: http://amzn.to/1MbsEHS
bareMinerals 100% Natural Lipgloss - Cupcake: http://amzn.to/1JQfE4a
Lip Smacker Starburst Party Pack Lip Glosses: http://amzn.to/1OWo3Ll
L'oreal Colour Riche Lipcolour, Fairest Nude, 0.13-Ounce: http://amzn.to/1jbDRgt
Watch more Kissing 101 videos: http://www.howcast.com/videos/508007-How-to-French-Kiss-like-a-Pro
Learn how to French kiss like a pro with the demonstration in this how to kiss video from Howcast.
How to French Kiss
When it comes to French kissing, there's a fine line between sexy and sloppy. Here's how to keep your smooches sensual.
You will need a clean mouth.
Step 1. Know what French kissing is. A kiss during which one or both partner's tongues enter the other person's mouth.
Step 2. Need we even say it? Have a clean mouth. If there's no way you can sneak out beforehand to brush, at least drink some water. It will flush away some of the bacteria that causes bad breath.
Step 3. Kiss without tongue until your partner indicates they are receptive to French kissing by parting their lips. Then slowly ease your tongue in their mouth.
Step 4. Start by making contact with just the tip of their tongue and then slowly extend your exploration. Keep your tongue moving. It shouldn't sit in your partner's mouth like a dead fish. But be gentle. It shouldn't feel like an eel was let loose in there either.
To keep your tongue motion smooth and steady, pretend you're savoring a soft swirl ice cream cone.
Step 5. Though French kissing is sometimes called "swapping spit," don't deposit so much saliva around your partner's mouth that they yearn for a face cloth.
Research shows that women in particular hate "too wet" kisses.
Step 6. Don't be so fixated on what your tongue is doing that you forget to use your hands. French kissing is hottest when it comes with plenty of stroking and caressing.
Did you know? 34 facial muscles are involved in the act of French kissing.
78
views
How to Do the Spongebob | Hip-Hop Dance
Love fresh moves? Check out these products next time you cut loose:
Hip-Hop Dancing Volume 1: The Basics: http://amzn.to/1OmqmqV
Urban Jam: Hip-Hop Dance with Laya Barak: http://amzn.to/1OmqruE
Ayouta Hip-hop Dance Masks: http://amzn.to/1L6UYqB
Meet My Neighbor, the Hip-Hop Dancer: http://amzn.to/1VEdfpf
Lisli Casual Baggy Hiphop Dance Sweat Pants: http://amzn.to/1FXgD7u
Watch more How to Hip-Hop Dance videos: http://www.howcast.com/videos/456076-How-to-Do-the-Spongebob-HipHop-Dance
Want to be a better hip-hop dancer? Why not take lessons from a choreographer to the stars? In this video, Randy R.C. Connor, who has worked with Britney Spears, P. Diddy, Prince, Mary J. Blige, Janet Jackson, and Jay-Z, teaches you how to do the Spongebob dance.
My name is Randy R.C. Connor, choreographer to the stars. I've worked with Britney Spears, P. Diddy Combs, Prince, Mary J. Blige, Janet Jackson, Jay-Z. We're gonna just break down some moves, that you can use at the club, at the parties, at home, in your bathroom -- just have fun guys, so let's get started. C'mon! Okay guys, here we go. Now, what we're about to do is the Spongebob dance. This is 1 of my niece's favorite cartoon characters. And this dance is really cool, and it's a lot of fun. But keep in mind, it's a high-energy dance, so always make sure that you're breathing through your nose, and out through your mouth, okay? So we're gonna start really simple, alright? And the basic step goes like, basically, you hop on the right, and you push, and you hop again on your right. So you hop, push, hop, push, okay? So you're hopping on your right, pushing. You're hopping on your left, you're pushing. Hopping on your right, pushing. Now, the arms, we're gonna coordinate the arms, okay? Just so we look clean, 'cause everything is always about just looking clean. Presentation, alright? So the arms is, we're going out position So we're going here, push....here, push, here, push, here, push here. Push, here, push, here, push, here, push, here. Push, here, push, here, push...alright? So that's the basic step, alright? Now, we're gonna try that with some music, alright? So here we go. Alright, ready guys? 5..6..7..and. Start slow...good. And arms. Now remember, you have to breathe, and it takes a little practice, but it's okay...you'll get it, alright? Just make sure you keep practicing, 'cause, uh, it takes a lot of energy. So let's do it 1 more time, all together, alright? Here we go. We're gonna start slow, and we're gonna speed it up. Ready? 5...6...5, 6, 7, and...push, push, push, push. And you're doing the Spongebob dance. There you go! Make sure you have fun, guys. Enjoy!
30
views

How to Tie a Cherry Stem In a Knot with Your Tongue
Tying a cherry stem into a knot using only your teeth and tongue is a fun skill to have. And it's actually quite easy.
Step 1: Show stem to audience
Demonstrate to your audience the cherry stem is not already in a knot before placing it in your mouth.
Tip
A maraschino cherry works better than a fresh one, because its stem has been soaked in liquid, making it easier to manipulate.
Step 2: Soften stem
Soften the cherry stem with your saliva for a few seconds.
Tip
You may want to bend the stem a few times or gently chew it to further soften it before attempting to knot it.
Step 3: Push down middle of stem
Push down on the middle of the stem with the tip of your tongue, so that it bends upward into a "U."
Step 4: Form an "X"
Using the back of your front teeth as a stabilizer, cross one end of the stem over the other, forming an "X."
Step 5: Hold in place & push loop upwards
Hold one end of the "X" in place with your teeth while pushing the loop upwards with your tongue towards the free end of the "X."
Step 6: Push free end through loop
Push the free end of the "X" through the loop using the bottom edge of your available front tooth.
Step 7: Release end of stem
Once the tip of the stem is through the loop, release the other end of the stem from your teeth.
Step 8: Position stem
Now position the stem so that the loop is flat against your four front teeth and the tip that is through the loop is pointing out.
Step 9: Push end further through loop
Push the end of the stem further through the loop until you can't push anymore.
Tip
If you can't get the knot very tight, use a little sleight of hand as you remove it from your mouth, holding one end with your teeth as you pull on the other end.
Step 10: Show it off
Voila--you're done! Now put the knot in the palm of your hand and show it off!
Did You Know?
After actress Sherilyn Fenn pretended to tie a cherry stem with her tongue on the TV show Twin Peaks, co-star Madchen Amick showed the cast and crew that she could actually do it!
18
views

Good Beginner Songs | Violin Lessons
So let's talk about good violin songs for beginners. The way I was started when I was a little girl; I started on the Suzuki method which is a very popular method to begin children on playing the violin. What it is is specific songs in books. And there's book one, book two, book three, book four, book five. And there's certain pieces that you have to play in order.
But you don't learn them by reading music at first. At first you're playing the tape over and over again in your house. And you're learning it like that, just by ear. So whether you're learning it by ear or whether you're learning it by looking at the music at first the most popular, popular piece to play on the violin is "Twinkle, Twinkle, Little Star".
And what's so great about this piece is that there's lots of variations you can do on it; different rhythms, which is very helpful for children, learning different rhythms. I like to call this rhythm "Mississippi Hotdog". And there's other rhythms like "Stop Listen".
Another great song to learn on the violin from the Suzuki method again is "Lightly Row". So it's very important that you learn pieces especially at the beginning. But always that you learn pieces that are at your level. You don't want to go too high because then you'll just get frustrated. You want to wait until you hit the harder pieces when you really really can do them no matter how exciting it is to go faster. So really those two pieces were in Suzuki book one. And I believe in that whole book. It's just terrific for beginners.
33
views

How to Do a Jumping Jack | Boot Camp Workout
Full Playlist: https://www.youtube.com/playlist?list=PL9E5DDBCFA8EA4B56
-
-
Boot Camp Workout Playlist - https://www.youtube.com/playlist?list=PL9E5DDBCFA8EA4B56
Looking for a Workout that kicks your ass? Check out these Hardcore fitness resources:
Rep 3 in 1 Wood Plyometric Box for CrossFit and Conditioning: http://amzn.to/1GwyDk9
Boot Camp and Group Training Routines Kindle Edition: http://amzn.to/1QZPdi0
The Official Five-Star Fitness Boot Camp Workout: http://amzn.to/1L0f2wR
Skinny Bitch Fitness: Boot Camp: http://amzn.to/1OlV81u
Tactical Fitness: The Elite Strength and Conditioning Program: http://amzn.to/1MePpq1
507054-How-to-Do-a-Jumping-Jack-Boot-Camp-Workout
So, lets talk about how to do a jumping jack. Your definitely gonna see jumping jacks as, a part of your warm up and even a part of your workout in many boot camps, because they're one of those great exercises where your getting movement in your upper body, your getting movement in your lower body, its cardiovascular and you don't need any equipment. So you can use it to warm up, you can use it as an interval, like a high intensity interval in-between a strength move where you wanna bring your heart rate up
10
views

How to Practice for Your First Kiss
With just a little preparation, you’ll be kissing like an old pro your first time out.
Step 1:
Make a loose fist out of your left hand and put your right thumb through the opening formed by your left index finger and thumb. The two thumbs will approximate a pair of lips.
Step 2:
With your clasped hands extended in front of you, practice moving your real lips toward the target. Tilt your head to one side as you make your approach.
Step 3:
Close your eyes just before you make contact.
Step 4:
Press your lips against your practice lips very gently at first; this will condition you not to bang a partner’s teeth when you’re kissing in real life.
Step 5:
Part your lips slightly and alternate pressure as you plant more kisses on and around your practice lips.
Step 6:
Now let your tongue probe the opening of your practice mouth just the tiniest bit.
Tip
Never jam your tongue down your partner’s throat! It’s second only to bad breath in things about kissing that gross people out.
Step 7:
Practice varying your technique. Go faster and then slower; gently and then harder. Occasionally focus on one lip at a time. Nibble their lips. Flick the tip of their tongue with yours. Basically, keep your mouth and tongue moving.
Step 8:
After you’ve been kissing your hand for a while, sniff it. If it smells bad, take steps to improve your breath before you kiss someone in real life! Daily flossing, rinsing, and brushing (including your tongue!) should do the trick.
Did You Know?
One study found that people who lean to the left when they’re kissing tend to be less available emotionally than their right-leaning counterparts.
29
views

How to Get Super Glue Off Your Skin
What happens when the toughest super glue gets on your skin? These tips will get you unstuck in no time.
Step 1: Soak in soap and water
Soak the bonded area in soap and water for a few minutes.
Step 2: Use nail polish remover
Put acetone-based nail polish remover on a cotton ball or swab and apply it directly to the glue.
Tip
Never apply to lips or eyes.
Step 3: Wash with soap and water
Wash the area with soap and water once the glue is gone.
Step 4: Apply lotion
Apply lotion to soothe your skin. Keep the super glue away from children.
Did You Know?
During the Vietnam War, super glue was used to seal minor wounds.
9
views

Basic Weight & Height Requirements | Modeling
Hearing the call of the catwalk? You gotta work - do your homework!
The Self-Made Model: Success Without Agencies: http://amzn.to/1VHJ8bs
Picture Perfect Posing: Practicing the Art of Posing: http://amzn.to/1N2krnG
The Business of Professional Modeling: http://amzn.to/1WQ75iZ
The Professional's Guide to Modeling: http://amzn.to/1jeLGls
Become a Successful Commercial Model: http://amzn.to/1OoNzY2
Watch more How to Be a Model videos: http://www.howcast.com/videos/512616-Basic-Weight-and-Height-Requirements-Modeling
Hi. My name is Trudi Tapscott, and I think if you're interested in modeling, the first thing that you know is that models are tall and skinny. So, the first question is, "How tall and how skinny do I have to be?" And the answer is, depending upon the type of modeling that you're doing, height is important and being skinny, in good shape and healthy are important. No one in the business that is a legitimate agent is going to tell you to starve yourself, but if you photographically, on film, don't look good, then that's something that needs to be talked about. Maybe you need to lose 5 pounds. Maybe you're retaining salt.
But, really, it goes by measurement more than weight, because it's a fit issue. So, you have to be able to fit the clothes. So, if you're not in the size that you can fit into the clothes, then the designer can't hire you because there's only one. It's not like you go to the department store and there's all sizes. There's one size and there's one look. They are trying to sell that look to all the buyers all around the world so that they can produce it. So, that's why the fashion show is six months in advance; they need to know what's going to sell, what's of interest to people, what they like.
So, that's been created and designed and it's a certain size. Height, the clothes, the length of a model, the proportion of a model is what a designer is looking for. What a casting director is looking for. So, height is important. If you're talking about shows, the reason it's important is because everyone's in a line and there's other people involved. It's not just you.
If you can be anywhere from 5"9' to 6"0' feet, that's a pretty big variation, but you're still tall. That's still taller than the average person. At least, in America, that's taller than the average person. So, modeling is not the average. You're not supposed to be average. You're supposed to be something that people look at in sort of a fantasy of what beauty is. So, you have to be thin and you have to be tall. Those are the things that matter in the business.
But you also have to be healthy. You could be a tall, thin girl, but there are thin people that look too thin. Some people, their body is naturally thin. If your body is not naturally thin, you can't starve yourself to be that skinny person. It all goes back to what type of model are you. Because if you are someone who's going model athletic clothes, then you don't want to be as skinny as the model who's modeling fashion, because you don't look necessarily athletic.
So, I think that there's two things that are not true about models when it comes to weight. And that is that they don't eat and they starve themselves. I think that they limit their intake when it's before a fashion show season. I think during show season they're so busy they don't have a lot time to eat, so they get thinner. But when they're shooting pictures, nobody wants to see someone who you can see their bones when they're shooting lingerie or bathing suits. So, it's about being a healthy, tall, thin, beautiful woman.
36
views

How to Do the Pencil thru Dollar Trick | Magic Tricks
$1 Coin: http://amzn.to/1AoWqok
Magic Cane: http://amzn.to/1R9SXhJ
Appearing Flowers: http://amzn.to/1EnBklz
Magic Handkerchief: http://amzn.to/1AjCLqm
Disappearing Coins: http://amzn.to/1F1xora
Bite Out Coin Trick: http://amzn.to/1doN55Z
Magic Wand: http://amzn.to/1Fsuf78
Male: Hey, have you any money on you, like a bill, a high bill?
Female: Are you going to give it back?
Male: Yes. I'll try. Oh, wow. High roller. Okay, hold your for a second. You've seen on T.V. where they cut a lady in half and stuff like that, right?
Female: Yes.
Male: I don't think you want to be cut in half right now.
Female: No.
Male: It's a little painful. So we're going to use the bill. I'm actually not going to cut the bill in half. I am going to put a hole right through the bill. Wouldn't that be cool?
Female: Yes.
Male: Watch. Pencil, right inside the hundred. It's inside, yes or no?
Female: Yes.
Male: Just like that, it goes right through. You can see the hole. You can see it inside, both sides.
Female: You're going to own me a hundred bucks.
Male: Maybe. Pull it right out. Now this is very interesting, Heather.
There's actually... Can you see it? A hole, but your hundred dollar bill is totally unharmed. There's no hole.
Female: Good thing.
Male: This is really, really cool because you can actually use any bill and any pencil, or a pen or a knife. You just need some kind of paper, it could be loose leaf paper. It could be another bill, actually. I am using index cards here. A Post-It Note. Anything you want, it doesn't really matter. I'll show you what to do with that in a moment. Basically what you need to do is finagle their bill a little bit and all you need to do is to get a little rip inside the bill.
You can actually have a ripped one in your pocket already of the same bill. You can switch it out. You can say, 'is this the hundred you just gave me? Oh, it is? Thanks a lot'. You can do the switch in your pocket or you can just finagle with their bill and when they're looking at you, you could just tear a little slit... I would say a quarter of the way down. Nobody sees that. It's normal. Basically you're going to take your index card or your Post-It Note and you rip off a small piece about that big.
You're going to fold the index card around the bill. Bend the bill down. I would say half an inch from the top. Have the index card on the outside. Fold it about that big so you show half the bill here and half of it is inside the index card. Take your pencil or your pen or whatever and you going to put it actually inside the fold. But, there's a secret. The pencil sneaks out of this little slit that you actually ripped and down towards the index card. If anything shows here, like a rip, you've got it covered with your thumb. In this case, it's pretty good. You don't really see much. You're going to cover that up anyway.
You can actually bend the back corner a little bit and the front corner a little bit. This is a very, very fair display. You can show both sides and that it's actually inside the bill. What you do now is you're going to push the pencil right through what seems like the hundred dollar bill. You show bother sides again, it looks really, really good. Turn back over and you're going to pull the pencil out. Show that the index card has a hole and show that the bill is totally normal. You put your fingers on the slit and that is the secret to the pencil through a borrowed bill.
25
views

4 Tips for Beginners | Roller-Skate
Strap on your Blades and get some Road Rash:
LED Rollerblade Wheels: http://amzn.to/1JaruFR
Gotham Rubber Helmet: http://amzn.to/1OcUAMI
Roller Derby AERIO Q-60 Men's Inline Skates: http://amzn.to/1MpZ4zd
Roller Derby Women's V500 Adjustable Inline Skates: http://amzn.to/1KdGLrk
K2 Skate Boy's Raider Pro Pack Inline Skates: http://amzn.to/1FdxNgS
K2 Skate Girl's Marlee Pro Pack Inline Skates: http://amzn.to/1Nv24Js
Watch more How to Roller-Skate & Rollerblade videos: http://www.howcast.com/videos/514094-4-Tips-for-Beginners-RollerSkate
Hi everybody, we're going to talk about roller skating tips for beginners. If you've never roller skated before, the biggest thing that you need to worry is balance. You would think balance is pretty easy, but when you put wheels on your feet, it's not so much. So the first thing when you put your skates on it's the T position. So when you have the T position together, it's one heel into the instep of the other skate. The purpose of doing this is so that your feet are underneath you, knees bent, your core is engaged, and that way your skates won't roll out from underneath you while you're standing there. So if you're on a hill, talking to a friend, looking at the cute guys or girls walking by, this is a great way to just stand there without having to worry about your feet moving out from underneath you.
The next thing is forward skating, is with your toes out, and rolling straight is toes straight ahead, forwards or backwards, and backwards skating is toes in. So it's kind of like a car, when your toes are out you're in drive, when your toes are straight, neutral, toes together, reverse. So if you start going backwards, just have a quick little glance down, your toes are probably pointing together, so stop, T-position, get your balance back underneath you, knees bent, and start again. We always start off with walking first because it's kind of difficult just to put skates on and roll, so toes out, knees bent, and walk like a duck. Small steps forward until you get your balance, and then once you have your balance you'll be able to push to the side and let your wheels roll.
So those are a couple of tips for you beginners out there, and happy rolling.
45
views
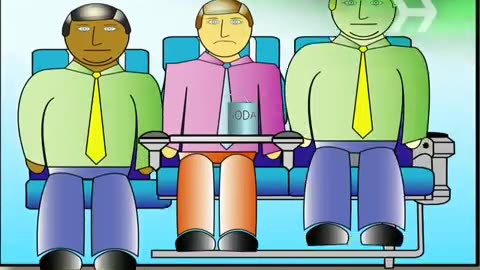
How to Pick a Great Airline Seat
Don't get stuck in a middle seat near a bathroom on your next flight. With a little time and effort, you can be sitting pretty.
Step 1: Figure out your priorities
There is no single "best seat" on an airplane — all have their pros and cons — so decide what's important to you. Legroom? Peace and quiet? A quick exit? A smooth ride?
Step 2: Check out seats
Don't assume anything about a seat without checking it out. Some bulkhead seats don't offer extra legroom, some "window" seats are between windows and therefore offer little view, and many exit seats, while providing more legroom, are narrower than other seats.
Tip
Find out what kind of plane you'll be on and then visit "seatexpert.com":http:// or "seatguru.com":http://. Click on any seat to see its pros and cons.
Step 3: Buy a better seat
Pay a small fee to ensure you get a seat with the most legroom. Many airlines now identify their best seats on their websites and charge for them accordingly.
Step 4: Don't forget about reclining
Take reclining into account. If you like to sit back, avoid the last rows in any section. If you hate people leaning into your lap, try to snare an exit seat; the seats in front of those rows usually don't recline.
Tip
Exit row seats are often not assigned until check-in. To snag one, get to the airport early.
Step 5: Consider the pitch
Consider the pitch of the seat, which is the distance between your seat and the one in front of you. You'll find this information on airline seat websites.
Step 6: Take turbulence into account
Take turbulence into account. If you're a white-knuckle flyer, sit over the front of the wing; that's where you're least likely to feel turbulence. Avoid the back, where you'll feel every bump.
Step 7: Consider the noise
If you need peace and quiet, avoid sitting in the back, where the engines are the loudest. And steer clear of the bulkhead, where families with babies are usually seated.
Step 8: Book early
When you buy your ticket, be sure to book your specific seat, either online or by calling the airline directly.
Tip
Increase your odds of sitting beside an empty middle seat by requesting a back row where either the aisle or window seat is already booked. The middle seats in back rows fill up last.
Step 9: Check back the day before
Check back 24 hours before your flight; this is when prime seating often is released. Plus, airlines occasionally switch planes, possibly turning your chosen seat into an undesirable one!
Step 10: Join a good-seat program
If you're a frequent flyer, consider joining an airline program that guarantees a good seat for an annual fee.
Did You Know?
The average airline seat in coach is just 17.2 inches wide.
11
views

How to Tell If Your Phone Is Tapped
Step 1: Check battery life
Take note of the lifespan of your battery. The phone's battery gets used when it's sending voice or text information to the source of the bug, or if someone is remotely activating the microphone. If the battery life is suddenly significantly shorter than it used to be -- even after getting a new battery -- your phone may be bugged.
Tip
There are phone applications available that monitor battery life and history.
Step 2: Feel your phone
Check the temperature of your phone. The battery in your cell gets warm when it's being used, so, when you haven't been on the phone, if the phone feels warm, it may have been in use without your knowledge.
Step 3: Monitor strange activity
Monitor unusual activity by your phone. If your phone suddenly starts turning on and off by itself, has difficulty shutting down or won't shut down at all, it may be subject to unauthorized use.
Step 4: Watch for coded text messages
Watch for coded text messages. If you get a text message that seems like data coding, with numbers and symbols instead of words, this could indicate misdirected attempts at data transmission by someone else.
Tip
If you want to make sure your calls and texts remain private, don't just turn your phone off -- take the battery out when you're not using it.
Step 5: Listen for background noise
Listen for background noise when you're on a call. Echoes, static, or clicking sounds may be caused by line or transmission interference, or by equipment used by someone tapping your call.
Step 6: Pay attention to your phone bill
Inspect your phone bill every month. If it indicates a spike in text or data transmission, someone else may be using it.
Step 7: Look out for unusual interference
Watch nearby electronic equipment. It is common for phone transmissions to interfere with signals from other phones, computers, radios, and televisions. However, if electronic interference occurs when you're not using the phone, it may be in use by someone else.
Step 8: Determine whether your land line is tapped
Find out if your land line is tapped by locating your Serving Area Interface, also known as a B-Box or cross-connect box. Determine which pair of wires, known as the cable pair, are associated with your phone number, and see if there are any duplicate lines or electronic devices connected to them.
Tip
B-Boxes are equipped with locks, but service technicians have passkeys, and many boxes aren't locked at all.
Step 9: Hire a company to perform a sweep
Hire a company to perform a wiretap detection sweep. Many companies offer such services, but they typically only pick up devices being used on your premises.
Did You Know?
From 2003 to 2006, the Federal Bureau of Investigation illegally obtained calling records for more than 3,500 telephone accounts, according to a report by the Justice Department's inspector general.
64
views
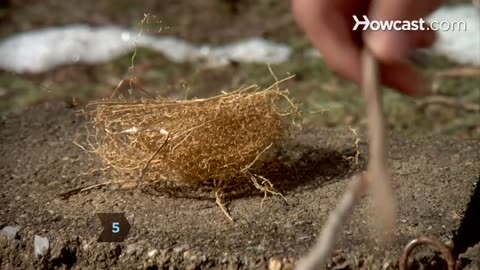
How to Start a Fire with an Aluminum Can & a Chocolate Bar
Step 1: Rub chocolate on the bottom of the can
Rub the chocolate all over the bottom of the can.
Step 2: Wipe the chocolate off
Wipe the chocolate off with a towel, cloth, or paper, rubbing and polishing as you wipe.
Warning
Do not eat the chocolate after it's been in contact with the aluminum – the residue may be toxic.
Step 3: Repeat
Repeat this process several times until the bottom of the can shines.
Tip
The can has been polished enough when it shines and reflects like a mirror.
Step 4: Angle the can
Angle the can in direct sunlight. Find a direct ray of sunlight and angle the bottom of the can so that it reflects the sun's rays.
Step 5: Place your tinder
Place your tinder – dry leaves, sticks, or paper – in a spot where you want your fire.
Step 6: Reflect a beam of sunlight
Reflect the concentrated beam off the can and onto the tinder, similar to how you might with a magnifying glass and a leaf.
Step 7: Continue to hold the beam
Hold the beam on the tinder until you see smoke. As soon as the tinder starts to burn, add wood to build your fire around it.
Did You Know?
Wildfire severity has increased and fire frequency has decreased during the past 200 years.
18
views

How to Dance like Usher | Hip-Hop How-to
Love fresh moves? Check out these products next time you cut loose:
Hip-Hop Dancing Volume 1: The Basics: http://amzn.to/1OmqmqV
Urban Jam: Hip-Hop Dance with Laya Barak: http://amzn.to/1OmqruE
Ayouta Hip-hop Dance Masks: http://amzn.to/1L6UYqB
Meet My Neighbor, the Hip-Hop Dancer: http://amzn.to/1VEdfpf
Lisli Casual Baggy Hiphop Dance Sweat Pants: http://amzn.to/1FXgD7u
Watch more How to Learn Hip-Hop Dancing videos: http://www.howcast.com/videos/499477-How-to-Dance-like-Usher-HipHop-Howto
What's up my name is Matt Steffanina and today I'm going to teach you guys how to dance like Usher. Usher is known for his big movements and his smooth glides. So I'm going to teach you guys a combination that incorporates both of those that you can practice on your own. You're going to start by stepping left, right. You're going to go ball exchange, a one, you're going to step forward two. You're going to jump out and you 're going to cross your left foot in front of your right, three.
Notice how I brought this arm in front to prepare for this turn. From here I'm going to take this arm and I'm going to use it to pull around, I'm going to unwind my feet and face the side. From here I'm going to take my front leg, step it out, then I'm going to switch my feet. When you switch your feet, you don't want to just step and step, you want to use your toes to make this smooth.
So as I step back, I go under the toe of this foot, then lower down slowly as I step out with my back foot. From here we are going to do a roll to the front, but we are going to isolate it. I'm going to start with my chest and upper body. So my chest is going front and around to bring my legs around after. Let's try and put that first eight count together. We have six, seven, eight. This goes a one, two and three, this is your prep, turn, four. Step your right foot out, five, switch your feet, six, pull to the front, seven, unwind your legs, eight.
When I release my legs, I'm going up on my toes again to bring my knees around to the front. From here I'm going to step my left foot in to meet my right and I'm going to body roll down. You want to create the illusion that this left foot stepping in causes your chest to go up to start this roll. As you finish this roll, you're going to bring your right knee up, then you're going to use your right leg kicking back to help you slide back on your left foot.
The further you travel back with this step, the more impressive it's going to look. So use this leg and really kick hard to travel. From here you're going to step this right foot back down in front and we're going to go into Usher's signature glide. So this is a little take on what Michael Jackson used to do and instead of gliding straight to the back, we're going to go in a circle. I'm going to start by going up on to my right toe.
From here, I'm going to push my left foot out and turn my toes so that they are facing away from each other. From here I'm going to bring my right foot in and shift my weight over to my left foot, gliding my right foot in. We're then going to go back up on to the right toe and continue this process all the way around. Pushing our left foot out, shifting our weight, bringing our right foot in. Right toe, shift our weight, bring our right foot in. When we get all the way back to where we started, we're just going to finish with a little groove.
Let's try to put that all together. We have five, six, seven, eight, ball exchange, two and three, turn four, right, left, chest, legs step together, roll down and three, four, you glide five, six, seven, eight, we bounce one, two, three, four. The groove at the end is up to you, just freestyle it. Have a good time. Practice that; and this is how you dance like Usher.
54
views

How to Use Bronzer Properly | Makeup Tricks
Check out these helpful makeup tools for applying bronzer to get that beautiful glow!
Murumuru Butter Bronzer:
🔗https://amzn.to/3IPanQN
14 Pcs Brush Set, Rose Golden:
🔗https://amzn.to/3DrPbz8
Compact Mirror with Light:
🔗https://amzn.to/3iW6hLS
Instant Age Rewind Eraser Dark Circles Treatment:
🔗https://amzn.to/3wSKVHQ
Skincare Products & Gel Primers:
🔗https://amzn.to/3Dr0V4K
Full Playlist: https://www.youtube.com/playlist?list=PLLALQuK1NDrjebZVDLutJlUC8glHV-0mN
-
-
Watch more How to Apply Makeup videos: http://www.howcast.com/videos/511963-How-to-Use-Bronzer-Properly-Makeup-Tricks
So there are a couple of different ways to use bronzer, and here are some tips on how to use it properly.
When it comes to bronzers you can either choose matte or something with a little bit of shimmer. I actually have both. Today, I am going to show you first how to use the shimmer with a stippling brush in a more natural way. The stippling brush basically just dissipates the amount of color you are applying because it starts thick and then thins out at the top. I am going to start by applying where sun would naturally hit the forehead, right up top here. This one has a really nice golden undertone. It's going to give her a nice sun kiss look but not be too heavy. When I am doing this look it's definitely going to be not so much for contouring, just more for giving yourself a little bit of glow if you feel too pale or you just want a little more color.
I am going to do the tops of the cheekbone here. You don't want to go too far into this area. I'd say stop about here. Another rule of thumb is like two fingertips away. I'm doing the top of the cheekbone, because once again like I said, at the top of the forehead sun comes down and hits here. It also comes down and hits this part of the face here. Also, for this kind of look bronze the top of the nose. I'm also going to bring it down. I just like to do a little sweeping right on the chin because when you are bronzing you don't want your face to look different than your neck. I kind of blend it downwards like this. This is really simple. Just a little bit of color. You really don't want to use bronzer all over the entire face. It gets pretty monotonous and kind of dull. Using it in these couple of directional areas, I like to think of making a 3 on the face or an E, just kind of like this. That's just a real simple tool, just a little tap on top of the nose.
The next trick is going to be a little more for contouring. I am using a matte bronzer and a brush that is tapered. It goes a little bit thinner so I can get that nice contoured look here. I am going to start at the cheekbone. Mattie if you could just go, perfect. If it's hard for you to tell where underneath the cheekbone is, you just do this ugly little fishy face. Not that Mattie could ever look ugly. Here we go. You can relax. Thank you. Just kind of to get that first little tip. It might look intense at first because I'm using such a pointed brush and bronzer that is a little more concentrated in color but we are going to blend it, so no worries. It really makes the bronzer look more believable when you apply blush and highlighter. But, right now we are just focusing on the bronzer. Once again, you want to follow the two fingertip rule away from the outside of the moth. You don't want the bronzer coming too far in. With this type of bronzer you definitely want to make sure you are blending.
The next tip I have is we are going to go to the temple right about here. I'm going to add a little bit of bronzer. This just kind of slims the face inwards. It creates a nice contrast, too, of the cheekbone between the lower contour and we would put highlight here and a little bit of contour again right here. Kind of brings it in this way. We are going to continue to sweep this up to the top of the forehead. Another cool tip for a little more of a contour type of bronze would be to keep kind of like we did on the other side but bring it down and do it even more dramatic here, on more of a contour type bronze. Instead of doing the bronzer on the top of the nose you would take it and do it on the side. I blend it downwards. This is a tricky spot. You really don't want to do too much here. All right, and that is how to bronze properly.
42
views

How to Play Pentatonic Scale Pattern #1 | Guitar Lessons
Must Haves for any Guitar Player:
On Stage XCG4 Black Tripod Guitar Stand: http://amzn.to/1KHP6HO
Dunlop Trigger Curved Guitar Capo: http://amzn.to/1UrBL7c
Korg GA1 Guitar and Bass Tuner: http://amzn.to/1Nafqfs
Dunlop Standard Tortex Picks: http://amzn.to/1L4YMYy
Ernie Ball 4037 Black Polypro Strap: http://amzn.to/1O8zLiu
Watch more How to Play Guitar videos: http://www.howcast.com/videos/434537-How-to-Play-Pentatonic-Scale-Pattern-1-Guitar-Lessons
There are many scales for the beginner guitar player to learn. Our expert is going to show you a scale he calls the pentatonic pattern #1. It's a practical scale he uses every single day. Once you learn it, you no doubt will too.
Next on the list is scales. So scales ‚Äì there's many, many, many books of scales, big encyclopedias of scales, but I'd like to show you the most practical scales that I use every single day. The very first scale I ever learned, I like to call it pentatonic pattern number 1, but it's just a pentatonic scale, or a shape of one. Let's dive in. I'm going to do it here at the 5th fret. So I'm on the 5th fret of the 6th string. And I'm going to use my first finger. Then the next note is not the 2nd fret away from that, not the 3rd fret, but the 4th fret. So on the 6th string I have the 1st and the 4th. Then I move down to the 5th string. And I'm going to do 1, 3 ‚Äì so notice I'm using my third finger. Then the next string, 4th string: 1 and 3. And then 1 ‚Äì 3 again, but on the 3rd string. Then 1-4, but on the 2nd. And then 1-4 on the 1st. So you see, 1-4. That's why I'm saying those numbers, so I have: 1-4; 1-3; 1-3; 1-3; 1-4; 1-4. Now if I want to go backwards, I just start with this note and work my way back. So I go: 4-1; 4-1; 3-1; 3-1; 3-1; 4-1. Now, this is a movable shape, just like bar chords or power chords. I can move this anywhere on the guitar and the shape doesn't change. That's the beauty of the guitar. Let's say we do it at the3rd fret. So I'm going to do it: 1-4; 1-3 ‚ and backwards. How about the 7th fret? And then how about we try Open. That's a little trickier because I have to pretend that my first finger is playing, sort of. Can you see the pattern here? I have in this imaginary spot, 1-4; 1-3; 1-3; all the way down. Of course we're not going to play it like that. We're going to play it a little more natural, right? So it's O-3; O-2; O-2; O-2; O-3; and O-3. That's the same exact pattern. It looks a little different. That's a little thing about the guitar, you always have to compensate for the open aspect. And then I'm just going to work my way backward. 3-O; 3-O; 2-O; 2-O; 2-O; 3-O. There you go. Pentatonic Pattern Number 1.
6
views
1
comment

How to Disconnect a Car Battery
It's important to learn to disconnect a car battery, because if you need to work on your vehicle, you don't want to risk electrocution.
Step 1: Find the negative
Find the negative terminal on the top of the battery. It's usually covered with a black cap, but if not you should be able to find a small minus sign near it or on the top of the connector.
Tip
The positive terminal usually has a red cap or a plus sign in case you're unsure which is which.
Step 2: Choose a socket size
Figure out what socket size you need to loosen the nut on the negative connector in order to disconnect the battery.
Step 3: Put together the socket wrench
Put the correct sized socket on the socket wrench. You may need to use a socket extender to be able to properly reach the nut on the connector.
Step 4: Loosen the nut
Loosen the nut on the negative terminal by placing the socket onto the nut and turning the nut counter-clockwise. It should take only a few turns to loosen.
Step 5: Disconnect the negative connector
Disconnect the negative connector once the nut is loosened by pulling it off. Set it aside, away from the battery.
Step 6: Disconnect the positive connector
Loosen the nut on the positive terminal and disconnect it from the battery. Remove the battery, being careful not to let the positive terminal touch any metal part of the car.
Did You Know?
Almost 99 million wet-cell lead-acid car batteries are manufactured every year.
6
views