Guitar Maintenance and Repair - Bridge Pin Holes
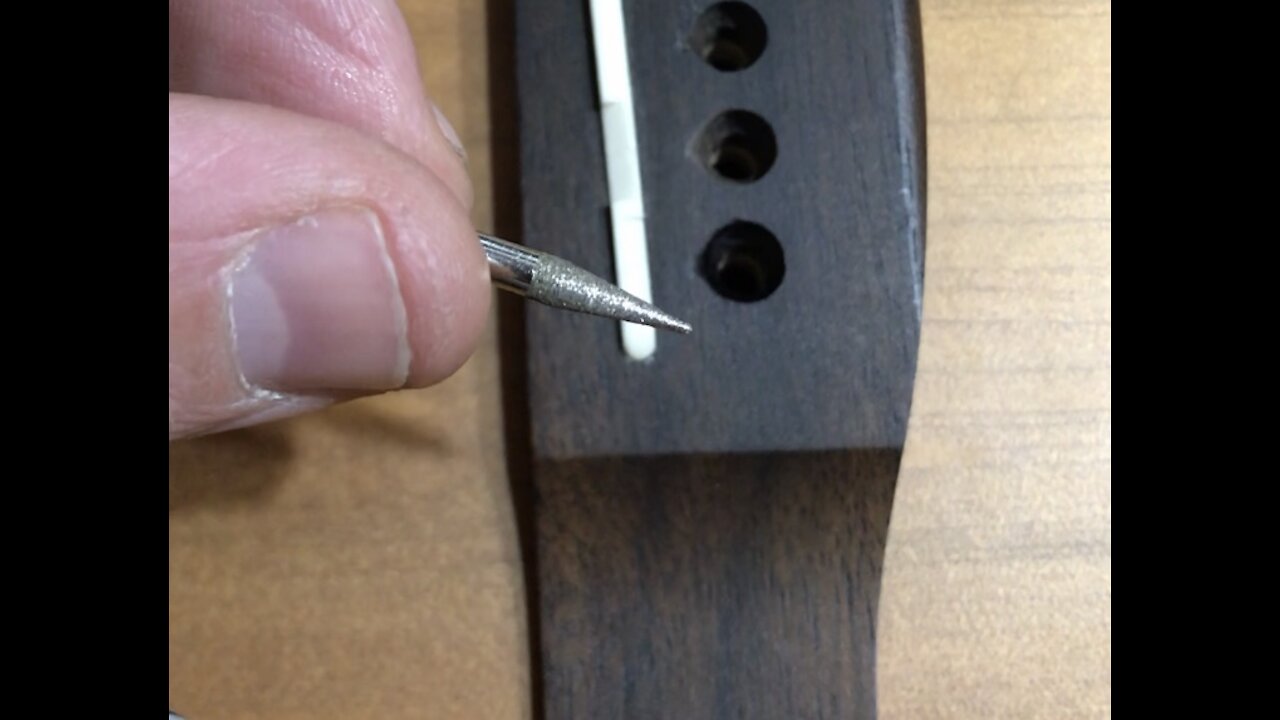
In this video, we look at the notch left on the bridge pin hole edge, from where the string comes in contact with the bridge, usually at a sharp angle.
These bridge pin holes are factory drilled at 90°, so the string cuts across a sharp edge at the exact anchor point of the string.
Fortunately, this sharp edge is just wood, so the string just cuts into the wood and leaves a notch.
In this job, we clean up that string notch, without making it any deeper!
we just contour the edges and give it a nice gentle radius for the string to contact, and hopefully get more vibration transfer.
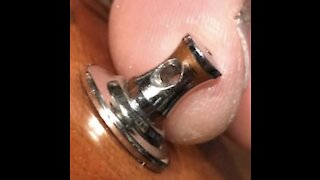
Also, we want to make sure the ball ends of the strings aren’t too fat, that they impede the bridge pin from seating properly.
On the ball end of the string, the core of the string wraps around the ball, and then doubles-back on itself.
Closely inspect the ball end during string installation, and make sure the stub end side of the string is turned AWAY from the string notch, so that the string can lay perfectly across the nice gentle radius you just made...
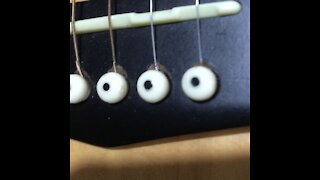
also, in this job we use a sharpie marker to blacken the insides of the bridge pin holes, and the string notch we just cleaned up.
This gives it a nice look that you can only really appreciate by A-B comparing with a guitar that hasn’t been blackened.
This video is part of a series on guitar maintenance and repairs.
In particular, this job is part of a routine string change job,
that also entailed inspecting and de-burring the tuning peg string holes.
If you break a guitar string, LOOK very closely at which end the string broke on, (bridge or tuning peg) theres a very good chance that theres a sharp edge or burr that caused the string to break.
And if you don’t fix this sharp edge, it will probably cause another string to break.
-
 5:15
5:15
Beginner Guitar
1 year agoProve My Hypotheses by Death Cab for Cutie
8381 -
 1:00
1:00
Beginner Guitar
4 years agoGuitar Maintenance - Blackening Bridge Pin Holes For Cosmetic Purposes
30 -
 1:03
1:03
Beginner Guitar
4 years agoGuitar Maintenance and Repair - Inspecting tuning machine holes for burrs
152 -
 7:06
7:06
Beginner Guitar
4 years agoFinishing Guitar String Ends - Beginner Guitar Maintenance
141 -
 0:20
0:20
WPTV
4 years agoJupiter Federal Bridge closed overnight for maintenance
13 -
 57:32
57:32
davidgpo
4 years agoDyson DC41 & DC65 Vacuum Repair & Maintenance
52 -
 1:18
1:18
uvulapie
4 years ago $0.02 earnedCheap Guitar Gear Review - Guyker Bass Bridge BB002
109 -
 1:49
1:49
WCPO
4 years agoBrent Spence Bridge repair work still on schedule
2 -
 14:11
14:11
TheGuitologist
4 years ago1982 MXR Distortion II Guitar Effects Pedal REPAIR
2775 -
 27:19
27:19
Center Stage Guitar Academy
4 years ago $0.06 earnedUnder The Bridge Guitar Lesson - Red Hot Chili Peppers
2283