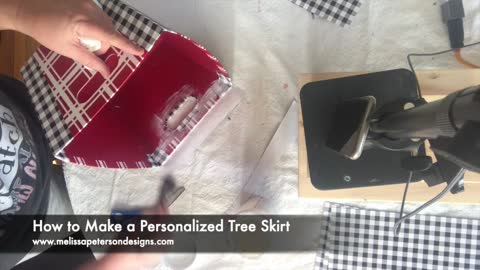
How to Make a Personalized Tree Skirt (box)!
What do you do when you change your mind after you bring your Chrsitmas haul home after shopping?
You craft and fix it!
New blog post with supply list!
https://melissapetersondesigns.com/tree-skirt/
29
views
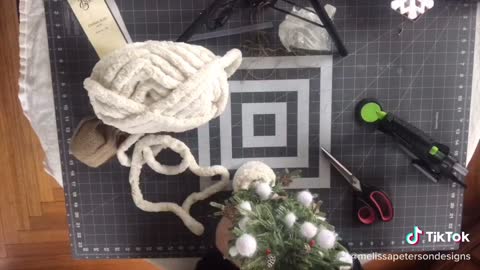
How I Decorated my Tabletop Christmas Tree with yarn Shorts
If your tired of burlap but you love texture in your decorating, adding a wrap of chunky yarn to your Christmas decor will definitely accomplish this goal!
https://melissapetersondesigns.com/yarn/
27
views
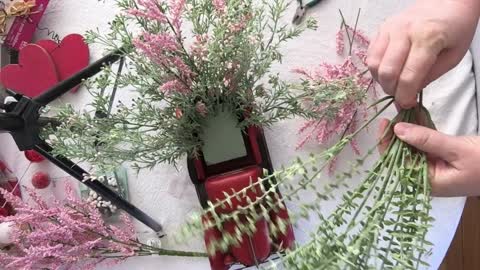
How I Decorated my Farmhouse Truck for Valentines Day
I purchased my Farmhouse truck at Hobby Lobby a couple of years ago and I’ve never decorated with it! I decided this is the year I am going to change that! Wish me luck!
Supplies I Used for my Truck decor
Farmhouse truck: I see Hobby Lobby is coming out with different colors! Don’t forget your 40% coupon or you can wait until there 50% off!
Greenery from Hobby Lobby: also save some $$$, wait until they are 50% off
Foam block
Fillers: I used Valentine picks from Dollar Tree
Ribbon from DecoExchange: Ribbon #RGO120058
Miniature Wreath
Channel stems, wire, or pipes
3M Velcro strips: these aren’t the exact ones I used, I had some leftovers of another brand that I needed to use up.
Scissors and wire floral cutters.
Hot glue and glue gun
DECORATING MY FARMHOUSE TRUCK
I love my red farmhouse truck, but it’s sat on my shelf, undecorated since I brought her home!
So, to get started, I didn’t want to glue my foam block in the bed of my metal truck so I used velcro command-style strips instead.
I wasn’t sure if it would work ok, but it did!
Next I grabbed my floral wire cutters and started cutting the greenery in individual pieces.
Now, my truck centerpiece ended up being pretty big, but if you choose you can snip the greenery so the stems are smaller and make a smaller arrangement.
Once I had these mostly snipped apart I started arranging the different florals in the foam.
Now my foam was still partially peeking through once I had all my greenery in place, but I have some decorative Valentine picks and left over Christmas picks to add to my truck centerpiece that will add more filler.
I am not a bow maker, but I am learning and I have some pretty leftover ribbon for my truck centerpiece.
Make sure to check out my video below to see how I made my simple bow, simple but easy!
I attached my bow to one of my decorative red and white Christmas picks with a wire and then used that to anchor my bow in my centerpiece.
The final touch, I found in the miniature doll section at Hobby Lobby a cute wreath and hot glued this on to the front of the truck.
That is is!
I really enjoy and plan to make a new arrangement for Easter too and what’s nice, most of these supplies can be saved and reused!
35
views
1
comment
How I Made these Adorable Birth Stat Signs
These are my first Birth Stat Signs! I was so excited when I was asked to make my version of these and when I saw these adorable unfinished wood signs at Hobby Lobby, my wheels started spinning!
Supplies I Used for these birth stat signs
2 White Beveled Beaded Wood Wall Decor
Dixie Belle Products: Cotton, Soft Pink, Peony and Satin Clear Coat
1 Hello Baby Transfer, specifically the flowers, by ReDesign with Prima
Jute Rope
STENCILING THE BIRTH STAT SIGNS
Before I got started, I removed the wood beads and string from the signs and put the beads in a safe place to reattach later.
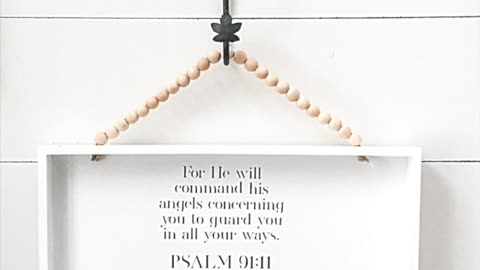
Then, I flipped the signs over and added my special touch to the backside.
This Spring, I was inspired to add a start adding a little prayer on the backside of my personal requests.
Some are stenciled on, sometimes I apply them as vinyl decals.
For this particular project, I used my Silhouette Cameo 3 to cut this design and used clear duck contact paper as transfer tape to apply the decals to the backside.
Click here for more details on how to apply vinyl decals.
Once this decals were applied, I used some Mod Podge to apply my business card and also seal the vinyl decals in place.
Next, I turned my sign back over and applied one coat of Cotton over the entire sign.
When this was dry, I grabbed my stencils I designed and applied them onto the signs.
For more ideas and blog post on how to use contact paper as stencils and painting signs, click here.
Now the pink was another matter!
We had the flower transfers figured out and Dixie Belle’s Soft Pink matched wonderfully with one of the flowers, but I was worried it was going to be too light.
So we decided to do a little paint mixing.
For these Birth Stat signs, I mixed a little Dixie Belle’s Peony to Soft Pink.
It was about 1/4 Peony to 3/4 Soft Pink blended together.
I painted them on, and since it’s pretty humid here in Iowa, I pulled the stencil before the paint had time to dry.
When pulling the stencil “wet”, as always, do it slowly to help prevent splattering wet paint on the board.
APPLYING TRANSFERS TO THE BIRTH STAT SIGNS
Once the paint is dry, I was ready to add the flower transfers to the Birth Stat signs.
Before we get started, to get more ideas on how to apply transfers, check out these blog posts!
These are so easy to apply, once you have an idea where you want them to be applied, take the backing off, line them up where you want them.
And put them in place.
Pretty much, once you lay them down you’re committed to that area.
Grab the squeegee the transfers come with and start pressing or rubbing the transfers on.
I’ll start pulling up one layer to see how well it’s adhered, if part of it pulls up, lay it back down and keep rubbing your squeegee over it until it’s adhered.
When the transfers were all applied, I applied three coats of Satin sealer over the signs.
I think with transfers, satin sealer works best since the transfers have a little shine to them also.
And once I grabbed some new jute rope, I threaded them back through the holes of the sign and reapplied the beads and tied the ends in a double knot to secure.
That’s it!
42
views
How I Up-cycled My Hobby Lobby Clearance Decor
Check out my new to me up-cycled decor! I found this piece at Hobby Lobby over a year ago marked down 90%! To be honest, I wasn’t really crazy about it but it was less than $3 and I was in that mood! LOL! And now I am so thrilled I didn’t pass this gem up!
Supplies I Used for my Up-cycled Decor
Decor of your choice
Dixie Belle Products: Cotton, White Lightning
Painters tape, small to medium paint brush
PREPPING MY UP-CYCLED
Prepping my up-cycled clearance decor was a little bit of a challenge.
If you notice there are three clear bottles hanging from jute rope, and I can only tie simple knots.
Plus the bottle needed a cleaning after sitting in my craft closet for over a year.
I carefully loosened the rope around the bottles and took them to kitchen to wash them.
Then I used painters tape and carefully taped around the rope where they were close to any wood.
I was also careful not to loose my loops in the jute rope where my bottles would fit in and hang.
Once I had those taped, I carefully wiped down all the wood to remove any fingerprints or dirt so my paint would adhere to the surface
PAINTING MY UP-CYCLED DECOR
This was the fun part,
I decided to go with Dixie Belle’s Cotton, their white-white paint.
Currently the wall decor had a yellowish tint to it that I do not like, it also was distressed along the edges but I decided to go with a cleaner look.
I grabbed my square artist brush, really any smaller to medium size brush will do and I started painting my up-cycled wall decor.
Once she was all dry, I decided not to seal her.
Technically with Dixie Belle, sealer is not required since there is sealer in their paint products.
I loved the matte look just as is!
Next I grabbed my three clear bottles and carefully put them back in the jute rope loops and tighten them up.
I used the knot on the top of the box to pull up the rope and readjust how the bottle hung.
For the final touch for my up-cycled clearance decor I added my favorite faux flower from Mustard Seed here in Albia and she was perfect!
33
views
My Prayer Wall & Canvas are Finally Done!
This has been a labor or love working on my prayer wall! For the full blog post with supply list go to www.melissapetersondesigns.com
24
views
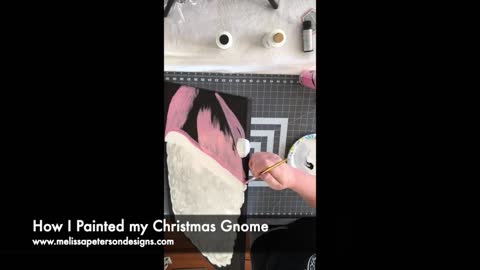
How I Painted my Christmas Gnome
Well I won't win any prizes but sometimes you just have to spend time playing with some paints and just have fun!
This little session was my paint therapy and I enjoyed every minute!
24
views
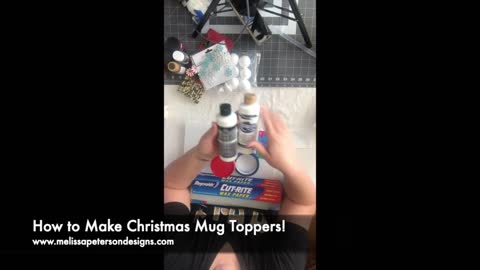
How to Make a Christmas Mug Topper
New blog post, shortened video AND supply list!
Link in bio or https://melissapetersondesigns.com/mug-toppers/ 💯🎄
For full blog post and supply list go to my website!
https://melissapetersondesigns.com/mug-toppers/
Don't forget to Subscribe and follow me on my social media!
Join MPD Tribe: https://melissapetersondesigns.com/mpd-tribe/
TikTok: https://bit.ly/3fpY7ZO
MeWe: https://mewe.com/i/melissapeterson1
Parler: https://bit.ly/3ftTluu
Rumble: https://rumble.com/c/c-309345
Pinterest: https://pin.it/3Ka1fOI
Facebook: https://www.facebook.com/melissapetersondesigns/
Facebook: https://www.facebook.com/boutiquebymelissamarie
Instagram: https://www.instagram.com/melissapetersondesigns/
Instagram: https://www.instagram.com/boutique_by_melissa_marie/
Making the world a little more beautiful with a paintbrush, a laptop, and a creative spirit.
23
views
1
comment

My Spring Tree Reveal
My Spring Tree reveal! I think this may be my cutest Easter tree yet! And I have the cutest surprise towards the bottom of the tree poking out! Check it out!
Bunny Butt and ribbons for my Spring Tree
The adorable ribbons, bunny butt and ears came from Decoexchange!
I’m afraid the last I looked, the bunny butt is no longer in stock but I’m wondering how hard (or easy) it would be to de-construct a bunny rabbit to use the butt and ears?
Hmmm…..
The bunny butt was the first thing I placed in my Spring Tree before adding other decorations.
My bow for my Spring tree was a simple combination of three different ribbons that I plan to use for my next project, my spring wreath.
Coming soon!
I had enough room at top of my tree and bow, where I added three carrot picks to top it off.
My bow topper, was the very last touch to my Spring tree.
FLOWERS AND PICKS FOR MY SPRING TREE
At Hobby Lobby, I found my tinsel garland in the Spring section and grabbed two of them and saved some money since they are 40% off.
The garland was the second decor I aded to my Spring tree.
I think Dollar Tree is becoming my new favorite craft and decoration store!
For my Spring Tree, I found a dozen pink Hyacinth florals bundles at Dollar Tree, grass picks with Easter eggs and berries bundles.
In all, I probably spent $20 in florals.
I love using bundle flowers, before I add them to my tree, I spread the flowers out to add dimension.
Each flower bundle was fluffed out and then placed randomly in my Spring Tree.
Next, I added my Easter egg and berries picks throughout the tree.
For my Spring Tree skirt, I am using my same skirt box from Christmas project.
I have two bricks in the bottom of the box to secure the tree and then I filled the Tree skirt with faux grass and faux Easter Eggs
I can tell you right now, I am so thankful I have those two bricks securing my tree! My cat Reeses almost pulled the tree down trying to play with the bunny butt!
Plus I added a ‘Bunny Crossing’ sign from my Easter stash and called it good!
If you decorate for Easter, I’d love to see it! You can follow me here and feel free to share your projects and crafts!
38
views
How I Created this Unique Guest Book
PREPPING THE “GUEST BOOK”
Once I brought home the Galvanized Metal Letter from Hobby Lobby, I cleaned all the surfaces.
I keep a bottle of White Lighting and water mixed up in a spray bottle for small projects.
For a small spray bottle I put in about 1/2 tablespoon of white lighting and then fill the bottle with water and mix well.
I’ll either spray the project or my cleaning rag, wipe down really well and then use another clean damp rag to wipe off any of the residue left behind.
Once the surface is dry, I grab my craft brush and start painting the surface with Slick Stick.
I use Dixie Belle’s slick stick on any surface that is non-porous or I’m concerned paint may have trouble adhering too.
Once the first coat is on and completely dry, I’ll add a second coat and let it dry then I usually wait a day before moving on to painting!
PAINTING THE “GUEST BOOK”
This project is going to be a guest book for a young mans’ graduation party and mom wanted this one done in black and she wanted a soccer ball added.
Since I decided to add the soccer ball in the PVPP method, I painted the metal letter in white or Dixie Belle’s cotton first.
PVPP is an acronym for Paint, Vinyl, Paint, Peel
ADDING THE SOCCER BALL PER PVPP
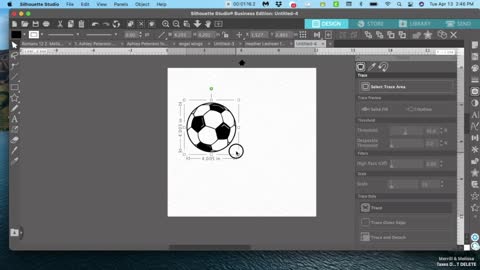
Once the white (Cotton) coat is completely dry, I used my Silhouette Cameo to cut a 4″ soccer ball design.
I actually cut two designs side by side, just in case I messed up and weeded the wrong part of the stencil.
Next I applied the stencil to the “guest book”, making sure there were no areas of the stencil not adhered to the metal.
Then I grabbed a clean craft brush and my Caviar paint.
I carefully painted over the stencil the first coat, while this was drying I started painting the remainder of the letter in cross-hatch pattern.
Cross hatching in painting is moving your brush in a criss-cross pattern. .
When the first coat of Caviar was dry, I went back and repeated the process, so the galvanized letter had two coat of paint.
Once dry, I used my 220 grit sandblock and lightly sanded over the stencil and the letter.
Then I carefully removed the stencil and with a small detail brush I painted over any areas that bled through, sometimes that happens.
SEALING THE “GUEST BOOK”
When it comes to sealing, when I paint with white, red or black paints I usually (not always) wait one day.
This is just a personal preference, I just want to make sure the paint is good and dry and won’t smear when the sealer is being applied.
Just as with my canvases I paint in my distressed style, I also applied the sealer in a cross hatch pattern.
Why? I liked the look.
When painting on slick surfaces sometimes brush strokes are hard to avoid and for some reason this give the finish a nice muted or matte look that I wanted!
Once she is cured, she is ready to be signed by friends and family with a white permanent marker!
And that is it!
29
views
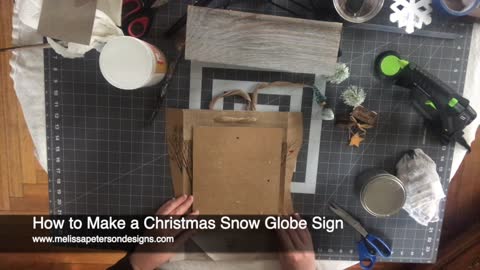
How to Make a Christmas Snow Globe Sign
I love when a craft comes out better than expected! Check out how I turned this shadow box craft into a snow globe!
For full blog post and supply list go to my website!
https://melissapetersondesigns.com/snow-globe/
17
views
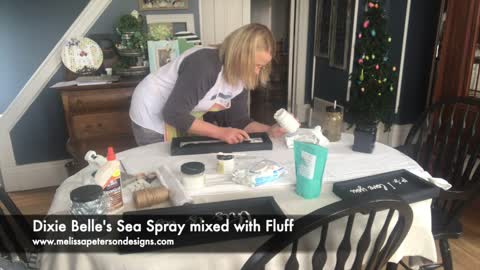
Dixie Belle's Sea Spray adding Textured Goodness to my Personalized Signs
Here I did a little experimenting using Dixie Belle's Sea Spray and stenciling!
Join MPD Tribe: https://melissapetersondesigns.com/mpd-tribe/
TikTok: https://bit.ly/3fpY7ZO
MeWe: https://mewe.com/i/melissapeterson1
Parler: https://bit.ly/3ftTluu
Rumble: https://rumble.com/c/c-309345
Pinterest: https://pin.it/3Ka1fOI
Facebook: https://www.facebook.com/melissapetersondesigns/
Facebook: https://www.facebook.com/boutiquebymelissamarie
Instagram: https://www.instagram.com/melissapetersondesigns/
Instagram: https://www.instagram.com/boutique_by_melissa_marie/
Making the world a little more beautiful with a paintbrush, a laptop, and a creative spirit..
18
views
How I Made my Patriotic Sign
DIY patriotic sign, what better way to get your American pride home decor started and get a little paint therapy too! All we need are a few supplies and we are ready to go!
Supplies I Used for my Patriotic Sign
Unfinished wood alphabet letter
Unfinished wood sign
Paint: Titanium white, Navy Blue, Lipstick Red
Round watercolor brush.
Scrapbook paper of your choice
Hot Glue gun and glue, Mod Podge
Scissors
PREPPING MY PATRIOTIC SIGN
To begin my project, I grabbed my letter and painted two coats of white.
While that was drying, I grabbed my scrapbook paper and roughly measured and cut the rectangle.
You can see in my YouTube video below, how I did the rough measuring.
I then liberally applied my Mod Podge on the board and decoupaged the scrapbook paper in place.
Now I always get inpatient during this step, once the paper is in place it’s best to wait until the paper is dry and then you can apply more Mod Podge as a sealer over it.
Once again, I didn’t wait and I had some bubbles pop up.
Thankfully they weren’t too noticeable!
PAINTING MY LETTER
Next I turned my attention back to my letter.
Now, with the scrapbook paper I had chosen, a solid colored letter would have looked great.
But I was in the mood to paint, and I did just that!
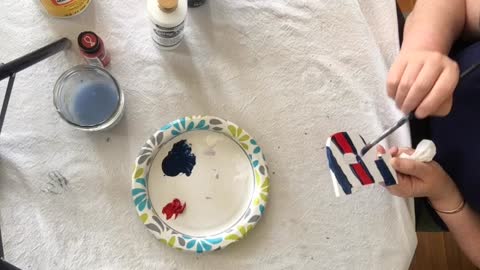
I grabbed my Blue and Red paint and started having fun!
Before I was done I even managed to add my version of stars.
HOW I PAINTED MY STARS
I used the end of my paint brush, dipped it in white and made a dot on my letter.
Then I used my brush to gently push the paint from the dot in five directions to make my star.
It worked!
ASSEMBLING MY PATRIOTIC SIGN
When the paint was all dry, I grabbed my favorite hot glue gun.
I applied a liberal amount to the backside and glued my letter in place.
And that is it!
25
views
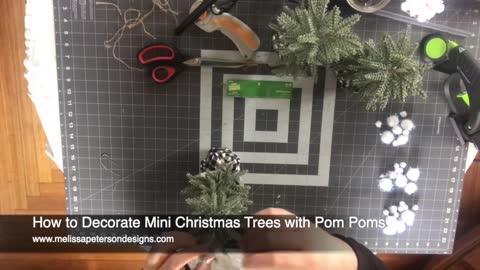
How to Decorate Mini Christmas Trees with Pom Poms
I love those mini Christmas Trees but I wanted to change mine up and decorate them to fit more with my Christmas decor!
Adding new fabric and pom poms, was just the perfect touch!
For full blog post and supply list go to my website!
https://melissapetersondesigns.com/trees/
14
views
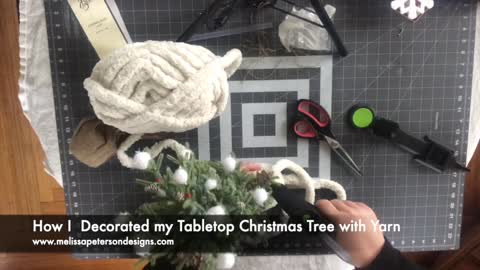
How I Decorated my Tabletop Christmas Tree with Yarn
If your tired of burlap but you love texture in your decorating, adding a wrap of chunky yarn to your Christmas decor will definitely accomplish this goal!
For full blog post and supply list go to my website!
https://melissapetersondesigns.com/yarn/
11
views
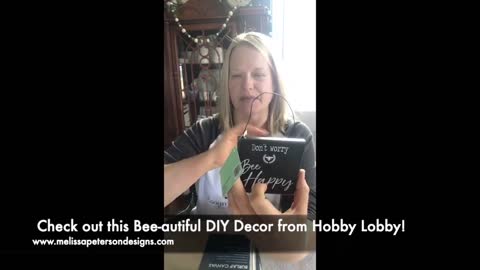
Check out this Bee-autiful DIY Decor from Hobby Lobby!
My hubby is digging this Bee-autiful Decor! Check out how easy this craft is and how you can add some umph to any small signs or plaques you may have!
Supplies I Used
3 –8″ x 8″ Burlap canvas
1 each – 4″ x 4″ Bee series signs from Hobby Lobby’s Spring section: Thank you for bee-ing you, You’re the Bee’s Knees, Don’t Worry Bee Happy.
Glue gun and glue stick
let’s get started
This project is way to easy!
I found these three cute small plaques in the Spring section at Hobby Lobby.
By themselves they are adorable and would look great in any display along side any Spring-y items but I wanted to figure out how I could make them stand out more and hang on the wall by my coffee bar!
It just so happened that the burlap canvases were on sale at the same time!
Instantly I thought of how I could make my own Bee-autiful wall decor!
Prepping
Heat up your glue gun and remove the wrapping from the burlap canvases.
Save those wood strips that come with the canvases for possible future crafting ideas!
I’ll think of something for them.
Next, you can use a screwdriver or pliers to remove the staples holding the wire hanger on each of the plaques.
I just folded mine over the backside since I was in a hurry.
PUTTING TOGETHER YOUR BEE-AUTIFUL DECOR
Once everything was prepped, I applied a generous amount of hot glue to the backside of the wood plaques.
The only area I didn’t apply the hot glue was about a 1″ border around the edges.
I didn’t want any hot glue seeping out along the side of the wood plaques.
Next I lined up the plaque over the burlap canvas and did my best to get it in the centered and held it in place until the glue cooled or cured.
Then I moved on and repeated this same process until I had all three Bee-autiful decor pics completed!
HANGING OPTIONS
The hangers that are in the canvas section I usually avoid.
I’ve had a few canvases fall off the walls using them, so I like to use the canvas frame and nail, or a sawtooth hanger and nail.
And, if the canvas is light enough, 3M strips are wonderful too!
GET CREATIVE!
This style of decorating has many options.
Instead of using burlap canvases for your Bee-autiful Decor, you could always use your choice of frames to apply the wood plaques too.
21
views
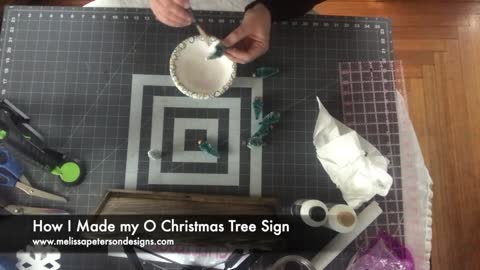
How I made my 'O Christmas Tree' Sign
I'm going Pink! I just made a pink 'O Christmas Tree' sign from vinyl and this is just too easy!
For full blog post and supply list go to my website!
https://melissapetersondesigns.com/vinyl-sign/
#ChristmasCrafts #ChristmasDIY
7
views