How I Made my Patriotic Sign
DIY patriotic sign, what better way to get your American pride home decor started and get a little paint therapy too! All we need are a few supplies and we are ready to go!
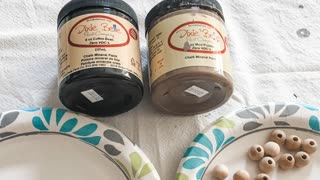
Supplies I Used for my Patriotic Sign
Unfinished wood alphabet letter
Unfinished wood sign
Paint: Titanium white, Navy Blue, Lipstick Red
Round watercolor brush.
Scrapbook paper of your choice
Hot Glue gun and glue, Mod Podge
Scissors
PREPPING MY PATRIOTIC SIGN
To begin my project, I grabbed my letter and painted two coats of white.
While that was drying, I grabbed my scrapbook paper and roughly measured and cut the rectangle.
You can see in my YouTube video below, how I did the rough measuring.
I then liberally applied my Mod Podge on the board and decoupaged the scrapbook paper in place.
Now I always get inpatient during this step, once the paper is in place it’s best to wait until the paper is dry and then you can apply more Mod Podge as a sealer over it.
Once again, I didn’t wait and I had some bubbles pop up.
Thankfully they weren’t too noticeable!
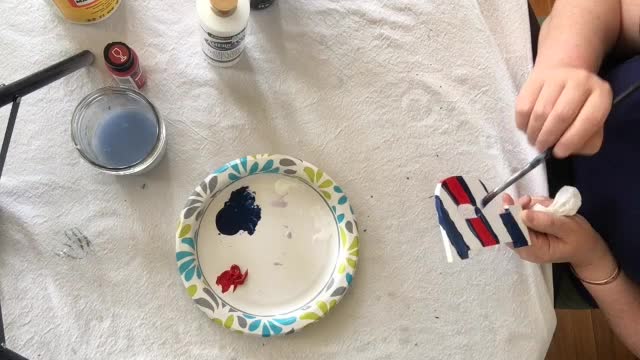
PAINTING MY LETTER
Next I turned my attention back to my letter.
Now, with the scrapbook paper I had chosen, a solid colored letter would have looked great.
But I was in the mood to paint, and I did just that!
I grabbed my Blue and Red paint and started having fun!
Before I was done I even managed to add my version of stars.
HOW I PAINTED MY STARS
I used the end of my paint brush, dipped it in white and made a dot on my letter.
Then I used my brush to gently push the paint from the dot in five directions to make my star.
It worked!
ASSEMBLING MY PATRIOTIC SIGN
When the paint was all dry, I grabbed my favorite hot glue gun.
I applied a liberal amount to the backside and glued my letter in place.
And that is it!
-
 1:28
1:28
MPDtribe
3 years agoHow I Personalized those Unfinished Wood Signs from Hobby Lobby
162 -
 2:45:42
Badlands Media
10 hours agoDevolution Power Hour Ep. 343
71.8K23 -
 1:24:00
Man in America
13 hours agoMarket Crash, Tariffs, USD Collapse: Trump's Plan to END the Old World Order? w/ John Perez
52.5K50 -
 8:07
8:07
Colion Noir
8 hours agoShould You Carry Non-Lethal Weapons For Self Defense?
42.5K53 -
 14:53
14:53
Forrest Galante
3 hours agoAustralia's Top 5 Deadliest Animals
21.8K9 -

DLDAfterDark
4 hours ago $1.23 earnedDLD Live! What's The "best" PDW?? Considerations For Trunk/Truck Gun & Gats in Bags & Backpacks
14.8K2 -
 15:25
15:25
Exploring With Nug
14 hours ago $16.19 earnedBag of Phones Found While Searching For Missing Man In River!
67.3K20 -
 3:58:27
fuzzypickles168
4 hours agoLate Nite Jam Session - Rock Band 4 | Was: EA Sports WRC | 1 John 2:1-17
12.1K -
![Nintendo Switch It UP Saturdays with The Fellas: LIVE - Episode #13 [Mario Kart 8 Deluxe]](https://1a-1791.com/video/fww1/97/s8/1/1/g/A/z/1gAzy.0kob-small-Nintendo-Switch-It-UP-Satur.jpg) 3:33:38
3:33:38
MoFio23!
13 hours agoNintendo Switch It UP Saturdays with The Fellas: LIVE - Episode #13 [Mario Kart 8 Deluxe]
36.1K -
 23:24
23:24
MYLUNCHBREAK CHANNEL PAGE
14 hours agoDams Destroyed Turkey
86.4K75