Guitar Shop - How to make a precision sanding block, to make precision wood shims
In this video, we make a sanding block, in order to make very precise, delicate, infinitely adjustable nut shim.
The main idea of this video is to show how double-stick tape can be used to hold a very small, delicate shim, while you sand it down to a very precise thickness, without breaking it...
I started this job by using a paperboard shim to test fit the nut. The action on the bass strings was perfect, but the action on the treble strings was too high.
Therefore i knew the maximum thickness of my wood shim would be the thickness of the paperboard,
And the minimum thickness would be 0, which would be the nut sitting directly on the nut slot.
So i could spend all day looking up factory specs on this particular guitar,
Or get specs from other well-known guitar factories,
Or get specs from a luthiers webpage...
And i could get out a micrometer, and feeler gages, and a calculator, and a pencil and paper...
and spend time coming up with a very precise game plan, from where we start, to where we want to be, and how we are going to get there, measured down to the hundred thousandths...
In my experience, ive found TWO major problems with this approach.
1) its very easy to sand too much, and make your part smaller than you had intended, and therefore probably unusable. this could be the difference between just a few sanding strokes, and by then you have already invested a lot of time sanding it down to the size you had intended. so your time is a complete waste, and the part is too, for this job. It becomes a spare part that “might” get used someday on another job. it becomes shop clutter.
But for now you have to start over making a new part...
2) you make the part to the exact size you had intended, down to the hundred thousandths...
Feels good man
Then you install the part, and wait for the glue to dry...
then finish setting up the guitar, and then you tune the guitar, and when you go to test each fret for fret buzz,
and realize that even though you did everything right, according to your plan,
theres still a major fret buzz problem, and the part you *just* made, is too small...
So you need to start over.
So both problems 1) and 2) result in a part (guitar nut or shim) that is too small, and both problems require you to start the job over from scratch.
I can afford to make mistakes, because i am working on my own guitars,
but if you were trying to run a guitar repair shop and you had to start a job over, you would be put 24 hours behind on this job, and probably other jobs too.
And thats not “compensated work”
Or a “compensated nut”.
Thats work that you, or the guitar tech, will just have to do for free, because you can’t charge a customer for your own mistakes.
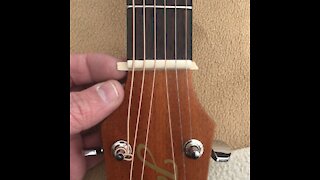
So anyway, what i have been doing for nut shims, is to make a long, tapered shim, to slide back and forth in the nut groove, to micro-adjust during a dry run test fit, until i get the action adjustment i want, and all the notes sound good everywhere.
the shim is longer than the nut, so that the shim sticks out on both ends, giving you something to grip, to pull on, during adjustment.
You can also use a combination of pull-push to gently adjust shim back and forth, so that you don’t break the shim you *just* spent an hour making...
One tricky thing is, when you go to tune the guitar, the bass strings will pull harder on the nut than the treble strings, and so the strings will pull the nut off to the side.
To compensate for this problem, tighten strings until they are close to intended tuning, but yet 3bass-3treble string tension is balanced enough so that the nut wont move, even if you try to gently nudge it side to side to see if it wants to move.
For this particular job, i had to make the micro-adjustment 3 times before i was satisfied with the action.
However, because of this over-long nut shim, i was able to make those adjustments quickly and easily.
Because making these micro-adjustments was already part of the job plan before i even started the job, i wasn’t even disappointed when my first test fit wasn’t as good as i wanted, because i knew the micro-adjustment was so easy.
Now instead of getting it “close enough”,
You can really dial-in that nut micro-adjustment to exactly where you want it, and test drive the guitar action, *before* committing to it with glue.
-
 1:38
1:38
Beginner Guitar
3 years agoGuitar Shop - Making and Fitting a tapered nut shim o
1411 -
 1:03
1:03
Beginner Guitar
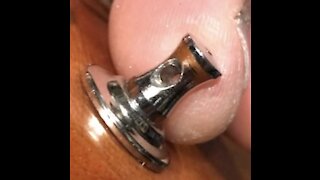
3 years agoGuitar Maintenance and Repair - Inspecting tuning machine holes for burrs
98 -
 17:19
17:19
Dragon954
2 years ago $0.02 earnedMy DIY Homemade Lap Steel Guitar
493 -
 1:20
1:20
stucasts
11 months ago12 String Acoustic Guitar, Magnum Marquis Series Handcrafted model MS-350
48 -
 0:39
0:39
Russdlp
3 years agoWoodworking Guitar Making Guitars By Hand #Shorts
11 -
 5:08
5:08
Iron Age Guitar Accessories
1 year agoMaking Wooden Guitar Picks
533 -
 23:05
23:05
Home Built Workshop
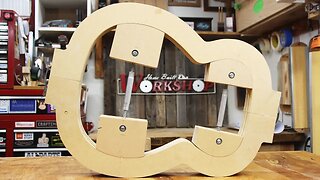
2 years agoHow to make an Acoustic Guitar Mold | Building an Acoustic Guitar
14 -
 2:13
2:13
Music Videos
4 months agoJacobs Guitars Tele Style. Hand made in the USA Barncaster 200 year old wood
57 -
 11:31
11:31
BasementGuitarSuperstar
2 years agoChapman Guitars ML2J - Rob Chapman's Personal Guitar - 1st Impressions
812 -
 17:46
17:46
BullfrogPondShop
4 years ago $0.03 earnedSHOPSMITH SHOP BUILT DRUM THICKNESS SANDER
50