
Variable Speed Freezer Compressor Test
Testing out the variable speed compressor feature and see how it affects energy consumption.
As shipped, the Sunstar freezer had a 510 ohm resistor in series with the thermostat contact. Using an audio spectrum app, this gave a 43Hz or 2580 RPM speed. At this speed, power was 66W, run time 40 minutes every 3 hours, energy consumption was 352WH/day. Removing that resistor gives a 2000 RPM speed, power dropped to 44W, run time increased to 94 minutes every 6 hours, resulting in 272WH/day consumption. This change reduced energy consumption by around 22%.
Secop information:
https://www.secop.com/about-us/history
https://www.secop.com/products/technical-literature/instructions-show/electronic-units-instructions
Blog post on variable speed operation:
https://coastalclimatecontrol.com/blog/variable-speed-refrigeration-and-air-conditioning-compressors
The DC freezer is proving it's benefits by staying powered off solar for over 2 weeks without the battery bank hitting 100% state of charge in early January. With the old upright freezer, I would have had to switch it back to grid power after a day or two of low power conditions. This is because I was able to switch off the AC output on the hybrid inverters most of the day to save on the power needed to operate that function.
In future videos, I'll be installing a 1500 ohm potentiometer in series with the thermostat to allow selecting any operating speed. Then I'll be installing an in-line watt meter to the freeze to be able to measure it's energy consumption. Then I'll be able to test energy consumption at the various speeds, both in a cool winter ambient temperature as well as in the hotter summer conditions.
Freezer is made in the USA by:
Solar Freeze, Llc
LaGrange Indiana
It seems that the compressor is made by Secop (formerly Danfoss) and is packaged by Keota for use in the Solar Freeze Sunstar freezers.
It is as "no frills" as you can get, manual defrost, no digital display, no WiFi, just a plain old thermostat dial and a power and fault LED indicator.
Ordered from:
https://www.thecabindepot.com/products/sunstar-solar-dc-chest-freezer-8cu
They seemed to have the best price including shipping. They are located in Canada, so you may get hit with a currency conversion fee when ordering, but there was no sales tax added.
Solar Freeze web site:
https://www.solarfreezellc.com/
Image credits:
BD35 cutaway:
debe @ https://forum.allaboutcircuits.com/threads/danfoss-compressor-speed-controller.118993/
Controller PCB:
obd.tech @ https://www.eevblog.com/forum/repair/repairing-electronic-control-unit-for-bd35-compressor/
More to come...
Subscribe for more content like this
Comment, like, share & click the bell icon
And as always, thanks for watching
20
views
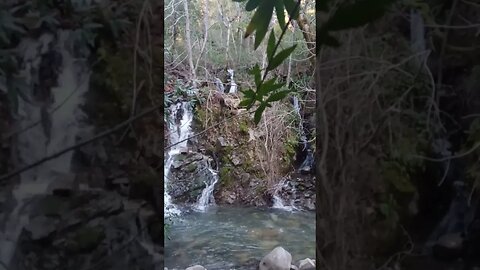
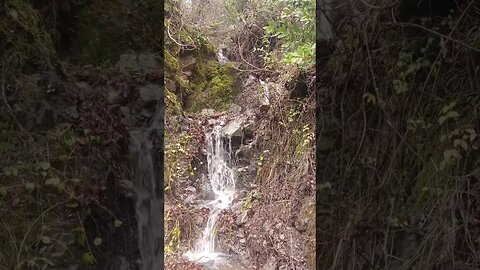
New Years Waterfalls, Two For One
Found a better view point to capture both water falls in one shot.
This water fall drops into Stevens Creek at the end of the outflow channel of an old abandoned pond. Located off Stevens Canyon Road, a few miles west of Cupertino, CA.
#shorts #shortsvideo #short #waterfall

12V DC Step Down Converter for the Garage
After a week of running the new 24V system in the garage, it was time to hook up the 12V step down converter and transfer the garage DC loads to it.
Using a 30A Xincol step down converter:
https://amzn.to/3j9VGRt
Not sure how well this unit will hold up, but I had purchased this some years back for another project and had it available. Outputs 12.4 volts at no load, dropping to 12.2 - 12.3 volts under a 190W load. The wire size seems to be a bit small, looks to be 18AWG, but so far it's working well.
Now, the garage/shop area is on it's own independent DC power supply. As long as there's a connection to the solar battery bank, it'll run. This is the first time in 10 years that I'll be able to see what the house uses compared to the garage, DC power wise.
In mid-winter, using minimal DC lighting, the garage is using 0.5KWH/day, about 0.33KWH of that for the freezer. During the rest of the year, I expect this to be 4 - 5 times that much. Using DC power right off the battery bank, via the BMS, is about as efficient as you can get.
More to come...
Subscribe for more content like this
Comment, like, share & click the bell icon
And as always, thanks for watching
15
views
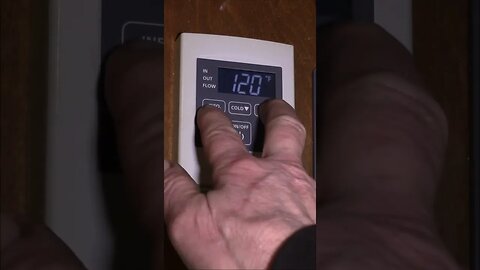
Takagi T-H3M Tankless Water Heater: Higher Temperature Setting
A short video to show the "two button trick" to access the higher temperature settings on the Takagi T-H3M tank less water heater with with either the TM-RE41 or TM-RE42 displays.
You can switch between °F and °C by pressing/holding the Info button for 3 secs. You can adjust the temperature between 100°F and 120°F just by pressing the Hot/Cold buttons. To go above 120°F/50°C you need to press/hold the Hot+Info buttons.
Earlier video, with more detail, where the "two button push" was blocked by my hand:
https://youtu.be/rYecHPXXQSE
I use this feature all the time. I like to think of this appliance as a hot water machine. It can produce the exact temperature hot water needed for a task:
Shower: 100°F
Warm clothes wash: 110°F
General use: 120°F
Hot clothes wash: 130°F
Dishwasher: 140°F
Be sure to rate, comment and share
And as always, thanks for watching
Intro:
Louisiana Fairytale by Austin Rogers
https://web.archive.org/web/20170402222425/http://drfiddle.com/show_tune.php?id=94
#takagi #tanklesshotwaterheaters #tankless
4
views

Old Forest Road: Water fall
Checking out the Canyon Trail crossing of Stevens Creek. Santa Clara County Parks had a sign up stating the trail was closed, although it looked like some people had crossed the swiftly flowing creek.
So I went back down to the Old Forest Road, that runs up to GeoCache GC75BP8. Quite a few more trees have come down in the recent storms. Got to see the creek flowing down the road where I noticed it had washed out the first time I came up.
I had noticed some potential water falls on the USGS hill shade map of this area and this is confirmation of that finding. Amazing how these hill shade maps have this level of detail.
More to come...
Subscribe for more content like this
Comment, like, share & click the bell icon
And as always, thanks for watching
#waterfall

Small water fall along the "Old Forest Road"
Atmospheric river storms got this waterfall running in early January, 2023. This water fall is in the creek alongside the "Old Forest Road" that runs up to GeoCache GC75BP8. I had noticed some potential water falls on the USGS hill shade map of this area.
#shorts #shortsvideo #short #waterfall
1
view
SunStar DC Chest Freezer: Energy Consumption
In a one week test in mid-winter, freezer consumed 330 watt-hours/day. Freezer is at approx. 0F (C) and ambient temperature 55F (13C). The old upright freezer used 1450 watt-hours/day in similar conditions or 4.4 times as much energy!
Freezer is made in the USA by:
Solar Freeze, Llc
LaGrange Indiana
https://www.solarfreezellc.com/
It seems that the compressor is made by Secop (formerly Danfoss) and is packaged by Keota for use in the Solar Freeze Sunstar freezers.
It is as "no frills" as you can get, manual defrost, no digital display, no WiFi, just a plain old thermostat dial and a power and fault LED indicator.
Ordered from:
https://www.thecabindepot.com/products/sunstar-solar-dc-chest-freezer-8cu
They seemed to have the best price including shipping. They are located in Canada, so you may get hit with a currency conversion fee when ordering, but there was no sales tax added.
This project has taken over a year to complete, so videos have been shot at various times over that period.
More to come...
Subscribe for more content like this
Comment, like, share & click the bell icon
And as always, thanks for watching
7
views
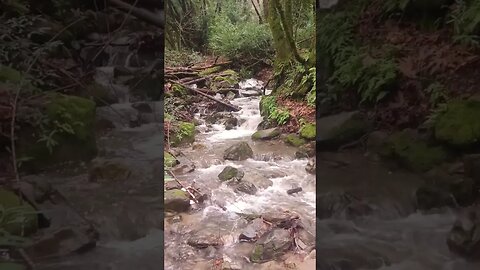
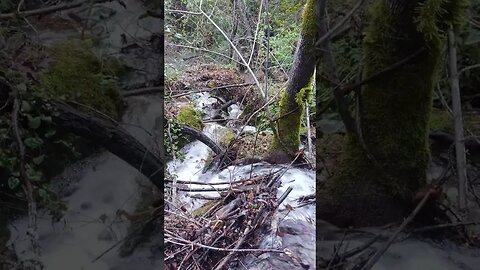
Stevens Creek Branch B after recent storms
Atmospheric river storms got this tributary of Stevens Creek running in early January, 2023. This cascade drops down from the Saratoga Gap Open Space Preserve near the end of the paved portion of Stevens Canyon Road.
#shorts #shortsvideo #short #cascade
3
views

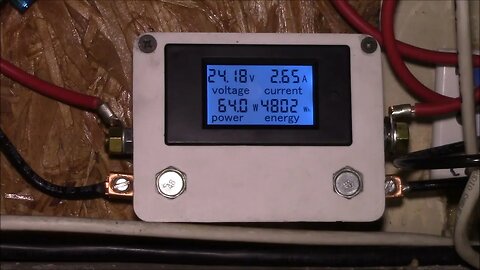
DC Power Meter Re-Wire
DC power meter was wired incorrectly and that caused some issues with the accuracy of the reading. I think I mixed up the shunt wires do to having to flip the meter and case over to wire it and thus swapping the load and source sides.
Initially I just swapped the 2 pickup wires on the shunt in order to have a "positive" current flow and that seemed to make the meter read amps and watts. However, the readings seemed to be inaccurate and that came down to having the meter "-" terminal connected to the load side of the shunt, I think that few mV difference between the source side of the shunt and the meter "-" caused the reading errors. Along the way, I must have also worked one of the wires loose in the meter connector block.
After having to pull the meter off the board a few times to work on it, I didn't want to take it off again after I got it working to shoot some video. It's hard to get a camera in there without completely removing the meter.
As far as meter accuracy, I think it's reasonable. It reads a bit higher than my clamp meter but a bit lower than the mV reading across the shunt with a 4-1/2 digit multi-meter. The voltage at the meter also seems to read a bit low, but I think overall, the watt and KWH readings are likely OK. Since I can't calibrate the meter, it is what it is.
Using a PZEM-051 DC power meter:
https://amzn.to/3VBFvJZ
Meter enclosure:
https://www.thingiverse.com/thing:1830137
Link to the thumbnail image with a description below:
https://photos.app.goo.gl/rX1zeyZc76sc7RvHA
Image credit: https://www.rcscomponents.kiev.ua/datasheets/pzem-051-datasheet.pdf
This project has taken over a year to complete, so videos have been shot at various times over that period.
More to come...
Subscribe for more content like this
Comment, like, share & click the bell icon
And as always, thanks for watching
1
view
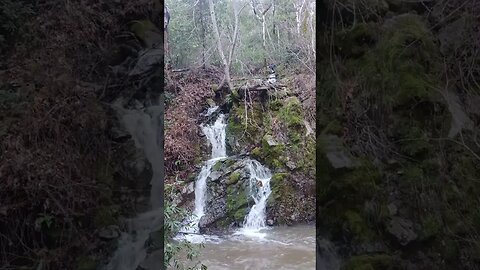
Small water fall above Stevens Canyon Road.
Atmospheric river storms got this waterfall running in early January, 2023. This water fall drops down from above Stevens Canyon Road just a ways up from the junction with Mt. Eden Rd.
#shorts #shortsvideo #short #waterfall

New Years Day Waterfalls
Atmospheric river storms got these waterfalls running on New Years Day. I had scouted this area out a year prior and kept it on my list to check after a heavy rain storm.
Be sure to check out the video card links for the background on finding these waterfalls. It was the result of many trips up here, looking for other things and also checking out USGS historic topographic and hill shade maps. These falls are visible off of a paved road, if you know exactly where to look. But I had ridden by here for 10+ years without knowing they were here.
This water fall drops about 50 ft. (15 m) into Stevens Creek at the end of the outflow channel of an old abandoned pond. Located a few miles west of Cupertino, CA. This part of the falls is hidden from view from below.
#waterfall #waterfalls
2
views
New Years Waterfall #2 View From the Top
Atmospheric river storms got this waterfall running on New Years Day. The camera view doesn't do it justice. I had scouted this area out a year prior and kept it on my list to check after a heavy rain storm:
https://youtu.be/5VjQvBeCuwo
This water fall drops about 50 ft. (15 m) into Stevens Creek at the end of the outflow channel of an old abandoned pond. Located a few miles west of Cupertino, CA. This part of the falls is hidden from view from below.
#shorts #shortsvideo #short #waterfall
4
views
New Years Waterfall #2
Atmospheric river storms got this waterfall running on New Years Day. I had scouted this area out a year prior and kept it on my list to check after a heavy rain storm:
https://youtu.be/5VjQvBeCuwo
This water fall drops into Stevens Creek at the end of the outflow channel of an old abandoned pond. Located a few miles west of Cupertino, CA.
#shorts #shortsvideo #short #waterfall
2
views

New Years Waterfall #1
Atmospheric river storms got this waterfall running on New Years Day. I had scouted this area out a year prior and kept it on my list to check after a heavy rain storm:
https://youtu.be/5VjQvBeCuwo
This water fall drops into Stevens Creek at the end of the outflow channel of an old abandoned pond.
#shorts #shortsvideo #short #waterfall
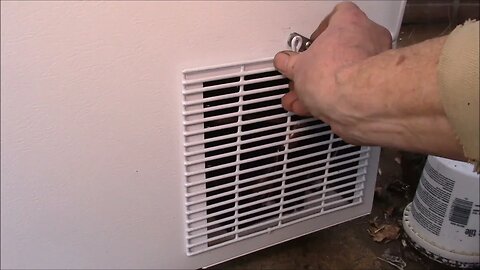
SunStar DC Chest Freezer, Final Touches
The Euro / DIN style DC power plug was spliced to the 10AWG power cable supplied with the freezer. Stuck on some foam blocks to the back and right side of the freezer to space it out from the wall properly. Added a no-tools swing clamp to the rear condenser grill to make future servicing easier.
With the foam blocks removed, was able to squeeze the freezer in through the 32" side door on the garage.
Freezer is made in the USA by:
Solar Freeze, Llc
LaGrange Indiana
It is as "no frills" as you can get, manual defrost, no digital display, no WiFi, just a plain old thermostat dial and a power and fault LED indicator.
Ordered from:
https://www.thecabindepot.com/products/sunstar-solar-dc-chest-freezer-8cu
They seemed to have the best price including shipping. They are located in Canada, so you may get hit with a currency conversion fee when ordering, but there was no sales tax added.
I would post a link to the Solar Freeze web site, but they don't have one. This company is old school in every sense.
This project has taken over a year to complete, so videos have been shot at various times over that period.
More to come...
Subscribe for more content like this
Comment, like, share & click the bell icon
And as always, thanks for watching
5
views

Garage DC Power Distribution Board
Time to make a power distribution panel for the garage and 24V DC freezer This board has a DC power meter and fuse block for 24VDC power and also feeds a 24V - 12V DC step down converter and fuse block to power the 12V loads in the garage. This will help to take the load off the existing 20 amp 12V power supply that will now only feed the rest of the house.
It expands on the original 12V power system installed some 9 years earlier that had an electrical box cut into the wall that feeds power in from the attic. This is installed under a storage shelf and has worked flawlessly during that time.
Using a PZEM-051 DC power meter:
https://amzn.to/3VBFvJZ
12/24V DC fuse blocks:
https://amzn.to/3Q4j9zu
12V Buck Converter:
https://amzn.to/3CeRBlb
https://amzn.to/3WY9uwL
Meter enclosure:
https://www.thingiverse.com/thing:1830137
This project has taken over a year to complete, so videos have been shot at various times over that period.
More to come...
Subscribe for more content like this
Comment, like, share & click the bell icon
And as always, thanks for watching
4
views

SunStar DC Chest Freezer Part 4
Time to make a power plug and receptacle for the 24V DC freezer. Decided to use a European / DIN style DC power plug. These are rated for 12V or 24V DC and 15 amps and have a much more secure fit that a common lighter plug and socket.
I find the clam shell style plugs work best for heavier gauge wires, but the screw together style should be good for 14AWG and smaller wires:
https://amzn.to/3vjnpli
I wanted to use a plug and socket that was designed for DC power, that had a robust connection and that could be securely mounted in an electrical box. I've seen other folks use XT60 or similar RC battery type connectors, so that's another option.
Freezer is made in the USA by:
Solar Freeze, Llc
LaGrange Indiana
It is as "no frills" as you can get, manual defrost, no digital display, no WiFi, just a plain old thermostat dial and a power and fault LED indicator.
Ordered from:
https://www.thecabindepot.com/products/sunstar-solar-dc-chest-freezer-8cu
They seemed to have the best price including shipping. They are located in Canada, so you may get hit with a currency conversion fee when ordering, but there was no sales tax added.
I would post a link to the Solar Freeze web site, but they don't have one. This company is old school in every sense.
This project has taken over a year to complete, so videos have been shot at various times over that period.
More to come...
Subscribe for more content like this
Comment, like, share & click the bell icon
And as always, thanks for watching
3
views

SunStar DC Chest Freezer Part 3
Making a dolly out of the shipping pallet to move the old upright freezer out of the garage. Adding some under-cabinet lights since the cabinet blocks the overhead lighting. This portion of the garage will be 100% solar powered off of 12V and 24V DC.
7W Motion Activated Dome / Area Light Fixture:
https://m4products.com/san9103a-03-dome-area-light-fixture-with-motion-activated-switch/
They also have touch and un-switched fixtures.
Freezer is made in the USA by:
Solar Freeze, Llc
LaGrange Indiana
It is as "no frills" as you can get, manual defrost, no digital display, no WiFi, just a plain old thermostat dial and a power and fault LED indicator.
Ordered from:
https://www.thecabindepot.com/products/sunstar-solar-dc-chest-freezer-8cu
They seemed to have the best price including shipping. They are located in Canada, so you may get hit with a currency conversion fee when ordering, but there was no sales tax added.
I would post a link to the Solar Freeze web site, but they don't have one. This company is old school in every sense.
This project has taken over a year to complete, so videos have been shot at various times over that period.
More to come...
Subscribe for more content like this
Comment, like, share & click the bell icon
And as always, thanks for watching

SunStar DC Chest Freezer Part 2
Testing out the DC chest freezer on the 24V battery bank. Also, finding the advantages of having 2 full size freezers which makes defrosting a simple task, more on that in an upcoming video.
Seems to use around 60W of power on either 12V or 24V. Runs up to around 75W when starting from ambient temperature, but power consumption falls to under 60W as the inside cools down.
Freezer is made in the US by:
Solar Freeze, Llc
LaGrange Indiana
It is as "no frills" as you can get, manual defrost, no digital display, no WiFi, just a plain old thermostat dial and a power and fault LED indicator. Ordered from:
https://www.thecabindepot.com/products/sunstar-solar-dc-chest-freezer-8cu
They seemed to have the best price including shipping. They are located in Canada, so you may get hit with a currency conversion fee when ordering, but there was no sales tax added.
I would post a link to the Solar Freeze web site, but they don't have one. This company is old school in every sense.
This project has taken over a year to complete, so videos have been shot at various times over that period.
More to come...
Subscribe for more content like this
Comment, like, share & click the bell icon
And as always, thanks for watching
1
view
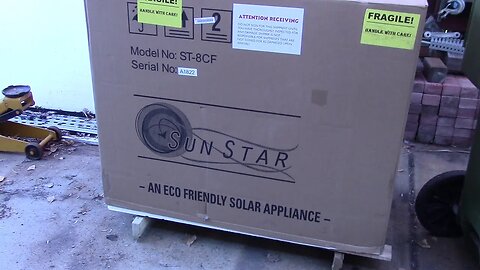
Sunstar DC Chest Freezer Part 1
After a 6 month wait, the DC chest freezer showed up today, let's check it out. I had initially waited until spring to order this, hoping to get it during the summer. That way I wouldn't have to deal with dodging rain storms and winter weather. That didn't work out too well :)
Freezer is made in the US by:
Solar Freeze, Llc
LaGrange Indiana
It is as "no frills" as you can get, manual defrost, no digital display, no WiFi, just a plain old thermostat dial and a power and fault LED indicator. Ordered from:
https://www.thecabindepot.com/products/sunstar-solar-dc-chest-freezer-8cu
They seemed to have the best price including shipping. They are located in Canada, so you may get hit with a currency conversion fee when ordering, but there was no sales tax added.
I would post a link to the Solar Freeze web site, but they don't have one. This company is old school in every sense.
This project has taken over a year to complete, so videos have been shot at various times over that period.
More to come...
Subscribe for more content like this
Comment, like, share & click the bell icon
And as always, thanks for watching
6
views

Above Freezer Storage Cabinet, Part 4
Next step is to finish assembling the cabinet, then add the doors, door stop and interior lights. Since this cabinet is large and heavy, it was built in place since it would been too unwieldy to lift into place fully assembled. Also, planning out the new 24VDC circuit and solar power situation in the garage/shop area.
This is a decently large cabinet, it's about 1 cubic yard or meter in volume. It has a middle and bottom shelf and is used to store parts inventory for the business.
We often have 10-20 boxes of a given item and then a dozen different items on hand to cope with the ongoing supply chain issues. Having a deep cabinet allows parts boxes to be stacked in long rows. With everything on one place, it's much easier to take a quick glance at what we have on hand and get orders in for items that are running low.
One underlying theme of this project is to re-use as much existing material that's sitting around.
This project has taken over a year to complete, so videos have been shot at various times over that period.
More to come...
Subscribe for more content like this
Comment, like, share & click the bell icon
And as always, thanks for watching
4
views
Above Freezer Storage Cabinet, Part 3
Next step is to finish assembling the side of the cabinet, then add cleats to the wall to support the middle and bottom shelves. Since this cabinet will be large and heavy, it'll be built in place since it would been too unwieldy to lift into place fully assembled. Also, the back and right sides will be the walls of the utility room.
This should be a decently large cabinet, it'll be about 1 cubic yard or meter in volume. It'll have a middle and bottom shelf and be used to store parts inventory for the business.
We often have 10-20 boxes of a given item and then a dozen different items on hand to cope with the ongoing supply chain issues. Having a deep cabinet allows parts boxes to be stacked in long rows. With everything on one place, it's much easier to take a quick glance at what we have on hand and get orders in for items that are running low.
One underlying theme of this project is to re-use as much existing material that's sitting around.
This project has taken over a year to complete, so videos have been shot at various times over that period.
More to come...
Subscribe for more content like this
Comment, like, share & click the bell icon
And as always, thanks for watching
3
views

Above Freezer Storage Cabinet, Part 2
Planning phase for replacing an old upright freezer with a new DC chest freezer. Next step is to make a few choice cuts on the shipping crate material and then start assembling the cabinet. Since this cabinet will be large and heavy, it'll be built in place since it would been too unwieldy to lift into place fully assembled. Also, the back and right sides will be the walls of the utility room.
This should be a decently large cabinet, it'll be about 1 cubic yard or meter in volume. It'll have a middle and bottom shelf and be used to store parts inventory for the business.
We often have 10-20 boxes of a given item and then a dozen different items on hand to cope with the ongoing supply chain issues. Having a deep cabinet allows parts boxes to be stacked in long rows. With everything on one place, it's much easier to take a quick glance at what we have on hand and get orders in for items that are running low.
One underlying theme of this project is to re-use as much existing material that's sitting around.
This project has taken over a year to complete, so videos have been shot at various times over that period.
More to come...
Subscribe for more content like this
Comment, like, share & click the bell icon
And as always, thanks for watching

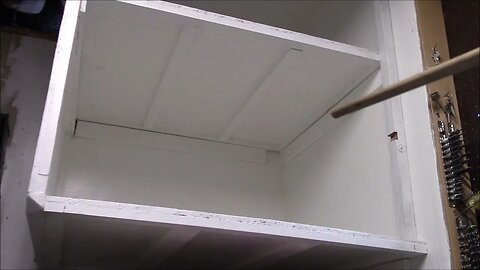
Above Freezer Storage Cabinet, Part 1
Planning phase for replacing an old upright freezer with a new DC chest freezer. First step is to figure out how to build a cabinet that'll be above the new chest freezer.
This should be a decently large cabinet, it'll be about 1 cubic yard or meter in volume. It'll have a middle and bottom shelf and be used to store parts inventory for the business.
We often have 10-20 boxes of a given item and then a dozen different items on hand to cope with the ongoing supply chain issues. Having a deep cabinet allows parts boxes to be stacked in long rows. With everything on one place, it's much easier to take a quick glance at what we have on hand and get orders in for items that are running low.
One underlying theme of this project is to re-use as much existing material that's sitting around.
This project has taken over a year to complete, so videos have been shot at various times over that period.
More to come...
Subscribe for more content like this
Comment, like, share & click the bell icon
And as always, thanks for watching

Heavy cut on a mini-lathe
Love the way this 12L14 steel machines. 0.100" / 2.5mm depth of cut with a TCMT carbide insert @ 1000 RPM
Each part takes 7 heavy passes like this, then measure the diameter and make a cleanup pass to final dimension. Flip the rod and repeat on the other end, then thread to M8-1.25.
These parts are for another batch of VW shift linkage weights:
https://www.4crawler.com/Diesel/ForSale/ShiftLinkage.shtml#BilletShiftRod
Took quite a few tries to get the hang of hand holding the camera and operating the lathe at the same time.
#shorts #shortsvideo
12
views