


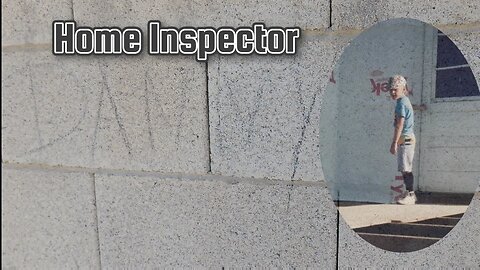
Always look in the garage cabinets for termites #homeinspection
Termites in Arizona are often found in garages due to a few reasons:
Wood Sources: Termites primarily feed on wood and other cellulose-based materials. Garages often contain wooden structures such as support beams, framing, or stored lumber. If the wood in the garage is untreated or in contact with soil, it can attract termites and provide them with a food source.
Moisture: Termites are attracted to moisture, as it helps them thrive and facilitates their digestion of cellulose. Garages, especially those with plumbing fixtures or water leaks, can create a moist environment that is conducive to termite activity. Water damage or leaks in garages can lead to increased humidity levels, making them more attractive to termites.
Entry Points: Garages often have multiple entry points for termites. Cracks in the foundation, gaps around utility lines or pipes, or damaged door and window frames can serve as entry points for termites. Once they gain access to the garage, they can then move to other parts of the structure.
Proximity to the House: Garages are typically attached or in close proximity to the main house. If termites establish a colony in the garage, they can easily migrate to the nearby wooden components of the house, causing potential structural damage.
To reduce the risk of termite infestation in a garage, it's important to take preventive measures such as:
Regularly inspecting the garage for signs of termites, such as mud tubes, discarded wings, or wood damage.
Minimizing or eliminating wood-to-soil contact by raising stored lumber off the ground and keeping firewood away from the garage.
Fixing any plumbing leaks or sources of excess moisture.
Sealing cracks and gaps in the garage's foundation and walls to prevent termite entry.
Considering termite treatments and regular inspections by professional pest control companies.
It's worth noting that Arizona has a significant presence of subterranean termites, which are particularly common and destructive in the region. These termites nest underground and build mud tubes to access above-ground food sources, making garages an attractive target if conducive conditions are present.
Follow me on
Facebook - https://www.facebook.com/homeinspectordanarizona
Reddit - https://www.reddit.com/r/homeinspectionfails/
Twitter - https://twitter.com/hominspectdan
Instagram - https://instagram.com/homeinspector_dan
youtube.com/@homeinspectordan
"Discover the secrets of a safe and sound home with expert property inspections."
Scheduling online
homeinspectordan.com
Home Inspection
Termite Inspection
Pool and Spa Inspection
Infrared Inspection
Moisture Detection
Sewer Camera Inspection
#termites #arizona #garage
26
views

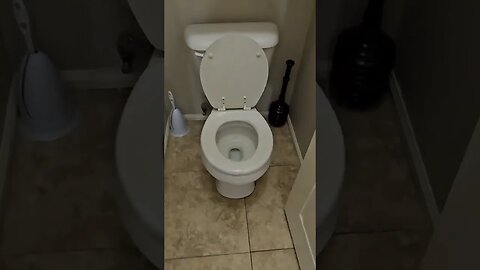
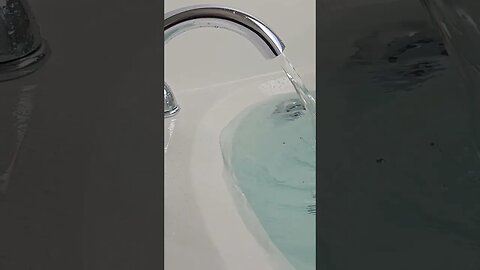
Can you even turn around in this bathroom?#youtubeshorts
Here are some general recommendations for the minimum clearances around a standard residential toilet we look for at a home inspection:
Side Clearance: There should typically be a minimum of 15 inches (38 centimeters) of clear space on at least one side of the toilet. This measurement is taken from the center of the toilet to any nearby obstruction, such as a wall or a fixture.
Front Clearance: There should be a minimum of 21 inches (53 centimeters) of clear space in front of the toilet. This allows for comfortable use and accessibility.
Rear Clearance: The distance between the center of the toilet and the wall behind it should be at least 15 inches (38 centimeters). This measurement ensures that there is enough space for the tank and for proper installation and maintenance.
It's important to note that these are general guidelines, and actual requirements may vary depending on local building codes, accessibility regulations, and the specific design of the toilet. Additionally, some jurisdictions may have specific requirements for accessible or wheelchair-accessible toilets, which may require larger clearances to accommodate mobility devices.
If you are remodeling or constructing a bathroom, it's recommended to consult local building codes or consult with a professional contractor or architect to ensure compliance with the specific regulations in your area.
Follow me on
Facebook - https://www.facebook.com/homeinspectordanarizona
Reddit - https://www.reddit.com/r/homeinspectionfails/
Twitter - https://twitter.com/hominspectdan
Instagram - https://instagram.com/homeinspector_dan
youtube.com/@homeinspectordan
"Discover the secrets of a safe and sound home with expert property inspections."
Scheduling online
homeinspectordan.com
Home Inspection
Termite Inspection
Pool and Spa Inspection
Infrared Inspection
Moisture Detection
Sewer Camera Inspection
#shorts #homeinspection #youtubeshorts
6
views
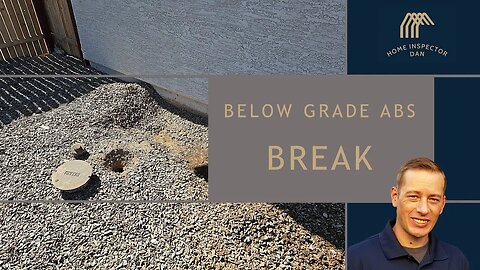
Broken and buried sewer main cleanouts at home inspection
When looking for the plumbing cleanout caps, I noticed one that was covered with a metal cap. After I lifted it up, I realized the ABS pipe was broken off below grade. There was another cleanout on site but it wasn't located after digging, it must be completely buried.
Follow me on
Facebook - https://www.facebook.com/homeinspectordanarizona
Reddit - https://www.reddit.com/r/homeinspectionfails/
Twitter - https://twitter.com/hominspectdan
Instagram - https://instagram.com/homeinspector_dan
youtube.com/@homeinspectordan
"Discover the secrets of a safe and sound home with expert property inspections."
Scheduling online
homeinspectordan.com
Home Inspection
Termite Inspection
Pool and Spa Inspection
Infrared Inspection
Moisture Detection
Sewer Camera Inspection
#SewerInspection #HomeMaintenance #PlumbingTips
2
views

Sewer Pipe Maintenance 101: Essential Tips for Homeowners to Prevent Plumbing Issues
In this video, we're covering sewer pipe maintenance, including essential tips for homeowners to prevent plumbing issues.
Plumbing problems can be costly and annoying, but with a little knowledge and preparation, you can prevent them from happening. In this video, we'll cover essential sewer pipe maintenance tips that will help you keep your plumbing system in optimal condition. We'll also cover some preventive measures you can take to avoid future problems. Watch this video to learn everything you need to know about sewer pipe maintenance!
#homeinspection #plumbingtips #sewerpipemaintenance
4
views

Peach 🍑 pickin' at Schnepf Farms for pie 🥧 filling! #short
Had a fun time pickin' peacheas down at Schnepf Farms with Janice. Hope we get some peach pie or kobbler out of this!
@schnepffarms2982
#peaches #pie #pickyourown

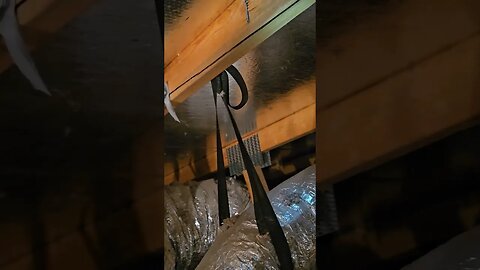
This cracked truss should have never been installed
A cracked truss on a new home can be a significant concern and should not be ignored. Trusses are structural components that provide support to the roof and distribute the weight of the roof evenly across the walls of the house. When a truss is cracked, it compromises the structural integrity and can lead to various issues. Here are some considerations:
Stability: A cracked truss may affect the stability of the roof system. It can result in uneven weight distribution, potentially leading to sagging or shifting of the roof. This can compromise the overall structural stability of the home.
Safety: If a truss is cracked, there is a risk of it further deteriorating or failing over time. This can potentially lead to a roof collapse or other safety hazards, posing a risk to the occupants of the home.
Structural Damage: A cracked truss can also impact other structural components of the home. It may cause stress on the walls, ceilings, or other parts of the building, leading to additional cracks or damage.
Water Intrusion: Cracks in trusses can create openings for water to enter the roof system. This can result in moisture problems, such as leaks, mold growth, and rot, which can further compromise the structural integrity of the home and lead to costly repairs.
If you discover a cracked truss in a new home, it is crucial to address it promptly. Here are some recommended steps:
Consult a Structural Engineer: It is advisable to consult a qualified structural engineer to assess the extent of the damage and provide professional guidance. They can evaluate the crack, determine its cause, and recommend appropriate remedial measures.
Notify the Builder/Contractor: Contact the builder or contractor responsible for constructing the home and inform them about the issue. Provide them with a written description and any documentation, such as photographs or reports, from the structural engineer. The builder may be obligated to rectify the problem under warranty or address it as per the terms of your agreement.
Follow Professional Recommendations: Depending on the severity and location of the crack, the structural engineer may recommend repair options. This could involve reinforcing the truss, installing additional support, or, in extreme cases, replacing the affected truss(es) entirely.
Remember, the specific actions to be taken will depend on the severity of the crack, the building codes and regulations in your area, and the warranty or contractual agreements with the builder. It is important to involve professionals who can provide accurate assessments and guidance tailored to your situation.
#newhome #shorts #homeinspection
30
views

Why would they call this a ghost door? #shortvideo
In this short video, we explore the phenomenon of doors closing on their own. Sometimes called "ghost doors," this phenomenon is caused by a number of factors, including drafts, dampness, and even static electricity.
If you're ever curious about why a door might suddenly close on its own, be sure to check out this short video! It'll explain the phenomenon in detail and give you some tips on how to prevent it from happening in the future.
#shortvideo #door #homeinspection
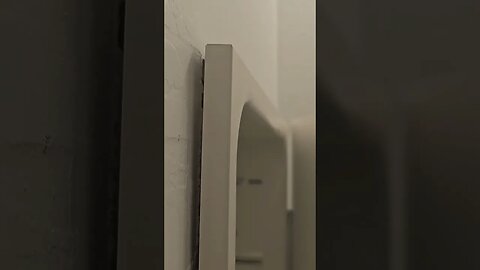
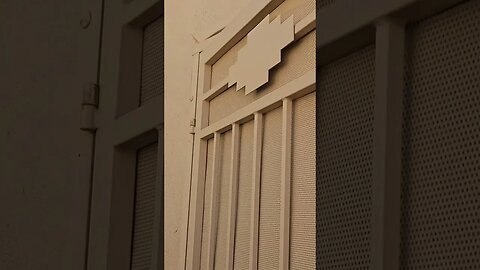
You won't believe the builder left the cabinet like this!
A medicine cabinet that is not securely attached to the wall is at risk of falling or tipping over. This can be particularly dangerous if the cabinet is heavy or if it contains glass shelves or breakable items. A falling medicine cabinet can cause injury to anyone nearby, especially if it lands on a person or causes objects to fall and create a hazard.
2
views
Breaking News: Home Builders Just Missed Their Deadline - What Happens Now?
If you are buying a home and the builder fails to complete it on time, you may have several options depending on the circumstances and the terms of your agreement with the builder. Here are some potential courses of action to consider:
Review the Contract: Start by reviewing the purchase agreement or contract you signed with the builder. Pay close attention to the clauses related to the completion date, delays, and remedies for such situations. It will outline the rights and obligations of both parties and provide guidance on the next steps.
Communicate with the Builder: Reach out to the builder to express your concerns about the delay and inquire about the reasons for the delay. It's important to maintain open lines of communication and document all conversations and correspondence.
Negotiate a New Timeline: Depending on the circumstances, you may negotiate a revised timeline with the builder. Discuss the expected completion date and ensure it is documented in writing. Clarify any additional details or requirements related to the revised timeline.
Request Compensation or Penalties: If the delay has caused inconvenience or financial loss, you may consider seeking compensation or penalties as outlined in your contract. These could include reimbursement for temporary housing costs, storage fees, or other reasonable expenses incurred due to the delay.
Consult an Attorney: If the builder fails to address the delay or if you believe your rights are being violated, it may be wise to consult with a real estate attorney. They can review your contract, assess your options, and provide legal advice based on the specific laws and regulations in your jurisdiction.
Consider Termination: In extreme cases where the builder consistently fails to meet the agreed-upon timelines and cannot provide a satisfactory resolution, you may have the option to terminate the contract. However, terminating the contract should be a last resort and should be done in consultation with legal counsel.
Remember, the specific remedies and options available to you may vary depending on local laws, the terms of your contract, and any applicable warranties or guarantees. It's essential to seek professional advice tailored to your situation to understand your rights and make informed decisions.
Follow me on
Facebook - https://www.facebook.com/homeinspectordanarizona
Reddit - https://www.reddit.com/r/homeinspectionfails/
Twitter - https://twitter.com/hominspectdan
Instagram - https://instagram.com/homeinspector_dan
youtube.com/@homeinspectordan
"Discover the secrets of a safe and sound home with expert property inspections."
Scheduling online
homeinspectordan.com
Home Inspection
Termite Inspection
Pool and Spa Inspection
Infrared Inspection
Moisture Detection
#short #shortvideo #newhomebuyer
4
views
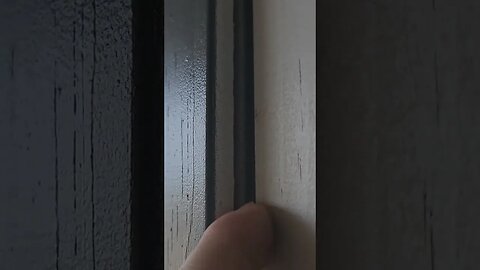
This is where your weatherstripping is meant to go
Weatherstripping is typically installed around the perimeter of a front door to create a seal between the door and the door frame, helping to prevent drafts, air leakage, and moisture intrusion. Here are the common areas where weatherstripping is applied on a front door:
Door Jambs: Weatherstripping is typically installed on the side jambs (vertical edges) of the door frame. It forms a seal when the door is closed, preventing air from passing through the gaps between the door and the frame. Weatherstripping for jambs often comes in the form of adhesive-backed strips or compressible foam tape.
Door Header: Weatherstripping can also be applied along the top of the door frame, known as the header. This helps create a complete seal when the door is closed, further reducing air infiltration and drafts. Options for header weatherstripping include adhesive-backed strips or bulb-style gaskets.
Door Bottom: The bottom of the front door is another common location for weatherstripping. A door sweep or door bottom seal is typically used in this area. It is attached to the bottom edge of the door and rests on the threshold or floor, sealing the gap and preventing drafts, dust, and pests from entering.
It's important to choose the right type and size of weatherstripping that suits your door and frame. There are various materials available, including rubber, foam, vinyl, or felt, each with its own sealing properties. Before installing weatherstripping, ensure that the door and frame are clean and free of debris for better adhesion and effectiveness.
Additionally, follow the manufacturer's instructions for proper installation. Weatherstripping should be applied in a way that allows the door to close freely without excessive resistance, ensuring a tight seal when closed but allowing for smooth operation.
By properly installing weatherstripping on your front door, you can enhance energy efficiency, reduce drafts, and improve comfort in your home by minimizing air leaks and heat/cold transfer.
#energysavings #homeinspection #doors
22
views
When the home builder says it will be finished in ONE WEEK ;)
When I went out to the home last week, the super on site told me to come back in one week. I confirmed with him 8 a.m. exactly 1 week from that day. So many things in this home were not finished for my client. They were closing just a day or two after I did the inspection. You can see in the video where I tested the GFCI breaker and it wouldn't stay on. The builder showed up during the inspection and tested all of the smoke detectors and got them to beep while I was there. But...the circuit!
My client pays extra money for me to inspect a property before they sign off on it. NOT when the builder determines and before the work is finished. It wastes my time and my clients time to have to review all of the silly mistakes that haven't been fixed or finished yet. And my money! I did not charge them for the trip I took from Gilbert to Goodyear for the first inspection, and my office confirms every inspection with the seller before it can be scheduled.
There seems to be a bit of a disconnect between the buyers and the builders in some developments I have worked in. As a buyer's advocate, everything that happens on that site while I am there will be communicated to my client. My clients won't buy the best homes if I am not questioning everything.
The younger picture of me was from when my dad and mom were building their dream home. I think those same clothes are back in style now! Thanks for watching and listening to me complain. This inspection should not have been so difficult for me and my client. I don't blame them for being stressed out on this one.
@homeinspectordan
#newhome #homeinspection #arizona
1
view

Home Inspector finds crushed Orangeburg drain pipes with sewer camera
Orangeburg pipes, also known as bituminous fiber pipes, were a type of sewer and drain pipe commonly used in residential plumbing systems in the mid-20th century, particularly from the 1940s to the 1970s. Here are some key points about Orangeburg drain pipes:
Material: Orangeburg pipes were made from layers of wood pulp and pitch (a form of coal tar). The layers were pressed and saturated with hot bitumen or asphalt, giving the pipe its distinctive appearance and flexibility.
Flexibility: One of the notable characteristics of Orangeburg pipes was their flexibility. This made them relatively easy to install as the pipes could bend and conform to the trench shape without requiring as many joints or fittings as rigid pipes.
Lightweight: Orangeburg pipes were lightweight, making them easier to handle and transport compared to other types of drain pipes, such as cast iron or clay.
Lifespan and Durability: Unfortunately, Orangeburg pipes have a reputation for being relatively short-lived and prone to various issues. Over time, the material could deteriorate and become brittle. The pipe's structural integrity could be compromised due to crushing, collapsing, or deformation, leading to leaks, blockages, and potential sewer line backups.
Vulnerability to Tree Root Intrusion: One significant issue with Orangeburg pipes was their vulnerability to tree root intrusion. The pipe's composition and flexibility made it more susceptible to invasion by tree roots seeking moisture. Root infiltration could cause blockages and further damage to the pipe, leading to a compromised drainage system.
Replacement: Due to the inherent issues associated with Orangeburg pipes, it is often recommended to replace them with more durable and long-lasting materials, such as PVC (polyvinyl chloride) or ABS (acrylonitrile butadiene styrene) pipes.
If you suspect that your plumbing system contains Orangeburg pipes or are experiencing problems with your drain lines, it is advisable to consult a professional plumber. They can assess the situation, identify the type of pipes in your system, and provide appropriate recommendations for repairs or replacements based on your specific needs.
Efflorescence is a crystalline deposit that forms on surfaces when water-soluble salts are carried to the surface through water evaporation. Here are a few possible causes and explanations for the white buildup:
Mineral Deposits: Water naturally contains minerals like calcium, magnesium, and various salts. When water evaporates from the surface of the drain pipes, these minerals can be left behind, resulting in a white residue.
Hard Water: If you live in an area with hard water, which contains high levels of dissolved minerals, it can contribute to the formation of white deposits over time. The minerals in the water can accumulate inside the pipes and create the buildup.
Leaking Sewer Lines: If there are leaks or cracks in the sewer lines, moisture can escape and cause the surrounding soil to become saturated. As the water evaporates, it can carry salts from the soil onto the surface of the pipes, leading to efflorescence.
Fertilizer or Chemicals: If you use fertilizers or chemicals in your yard, the runoff from irrigation or rainwater can carry these substances into the drain pipes. Over time, they can leave behind a white residue as the water evaporates.
While efflorescence itself is not typically harmful, it can be an indication of underlying issues. If you notice a significant buildup or if it is accompanied by other symptoms like foul odors or slow drainage, it may be advisable to consult a plumber to inspect your drain pipes. They can assess the situation and determine if there are any structural issues or clogs that need to be addressed.
Additionally, regular maintenance and cleaning of your drain pipes can help prevent the buildup of minerals and reduce the occurrence of efflorescence. A professional plumber can provide guidance on the best methods for cleaning and maintaining your specific drain pipe system.
35
views


