

How to Set Up Light Poles: Tips and Advice on Thinking Ahead
Not all the wiring we do for buildings is confined to the INSIDE of the building. Many times, we are tasked with installing site lighting/power to the EXTERIOR of the building and site. But how do we go about installing those light poles? In the latest episode of Electrician U, Dustin goes thru the process of how to prep for the installation and how to install the pole lights themselves.
🤘⚡️MEMBERSHIP⚡️🤘
JOIN ELECTRICIAN U - become a member and get:
FREE Continuing Education every year
FREE Practice Exams
FREE Monthly Video Courses
FREE Weekly Live Instructor-Led Classes
FREE Monthly Educational Newsletter
Premium Members-Only Content
Private Discord Channel
Monthly Members-Only Discord Chats
Sign up here --- https://www.electricianu.com/electrician-u-membership/
🎧🎹MUSIC AND VIDEO:🎹🎧
https://www.facebook.com/descantmv
🎬✍️ART AND ILLUSTRATION:✍️🎬
https://www.daverussoart.com
The first thing we must do is get the conduit run from the source of power TO the pole (or poles) itself. Pole lights generally are rather tall and will require a pole base to sit on. Someone will need to either drill a round hole several feet deep or dig a hole several feet deep. A round cardboard tube will be placed into the hole and project out of the hole a specific distance out of the ground (depending on site specific specifications). Once the rebar cage is installed, the conduits must be turned up and run up out of the top of the pole so they can be accessed via a handhole located in the pole itself, toward the bottom.
Important to note that generally a separate ground wire and a rod are usually required at the pole itself. This is in ADDITION to the equipment grounding conductor pulled in with the phase conductors. This additional ground is a grounding electrode conductor, NOT the equipment grounding conductor. Always check with your local AHJ and specifications to see what is needed.
Anchor bolts are imbedded in the concrete while it is poured. These bolts are to hold the pole itself down to the base. Somewhere around 1” in diameter (depending on pole height, weight, wind factors, etc.) and are anywhere from 18” to 36” long. 2 sets of nuts/washers will need to be on each bolt, and BOTH must project ABOVE the concrete level. This is important as the bottom set will be used to level the pole base (so the pole stands up straight) while the top set is used to actually fasten the bottom of the pole to the base.
Once all that prep work is done, you can start the pole installation itself. It is MUCH EASIER to install the head (or heads) on the pole and pull the wire from the top out of the hand hole while the pole is on the ground. Working at heights always takes longer, requires separate equipment, and carries additional risks that can be avoided. There are several ways to actually stand the pole up onto the pole base, but a sky track (or site forklift) is the standard equipment used. A crane can be utilized for longer poles if needed. A nylon choker/sling is put around the pole and the forks of the lift put thru one of the eyelets and up it goes. It is helpful to have an electrician or two on the ground to guide the pole onto the bolts, just make sure to KEEP YOUR HANDS OUT OF THE WAY!!
After the pole is set and the nuts tightened down, the pole is wired into the wires coming from the panel (and perhaps to the next pole(s) in line), the base cap put on to hide the anchor bolts, and the handhole cover installed.
We hope this has been helpful in understanding the process of installing pole lighting on a project. Is there a topic you would like to see discussed? Leave a comment in the comment section and let us know. Please continue to follow Dustin and Electrician U as we are constantly updating our content to assist our followers to be the best electricians they can be.
169
views

2022 Smart Devices You Must Have In Your Home!
When it comes to being an electrician, arguably we get to see some of the newest technologies that are on the market as well as some of the items that will be coming available soon! In the latest episode of Electrician U, Dustin gets his hands on some new devices that are coming available from Schneider Electric.
SPONSOR: ⚡️💡 SCHNEIDER ELECTRIC 💡⚡️
https://www.se.com/us/en/home/offers/connected-home/wiring-devices/?utm_source=electrician_u&utm_medium=feed&utm_campaign=resi_central
🤘⚡️MEMBERSHIP⚡️🤘
JOIN ELECTRICIAN U - become a member and get:
FREE Continuing Education every year
FREE Practice Exams
FREE Monthly Video Courses
FREE Weekly Live Instructor-Led Classes
FREE Monthly Educational Newsletter
Premium Members-Only Content
Private Discord Channel
Monthly Members-Only Discord Chats
Sign up here --- https://www.electricianu.com/electrician-u-membership/
🎧🎹MUSIC AND VIDEO:🎹🎧
https://www.facebook.com/descantmv
🎬✍️ART AND ILLUSTRATION:✍️🎬
https://www.daverussoart.com
The devices Dustin is looking at are the X and XD Series available from Schneider Electric and are connected wiring devices. This technology allows you to see how the individual device is performing as well as being able to control the device, via Wi-Fi, and turn it on or off! Schneider Electric has a Wiser Energy Monitor that allows you to see your overall systems performance. Which circuits are using the most, which are using the least, etc. However, with the advent of these new devices, the Wiser Energy Monitor now allows you to see the performance down to the device level in lieu of just the circuit! A pretty cool technology that is coming soon that should greatly improve how we see and track energy usage in our homes. The X series is currently available, and the XD will be released to the public soon.
The two specific devices that Dustin previewed in the video are the X series Dimmer and Receptacle. These devices allow you to see what is happening with them remotely via an app or on your phone, and even allow you to control them. So, if you left home and forgot to turn OFF something, you could simply login and shut that individual device OFF. Or, say maybe at Christmas time, you wanted to turn ON your Christmas lights or tree, you could do that.
A USB charger/receptacle is also a device that is offered within the series. Unlike other USB/receptacles that are available from other manufacturers, Schneider Electrics offers 2.4a USB ports on BOTH locations of the device, as opposed to the 1a & 2a ports on others. This allows you to charge your devices faster from both locations as well as being able to charge larger items like tablets.
A switch is offered as well. Upon initial glance, it appears the same as most paddle type decora style switches. However, the entire paddle is removable on these new devices. So, if your devices got painted over or scratched or something, you can simply replace the face of it and not have to rewire the entire device! Or to freshen up the look of a home, you could replace the face and face plate without having to redo ALL your devices. The XD series of plates for these devices changes the smaller size rockers with full size rockers. This can be a huge advantage for elderly, folks with vision difficulties, or smaller children, as it allows a much larger surface area to actuate the device!
On the XD series of devices there some additional changes on the internal ends of the device. The ground has been moved to the SIDE as opposed to the bottom and has been reinforced to operate the same as the hot or neutral wiring locations. Also, there are a variety of plate options available with these devices as well. There are several different color and style options that can be changed without tools and with relative ease. The cool thing about these devices is that you don’t have to change the entire device just the plate as the device sits entirely behind the plate!
We hope this has been informative in seeing what new technology is available on the market currently and what will be available soon. Is there a topic you would like to see discussed? Leave a comment in the comment section below and let us know. Please continue to follow Dustin and Electrician U as we are constantly adding new content to assist or followers in being the best electricians that they can be.
210
views

Should I Risk Zapping My Apprentice? Also, Is That a Wildebeest? #codyisawesome
As an electrician, safety must be at the top of our list. Without question. In the latest episode of Electrician U, Dustin talks about the way he wires a panel to ensure that the electrician on the other end doesn’t get a nasty surprise!
🤘⚡️MEMBERSHIP⚡️🤘
JOIN ELECTRICIAN U - become a member and get:
FREE Continuing Education every year
FREE Practice Exams
FREE Monthly Video Courses
FREE Weekly Live Instructor-Led Classes
FREE Monthly Educational Newsletter
Premium Members-Only Content
Private Discord Channel
Monthly Members-Only Discord Chats
Sign up here --- https://www.electricianu.com/electrician-u-membership/
🎧🎹MUSIC AND VIDEO:🎹🎧
https://www.facebook.com/descantmv
🎬✍️ART AND ILLUSTRATION:✍️🎬
https://www.daverussoart.com
So, here is the scenario. Say you have installed a new conduit/wire run for an AC unit. There are two of you working on the project and the work is almost done. The junction box up in the attic needs to be made up and finished and the wire needs to be terminated on the breakers and the panel closed up. A relatively easy task for each person, but what about the safety issue of potentially shocking the person up in the attic making up the box? Is there any way we can mitigate the risk of that electrician getting shocked (and potentially killed) if that breaker is accidentally turned on?
There are a few ways we could go about this. As Dustin discusses in the video, the first way would be to not terminate the wires UNTIL the person on the other end of them is complete with their portion of the work. That way there is no path available for electricity to flow to the equipment they are actually working on. Another way would be to terminate the wires and then immediately put a lockout/tag out on the breaker. However, in doing that, when reinstalling the dead front or putting the lockout portion ON the breaker, you risk accidentally turning the breaker on. This could result in a wicked shock to the person working on the other end of the wire!
Another way would be to have the one of the electricians SAFE OFF the wires in the attic, THEN terminate the wires in the panel, THEN install the Lockout/Tag Out, THEN go back and terminate the wires to the equipment itself. But, by doing it this way, several different steps are added and its honestly too easy to miss a step or get something out of sequence potentially resulting in the action you were hoping to avoid in the first place!
Safety should be our number one goal! And by thinking through the processes we are going to perform BEFORE we perform them, is a great way to identify and mitigate risks. Yes, it takes more time. Yes, sometimes it can be a pain in the butt! But at the end of the day, we are performing these jobs to sustain ourselves AND our families/friends. What good would we be to them or ourselves if we were hurt and couldn’t work? And if we accidentally got someone hurt by doing something we shouldn’t have done, we would have to carry that burden around with us
Another point in the video is the conduit/wiring of the installation itself. It is worth noting that even the NEC tells us, in article 110.12, to install in a neat and workmanlike manner. Dustin and his crew took their time and installed the conduit with the appropriate bends, even adding pull boxes along the way due to the quantity of bends in the run! Just because its in a shop, or high in the air, or some other out of the way place, doesn’t give us license to install shoddy work! So, kudos to Dustin and Company for installing something that is proper!!
We hope this has given you a bit of insight on how to mitigate the risk of shocking someone during an electrical installation. Is there a topic you would like to see discussed? Leave a comment in the comment section and let us know. Please continue to follow Dustin and Electrician U as we are constantly adding new content to assist our viewers be the best electricians they can!
96
views
What is Voltage Drop? How to Avoid it and Telltale Signs!
At some point or another, as electricians, we are going to have to address the problem of voltage drop. But what is it, what can it do to our equipment, and how can we combat it? In the latest episode of Electrician U, Dustin explains voltage drop and how it works.
🤘⚡️MEMBERSHIP⚡️🤘
JOIN ELECTRICIAN U - become a member and get:
FREE Continuing Education every year
FREE Practice Exams
FREE Monthly Video Courses
FREE Weekly Live Instructor-Led Classes
FREE Monthly Educational Newsletter
Premium Members-Only Content
Private Discord Channel
Monthly Members-Only Discord Chats
Sign up here --- https://www.electricianu.com/electrician-u-membership/
🎧🎹MUSIC AND VIDEO:🎹🎧
https://www.facebook.com/descantmv
🎬✍️ART AND ILLUSTRATION:✍️🎬
https://www.daverussoart.com
First let’s understand how it can work by relating it to water pressure. Think of a water faucet; if you turn DOWN the pressure (or have less pressure to start with), water will flow less as there is less pressure forcing it thru the pipe. Voltage drop works in much the same way! Next, we won’t necessarily REALIZE the issue until we apply a load to the circuit. In other words, we won’t notice we have an issue until we energize the circuit and attempt to have something work (motor, light, heater, etc.). The further we go (the longer the distance), the more voltage we will end up dropping. Also, we will see a bigger issue with voltage drop with smaller conductors. Lastly, there will be less voltage drop effect on a three-phase system than a single-phase system as a three-phase system is more efficient. Not much, but more efficient, nonetheless.
What are some of the effects of voltage drop? Well, the three major types of items we would normally deal with operate a bit differently under voltage drop. Lights may flicker if a ballasted type of light like LED or Fluorescent, they may be much dimmer than they normally would be if incandescent, or they may not operate at all. Heating type loads will tend to not heat up as much as they should, if at all. Motors may heat up too much, burn up, or tend to just struggle to turn.
We don’t want to figure out that we have a problem with voltage drop AFTER everything is installed and finished, so there are some formulas to use to see how much voltage drop we would experience. For single phase- 2 x K x I x D divided by CM. Three phase- 1.732 x K x I x D divided by CM. The difference between single phase and three phase is the efficiency in the system, although not much more! K will be dependent on conductor type. Use 12.9 for COPPER conductors or 21.2 for ALUMINUM conductors. I is the AMPERAGE of what you are attempting to use at the end of the run. D is the distance you are taking the circuit ONE WAY. To figure out what CM (circular mils) is, we need to know what SIZE of wire we are attempting to run. For that, Chapter 9 Table 8 in the NEC is where we would turn. The table shows us the circular mils size for all sizes of wire. So, in essence, after you crunch the number, you will have a BIG number divided by another BIG number! So, at first, it may seem like its too large, but once you divide it by that other large number it will come down! The resulting number after performing the calculation will be the number of volts LOST during that length of run with that size wire.
To combat voltage drop, there are a few things we can do to lessen the effects. You could shorten the run. If outside in the dirt, you could run straight from point A to point B in lieu of following building lines. You could also RAISE the voltage of the system you are putting at the end of the circuit (if possible). So in lieu of 240v maybe see if a 480v system can work. This will give you MORE voltage to lose and may help. You could also INCREASE wire size so you will have a larger conductor, therefore a larger number to divide with (CM). You may also try to see if there is a more efficient (less amperage) piece of equipment as that will result in the number on the top being smaller!
As far as the NEC goes, there are a couple of code articles that address Voltage Drop. Article 210.19(A) informational note 3 for Branch Circuits and 215.2(A) informational note for Feeders. In essence, they both allow 3% for either branch or feeders and no more than 5% for both combined.
We hope this has been helpful in understanding voltage drop and how to combat it! Is there a topic you would like to see discussed? Leave a comment in the comment section and let us know. Please continue to follow Dustin and Electrician U as we are constantly adding new content to help our followers be the best electricians that they can be.
159
views

Should I Work on Live Service Conductors? My Boss says YES!
Should we be working Live Service Conductors? In the latest episode of Electrician U, Dustin turns to a follower’s question “My boss refuses to turn off utility lines for any reason. Am I out of line for refusing to work live service conductors”?
🤘⚡️MEMBERSHIP⚡️🤘
JOIN ELECTRICIAN U - become a member and get:
FREE Continuing Education every year
FREE Practice Exams
FREE Monthly Video Courses
FREE Weekly Live Instructor-Led Classes
FREE Monthly Educational Newsletter
Premium Members-Only Content
Private Discord Channel
Monthly Members-Only Discord Chats
Sign up here --- https://www.electricianu.com/electrician-u-membership/
🎧🎹MUSIC AND VIDEO:🎹🎧
https://www.facebook.com/descantmv
🎬✍️ART AND ILLUSTRATION:✍️🎬
https://www.daverussoart.com
First, as talked about in other videos from Dustin, lets understand how electricity works. To summarize, electricity needs to make a complete loop to do its thing. So, out on the hot and returning on the neutral (or another hot if other than a single pole circuit). When you touch the hot wire to anything else; a ground wire, something that is grounded, a neutral wire, or another hot wire, you WILL get an arc blast! And if you are holding onto a hot wire and are touching something that is grounded, a neutral wire, or another hot wire, you WILL get shocked as you are allowing a completed path for everything to return to its source as it is intended. This can result in a wicked shock, temporary or permanent damage to your body, or death!
Which leads us to the next point and the crux of the question itself. You should NEVER attempt to work on live circuitry if YOU are not comfortable with doing so or if you don’t understand WHAT the risks are. You are the one who is ultimately responsible for your own safety. Not to say that others aren’t at fault for putting you in an unsafe situation, but you are the only one who can say NO. So, if your boss is refusing to have you work on something de energized, has not provided you the appropriate training, and hasn’t provided you the appropriate PPE, then you are well within your rights to decline to work on it. As electricians, we should turn power off to a circuit before attempting to work on it. There are a few instances where we cannot including, but not limited to, troubleshooting (as power generally needs to be on if we are trying to figure out why something isn’t working), greater risk to property/human life (say in a hospital on a critical power circuit that a patient is hooked up to), taking voltage/amperage readings, etc. But in these instances, the electrician should be trained on recognizing the risks, how to mitigate them as much as possible, issued the proper PPE to accomplish the task, and EVERYONE involved to sign off on what is being done and accepting the risks involved.
The PPE will vary dependent on the voltage and situation. The PPE can range from hot work gloves to full flash suits rated to 40 calories. The NFPA 70E is a great source for referencing what type of PPE is required to work in an energized situation.
Something else to consider is taking information from peers, other electricians, or supervisors. Again, it is up to you to determine your comfort level, and the folks you are asking questions to may not understand the specific situation you are looking at. From a training level, you should be provided all that you need to know regarding energized work AND have AT LEAST a few years in the trade to understand not only HOW electricity works but also the risks involved with working on it energized. A new apprentice should NEVER be put in a situation where they are forced or even asked to work on something hot!
We hope this has been insightful in helping you understand some of the risks involved with working on energized circuits and how to approach a situation where being asked to work on it energized. Is there a topic you would like to see discussed? Leave a comment in the comments section below and let us know. Please continue to follow Dustin and Electrician U as we are constantly adding new content to help our followers become the best electricians they can be!
142
views

2022 New Drills: New Drills Electricians Need
Those of us in the trades use our tools to make money. And who doesn’t love to see all the new cordless power tools available? In the latest episode of Electrician U, Dustin explains the differences between Milwaukee’s M12 & M18 drill platforms and goes thru some of the features.
SPONSOR: Milwaukee Grid ⚡️ https://www.milwaukeetool.com/Grid
🤘⚡️MEMBERSHIP⚡️🤘
JOIN ELECTRICIAN U - become a member and get:
FREE Continuing Education every year
FREE Practice Exams
FREE Monthly Video Courses
FREE Weekly Live Instructor-Led Classes
FREE Monthly Educational Newsletter
Premium Members-Only Content
Private Discord Channel
Monthly Members-Only Discord Chats
Sign up here --- https://www.electricianu.com/electrician-u-membership/
🎧🎹MUSIC AND VIDEO:🎹🎧
https://www.facebook.com/descantmv
🎬✍️ART AND ILLUSTRATION:✍️🎬
https://www.daverussoart.com
Milwaukee has been making power tools for a very long time and is considered the top tier of both corded and cordless power tools. Through extensive R&D, field testing, and the test of time, their products just keep getting better and better! They offer two different platforms of cordless tools and drills: the M12 and the M18. The biggest difference between the two is the voltage of the tools. The M12 operates via a 12-volt power battery while the M18 uses an 18 volt. This generally results in a stronger drill and longer battery life with the M18, but the tool will be considerably larger and heavier. The M12 platform is designed more for smaller tasks, single tasks where maximum power/longevity isn’t really needed, or tasks where weight/size would hinder the user.
Within each drill platform, there are also several different types of drills. The most common type is the screw-gun. This is in essence a powered screwdriver. There are not a lot of frills and options on this drill it simply either installs screws or removes them. This type of drill is perfect for installing switches, plugs, or any devices as it is small, lightweight, and perfectly suited for the task. The M12 version of this type of drill is small enough and light enough that you would probably not even know it was in your tool pouch!
Another type of drill, that is becoming increasingly more popular, is the impact drill. Unlike a screw-gun type drill, the impact has a slight hammering action when it turns. This results in being able to apply more torque to the work you are performing. There are drill bit sets and bit tip sets that are sold as impact rated, so this type of drill is honestly the first one most of us grab these days. The impact drill will also have speed settings on it as well. 1 moves slower with less impact, while 3 is very fast with more impact. So, make sure to set your speed to the work you are attempting to perform.
A drill/driver is the most common of the types. It is similar to the screw-gun but has many more settings to control speed, depth, and torque. Some types of this drill also have a hammer option on it used to drill through masonry surfaces like concrete, block, tile, etc. It vibrates when it spins which is much more conducive to masonry surface drilling. However, for a cordless drill, it does have limits! So, if you are drilling something large, say a ¾” anchor or super deep, you may want to consider using a rotary hammer drill. The rotary hammer drill is much larger and only drills/hammers in masonry. It doesn’t have options like a drill driver, uses specific bits that only fit in it, and is pretty heavy.
There are several accessories that come with most tools ranging from additional side mounted handles (these are for safety- USE THEM!!), to multi volt battery chargers that will charge both the M12 & M18 batteries, straps, etc. These accessories should be used as they are generally for safety or comfort/ease of use!
We hope this has been helpful in exploring some of the drill options for construction use. Is there a topic you would like to see discussed? Leave a comment in the comment section and let us know. Please continue to follow Dustin and Electrician U as we are constantly adding new content to help our viewers be the best electricians they can be!
257
views

Free Tickets - Klein BBQ, Brews & Electrician U and NECA in Austin
Register to win @ https://tinyurl.com/55yeazbu
Submit info at the link above for a chance to win tickets to the Klein BBQ, Brews & Electrician U event in Austin on October 16th @ 7pm
FREE NECA 2022 TICKETS
Use code DUSTIN @ https://www.necaconvention.org/ to get free entry to the NECA show in Austin all three days! This coupon includes the full trade show floor, Showstopper Showcase, 36 trade show education sessions (Contractor Solutions, Technology, and Leadership), guided tours of the most innovative and cutting-edge companies, Sports Zone, Pause for Paws, and the Song Bird Café.
#shorts #KleinTools #electrician #electrical #electricity #NECAAustin22
55
views

BEST OF CODE TIME 4: Grounding and Bonding, Junction Box Covers and Securing and Supporting MC Cable
Let’s face it. The NEC code book is BIG and has tons of articles in it! And we need to have a good understanding of those codes and articles to be able to perform our jobs. In the latest episode of Electrician U, Dustin dives back into the NEC code book to discuss a few of these with us.
🤘⚡️MEMBERSHIP⚡️🤘
JOIN ELECTRICIAN U - become a member and get:
FREE Continuing Education every year
FREE Practice Exams
FREE Monthly Video Courses
FREE Weekly Live Instructor-Led Classes
FREE Monthly Educational Newsletter
Premium Members-Only Content
Private Discord Channel
Monthly Members-Only Discord Chats
Sign up here --- https://www.electricianu.com/electrician-u-membership/
🎧🎹MUSIC AND VIDEO:🎹🎧
https://www.facebook.com/descantmv
🎬✍️ART AND ILLUSTRATION:✍️🎬
https://www.daverussoart.com
For our first topic, we will be discussing grounding and bonding. Are we allowed to use the conduit as the ground path? Say we had some air handlers that used the EMT conduit as the ground path and did not pull a specific grounding wire. On the same project, GRC was used for the outdoor units. What does the NEC code say about this. Article 250 of the NEC governs grounding and bonding and part 6 discusses types of grounding conductors allowed. Article 250.118 states “The equipment grounding conductor run WITH or ENCLOSING the circuit conductors shall be one or more or a combination of the following”. In that article, it goes on to list all the items we are allowed to use, which include copper/aluminum/copper-clad aluminum conductors, Rigid Metal Conduit, and Electrical Metallic Tubing. So, the NEC does in fact allow some types of conduits to be used as the equipment grounding conductors provided your couplings are tight and that a good continuous electrical pathway is achieved. Having said that, make sure and check your project specifications as many projects require you to install a separate equipment grounding conductor be installed with the other conductors to a piece of equipment. There are issues that can arise from using just the conduit as the equipment grounding conductor. Over time, couplings can become loose if not installed properly, pathways/wiring methods can change if places are remodeled, etc. and you can sometimes lose that continuous electrical pathway, hence the reason that most jobs these days require a separate equipment grounding conductor.
Next, are we required to close the cover of a junction box after working in it? Article 314.25 states in part “In completed installations, each box shall HAVE a cover, faceplate, lamp holder, or luminaire canopy”. This tells us that the box shall be PROVIDED with some type of cover but doesn’t specifically say it has to be INSTALLED or the box itself CLOSED with the cover. Where your voltage gets over 1000 volts, the language of the NEC code DOES change to include closing the boxes up. Always make sure and check with your local AHJ (inspector usually) and project specifications as there may be local codes or project specific requirements that may specifically state that the lower voltage range of electrical boxes be CLOSED in finished installations.
Are we allowed to use STAPLES to support MC Cable? While many electricians would argue that you cannot use staples but rather one-hole straps, some type of Caddy strap, etc. Article 330.30 covers securing and supporting of MC Cable. In 330.30(A) it states “Type MC cable shall be supported and secured by staples: cable ties listed and identified for securement and support; straps, hangers, or similar fittings; or other approved means designed and installed so as not to damage the cable”. So, staples ARE in fact allowed to be used to support MC Cable if you do not damage the cable and follow the supporting and securing code references. Zip ties may even be used if they are listed and identified to be used as such. Once again, check with your local AHJ to make sure they will accept that in your local jurisdiction.
We hope this has been helpful in understanding a few of the many code articles in the NEC. Is there a topic you would like to see a video on? Leave a comment in the comment section and let us know. Please continue to follow Dustin and Electrician U as we are constantly updating our content to help our followers become the best electricians they can be!
193
views
So After Reading all Your Comments, Here's How I'm going to Respond 🤔
What is the point in having information if you can’t pass it along and help others? So, you have asked, Dustin answered!! In the latest episode of Electrician U, Dustin answers some of the questions yall have been asking him lately.
🤘⚡️MEMBERSHIP⚡️🤘
JOIN ELECTRICIAN U - become a member and get:
FREE Continuing Education every year
FREE Practice Exams
FREE Monthly Video Courses
FREE Weekly Live Instructor-Led Classes
FREE Monthly Educational Newsletter
Premium Members-Only Content
Private Discord Channel
Monthly Members-Only Discord Chats
Sign up here --- https://www.electricianu.com/electrician-u-membership/
🎧🎹MUSIC AND VIDEO:🎹🎧
https://www.facebook.com/descantmv
🎬✍️ART AND ILLUSTRATION:✍️🎬
https://www.daverussoart.com
First up let’s discuss some questions from a recent video Dustin did regarding what to do if you don’t have a plan? One of our followers says “Lutron is trash. Cheap for profit”. Well, that is just one person’s opinions. As a whole, Lutron puts out many fine products that run through a wide range of applications and price ranges. Definitely worth looking into for a lighting control system. Keeping in mind that just because one person does not like something that it is automatically junk! It may be just different than they are used to using. It may also be that the person is pairing something against an upper-level manufacturer or model. Would be like comparing a ford truck to a Ferrari! Both are certainly nice, and both are useful, but both are distinctly different.
Another viewer wrote a comment on the same topic stating “This is the GC Purview. That person is supposed to know the where, when, why, who of everything happening. Is this a normal situation. Stop working for this GC. They are not doing their job. Sooner or later, they will lead you to a very bad place”. First of all, it may NOT be the GC that is heading up the not having a plan issue. In many cases it is the customer. The one paying your bill! In addition, that customer may have a rough idea of what they want, and are expecting you, the professional, to come up with solutions/plans on your own. In fact, quite frequently in the commercial construction realm, there is something called design/build. This is where, again, the customer has loose design parameters and enlists the help of the contractors working the job to figure out the particulars. Usually, this type of work lends itself to the contractor being able to charge a premium rate for these services.
Another writes “In looking at your videos- do you ever use a scope camera when troubleshooting? I keep one in the van, and it has paid for itself many times over. From fishing wires in walls to troubleshooting issues in inaccessible spaces to needing to see something that you can’t get into otherwise, it is well worth the expense. If you do have one, could you do a video on when to use it? Thanks in advance”. The simple answer to the overall question is yes, we do have more than one and Klein is the manufacturer. This type of equipment, while not cheap, is very helpful/necessary for the reasons you mention above, but primarily of most use to someone in the Electrical Service industry. There are so many specialized pieces of equipment that are very helpful to have from Meggers to Multimeters with many functions, to various types of lift type equipment to reach those hard to get to places. Each and every one is useful to have, but you must be selective in which you buy, or you will wind up with a lot of equipment and have spent a fortune to get it!
To find out the answers to all the questions asked in this video, make sure and watch it all! We really appreciate the comments and questions! They all are very helpful in deciding what to actually make videos on. Is there a topic you would like to see or a question that you have you need answers to? Leave a comment in the section below. Please continue to follow Dustin and Electrician U as we are constantly adding new content to help our followers be the best electricians they can be!
#customersquestions
#lastminutecancellations
#skilledtrades
#lutronshades
#electrician #electrical #electricity
70
views
1
comment

Josh's Last Week: Sorry for Such a Horrible Summer - Digging in the Texas Heat!!!
The summer of 2022 (although still not over with yet!) will be known as the summer of heat! At least here in Texas!! Seems that the heat showed up early and has been unrelenting since! In the latest episode of Electrician U, Dustin explains what his summer workload has been like and what it has been like having his son, Josh, work with him throughout the summer.
🤘⚡️MEMBERSHIP⚡️🤘
JOIN ELECTRICIAN U - become a member and get:
FREE Continuing Education every year
FREE Practice Exams
FREE Monthly Video Courses
FREE Weekly Live Instructor-Led Classes
FREE Monthly Educational Newsletter
Premium Members-Only Content
Private Discord Channel
Monthly Members-Only Discord Chats
Sign up here --- https://www.electricianu.com/electrician-u-membership/
🎧🎹MUSIC AND VIDEO:🎹🎧
https://www.facebook.com/descantmv
🎬✍️ART AND ILLUSTRATION:✍️🎬
https://www.daverussoart.com
First, lets give kudos to Josh for being an awesome apprentice electrician this summer! As most of us electricians know, the apprentice usually gets the labor-intensive work, the labor-intensive work that no one wants to do, or clean up! However, Josh stuck through it all without whining, moaning, or bitching about it. A definite rarity these days. To top that off, not only did he have to perform as a brand-new apprentice, but he had to work alongside his father almost every day AND did it all while temperatures were in the record high numbers! As I sit here and write this piece, I cannot think of another summer in recent years that has been as hot for as long as it has without letting go! Brutal to say the least.
Part of being an electrician is having to bring power INTO the buildings we work on. This is done typically in one of two ways. overhead thru the air, or underground thru the dirt. And here in Texas, the dirt is HARD. I mean, super hard and full of rocks. So much in fact, it usually requires us to dig with powered equipment or have rock bars alongside our shovels to bust up the soil/dirt/rock. So needless to say, electricians & apprentices here in the state of Texas, have to be a pretty hardy bunch of individuals. In addition to the soil composition itself, in the summertime it tends to get hot. Really hot! And this summer seems like the heat started earlier than normal and has been unrelenting ever since it began.
Another thing to consider is the type of work you are doing. Contrary to popular belief, the “boss” doesn’t just spend his/her days on the golf course or kicking back while everyone else is doing the hard work! Jobs must be found and estimated before the work can actually begin, and all the different projects have to be managed to be able to perform efficiently. And once the work has begun, the materials must be found, purchased, and delivered. After the work has been finished, it still requires someone to inspect it to make sure it was installed properly/safely and meets the customer's end vision. Even after all of that, there is still more work to do. Billings still need to be put together, funds collected from the customer, and the labor used to build the project & the materials used need to be paid for! So, a “boss” is constantly juggling several different stages of several different jobs at once on top of all the logistical company running. Add to that the projects that staff can’t get to still have to be done by someone and that someone is usually the person in charge!
Being an electrician (or in any trade honestly) is hard work! And most of us actually thrive on being able to do the things that most people either can’t or don’t want to. Its part of the allure of the trades themselves! So, if you have ideas of entering the trades or progressing thru the ranks, know its going to be a hard road. You are going to work hard, long hours doing many difficult tasks. But know that you are part of a trade with a history full of awesome hard-working folks that believe in a strong work ethic.
We hope this has been a good look into what some of the less than glorious parts of being an electrician is like! It is not just glamour, fortune, and fame!! Is there a topic you would like to see? Leave a comment below and let us know. Please continue to follow Dustin and Electrician U as we are constantly adding new content to help our followers be the best electricians that they can be!
127
views

A Difficult Task: Working On a Concrete House
Wiring a house can often be fraught with problems. And depending on the size, it can be quite difficult and time consuming to wire. In the latest episode of Electrician U, Dustin walks us through his wiring of a house made of CONCRETE!!
🤘⚡️MEMBERSHIP⚡️🤘
JOIN ELECTRICIAN U - become a member and get:
FREE Continuing Education every year
FREE Practice Exams
FREE Monthly Video Courses
FREE Weekly Live Instructor-Led Classes
FREE Monthly Educational Newsletter
Premium Members-Only Content
Private Discord Channel
Monthly Members-Only Discord Chats
Sign up here --- https://www.electricianu.com/electrician-u-membership/
🎧🎹MUSIC AND VIDEO:🎹🎧
https://www.facebook.com/descantmv
🎬✍️ART AND ILLUSTRATION:✍️🎬
https://www.daverussoart.com
The house is being wired with a Lutron system for the lighting, which relies on low voltage switching and networking between the control points. It allows you to set scenes, control several different switch legs from a single location as well as really customize your lighting to suit your needs. Since much of the control is achieved using low voltage cabling (as well as the programming itself) you may need to hire a low voltage contractor to do that portion of the work.
As seen in the video, the entire house is made up of concrete. However, the bulk of the walls and ceilings are furred out with wood so drywall can eventually be attached. The ceilings are generally furred out with larger dimensional lumber to facilitate ductwork and lighting fixtures and are almost roughed in just like normal. The walls on the other hand are a bit different. Some walls are furred out with traditional 2 x 4’s which allows you to rough in almost like normal. However, some of the walls/areas are furred out with just a 1 x 4 which doesn’t leave you enough room to rough the walls in traditionally. You must really plan your runs to go from room to room THROUGH the concrete walls where a thicker furring exists to rise vertically. Another option would be to use shallow 4 square boxes that wouldn’t require breaking out of the concrete to accommodate the deeper blue plastic nail on box. Remember NEC Article 300.4 says if we are within 1-1/4” from the face of the stud, we would have to protect the cable with nail plates so screws or nails wouldn’t accidentally penetrate the cable.
Something else to consider when wiring a house is article 110.12. This article tells us to install our electrical equipment in a neat and workmanlike manner! While this does leave it open a bit for what neat and workmanlike is, you should always install things properly and not looking like a tornado went thru the site!
So, for a project like this, it really goes a long way to make sure you plan your work really well. Know where you are rising to go overhead and through walls to connect things together. Install your work properly so it looks good. And make sure that you are staying far enough behind the face of the stud, so your wires don’t get penetrated with screws and nails!
We hope this has been helpful in discussing how to wire a house made of concrete. Is there a topic you would like to see discussed? Leave a comment in the section below and let us know! Please continue to follow Dustin and Electrician U as we are constantly adding new content to help our followers be the best electricians possible!
109
views

What to Do on a Jobsite Without a Plan
Not all of us are fortunate enough to have a job with an actual valid work plan. Or sometimes, we fail to make a good plan ourselves! In the latest episode of Electrician U, Dustin talks about what to do on a jobsite when you don’t have a plan and not sure where to really start.
🤘⚡️MEMBERSHIP⚡️🤘
JOIN ELECTRICIAN U - become a member and get:
FREE Continuing Education every year
FREE Practice Exams
FREE Monthly Video Courses
FREE Weekly Live Instructor-Led Classes
FREE Monthly Educational Newsletter
Premium Members-Only Content
Private Discord Channel
Monthly Members-Only Discord Chats
Sign up here --- https://www.electricianu.com/electrician-u-membership/
🎧🎹MUSIC AND VIDEO:🎹🎧
https://www.facebook.com/descantmv
🎬✍️ART AND ILLUSTRATION:✍️🎬
https://www.daverussoart.com
The one thing that you should consider is the NEC. It honestly has the information you need to be able to not only wire your project correctly, but WHERE to place things and HOW MANY. Something else to consider, as far as the NEC goes, is that the Code deals in minimums and maximums. You can always do MORE than the Code requires, but not less. Another good way to look at the building is “what would I do if I lived here”? That is at least a place to start!
So, for the house that Dustin is wiring in the video, the place to start would be where the power comes in, or the service. How big is it and where is it located? From there, know that you will have to have a panel to distribute the power throughout the jobsite. Again, how big is it and where is it located? As a side note, on some jobs, these two pieces will already be in place (in the case of remodels) and may not require anything more than adding circuitry to the existing panel.
The next logical place to figure out would be the receptacle layout. Article 210 of the NEC governs receptacles in dwelling units. In essence, 6 feet from a doorway and then receptacles need to be placed every 12 feet (or within 12 feet from the previous one) along the walls. There are a few exceptions that other sections will need to be referenced such as in kitchens, bathrooms, hallways, exterior locations, and a few other locations. If plans are non-existent or sketchy, you can always look around the job and make some assumptions or educated guesses. You should be able to tell where the kitchen is and be able to locate where power will be needed for the garbage disposal and dishwasher. You can tell where the bathrooms will be located so you can place your GFCI and switches. These items are easy to locate once you know what you are looking for. Water lines and drain lines are dead giveaways as to what will be placed where!
Lighting is a bit of a different animal than standard power and will require input from the owner or GC on the project. But even then, there are things that can be assumed. Can lights should be placed in the CENTER of the hallways. Generally, fixtures are placed in the CENTER of bedrooms with switches located adjacent to the doorway opposite of the doors actual swing. Remember, if there are multiple ways into the same room, you may have to consider installing 3-way or 4-way switching depending on the quantity of entrances into the room.
Another place to look for info is from the other subcontractors. Ask the AV (audio visual) contractor where the TV’s will be placed and what height should you place the power device. Also, another good question to ask, especially in todays era, is “where would the AV rack (if there is one) be placed” so you can provide the necessary items for that.
So, using the NEC as a reference and then logically walking thru the job and placing things where you would think is optimum, is a great place to start if you don’t have an actual plan. Ask questions of the other subs and collaborate. Without an actual plan, if you approach it that way, you can at least get started with your work and will usually allow you to rough in the bulk of the project.
We hope this has been helpful in understanding how to approach a project without an actual work plan in place. Is there a topic you would like to see discussed? Leave a comment in the section below and let us know. Please continue to follow Dustin and Electrician U as we are constantly adding new content to help our followers become the best electricians they can be!
80
views

"Should I Start an Electrical Business with My Boyfriend?" Reddit Response
Should I start an electrical business? A question we ask ourselves probably more than once! In today’s episode of Electrician U, Dustin answers a question from a follower about starting an electrical business with her boyfriend and gives some pros and cons of owning a business.
🤘⚡️MEMBERSHIP⚡️🤘
JOIN ELECTRICIAN U - become a member and get:
FREE Continuing Education every year
FREE Practice Exams
FREE Monthly Video Courses
FREE Weekly Live Instructor-Led Classes
FREE Monthly Educational Newsletter
Premium Members-Only Content
Private Discord Channel
Monthly Members-Only Discord Chats
Sign up here --- https://www.electricianu.com/electrician-u-membership/
🎧🎹MUSIC AND VIDEO:🎹🎧
https://www.facebook.com/descantmv
🎬✍️ART AND ILLUSTRATION:✍️🎬
https://www.daverussoart.com
Starting a business is a great opportunity but can be fraught with challenges and disappointments. In fact, most businesses fail due to either not having the strength to keep pushing, financial issues, or poor work practices and no one wanted to buy what you were offering. Another reason could be a falling out between people involved in the business. Make sure that the person(s) you are starting a business with have known or been around each other a good amount of time. After the initial good times tend to plateau, those involved in a business need to be able to withstand the bad times that will surely arise. Especially if it is someone you are romantically involved with as the BUSINESS will need to honestly come first and that MAY not bode well for a romantic relationship with a person. There are so many decisions to be made and much (ok, all) of the free time wrapped up in making the business successful, it MAY not leave time enough for a relationship. And what if it doesn’t work out between two people? Who gets what? It can muddy the waters quite a bit, which is not necessarily good for either the business OR the relationship.
Relationships aside, there are other considerations to be made when it comes to starting a business. First, understand that your bank account will be on a roller coaster. Money coming in and going out, sometimes not in the best ways! When it comes to finances, you also need to figure out what to charge. You should poll other businesses in your region and find out the going rate at a starting point. You must factor in what your expenses are (trucks, phones, buildings, etc. aren’t free!!) as well as what you want to make. If you are winning all the work you are bidding, chances are, you are not charging enough. On the inverse, if you are winning NONE of the work, chances are you are too high in your pricing. But remember, you are in business to MAKE money, not just lose it! Another point to remember is business credit. Ask local (and national) vendors for lines of credit. This will allow you to build your businesses credit up over time and can eventually lead to cheaper pricing overall if you buy enough volume from a vendor. This is crucial in winning work as the cheaper your expenses are, the less you have to charge, which should result in you winning more work.
Money management is very important. For the most part, resist spending money on anything unless it is job specific (and you can charge for it) or its something to benefit the company itself. And even then, scrutinize it carefully and spend only if necessary. Frugality is king! If you weren’t normally going to buy it, then don’t buy it when that large check DOES finally come in! Trust me, that money will have no problems leaving your bank account without you helping it any!! This is especially true in the first year or two when you are trying to grow and nurture your new company. Another good tip is to not hire employees too soon. Wait as long as possible to bring someone else in. Reason being is you are now responsible for their well being and pay. And that money must come from somewhere, that somewhere usually being what you pay yourself as the business owner!
So starting a business is definitely challenging, but can also be very rewarding! You are now able to work for something YOU own as opposed to someone else. Just make sure you really know who you are going into business with and have a good plan that considers both good times and bad. Have back up plans in place and watch your spending!
We hope this has been insightful into some of the issues regarding starting a business. Is there a topic you would like to see discussed? Leave a comment in the comment section below and let us know. Please continue to follow Dustin and Electrician U as we are constantly adding new content to assist our followers in being the best they can be.
99
views

BEST OF CODE TIME 3: Feeder & Service Entrance Conductor, Mechanical Execution of Work & Panelboards
There are a lot of sometimes confusing terms that we must learn as electricians. Especially considering that there are many different terms used to describe the same thing! In the latest episode of Electrician U, Dustin explains Feeder & Service Entrance Conductors, Mechanical Execution of Work, and Panelboards.
🤘⚡️MEMBERSHIP⚡️🤘
JOIN ELECTRICIAN U - become a member and get:
FREE Continuing Education every year
FREE Practice Exams
FREE Monthly Video Courses
FREE Weekly Live Instructor-Led Classes
FREE Monthly Educational Newsletter
Premium Members-Only Content
Private Discord Channel
Monthly Members-Only Discord Chats
Sign up here --- https://www.electricianu.com/electrician-u-membership/
🎧🎹MUSIC AND VIDEO:🎹🎧
https://www.facebook.com/descantmv
🎬✍️ART AND ILLUSTRATION:✍️🎬
https://www.daverussoart.com
Article 100 of the NEC defines Feeders as “all circuit conductors between the service equipment, the source of a separately derived system, or other power supply source and the final branch circuit overcurrent device”. In essence, a set of wires leaving the service and “feeding” another panel or distribution point. There are two definitions for Service Entrance Conductors in the NEC (one for overhead and one for underground). An overhead service entrance conductor is defined as “The service conductors between the terminals of the service equipment and a point usually outside the building, clear of building walls, where joined by tap or splice to the service drop or overhead service conductors”. An underground service entrance conductor is defined as “The service conductors between the terminals of the service equipment and the point of connection to the service lateral or underground service conductors”. So, the term feeder really describes a set of conductors AFTER the service feeding something while service entrance conductors describe the conductors BRINGING IN the service to our building.
When it comes to HOW we install our electrical work, we must install it correctly and properly not just a rag tag installation! Article 110.12 of the NEC tells us “Electrical equipment shall be installed in a neat and workmanlike manner”. That in itself tells us that we must install our work in a neat systematic order. The code goes on to tell us that we must close up any unused openings (we don’t want someone sticking something into a panel that would cause an arc flash), that the parts of the equipment cannot be damaged or contaminated with anything they aren’t supposed to have on them and that cables & conductors installed exposed on a surface of ceilings and walls shall be supported in a fashion that will not damage the cables.
Article 408, Part 3, governs the installation of Panelboards. Article 408.30 specifically tells us that the panelboard shall be protected by an overcurrent protective device that does not have a rating greater than the panel itself. So, you cannot protect a 225a panel with a 400a breaker! The panel could fail before the breaker trips. The NEC also states that the overcurrent protective device shall be located within or at any point on the supply side of the panelboard. That is why some of the panels we encounter are Main Lug Only and some are Main Circuit Breaker. As long as the panel is being protected by an overcurrent device on the Line Side of the panel, then the breaker doesn’t necessarily need to be IN the panel. However, Article 225 Part 2 (buildings or other structures supplied by a feeder or branch circuit) has some additional items to consider. 225.31 says that a building or structure have a disconnecting means for it. So, if you have a separate building it needs to have a means of disconnect for that building. That COULD be a panel or a disconnect. Many times, it is easier to place a panel on the exterior of the separate building and therefore provides a means of disconnecting power to that building.
We hope this has been helpful in understanding some of the terms and codes in the NEC. Is there a topic you would like to see discussed? Leave a comment in the comment section and let us know! Please continue to follow Dustin and Electrician U as we are constantly adding new content to help our followers be the best they can be!
93
views

BEST OF CODE TIME 2: Romex in Tubing, Ceiling Fans, J-Box Splices & Receptacles in Wet Locations
When installing any type of electrical work, we must adhere, at a minimum, to the most current version of the NEC. In todays episode of Electrician U, Dustin explores a few code references that are pertinent to many applications.
🤘⚡️MEMBERSHIP⚡️🤘
JOIN ELECTRICIAN U - become a member and get:
FREE Continuing Education every year
FREE Practice Exams
FREE Monthly Video Courses
FREE Weekly Live Instructor-Led Classes
FREE Monthly Educational Newsletter
Premium Members-Only Content
Private Discord Channel
Monthly Members-Only Discord Chats
Sign up here --- https://www.electricianu.com/electrician-u-membership/
🎧🎹MUSIC AND VIDEO:🎹🎧
https://www.facebook.com/descantmv
🎬✍️ART AND ILLUSTRATION:✍️🎬
https://www.daverussoart.com
Say we have a residence that has an exterior patio type area. And that patio has a masonry wall around the outside of it. Installed on that wall are exterior fixtures that need to be wired. Should we be putting Non-Metallic Cable (Type NM) inside Electrical Non-Metallic Tubing? Article 334.12B tells us that NM cable is NOT allowed in wet or damp locations. The reason for needing to know that, is most conduits, when installed underground, WILL be exposed to wet or damp conditions. So, keeping that in mind, moving over to article 100 definitions, we find that in an outside environment and underground, that would classify as a WET location. Finally, Article 300.5B, which covers underground installations, states that the interior of enclosures or raceways installed underground shall be considered WET locations and that conductors and cables installed within shall comply with 310.10C. In essence, 310.10C tells us that if we expose conductors to a wet location, they must be rated for that type of environment, which type NM cable is NOT.
NEC Code Article 314.27C tells us what boxes we must use when installing a ceiling fan. In essence, it tells us that boxes used for the sole support of ceiling fans must be listed, marked, and not support fans in excess of 70 lbs. For outlet boxes and outlet box systems designed to support ceiling fans that weigh more than 35 lbs., they also must be marked with the maximum weight supported. It furthermore tells us that in ceilings of habitable rooms of DWELLING OCCUPANCIES, in locations ACCEPTABLE for the installation of a ceiling fan, that we must provide a fan rated box. This means for a room within a residence, if you COULD at some point put a fan in that location, we must install a fan rated box. Reason being is, after we, the installing electrician leaves, we have no idea as to what that new owner will install, and we must leave them with an installation that would be safe for them to install a ceiling fan.
Article 314.29 requires us to install splices inside junction boxes, conduit bodies and handhole enclosures so that the wiring inside them can be accessible without removing any part of the building or structure. So, you must install your splice points where you can get after it without, for instance, having to cut a hole in the drywall.
Article 406 governs the usage of receptacles. 406.9 tells us that for wet or damp locations we must use weather resistant receptacles and for wet locations that installation must further be enclosed by something that is weatherproof regardless of whether or not something is actually plugged into it (enter the while in use cover plate!). Article 406.12 covers tamper resistant receptacles and basically tells us that any receptacle installed within a dwelling unit, guest room/guest suite, childcare, education facilities, business offices, dorm units, or assisted living facilities must be of the tamper resistant types. So, if you had an outside receptacle at a residence, it must be rated both WR and TR.
We hope this has been insightful in understanding a few of the code requirements that you are liable to run into while performing electrical installations. Is there a topic you would like to see discussed in a video? Leave a comment in the section below and let us know. Please continue to follow Dustin and Electrician U as we are constantly adding new content to help our followers become the best electricians possible!
238
views

BEST OF CODE TIME: ADA Requirements, Luminaires in Closets, Rigid Conduit Bends and EMT Securing
When it comes to the installation of our electrical work, we are not allowed to just put things in how we see fit! We must adhere to at least the minimums and maximums of the current NEC. In the latest episode of Electrician U, Dustin discusses some of the ADA requirements, luminaires in clothes closets, GRC bending and EMT securing.
🤘⚡️MEMBERSHIP⚡️🤘
JOIN ELECTRICIAN U - become a member and get:
FREE Continuing Education every year
FREE Practice Exams
FREE Monthly Video Courses
FREE Weekly Live Instructor-Led Classes
FREE Monthly Educational Newsletter
Premium Members-Only Content
Private Discord Channel
Monthly Members-Only Discord Chats
Sign up here --- https://www.electricianu.com/electrician-u-membership/
🎧🎹MUSIC AND VIDEO:🎹🎧
https://www.facebook.com/descantmv
🎬✍️ART AND ILLUSTRATION:✍️🎬
https://www.daverussoart.com
Annex J of the NEC discusses ADA standards for accessible design. This means that we are to install our electrical work that will accommodate those who have certain needs. For most of us, reaching a receptacle installed at 15” off the ground would generally not be an issue. But for a person who is in a wheelchair, having to reach down that far to plug something in may not be that easy. The same can be said for higher items like switches; having to reach above 48” may pose a problem for someone in a wheelchair. So, per the ADA standards, receptacles are generally mounted at 18” (as the minimum is 15”) and switches at 48” to the top of the box (48” switch height being maximum) to allow wheelchair bound individuals to access those items.
Clothes closets typically have a light fixture in them so someone can see what it inside! However, we cannot put a fixture just anywhere we want within the closet. Light fixtures tend to get warm (even hot) when they are on for any length of time, and since most types of clothes can catch fire, we need to be mindful of where we place the fixtures in a closet. Article 410.16 of the NEC discusses luminaires in clothes closets. This article tells us what types of fixtures we are allowed to install in a closet and where we can put them. For instance, we can use surface or recessed incandescent or luminaires with completely enclosed light sources, but we cannot install incandescent luminaires with open or partially enclosed lamps or pendant luminaires. It is just too easy for those types to come into contact with clothes and would pose a fire risk if installed. Article 410.16C also gives us locations where we are allowed to place a fixture within a closet dependent upon the type of light fixture being used. For instance, a surface mounted completely enclosed LED or incandescent fixture must be placed 12” from the clothes storage space while a recessed completely enclosed LED or incandescent can be 6” from the clothes storage space.
Article 344 of the NEC governs the installation of Rigid Metal Conduit. As with other types of rigid conduit, we are allowed a maximum amount of bend in a run before we need to set a box or other type of pull point, that number being 360 degrees. A common mistake made by newer electricians is to say we are allowed 4 90-degree bends. While 4 90-degree bends DOES add up to 360 degrees, we still need to account for any other bends within the conduit run such as offsets! So, you could have 4 90-degree bends, but there cannot be any other bends in the run.
Article 358 of the NEC discusses EMT and its usage and article 358.30 is where we would find the strapping/supporting requirements. In essence, for EMT, we are required to strap our conduit within 3’ of every outlet box, junction box, device box, cabinet, conduit bodies (LB for example), or other tubing termination and then at intervals not to exceed 10’. We are certainly allowed to install our strapping closer together, but not further apart than that. Keep in mind that the NEC is MINIMUMS and MAXIMUMS. We can always go above and beyond what the NEC directs us to, just not less than.
We hope this has been helpful in explaining a few of the many code and informational sections within the current 2020 NEC Code Book. Is there a topic you would like to see discussed in a video? Leave a comment in the section below and let us know! Please continue to follow Dustin and Electrician U as we are constantly adding to our content to assist our followers become the best that they can be!
133
views
KNOW WHAT YOU'RE DOING - or You Will FAIL Inspection!
What are the top NEC articles a new apprentice should know? In todays episode of Electrician U, Dustin talks about the top 8 code articles for new apprentices as they get ready to start wiring houses.
🤘⚡️MEMBERSHIP⚡️🤘
JOIN ELECTRICIAN U - become a member and get:
FREE Continuing Education every year
FREE Practice Exams
FREE Monthly Video Courses
FREE Weekly Live Instructor-Led Classes
FREE Monthly Educational Newsletter
Premium Members-Only Content
Private Discord Channel
Monthly Members-Only Discord Chats
Sign up here --- https://www.electricianu.com/electrician-u-membership/
🎧🎹MUSIC AND VIDEO:🎹🎧
https://www.facebook.com/descantmv
🎬✍️ART AND ILLUSTRATION:✍️🎬
https://www.daverussoart.com
First up is article 210.52 A1 of the NEC. In essence it tells us that for most rooms in a residence, along the walls, you can be no further than 6’ from a receptacle at any point. That means that receptacles are allowed to be 12’ apart from one another. This code reference includes having a receptacle within 6’ of a doorway also. You can certainly have them closer together than that, but no further apart. If you have walls that are completely comprised of glass (like floor to ceiling windows), you may have to make other arrangements such as installing them in the floor within 18” of the wall.
210.52 H covers hallways. It doesn’t have the same requirements as the above-mentioned code article, but rather says that for hallways of 10’ or more in length, we are to have at least one receptacle. This article changes a bit from 210.52 A1 in that it changes measuring along the wall line to down the centerline without being broken by a doorway. So, if you have a 10-foot hallway, then a doorway, then continue down the hallway for another 10 feet, that would be considered 2 hallways and a receptacle required in each.
Article 210.52 B3 requires at least 2 small appliance branch circuits to serve the countertops in a kitchen. You can have more than 2, but at least 2 are required. These circuits are to be GFCI protected. 210.52 D covers the GFCI receptacle(s) in bathrooms. It requires one within 3’ of the outside edge of each basin (sink). If you had 2 basins on one countertop, you could install one receptacle in the middle of them, but that may not be optimum for the customer, so their input may be needed in that case. The receptacles can be located on adjacent walls if within the 3’ requirement or in the cabinet itself, but not lower than 12” from the top of the basin. Be mindful that 406.9 C does NOT allow a receptacle within 3’ of a bathtub or shower.
210.12 A gives locations where arc fault protection is required. Arc fault protection is basically required in all rooms of a dwelling with the exception of outdoor circuits, bathroom circuits, and garage circuits. You CAN put AFCI protection on those 3 mentioned above but are not REQUIRED to. For those locations where you already have a GFCI device, consider using a dual function AFCI/GFCI breaker as it will save some cost.
Article 210.70 C requires at least one lighting outlet and a switch in an attic, underfloor spaces, utility rooms and basements. You can have more but are required to install at least one. It also states that we are to install a control at EACH point of entry. So, if there are multiple ways to get into the attic, a switch would be required at each one. 210.63 requires a receptacle within 25 feet of equipment. so, again in the attic, if there is equipment up there that may require servicing (furnace, water heater, etc) you would be required to install a receptacle within 25 feet of that equipment.
We hope this has been helpful in understanding some of the more common code references that newer electricians SHOULD know! Is there something you would like to see discussed? Leave a comment in the section below and let us know! Please continue to follow Dustin and Electrician U as we are constantly adding new content to assist our followers in being the best electricians possible!
65
views
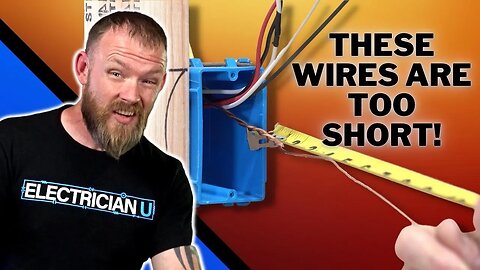
STOP Cutting Wires So Short!!! What Does Code Say?
There are not many things that irk an electrician more than when the previous electrician installing a device cuts the wires in the box super short!! I am quite confident that most of us electricians have been forced to work on a box that someone has left barely enough wire to install the devices! It isn’t fun!! In this latest episode of Electrician U, Dustin explains a bit about the rules surrounding how much wire to leave available in the box.
🤘⚡️MEMBERSHIP⚡️🤘
JOIN ELECTRICIAN U - become a member and get:
FREE Continuing Education every year
FREE Practice Exams
FREE Monthly Video Courses
FREE Weekly Live Instructor-Led Classes
FREE Monthly Educational Newsletter
Premium Members-Only Content
Private Discord Channel
Monthly Members-Only Discord Chats
Sign up here --- https://www.electricianu.com/electrician-u-membership/
🎧🎹MUSIC AND VIDEO:🎹🎧
https://www.facebook.com/descantmv
🎬✍️ART AND ILLUSTRATION:✍️🎬
https://www.daverussoart.com
Article 310.14 of the 2020 NEC states “at least 6 inches of free conductor, measured from the point in the box where it emerges from its raceway or cable sheath, shall be left at each outlet, junction, and switch point for splices or the connection of luminaires or devices. Where the opening to an outlet, junction, or switch point is less than 8 inches in any dimension, each conductor shall be long enough to extend at least 3 inches outside the opening.” The biggest reason for the length required at the box is so the electrician working on the device, fixture, or junction can actually have enough wire to perform the work. If the wires are too short to put a device or wire connector (wire nut) on, it makes the installation quite difficult, and sometimes unsafe, to accomplish.
The above code reference states 6 inches from where the wire emerges from its raceway or cable sheath. So that is from the BACK of the box where the wire enters! It is ok to leave a bit extra, but not overdo the extra length as it can become difficult to install some of the larger devices (GFCI or USB receptacles) in the boxes with too much wire. The second portion of the code reference states that for boxes with dimensions less than 8 inches, the wire must extend at least 3 inches from the opening (front) of the box. This part can be used to get the length correct on the grounds that are cut off when installing a green wire nut and leaving one wire long to connect to device but cutting the others short.
A couple good tips for getting the correct wire length in a box without having to pull out your tape measure!
1. When working in single switch boxes, push the wire into the back bottom of the box, then accordion them up to the top of the box and back down to the bottom and cut. This insures you have left enough wire to work with but still fit neatly inside the box.
2. Another tip is to use your fist to get the length you need. When working in a commercial setting where you pull wires in a pipe, grab the wires in your fist, put the back of your fist against the opening in the box, extend your thumb out and then cut your wires at the point where they reach your thumb.
3. Another item to remember are the wire connectors. You do NOT have to use RED wire connectors for joining two #12 wires. For those joints where you only have 2 wires, you can save some space within the box by using a smaller connector!
We hope this has been helpful in determining how much wire you should leave in an electrical box for access. Is there a topic you would like to see discussed? Leave a comment in the comment section below and let us know. Please continue to follow Dustin and Electrician U as we are constantly adding new content to assist our followers in being the best electricians they can be!
193
views

Material Shortages: Nothing is on the Shelves!!!
Material shortages! Most of us have experienced some sort of material shortage over the recent past. Frustrating to say the least!! In the latest episode of Electrician U, Dustin talks about this issue, what are some of the causes, and what are some of the other results.
🤘⚡️MEMBERSHIP⚡️🤘
JOIN ELECTRICIAN U - become a member and get:
FREE Continuing Education every year
FREE Practice Exams
FREE Monthly Video Courses
FREE Weekly Live Instructor-Led Classes
FREE Monthly Educational Newsletter
Premium Members-Only Content
Private Discord Channel
Monthly Members-Only Discord Chats
Sign up here --- https://www.electricianu.com/electrician-u-membership/
🎧🎹MUSIC AND VIDEO:🎹🎧
https://www.facebook.com/descantmv
🎬✍️ART AND ILLUSTRATION:✍️🎬
https://www.daverussoart.com
The recent shortage of electrical materials (well, the shortage of MOST construction materials) is due to the pandemic and the fall out from it. Even though we may be over two years past the start of the pandemic, we are still suffering from some of the effects from it. The material shortages honestly STARTED with people having to go home when Covid hit. This resulted in having only the materials that were on hand to be able to sell. Part of the problem lies in the length of time this pandemic has gone on. If it were short lived, factories could have simply reopened, worked some overtime to make up for the off time and it probably would have been back to business as usual! In fact, there have been cases where some places of business have not opened back up at all.
Furthering the problem of material shortages was the fact that some people/companies went into panic mode and bought up ALL they could find for certain materials. This left a deficit for the rest of us and honestly something that factories couldn’t keep up with. With workers out sick and factories/warehouses either offline or at a fraction of operating capacity, some manufacturers simply could not keep supply up with demand. In some areas of the country people even went to the extremes of STEALING from the larger supply stores. Yep, just walking in and taking items leaving the stores to raise their prices to make up for their losses! This also led to some of those stores having to lock up those higher priced valuable items and provide extra security protocols to ensure their theft was lessened.
The material shortage is continuing to rise even though the pandemic has calmed down. Believe it or not, some items that used to be stock are now being quoted by the vendors as being up to a year away from being available! A year!! This is further impacting the construction industry. Can you imagine having to tell your customer that they cannot occupy their new building for a whole year past their deadline? And the material shortage issue is not confined to the construction industry only. Has anyone looked for a new truck lately? Car lots are empty on many models and those you do find are twice as high as they were (proportionately) a year ago!
So, this material issue has forced us to explore other avenues to complete our projects and complete them on time! Could be different materials, different installation methods, different types of buildings all together! It is also forcing us to plan better (which isn’t necessarily a bad thing!) to project for delays and higher costs.
We hope this has been an insightful look into the current material shortages issue impacting the construction industry. What are you seeing in your local area? What are you doing to get past some of those issues? Leave a comment in the comment section below and let us know! Please continue to follow Dustin and Electrician U as we are constantly adding new content to assist our followers in being the best electricians possible.
67
views

Continuing Trim Out with My Son Josh!
After the demo and rough in phases a project are complete, the trim out phase must begin in order for the items that have been installed to function properly and look good! In the latest episode of Electrician U, Dustin (and his new apprentice Josh!!) trim out one of the projects they have been working on.
🤘⚡️MEMBERSHIP⚡️🤘
JOIN ELECTRICIAN U - become a member and get:
FREE Continuing Education every year
FREE Practice Exams
FREE Monthly Video Courses
FREE Weekly Live Instructor-Led Classes
FREE Monthly Educational Newsletter
Premium Members-Only Content
Private Discord Channel
Monthly Members-Only Discord Chats
Sign up here --- https://www.electricianu.com/electrician-u-membership/
🎧🎹MUSIC AND VIDEO:🎹🎧
https://www.facebook.com/descantmv
🎬✍️ART AND ILLUSTRATION:✍️🎬
https://www.daverussoart.com
First let’s discuss WHAT trim out is. It’s a general term we use to describe the installation of the final pieces of the equipment we have installed on a project. It consists of device plates (for receptacles, switches, etc.), trim rings for can lights, the lamps themselves for the light fixtures, and things of that nature. Some of these items we do NOT want to install until the project is all but complete. For instance, if we were to install the device plates early, the painter would most assuredly have to take them off to paint properly and the screws or plates usually either get damaged or lost somewhere. So, we wait to the end, and everything stays nice and new looking!
For this project, screwless device plates are being installed. This requires a bit different installation method than a standard device. There is an additional backplate that must be installed on top of the device. But the screws must be driven in just so, the device cannot be too tight to the wall or too loose, etc. or the plate won’t fit right. Its also a great opportunity for a newer apprentice to learn HOW to trim things out, as there are a few hundred receptacles over the four buildings on this project. Repetition is a great way for new electricians to learn. And by having so many devices in one project, it compacts that time down into one job! Another thing an apprentice must do is try to anticipate the needs of the person they are working with and have those needs met as quickly as possible. It’s also the apprentice’s job to LEARN by watching, assisting, and finally performing.
Installing the trims for the can lights will also happen during trim out. This project used super small micro can lights (a 3” can) with an adjustable color driver (it allows you to set what Kelvin color you would like the fixture to produce. The lower the Kelvin number the warmer/orange the color. The higher the Kelvin number the cooler/blue the light will be). Something to keep in mind when trimming out a project is your fingerprints. Try to keep your fingers off the newly painted walls/ceilings as much as possible. It just looks bad if you leave fingerprints everywhere and the painter may have to come back and repaint and will undoubtedly charge YOU for it!! Consider wearing latex gloves when trimming a project.
How you wired the project and the level of professionalism used during the rough in phase, will certainly be found when you trim out! As devices are being hooked up and energized/tested problems will undoubtedly arise and if things weren’t wired correctly, now BECOMES the time where we MUST fix them. But, due to the nature of the buildings finish, since other trades final work is done and we DON’T want to ruin it, it typically takes longer as we must move slower and be much more careful. So, try to install your wiring as correctly and professionally as possible; it’ll pay dividends in the end!
A special shout out to Dustin’s son Josh! He has been doing a great job of learning the electrical trade as an apprentice! He works super hard and is very eager! Doesn’t mess around on his phone either!! Josh asks the questions he should and is honestly interested in doing things the right way! Kudos Josh!!
We hope this has been helpful to understand the trim out process of a project! What topic would you like to see a video on? Leave a comment in the comment section and let us know! Please continue to follow Dustin and Electrician U as we are constantly adding new content to help our followers along in their electrical careers!
107
views

12 Tips for Running and Managing a Crew
Running a crew, leading a whole jobsite, or even managing an entire company has a ton of moving parts and takes years of practice and refining to be successful. In this latest episode of Electrician U, Dustin shares his top tips for being the one in charge of the crew
🤘⚡️MEMBERSHIP⚡️🤘
JOIN ELECTRICIAN U - become a member and get:
FREE Continuing Education every year
FREE Practice Exams
FREE Monthly Video Courses
FREE Weekly Live Instructor-Led Classes
FREE Monthly Educational Newsletter
Premium Members-Only Content
Private Discord Channel
Monthly Members-Only Discord Chats
Sign up here --- https://www.electricianu.com/electrician-u-membership/
🎧🎹MUSIC AND VIDEO:🎹🎧
https://www.facebook.com/descantmv
🎬✍️ART AND ILLUSTRATION:✍️🎬
https://www.daverussoart.com
The first thing to remember is that everything is on you! You are the one calling the shots and in charge of everything, so, good or bad, it all comes down to you. People are looking at you for direction and to have answers/direction and that includes customers. You will be the one coming in early, staying late, and working weekends to finish things up. The company, the work crews, and the customer all are expecting you to lead the charge and be ultimately accountable.
Secondly, as a person in any management role, other employees are not going to care as much as you do! Nor should you expect them to. For the most part, your employees are there to make a paycheck to support themselves and their families. Period. Again, they would like to work Monday thru Friday and go home and forget their workweek!! They simply don’t have as much at stake as you do, so the drive that you have is not the same. If you expect them to care like you do, you are going to set yourself up for failure as a leader thinking those employees are rotten, when in actuality, it is your leadership style that may need to be tuned up a bit!
It is your job to make everyone feel like they are doing a great job! You are the cheerleader. If you are constantly being negative with your employees, they will eventually just give up and probably leave. Some people work well with a bit of pressure applied, so you will have to learn each and every employee to see what makes them tick! But everyone needs to hear (frequency is dependent on the individual) that they are doing a great job. With the above tip about how much you care; this one is also where being a servant leader can reap benefits. If you can remember that YOU work for THEM and support them to be successful, you will most likely have better results! The same can be said for the inverse of the above! Its also your job to let them know when they are NOT doing a good job. But be tactful about it. Don’t attack their character, just fix the problem! If you just rip people apart on a personal level, they will be less inclined to admit mistakes. Frequency is also an issue. You will have better results if you are positively reacting to your employees and only come off the rails due to severity! Otherwise, they will just become immune to being chastised!
Your employees also need to see YOU being the solid ROCK behind them, but also be adaptable and fluid. It depends on the situation but be the one who is calm in the storm. Everything can be fixed if broken or if something gets missed. But just be calm, solve the problem, and get it fixed. You must be able to shift gears and go in different directions. You are also the one to set the goals. Set goals that will push them, but not break them! Give your people something to strive for and grow. Not everyone will want that responsibility, so it will be dependent on the individual employee. Recognize both people who strive AND those that just DO!!
Listen to those around you, regardless of your role. Be open to change and listen to others’ ideas. You may just be able to learn something new or a better way of doing something. Also, recognize them for their ideas so they will continue to think past the realm of normal! It is also beneficial to recognize when you are wrong or make mistakes. No one is perfect and you can drive your employees south if you carry that attitude of “its someone else’s mistake, not mine”. Be humble and own up to your mistakes.
We hope this has been a helpful insight on how to carry yourself when you are the one in charge. Be humble and a servant leader who supports and recognizes everyone else. It will help the TEAM grow and be successful. Is there a topic you would like to see a video on? Leave a comment in the comment section and let us know! Please continue to subscribe to and follow Electrician U and Dustin as we are constantly adding new content to help our followers be the best that they can!!
67
views
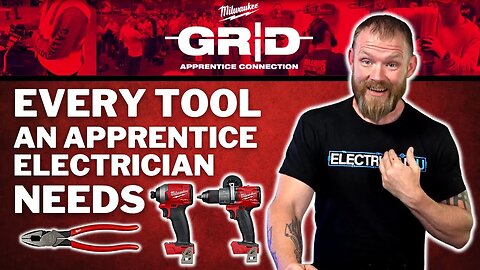
All the Tools Apprentice Electricians ABSOLUTELY Need!
When it comes to tools, there are so many choices available!! Almost endless and the task of choosing what you should buy can be daunting! But, if you are starting out as an apprentice electrician, what tools should you have? In the latest episode of Electrician U, Dustin talks about what tools are a must have for apprentices.
SPONSOR: Milwaukee Grid ⚡️ https://www.milwaukeetool.com/Grid
🤘⚡️MEMBERSHIP⚡️🤘
JOIN ELECTRICIAN U - become a member and get:
FREE Continuing Education every year
FREE Practice Exams
FREE Monthly Video Courses
FREE Weekly Live Instructor-Led Classes
FREE Monthly Educational Newsletter
Premium Members-Only Content
Private Discord Channel
Monthly Members-Only Discord Chats
Sign up here --- https://www.electricianu.com/electrician-u-membership/
🎧🎹MUSIC AND VIDEO:🎹🎧
https://www.facebook.com/descantmv
🎬✍️ART AND ILLUSTRATION:✍️🎬
https://www.daverussoart.com
A good cordless drill is very important to have, as you will be constantly screwing something to a stud or drilling a hole (among a plethora of other items), and Milwaukee offers some of the best cordless tools around! If able, purchasing a combo set of drill/hammer drill & impact driver would be optimum as they both have their individual strong points. Cordless platforms come in a few different voltages (although 18v would be best to use in a field environment all day long, with the 12v being next best) to suit the use of the individual. A good selection of bits, tips, and drill bits are invaluable to using your drills!
A good tape measure is next on our list as you will be gathering measurements quite frequently! A 25’ wide bladed tape measure with a magnetic tip seems to be the most common for electricians. The wide blade stands out far without breaking and the magnetic tip allows you to stick the tip on something metallic to start your measurements with (in addition to being able to pick metal items up off the floor without having to reach down for them!!).
When it comes to pliers, there are many variants out there but here are a few that are necessary for you to have. A pair of wire strippers are necessary as that is what us electricians do most days; terminate wires. Try to get a good pair of ergonomic handles, ranging from 10-20 gauge (at least), and with the screw cutting option (trust me, you will thank me for that later!). Lineman type pliers allow us to cut, pull, twist, and bang on things so a definite must have. They are definitely going to be the largest pair of pliers in your tool pouch as that heft helps in cutting wire. Diagonal cutting pliers are a bit like lineman’s pliers, but have only the cutting edge only with no plier tip. Useful when cutting or prying metal. Needle nose (much like the name implies) are skinny snouted pliers that allow you to reach into a slim space to manipulate an object or loop a wire. One should consider a multi plier that combines several of the ones mentioned above into one tool, so you don’t have as many tools in your pouch at once!
A level is important so we can install things on the level (see what I did there?!). As us electricians are constantly working with something metallic, a small torpedo level with magnets is very helpful. An electrician’s level is handy as it has several bubbles on it to assist when bending conduit to get to an accurate degree of bend! Super handy!! A good selection of screwdrivers is a must also. A large and medium flat head and a Phillips are ones you should always keep on you. A multi screwdriver is handy to have as it allows you to have several different screwdriver tips in one package.
A tester is a tool that every electrician should own and know how to use! There are many different types available, so research should be done, as long as it is applicable to the type and voltage you are working with. As a note, since you will be testing to make sure voltage is OFF before putting your hands on it, make sure that you choose a meter from a reputable company and take care of it!! Keep it separate from the rest of your tools, keep the leads in good working order and make sure you have fresh batteries in it!
We hope this has been helpful in determining which tools you should have to start your electrical career. There are many different choices out there, but what you carry should be tailored to the individual electrician and the tasks that you are performing! Is there a topic that you want to see a video for? Leave a comment in the comment section below and let us know! Please continue to follow Dustin and Electrician U as we are constantly updating our content to help our followers along in their career!!
155
views
1
comment

Is a Ground Rod Needed When Grounding Multiple Buildings?
If we were roughing in multiple buildings on a project, are we required to install a ground rod at each one? Are we required to bond our neutral conductor and grounding conductor at each location as well? In this latest episode of Electrician U, Dustin takes a look into the requirements for each of these to shed some light on the subject.
🤘⚡️MEMBERSHIP⚡️🤘
JOIN ELECTRICIAN U - become a member and get:
FREE Continuing Education every year
FREE Practice Exams
FREE Monthly Video Courses
FREE Weekly Live Instructor-Led Classes
FREE Monthly Educational Newsletter
Premium Members-Only Content
Private Discord Channel
Monthly Members-Only Discord Chats
Sign up here --- https://www.electricianu.com/electrician-u-membership/
🎧🎹MUSIC AND VIDEO:🎹🎧
https://www.facebook.com/descantmv
🎬✍️ART AND ILLUSTRATION:✍️🎬
https://www.daverussoart.com
Article 250.32 of the 2020 NEC governs buildings or structures supplied by a Feeder or Branch circuits. Under the exceptions to 250.32(A), the code states that a Grounding Electrode is NOT required in a building supplied with a single branch circuit (including multiwire branch circuits) IF that branch circuit includes an equipment grounding conductor. So, if we were supplying a separate building from our main building with a circuit for a light or a receptacle or something like that, as long as we included an equipment grounding conductor with our run.
Feeders are slightly different. Again, article 250.32 covers this, but we will be using part (B) for feeders. If we are supplying this separate building with a PANEL that will provide power for things within it, then we are to install an equipment grounding conductor WITH our feeder, and it needs to also be connected to the Grounding Electrode. In addition, part A of 250.32 does require a grounding electrode system and conductor (we used the EXCEPTION when talking about branch circuits!) to be installed. So, if it’s going to be a brand-new slab, we will be required to install our grounding system just like a normal commercial building would (Ufer, Building Steel, Cold Water, Ground Rod, Etc.). The equipment ground carried in our feeder is used to BOND the parts and the grounding electrode system still must be established!
Article 250.32 (B) also states “Any installed GROUNDED CONDUCTOR (Neutral) shall NOT be connected to the equipment grounding conductor or to the grounding electrode(s). So, this tells us that our neutral and ground should NOT be bonded together at our new building, as it is already bonded together at our service. Remember from previous videos, that Dustin established the bond is needed at ONE point only to complete the loop so that the OCPD can sense a LARGE current flow and trip. But we do not want to establish that bonding point twice and creating a choke point. That complete loop for a ground fault needs to happen RAPIDLY and since there are no motors, panels etc. to give us any resistance or loads to go through, the resulting current flow is massive (but very short lived) allowing the breaker to do its job and trip.
So, to recap, if you are installing a new building from an existing one, you are NOT required to install a grounding electrode if it is fed from a Branch Circuit. We ARE required to install a grounding electrode if it is being fed with a Feeder. And we do NOT want to rebond our ground and neutral at the new building as this bond is already made at the source building.
We hope this has been helpful in understanding where we are to install grounding electrodes and Neutral/Ground bonds. Is there a topic you would like to see discussed here on Electrician U? Leave a comment in the comment section below and let us know! Please continue to follow Dustin and Electrician U as we are constantly adding new content to assist our followers in becoming the best electricians that they can be!
403
views
How Do You Change Rotation Direction in Three Phase Motors
A question came in from one of our viewers about HOW to change the direction of a three-phase motor. In the latest episode of Electrician U, Dustin answers this question in addition to explaining to us WHY we are able to do this in the first place!!
🤘⚡️MEMBERSHIP⚡️🤘
JOIN ELECTRICIAN U - become a member and get:
FREE Continuing Education every year
FREE Practice Exams
FREE Monthly Video Courses
FREE Weekly Live Instructor-Led Classes
FREE Monthly Educational Newsletter
Premium Members-Only Content
Private Discord Channel
Monthly Members-Only Discord Chats
Sign up here --- https://www.electricianu.com/electrician-u-membership/
🎧🎹MUSIC AND VIDEO:🎹🎧
https://www.facebook.com/descantmv
🎬✍️ART AND ILLUSTRATION:✍️🎬
https://www.daverussoart.com
With a single-phase motor, we are relying on 180 degree opposing stators to move the center shaft. In fact, with single phase motors, we are actually applying power to the Capacitor which then relays power so said stator. The reason for that is that the central shaft can become stuck in a center state, thus not moving when power gets applied. But by utilizing a capacitor, that capacitor causes a shift when it starts up (sort of acting like a kick starter on a dirt bike motor) that moves the rotor a bit and allows the opposing coils to actually do their job. A three-phase motor operates a bit different. In lieu of having the 2 poles 180 degrees apart, since we are using 3 phases, those poles are 120 degrees apart. Instead of one pole strongly pushing and the other strongly pulling the rotor, on a 3-phase motor, one of the poles is strongly pushing while the other two are each sharing the pull function. As the pushing pole winds down, the other 2 poles are picking up speed/strength and the rotor’s momentum can be kept going until it hits the next pushing pole thus making the motor much more efficient and really negating the need for a capacitor.
So, onto the reason of why and how we can make a three-phase motor spin the opposite direction. The answer lies in the phases we just spoke of above. As the rotor is spinning, the pole that has been strongly pushing, is transitioning to pulling less, while one of the others that has been strongly pulling is transitioning to strongly pushing. If we swap two of the three phases, this causes power to be applied in a slightly different sequence thus causing the motor to spin the other way!
We can utilize this ability to shift in a positive way. If we hook up a three-phase motor only to find it is spinning backwards to the way we want it to do, we can simply swap two of the three phases and have that motor spin the way we want it to! And it can be any of the three phases, not just two in particular. We can swap A & B, or A & C, or any combination of. There are even meters available (called phase rotation meters) that we can connect to a three-phase circuit to see which way it is going. These meters are useful when we are replacing a piece of existing gear feeding equipment! Simply check the rotation BEFORE removing the gear, hook up the new gear in the same phasing as the old (A, B, C= Black, Red, Blue for instance), and then recheck BEFORE you energize any equipment on the new gear. If it is not spinning the same way, just swap two of the legs feeding the gear and you are in business!! To change a motors rotation, you needn’t necessarily do it IN the gear that is feeding the motor, you could do it anywhere between the gear and the motor. Keep in mind, that if you change it on the line side of said gear, you will be changing ALL the load side feeders feeding OUT of that gear, and that could change rotation on OTHER pieces as well! To combat that, just change two of the three wires on the load side of the specific equipment’s breaker only!
We hope this has been an informative look into the way a three-phase motor operates and how you can change the rotation of a three-phase motor! Is there an electrically related topic you would like to see discussed here on Electrician U? Leave a comment in the comment section below and let us know what you would like to see. Please continue to follow Electrician U and Dustin’s adventures as we are constantly adding new content to help our followers be the best electricians they can be!
179
views
1
comment

Ranch Demo: Time to Gut Out Some Horrible Old Electrical Work
As electricians, we are in the business of building things. I think that is a given! But not all the projects we are tasked with building lead straight into the “building” phase. Many times, we are required to remove a building or parts of a building before putting the new one in its place. In todays episode of Electrician U, Dustin shows us a bit about the “Demo” phase of a project!
🤘⚡️MEMBERSHIP⚡️🤘
JOIN ELECTRICIAN U - become a member and get:
FREE Continuing Education every year
FREE Practice Exams
FREE Monthly Video Courses
FREE Weekly Live Instructor-Led Classes
FREE Monthly Educational Newsletter
Premium Members-Only Content
Private Discord Channel
Monthly Members-Only Discord Chats
Sign up here --- https://www.electricianu.com/electrician-u-membership/
😀🔨SPONSOR: KLEIN TOOLS🔨😀
https://www.kleintools.com/
🎧🎹MUSIC AND VIDEO:🎹🎧
https://www.facebook.com/descantmv
🎬✍️ART AND ILLUSTRATION:✍️🎬
https://www.daverussoart.com
There are many sizes and scopes to a demo portion of the project. It can range from just removing/replacing the fixtures, to removing several walls, to tearing down a complete structure before building a new one in its place. Sometimes, the demo project will grow in size depending on what we find as we start tearing things apart! As a general rule, know what your trades individual scope is, and the overall vision of the demo project before you just randomly go to tearing into something! You don’t want to remove something that the overall person in charge wanted to stay, and we certainly do NOT want to make any situation less safe than need be!!
One of the things that a demo project does allow us to do is see directly into the past! Well, sort of! Codes and standards change over time; they don’t remain the same forever. A demo project allows us to go back to the codes/standards of a particular moment in time! So, it can be rewarding to see how the previous generations of electricians performed their craft. Seeing how someone else performed the same task as we do, can show us different ways of accomplishing the same thing that we maybe did not think of! It can also allow us to see how we can perform BETTER. For example, in the video, Dustin did find some wire joints that were NOT twisted together in the house he was demoing. Most of us know that our wire joints should be twisted together properly so they don’t peel apart when the wire connector is removed.
A demo project can also let us see different ways a project can be built. Throughout much of the country, projects are built on concrete slabs. But you may run into a project that is built on pier and beam (where the floor is built up off the ground on beams that are set on concrete piers in lieu of on an entire slab of concrete), and this may be something that you wouldn’t normally get to see in your travels! So, it can give us some exposure to different areas of construction where we can learn and grow in our crafts. Perhaps we can see the framing process as its happening or the plumbing as its going in, all of which is more knowledge for us!
As electricians, one thing we need to put some though into on a demo project is temporary power. If no provisions for an alternative temporary power source are made, at some point, we will be removing the available power, and no one will be able to plug anything in to do their work! As shown in the video, Klein Tools does make an awesome temporary power source called the KTB500. This is in essence a large battery capable of providing power to items. It can provide power to things on the low voltage (such as something plugged in with a USB cable) or it can also provide power to our 120v items (such as a radio or cordless tool battery chargers) so it is very versatile and an awesome compliment to an electrician’s tool kit!
We hope this has been an informative look into the demo phase of a project and allowed you to see into a portion of a project that you may not have been exposed to! Is there a topic you would like to see a video made on? Leave a comment in the section below and let us know! Please continue to follow Electrician U and Dustin as we are constantly adding new content to assist our followers in their careers!
383
views