Honeywell L5210: Z-WAVE Rules
In this video tutorial we will show you how to use the Honeywell L5100 Z-Wave card in the L5210 control panel to create rules.
Honeywell L5100-ZWAVE: http://alrm.gd/honeywell-l5100-zwave
Honeywell L5210: http://alrm.gd/honeywell-l5210
Get Monitored: http://alrm.gd/get-monitored
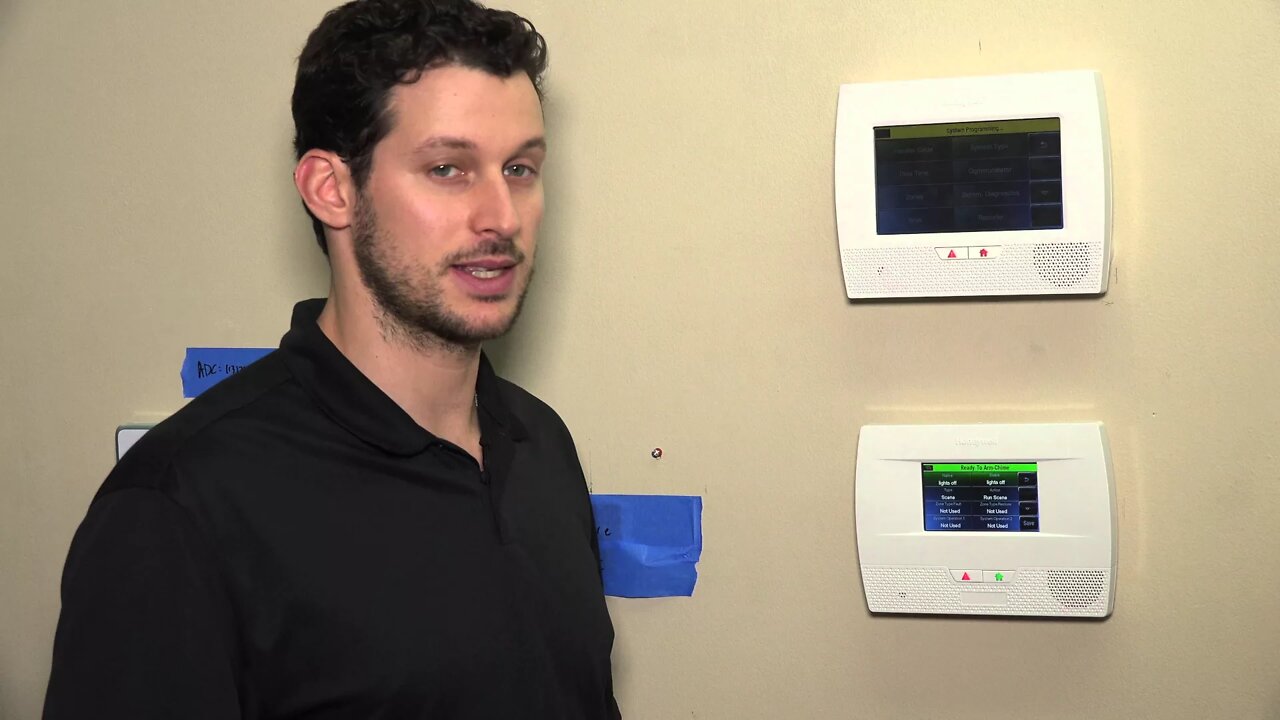
The Honeywell L5100 ZWAVE card enables your home security system to communicate with Z-Wave enabled lights, locks and sensors. The Z-wave is a sub-gigahertz frequency that uses RF to communicate between devices.
With the Z-Wave enabled you can control your lights, locks and sensors right from the control panel. This will allow you to define scenes, which will run automatic programs. The rules, then are what triggers the scenes to run.
Our video will show you how to create these rules using the Honeywell L5210 control panel with Z-Wave card installed and Z-Wave devices enrolled. We will discuss what a scene is and what a rule is, as well as how to set them up.
The first thing to do is create a scene. A scene is when you select Z-Wave device or devices and change the state. Turning lights on or off, for example. A rule, on the other hand, is a trigger that will automatically running a scene. Turning on lights (scene) when you disarm the panel (rule).
Once you have a scene (or scenes) set up, you can then create a rule to trigger them. Follow the video as we show you how to create a rule.
The first step is to get to the rules set screen. Follow the video if you have problems locating the rules screen. Press the home button beneath the touch screen. Then press “Automations” then press the down arrow until you see “Rules” and press it.
Note: You must have a scene defined prior to setting a rule.
From the rules screen, select the rule number you want to edit. In our video we select rule 1. You will select rule 1 also if this is your first time making a rule. Press the edit button to enter the rule and begin defining the parameters.
First you will need to name the rule. Once you give the rule a name press the done key and you will be taken back to the rule edit screen. Follow the video to learn how to trigger the rule.
On the rule edit menu press the “Type” area until it shows the “scene” option. Next, as the video shows, press the “Action” area until “run scene” appears. Next you need to press the “Scene” area in the top right to see the list of available scenes. Select the previously created scene.
The video will discuss in detail the different trigger options based on zones and sensors. Follow the video to learn about the different options and what they are used for. Depending on what you need your scene to do and how to run, chose the options that fit your needs.
Once you have the rule set, press save and exit back to the home screen. You should always test the rule to ensure it triggers the scene and everything works properly. Refer to our video if you have any issues.
-
 10:19
10:19
Alarm Grid Home Security DIY Videos
1 year agoPROA7 or PROA7PLUS: Awareness Zone Types
28 -
 2:44:29
TimcastIRL
4 hours agoBail DENIED For Leftist Who FIREBOMED Democrat Governor's Mansion, Mangione Effect | Timcast IRL
173K68 -
 24:05
24:05
Glenn Greenwald
9 hours agoAs U.S. Censorship Escalates, New Poll Reveals Declining Support for Israel: UNLOCKED Episode
113K93 -
 2:14:50
We Like Shooting
1 day ago $4.35 earnedWe Like Shooting 606 (Gun Podcast)
32.7K1 -
 1:00:41
Donald Trump Jr.
10 hours agoMake Main St Great Again, Interviews with Alex Marlow & John Phillips | TRIGGERED Ep.233
161K50 -
 1:45:23
megimu32
6 hours agoON THE SUBJECT: 2008 Called.. It Wants Its Chaos Back!
46.5K20 -
 1:01:53
BonginoReport
8 hours agoPolitical Violence on the Rise in America - Nightly Scroll w/Hayley Caronia (Ep.26) - 04/14/2025
126K81 -
 1:32:42
BlackDiamondGunsandGear
2 hours agoThey Don’t want you to Purchase 2A Related Products?
22.8K2 -
 DVR
DVR
Joe Pags
6 hours agoThe Joe Pags Show 4-14-25
80.4K -
 56:14
56:14
Sarah Westall
6 hours agoGlobal Agenda: Starve Small Business of Funds w/ Bruce De Torres
72.8K16