Lyric SIXCT: Program to Lyric
This video tutorial will explain how to program the Honeywell Lyric SIXCT door sensor to the Lyric control panel.
Lyric Controller: http://alrm.gd/lyric-controller
Get Monitored: http://alrm.gd/get-monitored
Honeywell releases the Lyric system SIXCT door and window sensor, which is quite possibly the most advanced door and window sensor on the market. This video will go over a first impressions look at the sensor and detail the good and the bad.
The new Lyric security system from Honeywell has all new technology for all in one wireless home protection. All of the sensors are battery operated and have full supervision which will give you complete control of your entire home defense system.
The SIXCT door and window sensor is a mini computer that is able to receive wireless firmware updates through the secure connection. The look of the sensor matches the look of the lyric system which allows for aesthetic appearance and a low profile.
Installing the sensor to the wall is made easy with a removable back plate that slide-locks in place. Removing the back plate allows for simple installation and mounting. Using the included wall anchors and screws you can quickly add door and window open detection to your existing Lyric security system.
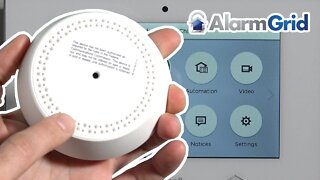
To program the Lyric SIXCT to the Lyric control panel, you will need to access the programming section of the panel. Follow the video to see how this is done. The sensors should not be powered on with their internal battery but installed in their permanent places.
You should always program a Lyric system using the furthest sensor from the panel first. The video will explain in depth why you should do it in this manner. Once you are ready to enroll the sensor, enter the Security menu on the control panel and then the Tools menu.
You will be prompted for the installer code. As the video shows, once you enter the installer code, you will be able to enroll the sensor. Enter the Program sub menu followed by the Zones menu.
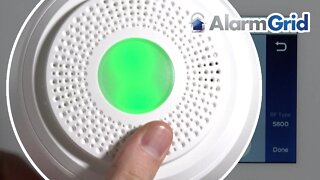
Find the zone you want to program the sensor to. Keep in mind the first two zones are the hardwired zones and should not be programmed with a wireless sensor. Edit the zone for your sensor and you will see the zone parameters. Press the serial number box. Now is when you want to power on the sensor by activating the battery.
Once the sensor has power, the Led on the sensor will flash and after about 20 seconds the MAC address will auto populate the field on the panel. You can either hit done on the screen to lock in the information, or fault the device one time.
Follow the video to learn about all the parameters for the zone and how they should be set. Once every zone parameter is set and locked in, exit programming to return the system to ready to arm status.
You should now test your sensor by faulting the device to ensure it sends the signal and trips the panel.
-
 11:17
11:17
Alarm Grid Home Security DIY Videos
8 years agoLyric SIXGB: Program to Lyric
5 -
 9:00
9:00
Alarm Grid Home Security DIY Videos
8 years agoLyric SIXSIREN: Program to Lyric
5 -
 3:45
3:45
Have Fun Teaching
3 years ago $0.01 earnedCounting by Sixes Song
159 -
 1:55
1:55
Ignitecore
10 months agoNightcore - abcdefu (Lyrics)
3 -
 0:31
0:31
Studio Dynna Express
1 year agoSia - Snowman - Lyrics (little piece)😍😘👍 #shorts #popmusic #sia
63 -
 4:08
4:08
LenLyrics
1 year agoLenLyrics Videoke
1 -
 4:13
4:13
LenLyrics
1 year agoLenLyrics Videoke
3 -
 2:36
2:36
Ignitecore
9 months agoNightcore - PROTO (Lyrics)
5 -
 2:10
2:10
Yiybrid
7 months agoAlkaline - C300 (Lyrics)
48 -
 3:42
3:42
Lyrics World
1 year agoNDubz - Charmer (Lyrics) 🎵
28