
Lyric SIXCT: Front Door Installation
This video tutorial will explain how to install the Honeywell Lyric SIXCT door sensor to your front door.
Honeywell SiXCT: http://alrm.gd/honeywell-sixct
Get Monitored: http://alrm.gd/get-monitored
Honeywell releases the Lyric system SIXCT door and window sensor, which is quite possibly the most advanced door and window sensor on the market. This video will show you how to install the sensor on your door.
The new Lyric security system from Honeywell has all new technology for all in one wireless home protection. All of the sensors are battery operated and have full supervision which will give you complete control of your entire home defense system.
The SIXCT door and window sensor is a mini computer that is able to receive wireless firmware updates through the secure connection. The look of the sensor matches the look of the lyric system which allows for aesthetic appearance and a low profile.
The Lyric SIXCT is a bit larger than the previous series door sensors, however, with wireless technology, signal encryption, built in thermistor and a longer rage, these are the most popular door and window sensors on the market.
Installing the sensor to the wall is made easy with a removable back plate that slide-locks in place. Removing the back plate allows for simple installation and mounting. Using the included wall anchors and screws you can quickly add door and window open detection to your existing Lyric security system.
When mounting the sensor it is important to try and mount the magnet on the door itself and have the sensor on the frame. This will prevent damage to the sensor from constant vibrations when closing the door.
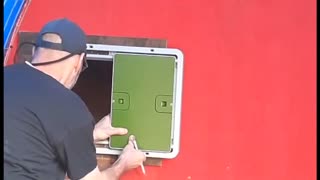
Installation is very simple. Follow along with the video to see how to install your Lyric SIXCT door sensor to your door. Ensure that the mounting surfaces are clean from dust, dirt and debris, and are dry.
As the video will show, the first step is to remove the back plate from the sensor. You can use this as a template for marking the screw holes. It is advised to use the screws to mount the sensor whenever possible. While the sensor does come with double sided tape, over time the tape will wear out.
The video will discuss the use of the third screw hole for the tamper switch break away. If you are not concerned with tampering of the switch you do not need to use this hole to mount. Align the back plate with the holes you previously marked and use the included screws to anchor the back plate to the door frame.
Once the back plate is secure, slide the sensor into place. The only step left is to mount the magnet to the door. In this example we are using the double sided tape. If you have a wooden door, you can use the screw mount option as well.
As you will see in the video, once everything is in place you just test the sensor by opening the door a few times to ensure the sensor reports the door opening to the control panel.
-
 3:31
3:31
Alarm Grid Home Security DIY Videos
1 year ago $0.01 earnedWireless Repeater: Use With Life Safety Devices
28 -
 19:28
19:28
Projects Around with Dave and Ray
3 years agoGarage Door Installation
66 -
 4:36
4:36
ButtersTheBean
3 years agoCat guards front door
48 -
 0:42
0:42
HANYMata
3 years agoCrazy front door Halloween decorations
22 -
 0:16
0:16
HANYMata
3 years agoUte Christmas decorations in front door
20 -
 13:32
13:32
Apple Valley Acres GA
3 years agoOmlet Door Unboxing And Installation
16 -
 LIVE
LIVE
RalliedLIVE
8 hours ago $6.74 earned24 HOUR BIRTHDAY STREAM
4,352 watching -
 LIVE
LIVE
Badlands Media
8 hours agoDevolution Power Hour Ep. 364
16,003 watching -
 LIVE
LIVE
Inverted World Live
2 hours agoCan Whales Teach Us to Talk to Aliens | Ep.61
3,521 watching -
 LIVE
LIVE
Side Scrollers Podcast
8 hours agoKing of the Couch 2025: WHO WILL TAKE THE CROWN?!
510 watching