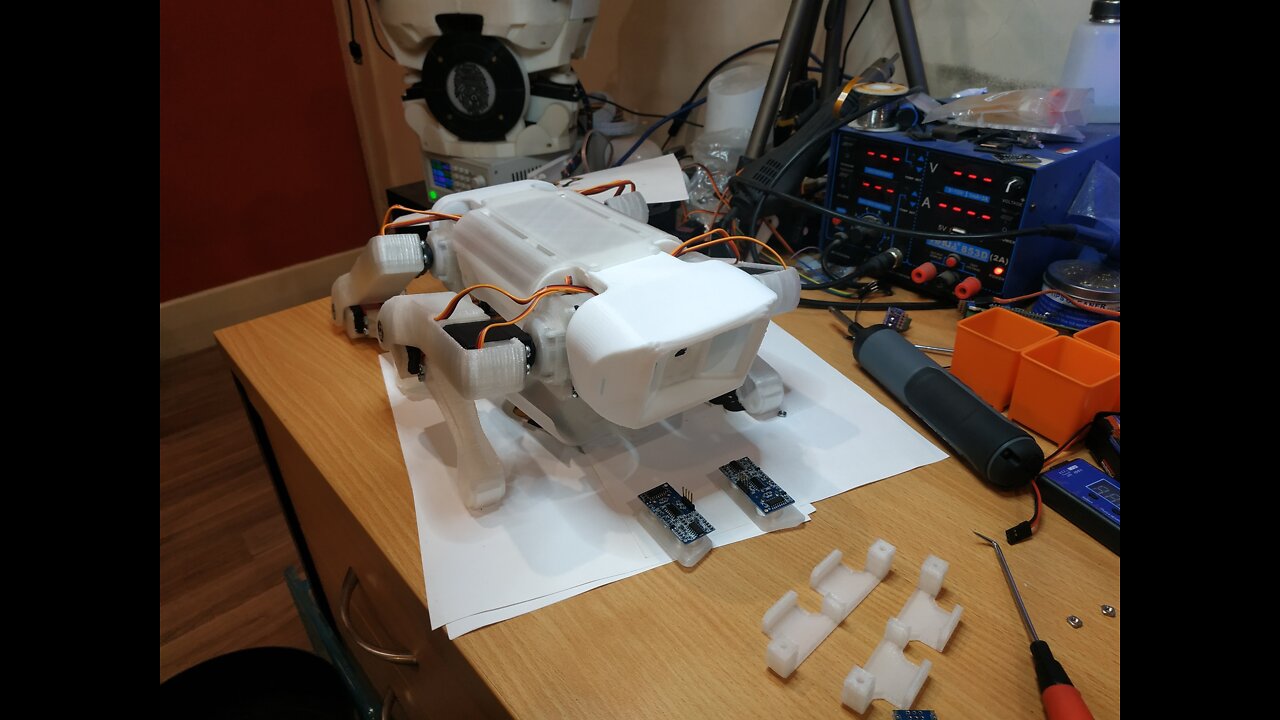
Spot Micro Part 5
Robot Dog, Part 5.
In the first four videos we started to build a robot dog based on the Boston Dynamics Spot, only smaller.
Now that we have all four legs done, as well as the bulk of the body, electronics mounted and wired,
In this part we put the electronic back into the body and install the two switched mode power supplies.
2 x XL4005 5A adjustable voltage Buck Mode SM
1 x Dual M20100CT 100V - 20A Power Barrier Rectifier TO-220 (2 x Diodes)
2 x M2.5 12mm long stand off with M2.5 male thread one end and female on the other.
2 x M2.5 15mm long stand off with M2.5mm female threads both ends.
4 x M2.5 6mm long screws.
Heat Shrink M3.5 (Cover each of the single wire connections at the battery connected and the diode)
Heat Shrink M5 (Cover the wire join on the negative wire)
Heat Shrink M7 (Cover the ends of the wire at the batter connectors)
-
 LIVE
LIVE
Mally_Mouse
22 hours agoFriend Friday!! 🎉 - Let's Play! - Microworks
167 watching -
 LIVE
LIVE
Quite Frankly
2 days agoHookah Special: Found Footage, Workplace Folly, More Cringe Music Vids (8/23/25 Re-Run)
452 watching -
 LIVE
LIVE
LFA TV
13 hours agoLFA TV ALL DAY STREAM - FRIDAY 8/29/25
755 watching -
 12:38
12:38
AlaskanBallistics
19 hours agoNutrek Optics Coppertag 5-25x56mm Review
2.35K -
 LIVE
LIVE
The Mike Schwartz Show
4 hours agoTHE MIKE SCHWARTZ SHOW Evening Edition with Guests Dr. PETER MCCULLOUGH and JOHN LEAKE
4,550 watching -
 1:01:41
BonginoReport
9 hours agoAI & The Woke Indoctrination Ruining Childhood - Nightly Scroll w/ Hayley Caronia (Ep.123)
76.1K15 -
 1:17:29
Kim Iversen
6 hours agoTrotskyite Neocons: How MARXISTS Built the Modern GOP
80.1K111 -
 4:11:58
StoneMountain64
4 hours ago#1 Battlefield Mastery Session with the BOYS
19.9K1 -
 1:23:45
Roseanne Barr
5 hours agoDeclassifying Presidential Sex Slavery W/ Cathy O’Brien | The Roseanne Barr Podcast #113
102K51 -

FusedAegisTV
19 hours agoHollow Knight Silksong Waiting Room ~~ pt. I
20.7K6