Replacement of rear shocks and front strut assemblies on a 2006 Chevy Trailblazer
Replacement of rear shocks and front strut assemblies on a 2006 Chevy Trailblazer.
Tools you'll need:
Torque wrench - https://amzn.to/3tqnbG9
3/8-Inch Drive Deep Impact Socket Set, Metric - https://amzn.to/3ajkoHh
1/2-Inch Drive Deep Impact Socket Set, Metric - https://amzn.to/2QcGqVt
Breaker bar
Combination Wrench Set - https://amzn.to/3sth1DU
Flex-Head Ratcheting Wrench Set, 6-19mm - https://amzn.to/3dp0uwA
Ball Pein Hammer 5-pc Set - https://amzn.to/2QdiqRU
chisel or flat punch - https://amzn.to/3x5Jtj0
Flathead and Phillips head - https://amzn.to/2QxYSI1
Jack - https://amzn.to/3dqcY7i
Jack stands - https://amzn.to/3gj17cL
Optional tools:
Ball Joint Separator / Fork - https://amzn.to/3uQB2pA
1/2-Inch Impact wrench - https://amzn.to/3mSBb9a
Strut Spring Compressor Set - https://amzn.to/3dqTr6M
On the passenger side of the SUV/Car
1. Take off the top of the airbox.
2. remove the air tube so you can get access to the two top strut bolts
Loosen the two 18mm nuts
As an optional step, you can use a set of Strut Spring Compressors to compress the strut to make it easier to pull out the strut. Again this is an optional step.
Then use a heavy hammer or Ball Joint Separator / Fork to remove the strut yoke from the lower control arm.
Loosen and remove the bolt in the upper part of the yoke.
Then separate the split in the yoke with a chisel or flat punch.
Be sure to line up the indention on the new strut with the holes of the yoke.
Replace the bolt and nut and tighten.
Then reverse the steps you did when you removed the strut assemblies
For the rear shocks, remove the two 18mm bolts and slide out the shock.
To replace reverse those steps.
Disclaimer:
Due to factors beyond the control of Hammond Auto LLC, it cannot guarantee against unauthorized modifications of this information or improper use of this information. Hammond Auto LLC assumes no liability for property damage or injury incurred due to any of the information contained in this video. Hammond Auto LLC recommends safe practices when working with power tools, automotive lifts, lifting tools, jack stands, electrical equipment, blunt instruments, chemicals, lubricants, or any other tools or equipment seen or implied in this video. Due to factors beyond the control of Hammond Auto LLC, no information contained in this video shall create any express or implied warranty or guarantee of any particular result. Any injury, damage, or loss that may result from improper use of these tools, equipment, or the information contained in this video is the user's sole responsibility and not Hammond Auto LLC.
-
 11:33
11:33
4DIYers
9 months ago $0.01 earnedHow to Replace the Rear Shocks on a BMW E90 3 Series
33 -
 12:10
12:10
TutorialGenius
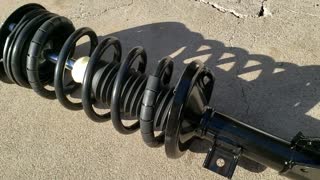
3 years agoFront Strut Assembly Replacement Tutorial (Saturn Vue)
4571 -
 28:53
28:53
Budget Friendly DIY
5 months agoDON'T OVERSPEND on your 2017 Kia Sedona Front Strut Replacement
261 -
 6:48
6:48
gofasthavefun.ca
1 year agoMercedes Benz Sprinter front strut/ shock REPLACEMENT (Bilstein) | AnthonyJ350
15 -
 9:59
9:59
4DIYers
1 year agoHow to Replace the Front Brakes on a GMC Sierra 1500HD GMT800
57 -
 22:19
22:19
DENichols
6 years agoMotor Mounts Front & Back Installation Part 2 of 3
24.5K -
 0:59
0:59
RocketGarageService
5 months agoHow to: Replacing Front Shocks
7 -
 4:19
4:19
Fix it Angel Car Repair Channel
7 years agoFront Struts Shocks Replacement '04-'13 Nissan Armada QX56 √ Fix it Angel
10 -
 19:30
19:30
BMW DIYs and Reviews
2 years agoGenuine BMW Carbon Fiber Strut Brace RETROFIT | m235i 2 series 4K
34 -
 22:00
22:00
DENichols
6 years agoMotor mounts front and back removal part 1
6.24K