
Mobile Home Bathroom Ceiling Repair
Phil's replacing the bathroom ceiling after he repaired a roof leak.
⏱️⏱️Chapters⏱️⏱️
00:00 Bathroom ceiling repair after roof leak
00:30 Taking the ceiling down
00:54 Going across the rafters not with them
01:13 Old drywall trick
01:42 Put OSB in
02:10 How to support the ceiling
02:45 Using fast mud, cuts time in half
🙏 Subscribe, 👍, it helps a lot!!
➤❓/ 💬: ask@straightarrowrepair.com
➤ Follow https://straightarrowrepair.com/pipf
➤➤I get a little for the channel-no charge for you if you use the links:
➤➤Shop Amazon https://amzn.to/3CxD1T4
➤➤Tool lists & recommended products🧰 https://straightarrowrepair.com/0lvf
➤➤Services We use
➤➤MORNINGFA·ME https://morningfa.me/invite/StraightArrowRepair
➤➤A2 Hosting http://www.a2hosting.com/refer/140244
➤➤Tubebuddy https://www.tubebuddy.com/StraightArrowRepair
➤➤Apsumo http://fbuy.me/v/philbridges
➤➤VidIQ: https://vidiq.com/straightarrowrepair
#MobileHomeRepair, #MobileHomeBathroom, #bathroomCeilingRepair
Transcription:
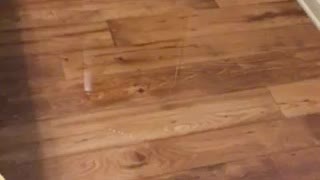
Uh, um, so we're going to. Fix the ceiling that we've already fixed the roof leak and, uh. Somebody else tried to fix it just thinking they a put waterproof material. But it's not waterproof. On the other side. So we're going to take that down and replace it with plywood, OSB, and then we'll finish it. Just like drywall.
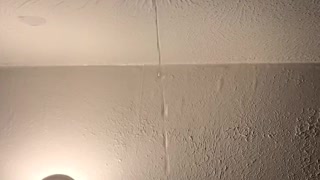
Taking the ceiling down. And, uh, there's signs of other animals being in here. Um, mice, which is normal birds. Uh, snakes. Um, but that's all part of it, that’s in town. It's not a big deal. You need to close in the ends to keep some of the traffic down, but they can get into areas small.
So what I'm doing is going across the rafters not with the rafters. So we pulled it all down, hammered down those nails, and we don't have any support way over here. But we're going to put that in and I'll show you how we do that. Um, we're going to cut it across. Measure it, also marked where the rafters are with a mark down below it, which is like an old drywall trick.
That way we know where to put the screws once we've covered it up. I can mark the studs, but in this case, we're not going to have to. The hard part is going to be getting it up here and then sliding boards in from both directions. Cause I'll do this side, and then I'll do that side and then I can put a piece in the middle. So here we go.
All right, we have put the OSB inexpensive plywood up there knowing full well that we're going to have to do some drywall. We’ve marked where they covered up. The wiring is still there.
And a vent fan for pulling out the moisture and the smell. Now, I'll always told you that, uh. Got the poo on me. We put 2bys on the sides here that set top the wall and then screw the plywood up and it hold it all up tight. Didn't have to have it, but it's usually good to do that. If you can't, what you can do is put trim around the outside of like a smaller crown mold or just regular trim and fastenen that.
And that will hold up that floating area. But as you're going to see, we're going to have this finished like drywall, textured, like drywall and painted white drywall. This is a wet mix. This is fast mud that we're using. It's dries in 20 minutes. Any of your fast muds. You use hot water instead of cold. It cuts the time in half.
We are not doing that and I'll be hard pressed to use it. But here's your screws into the rafters it. If you see any kind of inconsistency up and down, that's the rafters themselves. It's not the plywood or the installation.
-
 3:37
3:37
StraightArrowRepair
4 years agoBathroom Repair June 2020
101 -
 1:01
1:01
Amarushaya
4 years agoFlooding in ceiling, water heater, kitchen, bathroom and hallways
14 -
 0:23
0:23
ViralHog
4 years agoBathroom Water Leak Creates Peculiar Ceiling Pimple
149 -
 0:50
0:50
1776Now
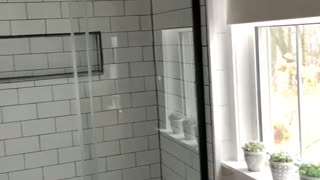
3 years agoShower / Bathroom upgrade
71 -
 1:06
1:06
tanhamilton1996
3 years agoMarmora bathroom job
16 -
 0:35
0:35
Ronberry65
4 years ago $0.01 earnedCeiling done
23 -
 1:41:17
Kim Iversen
2 hours agoElon Musk: The REAL Name In The Epstein Files... | RFK FIRES Entire Vaccine Advisory Board
45.9K21 -
 1:34:08
Redacted News
3 hours agoEMERGENCY! NGO'S PLANNING CIVIL WAR RIOTS ACROSS U.S.A. ON JUNE 14TH | REDACTED LIVE
107K108 -
 1:35:21
Ark of Grace Ministries
6 hours agoUrgent: America on the Brink of Civil War
23.6K7 -
 1:31:32
Dr. Drew
6 hours agoRiots R Us: How Radical NGOs (And A Walmart Heiress) Are Funding Los Angeles Unrest w/ Brian O'Shea & DC Draino – Ask Dr. Drew
18K1