EZ Dryer Door Switch Fix
The switch on your clothes dryer is going out and you can tell either because the dryer won’t start after the door is closed hard, or the dryer won’t start at all. This is an easy repair. We’ll show you!
#dryers #dryerrepair #applianceservice
We have a Whirlpool WED 5600SQ0 electric dryer. It’s an older model, but it has served us well. We’re too “thrifty” to let it go before it completely dies, even if we’d love to have the LG match to our front-load washing machine.
Servicing a dryer isn’t that difficult as it is a pretty simple machine. There is a rotating drum with a drive belt and motor, heater element, fan, chassis, controls, vent, access door and switch.
In these kinds of machines, when the door switch is defective, the dryer won’t start as the dryer “thinks” the front door is still open. Safety first. Or, if the the switch is failing, it may allow the dryer to run some times, but not others.
In our case, if the door was shut hard, then the switch wouldn’t work and the dryer wouldn’t start. When replaced, the dryer started up reliably, hard close on the door or not.
The repair is REALLY simple and well within the reach of the homeowner. You’ll only need a medium-sized (#2) Phillips screwdriver, a small flat-blade screwdriver, a small wash rag, and the replacement switch. For the Whirlpool WED5600SQ0, it is part number WP3406107. In November 2023, it was $28.
By the way, our favorite places to get appliance and tool repair parts are:
www.ereplacementparts.com and https://www.partselect.com/. Both offer good parts look-up search tools, good inventory, and lots of parts and machine diagrams.
The steps are:
Unplug the machine.
Remove the lint screen and set it aside.
Place the wash rag into the lint screen cavity to prevent parts from falling into it.
Remove the two screws holding the dryer top to the lint screen holder frame. Set the screws aside in a safe place.
Grasp the front edges of the dryer top and wiggle them forward to release the clips and to move the dryer unit forward.
Once the front top edge releases from its retention clips, lift the front edge and hinge the entire top (with the integrated control panel) up, and gently rest it against the wall behind the unit.
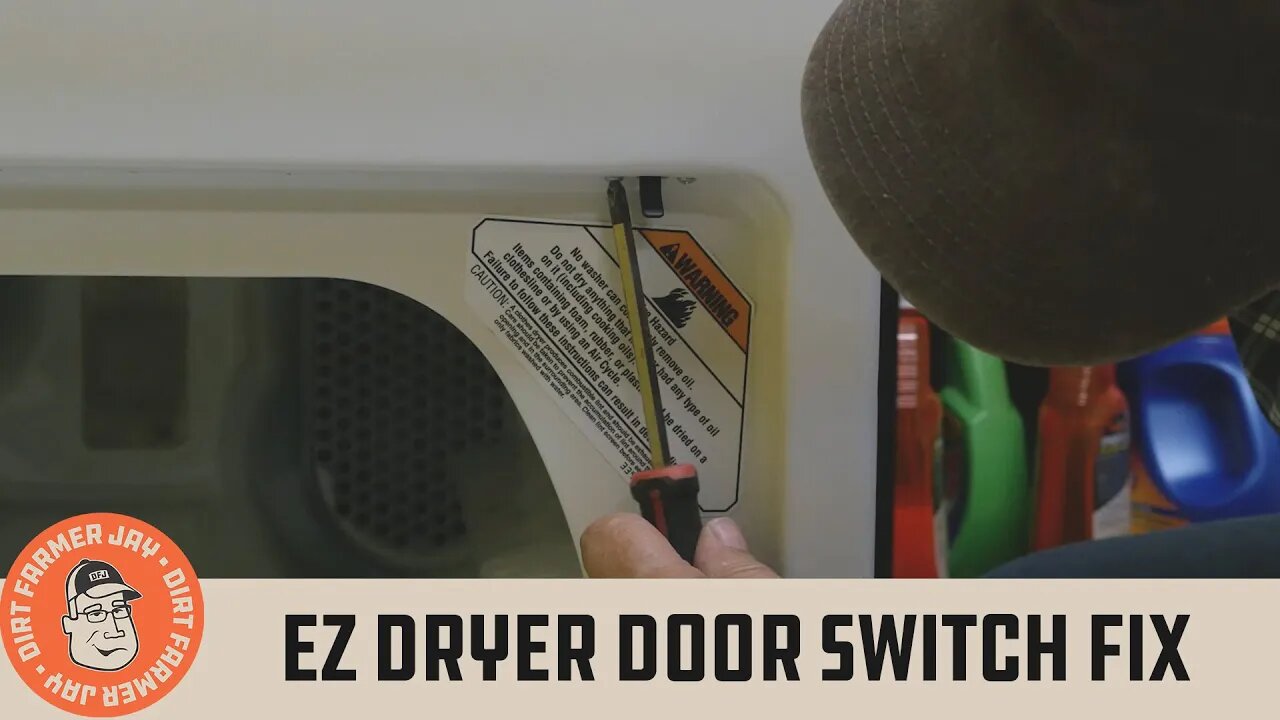
Open the front door and locate the switch mounting screws in the upper lefthand opening, use the Phillips screwdriver to remove the mounting screws, taking care not to drop them. Place the screws aside in a safe place.
From the top, lift out the connected defective switch and using the small screwdriver, disengage the wiring clips. Remove the old part, taking care not to drop it into the interior of the dryer chassis.
Install the new part by pressing the wiring plugs together. They are shaped so that they will go together in only one way.
Reinstall the switch from the door opening.
Lower the unit top back in place, and press back on the clips to ensure the front edge of the top is securely held down to the unit front and sides.
Align the lint filter tray with the screw holes, put the rag back in the cavity opening to protect against loss of the screws, reinstall and tighten the screws.
Reinstall the lint filter.
Plug the unit back in.
Enjoy your now-repaired dryer.
For other episodes about why we love our front-load washing machine and how to keep it pristine, check these out:
Why A Front-Loading Washing Machine Should be Your Next Choice:
Get Rid of Front Loader Washer Stink:
Just Do It Yourself!
-
 1:57:34
Badlands Media
14 hours agoThe Liberty Den Ep. 141: Gaza Riviera, Surgeon General Smackdowns, and Vatican Vibes
96.9K23 -
 2:05:50
TimcastIRL
13 hours agoDemocrats STORM ICE Facility, Rep ATTACKS Feds, Democrat Mayor ARRESTED | Timcast IRL
213K157 -
 3:24:28
Laura Loomer
14 hours agoEP121: White House Vetting Crisis Worsens
95.5K35 -
 2:57:28
Barry Cunningham
16 hours agoTRUMP EVENING BRIEFING: HAS THE NEXT CIVIL WAR BEGUN?
109K133 -
 1:18:28
Glenn Greenwald
16 hours agoFormer Greek Finance Minister Yanis Varoufakis: On Global Trade and Tariffs, EU Arming of Israel, Israeli Destruction of Gaza, & More | SYSTEM UPDATE #452
125K46 -
 2:16:01
TheSaltyCracker
14 hours agoNJ Mayor For Obstructing ICE ReeEEEStream 05-09-25
143K320 -
 53:35
53:35
Sarah Westall
14 hours agoPower Moves Worldwide are Being Hidden from the American Public w/ Andy Schectman
70.5K7 -
 1:10:30
BonginoReport
16 hours agoGirl Bosses, Tradwives & Incels, Oh My! Inside Modern Dating Culture w/ Mary Margaret Olohan (Ep.45)
138K65 -
 1:13:12
Kim Iversen
19 hours agoTrump's WAR On Anti-Israel SPEECH Could Be Coming For Us All
149K171 -
 52:16
52:16
LFA TV
22 hours agoWhat to Make of an American Pope | TRUMPET DAILY 5.9.25 7PM
53.4K9