Review: AUXITO H4:9003 LED Headlight Bulbs 100w
I’ll be reviewing these 9003 or also known as H4 LED bulb replacements from Auxito. I’ll be testing them out in a 2001 Toyota Tacoma. On the outside of the box, you’ll have some product specifications such as the operating voltage between 9-30 V, IP 67 rating, 6000 K color temperature, operating temperature between -40°F to 176°F, 50,000 operating hours and aluminum housing. They have a thinner frame profile making the light emitting radius much closer to a halogen bulb. This not only maximized output and performance but also provides a clean beam output. #auxito #auxitoled #ledlights #toyotatacoma
Product link: https://www.auxito.com/products/9003-led-bulb-h4-hb2-led-headlight-bulb-20000-lumen?ref=xR3VZnDW&variant=42135668752628
AUXITO's website: https://auxito.com/xR3VZnDW
15% coupe code: 4DIYERS
Website: http://4diyers.com
Patreon: https://www.patreon.com/4diyers
Facebook: https://www.facebook.com/4diyers
Twitter: https://twitter.com/4DIYers
Instagram: https://www.instagram.com/4diyers/
Tumblr: http://4diyers.tumblr.com
Pintrest: https://www.pinterest.com/4diyers/
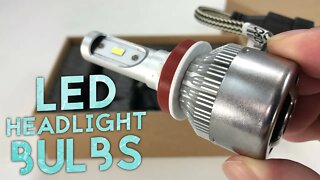
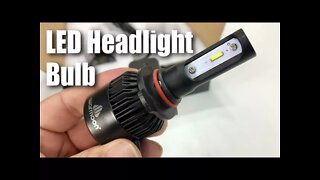
The LED lights are finished in a silver aluminum construction. There are four diodes on the light, two for low beams and two for high beams. Also included in the construction is a cooling fan, you can see the blades exposed just below the diode along with vent holes in the side. On the rear you can see the three terminals which is a plug and play setup. No modifications are required to install these. While some LED replacement bulbs do have adjustments, this one is designed so there’s no need for it that, it’s simply installed and you’re ready to go.
These have a smart IC driver with a 100w rating making them work in most vehicles without any radio inference problems, can-bus ready and prevent the chance of error warning lights on your vehicle.
For installation, start by opening the hood of the truck. Grab onto the tab for the rubber grommet, and pull upward and back at the same time. This will allow you to disconnect from the rear of the light housing. Once you have a view of the bulb, the last step for the removal is unclipping that metal retainer. It’ll have a tang on the one side, push this in, then pull it up and rotate out. The bulb can then be removed. Also make note of its orientation.
Make sure your hands are clean so you’re not getting the new LED replacement dirty. Insert it into the housing in the correct position. Those three tags on the outside are different sizes so it only fits in one orientation. Clip in that metal retainer, this will hold the LED light in place. Before installing that rubber grommet you can give it a quick test. Install the rubber grommet, there will be text printed on it that says top. This faces up. Ensure that the rubber grommet is clipped into place, this keeps out any dirt and moisture in the lens. It also pushes around the outside of the LED assembly. Finally is plugging in the electrical connector for the light, again this only has one orientation.
I am using the stock housing for testing. I have been testing these for a little while and haven’t found any issues where oncoming motorists were flashing their lights. These bulbs are rated for 20,000 lm as a pair and have a 50,000 hour lifespan. They are extremely easy to install, and no modifications are required for your vehicle. They have a compact design, 12,000 RPM cooling fans, and a 90° turning thermal fluid which improves the lifespan of the lights by keeping them cool. The high beams and low beams are all one assembly here, so they are a direct plug and play. Overall I am extremely happy with these lights. Living out in the country, there can be quite a bit of hazards on the road at night. Especially with no street lights, these will maximize my visibility while driving down those dark country roads. they help with reducing eye fatigue when driving at night, will allow you to see road signs easily, and greatly improve visibility regardless if you are using the lower or high beams.
Thank you to all those who watch my videos and support my content. Don't forget to subscribe to my channel for future tutorial videos and like my video if you found it helpful. New videos are always being uploaded every week!
© 4DIYers 2013
All Rights Reserved
No part of this video or any of its contents may be reproduced, copied, modified or adapted, without the prior written consent of the author.
-
 4:04
4:04
4DIYers
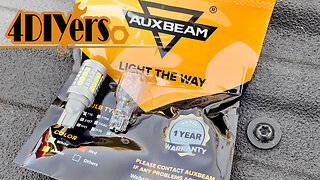
11 months agoReview: Auxbeam 912 921 T15 W16W 20W LED Light Bulbs
49 -
 4:56
4:56
4DIYers
11 months agoReview: Bevinsee V45 H8 H9 H11 LED Headlight Bulbs
53 -
 6:26
6:26
SeidelRanch
2 years agoSuper Bright LED Headlight Upgrade Kit - Auxito LED Light DD-Y13
101 -
 2:19
2:19
Militarized Citizen
1 year agoHow to Replace Headlight Bulbs on Your 2005-2015 Toyota Tacoma
763 -
 4:05
4:05
MarisReviewChannel
2 years agoAUXITO H11 LED Headlight Bulbs Set
58 -
 2:48
2:48
Peter von Panda
6 years agoH11/H8/H9 7600LM LED Automotive Headlight Bulbs by Woxma Unboxing
20 -
 3:55
3:55
Peter von Panda
6 years agoWarmoon 9005 36W 6500K 8000Lumens HB3 LED Car Headlight Bulbs Unboxing
13 -
 3:23
3:23
Peter von Panda
6 years agoAUNAX 6000LM 9003 H4 Hi/Lo LED Headlight Lamp Bulbs Kit Unboxing
61 -
 4:30
4:30
Peter von Panda
4 years agoSYLVANIA SilverStar zXe Super Bright Headlight Bulb Review
341 -
 13:44
13:44
Peter von Panda
6 years agoOlight H2R NOVA 2300 Lumens LED Flashlight & Headlamp Review
6