Review: Bevinsee V45 H8 H9 H11 LED Headlight Bulbs
Review on these H8, H9, or H11 replacement LED headlight bulbs from Bevinsee. As you may have seen not long ago, these were installed in a 2015 Mazda CX9. From my searches online, Mazda does seem to have an issue with poor headlight performance around this generation so this was certainly a great opportunity to test these out. This is their V45 model. #mazdacx9 #Bevinsee #ledlights
Product link: https://www.aliexpress.com/item/1005003116507952.html
$4.00 off over $39.00
10% Discount Code: BEVINSEEV451
Website: http://4diyers.com
Patreon: https://www.patreon.com/4diyers
Facebook: https://www.facebook.com/4diyers
Twitter: https://twitter.com/4DIYers
Instagram: https://www.instagram.com/4diyers/
Tumblr: http://4diyers.tumblr.com
Pintrest: https://www.pinterest.com/4diyers/
As a quick replacement overview, you’ll be required to access the rear of the light. Specifically for the Mazda CX9, there is a plastic domed cap with needs to be removed. Once removed, we then have access to the inside of the assembly where the factory style halogen bulb is located. Remove the electrical connector and then rotate the bulb counterclockwise to remove it.
They come as a pair in a pack and are rated to be 300% brighter and as mentioned earlier this is their V45 series. Included in the box will also be a generic installation guide. No modifications are required for the installation, they are a direct plug and play. The only thing that will need to be determined is that they have the correct polarity, however that is easily done by testing the bulbs before finalizing the installation. If the bulb doesn’t illuminate, then flip the plug around.
They are equipped with heat sinks and a built-in cooling fan, feature an aluminum construction and have an IP68 rating. The pair is rated at 120w with a brightness of 22,000 lumens, substantially brighter than compared to a stock halogen bulb. These are designed in such a way to have a light cutoff, not blinding fellow motorists on the road. These are being used in a projector housing as well which further helps direct the light output properly. And they have a 100,000 hour lifespan as well. As you can see there is also the module attached to the light, this will be positioned inside the headlight housing.
Here is a comparison between the factory halogen bulb and the LED before it’s installed back into the headlight assembly. As you can see there is a substantial increase in output and a much cleaner color improving visibility. As mentioned earlier these are polarity sensitive, so test the bulbs before finalization the installation. If the light doesn’t illuminate, it’s as simple as flipping around the plug to switch the negative and positive.
Install the light into the assembly. Make sure those 3 tabs are aligned, push it into place and then rotate clockwise to lock it in.
The module is then placed inside the house. I would recommend using a cable tie to hold the module in place when possible. In this scenario this wasn’t an option due to the design of the headlights.
After that is installing the plastic domed cap back into place. Align those tabs, then rotate clockwise to lock it in.
Here is a comparison between the lights, the LED is on the right and the factory style halogen is on the left. The vehicle still used halogen on the high beams, which is a separate bulb which is why you’re seeing different colors within one light. The LED has a much faster start up time including full light output almost immediately.
The LEDs are a great factory upgrade without making any modifications to your vehicle. The LED upgrades help improve your safety at night, has a lower operating temperature which helps reduce the deterioration of your headlight assemblies, lower voltage demand reducing the load on your electrical system, and modernize the look of your vehicle.
The bulbs are rated at 6000 kelvin which is compared to a mid day type light with a slightly blue tint. This cleaner color output does greatly help reduce eye fatigue when driving at night as well as safely illuminating any objects on the road. The lights are designed in such a way to provide a 360 degree of illumination, matching the angle of the halogen bulbs.
Overall I must say I’m very happy with their performance and am quite surprised how much of an improvement they made with the extremely poor performance of the factory bulbs. This is a must have for anyone doing night driving, especially if you live outside of the city.
Thank you to all those who watch my videos and support my content. Don't forget to subscribe to my channel for future tutorial videos and like my video if you found it helpful. New videos are always being uploaded every week!
© 4DIYers 2013
All Rights Reserved
No part of this video or any of its contents may be reproduced, copied, modified or adapted, without the prior written consent of the author.
-
 7:37
7:37
4DIYers
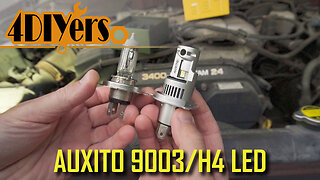
8 months ago $0.01 earnedReview: AUXITO H4:9003 LED Headlight Bulbs 100w
17 -
 4:04
4:04
4DIYers
11 months agoReview: Auxbeam 912 921 T15 W16W 20W LED Light Bulbs
49 -
 2:48
2:48
Peter von Panda
6 years agoH11/H8/H9 7600LM LED Automotive Headlight Bulbs by Woxma Unboxing
20 -
 6:49
6:49
Millennial Review
6 years agoReview of Simdevanma LED H13 Upgrade Headlight Bulbs
-
 13:44
13:44
Peter von Panda
6 years agoOlight H2R NOVA 2300 Lumens LED Flashlight & Headlamp Review
6 -
 7:41
7:41
Peter von Panda
2 years agoUpgrading Buick Encore With LED Headlight Bulbs
32 -
 4:48
4:48
Rev. Ce's Kitchen
1 year agoHow to: Headlight bulb replacement for a Buick Encore/ Chevy Trax 2013 and up.
16 -
 6:26
6:26
SeidelRanch
2 years agoSuper Bright LED Headlight Upgrade Kit - Auxito LED Light DD-Y13
101 -
 9:17
9:17
Peter von Panda
6 years agoThe Awesome Olight H16 Wave Motion Activated LED Headlamp Review
71 -
 3:58
3:58
ZhemJZ
7 years agoBoruit High Power Dual Light Headlamp Video Review
900