$1 Christmas hack (with a picture frame!)
Time to run down to Dollar Tree and grab some inexpensive picture frames.
The first thing we got to do is take these frames and lay them out. We’ll need quite a bit, but we also need some fabric. Take that first picture frame and turn it over, take the back off, because we don't need the picture inside, and we're going to also remove the glass. We can save that glass for another project another time. Put the back back on and flip that over. Now it’s ready to go.
To cover, pull that first cloth over and leave about an inch to an inch and a half surrounding the frame.
Once you get your piece cut, turn it back over, lay it down, and start gluing down the side. You want to get right up next to the edge and lay the fabric right over. Be careful because that hot glue is hot, so make sure you don't burn yourself.
Once you get that one side done, flip it back over, run a bead of glue right against the top again, pull it over and hold it in place.
Now we got that, don't forget about the tops. We're going to fold this like a Christmas gift. Fold the ends over and pull it right on over. Just a couple of gentle pushes right there and it stays.
Now we're gonna go ahead and cover four of our picture frames, these are my favorite fabrics.
Now it's time to put them together. The first two are going to go right next to each other but we need what we call a hinge. We can use some extra fabric, just cut it off about an inch for each side, run the hot glue right down the side, put that first piece on and overlap it. Put about half on, again some gentle love taps on that glue. Make sure it sets in place. Once it dries, pull it back and pull the other picture frame right up next to it. Run some glue down that edge too. Once that glue is on there, quickly, but carefully, lay that other fabric right over. This is going to put both of these together, and look at that, you're going to have a nice hinge that holds it together.
The second one, every other one, though, it's going to be a little different when we put this glue down our strip of fabric, is going to be a lot wider. Again, just put it down halfway, but this time take two of the picture frames. Put both faces together, because we're going to put the glue and wrap it over the back. Once you do that, just put it on over. Hold it in place and make sure it sets up really nicely. It needs to stay strong, but here's the reason we do this; as you fold it up, one end goes like that look at this we fold it the other way because we want to make this easy for storage.
Now we've only got three here but it's time to make some more. I had to use 10 of these and look at the store up really nice, but this Christmas we don't want it stored, we're going to go ahead and start placing it around our Christmas tree. Look how beautiful that turned it is just so lovely and it makes a nice tree color.
I hope this inspired you to build your own Dollar Tree tree collar.
Thanks for watching Hometalk and we'll see you next time!
Hometalk | Ideas you can do.
Get our daily email for endless DIY ideas: https://ht.hmtlk.com/l/4VfU
FACEBOOK → https://www.facebook.com/Hometalk
INSTAGRAM → https://www.instagram.com/hometalk
PINTEREST → https://www.pinterest.com/hometalk
TIKTOK → https://vm.tiktok.com/ne4T87
#diy #hometalk #christmas2022 #christmas #christmasdecor
-
 20:09
20:09
gwphomestead
3 years agoMaking Picture Frames to Give Away as Christmas Gifts
26 -
 15:49
15:49
Marching North
1 year agoDIY Macrame Christmas Tree Wall Hanging Ornament
39 -
 13:28
13:28
MacrameVibeNorMandy
1 year agoHow to Macrame| Christmas Ornament| DIY Christmas
34 -
 15:03
15:03
InlandWoodandResin
4 months ago $0.04 earnedconquer picture frames with one tool
15 -
 22:16
22:16
MooreCrafts
3 years agoHoliday Craft idea diy Christmas Frame
32 -
 15:18
15:18
Wood, Metal, Everything
10 months ago $0.05 earnedI Somehow managed to Fit a round Picture in a Square Frame! AND Almost broke the Picture Glass!
93 -
 14:04
14:04
WoodWorkWeb
8 years agoHow to Make Picture Frames - Updated
10 -
 13:12
13:12
Marching North
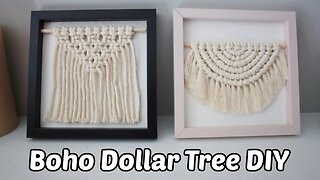
2 years ago $0.01 earnedDIY Framed Macrame Wall Hanging (2 Designs!)
63 -
 23:04
23:04
Marching North
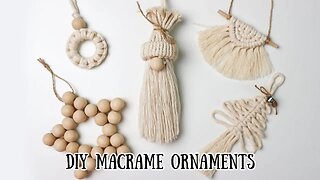
1 year ago $0.01 earnedDIY Macrame Christmas Ornaments
55 -
 4:25
4:25
Peter von Panda
3 years agoCheap Skinny Tall Flocked Artificial Christmas Tree Review
17