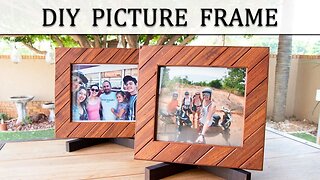
Making Picture Frames to Give Away as Christmas Gifts
I made six picture frames to give to family as Christmas gifts in 2020. This video takes you through each step and I go over a few mistakes I made as well.
I made these frames using pallet wood and the first thing I had to do was remove any nails and staples that might be in the wood. After that I ran the boards through my table saw to get one straight edge, and then flipped the boards around so that nice cut edge was against the fence and ripped everything to the final width.
The next step was to run each board through my thickness planer. The exact thickness wasn’t critical in this case as I just needed everything to be the same.
Usually I try to reuse glass I have laying around but this time I opted to just buy some cheap picture frames from the dollar store and rob the glass from those. It saved me a lot of time.
I cut the rabbet in the back of the frames using my table saw and then for detail put a 45° chamfer on the front using my router table. The chamfer is a very simple profile but it is a nice touch in my opinion.
I used a template to cut the side pieces to the proper length. Because I don’t have a good way to use a stop block for miter cuts the template works well. To figure out how long each side should be use the below formula:
●Side length = length of art + (frame material width x 2) – (rabbet width x 2) +1/8”
So for an 8x10 picture using 1-1/2” wide frames with a 1/4” rabbet, your sides end up being 10-5/8” and 12-5/8”.
I glued everything together using painters tape as a clamp (make sure all your sides are facing the same direction!) and then reinforced the miters from the back using a plywood plug. Because I wasn’t very careful when drilling the holes I had to get creative to get good clamping pressure on the plugs while the glue dried.
As I started sanding I realized my miters weren’t very crisp so I filled those gaps in using a sawdust/glue mixture. Using sawdust from the wood you’re using in your project ensures that when you apply your finish it won’t stand out. I chose Minwax Special Walnut – it’s our go-to stain – and then added a few coats of wipe-on polyurethane.
I completed the assembly by adding the glass, the picture, and an acid-free backer board to the frame. The backer board is held in place using brad nails. I tried to add a paper backing to my frames to make sure dust never got into the frame but for one reason or another I couldn’t get the paper to stick. So I opted not to use a backing here and assured myself I’ll do better next time.
I’m happy with how these turned out and there’s plenty of room to improve. And yes, the recipients were very happy as well. If you enjoyed this video please hit the thumbs up, and subscribe to our channel if you’re enjoying our content. Thanks for watching, everyone!
●David Picciuto of Make Something has EXCELLENT tutorials on how to make picture frames. If you’re interested in this and haven’t watched his channel I highly recommend it.
●Picture Frame Making, Everything You Need to Know. Includes Matting & Mounting - https://youtu.be/nX35y_QFqjM
★ Follow us on Instagram: https://www.instagram.com/gwphomestead/
#woodworking #DIY
-
 10:00
10:00
Hometalk
1 year ago$1 Christmas hack (with a picture frame!)
9 -
 18:32
18:32
Home Built Workshop
2 years agoHow to Make a Picture Frame Sled | This one is for a Small Shop
14 -
 14:04
14:04
WoodWorkWeb
8 years agoHow to Make Picture Frames - Updated
10 -
 15:03
15:03
InlandWoodandResin
5 months ago $0.04 earnedconquer picture frames with one tool
15 -
 14:42
14:42
DIY With Greg
3 years agoHow To Make A Picture Frame | Reclaimed Wood
9 -
 10:05
10:05
Hew And Awe
10 months agoMaking a picture frame - power carving - Woodworking.
16 -
 8:25
8:25
Hometalk
1 year agoGrab a pack of Walmart ornaments for this stunning Christmas idea!
228 -
 15:50
15:50
Handyman_Pros
7 months agoHoliday Gifts: Using your Skills to Create Meaningful Presents
63 -
 9:12
9:12
Mehsim.Creations
1 year agoHow to Make Photo Frame at Home | DIY Cardboard Frame Ideas | Craft ideas
1981 -
 15:49
15:49
Marching North
1 year agoDIY Macrame Christmas Tree Wall Hanging Ornament
41