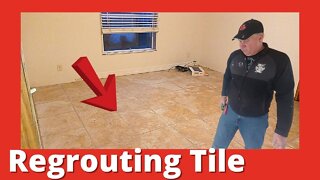
How To Grout Tile Floor
The guys are back to show you some tips and tricks for grouting tile bathroom floors, an easier way to clean the mess
⏱️⏱️Chapters⏱️⏱️
00:00 Intro
00:12 Back after all the tile has been set
00:23 Made sure the customer was happy with the color
00:35 He's used to using drywall tools
00:50 Forcing the grout in the cracks
01:05 He suggested the kids get to pull the spacers out
01:25 How we mix our grout
01:35 Don't want to mix a lot because got to get it down it 45 mins
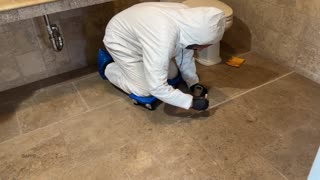
01:55 Wiping down the tile with a sponge
02:10 Using thrift store towels to clean
02:35 After the towel leaves a fine dust
02:55 Come back in an hour and knock the dust off all of this
🙏 Subscribe, 👍, it helps a lot!!
➤❓/ 💬: ask@straightarrowrepair.com
➤ Follow https://straightarrowrepair.com/pipf
➤➤I get a little for the channel-no charge for you if you use the links:
➤➤Shop Amazon https://amzn.to/3CxD1T4
➤➤Tool lists & recommended products🧰 https://straightarrowrepair.com/0lvf
➤➤Services We use
➤➤MORNINGFA·ME https://morningfa.me/invite/StraightArrowRepair
➤➤A2 Hosting http://www.a2hosting.com/refer/140244
➤➤Tubebuddy https://www.tubebuddy.com/StraightArrowRepair
➤➤Apsumo http://fbuy.me/v/philbridges
➤➤VidIQ: https://vidiq.com/straightarrowrepair
#bathroomremodeling #bathroom #bathroomrenovation
Transcript:
Hello friends, today we're after the grout and if you’ll pan through there, the tiles all been set and we're putting the grout in. Make sure the customer was happy with the color. And I'm using a sanded grout and use the finishing knife to push it in. That way.
I'm just really familiar with finishing knives, all your drywall finishing and we mixed it with a battery power drill and a beater. Which I'll show you here shortly, how that works and I’m forcing the grout in there. Of course, we've taken all the spacers out. We didn't do it. The kids that live here had a lot of fun doing it. I had suggested that would be some fun for the kids to do. And so we’ll let that set a little bit and we will keep on keeping on and we'll come back here, start wiping it out. Wiping it down and we'll show you how to do that.
Okay. In case you're wondering, go ahead keep mixing. This is how we make, use a beater like this and a battery powered drill. Don’t to mix a whole lot because I've got to get it down in 45 minutes. That's when it starts getting stiffer than to wipe it all down. So that's about the mixture that we want maybe a little thicker, but that'll work. And then we're going inside and put it in.
When we first start off, we do the sponge to watch how Drew’s doing this, getting the main part of it off. When we come back with the towel. If you look back here we’re using towels, Clay’s tracking it up. But this team is getting better and better at it and you can pull it down with a towel.
Believe it or not, that works better than sponges and it could be expensive if you buy them brand new towels. I go to thrift stores and pick them up, and then use them again and again. The sponge I can’t reuse, but a towel cleans it up and does a better job. Now, after that towel does its job, it’ll leave a fine dust. And here by the way we need to clean that up. It will leave a fine dust and then we'll come back with the towel again and wipe that dust down. We'll get it all cleaned up nice and pretty. And that’s how you grout.
Okay. The next thing we're going to do is if you let this dry for about an hour or so, we're going to take a towel knock the dust off of all this.
-
 3:38
3:38
StraightArrowRepair
2 years ago $0.02 earnedApplying Grout To Tile Floor - Mobile Home
236 -
 3:55
3:55
Home Repair Hub
2 years agoHOW TO SEAL GROUT ON A TILE FLOOR
31 -
 0:59
0:59
Wood, Metal, Everything
1 year ago $0.02 earnedMost important tip EVER for Grouting Tile | #shorts
94 -
 4:23
4:23
DIYEASYCRAFTS
8 years agoHow to Grout Tile easy DIY project
8 -
 26:45
26:45
Tile Installation Done Right
1 year agoHuge 20x40 porcelain tile installed on a floor.
1031 -
 9:18
9:18
CustomConcreteDesign
2 years agoDECORATIVE Concrete | Tile Patio ACID STAINED CONCRETE with a Decorative Tuscan SLATE Texture!
871 -
 10:53
10:53
GappsiGiuseppeAbbrancati
6 months agoGrout and Tile Cleaning in Your Home | Bathrooms, Kitchens, Walls and Floors
1 -
 10:08
10:08
Tile Installation Done Right
1 year agoLarge format tile, Bathroom Floor.
38 -
 0:34
0:34
Gilbert AZ Carpet Cleaning
1 year agoTile & Grout Cleaning Gilbert AZ
42 -
 6:25
6:25
ALLCHECKOUT
3 years agoRmolitty Mold and Mildew Remover Cleaning Gel for Wall Tiles Grout Bathroom Kitchen FULL REVIEW
49