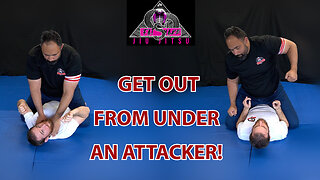
BJJ White Belt - Lesson 1: Trap and Roll Escape (BJJ Basic Combatives)
If you ever find yourself trapped under a larger, more athletic opponent, this technique may save your life.
1. Standard Variation (0:00)
2. Punch Block Variation (9:08)
3. Headlock Variation (16:52)
4. Open Guard Pass (22:17)
5. Reflex Development Drill™ (30:19)
6. Mindset Minute (34:40)
Technique: Trap and Roll Escape
Position: Mount
Overview
In a real fight, the goal is to achieve the top position once the fight goes to the ground; the problem is that things don’t always go according to plan. Against a larger attacker, you are likely to end up on the bottom of the mount position which is the single worst place to be in a fight. From this position the top person can strike or strangle you at will and you cannot effectively strike back. The worst part
about trying to escape the mount without an effective strategy is the panic you experience and the extreme exhaustion it will inevitably
cause. The Trap and Roll Escape is a simple, reliable way to remove your opponent from atop of you. In this lesson you will learn
three variations of the Trap and Roll starting with the Standard Variation.
Technical Slices
1. Standard Variation
• Indicator: Opponent grabs your chest or throat with one or both hands.
• Essential Detail: Trapping everything all at once
• Most Common Mistake: Rolling sideways instead of bridging upwards
• Safety Tip: Top person tuck shoulder
• Bad Guy Reminder: Keep hands on chest for this variation
• Drill Orders: Start from mount, conduct 1 repetition, reverse roles
2. Punch Block Variation
• Indicator: Opponent sits up to throw punches.
• Essential Detail: Constant closeness
• Most Common Mistake: No reach with hugging arm
• Safety Tip: Bad guy must tuck fingers prior to roll
• Bad Guy Reminder: Post hands on ground for base when pulled forward
• Drill Orders: Start from mount, conduct 1 repetition, reverse roles
3. Headlock Variation
• Indicator: Opponent establishes a headlock and inserts the grapevines.
• Essential Detail: Remove the grapevine and tuck foot prior to bridge
• Most Common Mistake: No reach with hugging arm
• Safety Tip: Top person should not insert the grapevines too aggressively
• Drill Orders: Start from mount, conduct 1 repetition, reverse roles
4. Open Guard Pass
• Indicator: Opponent’s legs remain uncrossed after the Trap and Roll Escape is executed.
• Essential Detail: Effective hip control
• Most Common Mistake: Weak base points
• Bad Guy Reminder: Check partner’s base during the pass
• Drill Orders: Start from mount, execute any escape variation, pass open guard, reverse roles
Reflex Development Drill
Practice all variations of the Trap and Roll Escape – Mount (L1)
Mindset Minute
Because being mounted is so dangerous, we present several techniques in this course to prevent it from happening in the first place.
View the Trap and Roll Escape as an emergency tool of last resort. In a future lesson, you will learn the Elbow Escape from the mount,
which can be used to escape the mount if the Trap and Roll escape fails.
-
 8:04
8:04
FatSnakeBJJ
3 months agoThe Trap and Roll Escape
26 -
 12:15
12:15
FightFast
2 months agoTop 5 simple (but vicious) fight-enders. (Advanced moves for beginners.)
27 -
 6:08
6:08
FightFast
2 months agoBreak the rules: Insane tips for using a stick in street fights
69 -
 24:19
24:19
FightFast
2 months agoBest Fighting Moves To Use In A Street Fight | Self Defense With Paul Vunak, Kathy Long and Jim West
91 -
 13:11
13:11
FightFast
2 months ago3 Ways to Block a Punch! Self Defense Technique
33 -
 8:55
8:55
Shredded Dad's Garage Gym
3 years ago43 Evolve Over Pull Up Bar Exercises (BEST Doorway Pull Up Bar)
177 -
 3:10
3:10
JimT62
1 year agoGROUND GRAPPLING (Kato) sparring exercise
42 -
 3:33
3:33
Tobinator0311
1 year agoBACK AND TRAP WORKOUT for Use at Any Gym - 20230131
12 -
 15:47
15:47
FightFast
2 months ago5 Devastating Fight Moves for Beginners Self Defense. (These work!)
91 -
 3:03
3:03
Kenneth Brown BJJ
3 years agoThe Basic Upa Roll for Jiu Jitsu White Belts
7