

Web Browser - Google Chrome - Enable Strict Site Isolation
Web Browser : Google Chrome - Enable Strict Site Isolation
How I enable the Strict Site Isolation Option in Google Chrome. (...because of Spectre & Meltdown)
_________________________
*N.B./Disclaimer - This video shows one of possibly many ways, under one computer's configuration, to implement the desired effect. If you choose to follow this example, you do so AT YOUR OWN RISK.*
___________________________
Download: KB4056891 & KB4056892
https://www.catalog.update.microsoft.com/Search.aspx?q=kb4056891
https://www.catalog.update.microsoft.com/Search.aspx?q=kb4056892
There are other patches for other Versions here too. You'll need their respective KB numbers.
___________________________
Links:
Articles:
https://www.cnet.com/how-to/how-to-protect-your-pc-against-the-intel-chip-flaw/ by Matt Elliott
http://windowsreport.com/kb4056891-kb4056890-kb4056888-kb4056893-kb4056897/ by Madeleine Dean
https://www.chromium.org/Home/chromium-security/site-isolation ___________________________
Open Google Chrome on whatever Device it is installed on and in the Address Bar type: chrome://flags then press the Enter Key Once that Page has opened, go to to the Customize and Control Google Chrome Button or Menu or the Hamburger Button in the top left corner of the Browser, Click it ...then select Find or Find in Page if on an Android Device. In the Search Box type the word: Isolation You should now see all the options that contain the word "Isolation" highlighted. Go to the one with the Heading of "Strict Site Isolation" and click the Link at the bottom of the Option Description that now reads "Enable" so that it is changed to "Disable". There-by enabling the Option, of course. Right above the "Disable" link that I changed from "Enable" is a Link the reads "#enable-site-per-process", right-click it and choose "Copy Link Address" You can use this after Chrome re-starts to quickly double-check the Setting to make sure it's set as desired. You will notice that Google Chrome will pop-up an Action Button at the bottom of the Browser asking you to "Relaunch Now" in order for the changes to take affect. Click it. Once the Web Browser has re-started go back to the Address Bar and paste-in the Link that was copied and make sure it was applied properly. Again, I'd do this on any Device running Google Chrome and do my Web Surfing in Google Chrome until the Hardware Companies, i.e. Intel, AMD and ARM can roll-out patches to Companies such as Dell, HP and so forth.
Firefox 's latest Update, also, adds mitigation for Spectre.
___________________________
The entire Article can be found here:
https://www.tkcomputerservice.com/web-browser-chrome-strict-site-isolation.htm
19
views

Web Browser - Create a Desktop Shortcut that opens Links and Files in Google Chrome
Web Browser : Create a Desktop Shortcut that opens Links and\or Files in Google Chrome
Create a Desktop Shortcut that opens Links and/or Files in Google Chrome (Open Web Pages in Google Chrome if it's not the default Web Browser)
____________________________
*N.B./Disclaimer - This video shows one of possibly many ways, under one computer's configuration, to implement the desired effect. If you choose to follow this example, you do so AT YOUR OWN RISK.*
____________________________
Links :
Google Chrome Offline Installer :
https://www.google.com/intl/en/chrome/browser/desktop/index.html?standalone=1
____________________________
What is Needed :
1. Administrator Privileges
2. The Google Chrome Web Browser installed.
3. An Internet Connection. (optional)
___________________________
The entire Article can be found here:
https://www.tkcomputerservice.com/web-browser-open-with-chrome-shortcut.htm
29
views
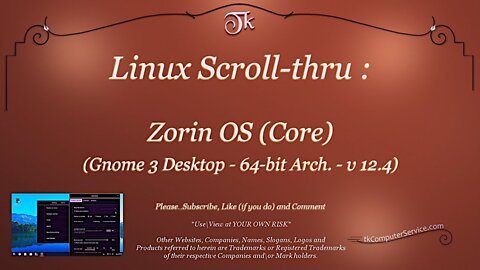
Scroll-thru - Linux - Zorin OS (Core - 64bit - v 12.4 - Gnome 3 Desktop)
Scroll-thru : Linux - Zorin OS (Core - 64bit - v 12.4 - Gnome 3 Desktop)
___________________________
*N.B./Disclaimer - This video shows one of possibly many ways, under one computer's configuration, to implement the desired effect. If you choose to follow this example, you do so AT YOUR OWN RISK.*
___________________________
Zorin OS (Core - 64bit - v 12.4 - Gnome 3 Desktop) (Live CD\DVD shown in Video)
(...these Videos are a quick over-view, in an attempt to save People Time & Discs before choosing a version of Linux that best suits them.)
Features & Requirements
Features:
Gnome 3 Desktop (Debian - Ubuntu Based), Software & Manager, Linux kernel 4.15,
Windows Wireless Drivers (NDISWrapper), Wine, LibreOffice Suite,
Brasero (CD/DVD Burner), Geary Email Client, Windows/Mac-like Environment
Requirements:
1GHZ Processor, 1.5GB RAM, 20GB Disk Space, 800x600 (Ultimate)
700MHZ Processor, 512MB RAM, 10GB Disk Space, 640x480 (Core) Video Card, Sound Card
(...shown on a 2.8 GHZ dual-core Intel Processor with 2 GB of RAM, Nvidia NVS 290)
*I have run many Distributions of Linux on far less than the minimum suggested requirements. Always try, usually there's just a performance cost and some of your very precious Time.*
___________________________
Download at : https://zorinos.com/download/ - approx. 1.5GB Download Size. (ISO Format)
___________________________
The entire Article can be found here:
https://www.tkcomputerservice.com/linux-zorin-gnome-12-4-preview.htm
19
views
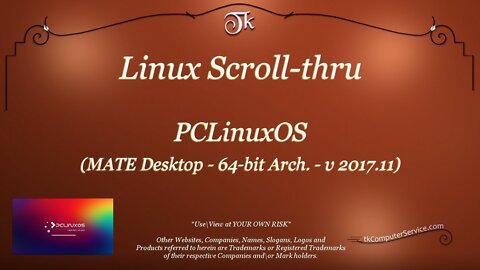
Scroll-thru - Linux - PCLinuxOS (64bit - v 2017.11 - Mate Desktop)
Scroll-thru : Linux - PCLinuxOS (64bit - v 2017.11 - Mate Desktop)
___________________________
*N.B./Disclaimer - This video shows one of possibly many ways, under one computer's configuration, to implement the desired effect. If you choose to follow this example, you do so AT YOUR OWN RISK.*
___________________________
Linux - PCLinuxOS (64bit - v 2017.11 - Mate Desktop) (Live CD/DVD shown in Video)
(...these Videos are a quick over-view, in an attempt to save People Time & Discs before choosing a version of Linux that best suits them.)
Features & Requirements
Features:
MATE Desktop, xorg 1.19.4, Nvidia Drivers (pre-installed),
grub2, compiz/emerald ....
Requirements:
64bit Processor (Intel/AMD), 2GB RAM, 15GB Disk Space
Nvidia/Intel/AMD Video Card, Sound Card
(...shown on a 2.8 GHZ dual-core Processor with 2 GB of RAM, close to minimum suggested requirements)
*I have run many Distributions of Linux on far less than the minimum suggested requirements. Always try, usually there's just a performance cost and some of your very precious Time.*
___________________________
Download at : https://www.pclinuxos.com/get-pclinuxos/ approx. 1.6GB Download size. (ISO Format)
___________________________
The entire Article can be found here:
https://www.tkcomputerservice.com/linux-pclinuxos-mate-2017-11-preview.htm
14
views
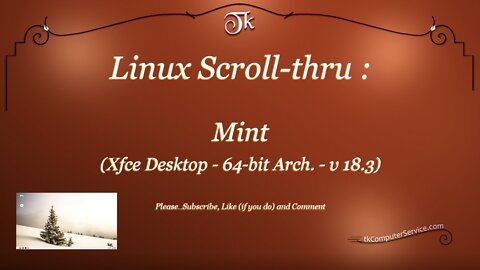
Scroll-thru - Linux - Mint (64bit - v 18.3 - Xfce Desktop)
Scroll-thru : Linux - Mint (64bit - v 18.3 - Xfce Desktop)
___________________________
*N.B./Disclaimer - This video shows one of possibly many ways, under one computer's configuration, to implement the desired effect. If you choose to follow this example, you do so AT YOUR OWN RISK.*
___________________________
Linux - Mint (64bit - v 18.3 - Xfce Desktop) (Live CD/DVD shown in Video) (32-bit available)
(...these Videos are a quick over-view, in an attempt to save People Time & Discs before choosing a version of Linux that best suits them.)
Features & Requirements
Features:
Xfce Desktop, Software Manager, Flatpak Support,
Backup Tools, NDISWrapper, Long Term Support
XFCE 4.12, kernel v 4.10, Ubuntu 16.04 Package Base ....
Requirements:
Processor (...not stated), 1GB RAM, 15GB Disk Space
1024x768 capable Video Card, Sound Card
(...shown on a 2.8 GHZ dual-core Intel Processor with 2 GB of RAM)
*I have run many Distributions of Linux on far less than the minimum suggested requirements. Always try, usually there's just a performance cost and some of your very precious Time.*
___________________________
Download at : https://www.linuxmint.com/download.php - approx. 1.8GB Download size. (ISO Format)
___________________________
The entire Article can be found here:
https://www.tkcomputerservice.com/linux-mint-xfce-18-3-preview.htm
11
views
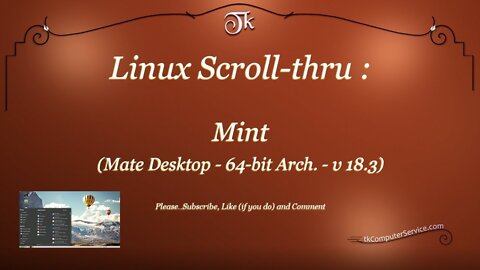
Scroll-thru - Linux - Mint (64bit - v 18.3 - Mate Desktop)
Scroll-thru : Linux - Mint (64bit - v 18.3 - Mate Desktop)
___________________________
*N.B./Disclaimer - This video shows one of possibly many ways, under one computer's configuration, to implement the desired effect. If you choose to follow this example, you do so AT YOUR OWN RISK.*
___________________________
Linux - Mint (64bit - v 18.3 - Mate Desktop) (Live CD\DVD shown in Video) (32-bit available)
(...these Videos are a quick over-view, in an attempt to save People Time & Discs before choosing a version of Linux that best suits them.)
Features & Requirements
Features:
Mate Desktop, Software Manager, Flatpak Support,
Backup Tools, NDISWrapper, Long Term Support
Linux-firmware 1.157.13, kernel v 4.10 ....
Requirements:
Processor (...not stated), 1GB RAM, 15GB Disk Space
1024x768 capable Video Card, Sound Card
(...shown on a 2.8 GHZ dual-core Intel Processor with 2 GB of RAM)
*I have run many Distributions of Linux on far less than the minimum suggested requirements. Always try, usually there's just a performance cost and some of your very precious Time.*
___________________________
Download at : https://www.linuxmint.com/download.php - approx. 1.9GB Download size. (ISO Format)
___________________________
The entire Article can be found here:
https://www.tkcomputerservice.com/linux-mint-mate-18-3-preview.htm
8
views
Scroll-thru - Linux - Mint (64bit - v 18.3 - Cinnamon Desktop)
Scroll-thru : Linux - Mint (64bit - v 18.3 - Cinnamon Desktop)
___________________________
*N.B./Disclaimer - This video shows one of possibly many ways, under one computer's configuration, to implement the desired effect. If you choose to follow this example, you do so AT YOUR OWN RISK.*
___________________________
Linux - Mint (64bit - v 18.3 - Cinnamon Desktop) (Live CD\DVD shown in Video) (32-bit available)
(...these Videos are a quick over-view, in an attempt to save People Time & Discs before choosing a version of Linux that best suits them.)
Features & Requirements
Features:
Cinnamon Desktop, Software Manager, Flatpak Support,
Gnome Games, HiDPI Support, Long Term Support ....
Requirements:
Processor (...not stated), 2GB RAM, 15GB Disk Space
1024x768 capable Video Card, Sound Card
(...shown on a 2.8 GHZ dual-core Intel Processor with 2 GB of RAM)
*I have run many Distributions of Linux on far less than the minimum suggested requirements. Always try, usually there's just a performance cost and some of your very precious Time.*
___________________________
Download at : https://www.linuxmint.com/download.php - approx. 1.8GB Download size. (ISO Format)
___________________________
The entire Article can be found here:
https://www.tkcomputerservice.com/linux-mint-cinnamon-18-3-preview.htm
18
views

Scroll-thru - Linux - Bodhi (64bit - v 4.4.0 - Moksha Desktop)
Scroll-thru : Linux - Bodhi (64bit - v 4.4.0 - Moksha Desktop)
___________________________
*N.B./Disclaimer - This video shows one of possibly many ways, under one computer's configuration, to implement the desired effect. If you choose to follow this example, you do so AT YOUR OWN RISK.*
___________________________
Linux - Bodhi (64bit - v 4.4.0 - Moksha Desktop) (Live CD\DVD shown in Video) (32-bit available)
(...these Videos are a quick over-view, in an attempt to save People Time & Discs before choosing a version of Linux that best suits them.)
Features & Requirements
Features:
Moksha Desktop (Enlightenment Based), Software Manager, Update Manager,
AppPak (pre-intalled common Apps), PCManFM (File Manager),
Desktop Gadgets, OpenShot Video Editor
Requirements:
1GHZ Processor, 512MB RAM, 10GB Disk Space
Video Card, Sound Card
(...shown on a 2.8 GHZ dual-core Intel Processor with 2 GB of RAM, Nvidia NVS 250)
*I have run many Distributions of Linux on far less than the minimum suggested requirements. Always try, usually there's just a performance cost and some of your very precious Time.*
___________________________
Download at : https://www.bodhilinux.com/download/ - approx. 1.3GB Download Size. (ISO Format)
___________________________
The entire Article can be found here:
https://www.tkcomputerservice.com/linux-bodhi-4-4-0-preview.htm
11
views
Scroll-thru - Linux - Mint (32bit - v 18.3 - KDE Desktop)
Scroll-thru : Linux - Mint (32bit - v 18.3 - KDE Desktop)
___________________________
*N.B./Disclaimer - This video shows one of possibly many ways, under one computer's configuration, to implement the desired effect. If you choose to follow this example, you do so AT YOUR OWN RISK.*
___________________________
Linux - Mint (32bit - v 18.3 - KDE Desktop) (Live CD/DVD shown in Video) (64-bit available)
(...these Videos are a quick over-view, in an attempt to save People Time & Discs before choosing a version of Linux that best suits them.)
Features & Requirements
Features:
KDE Desktop, Software Manager, Flatpak Support,
Backup Tools, NDISWrapper, Long Term Support
KDE Plasma 5.8, kernel v 4.10, Ubuntu 16.04 Package Base ....
Requirements:
Processor (...not stated), 1GB RAM, 15GB Disk Space
1024x768 capable Video Card, Sound Card
(...shown on a 2.8 GHZ dual-core Intel Processor with 2 GB of RAM)
*I have run many Distributions of Linux on far less than the minimum suggested requirements. Always try, usually there's just a performance cost and some of your very precious Time.*
___________________________
Download at : https://www.linuxmint.com/download.php - approx. 2.1GB Download size. (ISO Format)
___________________________
The entire Article can be found here:
https://www.tkcomputerservice.com/linux-mint-kde-18-3-preview.htm
2
views

Networking - TCP\IP Netstat Network Command-Line Utility
Network Tools : TCP\IP Netstat Network Command-Line Utility
How to use Windows TCP\IP Netstat Network Command-Line Utility.
___________________________
*N.B./Disclaimer - This video shows one of possibly many ways, under one computer's configuration, to implement the desired effect. If you choose to follow this example, you do so AT YOUR OWN RISK.*
___________________________
Netstat is Short for Network Statistics and is a Command-line Utility or more precisely a Console Application. As it's Name suggests, it displays Protocol and Network Statistics for all Network Interfaces attached to the Computer. A Network Interface, more commonly referred to as a Network Interface Card is any piece of Hardware that allows the Computer to connect to a Network. The two most common types are a USB Wireless Adapter and a PCI Network Card (NIC).
Netstat's main scopes are TCP (Transmission Control Protocol), UDP (User Datagram Protocol), IP (Internet Protocol) and ICMP (Internet Control Message Protocol), for both IPv4 and IPv6.
To use it, open the Command Prompt, which is normally found under the Accessories Folder in the Start Menu. Goto, the Start Menu Button then Accessories and right-click the Command Prompt Shortcut and click "Run as Administrator".
Now that the Command Prompt Window is Open, type in "Netstat /?" and press the Enter Key, this will bring up the Help Menu for Netstat Utility and display all of it's Switches and a brief Description for each. Switches are additional commands that display specific Information the Netstat Command is able to retrieve.
The available Command-line Switches are as follows :
Netstat -a, Netstat -b, Netstat -e, Netstat -f, Netstat -n, Netstat -o, Netstat -p (protocol), Netstat -r, Netstat -s, Netstat -t, Netstat (time interval)
The Switches are able to be used in conjunction with each other, the spaces between them are required and Case is ignored.
The use of the Netstat Command with no switches will display by default, the TCP Protocol, then the Local Address, then the Foreign Address and lastly the current State. The Local Address is the Computer's Network Interface Address, the Foreign Address is the Address of the remote Connection the Local Address is connected to and the State is the current Connection Status of both. The Connection Status or State can have several values. The most common are as follows and are loosely defined:
"Listen" - Meaning the Local Address is waiting for a connection from a Foreign Address. "Established" - Meaning the Local Address and the Foreign Address are actively connected. "Fin_Wait_1 & 2" - Meaning one or both of the Connections are waiting for a Termination Request or for the acknowledgement of a previously sent Termination Request. "Close_Wait" - Meaning the Foreign Address is waiting for a Termination Request from the Local Address. "Time_Wait" - Meaning The Local Address or the Foreign Address is waiting to make sure the Termination Request has been acknowledged and all Packets have been sent and received. "Syn_Sent" - Meaning the Local Address is waiting for a matching Connection Request after sending an initial Connection Request to the Foreign Address. For more Information on TCP Connection States follow this Link. https://support.microsoft.com/en-us/kb/137984
___________________________
The entire Article can be found here:
https://www.tkcomputerservice.com/windows-vista-windows-7-netstat.htm
52
views

Hardware - How to professionally apply CPU Thermal Paste (CPU Thermal Grease)
Computer Hardware : How to apply CPU Thermal Paste (Grease)
___________________________
*N.B./Disclaimer - This video shows one of possibly many ways, under one computer's configuration, to implement the desired effect. If you choose to follow this example, you do so AT YOUR OWN RISK.*
___________________________
How to professionally apply CPU Thermal Paste (CPU Thermal Grease)
What is Needed?
1. Scissors
2. An old Credit Card
3. Cotton Swabs
4. Latex Gloves
5. 91% Alcohol
6. A lint-free Cloth & Brush
7. CPU Thermal Paste (a.k.a. CPU Thermal Grease)
___________________________
In this Video I will show how-to properly apply CPU Thermal Paste to the Central Processing Unit of a Computer.
There are a few requirements needed before beginning, they are : An old Credit Card, a pair of Scissors, 91% Alcohol, a lint-free Cloth and Brush, some latex Gloves, Cotton Swabs (Q-Tips) and CPU Thermal Grease.
Take an old unused Credit Card and cut a strip approximately 1/2" wide the length of the Card. Do not use any part of the Card that isn't completely flat. Then take the cut Strip and cut-off 1" of that. Make two small cuts on either Side of the Piece cut from the Strip approximately 1/4" from one End. Now, fold the Piece at a 90 degree angle making a small Handle. The Piece should look like the Letter "L" laying down on the long Part. This will be used to actually apply the CPU Thermal Paste to the top of the CPU. Do not apply Thermal Paste to the CPU Cooler, as the Surface Area is generally larger than the Top of the CPU and will result in an over-use of Thermal Compound.
Now acquire two or three Cotton Swabs with plastic Applicators (Sticks). These will be used for two different Operations. One, to clean-up any excess Thermal Paste after application. Secondly, to make a Scrapper to remove excess Thermal Paste from the previously made Applicator and put it back on the CPU for spreading. (...see Video for Instructions)
Put-on the latex Gloves and using the Alcohol and a lint-free Cloth, clean both the top of the CPU and the bottom of the CPU Heat Sink (Cooler).
If a lint-free Brush is available use it to ensure there are no foreign objects on either Surface.
Next, apply a very small amount of CPU Thermal Grease to the center of the CPU. Do not use too much. As a matter of Fact, use too little. It's always easier to add more than to remove excess. Using the Applicator spread the Thermal Paste from the Center to the outside of the CPU. Using even pressure on the Applicator and keep the Applicator as flat as possible while doing so.
Clean any excess Paste away from the Edges of the CPU. The Thermal Paste should be on the Top of the CPU only and spread as thin as possible. Once the Thermal Paste is applied satisfactorily, seat the Cooling Block down on the CPU and very gently wiggle it in-place. Do not wiggle it wildly as that may produce flashing. (flow of grease over the edges and away from the top of the CPU) Tighten the Bolts in an alternating Pattern and with a couple of Turns each at a time.
Turn the Computer on and go into the BIOS. Note the CPU Temperature. Make sure to let it run for a few Minutes to get an accurate Temperature Reading. Then, go to the CPU Manufacturer's Website and down-load the Data Sheet for the particular CPU and make sure it is operating below the maximum Operating Temperature.
___________________________
The entire Article can be found here:
https://tkcomputerservice.com/hardware-apply-cpu-thermal-paste.htm
53
views
Office - How to Print Postage without Black Ink (eBay)
Office : How to Print Postage without Black Ink (eBay)
This is a How-To on printing postage when the black Ink Cartridge is empty.
___________________________
*N.B./Disclaimer - This video shows one of possibly many ways, under one computer's configuration, to implement the desired effect. If you choose to follow this example, you do so AT YOUR OWN RISK.*
___________________________
What is Needed?
1. A color Ink Cartridge with Ink other than just Red or Yellow.
2. An Image Manipulation Program (GIMP (shown), Photoshop, etc)
that allows Selection by Color.
3. A modern Web-Browser (Chrome (shown), IE, Firefox).
4. Some type of Removable Media, if printing directly from the Printer is desired.
(...usually a USB Thumb Drive or SD Card)
___________________________
The entire Article can be found here:
https://www.tkcomputerservice.com/printer-print-postage-without-black-ink.htm

Hardware - Hard Drive Tools - HDD Erase
Hard Drive Tools : HDD Erase
How I setup and use HDD Erase to wipe data from ATA Hard Drives. How to erase Hard Drives with HDD Erase.
This Program is generally for use with older Hard Drives.
___________________________
*N.B./Disclaimer - This video shows one of possibly many ways, under one computer's configuration, to implement the desired effect. If you choose to follow this example, you do so AT YOUR OWN RISK.*
___________________________
Download at: https://cmrr.ucsd.edu/resources/secure-erase.html
___________________________
Free ISO Burner\Recorder:
http://isorecorder.alexfeinman.com or
https://cdburnerxp.se/en/home
___________________________
To make a USB Drive Bootable with the HDD Erase Image (hdderase.iso), you may first need to extract the .iso file itself. You can do this with PeaZip: http://www.peazip.org/
For burning the HDDErase.iso Image to a USB Drive: Rufus https://rufus.ie
___________________________
To make a bootable Floppy: Make a standard bootable Floppy and put the "hdderase.exe" on it.
___________________________
The program I'm highlighting here is HDD Erase or (a.k.a.) Hard Disk Drive Erase.
It downloads as a compressed .ZIP folder that contains various files, including an .EXE and an .ISO Image.
This Program destroys data, permanently. If you forget to back-up some data,
like maybe your favorites, they are gone. That is extremely important to remember!
HDDErase is an older program, but still gets the job done. If your BIOS does not allow the setting of a secure Hard Drive Password, HDDErase will not run. Unfortunately, most newer BIOSs don't allow the setting of a HD Password.
To use HDDErase download and extract the contents of HDDErasreWeb.zip.
Then you can burn a CD, make a bootable floppy or a bootable USB Key.
After burning the Disc make sure the Computer is set to boot from the CD\DVD Drive.
This can be accomplished through the BIOS or by selecting the "Boot Menu" (F12 for most) at POST and then choosing the Drive where the HDDErase Disc is located.
When HDDErase boots it'll present the User with a custom Windows 98 Start-up Menu.
The first selection is the most compatible, but you can try the other selections
if it fails to boot. Once HDDErase starts it'll goto a Command Prompt.
At the Command Prompt - type-in "hdderase" - then "Enter". The User will
be presented with a couple of Warning Screens. Then you can Select the Hard Drive you wish to erase - at the Options Menu type-in "1" - then "Enter". HDDErase will now start erasing the selected Drive. Once the Hard Drive has been erased you can re-boot into your Operating System Disc or create and format a new partition.
___________________________
The entire Article can be found here:
https://www.tkcomputerservice.com/hdtools-hdderase.htm
11
views

Hardware - Hard Drive Tools - DBAN (Darik's Boot and Nuke)
Hard Drive Tools : Darik's Boot and Nuke (DBAN)
How I setup and use DBAN to wipe data from Hard Drives. How to erase Hard Drives with Darik's Boot & Nuke.
___________________________
*N.B./Disclaimer - This video shows one of possibly many ways, under one computer's configuration, to implement the desired effect. If you choose to follow this example, you do so AT YOUR OWN RISK.*
___________________________
Download at: https://dban.org
Free ISO Burner \ Recorder :
http://isorecorder.alexfeinman.com or
https://cdburnerxp.se/en/home
___________________________
To make a USB Drive Bootable with the 1.0.7 Image (dban-1.0.7_i386.iso), you may first need to extract the .iso file itself. You can do this with PeaZip http://www.peazip.org
For burning the 2.2.7 DBAN ISO Image to a USB Drive: Rufus https://rufus.ie
___________________________
To make a bootable Floppy: Insert a blank floppy disk and run dban-1.0.7_1386.exe
___________________________
The program I'm highlighting here is DBAN or (a.k.a.) Darik's Boot and Nuke.
It downloads as an .ISO image for either a CD or a DVD. This Program destroys data, permanently. So, Back-up, Back-up and then Back-up again. I have used this program for very long time and it's become the de facto King of Hard Drive Wiping. When I re-install any Operating System, I prep the Hard Disc with DBAN before doing so. After burning the disc make sure the computer is set to boot from the CD\DVD Drive. This can be accomplished through the BIOS or by selecting the "Boot Menu" (F12 for most) at POST and then choosing the drive where DBAN is located.
Once DBAN boots you'll be presented with several options, most having to do with becoming familiar with DBAN. To setup DBAN for a custom wipe, be it the method or just selecting a drive, press the Enter key at this point. Now it is possible to choose the Hard Drive, the method and various other settings before wiping data. Choosing the "autonuke" command will erase all Data from all Hard Drives. The entire process can take hours depending on the method and rounds, so don't get in a hurry. Also, if you forget to back-up some data, like maybe your favorites, they are gone. That is
extremely important to remember!
The three methods I use are as follows:
Quick (0-4 hrs.) + Med. Security = RCMP w\1 round;
Normal (3-10 hrs.) + Med. Security = RCMP w\atleast 2 rounds;
Hard Core (5-24 hrs.) + High security = PRNG w\4 or more rounds.
For Re-Installs, Please use the Re-Install Check-List https://repo.tkcomputerservice.com/vt2697i/File_Repository/OS_Installation/checklist.zip
You can find most of the information for the Check-list by using either Speccy https://www.ccleaner.com/speccy or BelArc Advisor https://www.belarc.com
___________________________
The entire Article can be found here:
https://www.tkcomputerservice.com/hdtools-dban.htm
22
views

Hardware - Dell Inspiron Duo Teardown (1090)
How to Tear-down the Dell Duo to be able to replace the Battery, Hard Drive & Etc.
___________________________
*N.B./Disclaimer - This video shows one of possibly many ways, under one computer's configuration, to implement the desired effect. If you choose to follow this example, you do so AT YOUR OWN RISK.*
___________________________
Dell Inspiron Duo (1090) Drivers: http://www.dell.com/support/home/us/en/19/product-support/product/inspiron-duo/drivers
Several Websites are reporting that upgrading to a SSD is possible.
The Dell Inspiron Duo (1090) will Update to Windows 10 with all drivers functioning except the accelerometer, which is recognized but doesn't work properly. That may be fixed in later updates of Windows 10.
Maximum memory: 2GB
___________________________
The entire Article can be found here:
https://www.tkcomputerservice.com/hardware-dell-duo-1090-disassembly.htm
7
views

Need for Speed - High Stakes - (4 Laps)
Need for Speed : High Stakes - (4 Laps)
In-car View
___________________________
*N.B./Disclaimer - This video shows one of possibly many ways, under one computer's configuration, to implement the desired effect. If you choose to follow this example, you do so AT YOUR OWN RISK.*
1
view

Age of Empires II - The Conquerors Expansion (Complete Play-through) (No Commentary)
Age of Empires II - The Conquerors Expansion (Complete Play-through) (No Commentary)
...just a quick Game from start to finish.
___________________________
*N.B./Disclaimer - Other Websites, Companies, Names, Slogans, Logos and Products referred to or shown here-in are Trademarks or Registered Trademarks of their respective Companies and/or Mark Holders.*
One of the Games I've played the most. Age of Empires II, and really the entire Series offer a simple strategy Game with intuitive Game-play and Objectives. Frankly, it doesn't need explanation for anyone that has ever played Video Games before. It's definitely a Classic.
___________________________
Cheat Codes:
Press ENTER, during a single Player Game and in ALL CAPS type:
LUMBERJACK 1000 Wood
ROBIN HOOD 1000 Gold
CHEESE STEAK JIMMY'S 1000 Food
ROCK ON 1000 Stone
I LOVE THE MONKEY HEAD get VMDL
HOW DO YOU TURN THIS ON get rock-slinging Car
TO SMITHEREENS get a Saboteur
I R WINNER win Game
WOOF WOOF turns Birds into flying Dogs *Conquerors only*
POLO no Fog
MARCO reveal Map
AEGIS instant Building
NATURAL WONDERS control all Animals
RESIGN or WIMPYWIMPYWIMPY lose Game
TORPEDO (1-8) ends that numbered Player's Game
BLACK DEATH win GAME
FURIOUS THE MONKEY BOY get furious monkey Boy *Conquerors only*
___________________________
https://tkcomputerservice.com/computer-games-age-of-empires-2.htm
12
views

Gaming - Commodore 64 - Games
Commodore Computer games 25 years ago.
Sorry for the low quality.
This was captured just as they were played, back then.
https://tkcomputerservice.com/computer-games-c-64.htm
2
views

Need for Speed - Porsche Unleashed - Revisited (after 20 Years)
I hadn't Gamed in a very long Time, maybe some AOE2 here & there, so I thought I'd break-out alittle Need for Speed - Porsche Unleashed. Needless to say, I need some Practice. Still fun after all these Years, though.
___________________________
*N.B./Disclaimer - This video shows one of possibly many ways, under one computer's configuration, to implement the desired effect. If you choose to follow this example, you do so AT YOUR OWN RISK.*
3
views

Email - Setting up an Outlook.com, Live.com or Hotmail.com eMail Account (Server Settings)
Email : Setting up an Outlook.com, Live.com or Hotmail.com Email Account
How I setup an Outlook.com, Live.com or Hotmail.com Email Client Application.
(Android's default Email Client Application shown.
___________________________
*N.B./Disclaimer - This video shows one of possibly many ways, under one computer's configuration, to implement the desired effect. If you choose to follow this example, you do so AT YOUR OWN RISK.*
___________________________
***Newer Servers, the old ones should still work for a period of time.***
IMAP Settings
Server name: outlook.office365.com
Port: 993
Encryption method: TLS
SMTP Settings
Server name: smtp.office365.com
Port: 587
Encryption method: STARTTLS
___________________________
The entire Article can be found here:
https://www.tkcomputerservice.com/email-setup-outlook-com-account.htm
15
views
Computer Security - Increase the effectiveness of any Antivirus Program in Windows
Computer Security : Increase the effectiveness of any Antivirus Program
**These are the first things to do if a Computer has acquired a Virus or Malware**
___________________________
*N.B./Disclaimer - This video shows one of possibly many ways, under one computer's configuration, to implement the desired effect. If you choose to follow this example, you do so AT YOUR OWN RISK.*
___________________________
How I make Anti-virus and\or Anti-malware Solution more effective, allowing them to better clean the Operating System and the Files in it. This allows for better file recovery and/or back-up before re-installing the Operating System. It, also, minimizes the chance of re-infecting the newly installed OS.
___________________________
What's Needed :
Administrator Privileges, an Internet Connection, a complete Operating System Back-up and a note of the changes made. The means to Back-up any cleaned Files and/or Data to an External Drive or cloud-based Repository Service.
___________________________
Manual Virus Signature Database update Links :
AVG - https://www.avg.com/en-us/download-update
Avast - https://www.avast.com/download-update
Avira - https://www.avira.com/en/support-vdf-update-info
Bitdefender - https://www.bitdefender.com/site/view/Desktop-Products-Updates.html
ClamWin - http://www.clamwin.com/content/view/58/27/
Comodo - https://www.comodo.com/home/internet-security/updates/vdp/database.php
F-Prot - https://subscription.f-prot.com/login/index.html
F-Secure - https://www.f-secure.com/en/web/labs_global/database-updates
McAfee - https://www.mcafee.com/apps/downloads/security-updates/security-updates.aspx
Microsoft Security Products (Windows Defender included) - https://www.microsoft.com/en-us/wdsi/definitions
Norton-Symantec - https://www.symantec.com/security_response/definitions.jsp
Panda - https://www.pandasecurity.com/usa/homeusers/downloads/tree/
Quick Heal - www.quickheal.com/quick-heal-antivirus-updates-download
Sophos - https://www.sophos.com/downloads/ide/
TREND Micro - http://downloadcenter.trendmicro.com/index.php?clk=left_nav&clkval=pattern_file®s=NABU
___________________________
Bootable Anti-malware Solution :
ESET : https://www.eset.com/us/download/tools-and-utilities/
AVG Rescue CD - https://www.avg.com/en-us/rescue-cd-business-edition
Avira Rescue System - https://www.avira.com/en/download/product/avira-rescue-system
Bitdefender Rescue CD - https://www.bitdefender.com/support/how-to-create-a-bitdefender-rescue-cd-627.html
___________________________
The entire Article can be found here:
https://www.tkcomputerservice.com/antimalware-increase-efficiency-antivirus-programs.htm
25
views

Computer Security - ESET SysRescue Live - Free Anti-malware Solution
Computer Security : ESET Sysrescue Live - Free Anti-malware Solution
This is a How-To on using ESET's free bootable Anti Malware Solution. I'll show how I setup the Scanner & give my "Best Practices" on it's use and what to do if infected.
___________________________
*N.B./Disclaimer - This video shows one of possibly many ways, under one computer's configuration, to implement the desired effect. If you choose to follow this example, you do so AT YOUR OWN RISK.*
___________________________
Links :
ESET : https://www.eset.com/us/
ESET's free Tool Webpage : https://www.eset.com/us/download/tools-and-utilities/
You'll need a USB Drive, external Hard Drive or CD\DVD around 1 GB in capacity.
(CD is recommended)
___________________________
The entire Article can be found here:
https://www.tkcomputerservice.com/antimalware-eset-sysrescue-1-0-14-0.htm
2
views

Apps : Rufus - Microsoft Store App (UWP App)
Apps : Rufus - Microsoft Store App (UWP App)
The Rufus Bootable USB - Hard Drive - Memory Stick Creator is now
available in the Microsoft Store.
tk Computer Service 🖥 - quick Tip
___________________________
*N.B./Disclaimer - This video shows one of possibly many ways, under one computer's configuration, to implement the desired effect. If you choose to follow this example, you do so AT YOUR OWN RISK.*
___________________________
Download at: https://rufus.ie/
Rufus MS Store Link: https://www.microsoft.com/en-us/p/rufus/9pc3h3v7q9ch
4
views