
Guitar Rote Exercises - Lateral Finger Strength And Stability Exercises
In this exercise, we strengthen and condition the fingers and hand, so that they have more lateral stability and control.
When you are beginner guitar player, your fingers are weak, both in grip strength and , and in side-to-side motion.
So the purpose of this exercise is to bring awareness to these weaknesses, so that they may be addressed, and strengthened,
So that later on, you will not be hindered in learning a new song, because of weak hands and fingers.
In particular, these are exercises for lateral finger motion (side to side) control and stability.
On a piano, the space between every pair of white keys is the same,
But on a guitar, the distance between every set of frets is slightly different,
Therefore, even though we have moveable chord fingering shapes, those shapes must be micro-adjusted for each hand position.
Also, when doing slides or gliss, your lateral finger strength will get stronger, and it will need to be stronger, to do slides and gliss well.
Also, as with other strengthening exercises, you will go from too weak, to too strong,
So when that day arrives, you’ll want to practice doing slides/gliss with increasing levels of tension, from 0-10, and decreasing level of tension from 10-0
108
views
Guitar Rote Exercise - Practice Fretting As Lightly As Possible
In this exercise, we practice calibrating the fret hand fingers pinch, or grip, or fretting strength.
In particular, we are calibrating the fingers touch, from the point the finger touches the string, to the point the string is fretted just hard enough to sound good.
So, during this exercise, you really want to focus your attention on your fretting finger, as it touches the string, and slowly presses the string into the fret.
You’ll want to keep plucking the string over and over, so that your ear can really get a good listen to the sound change, as that string gets close to the fret, and touches the fret, and is pressed into the fret.
So as a beginner, we were told to fret hard, or fret harder, because we have weak fingers.
But now your fingers are too strong, and need to be calibrated again, for your current strength and conditioning level.
So, if we imagine that as we touch the string, the pressure we exert is at level 0, and the hardest we can fret is level 10,
And then as we exert more pressure, lets say to level 5, the string moves backward, and touches the fret, with pressure level 5.
Because pressure level 5 doesn’t sound quite as good as level 6, we practice fretting up to pressure level 6,
Instead of practicing with pressure level always set to 10 or even 11.
By practicing how to lighten up your touch, you will have many benefits, for example
1) you can play longer. You wont get fatigued as quickly
2) your blood pressure will lower. Relax!
3) you will be more nimble, and move from point to point on the fretboard more quickly and efficiently
4) you wont dent the back of your string on the frets
5) you won’t wear out your frets as fast
From an eagle eye view, this is a transitional exercise, from beginner guitar to intermediate guitar.
It indicates that you have mastered many smaller maneuvers, that you have played many notes, that you are stronger, and faster, and have more spatial awareness,...
As your body is strengthened and conditioned with these rote exercises,
you will now more easily overcome many obstacles that would have otherwise given you problems.
For example, because all of your fingers are now stronger, and each finger knows how to properly fret a note,
you then can more easily learn new chords, or riffs, etc that you would have struggled with with weak, disorganized, undisciplined fingers...
These exercises are the difference between learning a song on a guitar,
And learning how to fundamentally, completely play the guitar, as a musical instrument.
The difference between giving a man a fish, and teaching a man how to fish.
The difference between teaching a student how to play *a song,
and teaching a student how to play *any song, in any key...
Teaching a student how to read other peoples music,
Verses teaching a student how to write their own music.
186
views
1
comment
Guitar Rote Exercises - Calibrating Fret Hand Grip or Pinch Pressure
In this exercise, we work on calibrating our fret hand pinch or grip pressure.
When we are first beginning to play guitar, our hands were weak, and soft,
But as we practice, our muscles get stronger, and our callouses get thicker,
And you can easily find yourself accidentally pinching or gripping or fretting too hard.
This exercise goes together with a pick hand exercise, where we work on calibrating pinch or grip pressure applied to the pick.
One part of the lesson thats not mentioned here, but should have been, is to do the following calibration....
1) fret a note as you normally would, and pluck the sting to make it sound.
2) fret the note slightly harder, and pluck the string again...
3) fret and sound the note 10 times in a row, and each time fret it a little bit harder than the time before, so that by the time you get to 10, you are fretting as hard as you can.
4) fret and sound the note 10 more times in a row, and each time fret a little but softer than the time before, so that by the time you get to 10, you are fretting absolutely as soft as you can, while still sounding good.
5) repeat on each finger
6) practice all fingers, everywhere, on each string, at every fret.
Another reason for this exercise is to kick-the-crutch so-to-speak
The crutch, in this case, being the thumb as an anchor point.
In earlier exercises, we set out to deliberately train to use the thumb as not only *an anchor point, but the first and primary anchor point!
So this exercise is another transitional exercise, between beginner and intermediate guitar player.
At first you were too weak, but now you are too strong!
Also, by removing the thumb from the equation, by moving the thumb to the bottom side of the neck, we can calibrate a few more things, namely
1) each fingers strength, independent of the thumb strength.
2) pick hand arm leverage on guitar body.
3) is 1) and 2) together.
Which means your guitar is in the normal playing position, and with your fret hand finger, you are pushing backward on the string, into the fretboard.
Normally, your thumb would be behind the neck, preventing the neck from moving backward, away from your finger, as you try to fret a note.
But because your thumb is gone, the guitar neck is free to swing backward, away from your finger, as you fret a note.
But because your pick hand arm is resting on the guitar body, you can lean on the guitar body and leverage the guitar neck forward, as you try to fret the note.
This is a careful balancing act, because whichever pushes harder, will make the guitar neck move forward or backward.
Once you master this balancing act, your thumb is free to move around, and not act as an anchor, or to act as an anchor in new ways.
This is helpful, as you will discover, when you go to reach certain notes on the neck, and your thumb actually prevents you from reaching them, because your thumb is hooked under and behind the neck, and trapped.
By putting your thumb underneath the neck, you are freeing the thumb from being trapped behind the neck,
So for example you can reach the highest fret on the low E string.
Normally, you wouldn’t ever play that note, because its unreachable, and its easier to find that note elsewhere.
So, because we can’t easily reach the note, we tend to not play the note, and it becomes a cycle of what you practice, or don’t practice.
So with this thumb-under hand position, you can be more easily prepared to reach the hardest note, and then we might practice playing that note more, and eventually get to the point where we are comfortable working in all 4 corners of the fretboard,
82
views
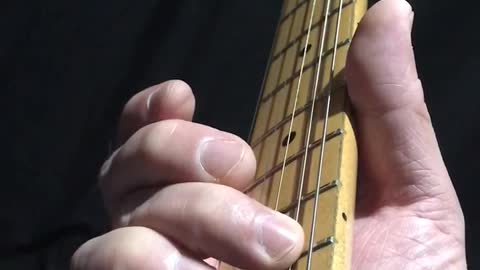
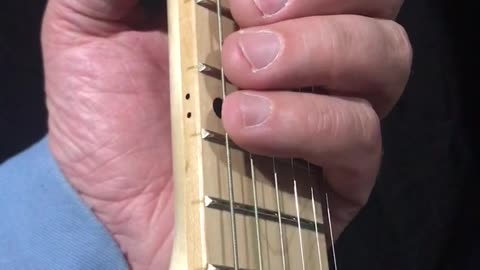
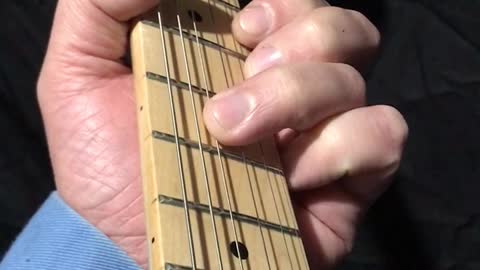
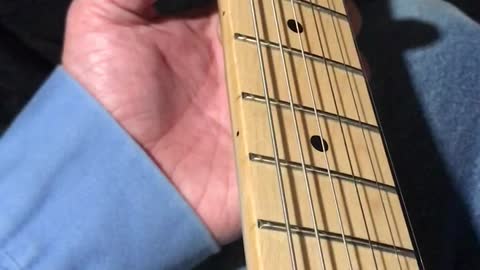
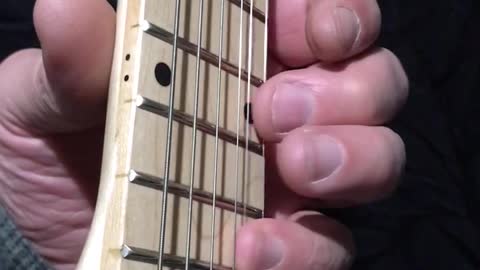
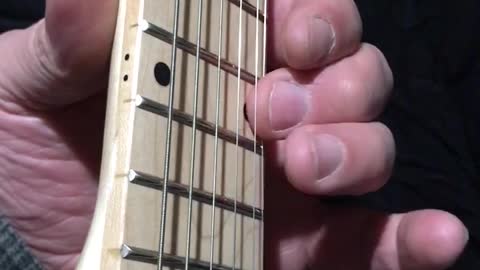
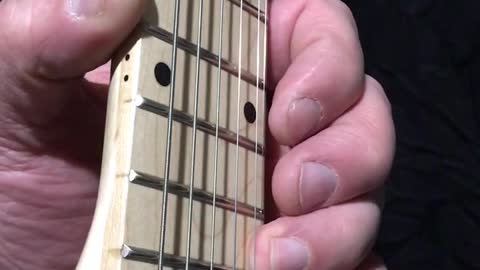
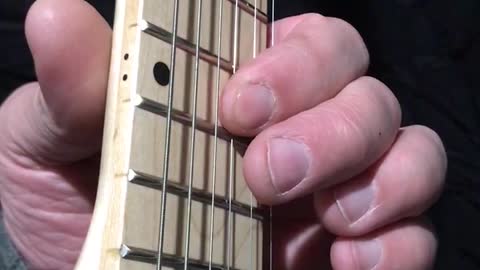
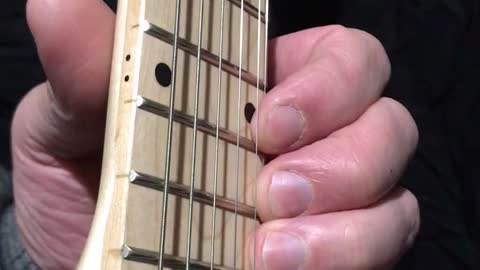
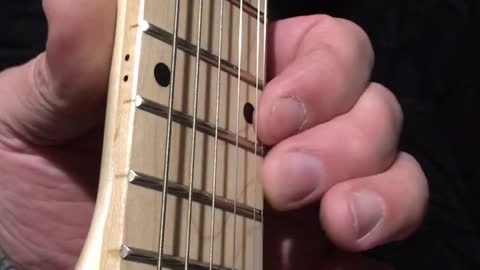
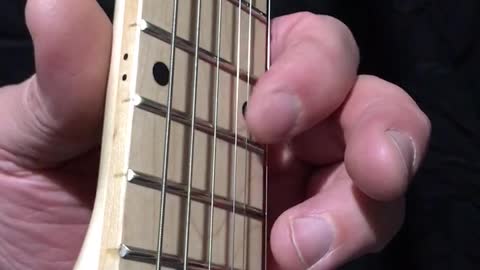
Guitar Rote Exercises - Setting The String Gap On All 4 Fingers
In this exercise, we continue the previous exercise,
which was to set the finger gap on 1 finger.
Now we will practice setting the finger gap on all 4 fingers.
Notice that my pinky finger comes way up? That’s not good, and its something I’m working on improving.
Otherwise the exercise is just more spatial awareness training, and ear training.
85
views
1
comment

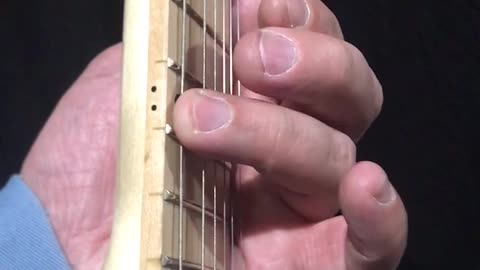
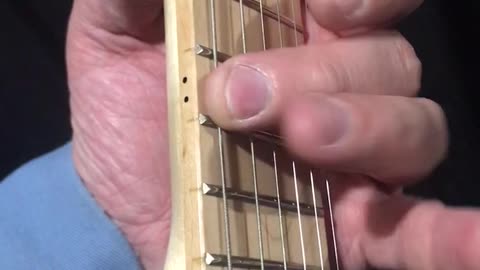
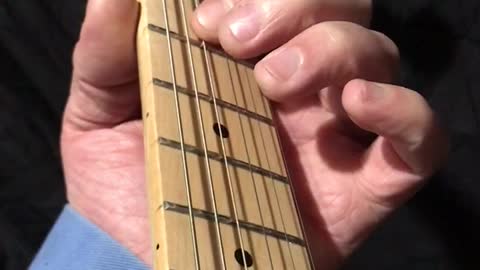
Guitar Rote Exercises - Setting The Gap Between Finger And String
In this exercise, we practice lifting our finger off of the string, to get a very precise gap.
In my opinion, based on nothing at all...
The gap between the finger and string should be about the same as the gap between the string and the fret,
So that the string is situated half way between your fingers full range of travel,
Or that your finger is twice as far from the fingerboard as your string is.
Instead of claiming that this gap is the correct gap, i encourage each of you to experiment for yourself, and find the gap that works best for you.
The point of the exercise ins’t to make a rigid rule about a gap,
but rather just to bring your awareness to the fact that the gap exists, and that you will want to find the gap thats right for you.
Obviously this will depend on your playing style, strength, and skill, in particular being able to do hammer-on’s
This exercise will help with spatial awareness, that is, the knowing of exactly where your fingers are in relation to other things.
Practice this exercise with all fingers, everywhere, on all strings, and at all frets.
22
views
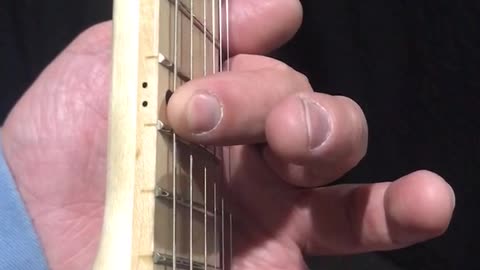
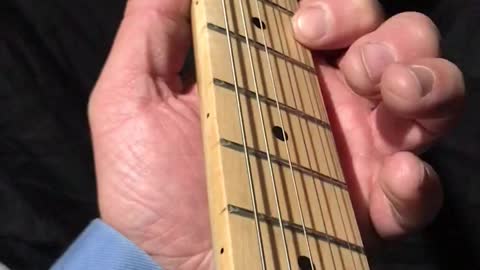
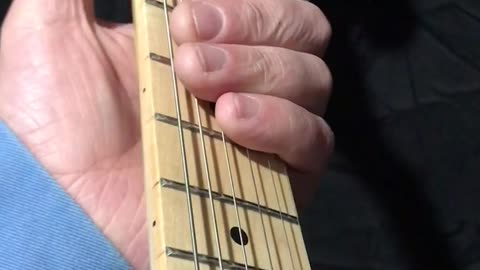
Guitar Rote Exercise - Using 4 Fingers To Play 1 Note - 4 Half Steps
In this exercise, we continue on from the previous exercise,
which was to use 4 fingers to fret 1 note,
Now in this exercise, we do the same thing,
Which is to use 4 fingers to fret 1 note,
And then we move down in 1 Half Step increments, and repeat the exercise.
This is just a rote exercise, meant to strengthen, condition, calibrate, callous all of your fingers evenly,
So that later, when you want to make chords or play melodies, all of your fingers will be up to the task, and you won’t be struggling as much with the basics.
29
views
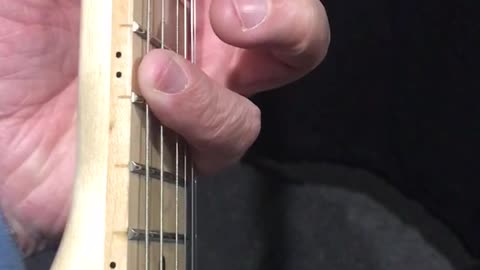
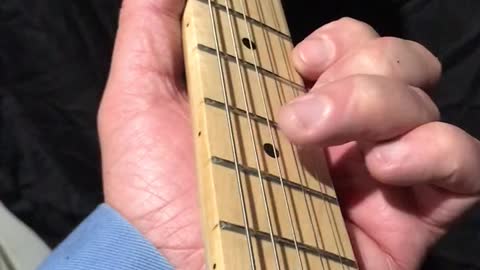
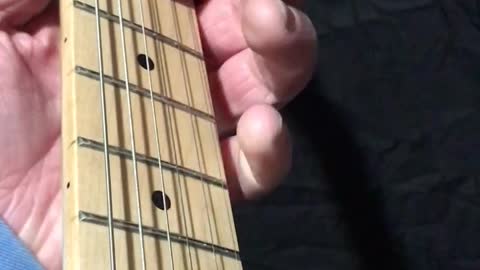
Guitar Theory - Using 4 Fingers To Play 1 Note
In this exercise, we anchor the thumb near the 9th fret dot marker,
And then fret the E string at the 12th fret, with each of your 4 fingers, one after another, back and forth until it is smooth and legato.
This exercise is meant to do two things,
1) break the bad mental habit of thinking that you need to use a certain finger to make a certain sound.
2) make the good mental habit of thinking you can use any finger to make any sound.
So, after you have mastered this exercise in the position shown, practice the exercise everywhere, on all strings, and all frets.
While you would probably never actually play guitar this way, it does nimble up your fingers so that you can naturally “adjust” on the fly.
Also, if you are a beginner guitar player who needs to develop callouses on your fingertips, this would be a good exercise for that.
Also, if you are a beginner guitar player who needs to practice strengthening and conditioning your finger muscles evenly, this is a good exercise for that.
By playing the exact same note with each finger, your ear can discern the differences on each finger, which you can then work on until each finger sounds the same.
52
views
Beginner Guitar - House Of The Rising Sun - A Minor Pentatonic
In this exercise, we use use the song House of the Rising Sun to practice the A minor pentatonic scale in the 5th hand position.
We start on a high A note, and work our way down the scale and resolve one octave lower on an A note.
This particular exercise is good, because we usually start with a “root” note that is low, and the work our way “up” from there, whereas with this exercise, we start with a high note (that happens to be a root note) and working our way down to a lower root note.
So if we learn to count up from 1 like 123456789101112
This would be learning to count down from 12 like 121110987654321
This exercise covers a range of 12 half-steps or a perfect octave.
98
views
1
comment
Intermediate Guitar - Star Spangled Banner in 4th Hand Position
In this video, i demonstrate one way to play the star spangled banner, mostly in the 4th hand position.
I’ve always loved the song, and so i binge watched YouTube how-to videos, and each one of them had their own way of explaining it,
And none of those lessons “clicked” with me, which was discouraging because i really wanted to master playing this song.
So i just kept noodling around and incorporating all the ideas from all those lessons, and came up with this version.
In this rendition, you’ll notice a lot of extra-curricular clanking and banging around, and thats somewhat intentional.
It turns out, that when you play this song in the 4th hand position, all of the open sting notes just happen to clank and clash in a perfectly imperfect way.
This song could be played in this hand position, more cleanly, and it would sound good,
However, i like the way the mistakes sound, so i not only don’t try to avoid them, i go out of my way to make sure i make them!
I suppose if its on purpose, its no longer a mistake...
Anyway, if you want to replicate the mistakes, its mostly just a matter of “accidentally” hitting 2 strings instead of 1, and the extra string you hit on accident is usually the adjacent open string that sounds lower.
So for example, if you want to hit a note on the A string, then you simply play the note on the A string AND “accidentally” also play the Open E string,
So that nearly every note that is supposed to be played, is “accidentally” accompanied by an open string that is not supposed to be played...
We use this song as a lesson, because its old and in the public domain,
It has that major sound that we want to practice,
It will probably never go out of style,
Its based on an old English Pub drinking song...
Everyone who covers this song, owns it.
Jimi Hendrix version of this song at Woodstock is mind-blowing.
The first time i heard it, i thought it sounded like a guitar falling down a flight of stairs,
But after some research, i discovered that there are many “sounds of war” in the song, such as a machine gun, a bomb dropping, women screaming, an ambulance or air raid siren...
And after you know thats the sounds he was trying to achieve, you can “hear” it yourself.
Have a listen...
https://m.youtube.com/watch?v=MFLy8eGtSYo
Jimi videos disappear fast so heres a search in case video gets taken down
https://m.youtube.com/results?search_query=jimi+woodstock+star+spangled+banner
97
views
Guitar Theory - House Of The Rising Sun Chords
In this exercise, we practice House Of The Rising Sun chords
AA,CC,DD,FF,AA,E7E7
Repeat thru song.
The E7 chord is made by making a normal E major chord, and then lifting the ring finger, or “sus” meaning suspended or lifted finger.
This lowers the E note octave on the D string down 2 half steps to a Minor 7 sound on the Open D string
Other than the E7, which is easy, the rest of the chords are straight forward open chords in the 1st hand position.
For an eagle eye view, and to get a sense of why we do things in the sequence we do them,
If you were to go to any guitar teacher, they may try to show you how to play these kinds of chords on day 1 of your lessons,
before you have even had a chance to figure out how to fret even 1 note, they are trying to make you fret 3 notes!
And what makes it worse is, its the farthest away hand position, so you have to reach, and your shoulder gets tired quick,
Then the frets are spread out farther at that end of the fretboard, making fingering some chords or reaching some notes tricky,
And the first hand position is also where its hardest to fret the strings, because the nut action.
The first hand position is the worst hand position, and yet thats exactly where they start every guitar student.
So these lessons are planned so that you start on the 12th fret, which is where the frets are spaced nicely, your eye can see clearly, the action is easiest, and your shoulder isn’t exhausted after a few minutes practice.
So we start at the 12th hand position and work our way down to the 1st hand position,
and then work our way back up from the 1st hand position back to the 12th hand position.
This song, House of the Rising Sun, is a very important blues standard, perhaps the standard of all standards...
Its so old that nobody knows who wrote it, and its also in the public domain, so you can cover it.
This song is the perfect teaching tool, because you can start very simple, and keep building on this song, re-inventing it every time you play it.
This song is also the doorway to the Minor Pentatonic, which is the doorway to the Blues, and Rock and Roll, and Metal music.
So if you are a student of music, and you are digging deep to find the roots of the music you love, this song is what you have been looking for!
92
views
1
comment
Beginner Guitar - C Major Chord Shape
In this exercise, we practice the C Major chord in the 1st hand position.
C major’s ‘relative’ is A minor.
Both the C major and A minor chord anchor the pointer finger on the B string, 1st fret,
And to change from one chord to the other you just move your middle and ring fingers.
This C shape can be modified to make it more moveable, but its awkward, so guitarists just find another way to make the sound they want to hear.
This C chord is 1 of the 3 critical components to the so-called “3 chord trick” or “3 chord song”,
The other 2 chords being G and D.
Mastering this chord is a milestone in your guitar development, because it indicates that you are able to articulate 3 fingers, and fret 3 notes, at the same time.
Considering that we started these guitar lessons practicing to master playing just 1 note, with just 1 finger...
Soon, after you have mastered the G and D chords, and are able to transition between the GCD chords, you will be ready to try and play songs,
and will be moving from beginner guitar to intermediate guitar.
59
views
Beginner Guitar - A Minor and A Major Chord Shapes
In this exercise, we practice making the A minor chord shape,
which is the same as the E minor chord shape, but everything is moved up one string.
The A Major is made by using the pinky finger to sharpen the note on the B string, which is the 3rd scale degree, up from a minor 3rd, to a major3rd.
It would be unusual to play both the A minor and A major chords in the same song,
But this exercise is good for ear training, and listening to the difference between a minor and major sound, which is usually dictated by whether the 3rd scale degree is minor or major
3 half steps for minor 3rd
4 half steps for major 3rd
45
views
Beginner Guitar - E Major and E Minor Chord Shapes
In this exercise, we practice the E major and E minor chord in the 1st hand position.
Since this guitar is tuned E standard, (EADgbe) the lowest sounding note is E,
and so the lowest sounding chord is also E.
The difference between these two chords is just whether the pointer finger sharpening the highest sounding note, which is the 3rd, from minor3rd to major3rd,
The E major shape, if moved up one string, becomes the A minor shape.
While it would be unusual to play both of these chords in the same song,
This exercise is still good for learning to hear the difference between a minor and major sound, contrasted with each other, like A-B testing.
92
views
Guitar Theory - Minor Pentatonic Scale - House Of The Rising Sun
In this lesson, we continue to use the song House of the Rising Sun to practice the minor pentatonic scale.
In the previous lesson, which was the first verse, we started at the low root note, and worked our way up from there.
In this lesson, which is the second verse, we start at a high root note, and work our way back down from there.
93
views
Guitar Theory - Minor Pentatonic - House Of The Rising Sun
In this exercise, we practice the minor pentatonic scale notes,
By using the song, house of the rising sun.
House of The Rising Sun, is like the standard song of all standard songs.
Its a very old song, that is in the public domain,
And that has been covered by everyone.
I suspect this is because the song is such an excellent teaching tool, that music teachers can’t help but to use it to teach music to their students.
The overall structure of the song, including the minor pentatonic scale, and the 12 bar blues beat/rhythm turnaround,
Makes it so that its approachable for a beginner,
Easy to improve for an intermediate player,
And truly a song you can re-interpret every time you play it.
This is a landmark song for any guitar student, especially anyone following these set of beginner guitar lessons from start to finish.
This could be one of the first 5 songs you learn, and will help unlock so much more music in the future.
66
views
Guitar Theory - Box Shape - Root Notes
In this lesson, we continue on from the previous two lessons, which were,
to build a bar barre, with the pointer finger and/or thumb, as an anchor point,
And then to use the other 3 fingers to explore all reachable notes, following the “1 finger per fret” rule.
In this exercise, we kind of ignore the frets, and just let our hand relax and melt into the string/fret matrix.
Everyones hands are unique in size, and therefore everyones hands will fit differently at the 5th hand position.
As you can see in this video, when my hand is relaxed, my pinky finger cant reach the 8th fret.
While i could theoretically stretch my fingers out to reach the 8th fret, that would require more effort, and we are trying to work toward effortless playing...
So as you practice this box shape up and down the neck, you will find that each hand position feels slightly different than the adjacent hand position,
Ranging from feeling like the frets are too far apart,
to feeling like the frets are too close together.
And somewhere in between those two extremes, there is a sweet spot, where the distance between the frets fits your relaxed finger spread better than anywhere else on the neck.
Find this sweet spot hand position, and just noodle around there for a while.
28
views
Guitar Theory - Box Shape - For Minor And Major Pentatonic And Blues Scales
In this exercise, we continue on from the previous exercise,
which was to practice making a bar barre shape with the thumb and pointer finger across all 6 strings, at the 5th hand position,
To make half of the box shape,
So now we move on, and use the other 3 fingers to reach the other half of the notes.
In this video, there are shown a few shapes and scale degrees,
3 root triangle shape.
F shape (major shape)
Minor 3rd (minor shape)
Perfect 4th and 5th, which can be thought of as minor or blues shapes within the context of this box shape
The A Minor Pentatonic and C Major Pentatonic are relative minor/major of each other, and thus use the same notes, but from different starting points,
Where the Am5 starts on E string 5th fret A note,
And CM5 starts on E string 8th fret C note.
If you follow the “1 finger per fret” rule,
Then your pointer finger will play all the strings at the 5th fret,
And your middle finger will play all the strings at the 6th fret,
And your ring finger will play all the strings on the 7th fret,
And your pinky finger will play all the strings at the 8th fret...
Then your entire hand will have to micro-adjust between each note.
The most difficult note to reach will be with your pinky finger on the 8th fret low E string,
So if you start there, at the most difficult note to reach, and work your way back thru each note, they should get progressively easier to reach.
That note just happens to be a Minor 3rd interval, within the context of this box shape,
So unfortunately its an important note, and you really will need to practice reaching for it with your pinky finger, which is your weakest finger, at its most extreme reach...
But the good news is, this is the most difficult of all the normal maneuvers, so if you can master this one maneuver, then you know you can master any maneuver on guitar.
33
views
Guitar Theory - Using Thumb And Pointer Finger To Make A Bar Barre - 5 Half Steps
In this exercise, we use the thumb and pointer finger to make a bar or barre across all of the strings,
This exercise is shown at the 5th hand position, which is when your fret hand pointer finger is just behind the 5th fret, closer to the nut,
However this exercise should be practiced on all frets. (Hand positions)
This moveable bar barre shape works in all hand positions,
and your hand position will dictate which key you are in.
because i am tuned standard E (EADgbe),
and my hand is in the 5th position,
that means the notes played on both outside strings (E-e) will both be A notes,
which are two full octaves apart, or 24 half steps.
These outside strings provide you with a low-note and high-note that are always the same note, thus always sound good together, and are always in key, no matter what.
Up one string from the Low E is the A string,
which, because i am already in the 5th hand position, means i am in the key of A, and so this open A string can be played open or fretted and will sound good both ways.
Because the A string is somewhat tricky to fret with your thumb and fingers like this, its ok to just not bother too much if you get it or not, because it will sound good either way.
If you accidentally don’t fret the A string, it will sound as an A note.
If you accidentally do fret the A string, it will sound as a Perfect 4th note.
There is a video on youtube “Why you suck at guitar - Barre Chords” which i recommend you take a detour and watch, as he does a pretty good job of explaining how to make these bar barre shapes, which looks easy but can be very frustrating in practice
https://www.youtube.com/watch?v=DrlF4Tc8qC8
This particular bar barre shape exercise will become the foundation on which to build more later...
In particular, all of these notes make up every-other-note in the 2 note per string minor pentatonic scale.
This shape is the backbone for the A minor pentatonic scale,
And more importantly is the backbone for the A minor pentatonic box shape,
And also the A blues scale.
If we think of a box shape as having 4 sides, then this bar shape alone is 1 whole side of the box,
A huge square box which is 24 half steps on each side, (given a 24 fret guitar)
And from this bar barre, or side of the box, we can use it as an anchor or reference point, to know where all of the notes are, that are reachable from the bar anchor.
Every scale degree 1-12: is reachable from this shape,
So its a good exercise to work out in your mind where each scale degree is, by number 1-12
Later, we will do exercises that only use the notes of a certain scale (minor pentatonic and blues)
And since you have already practiced counting half steps, finding and naming these scale degrees will be easier
This box shape is one of the things that made Jimi Hendrix great, in my opinion,
Hendrix is often thought of as a guitarist, but he usually sang lead vocals too, and merely accompanied himself on guitar, while the rest of the band followed his lead.
So if you binge watch Jimi Hendrix videos, watch very carefully every detail of how he moves, from head to toe.
And notice that often when he sings, he has his hand locked in this box shape,
And when he is not singing, he moves his hand position a lot more.
So, he can alternate between singing lead, and playing lead guitar,
And when he is singing lead, his hand is locked into a shape that insures he is in the right key.
Another even better example is Kris Kristofferson who literally played an entire concert, solo, just him and his acoustic guitar, standing at a microphone all night...
And the entire night Kris only played 2 chords
An E chord and A chord.
For every song on the setlist.
And while i am always impressed by musicians who shred on guitar,
Kris taught me to appreciate minimalism, and how you can write a lot of songs without getting too hung up on chord progressions and music theory
So if this exercise, done in the 5th hand position, is in the key of A minor pentatonic / A blues
This exercise, if done with all open strings, would then be in the key if E minor pentatonic / E minor blues.
Or if this exercise was done at the 12th hand position, it would also be in the key of E minor pentatonic / E minor blues
From an eagle eye view of the lesson plan, this exercise is important because is signifies a milestone in guitar development,
Specifically, that you are able to fret notes with your thumb and all fingers,
That you are able to move from note to note, and string to string, without getting lost,
That you have learned the easy half of the box shape,
And that once you learn the other half of the box shape, you will then know 2 different scales, which are the minor pentatonic, and blues scales,
You will have a foundation on which to build more bar barre chord shapes,
And perhaps most importantly, you will soon be able to forget about all of these lessons in counting half steps and naming scale degrees,
and just play the guitar, without thinking about it.
Because you will be preoccupied singing,
Or working on songwriting,
Because at the end of the day, nobody is going to pay you to practice scales,
But if you are lucky, and work hard, one day someone might give you a penny or nickel to sing a song, and accompany yourself on guitar.
FREEBIRD!!!
https://www.youtube.com/watch?v=1aEVxyMqXBo
301
views
Guitar Theory - Using Middle And Pinky Fingers - 2 Half Steps - 5 Half Steps
in this exercise, we use our middle and pinky fingers to fret 2 notes on 1 string,
2 half-steps, or 1 whole step apart.
Then we move to the adjacent string and repeat, which is
5 half steps, or a perfect 4th.
This exercise is important because this is an important root level maneuver when playing a major scale starting on the low E string with a root1-M2 interval on the E string, and then the P4-P5 interval on the A string.
Its also a good exercise for practicing using your middle and pinky fingers for anchor/reference/pivot points,
Which can be used as a foundation on which to build more later...
31
views
Guitar Theory - Using Adjacent Fingers To Fret Adjacent Notes On One String, And Adjacent Strings
In this exercise, we use different combinations of adjacent fingers,
to fret 2 adjacent notes on one string,
And then moving to the adjacent string and repeating.
The previous exercise used the fingers 1-2,
So in this exercise we will be using
fingers 2-3 (middle and ring)
fingers 3-4 (ring and pinky)
This exercise combines two exercises we did earlier, which are
1 Half-step using adjacent fingers on one string.
5 half-steps by jumping to adjacent string at the same fret.
This exercise will help you build spatial awareness in 2 different axis
Axis 1 is the half step on a string,
Axis 2 is the perfect 4th between the strings
Bonus points for working out what happens to the interval between the G and B strings,
and what you have to do to correct the interval to match your intended pattern.
Hint: you have to sharpen the note on the B string
41
views
Guitar Theory - Using Pointer and Ring Fingers To Fret 2 Notes Per String - 2 Half-Steps
In this exercise, we use the pointer and ring fingers to fret 2 notes on 1 string,
2 half steps apart, or a whole note...
Before moving on to the next string and repeating.
This exercise helps build spatial awareness not only physically in your hands,
But also aurally, in your ears.
If we look at this lesson from an eagle eye view, it is composed of two exercises that we have already done earlier, which are,
Using Pointer and Ring fingers to do a whole step interval on one string.
Using pointer finger to do a perfect 4th interval between two strings.
112
views
Guitar Theory - Using 2 Adjacent Fingers To Fret 2 Adjacent Notes Per String
In this exercise, we use 2 adjacent fingers to fret 2 adjacent notes on 1 string,
And then moving to the adjacent string and repeating.
This exercise helps develop your fingers sense of where they are on the fingerboard,
Or what is called ‘spacial awareness’, which is a very important concept that we will continue to work on.
Spacial awareness allows us to expand ourselves beyond our physical body, to at least an imaginary bubble the size of your wingspan and reach in every direction.
Spacial awareness helps us dance,
And dance helps us feel the music,
And feeling the music helps make better music...
91
views
Guitar Theory - Using 4 Fingers To Fret 4 Adjacent Notes On One String - 3 Half-Steps
In this exercise, we use all 4 fingers to fret 4 adjacent notes on 1 string, at the 12th fret
Before moving to the adjacent string...
This exercise is a good intermediate point in your guitar lessons.
From a beginners view, if we can do this exercise LEGATO, meaning even and smooth, from beginning to end,
That means our picking hand is able to pick out 4 notes on a string before moving on to another string.
That means each of our fingers has been trained, and exercised, and abused, and blistered, and calloused, strengthened, and grip calibrated, and toned down, and brought under control, and open, and loose, and relaxed, and working effortlessly, and comfortably, and...
From the moment you master this relatively simple exercise, you will be ready to start taking away notes from it, stripping it down, analyzing the notes that we use, and don’t use...
There is not a single scale that is not contained within the outline of these notes, in any hand position.
So from this point forward, as an intermediate student, your job is to chip away at this exercise, to play every possible combination of notes, from any starting note...
To learn all of the scales
starting with the chromatic. “Chrome” like a mirror, reflects all colors.
So a chromatic scale is all notes, usually thought of as 12 half-steps within an octave,
But in truth the chromatic scale is like a number line 1,2,3,4,5,6,7,8,9,10,11,12
But then also all the infinite space between 1 and 2, etc.
Think slide guitar...
Next learn where the Root, Perfect 4th, Perfect 5th, Perfect Octave 8va are.
These anchor points will be used more often than others during normal guitar playing, and will give you the foundational reference point - anchors you can use to build more upon later.
Next, learn the minor and major pentatonic scales,
And use these pentatonic scales as a frame work upon which to learn the natural minor and major scales...
Next, practice each of these scales, but use each different scale degree note as the root note. This is mode.
95
views
Guitar Theory - Using 3 Fingers To Fret 3 Notes Per String
In this exercise, we use 3 fingers to fret 3 adjacent notes on a single string.
From a music theory view, this combination of notes would only work in the blues scale between the perfect 4th, blue note, perfect 5 interval...
Which to me, is all the reason we need to practice it...
But beyond music theory, this maneuver is very helpful from a “noodling” view,
in that you kind of dip your toe in the water, but you don’t have to commit to anything
You can use this maneuver as a passing-note or pick-up note.
It lets you keep on listening to yourself, while you try to find the note you actually wanted to hear
Music purists would say that a good musician should play the right note, right on time, without any extra noodling or fill.
Even Jimi Hendrix was unpopular with some other musicians he jammed with, because he was noodling around too much...
But then there are those of us who never heard the noodling as mistakes or imperfections, and just considered it part of the Jimi Hendrix Experience
This maneuver is also an introduction to “the 3-finger thing” as some musicians call it.
With 3 fingers on one string, you can get different kinds of control on bends and tone.
103
views
Guitar Theory - Using Pointer And Pinky Fingers Across 3 Half-Steps
In this exercise, we use the pointer and pinky finger across 3 half steps.
Usually you would learn that 3 half-steps is a minor 3rd,
And usually you would learn that, within the context of the Minor Pentatonic Scale.
These being your first 2 notes: root1 - m3
However, 3 half-step maneuvers are not limited to the role of minor 3rd,
And therefore, the rote exercises we do today, will help us make these maneuvers more easily when we have to do them in other contexts.
81
views