
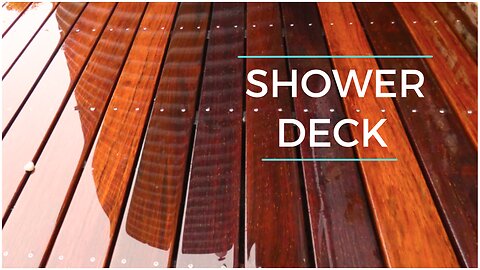
How To Build A Deck On The Ground For An Outdoor Shower || Ground Level Deck Ideas
In this videos I show you how to build a deck on the ground for an outdoor shower. I updated my shower deck platform in this informative video and I hope you take away some new ground level deck ideas.
Watch as I guide you through the entire process, including all the essential setup tips and mathematical calculations needed to construct any unique timber deck
Music
Birdseye Blues - Chris Haugen
Natural Light - Chris Haugen
TIME CODE
0:00 - Intro
0:50 - Demolish the old deck platform
1:45 - Drain guide
2:02- Deck frame installation
3:40 - Decking board installation
4:17 - Decking board set out
5:45 - Cut and fill in decking boards
5:57 - Wedge, pre drill and screw decking boards
7:08 - Apply decking oil
Check out our blog post below
https://greysand.com.au
▼ ▽ LINKS & RESOURCES
Website
https://greysand.com.au
▶ Found this video helpful? Make sure to click the Like 👍 button if you want to see more videos like this.
▶ Click the Subscribe button to get more videos like this and click the bell 🔔 notification icon to be alerted of any new videos I release.
Amazon affiliate links
Tape Measure - https://amzn.to/3pEMvbZDril Bit - https://amzn.to/3eAAC0w
Combination Square - https://amzn.to/3zcJ9Ac
Nail Belt - https://amzn.to/3mK1MXr
Ear Muffs - https://amzn.to/3Htqp2tSafety
Glasses - https://amzn.to/3ze9rlJ
Hammer - https://amzn.to/32TV8qw
Battery Drill Tool Kit - https://amzn.to/3sQllkv
Battery Circular Saw - https://amzn.to/3zbdgYK
Microphone - https://amzn.to/3wnlAVV
Disclaimer:
These videos are intended to provide information and inspiration only. If you choose to imitate, duplicate or copy anything you may have observed in these videos, you do so at your own risk. Greysand does not take any responsibility for any action taken as a result of the information or advice on this YouTube channel and shall not have any liability in respect of any injury or damage that may result. To view full disclaimer, click here: https://greysand.com.au/disclaimer/
4
views
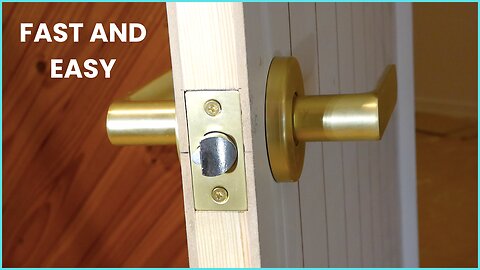
How To Install An Interior Door Frame, Door And Lock in Under 9 Minutes
In this videoI show and explain how to install a door frame, hang a door and install a basic interior lock. The entire process is shown in easy to follow step by step videos with detailed explanations.
I hope you enjoy the video
TIME CODE
0:00 - Intro
0:35 - Rip down door frame
1:26 - Rebate and cut door frame to size
2:04 - Rebate hinges into door frame
3:06 - Install door frame
4:31 - Transfer hinges heights from door frame to door
5:17 - Install hinges to door
6:05 - Install door
6:45 - Install lock
Check out our blog post below
https://greysand.com.au
▼ ▽ LINKS & RESOURCES
Website
https://greysand.com.au
Amazon affiliate links
Tape Measure - https://amzn.to/3pEMvbZDril Bit - https://amzn.to/3eAAC0w
Combination Square - https://amzn.to/3zcJ9Ac
Nail Belt - https://amzn.to/3mK1MXr
Ear Muffs - https://amzn.to/3Htqp2tSafety
Glasses - https://amzn.to/3ze9rlJ
Hammer - https://amzn.to/32TV8qw
Battery Drill Tool Kit - https://amzn.to/3sQllkv
Battery Circular Saw - https://amzn.to/3zbdgYK
Microphone - https://amzn.to/3wnlAVV
Disclaimer:
These videos are intended to provide information and inspiration only. If you choose to imitate, duplicate or copy anything you may have observed in these videos, you do so at your own risk. Greysand does not take any responsibility for any action taken as a result of the information or advice on this YouTube channel and shall not have any liability in respect of any injury or damage that may result. To view full disclaimer, click here: https://greysand.com.au/disclaimer/
8
views
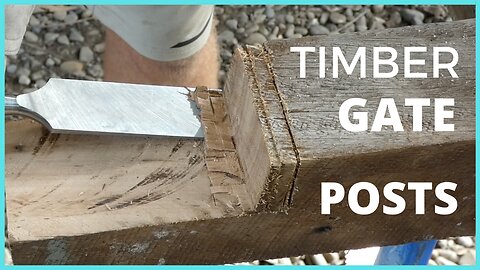
How To Install Recycled Timber Posts For A Gate | No Music | No Talking
In this video I show how I installed 2 recycled hardwood timber posts for a gate to my vegetable garden.
https://greysand.com.au/
▼ ▽ LINKS & RESOURCES
Amazon affiliate links
Tape Measure - https://amzn.to/3pEMvbZDril Bit - https://amzn.to/3eAAC0w
Combination Square - https://amzn.to/3zcJ9Ac
Nail Belt - https://amzn.to/3mK1MXr
Ear Muffs - https://amzn.to/3Htqp2tSafety
Glasses - https://amzn.to/3ze9rlJ
Hammer - https://amzn.to/32TV8qw
Battery Drill Tool Kit - https://amzn.to/3sQllkv
Battery Circular Saw - https://amzn.to/3zbdgYK
Microphone - https://amzn.to/3wnlAVV
Disclaimer:
These videos are intended to provide information and inspiration only. If you choose to imitate, duplicate or copy anything you may have observed in these videos, you do so at your own risk. Greysand does not take any responsibility for any action taken as a result of the information or advice on this YouTube channel and shall not have any liability in respect of any injury or damage that may result. To view full disclaimer, click here: https://greysand.com.au/disclaimer/
9
views
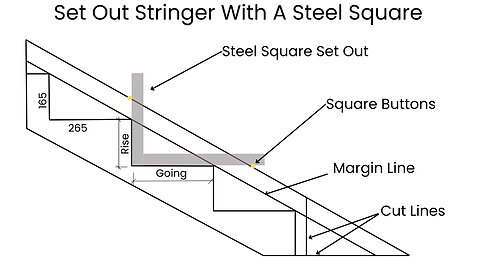
How To Build Stairs For A Deck || How To Build Stair Stringers || DIY Tips And Maths Formulas
In this video ill show you you how to build outdoors stairs. I'll show you how to calculate, mark out then build and install a simple flight of timber stairs.
I'll provide all the mathematical formulas with diagrams and explanations, then walk you through each stage of the set out and building process.
Timecode
0:00 - Intro
0:41- Calculations and drawings
3:38 - Mark out the stringer
6:34- Rebate the steps into the stringer
8:02 - Oil timber
8:15 - Assemble stair members together
8:44 - Attach threaded rod
9:27 - Install stairs into position
▼ ▽ LINKS & RESOURCES
Website
https://greysand.com.au/
Tape Measure - https://amzn.to/3pEMvbZDril Bit - https://amzn.to/3eAAC0w
Combination Square - https://amzn.to/3zcJ9Ac
Nail Belt - https://amzn.to/3mK1MXr
Ear Muffs - https://amzn.to/3Htqp2tSafety
Glasses - https://amzn.to/3ze9rlJ
Hammer - https://amzn.to/32TV8qw
Battery Drill Tool Kit - https://amzn.to/3sQllkv
Battery Circular Saw - https://amzn.to/3zbdgYK
Microphone - https://amzn.to/3wnlAVV
Disclaimer:
These videos are intended to provide information and inspiration only. If you choose to imitate, duplicate or copy anything you may have observed in these videos, you do so at your own risk. Greysand does not take any responsibility for any action taken as a result of the information or advice on this YouTube channel and shall not have any liability in respect of any injury or damage that may result. To view full disclaimer, click here: https://greysand.com.au/disclaimer/
40
views

How To Install A Large Surface Sliding Top Hung Barn Door | No bolts
In this video I walk you through the step by step process on how to install a large sliding barn door with a solid hardwood mounting board.
A large sliding barn door is a great way to separate 2 spaces in a building without losing any floor space.
Stay tuned for more step-by-step instructions and valuable insights into creating DIY projects that combine simplicity, elegance, and effectiveness. Subscribe for more DIY projects and don't forget to hit that notification bell to never miss an update!
Timecode
0:00 - Intro
0:45 - Find the centre line of the door track
1:05 - Mark the bottom of mounting board height onto wall
1:59 - Install the mounting board onto the wall
2:24 - Install the door track to the mounting board
2:42 - Install the rollers onto the door
3:10 - Attempt to straighten the door
3:44 - Cut rebate into the bottom of the door
4:25 - Install door guide onto floor
5:11 - Install door handle
5:40 - Conclusion
▼ ▽ LINKS & RESOURCES
blog post -
Tape Measure - https://amzn.to/3pEMvbZDril Bit - https://amzn.to/3eAAC0w
Combination Square - https://amzn.to/3zcJ9Ac
Nail Belt - https://amzn.to/3mK1MXr
Ear Muffs - https://amzn.to/3Htqp2tSafety
Glasses - https://amzn.to/3ze9rlJ
Hammer - https://amzn.to/32TV8qw
Battery Circular Saw - https://amzn.to/3zbdgYK
Microphone - https://amzn.to/3wnlAVV
▶ Found this video helpful? Make sure to click the Like 👍 button if you want to see more videos like this.
▶ Click the Subscribe button to get more videos like this and click the bell 🔔 notification icon to be alerted of any new videos I release.
▶ CONNECT WITH ME
www.greysand.com.au
Instagram: greysand_zander
Disclaimer:
These videos are intended to provide information and inspiration only. If you choose to imitate, duplicate or copy anything you may have observed in these videos, you do so at your own risk. Greysand does not take any responsibility for any action taken as a result of the information or advice on this YouTube channel and shall not have any liability in respect of any injury or damage that may result. To view full disclaimer, click here: https://greysand.com.au/disclaimer/
15
views
1
comment

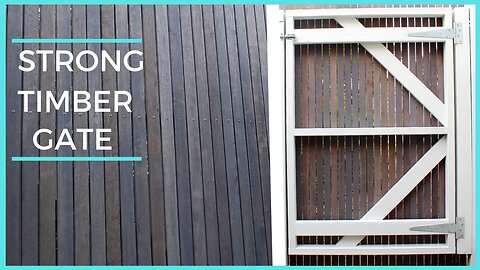
How To Build A Simple Wooden Gate || Clean Design || No Diagonal Bracing
In this video I'll guide you through the process of constructing and installing a clean and straightforward garden gate. We believe this design is one of the simplest and most efficient you'll come across.
In this project, we've deliberately avoided using any intrusive diagonal bracing commonly seen in garden gate designs. Instead, we've employed 90-degree metal angles. The result? A gate that offers an open and uncluttered appearance, perfectly suited for our 10mm aviary wire, ensuring the security of our beloved vegetable garden.
Stay tuned for step-by-step instructions and valuable insights into creating a garden gate that combines simplicity, elegance, and effectiveness. Subscribe for more DIY projects and don't forget to hit that notification bell to never miss an update!
Timecode
0:00 - Intro
1:05- Cut timber framing to size
1:23 - Assemble frame
1:58 - Metal angles
2:24 - Paint the frame
3:03 - Attach aviary wire
3:36 - Attach hinges to gate
3:54 - Install gate
4:25 - Install latch
4:42 - Conclusion
▼ ▽ LINKS & RESOURCES
Tape Measure - https://amzn.to/3pEMvbZDril Bit - https://amzn.to/3eAAC0w
Combination Square - https://amzn.to/3zcJ9Ac
Nail Belt - https://amzn.to/3mK1MXr
Ear Muffs - https://amzn.to/3Htqp2tSafety
Glasses - https://amzn.to/3ze9rlJ
Hammer - https://amzn.to/32TV8qw
Battery Circular Saw - https://amzn.to/3zbdgYK
Microphone - https://amzn.to/3wnlAVV
▶ Found this video helpful? Make sure to click the Like 👍 button if you want to see more videos like this.
▶ Click the Subscribe button to get more videos like this and click the bell 🔔 notification icon to be alerted of any new videos I release.
▶ CONNECT WITH ME
www.greysand.com.au
Instagram: greysand_zander
Disclaimer:
These videos are intended to provide information and inspiration only. If you choose to imitate, duplicate or copy anything you may have observed in these videos, you do so at your own risk. Greysand does not take any responsibility for any action taken as a result of the information or advice on this YouTube channel and shall not have any liability in respect of any injury or damage that may result. To view full disclaimer, click here: https://greysand.com.au/disclaimer/
32
views
1
comment
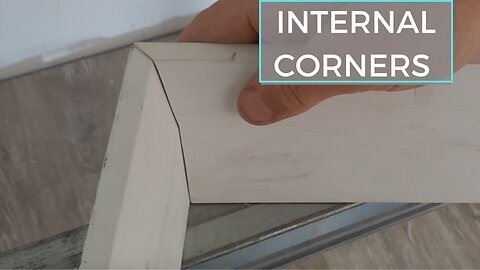
Two Techniques For Baseboard / Skirting Internal Corners
Not sure the best technique to install baseboard/skirting in internal corners?
In this video I show show two easy to follow techniques on how to cut and install baseboard / skirting internal corners.
Disclaimer:
These videos are intended to provide information and inspiration only. If you choose to imitate, duplicate or copy anything you may have observed in these videos, you do so at your own risk. Greysand does not take any responsibility for any action taken as a result of the information or advice on this YouTube channel and shall not have any liability in respect of any injury or damage that may result. To view full disclaimer, click here: https://greysand.com.au/disclaimer/
10
views
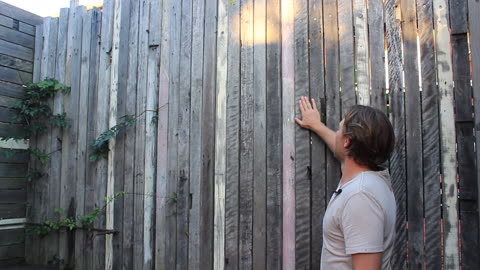
How To Build A Privacy Fence With A Wooden Gate
In this video I show you How To Build A Strong Wooden Fence Gate as a fun DIY project. I created a this hidden gate as a private access to the side of my property. This video is a complete walk through on how to build a gate In a fence. The design is for the gate to be blended into the hardwood screen. If you are interested in how to build a timber gate that looks great then this is the video for you.
The gate blends into the screen and it's not possible to see there is an entry from the front of the property. I finished the timber with a Cabot's decking oil stain that finishes the timber a Grey/Brown faded timber colour. In the video I walk through all the steps from start to finish to build this gate and screen.
Subscribe to the channel for more creative projects!
http://www.greysand.com.au/
Music by Dekobe https://soundcloud.com/dekobe
Items used in this video:
Cabots exterior stain oil - https://cabots.com.au/product/cabots-deck-exterior-stain-oil-based/
Tape Measure - https://amzn.to/3pEMvbZDril Bit - https://amzn.to/3eAAC0w
Combination Square - https://amzn.to/3zcJ9Ac
Nail Belt - https://amzn.to/3mK1MXr
Ear Muffs - https://amzn.to/3Htqp2tSafety
Glasses - https://amzn.to/3ze9rlJ
Hammer - https://amzn.to/32TV8qw
Battery Drill Tool Kit - https://amzn.to/3sQllkv
Battery Circular Saw - https://amzn.to/3zbdgYK
Mitre Saw - https://amzn.to/3eF8Lw5
Wheel Barrow- https://amzn.to/3pCDBMd
Concrete finisher - https://amzn.to/3EJgmpy
Microphone - https://amzn.to/3wnlAVV
To skip ahead to certain task check out the time stamps below.
Timecodes
0:00 - Intro
0:30 - Digg Holes
2:10 - Temporary Brace Post
3:10 - String line posts
4:28 - Pour concrete
5:00 - Lay crushed granite
5:30 - Dress reclaimed hardwood
6:46 - Build gate
8:11 - Paint gate
8:25 - Attach hinges to gate
8:44 - Paint posts
9:05 - Install gate
10:09 - Stain the screening
10:55 - Cut and pre-drill
11:18 - Install screening onto gate
12:00 - Screw off remaining screening
13:00 - Conclusion
Disclaimer:
These videos are intended to provide information and inspiration only. If you choose to imitate, duplicate or copy anything you may have observed in these videos, you do so at your own risk. Greysand does not take any responsibility for any action taken as a result of the information or advice on this YouTube channel and shall not have any liability in respect of any injury or damage that may result. To view full disclaimer, click here: https://greysand.com.au/disclaimer/
59
views
How I Installed My Rustic Outdoor Bathroom. All Ideas, Pro and Cons
In this video I'll give you my outdoor bathroom ideas and we'll explore the pros, cons, and features of our rustic outdoor bathroom.
Allow me to take you on a tour of a real outdoor bath area made from many up-cycled materials. Are you considering adding an outdoor bathroom to your home?
I will walk you through the benefits of having an outdoor bathroom and also share some personal experiences, such as taking an icy cold shower in the winter while looking at a sunrise or sunset, or letting our kids play in the garden while they shower.
You'll learn about the pros of keeping water out of the indoor bathroom, feeling better and more refreshed after an outdoor shower or bath, and being able to make a big mess without much cleaning needed. You'll also see how easy it is to adapt an outdoor bath into an outdoor ice plunge by adding some ice to the water.
Of course, there are also some cons to consider, such as the time and money required to create the space and maintain the area.
We'll take you on a tour of a real outdoor bath area, showcasing some of the features and design elements that make it a relaxing and functional space. From the timber platform to the garden rocks to the hot and cold water options, you'll see firsthand how an outdoor bathroom can be a great addition to any home.
If you're curious about outdoor bathroom ideas, or considering adding one to your own home, this video is a must-watch. So sit back, relax, and let me show you how to create your own outdoor oasis!
Music - Gurty Beats - "RJGURT2" https://soundcloud.com/gurtybeats/rjgurt2
Time code
0:00 - Intro
0:46 - Exciting new feature
1:08 - Walk though out door bath and shower area
2:00 - Up-cycle old bathtub
2:20 - Plumbing description
2:44 - Cold plunge adaption
3:10 - Reveal the new feature
3:40 - Conclusion
Website
https://greysand.com.au
Disclaimer:
These videos are intended to provide information and inspiration only. If you choose to imitate, duplicate or copy anything you may have observed in these videos, you do so at your own risk. Greysand does not take any responsibility for any action taken as a result of the information or advice on this YouTube channel and shall not have any liability in respect of any injury or damage that may result. To view full disclaimer, click here: https://greysand.com.au/disclaimer/
26
views
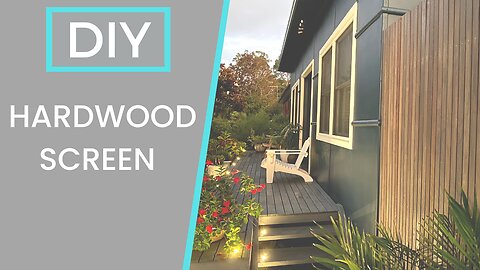
How to Build Vertical Timber Screen
In this video we go through a step by step guide on how to build your own vertical hardwood timber privacy screen that is attached to the side of a house.
All the steps are included to help you follow along and learn some helpful DIY carpentry and building skills.
Timecodes
0:00 - Intro
2:10 - Bolt Timber post To Wall
3:37 - Temporary Brace Post
4:14 - Concrete Timber Post Into Ground
5:10 - Finish Timber Framing
5:30 - Paint Timber Frame White
5:40 - Cut Timber Screening Boards
6:30 - Pre Drill Timber Screening Boards
7:10 - Scribe the First Screening Board to the House
8:30 - Screw the End Screening Board On Parallel
9:10 - Set Out with Math
9:53 - Screw Every 5th Screening Board into position
10:30 - Install All Remaining Timber Screening Boards
12:50 - Plane the End Boards to Fit
13:40 - Screw Final Timber Screening Board into Position
Check out the full blog post below!
https://greysand.com.au/how-to-build-vertical-timber-screen/
I hope you have enjoyed the video. I have added a list of helpful tools used for carpentry projects below. Please note that these are affiliate links.
******Affiliate Links*****
Tape Measure - https://amzn.to/3pEMvbZ
Dril Bit - https://amzn.to/3eAAC0w
Combination Square - https://amzn.to/3zcJ9Ac
Nail Belt - https://amzn.to/3mK1MXr
Ear Muffs - https://amzn.to/3Htqp2t
Safety Glasses - https://amzn.to/3ze9rlJ
Hammer - https://amzn.to/32TV8qw
Battery Drill Tool Kit - https://amzn.to/3sQllkv
Battery Circular Saw - https://amzn.to/3zbdgYK
Planner - https://amzn.to/3JyGIN5
Mitre Saw - https://amzn.to/3eF8Lw5
Chisel Kit - https://amzn.to/3FIMTvQ
Jig Saw - https://amzn.to/3zec7jb
Wheel Barrow - https://amzn.to/3pCDBMd
Small Step ladder - https://amzn.to/3Ho3tBI
Disclaimer:
These videos are intended to provide information and inspiration only. If you choose to imitate, duplicate or copy anything you may have observed in these videos, you do so at your own risk. Greysand does not take any responsibility for any action taken as a result of the information or advice on this YouTube channel and shall not have any liability in respect of any injury or damage that may result. To view full disclaimer, click here: https://greysand.com.au/disclaimer/
15
views
How to install an interior door for beginners
In this video I show a step by step guide on how to install an interior door from start to finish. This is by far easiest method to install doors.
I show you a technique using a story rod that will easily transfer the hinge positions from the door frame, to the door edge. There is no need to be moving the door in and out of position when you use this method.
I hope you have enjoyed the video. I have added a list of helpful tools used for carpentry projects below. Please note that these are affiliate links and not the exact tools I used for the video.
******Affiliate Links*****
Slip on Work Boots - https://amzn.to/3q6apxn
Laser Level - https://amzn.to/3r9mfX4
Tape Measure - https://amzn.to/3pEMvbZ
Dril Bit - https://amzn.to/3eAAC0w
Combination Square - https://amzn.to/3zcJ9Ac
Nail Belt - https://amzn.to/3mK1MXr
Ear Muffs - https://amzn.to/3Htqp2t
Safety Glasses - https://amzn.to/3ze9rlJ
Hammer - https://amzn.to/32TV8qw
Battery Drill Tool Kit - https://amzn.to/3sQllkv
Battery Circular Saw - https://amzn.to/3zbdgYK
Mitre Saw - https://amzn.to/3eF8Lw5
Clamps - https://amzn.to/3JVnscL
level - https://amzn.to/3fdgQbz
Chisel Kit - https://amzn.to/3FIMTvQ
Hole saw door lock kit - https://amzn.to/33jKtoV
Small Step ladder - https://amzn.to/3Ho3tBI
10
views

How To Build Strong Timber Floating Shelves
In this video I show how to build strong timber floating shelves to enhance a living area. This DIY Floatng Shelves/ Home Renovation Project is interesting, fun and makes a big impact to any room in the house.
The video includes all the steps on how to build floating shelves and transform a space in your home. I enjoyed making the shelves and creating the video for you to follow along with.
The shelves are really strong and can hold my body weight - approximately 70 kg or 154 pounds.
You can follow along with and do this in your home also.
Check out the detailed blog post in the link below
https://greysand.com.au/how-to-build-floating-shelves/
It's a fun DIY project that can be a fantastic learning experience. If you want to skip ahead to particular parts of the project check out the time codes below.
Timecode
0:00 - Intro
0:57 - Material list
1:48 - Mark the timber frame locations onto the wall
2:15 - Mark the floating shelves locations onto the wall
2:31 - Cut the timber shelving material to the correct length
3:01 - Mark out the timber dowel positions and drill
4:05 - Rip the timber to the correct width
4:44 - Install the dowel into the shelving
5:05 - Sand the floating shelving
5:36 - Pre drill stud locations into timber shelving
6:00 - Screw the first section of the floating shelving to the wall
6:30 - Install the second section of shelving
7:21 - Plaster patching
7:50 - Sand the plaster and shelves
8:07 - Caulking the intersection between the floating shelve and the wall
8:22 - Paint the primer/under coat on the shelves and plaster patches
8:40 - Paint the walls matching the same colour as the interior of the house
8:50 - Finish the floating shelves with 2 coats of semi-gloss acrylic paint
9:23 - Conclusion
I Hope you have enjoyed the video. I have added a list of helpful tools used for carpentry projects below. Please note that these are affiliate links.
******Affiliate Links*****
Tape Measure - https://amzn.to/3pEMvbZ
Dril Bit - https://amzn.to/3eAAC0w
Combination Square - https://amzn.to/3zcJ9Ac
Nail Belt - https://amzn.to/3mK1MXr
Ear Muffs - https://amzn.to/3Htqp2t
Safety Glasses - https://amzn.to/3ze9rlJ
Hammer - https://amzn.to/32TV8qw
Battery Drill Tool Kit - https://amzn.to/3sQllkv
Battery Circular Saw - https://amzn.to/3zbdgYK
Caulking Gun - https://amzn.to/3sjnDXI
Mitre Saw - https://amzn.to/3eF8Lw5
Small Step ladder - https://amzn.to/3Ho3tBI
Painting tools
******Affiliate Links*****
Paint Brushes - https://amzn.to/3fdAILR
Paint Roller - https://amzn.to/3K6KJIT
10 in 1 painters tool - https://amzn.to/33ud37r
Paint Mixer - https://amzn.to/31PJCw5
Filming equipment
******Affiliate Links*****
Tripod - https://amzn.to/369WkYR
Panasonic Camera - https://amzn.to/3irr0XU
USB Microphone - https://amzn.to/3wnlAVV
Disclaimer:
These videos are intended to provide information and inspiration only. If you choose to imitate, duplicate or copy anything you may have observed in these videos, you do so at your own risk. Greysand does not take any responsibility for any action taken as a result of the information or advice on this YouTube channel and shall not have any liability in respect of any injury or damage that may result. To view full disclaimer, click here: https://greysand.com.au/disclaimer/
50
views
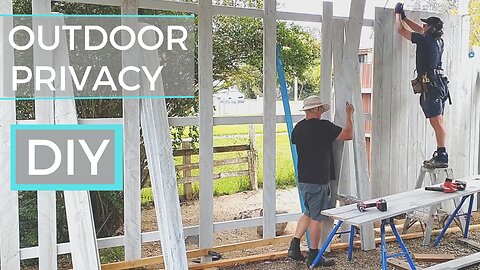
How To Build A Privacy Screen Outdoors With Existing Posts
In this video I take you through a step by step guide on How To Build A Privacy Screen Outdoors With Existing Posts. I use a rustic rough sawn GARDEN timber to create this textured whitewash finish.
I show you my easy method to create a really unique finish, that is easy, simple and pretty cost effective to do yourself. This backyard privacy screen is a fantastic way to create more privacy on your property.
Timecodes
0:00 - Intro
0:20 - Paint The Timber White
0:52 - Scape Off the White Paint To Create The Stylish White Wash Finish
1:24 - Paint The Steel Post White
1:34 - Attach Temporary Bottom Batten
1:50 - Screw on Metal Brackets To Steel Posts
2:10 - Measure, Cut and Attach Timber Battens
2:36 - Laser Level
3:10 - Install The Two End Screening Boards
3:32 - Cut Timber Screening Boards To length
3:44 - Math Calculations
4:20 - Set out Every 5th Board
4:50 - Pre Drill timber Boards For Screw Line
5:00 - Attach Every 5th Screening Board
5:30 - Fill in remaining Screening Boards
6:52 - Finish Wedging and Screwing Privacy Screening Boards
7:30 - Material List
Check out our blog post below!
https://greysand.com.au/how-to-build-a-privacy-screen-outdoors-with-existing-posts/
I hope you have enjoyed the video. I have added a list of helpful tools used for carpentry projects below. Please note that these are affiliate links and not the exact tools I used for the video.
******Affiliate Links*****
Slip on Work Boots - https://amzn.to/3q6apxn
Laser Level - https://amzn.to/3r9mfX4
Tape Measure - https://amzn.to/3pEMvbZ
Dril Bit - https://amzn.to/3eAAC0w
Combination Square - https://amzn.to/3zcJ9Ac
Nail Belt - https://amzn.to/3mK1MXr
Ear Muffs - https://amzn.to/3Htqp2t
Safety Glasses - https://amzn.to/3ze9rlJ
Hammer - https://amzn.to/32TV8qw
Battery Drill Tool Kit - https://amzn.to/3sQllkv
Battery Circular Saw - https://amzn.to/3zbdgYK
Mitre Saw - https://amzn.to/3eF8Lw5
Clamps - https://amzn.to/3JVnscL
level - https://amzn.to/3fdg
Disclaimer:
These videos are intended to provide information and inspiration only. If you choose to imitate, duplicate or copy anything you may have observed in these videos, you do so at your own risk. Greysand does not take any responsibility for any action taken as a result of the information or advice on this YouTube channel and shall not have any liability in respect of any injury or damage that may result. To view full disclaimer, click here: https://greysand.com.au/disclaimer/
6
views
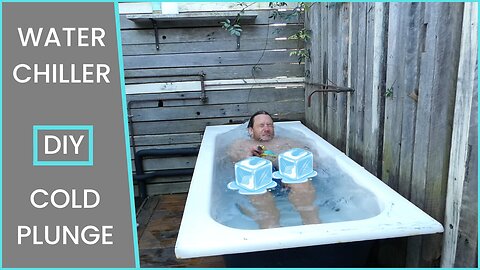
How To Make A DIY Cold Plunge At Home With No Ice
In this video I show How To Make A Cold Plunge At Home From An Existing Bathtub using a water chiller and a transfer pump.
After doing a bit of research I decided that this was the best way for me to create a cold plunge at home as I already had an outdoor bath i could connect a water chiller to the bath using a transfer pump.
Music
Birdseye Blues - Chris Haugen
Natural Light - Chris Haugen
TIME CODE
0:00 - Intro
1:15 - Demo old stairs and build level platform
2:16 - Transfer pump preparation
4:00 - Plumbing fittings connecting to pump
4:50 - plumbing design explanation
5:51 - Drill inlet and outlet holes into the bath
8:17 - Installation of copper pipes, fittings and pipe insulation
9:36 - Fill the bath and run of the system
12:03 - Jump in the cold plunge bath to test it out
▼ ▽ LINKS & RESOURCES
Website
https://greysand.com.au
Amazon affiliate links
Tape Measure - https://amzn.to/3pEMvbZDril Bit - https://amzn.to/3eAAC0w
Combination Square - https://amzn.to/3zcJ9Ac
Nail Belt - https://amzn.to/3mK1MXr
Ear Muffs - https://amzn.to/3Htqp2tSafety
Glasses - https://amzn.to/3ze9rlJ
Hammer - https://amzn.to/32TV8qw
Battery Drill Tool Kit - https://amzn.to/3sQllkv
Battery Circular Saw - https://amzn.to/3zbdgYK
Microphone - https://amzn.to/3wnlAVV
Disclaimer:
These videos are intended to provide information and inspiration only. If you choose to imitate, duplicate or copy anything you may have observed in these videos, you do so at your own risk. Greysand does not take any responsibility for any action taken as a result of the information or advice on this YouTube channel and shall not have any liability in respect of any injury or damage that may result. To view full disclaimer, click here: https://greysand.com.au/disclaimer/
14
views

Waves From Indonesia And South Coast N.S.W
In this video is some surf clips of waves in Indonesia and the south coast of NSW that I've caught over the last couple years.
Music - Gurty Beats - "365" https://soundcloud.com/
Gurty Beats - "RJGURT2" https://soundcloud.com/gurtybeats/rjgurt2
33
views
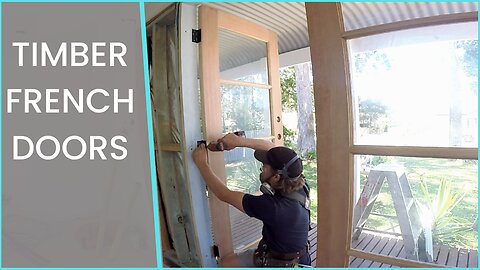
How To Install French Doors, Frame And Locks - Step By Step
In this video, I show all the tips and tricks for HOW TO INSTALL FRENCH DOORS. Included in the video are how to build and install a custom timber frame for timber french doors, the installation of the french doors, and also the procedure for how to install french door locks.The techniques and procedures learned from years of experience are included to help anyone who watches achieve a nice result and hopefully avoid any mistakes along the way.
This is a good french door installation guide for anyone interested in how to install exterior french doors.
Check out the full blog post
https://greysand.com.au/how-to-install-french-doors/
Music by Dekobe https://soundcloud.com/dekobe
Timecode
0:00 - Intro
1:02 - Measurements and sizes
1:32 - Cut door frame material
2:18 - Rebate hinges into the door frame
3:11 - Rip and plane door frame to size
3:49 - Assemble door frame
4:14 - Install the french door frame
4:49 - Rebate and install hinges into doors
5:26 - Install the first french door
6:20 - Install the second french door
6:35 - Install mounted bolts
7:04 - Install french door handles and dead bolt
8:30 - Attach timber trim
8:48 - Conclusion
▼ ▽ LINKS & RESOURCES
Website
Tape Measure - https://amzn.to/3pEMvbZDril Bit - https://amzn.to/3eAAC0w
Combination Square - https://amzn.to/3zcJ9Ac
Nail Belt - https://amzn.to/3mK1MXr
Ear Muffs - https://amzn.to/3Htqp2tSafety
Glasses - https://amzn.to/3ze9rlJ
Hammer - https://amzn.to/32TV8qw
Battery Drill Tool Kit - https://amzn.to/3sQllkv
Battery Circular Saw - https://amzn.to/3zbdgYK
Microphone - https://amzn.to/3wnlAVV
Disclaimer:
These videos are intended to provide information and inspiration only. If you choose to imitate, duplicate or copy anything you may have observed in these videos, you do so at your own risk. Greysand does not take any responsibility for any action taken as a result of the information or advice on this YouTube channel and shall not have any liability in respect of any injury or damage that may result. To view full disclaimer, click here: https://greysand.com.au/disclaimer/
27
views

How To Build A Gable Roof Frame || DIY Roof Framing Tips And Maths Formulas ||Garden Pergola Part 2
In this video I show HOW TO BUILD A GABLE ROOF FRAME from recycled Australian hardwood. I show the entire process and also include al the roof framing calculations needed to build any unique gable roof frame.
Music
Birdseye Blues - Chris Haugen
Natural Light - Chris Haugen
TIME CODE
0:00 - Intro
0:50 - Ridge set out
1:26 - Ridge beam installation
1:45 - Cut a template rafter
2:06 - Test template rafter
2:51 - Installation of rafters
3:52 - Cut and install ridge supports
5:46 - In depth breakdown of the roofing trigonometry calculations and drawings
8:38 - Pythagorean theorem for roofing
9:38 - Conclusion
Check out our blog post below
https://greysand.com.au/how-to-build-a-roof-frame/
▼ ▽ LINKS & RESOURCES
Website
Amazon affiliate links
Tape Measure - https://amzn.to/3pEMvbZDril Bit - https://amzn.to/3eAAC0w
Combination Square - https://amzn.to/3zcJ9Ac
Nail Belt - https://amzn.to/3mK1MXr
Ear Muffs - https://amzn.to/3Htqp2tSafety
Glasses - https://amzn.to/3ze9rlJ
Hammer - https://amzn.to/32TV8qw
Battery Drill Tool Kit - https://amzn.to/3sQllkv
Battery Circular Saw - https://amzn.to/3zbdgYK
Microphone - https://amzn.to/3wnlAVV
Disclaimer:
These videos are intended to provide information and inspiration only. If you choose to imitate, duplicate or copy anything you may have observed in these videos, you do so at your own risk. Greysand does not take any responsibility for any action taken as a result of the information or advice on this YouTube channel and shall not have any liability in respect of any injury or damage that may result. To view full disclaimer, click here: https://greysand.com.au/disclaimer/
16
views
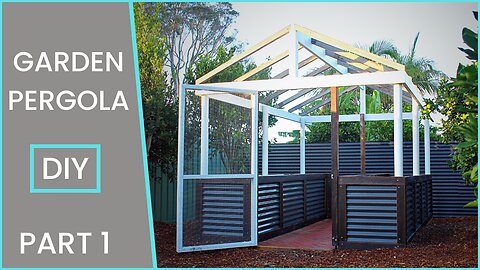
How To Build The Best Veggie Garden Pergola | Part 1
In this video series I’m going to show you how I transformed an unused space in my backyard in to a pest proof enclosed garden with raised beds.
The main aim of this project is to grow enough fresh vegetables to feed our family and share with our friends. Growing the vegetables will be a fun activity that our family can do together.
The garden needs to be unclosed with aviary wire to stop birds and possums from eating the vegetables before we do.
I also want to use as much recycled materials save some money and give the project some added character.
This first video will cover the jobs from clearing out the site area, setting out the post holes, digging, bracing and concreting the posts into place and setting up the roof beam to pitch gable rafters from.
Timecodes
0:00 - Intro
0:40 - Remove timber screen
1:30 - Clear site area and set out
2:16 - 3-4-5 method explained
3:08 - Pythagorean theorem
3:47 - Install Pergola posts
4:53 - Installation of roof beams
5:45 - Conclusion
▼ ▽ LINKS & RESOURCES
Website
https://greysand.com.au
Tape Measure - https://amzn.to/3pEMvbZDril Bit - https://amzn.to/3eAAC0w
Combination Square - https://amzn.to/3zcJ9Ac
Nail Belt - https://amzn.to/3mK1MXr
Ear Muffs - https://amzn.to/3Htqp2tSafety
Glasses - https://amzn.to/3ze9rlJ
Hammer - https://amzn.to/32TV8qw
Battery Drill Tool Kit - https://amzn.to/3sQllkv
Battery Circular Saw - https://amzn.to/3zbdgYK
Microphone - https://amzn.to/3wnlAVV
Music - Gurty Beats - "RJGURT2" https://soundcloud.com/gurtybeats/rjgurt2
Disclaimer:
These videos are intended to provide information and inspiration only. If you choose to imitate, duplicate or copy anything you may have observed in these videos, you do so at your own risk. Greysand does not take any responsibility for any action taken as a result of the information or advice on this YouTube channel and shall not have any liability in respect of any injury or damage that may result. To view full disclaimer, click here: https://greysand.com.au/disclaimer/
8
views
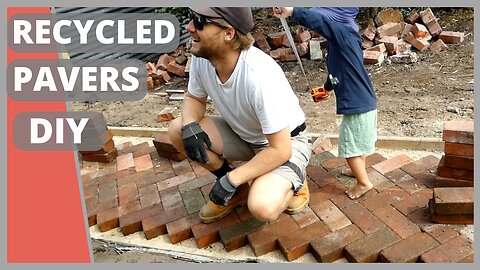
How To Lay Pavers On Dirt And Sand For A Garden Walk Way || Herringbone Pattern || Beginners Guide
In this video I show How To Lay Pavers On Dirt And Sand For A Garden Walk Way. I start with a big muddy mess and the final result is a nice garden walk walk made from recycled pavers.
This project involves the timber edge boards for the path, the 2 base materials and laying the pavers in a herringbone pattern. I finish the path with silica
Timecode
0:00 - Intro
1:05- Timber edging
1:59 - Granite and dirt base
2:22 - Weed matting
2:38 - River sand base
3:37 - Herringbone Paver set out
4:13 - Lay herringbone pavers
5:51 - Jointing sand
6:17 - Conclusion
▼ ▽ LINKS & RESOURCES
Tape Measure - https://amzn.to/3pEMvbZDril Bit - https://amzn.to/3eAAC0w
Combination Square - https://amzn.to/3zcJ9Ac
Nail Belt - https://amzn.to/3mK1MXr
Ear Muffs - https://amzn.to/3Htqp2tSafety
Glasses - https://amzn.to/3ze9rlJ
Hammer - https://amzn.to/32TV8qw
Battery Drill Tool Kit - https://amzn.to/3sQllkv
Battery Circular Saw - https://amzn.to/3zbdgYK
Microphone - https://amzn.to/3wnlAVV
▶ Found this video helpful? Make sure to click the Like 👍 button if you want to see more videos like this.
▶ Click the Subscribe button to get more videos like this and click the bell 🔔 notification icon to be alerted of any new videos I release.
▶ CONNECT WITH ME
www.greysand.com.au
Instagram: greysand_zander
Disclaimer:
These videos are intended to provide information and inspiration only. If you choose to imitate, duplicate or copy anything you may have observed in these videos, you do so at your own risk. Greysand does not take any responsibility for any action taken as a result of the information or advice on this YouTube channel and shall not have any liability in respect of any injury or damage that may result. To view full disclaimer, click here: https://greysand.com.au/disclaimer/
30
views
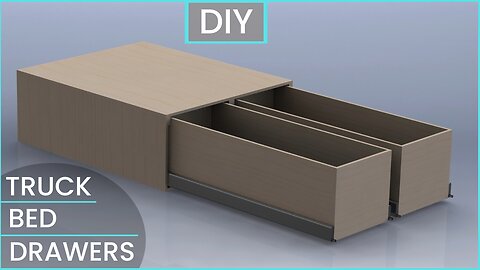
How To Build Large Truck Bed Storage Drawers | DIY
In this video, I'll show you HOW TO BUILD AND INSTALL truck bed storage drawers into your truck or vehicle. The video will guide you through the process of building your own heavy duty drawer system, with step by step instructions from start to finish.
I"ll show you how to measure, cut, build and install the large sliding drawers with all the tips and tricks needed to achieve a great product. This design is customisable to fit any vehicle, home or workshop. It's heavy duty and can take a load of 180 kg ( 398 lb) per draw unit . The drawer unit can be adapted and customised to fit any space required.
This project was planned to organise the space on the back of my truck to make room fro new tools and these large heavy duty sliding drawers are the perfect design. I can load them up with all my work tools, as well as our camping gear for holidays. We are about to go away on a big holiday, so it's going to be great to swap the work tools with our camping gear in our new truck bed storage drawers.
Link for the draw plans -
https://greysand.com.au/heavy-duty-drawer-plans/
Timecode
0:00 - Intro
0:42 - Material list
1:02 - Measuring and cutting
1:43 - Cutting plywood
2:06 - Carcass and drawer assembly
3:24 - Fix drawer slides to carcass
4:17 - Fit the drawer to the slider
6:41 - Installation of the units
7:47 - Conclusion
▼ ▽ LINKS & RESOURCES
here is the link for the drawer sliders
https://www.nover.com.au/heavy-duty-slides-repon/
Blog post
https://greysand.com.au/how-to-build-vehicle-drawers/
We also have a detailed set of plans to go along with the video available here
https://greysand.com.au/heavy-duty-drawer-plans/
Tape Measure - https://amzn.to/3pEMvbZDril Bit - https://amzn.to/3eAAC0w
Combination Square - https://amzn.to/3zcJ9Ac
Nail Belt - https://amzn.to/3mK1MXr
Ear Muffs - https://amzn.to/3Htqp2tSafety
Glasses - https://amzn.to/3ze9rlJ
Hammer - https://amzn.to/32TV8qw
Battery Drill Tool Kit - https://amzn.to/3sQllkv
Battery Circular Saw - https://amzn.to/3zbdgYK
Mitre Saw - https://amzn.to/3eF8Lw5
Microphone - https://amzn.to/3wnlAVV
▶ Found this video helpful? Make sure to click the Like 👍 button if you want to see more videos like this.
▶ Click the Subscribe button to get more online business training like this and click the bell 🔔 notification icon to be alerted of any new videos I release.
▶ CONNECT WITH ME
Website: https://www.greysand.com.au/
Instagram: greysand_zander
60
views
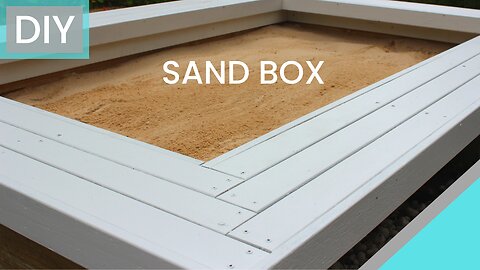
Sand Box DIY
Everything In this video is made for fun, I'm not serious about using a sand box as child care. But my kids live playing in it.
It's also not investment advice. I know the title is a big claim but hear me out as a may have a good point. Or maybe not.
In the video I give a detailed walkthrough on how I made a kids sand box with a herringbone bench sear. I'm estimating it will return me over $38,000 of kids childcare value over 5 years .With an ROI of over 21,000% . I've included my calculations in the video to follow along and see how much time it will save me by looking after my sons.
I give a detailed walkthrough on how I make the box and use a reclaimed hardwood to clad the sand box. The external corners are created using a herringbone pattern that is a fun wood working pattern.
Subscribe to the channel for more creative projects!
http://www.greysand.com.au/
Music by Dekobe https://soundcloud.com/dekobe
Items used in this video:
Tape Measure - https://amzn.to/3pEMvbZDril Bit - https://amzn.to/3eAAC0w
Combination Square - https://amzn.to/3zcJ9Ac
Nail Belt - https://amzn.to/3mK1MXr
Ear Muffs - https://amzn.to/3Htqp2tSafety
Glasses - https://amzn.to/3ze9rlJ
Hammer - https://amzn.to/32TV8qw
Battery Drill Tool Kit - https://amzn.to/3sQllkv
Battery Circular Saw - https://amzn.to/3zbdgYK
Mitre Saw - https://amzn.to/3eF8Lw5
Wheel Barrow- https://amzn.to/3pCDBMd
Concrete finisher - https://amzn.to/3EJgmpy
Microphone - https://amzn.to/3wnlAVV
To skip ahead to certain task check out the time stamps below.
Timecodes
0:00 - Intro
1:30 - Build the frame
2:28 - Install the bench seat frame
2:56 - Sand box child care investment numbers
3:45 - Fill the sand box with sand
4:21 - Clean and paint reclaimed hardwood
5:09 - Install the reclaimed hardwood
6:34 - Final paint to finish
23
views
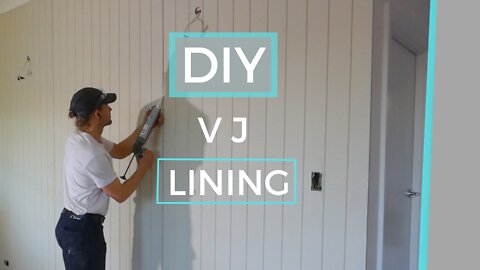
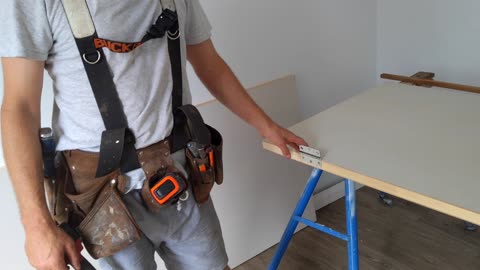
How to Install V Jointed Panels On Plaster
In this video I give a complete step by step guide on how to create a feature wall using V jointed Lining boards. It's an easy job that you can do over a weekend.
You will learn how to install wall panels with adhesive and nails combined for a secure install.
This is a great DIY Project that anyone can do to enhance a living area in your home. With clear details on each step it is an easy video to follow along with.
I really enjoy renovating old houses and creating nice DIY projects. I hope you have found this video useful to help with your DIY home renovation projects. To skip ahead to certain task check out the time stamps below.
Time code
0:00 - Intro
2:26 - Remove timber baseboard | skirting
2:37 - mark wall with laser level and stud finder
3:22 - Measure first sheet size
3:35 - Cut and drill the first VJ lining board sheet
4:32 - Glue flexible adhesive to the wall
4:45 - Install the first VJ lining board sheet
5:35 - Install the second VJ lining board sheet
5:48 - Measure the final sheet
6:11 - Scribe and cut the last VJ lining board sheet
6:32 - Install the last VJ lining board sheet
6:50 - Re-attach the baseboard | skirting
7:05 - Painting preparation
7:30 - Painting the feature wall
8:11 - Conclusion
I Hope you have enjoyed the video. Below is a list of helpful tools used for DIY projects. Please note that these are affiliate links.
Tape Measure - https://amzn.to/3pEMvbZ
Dril Bit - https://amzn.to/3eAAC0w
Combination Square - https://amzn.to/3zcJ9Ac
Nail Belt - https://amzn.to/3mK1MXr
Ear Muffs - https://amzn.to/3Htqp2t
Safety Glasses - https://amzn.to/3ze9rlJ
Hammer - https://amzn.to/32TV8qw
Battery Drill Tool Kit - https://amzn.to/3sQllkv
Battery Circular Saw - https://amzn.to/3zbdgYK
Caulking Gun - https://amzn.to/3sjnDXI
Mitre Saw - https://amzn.to/3eF8Lw5
Small Step ladder - https://amzn.to/3Ho3tBI
Painting tools
Paint Brushes - https://amzn.to/3fdAILR
Paint Roller - https://amzn.to/3K6KJIT
10 in 1 painters tool - https://amzn.to/33ud37r
Paint Mixer - https://amzn.to/31PJCw5
Filming equipment
Tripod - https://amzn.to/369WkYR
Panasonic Camera - https://amzn.to/3irr0XU
USB Microphone - https://amzn.to/3wnlAVV
Follow along with our step by step article here https://greysand.com.au/how-to-install-wood-paneling-on-plaster-walls/
23
views