
Don't use ceramic caps in your Amiga1200. Here is why
Don't replace the electrolytic capacitors in your retro computers with MLCCs! Here's why...
The previous Video: https://youtu.be/8ziu90dil2A
Used capacitors in this video:
25SEK470M
16SEPF1000M+T
EEH-ZC1V100R
EEH-ZC1E470P
EEH-ZC1E220R
EEH-ZC1E101XV
Understanding Polymer and Hybrid Caps:
https://www.mouser.de/pdfdocs/Panasonic_Capacitors_WP_final-4.pdf
https://www.mouser.de/new/panasonic/panasonicEEHZCcaps/
Music by #DigitalArtDeco ©
#Amiga #Restoration #recap
88
views

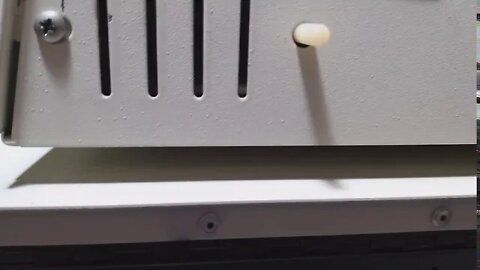
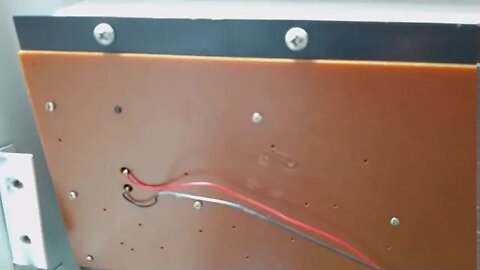
Let's build the most powerful low ripple power supply for your AMIGA with OVP. Part 1
I mean 5 millivolts (mV) and not microvolts (μV)! Sorry :-)
Ripple in power supplies can be a problem for old computer hardware. If I may say it even more extreme: Ripple is in the long run the death for computer chips! Therefore I want to use a power supply that has a ripple of less than 5 mV!
The power supply I used here is called "NMC-101" from FG-Elektronik GmbH in Germany. It is a multi-voltage power supply for measurement systems. It supplies 6 amps on the 5 volt line and 1 amp on the two 12 volt lines. It also has a -5 volt line, but we don't need -5 volts for the Amiga. Best of all, it even has overvoltage protection on the 5 volt line.
In this first part I try to install the power supply into an old case I had lying around. For the power supply I use a mains input module FKI 2-50-2 which also contains mains filters.
Link to the previous video with the TRACO POWER PSU:
https://www.youtube.com/watch?v=Bp4KpipmpEo
Main input modul FKI 2-50-2:
https://eu.mouser.com/ProductDetail/Schurter/43044025?qs=t6KQFvBAdNM8LomXfbyzXw==
Datasheet for the NMC-101 I found:
https://www.yumpu.com/de/document/read/10906192/nmc-100-fg-elektronik-gmbh
Music composition and production by Digital ArtDeco.
40
views
New badge for my Commodore 1541 diskdrive
In a previous video I repainted this floppy drive. In the comments I was told that the color of the badge does not match the blue. I realized that afterwards as well. Because somehow the metallic blue didn't match with the original badge from Commodore.
What do you think? Do you think that this badge fits better to the color now? Write it to me in the comments.
Here the link for the previous video:
https://youtu.be/dWbCWFm5wF4
Music by me.
#restoreation #commodorec64 #repaint #1541 #diskdrive
35
views

Finally I got it! Unbox and Lets Play "ATTACK OF THE PETSCII ROBOTS"
I got mail from "The 8-Bit Guy"! I ordered the game "Attack of the PETSCII Robots" for the Commodore C64. I wanted to have the autograph version. And today finally I got it. Let's open the package and load the game into our C64.
Link to the Video where I repaint the Commodore 1541:
https://www.youtube.com/watch?v=dWbCWFm5wF4&t=538s
The 8-Bit Guys Video about the game:
https://www.youtube.com/watch?v=uyf7tiSO9vo
#Retrogaming #C64 #Commodore
25
views

Metallic car paint for the Commodore 1541 floppy drive.
I want to use a metallic lacquer for the Commodore 1541 floppy drive. This will be the sports car among the floppy drives.
Here the link for the video where I change the voltage regulators with my own designed TO-3 pachaged regulators:
https://youtu.be/rpAeyCYEp4o
This link is for the C64 case repaint:
https://youtu.be/ZHhmVrc4_Ds
music by masterdrwho , its also me :-)
#restoreation #commodorec64 #repaint #1541 #diskdrive
56
views

Repainting the C64 and also burn the case. (by accident)
I would like to revise this very dirty and unfortunately also yellowed C64 box and bring it to new shine. As you can see, there is some work to be done. The C64 logo is bent and looks a bit out of the box. I will try to bend the aluminum logo back into the right position and hope that I don't damage it too much. There are still some labels from previous owners that I will remove with a heat gun.
I would like to repaint this box. For this I will use a primer from Rost-Oleum. After that I will use a satin spray paint in the color "gentian blue".
Look how clumsy I am and burn the case in the process.
music by masterdrwho
#restoreation #commodorec64 #repaint
45
views


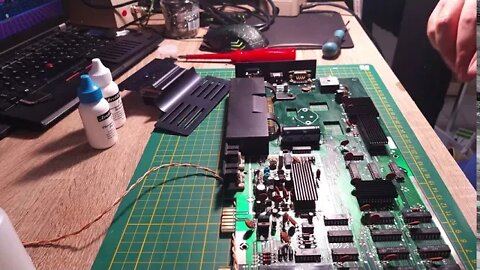
Recap the Amiga 1200 with Aluminum Polymer Solid Caps. Never leak again.
In this video I recap my Amiga 1200 and use so called Aluminum Polymer Solid Caps. It's all the rage in electronics. Never leak again!!
Music by #DigitalArtDeco ©
#Amiga #Restoration #recap
20
views
1
comment

A replacment Powersupply for your AMIGA. Update of the old PSU # 391029-03.
Updade: The ripple ist nearly 70 -80 mV p-p! In the video I said 7-8 mV but this is wrong! The damping switch on the probe was set to 10x!
I would like to bring to your attention a problem with the old power supply # 391029-03 for the Amiga 500, Amiga 600 and Amiga 2000. With this particular power supply for the Amiga 1200, I noticed that the output voltages did not work properly. The 5 volt channel had too much ripple. The positive 12 volt output voltage was too high and the negative was not present at all. So I did not connect this to my Amiga 1200, but tried to do a failure analysis. I decided not to repair the board, but to replace it completely, so I thought about what could be a safe replacement for such a power supply. Of course there are the power supplies from Meanwell, they are really cheap. But somehow I didn't feel comfortable with the concept of Meanwell, because I wanted to build an industrial-grade replacement for my power supply, so I looked around for industrial power supplies and came across a very good, but expensive AC-DC converter. It is the AC DC converter from tracopower, more precisely the TMP 30522 C.
Music by masterdrwho
#Amiga #Restoration #PSU
68
views

THUNDER STORM Sound with birds and children for Sleeping and Relaxation Ambience 100 % real Nature
Enjoy the sound of real nature. Thunderstorm and rain sounds with birds and children's voices in the background. Dive into your early childhood memories of a late summer evening in your sheltered home.
44
views
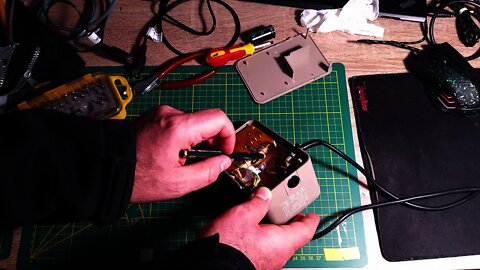
Fix the "Brick of death". Commodore 64 Powersupply update. Recap and replace the voltage regulator.
In this video I want to show, how you can update your so called "Brick of death" or your Commodore C64 & VIC20 Power supply. I replaced the 7805 voltage regulator in this power supply with my own designed switch mode voltage regulator. See also my previous videos for more details about my voltage regulator.
I also changed the capacitor here. Now I hope, this power supply for my vintage Commodore machines will be more save as before. What do you think? Please let me know and give a comment below.
34
views

Raplacing the voltage regulators in the Commodore VC 1541 disk drive.
In a previous video I talk about my switch mode voltage regulator in a Commodore VC 20 or VIC20. Today I want to show you, if it’s make sense to also change the two voltage regulators in the Commodore VC 1541 disc drive. And guess what.... No more head problems with my switch mode voltage regulator design. Here we are replacing the old TO-3 packaged LM340KC for the 12 volt line and the UA7805KC for the 5 volt line. Both regulators are capable to carry 3 amps continuously! Have fun with my video and don’t forget to subscribe :-)
The switch-mode regulators are open hardware now! You can dowload the gerber files from Github:
https://github.com/DigitalArtDeco/SwitchModePSUinTO3
See also:
Adrian's Digital Basement: How to make a cool Commodore 1541 disk drive
https://www.youtube.com/watch?v=0341BW_P91E&t=0s
The 8-bit Guy: Commodore C116 and drive repair, 240V to 120V conversion
https://www.youtube.com/watch?v=aXt6Obgm2G4#t=4m5s
Dr. Dave's Diversions: Commodore 1541-DC: a 1541 mod for DC power, like the 1541-II
https://www.youtube.com/watch?v=0t6zxi5-aD0&t=628s
Jan Beta: Commodore 1541 Floppy Disk Drive Repair
https://www.youtube.com/watch?v=CDj6JEqPkzA
87
views
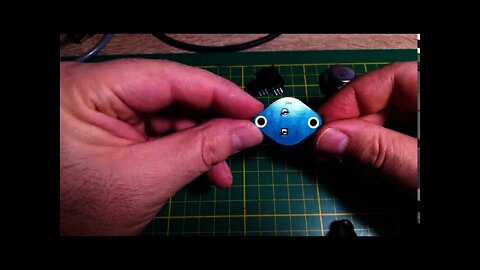
Build your own switch mode voltage regulator for your Commodore VIC 20. Replace the obsolete LM323K.
To reduce the current in my Commodore VIC 20, I decided to change the LM323K linar regulator with an switchmode voltage regulator. I start a small project and create the schematic in KiCAD and order the PCB from JLCPCB. All the components are in surfacemount and it was easy to essably them by hand in my lab.
The switch-mode regulators are open hardware now! You can dowload the gerber files from Github:
https://github.com/DigitalArtDeco/SwitchModePSUinTO3
This is a switching voltage regulator for replace the obsolete LM323K. It is a synchronous buck (step-down) converter. It provides an output voltage of 5 V. The input voltage can be 4,5 to 24 Volts with a continuous current of 3 amps! At room temperature, it does not need a heatsink! The switching voltage regulator operates with a frequency of 500kHz. This device has the same shape as the original TO-3 package. The TO-3 package was used in old devices like game consoles, computers from the 1980 and pinball machines. Therefore you can use this switching voltage regulator to replace your old linear regulators and prevent from damage your old machines. Extremely low ripple and noise! The Pins and the surface of the device are gold plated. The design of the regulator was done with precise calculation and test in the lab. The pcb traces was done to meet the radiation and emission regulations!
Features:
Output Ripple (20MHz bandwidth) with 12V input and with a current of 0,5A: 15mV p-p !!
Wide input range from 4,5 - 24 Volts DC Fixed output voltage of 5 Volts DC
Efficiency up to 96%!
Voltage drop from no load to full load: less than 0,95 %
Low Profile
Short-circuit protection and thermal shutdown
Shielded Power Inductor
Music: By masterdrwho
55
views
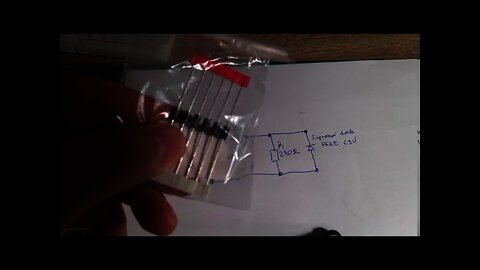
Checking the suppressor diode P6KE 6.8 and lets burn it
In this video I want to check the suppressor diode P6KE 6.8 and how it reacts if we bring it to the limits. As you can imagine, it will burn :-) In a previous video I used on of these diodes in my Commodore 64 and VIC20 to protect the IC chips against overvoltage.
Music by masterdrwho ( its me)
42
views

Recreating the famous Pultec EQP-1A Program Equalizer with KiCad and order PCB at JLCPCB
In this video I show the designe process and the finished PCB for an new EQP-1A Program Equalizer. This project is still ongoing and there will be more videos and finally the finished product.
Music: by masterdrwho (by the way, its also me. )
11
views
Replacing the old LM323K voltage regulator and test inside the Commodore VIC20.
I replace the voltage regulator LM323K and test it with my scope for ripple and value.
Music by masterdrwho
5
views
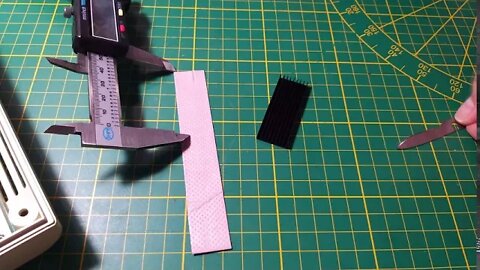
Installing high performance thermal pad on the VIC20.
Music: masterdrwho (by the way: its also me :-)
5
views

My last garage sale catch. A commodore VIC20. Will it work?
I was very lucky to get this Commodore VIC20 at a garage sale. In this video I explain what I had to do to save it for the future.
Music: masterdrwho (by the way: its also me :-)
7
views

Commodore VIC 20 future proofed!
Here is the finished result for the Commodore VC20. It is recaped and cleaned. A new rectifier and several IC sockets was added.
Music and composition by: masterdrwho ; by the way, its me also :-)
https://soundcloud.com/masterdrwho/mylosttime
8
views

Commodore PET 2001 The real one
Here is a closer look to a Commodore PET 2001.
Musik: Me and My Guitar. :-)
If you want to buy this Commodore PET 2001 on Ebay:
https://www.ebay.de/itm/203098378302
6
views

Commodore Pet 2001
This is a Commodore PET 2001 in very good condition. I found this piece of history in a garage sale. It has a 220V powersupply built in. Surprisingly, the name ist PET and not CBM! This is very unique.
6
views