

How To FORCE Muscle Growth (5 Science-Based Methods)
How To FORCE Muscle Growth (5 Science-Based Methods)
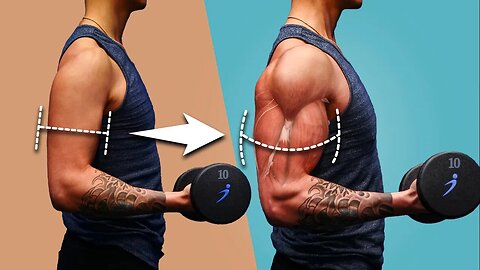
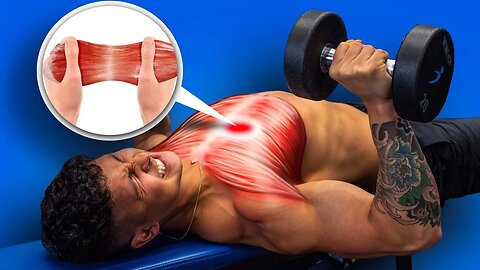
When it comes to how to grow muscle, you need to continuously challenge them with more than they’re used to. In other words: you need progressive overload. As simple as this sounds, most people’s training don’t accomplish progressive overload. Sure they’ll get a good pump and sweat out of their workouts but they aren’t actually doing much to signal their muscles to grow overtime. To understand the importance of progressive overload for hypertrophy, you should first know how muscles grow. So let’s say we just finished a workout. Immediately after, our muscles don’t actually get stronger. In fact, it’s not until after a few days of proper recovery that they adapt to the damage we put them through. Meaning? For consistent gains overtime, your workouts need to be designed such that they literally force your muscles to grow every single session. So, today, we’ll cover the 5 types of progressive overload you must know.
Increasing the amount of weight lifted is the progressive overload method most people rely on. To apply it, it’s quite straightforward. Let’s say you can currently bench press 100lbs for 8 reps. Next week, you might try to increase the load and do 110lbs for 8 reps. That said, if you take our previous example of bench pressing 100lbs in week 1 and adding 10lbs of weight every week, at the end of the year theoretically you should be benching 620lbs. That’s impossible. This is where our next point comes in handy.
When applied properly, adding more reps is another great way to incorporate progressive overload into your training to force your muscles to grow. As long as you’re continuing to push hard, you can keep the same weight and increase all the way up to 30 reps and still get the same growth compared to adding more weight. This is helpful if you only have limited equipment or a nagging injury and can’t increase the weight on your lifts. However for those who do have access to more weights, consider double progression. However, again this often only works for so long. What happens when you get stuck unable to add more weight or do more reps?
The next method of progressive overload to stimulate hypertrophy has to do with how many sets you perform. However, while ee know doing at least 10 sets per muscle-group per week nearly doubles the amount of gains you would get from doing 5 sets per muscle group per week, there comes a point of diminishing returns when you get into the 20-30 set zone. A good rule of thumb is to increase volume no more than 10-20% per week. Then, once you get to the 20-30 set zone or just begin to feel quite fatigued, you can cycle back to the original program you started with.
The next two types of progressive overload are ways you can continue forcing your muscles to grow while lifting the same weight and doing the same number of reps and sets every week. First: if we slow down our reps, we can increase the amount of time that tension is placed on the muscle to stimulate more growth. This is especially effective for exercises involving smaller, weaker muscle groups like lateral raises where adding just a little bit of weight disproportionately often increases the difficulty, or bodyweight exercises like push-ups and pull-ups where adding weight may not even be an option. However, you want to avoid going too slow as that can provide the opposite effect and start to hinder muscle growth rather than boost it. Note: it seems that we can slow down our reps up to about 6 seconds total.
Oftentimes when people think they are challenging their muscles more by adding more weight to their lifts, they really just end up compromising their form in the process. Instead, realize that when it comes to how to grow muscle, if you do the same workout you did the week before, but you performed your exercises with better control, less momentum, and more activation of your target muscles, that is progression. Better form involves relying more on the target muscles and will result in growth even if all other variables remain the same.
Now as for which of these 5 methods is best and will provide the most growth, the truth is, it depends. It depends on your level of experience, your equipment availability, and if there’s a certain type of plateau you’re stuck in. The best way to find out is to experiment with them and see what works best for you. But if you’re looking for a step by step program that takes care of all the guesswork for you and ensures that week by week you’re challenging your body in the right way to consistently build muscle and lose fat, just take our analysis quiz to find out which of our programs is best for you and your body below:
https://builtwithscience.com/your-pot...
Subscribe to my channel here:
https://www.youtube.com/jeremyethier/...
16
views
FIX Your Knee Pain- Stop Ignoring This Muscle! (Full Exercise Routine)
FIX Your Knee Pain- Stop Ignoring This Muscle! (Full Exercise Routine)
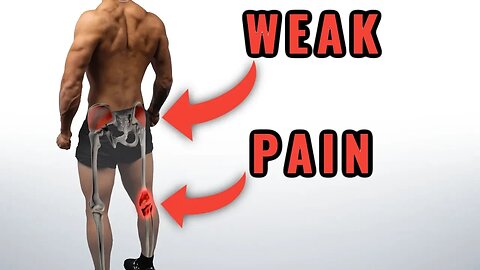
If you currently experience nagging knee pain when lifting or knee soreness during exercise, then you already know the extent to which this negatively affects your workouts and overall progress. It’s also likely that you’ve tried to address the problem by either avoiding certain exercises or focusing solely on strengthening the structures around the knee. But the truth is, although there’s several causes of knee pain, it’s often due to a commonly overlooked aspect within most people’s training routines: strengthening the glute medius. This is because the glute medius, which is one of the lesser known glute muscles, plays a vital role in key movements at the hip (pop up abduction and rotation). And when the glute medius is weak, you’re unable to properly control your femur and as a result it slightly rotates inward to compensate which happens anytime you stand, walk, or perform lower body exercises for example. And this inward rotation creates excessive stress on the knees in different areas, hence creating the knee pain you might be feeling. In fact, research shows that a weak glute medius is often correlated with knee pain. Research also shows that strengthening weak glutes with glute medius exercises or a glute medius workout seems to fix knee pain. Thus, it seems that hip strengthening exercises to strengthen the glute medius muscle seems to be an effective “knee pain exercise” to fix knee pain or soreness. But, it’s vital that you choose the right glute medius exercises. In this video I’ll show you how to assess whether you have a weak glute medius in the first place, then I’ll show you a glute medius workout you can do based on research that has compared glute medius activation on a variety of exercises. Incorporating the exercises shown overtime should greatly improve any knee pain or knee soreness you might be feeling during exercise.
VIEW MY SCIENCE-BASED PROGRAMS HERE:
https://builtwithscience.com/bws-free...
PURCHASE MINI-BANDS HERE:
https://shop.builtwithscience.com/col...
FOLLOW ME ON INSTAGRAM & FACEBOOK:
https://www.instagram.com/jeremyethier/
https://www.facebook.com/Jeremyethier...
MUSIC:
https://soundcloud.com/lakeyinspired
STUDIES:
Glute medius and knee pain correlation:
https://www.ncbi.nlm.nih.gov/pubmed/1... https://www.ncbi.nlm.nih.gov/pubmed/1...
https://www.sciencedirect.com/science...
Strengthening glute medius reduces knee pain:
https://www.ncbi.nlm.nih.gov/pubmed/2...
Glute medius activation (EMG) systematic reviews:
https://www.ncbi.nlm.nih.gov/pmc/arti... https://www.ncbi.nlm.nih.gov/pubmed/2...
29
views
How To Build Muscle WITHOUT Lifting Heavier (5 Science-Based Hacks)
How To Build Muscle WITHOUT Lifting Heavier (5 Science-Based Hacks)
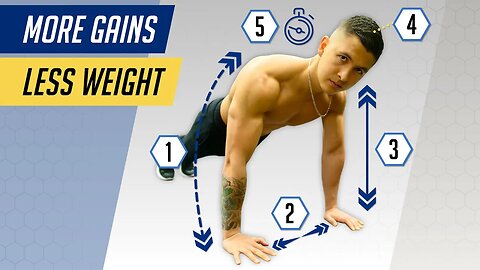
When it comes to how to build muscle, we all know the importance of progressive overload. However, what most of us fail to realize is that the progressive overload principle isn’t limited to just adding more weight to an exercise. By definition it simply means doing more than you’ve done before, which places greater tension on your muscles overtime and causes them to grow. And there are a variety of ways to accomplish this without the need to add on more weight (i.e. you’ll be able to progressive overload at home). In this video, I’ll show you how to build muscle without heavy weights, so you can continue maximizing growth without lifting heavier.
One of the things we can do for more growth without adding more weight is to vary our lifting tempo. By simply slowing down our reps, our muscles will now experience greater time under tension to stimulate more growth. And that’s also a key to the progressive overload principle. However, there is a threshold beyond which slowing down the speed of your lifts has a detrimental effect on hypertrophy. A lifting tempo of roughly 0.5-3 seconds for the concentric and eccentric portions of your reps is best. Another way we can build more muscle without heavier weights is by using the same load and performing the same amount of reps BUT with more efficiency. Meaning that you’re lifting the same load but with better form, more control, and with better activation of the target muscle.
The next thing we can do to progressive overload at home is to shorten the rest periods we take between our sets. Because if we can go from performing let’s say a dumbbell shoulder press for 10 reps at a certain weight with 3 minutes of rest in between sets, to now performing the same reps and weight but with just 2 minutes of rest, we’ll stimulate more growth due to the added metabolic stress. However, we don’t want to shorten the rest times to the point where our volume and reps performed decrease significantly. For your main compound movements in the gym and even compound bodyweight movements, you wouldn’t want to decrease your rest times to shorter than 2 minutes. Whereas for isolation movements, you can decrease your rest periods to 60-90 seconds.
Another thing we can do for progressive overload is alter the range of motion of our exercises. If you perform these various exercises with the same amount of weight, yet simply increase the range of motion of the exercise, you can effectively increase both the stretch and the time under tension your muscle experiences during each rep and as a result stimulate more growth. Also, because lifting light weights with higher a rep range builds comparable muscle growth as heavier weights with a lower rep range do as long as you’re pushing to or close to failure, you can just simply increase the numbers of reps you perform per set to maximize muscle growth. As for how high to go, the threshold seems to be right around 30 reps or so.
So, as for how to best implement these 5 methods, I would recommend always starting with efficiency before moving onto the other methods. So for example let’s say you can perform 3 sets of 15 reps of a weighted push-up and are now ready to overload it to stimulate some more growth. To do so, you should first start by aiming to perform those 3 sets of 15 reps with better form and with better activation of your chest. Only once you nail that down should you then move onto the various other methods I discussed in this ‘how to build muscle without heavy weights’ video to make the movement even more difficult.
All in all though guys tension is tension, and your muscles can’t tell whether you apply that extra tension on your muscle by lifting heavier or by using some of the methods I went through in this ‘how to build muscle without lifting heavier’ video. And although there does eventually come a point where it’s just more convenient to overload your movements by adding more weight, I hope you were able to see that there are nonetheless many viable ways that you can continue stimulating growth without the need to lift heavier. And for a step-by-step all in one program that shows you exactly how to train and eat to build muscle and lean down most effectively with science, then simply take the analysis quiz to discover which science-based program would be best for you and where your body is currently at below:
https://builtwithscience.com/bws-free...
Filmed by: Bruno Martin Del Campo
MUSIC:
https://soundcloud.com/iamryanlittle
STUDIES:
LIFTING TEMPO
http://citeseerx.ist.psu.edu/viewdoc/...
https://www.ncbi.nlm.nih.gov/pubmed/2...
REST TIME
https://www.ncbi.nlm.nih.gov/pubmed/2...
REP RANGE
https://journals.lww.com/nsca-jscr/Ci...
296
views
2
comments
How Much Cardio Should You Do To Lose Belly Fat- (4 Step Plan)
How Much Cardio Should You Do To Lose Belly Fat- (4 Step Plan)
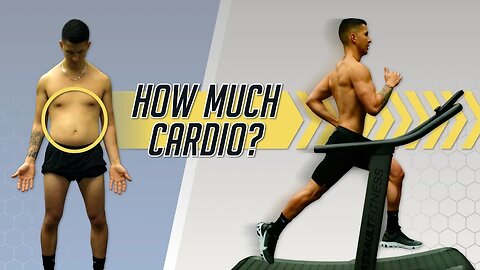
Wondering how much cardio is needed to burn belly fat? Well, you’re in the right place. We’re going to talk all about cardio, and more specifically how you can use it to get rid of belly fat. The truth is, most people seeking burn belly fat approach their cardio routines the wrong way and fail to account for the various metabolic adaptations we experience. The good news though is by Implementing the right cardio plan, you will be able to break through any plateaus you encounter to the point where you’re able to lose belly fat. Before that, let’s first take a look at the problems we face when it comes to cardio and belly fat loss.
One of the major limitations with cardio for fat loss is that as we lose weight and improve our fitness levels, our body compensates by trying to burn less calories throughout the day. That’s obviously bad news if you want to burn belly fat. And is also why your cardio plan needs to be designed and actually progressed overtime such that it accounts for this. But, at the same time, you don’t want to do too much too soon.
So, how exactly do we account for those factors? Well, we can do so with a 4-step plan that when combined with a calorie deficit from your diet, will help you lean down and eventually get rid of belly fat. The first thing we need to do here is establish a small amount of cardio to get you in the habit of moving and adhering to a cardio plan that we can then progress. What I’d recommend is just 10 minutes of incline walking every single day. You can swap this for light cycling or any low intensity, low impact cardio modality.
In step 2, we want to then very gradually start increasing the duration and/or difficulty of our cardio sessions. But again, the key here though is that you’re simply increasing your cardio very gradually overtime to enable you to break through any plateaus you encounter so you lose belly fat successfully. That said, the extent to which you do so though will vary individually and depend on your lifestyle.
As you apply the above 3 steps, you need to ensure that you’re not then compensating outside of these cardio sessions. So, to avoid this possible compensation from impeding your belly fat loss, you need to control and monitor 3 variables. First, your step count. Second, you need to be adhering to a regular weightlifting routine. And lastly, you need to monitor and control your calorie intake and ensure that you’re still adhering to a calorie deficit.
Now the last step here has to do with maintaining your new physique. Find a routine or hobby that you can now stick to that'll enable you to maintain your new bodyweight and physique with ease.
Here’s a summary of what I’ve covered on how much cardio is needed to burn belly fat:
Step 1 (Baseline): Start at a low baseline level of cardio.
Step 2 (Increase): In gradual increments, increase the duration/difficulty of your weekly cardio sessions every time you reach a plateau.
Step 3 (Control): Control all other variables and keep them consistent (weights routine, daily steps, calorie intake) to avoid compensating for your cardio sessions.
Step 4 (Maintain): After you’ve successfully stripped off the belly fat, find a routine that’ll enable you to maintain your new bodyweight and physique.
Just keep in mind that you need to be pairing your cardio routine with a regular weightlifting routine and a solid nutrition plan, as these will both help speed up the process and ensure that you don’t just end up “skinny fat” by the end of your fat loss journey. And for a step by step plan that shows you exactly how to do this by optimizing your workouts, nutrition, and cardio plan for you such that you can lean down as efficiently as possible with science, just like countless of our members have done with their Built With Science programs, then simply take the analysis quiz below to discover which specific program is best for your body and where it’s currently at:
https://builtwithscience.com/bws-free...
Subscribe to my channel here:
https://www.youtube.com/jeremyethier/...
*The scientific contents of this video have been proof-read and verified by published researcher Dr. K Rayani, PhD in Biomedical Physiology and Kinesiology
Filmed by: Bruno Martin Del Campo
MUSIC:
soundcloud.com/lakeyinspired
STUDIES:
CARDIO ADAPTATION
https://link.springer.com/article/10....
https://journals.physiology.org/doi/f...
https://pubmed.ncbi.nlm.nih.gov/12609...
file:///Users/jeremyethier/Downloads/Role-of-NEAT-in-Human-Obesity-CvL2014.pdf
https://www.ncbi.nlm.nih.gov/books/NB...
https://journals.physiology.org/doi/f...
MODEL OF ENERGY EXPENDITURE
https://www.ncbi.nlm.nih.gov/pmc/arti...
43
views
Fix -Anterior Pelvic Tilt- in 10 Minutes_Day (Daily Exercise Routine)
Fix -Anterior Pelvic Tilt- in 10 Minutes_Day (Daily Exercise Routine)
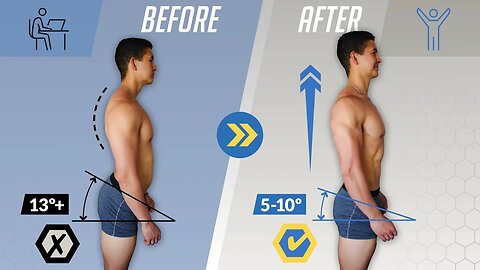
Sitting for the majority of the day can lead to the development of the posture where the head protrudes forward, the mid back and shoulders round forward and the lower back arches excessively with an anterior tilt of the pelvis. Which can then lead to tightness and aches and pains in the neck, shoulders, lower back, and other areas. To reverse the adverse effects of sitting too much, I’ll be showing you two quick and easy 5-minute corrective routines with 8 exercises for posture that you can do anywhere, that are designed to mobilize these tightened areas (fix rounded shoulders), strengthen the weakened muscles (fix hunchback posture) , and work on correcting any asymmetries. Let’s get straight to covering the exercises for better posture.
The first routine will focus primarily on the upper body. The first exercise is over and backs. This exercise is used to open up and stretch the shortened chest and shoulder muscles, which will help fix hunchback posture. Next, we’re going to move onto the cobra pose. This is arguably one of the single best exercises for better posture because if you go joint by joint, the entire body is almost completely reversed in this stretch position compared to a typical sitting posture. The next exercise is the stand and reach, which will be used to help correct some of the asymmetries developed from slouching one way when sitting. Next, we’re going to move onto wall slides and chin nods that’ll help strengthen the weakened lower traps that contribute to that hunched over posture, and the weakened neck flexors that contribute to that forward head posture.
Next, we’ll move onto the second routine, which focuses on exercises for posture for the lower body. First, we’ll use quadruped thoracic extensions to work on “mid-back” mobility that gets stiffened from sitting and not only promotes that hunched over posture but can also cause problems and compensations in the lower back and lower body. Next, we’re going to move onto stretching out the hip flexors which have become tightened over time and are pulling the pelvis into that anterior pelvic tilt with the kneeling hip flexor stretch. Then, we’re going to move onto the pigeon stretch, that not only further lengthens the tightened hip flexors, but also helps open up the hips with external rotation and addresses any asymmetries present there to best set us up for success in the strengthening exercise we’ll do next. Lastly, we’ll move onto glute bridges to help awaken and strengthen the glutes that tend to become inactive and weakened as a result of prolonged sitting, and are now pulling the pelvis into that anterior pelvic tilt.
So, here are the two routines all summarized with rep range and timing guidance for each of the exercises that’ll help you fix that hunchback posture and reverse the effects of sitting too much.
Routine 1 (Upper Body Focus)
Exercise 1: Over-And-Backs (~10-15 slow reps)
Exercise 2: Cobra Pose (~5-10 slow reps with pause at top)
Exercise 3: Stand And Reach (~5-10 reaches each side, pause at end position)
Exercise 4: Wall Slides With Chin Nod (2 sets of 10-15 reps)
Routine 2 (Lower Body Focus)
Exercise 1: Quadruped Thoracic Rotations (~10 reps each side with pause at top)
Exercise 2: Kneeling Hip Flexor Stretch (~30-45 second holds each side)
Exercise 3: Pigeon Stretch (~30-45 second holds each side)
Exercise 4: Glute Bridges (2 sets of 10-15 reps with pause at top position)
I’d suggest aiming to perform both of these routines at the very least once a day, and ideally each twice a day if you do sit quite a bit. As it’s the consistency and frequency with these routines that’s key. But, keep in mind as well though guys, that sitting is just part of the problem. I mean we see similar postural imbalances in those who stand all day as well. The real problem is not taking regular breaks, not being aware of your posture throughout the day, and just not moving enough in general. So focus on improving those aspects, while incorporating the exercises for better posture mentioned in this video, and you’ll be able to create positive long lasting changes and as a result look, feel, and perform that much better. And for a step-by-step holistic program that shows you exactly how to train and eat to build muscle and lean down without overlooking key muscles like the ones shown in this video, then simply take the analysis quiz to discover which science-based program would be best for you and where your body is currently at below:
https://builtwithscience.com/bws-free...
Subscribe to my channel here:
https://www.youtube.com/jeremyethier/...
Filmed by: Bruno Martin Del Campo
MUSIC:
https://soundcloud.com/iamryanlittle
GLUTE BRIDGE
https://www.ncbi.nlm.nih.gov/pmc/arti...
156
views
2
comments
How To Build A Big Back At Home (NO WEIGHTS & NO PULL-UP BAR)
How To Build A Big Back At Home (NO WEIGHTS & NO PULL-UP BAR)
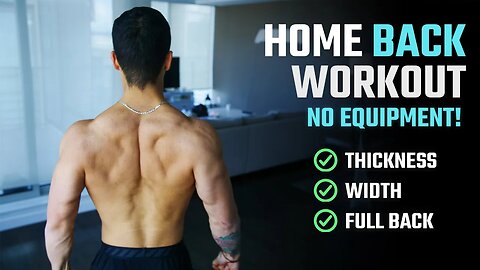
If you’re familiar with home workouts, you already know that the back is probably the most difficult muscle to adequately train at home without equipment and especially when there’s no pullup bar available. Admittedly, there are plenty of home workouts for back out there that do “target” the back muscles to a certain degree. But they either fail to actually work your back muscles through their full range of motion or they just don’t provide enough load or resistance to enable you to build back muscle without equipment. In this video though, I’ll go through the best back workout at home that avoids those two common pitfalls and will instead enable you to target and build back muscles at home.
The first exercise that’ll help you build back muscles at home is the bodyweight lat pulldowns, which will be a replacement for the pull-ups or lat pulldowns that you’d typically perform in the gym to target the lats. To do so most effectively, you ideally want to use the bed sheet setup I’ve presented in my other home workouts. If these are too difficult, you can regress them by bending your knees like so and then using your legs to help push you up during each rep. And if you aren’t using the bed sheet set up, an alternative is something I’ve shown in my past home workout video, the sliding lat pulldown.
Next, we’re going to move onto a bodyweight row to now shift a little more emphasis to our mid-back musculature like the mid-traps and rhomboids for more back thickness. For the easiest modification, you can perform these with a split stance and use your back leg to help raise your body up during each rep. If you’re not using the sheets though, then ideally you’ll want to find a table sturdy and long enough to safely perform your row, which can be made easier by bending your knees and using your legs for assistance.
Next, we’re going to use an exercise that’ll help you target the lats for more back width (no pullup bar needed). And we’ll use the sheets here again in order to best simulate a dumbbell pullover or straight arm pulldown that we’d typically perform in the gym to target the lats. To start out, I’d recommend doing these with your feet further away from the door. An alternative if you’re not using sheets though are to perform a sliding version of these on the ground. Next, we’re going to use the sheets to now perform face pulls to target the mid and lower traps as well as the various rotator cuff muscles that are all important muscles for postural improvements and overall scapula and shoulder stability. And if you aren’t using the sheet setup, to hit some of these important muscles you can perform wall slides instead.
Next, we’re going to finish the workout that’ll help you build back muscle without equipment off with the prone arm circles (legs elevated) that’ll enable us to not only work all of our upper back muscles but will now target and strengthen the lower back through hip extension as well. If this is initially too difficult for you though, I’d recommend raising your legs and upper body to a lesser degree, and performing the arm circle movement faster. Over time, you can progress by raising your legs and upper body a little more while slowing down the tempo of your arm circles.
So, to sum everything up, here’s the best back workout at home you can do:
Bodyweight Lat Pulldowns: 3 sets
Bodyweight Inverted Row: 3 sets
Straight Arm Pulldown: 3 sets
Bed Sheet Face Pulls: 3 sets
Prone Arm Circles: 3 sets
I’d recommend instead splitting it up into at least 2 days throughout the week by using an upper/lower split for example to better manage the training volume and frequency. And ideally you want to use a rep range of roughly 10-15 reps per set for your home workouts for back, but you should worry less about the rep range and instead focus on taking each set of the workout either to failure or within a rep or two short of failure in order to maximize growth despite having access to heavy weights.
But by executing and progressing this workout properly overtime as you get stronger, you’ll be able to build your back in the comfort of your own home without the need for heavy weights. Just keep in mind though that that’s just one piece of the puzzle. Because pairing your workouts with the right nutrition plan is essential when it comes to seeing results and packing on size. And for a step-by-step science-based program that takes care of all the guesswork for you by showing you both how to workout AND what to eat week after week in order to build muscle as efficiently as possible with science, simply take the analysis quiz to discover which science-based program would be best for you and where your body is currently at below:
https://builtwithscience.com/bws-free...
Filmed by: Bruno Martin Del Campo
MUSIC: https://soundcloud.com/iamryanlittle
68
views
How To Build MORE Muscle With Home Workouts (4 Science-Based Methods)
How To Build MORE Muscle With Home Workouts (4 Science-Based Methods)
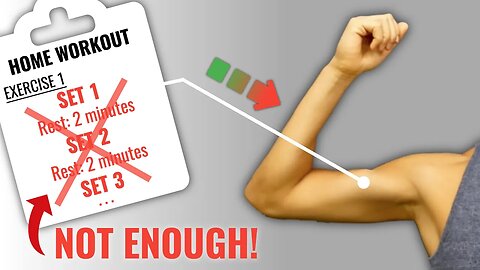
If you’re just training with your bodyweight or lighter weights with your home workouts, you aren’t eliciting nearly as much tension on your muscles as you are with heavier weights. And this makes it difficult to grow muscle at home with a home workout routine. However, don’t lose hope if you’re training for muscle growth at home. When it comes to ‘how to build more muscle at home,’ metabolic stress is another pathway we can take advantage of. And in this video, that’s exactly what I’ll show you how to do with 4 science-based home workout tips and tricks that will help you build muscle at home more effectively.
The first of my home workout tips and tricks is something called overcoming isometrics. All you need is a towel. Let’s say you’re about to perform a set of banded or light weight squats. What you can do is first perform a squat isometric. So simply wrap a towel or bed sheet under your feet and wrap it around each your hands. Then, use your legs to push up with maximal effort against the immovable resistance, and keep this up for 20-30 seconds. It works for virtually every one of your muscle groups, and is just an effective way of ensuring that you’re able to activate all of your muscle fibers and accumulate more metabolic stress during your sets with lighter weights to boost the growth you experience.
When it comes to training for muscle growth at home, make use of something called rest pause sets. So, you’d perform your first set until failure or close enough to it and note down how many reps you got. Let’s say you got 20 reps. Then, you would stop and rest for just 20 seconds, and then go right back into the exercise and again take it as close to failure as you can. Keep repeating this short rest and work cycle UNTIL you manage to match the number of reps you got in your first set, so in this case 20. The benefit of executing your sets in this fashion is not only that it saves time, but for many individuals it mentally pushes you to get closer to true failure while considerably boosting the metabolic stress in your muscles.
The next method to grow muscle at home is to mindfully squeezing the target muscle as hard as possible during, and in between each rep. Doing so helps elicit a little more metabolic stress, fatigue, and tension to that muscle. So what I’d suggest is with something like curls, rather than just mindfully curling the weight up, focus instead on contracting your biceps as hard as possible as you do so. When properly applied to your various exercises, you won’t be able to do nearly as many reps as you could do previously due to the heightened level of fatigue and metabolic stress in your target muscle, which will as a result lead to better growth from those sets.
The fourth and final method to build muscle at home is to combine the various equipment you have available. Most of you will have light weights and some kind of band laying around at home. Light weights on their own may not be challenging enough for growth. But by throwing a band into the mix, it now becomes increasingly challenging. And the added benefit about using bands to accomplish this is that they provide a progressively increasing resistance to provide resistance in parts of the exercises where there would normally be none.
Hopefully you were able to see that regardless of how limited you are with your home workouts, there are various home workout tips and tricks that you can manipulate the way in which you perform them in order to increase the level of growth you experience from them. And it’s key strategies like this which make all the difference in terms of the effectiveness of home workouts and is something that most home workouts unfortunately miss the mark on.
That’s why within my Built With Science programs, the home workouts included are designed so that regardless of what equipment you may or may not have available, you can continue maximizing your results and building muscle while working out at home. And therefore, when used in tandem with the gym-based program, you can seamlessly transition between your home workouts and your gym-based workouts whenever you please.
To find out which program would be best for you, simply take the analysis quiz below to discover which specific program is best for your body and where it’s currently at (HOME WORKOUTS BONUS INCLUDED):
https://builtwithscience.com/bws-free...
Filmed by: Bruno Martin Del Campo
MUSIC:
Music by Ryan Little - blessings. - https://thmatc.co/?l=B17DEC20
STUDIES:
REP RANGE
https://www.ncbi.nlm.nih.gov/pubmed/2...
REST PAUSE SET
https://journals.lww.com/nsca-jscr/Ci...
FORCEFUL CONTRACTION
https://docit.tips/download/the-acute...
59
views
How To BUILD More Visible Abs (3 Science-Based Steps)
How To BUILD More Visible Abs (3 Science-Based Steps)
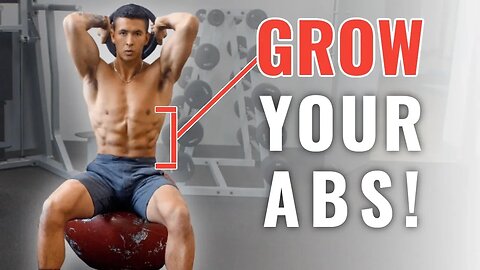
If you want to make your six-pack pop and get your abs to show even at a higher body fat percentage, then one of the ways you can achieve this is by actually growing your abs. If you choose the right abs exercises and get stronger with them over time, your abs will respond with growth and hence improve the overall look and visibility of your six-pack. Research agrees with this: a recent 2017 paper analyzed the effect of 10 weeks of regular abdominal training on abdominal growth in twenty-eight collegiate male soccer players. And after the 10 weeks, they experienced a significant 2.1mm increase, 1.9mm increase, and 2.7mm increase in the thickness of their upper, mid, and lower abs respectively. In this video, I’ll show you how to get abs to show through fat through proper ab exercise progression. I’ll cover three evidence-based steps you need to follow when it comes to how to grow abs fast, so you achieve your desired shredded abs.
The first step to get your abs to show is to choose the right exercises. While there are many abs exercises to choose from, not all are equally effective in helping you grow your abs. According to the 2017 paper mentioned earlier, it was found that subjects that performed only static or isometric abs exercises like the plank, experienced no abdominal growth after 10 weeks. Therefore, static exercises like the plank wouldn’t be your best bet for growing your abs when compared to dynamic exercises that take the abdominal muscles through their full range of motion. More specifically, though, you'll want to opt for dynamic abs exercises, such as the Swiss ball crunch, reverse crunch, and the hanging leg raise.
The second step to follow when it comes to how to grow abs fast is to perfect your form. And this is critical because if you don’t, you’ll end up shifting the load to other muscle groups – such as the hip flexors – instead of working your abs. When it comes to the weighted cable crunch, you should choose a weight you can control and lock your hips into the starting position with your knees bent at roughly 90 degrees. Then, exhale and tighten your abs by thinking about drawing your belly button in towards your spine to create more stability. Only then should you crunch the weight downwards by bringing your shoulders down towards your hips by flexing your spine, as this is precisely what the abs are responsible for doing. And as you crunch down, don't let your hips sink back into your heels. Keep them locked in the starting position. All the movement should come from the flexion of your spine.
Then for bottom-up movements like the reverse crunch, again you need to avoid aimlessly swinging and just using momentum, as this makes it a hip flexor exercise with little stimulation of the lower abs. Instead, you need to first again exhale and tighten your abs by drawing your belly button while moving into posterior pelvic tilt such that your lower back is flat against the bench. And then from here, think about raising your pelvis off the bench and curling it towards your belly button while visualizing your lower abs working to do so.
The final step in how to get abs to show through fat is to ensure ab exercise progression. And just so you have a systematic way of doing so, what I'd recommend is stick to a rep range of roughly 10-15 reps for your sets of weighted abs exercises and overload it based on that rep range. So, for example, let's say you have 3 sets of the weighted cable crunch to do. Once you can comfortably complete all 3 sets of the exercise with 15 quality reps, then you're now ready to overload it further by simply increasing the weight to the next increment. And then again with the new weight, once you build up the abdominal strength to complete 3 sets of 15 quality reps, you can proceed to bump up the weight even more and repeat the process.
So, I hope you were able to see that you'll be able to effectively increase the thickness and growth of your abdominal muscles through the three outlined steps. But keep in mind that you'll also need first to strip off excess belly fat to reveal all your hard work. And this is where nutrition and eating the right foods in the right amounts become critical.
For a science-based step-by-step program that shows you exactly how to work out and how to set up your nutrition to effortlessly drop fat week after week, take the quiz below to discover what fat loss program is best for you:
https://builtwithscience.com/bws-free...
Filmed by: Bruno Martin Del Campo
MUSIC:
Music by Ryan Little - Think About You - https://thmatc.co/?l=9E7F675F
FOLLOW ME:
https://www.instagram.com/jeremyethier/
https://www.facebook.com/Jeremyethier...
STUDIES:
10-WEEK CORE TRAINING ON SOCCER PLAYERS
https://www.ncbi.nlm.nih.gov/pmc/arti...
45
views
How To Build Muscle Almost 2x Faster (NEW RESEARCH)
How To Build Muscle Almost 2x Faster (NEW RESEARCH)
You might be able to gain muscle faster (almost twice as fast!) as you are right now - and still remain “natty”. How? With what I like to call “stretch-focused training”. A training technique that has seemed to crack the code to what it takes to build muscle fast naturally. I’ve even started experimenting with it, and honestly, it seems like it’s working. Don’t just take my word for it, though. I’ve assembled my elite crew of researchers to dive into the science, separate the truth from the fad, and figure out the best way to use this training to build muscle faster. If you want to learn how to maximise your gains, keep reading.
Click below to join our brand new 2.0 training and nutrition programs:
https://builtwithscience.com/built-wi...
Click below to subscribe for more videos:
https://www.youtube.com/jeremyethier/...
Before moving into the practical of how to build muscle faster, let’s explain the concept behind “stretch-focused training”. Whenever you lift weights, your muscles contract to lift the weight up and then stretch in order to lower the weight back down. The muscles can sense the stretch in the contractile units and, in response, kickstart a complex process that tells the body to build more muscle. This is what researchers now term "stretch-mediated hypertrophy".
But is there evidence that it can help you gain muscle fast? Yes, and here are 4 studies I want to look at. First study: participants who performed only bottom half of the curl experienced 2.6x more biceps growth than those who only performed the top half of the curl. Second study: the group who only performed the bottom half of the leg extension saw better growth than those who did the top or the full range of motion! Further proof of the stretch-mediated hypertrophy (third study): participants who did the overhead cable extensions experienced about 1.5x more growth than those who did cable pushdowns. Fourth study: those who did seated hamstring curls saw better growth than those who did lying hamstring curls.
How do you go about applying all this to potentially build muscle faster? I have 3 training tips for you. The first tip applies to all your exercises. We know how important the bottom position of an exercise seems to be for growth, so don't cut it short. Also, make sure you’re actually controlling the weight down to the bottom position, and then when you get there, don’t cheat or bounce out of it using momentum.
The next tip when it comes to how to maximize your gains has to do with your exercise selection. Note: you don’t need a bunch of special exercises that will provide more “stretch-mediated hypertrophy”. You’re already doing them. The tried and true exercises like bench press, curls, and squats all put your muscles in a deep stretch position given that you perform them with a full range of motion. However, there are some muscles that can potentially benefit from being stretched to a greater degree. These are what’s known as “bi-articulate” muscles. So for these muscles, you’ll want to make sure you’re doing an exercise that puts them into that position of “extra stretch”. But until more muscle groups and exercises come up in future research, here’s the 4 muscles and exercises I’d be comfortable recommending you incorporate.
The first two are the hamstrings and triceps. Using exercises like seated leg curls and any sort of triceps overhead extensions can provide a greater stretch and help you build muscle fast naturally. The biceps is another muscle I’d add to this list. One of its heads, the long head, can be positioned into an even greater stretch by performing a slight incline curl or a behind the body cable curl. Although there isn’t direct evidence on this yet, it does seem likely to provide a benefit. Lastly, the glutes. While there’s no direct evidence yet, romanian deadlifts, squats, and split squats will likely be your best bet since they challenge your glutes in that all important stretched position.
Last but not least, we have more of an advanced tactic that I like to call “lengthened partials”. Before I share the technique though, just realize you don’t want to use this on big exercises like squats, deadlifts, and overhead press and you also don’t want to do this very often since it can be quite fatiguing. But every now and then, such as during your very last set for a “safe” exercise such as a dumbbell press, flyes, leg extensions, triceps extension, and biceps curl, try this out. After you reach the point where you can’t do anymore full range of motion reps, continue your set by performing half reps at the bottom position to stress your muscle in that stretched position until you reach failure.
48
views
How To Build Muscle At Home- The BEST Full Body Home Workout For Growth
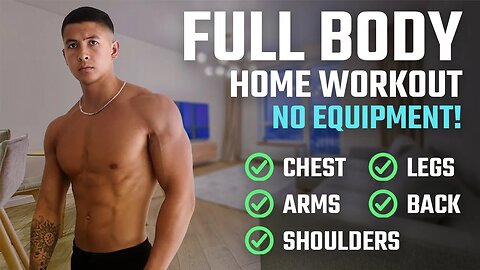
How To Build Muscle At Home- The BEST Full Body Home Workout For Growth
In today’s video we’ll go through a science-based full body home workout routine. When we think of a home workout, we assume that they’re inferior for muscle growth. For many bodyweight workout at home routines out there, this is true. But, this is simply because they aren’t designed properly. You can make comparable gains in muscle mass by using either lighter loads (like bodyweight exercises), or heavier weights in the gym. But there are a couple key points that people overlook when it comes to home full body workout routines.
First off, is that you need to push to near failure for every single set you perform in this full body home workout routine. If you stop well short of failure during your sets then you’ll fail to fully activate all the motor units within your muscles. And you won’t experience the same amount of growth that you would when using heavy weights. Secondly, you need to be working with a weight or resistance that is at least 30-40% of your 1 rep max if you want to maximize growth. So 30-40% of your 1 rep max equates to around 30-40 reps per set. So, make sure you can’t do more than that for the following exercises.
All that said, we’re now ready to dive into the full home workout. The first exercise we’ll use here are narrow grip push-ups with the hands placed in a diamond shape, which will be used to target the chest and triceps. Next, we’ll use the inverted row to target our overall back with most of the emphasis on the mid back for thickness. Then, the third exercise is pike push-ups, which mainly target the shoulders and triceps. Now, it’s time to target the back, primarily the lats, with a vertical pulling angle through the sliding lat pulldowns.
The fifth of the bodyweight exercises is the bicep towel curls, which allows for arms isolation. Then, to target the long head of the triceps, you can simply switch over and perform tricep extensions in your setup for the bicep curls. For most of us, bodyweight squats just aren’t going to cut it. Which is why we’ll use the towel set up again to perform assisted pistol squats to target the quads and glutes. For the eighth exercise, we’ll move onto the Bulgarian split squat with your rear leg elevated on a platform, which will again further target the quads and glutes. Lastly, we’ll use the sliding leg curl to work the hamstrings through both hip and knee extension.
Now, as for your home workout routine, just like your exercises in the gym, it’s vital that you get adequate rest of roughly 2 minutes between each of your sets. And to do so in this workout while saving time, you can perform the following upper body exercises in a superset fashion:
Home workout (superset):
SUPERSET:
Diamond Push-Ups: (4 sets – 2 flat, 2 decline)
Inverted row (4 sets)
SUPERSET:
Pike Push-ups (3 sets)
Lat pulldowns on floor (3 sets)
SUPERSET:
Biceps towel curl: 2 sets
Tricep bodyweight extensions: 2 sets
Assisted pistol squat: 3 sets each side
Bulgarian split squat 3 sets each side
Hamstring leg curls: 4 sets
I’d recommend performing this full body home workout 3-4 times a week.
Guys I hope you enjoyed this one and I also hope you were able to see that it’s the little details like what I went through in this video that really are key to maximizing growth and to actually see progress with whatever workout routine you choose to do. And for a step-by-step program that takes care of all the guess work for you and shows you exactly how and what to work out and eat week after week so that you can fuel your body and build muscle most effectively with science, then simply take the analysis quiz to discover which science-based program would be best for you and where your body is currently at below:
https://builtwithscience.com
DOWNLOAD THE HOME WORKOUT PDF BELOW:
https://builtwithscience.com/homework...
SCIENCE-BASED PROGRAMS:
https://builtwithscience.com/bws-free...
MUSIC:
soundcloud.com/lakeyinspired
Filmed by: Bruno Martin Del Campo
STUDIES:
MUSCLE GROWTH & LOAD
https://journals.lww.com/nsca-jscr/Ci...
https://journals.lww.com/nsca-jscr/Ab...
DIAMOND PUSH-UP
https://www.ncbi.nlm.nih.gov/pmc/arti...
https://www.ncbi.nlm.nih.gov/pubmed/1...
https://www.ncbi.nlm.nih.gov/pubmed/1...
SUPERSET
https://pubmed.ncbi.nlm.nih.gov/28796...
Subscribe to my channel here:
https://www.youtube.com/jeremyethier/...
96
views
How To Build Muscle For $8_Day (HEALTHY MEAL PREP ON A BUDGET)
How To Build Muscle For $8_Day (HEALTHY MEAL PREP ON A BUDGET)
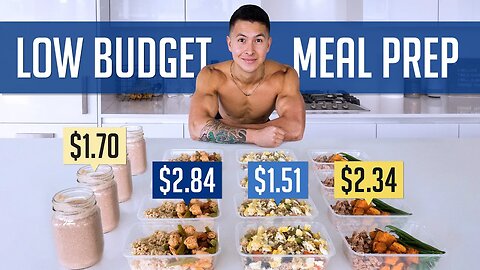
There’s a common misconception out there that eating healthy (and tasty) on a budget is impossible. But that’s not true. You can, in fact, meal prep on a budget. I’m going to show you exactly how you can build an effective and healthy budget-friendly meal prep plan for just over $8.00/day ($8.39)–complete with budget meals recipes. So, the first thing we need to do to make our meal prep budget friendly is choose the right food sources. I've listed out what the most friendly protein, fats, and carbs options are in the video and you want to use those sources to design your meal prep on a budget.
So, knowing that, let’s put this into practice and dive into our budget meals recipes. The meal plan will consist of 4 main meals with at least 20g of protein within each meal in order to keep our muscle protein synthesis levels elevated throughout the day. The total equates to 2,700 calories and roughly 160g of protein.
Meal #1: Breakfast Smoothie ($1.70)
2 tbsp (30g) Peanut Butter: $0.16
2 cups (500mL) 2% Milk: $0.30
1 banana: $0.16
1/3 cup (30g) Oats: $0.08
1 scoop (35g) Whey Protein: $1.00
766 calories, 55g protein, 78g carbs, 29g fat
Meal #2: Egg Stir Fry ($1.51)
3 whole eggs: $0.42
½ cup (~100g) uncooked brown rice: $0.45
1 chicken stock cube: $0.06
½ (~45g) cup carrots: $0.12
½ (~45g) cup celery: $0.20
½ (~45g) cup cabbage: $0.14
3-4 tbsp soy sauce: $0.08
2 tsp garlic powder: $0.04
602 calories, 27g protein, 81g carbs, 18g fat
Meal #3 Fajita Bowl ($2.84)
½ cup (~100g) uncooked brown rice: $0.45
1 chicken stock cube: $0.06
4oz (~110g) raw diced chicken breast: $1.10
1 green pepper: $0.48
1 diced sweet onion: $0.28
1 cup (~230g) canned pinto beans: $0.30
¼ cup (~100g) salsa: $0.11
Seasoning: $0.06
782 calories, 48g protein, 130g carbs, 8g fat
Meal #4 Ground Turkey Sweet Potato Dish ($2.34)
4.5 ounces (~125g) raw ground turkey (93/7): $0.76
10oz (280g) raw diced sweet potato: $0.73
1 cup (~150g) fresh green beans: $0.69
1 tbsp (15mL) olive oil: $0.06
Seasoning: $0.10
560 calories, 30g protein, 58g carbs, 24g fat
So now that we’ve gone through the budget-friendly meal prep plan, let’s go over some important information as to how to actually implement it. What I’d recommend is meal prepping the 3 meals but not the smoothie and instead just making that fresh as it takes just 5 minutes to do and will taste a lot better. I’d also recommend prepping these meals to be good for 3 days.
Next, let’s cover how to add some variety to it. Doing this is actually quite simple and can be done by just swapping out some of your protein, carb, or fat sources in your meal for an equivalent amount of another budget friendly food source instead (I have a chart of them in the video). In addition to this, experiment with different seasonings, sauces, and veggies for each dish as well.
Lastly, let’s cover how to tweak the calories and macros of this meal prep plan to better suit you while still being budget friendly. Basically, you want to prioritize aiming for around 1g of protein per lb of your bodyweight and a calorie intake of your bodyweight in lbs multiplied by around 15-17. Once you have these two targets set, you can simply increase or decrease the portions of the meals in this plan as needed.
Hopefully, you were able to see that eating healthy while at the same time keeping it tasty can indeed be done on a budget. And for a step-by-step program that puts this all together for you by showing you not only how to train to build muscle, but also shows you exactly what to eat, how much to eat, and then how to adjust this overtime so that you can build muscle as efficiently as possible just like several of our members have done with their Built With Science programs, then simply take the analysis quiz to discover which science-based program would be best for you and where your body is currently at below:
https://builtwithscience.com/bws-free...
DOWNLOAD YOUR BUDGET MEAL PLAN:
https://builtwithscience.com/budgetme...
Subscribe to my channel here:
https://www.youtube.com/jeremyethier/...
Filmed by: Bruno Martin Del Campo
MUSIC: https://soundcloud.com/iamryanlittle
TIMESTAMPS:
0:00 - Budget friendly food sources
2:00 - Budget friendly grocery stores
2:40 - Overview of meal plan
3:00 - Meal #1
3:33 - Meal #2
4:35 - Meal #3
5:33 - Meal #4
6:30 - How to meal prep
7:58 - Food swaps
8:42 - Customizing macros
9:50 - Download meal plan
10:10 - Watch me!
89
views
1
comment
Eat Twice As Much, Keep Calories The Same (Eat These Instead)
Eat Twice As Much, Keep Calories The Same (Eat These Instead)
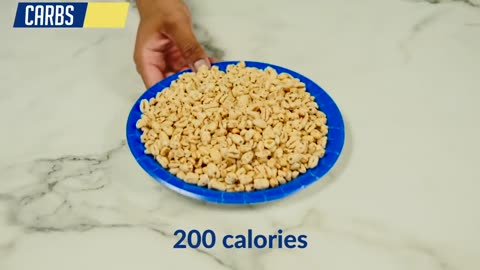
When people first start out with a “fat loss diet’, they are totally unaware of just how calorie dense typical food options that they’re used to eating really are. Which is one of the biggest diet mistakes around. Plus, is one of the main reasons why many who “eat clean” or “work hard” are still not losing stubborn fat. So, we’re going to showcase what 200 calories looks like in the most commonly reported “problem” foods (e.g. 200 calories of rice or pasta) so that you can see just how easy it is to overeat with these foods. We’ll then show you what 200 calories looks like with much better options (i.e. volume-dense foods) so that you can see just how much more food you could be eating and calories you could be saving with the right fat loss foods.
We’ll start off by looking at the most common problem protein sources that were reported from clients who were not losing fat. We have ground beef, pork chop, bacon, and fattier steak cuts (e.g. New York Strip). These are packed with a ton of additional fat and hence bring up their calorie counts quite a bit. For 200 calories, you’re not getting much at all and are easy to overeat. Some better options would be to sub the ground beef for extra lean ground turkey, sub the pork chop for chicken breast, sub the bacon for turkey bacon, and just be mindful of how many calories fattier cuts of steak can quickly add up to. Some other excellent leaner protein options are egg whites and even shrimp.
Next are carbs. Some of the most problematic snacks we found with clients who were not losing fat were oreos, potato chips, and high calorie cereals. When used in moderation these foods are fine, but there is no way you’re stopping at 200 calories, which just goes to show you how quickly the calories can add up without you being aware of it. Not to mention that the impact these foods will have on your hunger will be minimal. Better volume-dense food options include strawberries, carrots, puffed wheats, and plain air-popped popcorn.
Additional potentially problematic carb sources include pasta and rice. These food sources aren’t “bad” at all, but they are very easy to unknowingly overeat. I mean me being half Filipino I grew up eating rice pretty much every day, and whenever I’d have it, there’s no way I’d willingly be stopping at 200 calories worth of rice. A better option would thus be cauliflower rice or zucchini noodles.
Lastly, we have fats. Now all fats in general, even “healthy” sources will be very dense in calories. This doesn’t mean that you should avoid them since we do need a minimum amount of fat for our body’s to properly function. But, it does mean that you need to be more mindful of your portions whenever you eat them because of how easy they are to overeat. Chances are you’re eating way more than what you thought was just a serving of peanut butter or a serving of nuts. Which is why for these foods, it’s important to not only get yourself familiar with their serving sizes but actually spend the time to weigh out these foods when you consume them just to ensure you’re not overeating.
One more problematic fat worth mentioning is salad dressings. Oil based dressings don’t provide much at all for 200 calories. In fact, many of you likely use twice or even triple this amount whenever you have a salad. Which turns what you thought was a low calorie meal into the equivalent of a couple slices of pizza. Instead, either again measure these dressings when you use them, or one of the possible ‘food swaps’ you could do is opt for salad dressing options with lower calories.
Hopefully, you can see just how much more food you’re able to eat and how much easier it would be to suppress hunger and adhere to your diet by simply making smarter food choices. You can also see just how easy it is to essentially sabotage all the progress you may have made dieting throughout the week by making the diet mistake of letting loose on the weekends and unknowingly consuming thousands of additional calories from these more calorie dense foods. So, consider these swaps but more importantly just be mindful of your portions with certain foods. There are no real “good” or “bad” foods, just smarter food options depending on what your goal is.
And for those looking for a complete, all in one step by step program that shows you exactly what to eat and how to train week after week to transform your body in the most efficient way possible, then take the analysis quiz to discover which science-based program would be best for you and where your body is currently at below:
https://builtwithscience.com/bws-free...
FAT LOSS FOODS INDEX PDF DOWNLOAD:
https://builtwithscience.com/fatlossi...
Subscribe to my channel here:
https://www.youtube.com/jeremyethier/...
MUSIC: https://soundcloud.com/iamryanlittle
19
views
Drop Sets vs Normal Sets for Muscle Growth
Drop Sets vs Normal Sets for Muscle Growth
When it comes to the quest of maximizing muscle growth, a variety of different training methods are often employed. One popular training method, drop sets, are a perfect example. First off, what are drop sets? Drop sets simply involve performing one or more sets with a lighter weight immediately after you finish your heavy set. You can do drop sets for arms, chest, back, and so on – you could even do a whole drop set workout if you wanted to. They’re typically used to accumulate volume in a shorter amount of time, achieve a greater muscle pump, and elicit more metabolic stress than you would with standard straight sets. Which would theoretically mean that drop sets can lead to better muscle growth and mass gain. However, given that recent research has revealed that metabolic stress may not be as important for muscle growth as we once thought, it begs the question as to whether drop sets are worth incorporating at all, or whether sticking to normal straight sets would instead be best. That’s exactly what I’ll cover in my video, where you’ll learn the benefits of drop sets, whether you should do drop sets or not, and if drop sets can build muscle faster than normal sets.
VIEW MY SCIENCE-BASED PROGRAMS HERE:
https://builtwithscience.com/bws-free...
FOLLOW ME ON INSTAGRAM & FACEBOOK:
https://www.instagram.com/jeremyethier/
https://www.facebook.com/Jeremyethier...
MUSIC:
https://soundcloud.com/lakeyinspired
STUDIES:
Drop set studies:
https://www.ncbi.nlm.nih.gov/pubmed/2...
https://www.ncbi.nlm.nih.gov/pubmed/?... https://www.ncbi.nlm.nih.gov/pubmed/2...
Failure studies:
https://www.ncbi.nlm.nih.gov/pubmed/?...
https://www.ncbi.nlm.nih.gov/pubmed/2...
(Triceps Extension exercise illustration used is property of and copyright WorkoutLabs LLC)
12
views
Do These 3 Things EVERY Workout (Builds Muscle Faster)
Do These 3 Things EVERY Workout (Builds Muscle Faster)
Gym goers make common mistakes that prevent them from achieving the results that they desire. In this video, I will cover three crucial things you need to do during every workout to build muscle faster and continue to make progress in the gym. The goal will be to give easy to follow training tips and workout tips to build muscle that will help you get the most out of your gym routine, including the best way to lose weight and how to gain muscle most quickly.
For most people, its far too easy to forget details and in the gym, the devil is in the details. This means that forgetting what you did last time you worked out, or the time before can be a major problem when it comes to deciding what to do during your workout. How so? We know that lifting heavier weights and greater volumes is the key to building muscle mass. Well you cannot make incremental progress if you are not sure about what exactly you were able to do the last time you went to the gym. The solution? A workout log where you write down the details of your workout.
Having decided that you will be taking notes of your workout is a good start. Now you should give some thought to the details. For example, taking notes on your phone is good and there are many free apps that can be used to better organize your workouts. Writing down the weight you lifted and the number of reps in each set is the bare minimum. You may want to take note of how difficult the sets were, how much time you took to rest between them, and the order of your exercises which may be different from one session to the next. The notes you take will allow you to look back at the previous weeks and make continuous progress, over time these small increases will add up to make a huge difference in the results that you see.
The second main consideration is your rest periods. Studies have shown that rest periods of 3 mins between sets correspond to significantly greater amounts of muscle growth and strength increase than 1 min of rest. This means that resting for as long as you feel like is not the way to go. Timing your rest period to ensure you give yourself 2 – 3 mins between sets is ideal. 2 – 3 mins will give your muscles the time they need to recover, in order to optimally perform during the next set. What if these rest periods are too long? How about incorporating some mobility work or stretching between your sets to stave off boredom and help with recovery.
Arguably the most important thing you can do to prepare for a good workout is by using a proper warmup before hand. Warmups are essential to boost range of motion and muscle performance during your exercise routine. Your warmup should begin with 5 mins of light intensity cardio and/or dynamic stretching of the muscles you plan to exercise. For example, if you plan to do bench press, shoulder press, or squats, you should warmup the respective muscles. This will increase body temperature and ramp up your metabolism in preparation for the exercise. Before your first set, use light weights to acclimate your muscles and enhance neuromuscular activation. You can perform one set of about 10 reps with 50% of your working weight, followed by 1 set of about 7 reps at 70% of your working weight, and 1 set of 1 – 2 reps at about 90% of your working weight. This is a nice way to ensure your technique is optimized and your muscles are warmed up without tiring yourself out.
You simply aren’t going to see the results that you’re after if you’re not optimizing all aspects of your training. This is exactly why within my built with science programs I cover training with detailed, step-by-step instructions on how to build muscle as quickly as possible. And to get started, you simply take the body type analysis quiz below to determine what muscle-building program is best for you: https://builtwithscience.com/bws-free...
WARMUP VIDEO:
• How to PROPERLY Warm Up Before Weights
FILMED BY: Abdo Megahid
Instagram: @abdohmegahed
MUSIC:
Music by Ryan Little - fall so high. - https://thmatc.co/?l=F77E5E72
GRAPHICS: Vector art from Vecteezy.com
FILMED AT:
Club One Fitness
Facebook: Club One Fitness
Subscribe to this channel here: https://www.youtube.com/jeremyethier/...
44
views
How Quickly Do You Lose Muscle When You Stop Working Out- (And How to Prevent It!)
How Quickly Do You Lose Muscle When You Stop Working Out- (And How to Prevent It!)
For the majority of lifters, it’s likely that at some point you’ve had to take some time away from training - whether it’s due injury, a vacation, or life just getting in the way. But what happens when you don’t workout? And how long can you stop working out for before you start to experience muscle loss? Well, the truth is, if you stop exercising altogether then you’ll experience a dramatic decrease in your muscle size pretty quickly. For example, research shows that taking a week off from lifting can cause an 11% decrease in type II muscle fiber size. And when you’re fully immobilized, you can lose around 1 kg of lean muscle mass in just 10 days! But luckily, this initial decrease in size is mainly due to glycogen and water stores that are being depleted from your muscle due to not working out. So with that being said, how long does it take to lose muscle (actual muscle mass)? Most research shows that you start losing muscle mass after 3 weeks without working out. But the good news is, this can be mitigated with 3 simple, science-based steps. The first thing you want to do is eat at maintenance calories. Research indicates that eating at a deficit causes excessive muscle loss when you’re not training. On the other hand, eating at a calorie surplus not only causes excessive fat gain but ALSO enhances the rate of muscle loss. Thus, sticking to maintenance calories is your best bet. Next, you obviously want to keep your protein intake high throughout this period in order to best maintain your muscle mass and prevent muscle loss from occurring. Lastly, you want to stay active. Activities like brisk walking or doing the chores for example will all help with muscle loss prevention better than if you were simply sedentary. And if you can workout at all, it doesn’t take much to maintain your muscle mass – 1-2 full body workouts per week is likely enough! So implement those three points and you’ll be able to mitigate any muscle loss from occurring during this period.
VIEW MY SCIENCE-BASED PROGRAMS HERE:
https://builtwithscience.com/bws-free...
FOLLOW ME ON INSTAGRAM & FACEBOOK:
https://www.instagram.com/jeremyethier/
https://www.facebook.com/Jeremyethier...
MUSIC:
https://soundcloud.com/lakeyinspired
STUDIES:
Glycogen and decreased muscle size:
https://www.ncbi.nlm.nih.gov/pubmed/2...
https://www.ncbi.nlm.nih.gov/pubmed/1...
https://www.ncbi.nlm.nih.gov/pubmed/1...
https://www.ncbi.nlm.nih.gov/pubmed/3...
3+ weeks muscle loss:
https://www.researchgate.net/publicat...
https://www.ncbi.nlm.nih.gov/pubmed/2...
Maintenance calories and protein intake:
https://www.researchgate.net/publicat...
Stay active:
https://www.ncbi.nlm.nih.gov/pubmed/2...
https://www.ncbi.nlm.nih.gov/pubmed/3...
13
views
How to ACTUALLY Lose Belly Fat (Based on Science)
How to ACTUALLY Lose Belly Fat (Based on Science)
How to lose belly fat? Belly fat is really easy to gain yet often the hardest area to lose. There are 2 types: the annoying belly fat we all know that covers your abs, and a more dangerous type of belly fat stored deep within your organs known as visceral fat. To find out how to get rid of both types of stubborn belly fat (most effectively), I reached out to 5 of the world’s most qualified fat loss scientists and came up with 5 easy steps anyone can easily start doing today to lose belly fat. Includes belly fat workout and nutrition tips.
Click below for a calorie calculator that shows you exactly how many calories you should eat:
https://builtwithscience.com/calorie-...
Click below for a step by step plan training plan that transforms your body as efficiently as possible:
https://builtwithscience.com/quiz-pri...
Layne Norton
https://www.instagram.com/biolayne/
https://biolayne.com/
Alan Aragon
https://www.instagram.com/thealanaragon/
https://alanaragon.com/
Eric Trexler
https://www.instagram.com/trexlerfitn...
https://macrofactorapp.com/
Bill Campbell
https://www.instagram.com/billcampbel...
https://www.billcampbellphd.com/
Laurin Conlin
https://www.instagram.com/laurinconlin/
For the first and most important step, I spoke to Layne Norton. Scientific researcher, champion powerlifter, and honestly just a really smart dude who calls out BS when he sees it. Here's what he said about belly fat. There is research showing that exercise can reduce visceral fat without actually causing weight loss. So it is a good idea to exercise in general, but specific exercises are not going to target preferentially belly fat. The real key to losing belly fat is just getting into a caloric deficit consistently and doing it for long enough.
How do you create a calorie deficit? Diet. And that’s where our next expert Alan Aragon comes in. Alan suggests to come up with a list of your 20 favorite foods by picking 3 across 6 food groups —high protein, fat, fibrous vegetables, starch, milk, and fruits — and making up the difference with 2 YOLO foods. Alan emphasized the importance of eating enough protein when dieting. Ending off, Alan shared an interesting finding: that when calories are matched, hypercaloric diets high in saturated fats may cause greater gains in visceral and ectopic fat than those high in polyunsaturated fats.
Now, let's talk about the right type of “belly fat workout” to do to help you avoid regaining belly fat as soon as your diet is over. To explain this is Eric Trexler, pro natural bodybuilder and published scientist with a PhD in Human Movement Science. Eric maintains that there are some major benefits of resistance training (reduce muscle mass loss, which helps with better muscle definition and appetite regulation) if you're trying to lose belly fat and really just trying to lose fat in general. Also, Eric reminds us that cardio can be a really helpful thing in keeping your expenditure higher when that non-exercise activity starts to go down over time. Everything that gets you moving — i.e., including NEAT — counts.
Even with nutrition and nailed down, there’s an overlooked variable when it comes to how to lose belly fat. What is it? Sleep, as explained by Exercise Science professor Bill Campbell. Bill shared about a recent study that suggests that there may be a link to sleep restriction leading to overeating, which causes a gain in body fat that is preferentially stored in the belly region. So I would suggest that you get about seven hours per night. Note that sleep matters regardless of whether you’re in a calorie deficit or not. More specifically, one study suggests that lack of sleep alone may in fact lead to more muscle loss and less fat loss during a diet.
So you now know how to get rid of your stubborn belly fat. But there’s one more thing you need. Laurin Conlin, a master coach, exercise scientist, and IFBB Bikini Pro will help explain what it is. First, it's important to recognize that unless genetically you have little body fat on your abs and core area, you will probably need to get leaner than you'd think to lose belly fat. Second, take multiple measures of progress. You can use scale, weight, and measurements as quantitative feedback, but we also wanna look at qualitative feedback such as how your clothes are fitting, how you're looking, and how much better you're feeling. And lastly, be patient and recognize that you're usually quitting right before it gets good. It doesn't matter how perfect your program is, unless you remain consistent, you are short-changing yourself and your results.
Click below to subscribe for more videos:
https://www.youtube.com/jeremyethier/...
Timestamps:
0:00 - The 2 types of belly fat
0:32 - The key to losing belly fat (Layne Norton)
1:42 - Nutrition plan (Alan Aragon)
6:38 - Exercise plan (Eric Trexler)
9:40 - How sleep affects belly fat (Bill Campbell)
13:04 - Why most people fail (Laurin Conlin)
90
views
How Many Calories Should You Eat To Lose Fat? (GET THIS RIGHT!)
How Many Calories Should You Eat To Lose Fat? (GET THIS RIGHT!)
The fact that you clicked into this video tells me that you know the importance of calories for fat loss, regardless of how “clean” your diet may be. And you likely also understand that in order for fat loss to occur, you need to be eating in a caloric deficit to force your body to start burning its stored fat. Now, a fat loss diet sounds simple in theory, but in practice people often screw up their calorie intake for weight loss. In today’s video, I’ll clear up the confusion for you. I’ll show you how to pinpoint exactly how many calories your specific body needs a day to lose weight–while maximizing your fat loss and minimizing negative side effects (e.g. muscle loss).
The first step is to get a general estimate of your calorie intake for weight loss. Now, even the most “accurate” of calorie intake equations out there are all estimates. They all require some fine tuning based on how you progress, which is what we’ll do in step 2. To avoid overcomplicating things, what I’d recommend is take your bodyweight in lbs, and multiply that by anywhere from 10-13. If you’re a younger, leaner, and/or more active individual then go with the higher end of this range. If you’re an older, less lean, and/or less active individual then go with the lower end of this range.
The next step is to determine what an appropriate rate of weight loss would be based on your specific body. This is important for us to get right because if we eat in an overly aggressive caloric deficit and lose weight too quickly, not only is this unsustainable for most of us in the long run, but it also puts us at a greater risk for muscle loss. Maintaining your muscle mass as you diet needs to be your priority. We can do this by sticking to a weight loss of no more than 0.5-1% of bodyweight loss per week. That said, the more body fat you have to lose, the faster you can lose fat without risking muscle loss. So what you can do is to take your current estimated body fat percentage, and divide that by 20. The number you get will be a more accurate % rate of weight loss that you’ll want to aim for per week.
Once you have the number of calories for fat loss down, it’s time to implement and fine tune it with step 3. Start adhering to and monitoring your daily calorie intake as well as tracking your morning bodyweight. After about 4 weeks of tracking, analyze the data. We can often dismiss Week 1 since most people will lose quite a bit of water weight during this initial period of dieting. But in the following weeks, we’ll want to look more closely at the numbers. Look at how your weight has changed relative to your calorie intake. Science aside, if your recommended rate of weight loss is 2lbs per week, yet you just personally find this too aggressive, then slow it down. Stick with a rate of weight loss that’s sustainable. That’s ultimately what’s most important for long term success.
There’s one all too common mistake that people make with their fat loss diet you’ll want to avoid, which is attempting to eat back the calories you burn from exercise in general. Fitness trackers, cardio machines, and even us as humans are terrible at estimating the calories we burn through exercise and almost always overestimate it by at least 20%. And secondly, the 3 step method mentioned above already accounts for the calories you burn from physical activity and throughout the day. If you do end up losing weight too quickly because of your additional exercise, then you would just adjust this by eating more as we discussed earlier.
So, to wrap everything up, here’s a step by step example of how you could start calculating – and implementing – how many calories you need to lose weight:
1. Determine what your estimated calorie intake should be to lose fat based on the simple equation outlined in step 1.
2. Then, determine what your optimal rate of weight loss should be based on the simple equation outlined in step 2.
3. Finally, implement this while monitoring how your weight progresses throughout the weeks and if needed, adjust your calorie intake so that your actual rate of weight loss is closer to your target.
And that’s pretty much all there is to it! This does however assume that you’re tracking accurately in the first place and being consistent with your activity levels, so don’t overlook these other variables as well. And for a step-by-step program that shows you how to easily set up, track, and monitor each of these important variables while equipping you with a science-based nutrition and training program designed to transform your body as efficiently as possible, then simply take the analysis quiz to discover which science-based program would be best for you:
https://builtwithscience.com/bws-free...
BODY RECOMPOSITION VIDEO:
• How to Lose Fat AND Gain Muscle at th...
MUSIC: https://soundcloud.com/iamryanlittle
32
views
How Long Should You Diet To Get A Six-Pack? (AVOID THIS MISTAKE!)
How Long Should You Diet To Get A Six-Pack? (AVOID THIS MISTAKE!)
How long does it take to get six pack abs? This is one of the questions I’ve always wondered when I first started training seriously, because for many of us, getting well-defined six pack abs is the ultimate goal. But the answer to just how long until your abs show is that it depends. More specifically, your six pack timeline depends on 1) where you’re at right now, 2) how defined and visible you want your six-pack to be, and 3) the process you use to get there. Because let’s face it, some work out for years and can never quite achieve it because they’re using the wrong approach. Which is why in this video, we’ll first calculate how long achieving a six-pack will take for you, and then more importantly, we’ll cover how to best ensure your success (i.e. six pack diet tips).
For men, 12% is when you start to really see some good definition with your six-pack, and at 10% your six-pack is clearly visible and well defined. For women, I wouldn’t recommend a “clearly visible six pack” as being the goal, but some percentage equivalents to what I covered with males would be around 22%, 20%, and 18%. To determine roughly how long you have until your abs show, we can use the following formula: Bodyweight With Goal Six Pack = Lean body weight/(1-desired body fat percentage).
Step 1: First, we’re going to determine your lean body weight, which is simply how much you would weigh if you had absolutely no fat.
Step 2: Next, pick your goal body fat percentage.
Step 3: Once you have this, divide it by 100, and we’ll then plug everything into the formula.
Step 4: Then, simply take that number and subtract it from your current bodyweight. The number you get there represents roughly how much fat you’d have to lose in order to achieve your goal body fat percentage and strip off enough fat for your six pack abs to become visible.
Based on this number, we can determine roughly how long it will take you to attain your six pack. But this is also the step where most people screw everything up. Because, chances are they’re going to try to lose that weight as fast as possible in an attempt to attain their six-pack as quickly as possible. But what most people don’t realize is that there’s a limit to how much fat you can lose every day. Exceeding this limit will cause more weight to be lost, but from muscle, not from fat.
That’s why there are a few six pack diet tips you should follow. First, it’s recommended to set a goal of losing an average of 0.7% of your current body weight per week. Second, you should provide yourself with a few weeks of extra time and expect the process to have its ups and downs. That’s because the estimation you calculated assumes you’re following your program to the tee and remaining consistent day after day and week after week.
In addition to this few weeks of added buffer time to your six pack timeline estimation, another thing you may want to consider is taking periodic breaks from your several weeks of dieting. This is because the longer you diet for, the harder it will inevitably become. As you lose more and more weight, it is likely that increased hunger and fatigue will start to set in, making adherence difficult. To counteract this, research shows that taking “diet breaks” can help to fight off these cravings. Do note however that this will extend the time required to reach your goal. But if you’re not in a rush to hit that goal for a big event for example, then it’s something you’ll want to consider particularly towards the end of your diet when you’re much leaner and the diet gets much harder.
So, all in all guys, despite everything I went through with regards to the question, “How long does it take to get six pack abs?”, please don’t obsess over the exact time it’s going to take. Although it’s good to have a rough time frame in mind, which is what the formula I went through can help you do, focus on the process and the specific steps that you will take to achieve your goal rather than how long it will take.
But if you’re seeking more guidance and looking for an all-in-one customized approach that shows you step by step exactly how to train and how to eat week after week in order to burn off unwanted fat and build lean muscle just like thousands of our Built With Science members have done, then take the analysis quiz to discover which science-based program would be best for you and where your body is currently at below:
https://builtwithscience.com/bws-free...
USEFUL ARTICLES/VIDEOS:
https://builtwithscience.com/how-many...
https://builtwithscience.com/how-to-d...
https://builtwithscience.com/best-die...
Subscribe to my channel here:
https://www.youtube.com/jeremyethier/...
MUSIC: Lakey Inspired
36
views
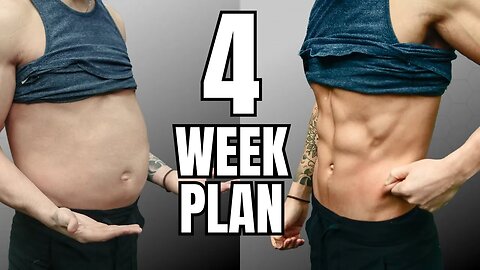
How 4 Weeks Can Get Rid Of Your Belly Fat For Good
How 4 Weeks Can Get Rid Of Your Belly Fat For Good
I’m going to show you how to lose belly fat for good with a 4-week plan. During each week, we’ll implement one of 4 things that have been found in research to be the key to lose stubborn belly fat and keep it off. We’ll show you how to properly assess and monitor your belly fat loss progress, give examples of food swaps to consider for your weight loss diet plan to kick start fat loss, talk about a few exercises to speed it up, and then combine everything with a bonus tip for those who are really serious – and want to lose belly fat, fast. By the end of this video, you’ll have a full plan that you can get started with immediately, and if followed consistently, will help you finally lose that stubborn belly fat.
In week 1, you need to weigh yourself every morning after waking up and after using the bathroom. Don’t drink or eat anything before. After 7 days, take an average of your weight. This 7-day average will then be your “weight” for that week. Every week you will repeat this process. You will then compare these weekly averages to assess how much fat (i.e. belly fat) you’re losing with what we will implement next in weeks 2-4. A reasonable goal is to lose weight at a rate of around 0.5-1% of your body weight per week.
During this second week, you need to close the gap between how many calories you can eat to lose fat and how many calories you’re currently eating to kickstart the process of losing your stubborn belly fat. A simple method to get a rough estimate of how many calories you can eat is to take your body weight and multiply it by either 13 or 29 depending on if you’re using lbs or kgs. Download a food tracking app such as MyFitnessPal and start logging down every single thing you eat during a typical day. By the end of the first day, you’ll be able to see roughly how many calories you’re eating.
This number will most likely be higher than the number of calories you can eat to lose fat. We need to close this gap. Employ a flexible approach toward your diet plan for the best chance of success at weight loss. This is where you more or less continue eating what you want, but gradually make swaps to reduce your calorie intake.
Although reducing calories is the main thing you want to do when it comes to how to lose stubborn belly fat, being active should not be overlooked as it will speed up the process. That’s why, starting in week 3, we’ll track NEAT. It may not seem like it, but daily living activities like walking, fidgeting, washing dishes, and gardening can make a big difference when it comes to fat loss. The easiest way to track your general activity is through your step count. The greatest benefits seem to occur in the neighbourhood of 7,000-9,000 steps per day and is a good minimum goal to aim for.
During week 4, you need to implement a structured exercise routine with the right amount and the right type of exercise. As a recommendation, you should aim for a minimum of 30 minutes of exercise 3 times per week. If you can up this to at least 60 minutes 4-5 days per week that is even better. That will help you lose belly fat – fast. As for the type of exercise to do, what we recommend within our Built With Science programs that have worked wonders for thousands of members, is to start with a foundation of about 3-5 weight training days per week. Once you’re consistent with that, add in 20-30 minute cardio sessions to help you hit the weight loss targets we established back in week 1.
Although you can’t directly target fat loss from your belly, you can grow your abs just like any other muscle by training them with weights. As they grow, they will pop more through your skin and as a result, make them more visible even if you haven’t lost all the stubborn belly fat. To do this, train your abs with weighted movements regularly 2-3 times a week. Weighted cable crunches, weighted reverse crunches, and weighted sit ups are all great options.
Keep in mind that this should not be implemented until you’ve nailed down the previous 4 things. Once you get all 4 implemented, you’ll start experiencing fat loss. Keep this up for long enough and stay consistent with it, and eventually the fat will come off from stubborn areas like your belly.
For those looking to take this one step further with a program that puts all of this together for you, such that you know exactly how to train and what to eat week after week to lose stubborn fat for good and build lean muscle just like thousands of our members have done, then take our free analysis quiz to determine which of our plans will best help you transform your specific body below:
https://builtwithscience.com/your-pot...)
Subscribe to my channel here:
https://www.youtube.com/jeremyethier/...
Music by:
https://brettjanzen.ca/
brettjanzenmusic@gmail.com
26
views
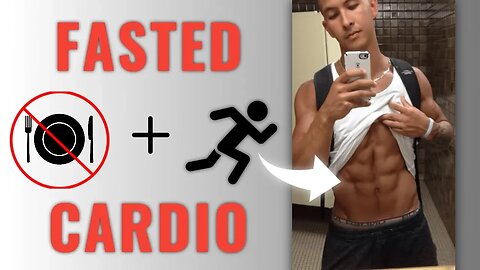
Fasted Cardio- Why You SHOULD Do It To Lose Fat Faster (And How To Do It)
Fasted Cardio- Why You SHOULD Do It To Lose Fat Faster (And How To Do It)
When it comes to how to lose fat as fast as possible, then it’s often wise to include some form of cardio for fat loss in your routine to speed up the process. But, to lose fat fast, many suggest performing your cardio on an empty stomach – or in other words “fasted cardio” often first thing in the morning. But what exactly are the fasted cardio benefits? Does fasted cardio work in terms of fat loss and weight loss? What fasted cardio results can you expect to see after implementing it? And how do you do fasted cardio in the first place? Well, in this video I’ll answer all those questions.
The basic theory behind fasted cardio being superior for fat loss is the fact that research has shown that when exercising in a fasted state, your body preferentially burns more fat for energy since your insulin and glycogen levels are low during this period. Whereas when you eat before you exercise, your body now tends to preferentially use more carbs and less fat for energy when compared to if you were fasted. And this is mainly what led people to believe that performing your cardio in a fasted state would speed up fat loss to an even greater degree. However, although it’s true that you burn more fat during a fasted cardio session, it’s vital that you take into consideration the post exercise period and what happens to your body after the session. Because research has shown that although you may have preferentially burned more fat during the fasted cardio session, your body eventually compensates for this by burning more carbohydrates for the rest of the day. So by the end of it, you’ve essentially burned the same amount of fat as you would have had you eaten before your cardio.
But with that being said, there are some fasted cardio benefits that explain why so many people use it in their routines to lose fat. First off, it often indirectly reduces your calorie intake and makes it easier for you to eat at a calorie deficit since your meals are pushed closer together throughout the today. Secondly, getting your fasted cardio workout done first thing in the morning as opposed to waiting later in the day when you’ll be more likely to skip it often helps with consistency and adherence.
Now as for how to do a fasted cardio workout, you’ll want to mainly stick to low to moderate intensity cardio sessions lasting less than an hour long. HIIT fasted cardio should be used sparingly as it requires a lot more time to recover from and depletes your glycogen to a greater extent which can be detrimental especially if you’re going to be lifting weights later on in the day.
But all in all, although fasted cardio doesn’t have any magical fat loss effect in of itself, it may be useful for its indirect benefits. And for an all-in-one science-based program that combines all these little details into a step-by-step plan for you to build muscle and lose fat as quickly as possible, then simply take the starting point quiz below to determine what program is best for you:
https://builtwithscience.com/bws-free...
WRITTEN ARTICLE:
https://builtwithscience.com/fasted-c...
FOLLOW ME ON INSTAGRAM & FACEBOOK:
https://www.instagram.com/jeremyethier/
https://www.facebook.com/Jeremyethier...
FILMED BY:
Abdo Megahid
Vimeo: https://www.vimeo.com/abdohmegahed
Facebook: https://www.facebook.com/abdohmegahid
Instagram: @abdohmegahed
MUSIC:
Soundcloud.com/lakeyinspired
GRAPHICS:
Vector art from Vecteezy.com
STUDIES:
Fasted cardio fat and carbs utilization:
https://www.ncbi.nlm.nih.gov/pubmed/9...
https://www.ncbi.nlm.nih.gov/pubmed/1...
Fasted cardio meta-analysis:
https://www.ncbi.nlm.nih.gov/pubmed/1...
Fasted cardio reduces daily calorie intake:
https://www.hindawi.com/journals/jnme...
https://academic.oup.com/jn/advance-a...
Keep fasted cardio workouts less than an hour:
https://www.ncbi.nlm.nih.gov/pubmed/2...
25
views

We Tested 16 Chest Exercises, These Are Best For Growth
We Tested 16 Chest Exercises, These Are Best For Growth
Here's Betty: a $12,000 EMG machine who is going to help us determine what the best chest exercises for growth (from upper chest to middle chest to lower chest exercises) ACTUALLY are. EMG stands for electromyography, and it’s a way of measuring the electrical activity produced by muscles when they contract. To make sure I run this experiment evaluating my list of chest exercises as best as possible so that we, and you, could actually trust the data (i.e., that these are the best exercises for a bigger chest), I called up a few colleagues and they led me to John, a Master’s student specializing in EMG.
Vote on the shoulders exercises you think will come out on top (winners get a FREE Built With Science program and ALL entries get a discount code):
https://builtwithscience.com/vote
Take a deeper look into the data here:
https://builtwithscience.com/workouts...
Click below for a step by step plan training plan that reveals all the best exercises you should do for each and every muscle group:
https://builtwithscience.com/built-wi...
Click below to subscribe for more videos:
https://www.youtube.com/jeremyethier/...
It was time to prep the experiment to find out what the best chest exercises for growth really are—and think about all the variables we had to control. First variable: subjects. Everyone’s bodies are slightly different, and the more subjects in study, the more reliable the data. So, I wanted at least 3 subjects in total. Luckily we had Alex and Raza. Raza is more of a beginner so I thought it’d be interesting to see how his results compare to mine and Alex’s. Next, weight. we had to figure out how much weight we’d be using on each chest exercise to ensure that they were equally as challenging. A week before the test date, we all spent a whole day in our gym and figured out our estimated “1 rep max” for each exercise. On test day, we’d use 70% of this weight for each of the exercises.
Plus, we came up with a wager. Before we conducted the experiment to find out what the best exercises for a bigger chest are, the three of us wrote down on a piece of paper what exercises we think will end up being the top 2 for each area of the chest. Once we got the results, we’ll compare them to each of our lists and the person who gets the least exercises correct will be dunked into a human body sized Canadian Tundra Death Trap!
Here are all the chest exercises we tested:
Push-ups
Banded push-ups
Standing cable fly
High to low cable fly
Seated cable fly
Chest dips
Barbell bench press
Incline barbell bench press
Flat dumbbell press
Incline machine press
15 degree incline dumbbell press
30 degree incline dumbbell press
45 degree incline dumbbell press
Decline dumbbell press
Pinch press
Pec deck machine
Note: with several variables and just 3 subjects, it’s hard to detect any statistical differences. That said, I did average the data and found some really interesting findings that align with a lot of other research. So, let’s start with the best upper chest exercises. The top two exercises were both incline dumbbell presses, just at different bench angles. We tested 15 degrees, 30 degrees, and 45 degrees. The lower inclines of 15 degrees and 30 degrees came out on top.
Next, middle chest exercises. The first winner is the decline dumbbell press, but not the typical version you see at the gym. We used just a very slight elevation by placing a weight plate underneath the front of the bench. Usually this helps emphasize the lower chest the most. But to my surprise, it did an excellent job of activating the mid chest for all 3 of us. The other winner was the seated cable fly. In this case we put the cable handles at chest height.
Finally, the lower chest exercises. Here I expected high to low cable flyes to win, because tension from the cable aligns well with the lower chest fibers. While it did end up scoring well, seated cable flyes came out on top. This might be because it’s a more stable setup, with the tension from the cable still aligning quite well with the lower chest. The other winner was once again the decline dumbbell press, suggesting that the very slight decline aligns the press very well with both the middle and the lower fibers of the chest.
Who got dunked? Watch the video! That said, I got really emotional during the ice plunge. After hitting 100,000 subscribers on YouTube, I founded Built With Science which stemmed from a bigger vision I always had in mind: to build a legacy that would bring a more scientific and research-backed approach to the fitness industry and weed out the BS and “bro-science” that plagues the industry. This little science experiment was a big step towards realizing that. I’m excited for where this leads and I appreciate you joining me on this journey.
49
views
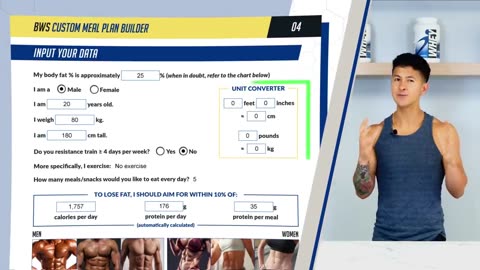
Build The Perfect Meal Plan To Get Ripped (4 Easy Steps)
Build The Perfect Meal Plan To Get Ripped (4 Easy Steps)
A one-size-fits-all diet plan doesn’t exist. That’s why, in this video, I’m going through – in just 4 easy steps – how you can build a custom diet meal plan made specifically for your body and your taste buds. We’ll first quickly figure out your calorie and protein goals and how many meals you should have for your fat loss diet, then we’ll fill in these meals for weight loss with specific foods. By the end of this video, you’ll have a system you can use to build countless different meal plans for your weight loss diet that you can actually stick to.
I remember stumbling across a diet meal plan on an online fitness forum back in the day. It involved eating the same 4 bland, boring, lifeless meals every day for weeks on end to lose fat. Guess what? All the work and suffering didn’t even get me any results! Which came down to 2 reasons. The first is that many “health” foods we’re told to eat are very calorie dense. That means they can easily take you out of a calorie deficit. The second issue is that if a calorie deficit is achieved with a strict meal plan, then it will work in the short term but not necessarily in the long term. That’s why the meal plan we’ll go through today will be personalized to your body, your taste buds, and set up in a flexible way for both short term and long term success.
The first step is the most important step if we want the diet plan to actually work. There’s no point adding any foods into our plan if we don’t yet know how many calories you can eat to lose fat. Now, most calorie calculators out there are a shot in the dark. They don’t consider how much muscle you have, how much you move every day, whether you lift weights or not, your age, your gender, and your height all affect how many calories you burn every day. The method we’ll use involves just a few simple steps that will take all of these factors into account and will be the easiest way for you to accurately determine the calorie target for your meal plan. To save you from the boring math, we’ve automated these calculations for you into the meal plan builder we created for you to download. Within just a few minutes of using it you’ll have your goal calories calculated for you.
After calories, the next most important component of your fat loss diet meal plan is how much protein it contains. Whether you shoot for the lower end or higher end of this range however will depend on your body fat. Those with more body fat will require less protein. In the meal plan builder you can download, we’ve automated this calculation for you. Most of you will end up with a goal of 1 gram per pound of your bodyweight, for example a goal of 180 grams of protein if you weighed 180 lbs.
The number of meals you eat per day for weight loss will determine how many calories and how much protein will be contained in each meal. That being said, protein frequency does seem to be important to minimize the risk of muscle loss as you lose fat. There’s an ideal range you’ll want to stick within. This seems to be between roughly 3 and 6 high protein meals per day, each separated by a few hours. This is where personal preference is key. Whatever you pick should best suit your schedule and keep you full and energized throughout the day. Once you’ve picked the number of meals you’d like to eat, divide your protein intake up evenly across the number of meals.
Now it’s time for the fun part, filling in your meal plan for your weight loss diet. We’re going to provide you with 3 lists of protein, carbs, and fats to use to fill your meal plan with how you wish. In the downloadable meal plan builder, we’ve also added vegetarian and vegan protein options to this list. The foods in these lists are the lowest calorie density options available, and will be highly effective at keeping you full. So, at each meal, select the foods from each category that you want to eat and adjust the portions so that by the end of the day you get close to your calorie and protein goal by at least within about 10%. Throw in a little bit of your inner chef to get a meal plan that’s designed specifically for your body and filled with enjoyable meals .
Nutrition is hands down the most important part of getting lean. Within our Built With Science programs we remove the guesswork from your plan and show you exactly how to train and how to eat in order to burn off unwanted fat. To get started today, you can take our free analysis quiz to discover to discover which of our programs would be best for you and your goals below:
https://builtwithscience.com/your-pot...
Download the Custom Meal Plan Builder here:
https://builtwithscience.com/mealplanner
Subscribe to my channel here:
https://www.youtube.com/jeremyethier/...
34
views
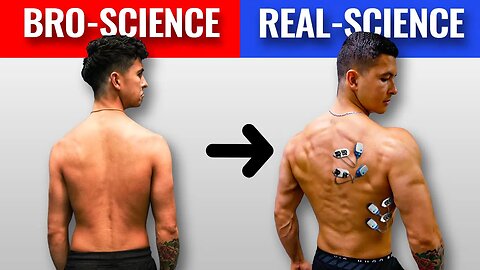
We Tested 17 Back Exercises, These Are Best For Growth
We Tested 17 Back Exercises, These Are Best For Growth
The back is such an important part of what makes an impressive physique. But with literally 100’s of different back exercises out there, it’s hard to tell which you should do in your back workout. That’s why we got Betty - our muscle activation measuring machine. Today we’re using her to test the best back exercises on 4 different people. At the end, we’ll use the results to create a perfect back workout you can trust is the best back workout that’ll get you the muscular, powerful looking back you’re after.
Different back exercises will target different back muscles. The two main features of a well-developed back are thickness, and width. Most thickness comes from the mid and upper back muscles. So we put a sensor on the mid-traps. We also put a sensor on the lower traps. The main muscle responsible for widening your back and building is the lats. Because it’s the largest muscle of the upper body, we put 2 sensors on it, one on the upper lats, and one on the lower lats.
Next, let’s cover the details of the experiment that’ll help us find the best back exercises. Subjects: Coach Alex, Raza, Tahnee, and myself. There was no wager this time around. We had to control 3 variables: 1) weight testing, sensor placement, and maximum voluntary contraction. We did 1 set of 5 reps, then took at least 5-minute rest before moving onto the next exercise. We also rotated between horizontal and vertical pulling exercises.
Note that Betty, and EMG research in general, has its limitations. More activation does not always lead to more growth, and there are other variables to consider when determining how well an exercise grows muscle. That said, after averaging the data, I did find some very interesting insights that align with other current research.
First, “overall back builders” to include in your back workout. The first is deadlifts. Your legs are mostly responsible for moving the weight, but all of your upper and lower back muscles have to work hard to keep your body stable as you lift. Although they aren’t taken through their full range of motion and are only contracting isometrically, this is still a powerful stimulus for growth especially because of the heavy weight used and the deep stretch that some of these back muscles experience. The second exercise is bent-over rows. Similar to deadlifts, you’re able to load it relatively heavy and your whole back, including the lower back, is helping you stabilize and move the weight. The overhand grip led to more mid back activation whereas the underhand grip, led to slightly more lats activation primarily in the lower lats.
Next, the best exercises for the mid and upper back. The exercise that came on top was the inverted rows. It led to the highest back activation for both Tahnee and Raza but didn’t do nearly as well for both myself and Alex. So while it is a great bodyweight exercise that I’d highly recommend for most females and beginners, as you get more experienced you’ll want to consider other movements that you can start adding weight to or save this exercise for the tail end of your workout. As for the other exercises that came out on top, wide grip seated cable rows and dumbbell chest supported rows with the elbows flared out and shoulder blades squeezed together at the end, both led to the highest activation after the inverted row. So, when talking about the “best back workout”, these two will definitely make an appearance.
Now, I want to talk about the lower traps. It’s an extremely important yet often overlooked muscle for overall shoulder health and posture. So I’d recommend including at least one lower traps exercise in your routine. And the one that came out on top during our experiment? Incline prone Y raises.
Last but not least, the lats. While lat pulldowns and pull-ups do a pretty good job of activating the lats, one move in particular however led to higher activation than any of those exercises. The lat-focused row.
Let’s put everything we learned into “perfect back workout” that you can start using right away. I’d recommend picking one exercise from each of the categories we went through and then adding in prone Y raises to the end to give the lower traps some extra love.
Sample Back Workout
Bent-Over Barbell Row
Pull-Ups
Dumbbell Chest Supported Row (elbows angled out)
Incline Prone Y-Raises
Click below for a step by step plan training plan that reveals all the best exercises you should do for each and every muscle group:
https://builtwithscience.com/built-wi...
Download your FREE back workout PDF:
https://builtwithscience.com/backworkout
Vote for the glutes exercises you think will come out on top:
https://builtwithscience.com/vote
Click below to subscribe for more videos:
https://www.youtube.com/jeremyethier/...
73
views

We Tested 17 Shoulder Exercises, These Are Best For Growth
We Tested 17 Shoulder Exercises, These Are Best For Growth
Betty and I are back. She’s a $12,000 science machine that’ll help us determine which of these 17 shoulder exercises are the best and which are the worst for building big shoulders. I tested these best shoulder exercises on 3 subjects, averaged the data, and found some very interesting insights that align with other research out there. With the results from this experiment, you’ll be able to save literally years of wasted time doing the wrong movements for your body—and finally get those bigger, wider shoulders you’ve been dreaming of. So, without further ado, let’s dive right in and find out what the best shoulder exercises (really) are and then talk about how to use them in your shoulder workouts.
Click below for a step by step plan training plan that reveals all the best exercises you should do for each and every muscle group:
https://builtwithscience.com/bws-free...
Vote for the back exercises you think will come out on top:
https://builtwithscience.com/vote
Click below to subscribe for more videos:
https://www.youtube.com/jeremyethier/...
Let’s explain what and then who we’ll be measuring to find out what the best shoulder exercises are. We’re putting sensors on the front, side, and rear delts. But we’re also putting one sensor on the upper traps, you’ll find out why later. As for who we’ll be testing, it’ll be me, Alex, and Raza (yes, again!) What about the wager? Well, we ordered the world’s hottest bowl of noodles. We also got the world’s hottest chip made with the Carolina reaper. And a gummy bear, which comes in at 9,000,000 Scoville. Each of us is going to write down on a piece of paper what we think the top 2 shoulder exercises will end up being for the front, side, and rear parts of the shoulder. The person who gets the most exercises correct still suffers, just not as much. They get to choose who has to eat what. Before testing what’ll give us big shoulders, we had to prep 3 things. First, our estimated “1 rep max” for each exercise.
Next, we needed a clean shave to make sure the electrodes stick. Finally, before we could start the first exercise, we had to take our maximum voluntary contraction (MVC) measurements.During the experiment, we did 1 set of 5 reps and then taking at least a 5 minute rest before moving to the next exercise. We also rotated between front delt, side delt, and rear delt exercises to avoid overly fatiguing one region.
So, what are the exercises that’ll give us bigger, wider shoulders? Let’s start with the front delts. Both winners were overhead shoulder presses, just different variations of them. We tested the seated dumbbell press, standing dumbbell press, seated barbell press, and the standing barbell press. But for the seated variations, we were actually able to use slightly heavier weight than the standing variations because of the extra stability provided by the bench. The seated versions performed the best. One more thing for the front delts. Although the overhead presses we just talked about will provide significantly more activation on the front delts (71% for me), it’s likely that you’re already working this muscle quite a bit whenever you perform chest exercises. So my recommendation would be to do overhead presses once, maybe twice a week depending on your goals.
Now the side delts (i.e., what’ll give us wider shoulders). This took me by complete surprise. The winners ended up being the two standing shoulder presses we tested. But this is all simply because the side delts are helping stabilize the weight up at the chest, which isn’t a powerful stimulus for growth. It’s a case where more activation doesn’t necessarily lead to more growth, one of the limitations of Betty. Taking this into consideration, I’d remove shoulder presses from the top which would now bring the lateral raises to the top of this list. In this experiment, the standard dumbbell lateral raise and the lying incline lateral raise came out on top, with cable lateral raises following closely behind. All of those are great options.
Last but not least, the rear delts. The top exercise was the double arm reverse cable fly. With this exercise, by setting the cables high and pulling the arms down and back at a 45 degree angle from the body, it lines up the constant tension from the cable almost perfectly with the rear delts. As for the other rear delt winner, it’s the reverse cable fly, but with one arm and the body positioned sideways to the cable. Now although these two exercises look very similar, they actually both challenge the rear delts in a different way. The double arm challenges your rear delts most in the middle of the movement. Whereas the single arm challenges your rear delts most in the beginning of the movement which recent research has shown to be arguably the most important part of the movement for growth.
79
views
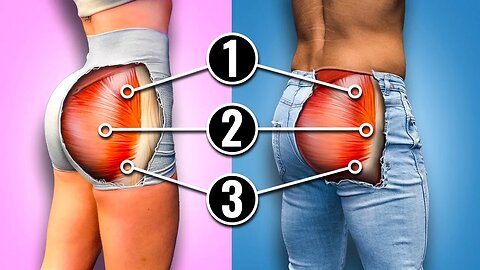
We Tested 17 Glute Exercises, These Are Best For Growth
We Tested 17 Glute Exercises, These Are Best For Growth
Well-rounded glutes are not only the key to a nicer butt, but they also play an important role in strength, power, athleticism, and preventing injury. To build a nice butt, it's important to choose the right glute exercises and do the best glute workouts. In this video we test 17 glute exercises (hip thrusts, back squats, cable kickbacks, bulgarian split squats, and more) to see which ones came out ontop. At the end, we combine everything into the best glute workout for women and the best glute workout for men to grow your booty faster and get you a bigger, stronger butt.
Download the Glutes Workout PDF Below:
https://builtwithscience.com/glutesPDF
Video To Help With Proper Glute Training Form:
• ROUNDER GLUTES: 5 Mistakes Keeping Yo...
Click below for a step by step plan training plan that reveals all the best exercises you should do for each and every muscle group:
https://builtwithscience.com/bws-free...
Thanks to Coach Kassem for his help with the video:
His Instagram: https://www.instagram.com/coach_kasse...
His Training: https://n1.training/
Click below to subscribe for more videos:
https://www.youtube.com/jeremyethier/...
38
views